1d ago
How to Plant a Fruit Tree
This is a free preview of a paid episode. To hear more, visit gardenbasics.substack.com It seemed like a simple enough garden question to answer. The writer of the email, Steve, said: “I have never cared for a young peach tree or any other variety so I don’t know what to do since I got it in the ground. Now what?” Steve included a picture of the tree, which you can see here. America’s favorite retired college horticulture professor, Debbie Flower, and I ended up having more questions and comments after closely studying the picture. The end result? An episode mostly dedicated to how to plant a fruit tree to insure success. This was originally recorded for the Garden Basics podcast in July of 2020, thus the reference to a hot summer and the muffled sounds of us talking with mandatory masks on. Paid subscribers get full access to all newsletters and podcasts, and we’re having a holiday sale! TRANSCRIPT Q&A: How to Plant and Care for a Young Fruit Tree Farmer Fred Let’s delve into the mailbag, more mail coming into Fred at farmerfred.com here on the garden basics podcast. And we bring in Debbie Flower, retired horticultural professor at many universities and colleges, and she owns a peach tree too. So this is right up her alley. Steve writes in and says, “I have never cared for a young peach tree or any other variety. So I don’t know what to do now that I got it in the ground and mulched. I was given good info and how to put it in the ground. And I believe I was successful. But now what? The tree came in a typical pot with all its roots and dirt, I’m watching online videos, and it’s left me unsure of what to do and when.” Well, Steve was very kind to send along a picture of his new peach tree that he just planted. It’s a little difficult to say how tall the tree is currently, but it looks like…well, let’s just play, ‘what’s wrong with this picture’, Debbie? What’s wrong with Steve’s picture of his peach tree? I see several issues there. Staking Techniques for Young Trees Debbie Flower Well, the first thing that jumps out at me is that the stake is taller than the peach tree. We only want to stake a tree, even a newly planted one, if it is unable to stand up on its own. If it is unable to stand up on its own, then we want to tie it. It’s hard to tell, but it looks like it could be tied at two locations. Not sure if that lower one is really there. Farmer Fred I think that’s a big branch down there. Debbie Flower Okay. Oh, yes. So we only want to tie it as low as we can, to make it stand up straight. He has it tied nearly at the top of the tree. Farmer Fred That’s a very good point you’re making there is that when you’re staking a tree, you want the tie to be at that point where the tree would actually bend. So what you do, you run your hand up the trunk of the tree and at that point where you can get the tree to stand up, that’s where you would tie the top loop. Debbie Flower Exactly, but he can’t tell if it’s going to fall over because if you look right down at the bottom, it is still attached to the nursery stakes. Nursery stakes are used to get that initial upright growth out of the stem, but it prevents the tree stem, fruit tree or otherwise from moving in the wind and from developing strength. And so you need to take it off . I think of it as trees in bondage. When they’re tied this close to the stake, it’s very useful in the nursery, employees can pick up the tree and move it and throw it in a truck and take it out of the truck and the upright part of the tree stays stable, but it is not what we want for the ultimate life of the tree. We want that trunk to strengthen. In order to do that the trunk has to move in the wind just like we have to use our muscles in order for them to strengthen. That trunk has to move in the wind to strengthen, so take it off of that nursery stake and take it off of the very tall stake and see what happens and it is very likely to fall over, not right onto the soil; if it falls over and hits the soil you dig it out and take it back to the nursery. That means there’s a root problem. Somewhere along the length of that tree, that trunk will curve and the top of the trunk of the tree will bend down toward the earth. And that’s when you do what you said, which is run your hand up from the bottom of the tree and at some point the top of the tree will zing back up in the air. That’s the point at which you want to attach the trunk of the peach tree to the stake. Preferably you have two stakes, one on either side of the trunk and you want them a distance from the trunk of the tree, maybe a foot. The reason for that is you don’t want the tree when it is moving in the wind to rub against those stakes and you don’t want them any taller than you need them to be. So the height of the stake would be just maybe five inches above that, about the height of your hand on that trunk. Maybe it’s three inches, just a few inches above, so that you have room to tie. You’re going to tie the trunk to both stakes at about the same location on the tree trunk to each stake, so it looks like one line across from one stake to the tree and back and then from the other stake to the tree and back. It appears when you look at it to be one line across. Does that makes sense? Farmer Fred Yes, it makes perfect sense. And again, he would want if the tree needed to be staking and that goes back to see if the tree can stand up by itself. But if the tree needs staking you would use two and to his credit, Steve did use green tape that’s like tree tie tape, It’s called. And what we don’t know because we can’t see into the foliage of how he’s tied it to the tree. If it’s a figure eight or wrapped, really tightly around the tree, it shouldn’t be wrapped tightly on the tree, it should be sort of a loose figure eight configuration, right? Debbie Flower Right. And that’s part of using two stakes. Because if it’s loose, then the tree may fall toward the stake. If you have one loosely pulling it toward the stake on the other side, then that corrects that problem. Farmer Fred To Steve’s credit, he’s done a lot of things right here we can see that the tree is located in full sun. It looks like he has mulch underneath the tree but the mulch is not touching the trunk of the tree. Pruning New Deciduous Fruit Trees Farmer Fred But I want to go back even further to when he planted the tree. It looks to be a five or six foot tree. Now if he bought this fruit tree, what they call bare root, which would be before it leafed out, and they used to sell fruit trees basically plunked into sawdust and you would go and you’d pull it out of the sawdust and they’d wrap it up a newspaper for you to take it home. Now even though it’s still called bare root, most fruit trees that are sold are come in pots. So we don’t really know if the tree had leafed out before he bought it or if it was still dormant when he did buy it, but the fact of the matter is, when you get a bare root fruit tree home, one of the first things you need to do is basically cut it off at the knee so you get lower branching, this one doesn’t look like it was cut off at the knee. Debbie Flower Correct. Some people may Saturday here that you cut a fruit tree off at the knee. But that is to keep the fruit bearing branches low to the ground so that you don’t have to stand on a ladder to take care of them. It’s a really wonderful way to grow fruit. Farmer Fred Exactly and and you’re not inhibiting the production of fruit at all. You’d still have plenty of fruit is just going to develop some lower scaffolding to make it easier for you to pick fruit. What’s great about starting with a new tree is it makes it Much easier for keeping that tree at a height that’s manageable. So you never have to get on a ladder. And basically, you stick your hand as far in the air as you can. And you don’t let the tree get any taller than that. Debbie Flower Right? The height of the tree is is where your hand and the pruning shears when you raise your hand above your head, the highest it goes. That’s how tall you want the plant to be. Farmer Fred If he’s only planted the tree, could he cut it back in half now? Or should he wait until the dormant season? And can you even cut it back one year into its growth? Debbie Flower Pruning to fruit trees can happen during the growing season Yes, but right now we’re in the maybe thick of summer. It’s hot, Farmer Fred It’s hot. Debbie Flower It’s very sunny. We wear sunscreen and hats and things to protect our skin. If we cut that young tree back now, branches would be exposed to the strong sun that have never seen the strong sun before and they will sunburn, and you could lose the tree from that. So I would recommend waiting until it goes dormant. Farmer Fred Now that is a hard thing to do, if you’ve ever done it, you’ve probably done demonstrations of cutting back bare root fruit trees in front of a crowd and it always gets gasps of horror. Whenever you take your pruners and cut a six foot stick back to a two and a half or three foot stick. Yes. And in Steve’s case, he’s going to be cutting off a lot of growth that had leaves and he’s going to feel really bad doing it. But he should. Debbie Flower He should. And what those leaves are doing for that tree right now is feeding the roots. It’s has no flowers or fruit on it that I can see. And so the the food that’s made in those leaves and that’s where plants make their food goes to a couple of places. One is the tips of those branches for new growth. And the other is the roots and a newly planted plant needs food to make roots. All plants need food to make roots. But it’s especially important when the plant is new to the garden, because it only has the roots that were in whatever container you bought it in. And that’s a very small amount and it’s also a very narrow sized root system and can make the plant unstable if the roots just stay in that little tiny area. So he wants the leaves to grow the leaves to make food send them to the roots, the root system to take off and then during dormancy this year. Now here’s the geek in me. Farmer Fred All right, go ahead. We can geek out. Debbie Flower As plants go dormant, deciduous plants - and a peach tree is deciduous - meaning they lose all of their leaves at one time in the year. And that will be in the fall. The plant will re-absorb all the good stuff it can out of those leaves and store it in the trunks and the roots. And so he’s not losing, he’ll lose some some stored food but a lot of that stored food will be absorbed back into the plant and go down into the roots before he takes that stem off. So it’s important to wait until all the leaves have fallen off, so that all that good food the plant has made, has had a chance to get down into the roots and strengthen the plant down there. Farmer Fred So full dormancy would be when all the leaves have fallen from the tree. But before the soil temperature is warm to the point where it starts breaking out new buds, here in the Central Valley of California that could be in February, other parts of the country might be a little later. Debbie Flower Right. And he doesn’t want to do it before then because it will stimulate growth in strange places and which might cause sunburn. Farmer Fred And maybe frost damage to to the new growth. Debbie Flower Yes, so full dormancy, all the leaves are gone. But before it warms up enough for the buds to break and new growth to begin. Farmer Fred Now remember, too, we’re talking about a tree that is only one year old or less. For people who have put in fruit trees that might be three years, five years old, and you didn’t cut it back by half when it was planted, it’s not a good idea to be cutting a tree that is that old, down to the knees. So what you’d want to do is start a process where you’re cutting it back from the top to get it to a height where you can manage it. Debbie Flower Yes, yes. And you never take more than one third of the canopy, one third to one half of the canopy, out of the tree in any one year. You’re going to take a big branch out and then wait another year and take another big branch out until you’ve brought it down to the level you you want it to be. Pruning Fruit Trees: Thinning Cuts vs. Heading Cuts Farmer Fred Well this is a good opportunity to explain the difference between thinning and heading. So okay, are you talking about making a thinning cut or a heading cut? Debbie Flower Okay, so thinning is removing the branch from its point of origin, the place where it has grown out from a bigger branch, taking it all the way back. And there’s good ways to do that and bad ways to do that. But regardless of whether you do it well or not, it’s called thinning and it results in the natural shape, the plant will regrow into its natural shape. Heading cuts are used on things like hedges, their random cuts in the middle of the branch, or when we prune something into a geometric shape, a square or a circle, and those cuts come middle of the branch and they result in unnatural regrowth of that branch. A lot of buds below where you took the cut open all at once, and you get a very bushy, dense external growth on the plant. If you have done heading cuts to a shrub, go out and look at it. Pull the outside edge apart and you’ll probably see lots of branches in there but no more leaves. You tend to get a very dense foliage on the outer side. There will be lots of leaves on the outside, and no sun goes through to the inside. So when we’re talking about bringing an old tree back to, it’s a shorter shape, and I did this with an apricot in my yard, you want to do thinning cuts, you want to find the origin of that branch and cut it back to where it’s attached to another branch and then remove that. And that will allow other branches that are in my case below that branch and probably in your tree, they’d be below that branch as well, to grow and be strong. And then wait a year and take another one back to its origin. Farmer Fred Well this is an eye opener for me because I always thought that cutting one third of the tree back meant cutting one third of the height back and you’re talking about cutting out one third of the branches. Debbie Flower I choose the branches that are above where I want them to be and cut them back. You can either cut back to their origin or you can cut them back to a place where there is another branch that is one third to one half or more the diameter of the branch to which it is attached. This is hard to do verbally. Farmer Fred Do you want me to put on some tap dance music for you? Debbie Flower Really. So, when we’re cutting the peach tree, the young peach tree back to the knee height, we’re definitely doing a heading cut. Right? Farmer Fred But you’re talking about the old trees, right? Yeah, the older trees when you talk about taking out one third of the growth every year till you get it to the height that you want. Wouldn’t that mostly be heading cuts? Debbie Flower I don’t do it that way. Okay. All right, all right at the top of the plant, find the branch that’s that’s the tallest. I do this with even shorter plants and run my hand down till I find where it’s attached, or where it has a branch of its own. That is, one third to or greater in diameter, then The branch that I’m removing, and I take it at that point. Farmer Fred All right, so that would be a thinning cut. Debbie Flower Yeah, that is considered a thinning cut because the branch that is remaining, even though it’s attached to the branch I’m removing is big enough to take over as the leader. It has the hormonal strength to remain the leader. Farmer Fred You’re a good tap dancer. All right. All right. So that was a scenic bypass about older trees and how you can bring them back to a height where you don’t have to get on a ladder to be picking fruit or netting the tree. After the Paywall: Irrigating young fruit trees; best practices for planting fruit trees; watch out for counterproductive “ancillary sales techniques” at nurseries.

Dec 12
2025 Tomato Review Show...And More!
This is a free preview of a paid episode. To hear more, visit gardenbasics.substack.com Holiday Special! For the rest of December 2025, get an annual subscription to the Beyond the Garden Basics newsletter and podcast for 40% off the regular price. Just $30 a year! In this episode, Farmer Fred connects with Don Shor of Redwood Barn Nursery to reflect on the 2025 tomato growing season, sharing their experiences and insights while evaluating the performance of various tomato varieties. Farmer Fred ranks his 2025 tomato season as one of his worst, only second to the scorching summer of 2022, yet he notes that the overall weather conditions this year were quite favorable. Don shares insights from his own experience, noting that several of his trusted varieties, such as Rugby and Bodacious, underperformed this year, likely due to the dry start to the season affecting irrigation practices. They delve into critical topics such as soil moisture levels and root development, emphasizing the importance of watering practices in achieving healthy tomato yields. As the conversation progresses, they discuss the other plants in their gardens, including peppers, onions, edible pumpkin seeds (Pepitas), and cucumbers. Don highlights the successful lemon cucumber, which flourished without issues of mildew, noting the significant yields from this variety. They also explore the common pitfalls of cucumber cultivation and the importance of managing watering strategies to ensure plants remain productive through the growing season. From irrigation practices to soil health and the excitement of trying new varieties, this episode offers an engaging and informative wrap-up of the tomato growing season. Farmer Fred and Don conclude with hopeful notes for the next planting season, reinforcing the lessons learned and anticipating the joys of gardening and fresh produce in the coming year. And as always, a transcript of the podcast is attached for paid subscribers. 2025 Tomato Review Show…and More! TRANSCRIPT Farmer Fred: [0:00] So how was your 2025 tomato year? Well, you get to hear my sob story, and you can hear about all the successes from Don Shor of Redwood Barn Nursery in Davis, California, for the next few minutes. And we’ll talk about other plants as well that did well or didn’t do well in the way of peppers and cucumbers. And who knows which way the conversation will go, but we’ll certainly cover tomatoes. I have to rank the 2025 tomato growing season in my own yard as the second worst ever. Don, you may remember the first worst, which was that summer two or three years ago when in September it got up to, what, 115 degrees? Don Shor: [0:40] Yes, two days at 116, two at 110, and three at 106 over here in the Davis area. That was quite epic in September 2022. We’ll talk about that one for a long time to come. Yeah, it did impact yields late in the season, that’s for sure. ================ CHEF’S CHOICE ORANGE TOMATO Farmer Fred: [0:54] And this year, the weather here in Northern California was excellent. It didn’t get too hot for too long. I’m sure it got over 100, but not by much. And there weren’t extended days of over 100 degrees. It was a very, very nice summer. But I see in my notes here, the first full size tomato I took out of production was on September 27th, the Chef’s Choice Orange Tomato. I harvested 30 ripe tomatoes, but it was the end of production, and I needed the space anyway. But let me tell you about one success, though, and it’s a thing that you told me about to do, and it really works. One of the tomatoes I planted this past year was the Bush Early Girl, that I grew in a container, and I started it (from seed in the greenhouse in early February) and planted it outside on April 6th. And it produced early and often, come June. And by the end of July, it was done for, but it gave me those early tomatoes. And I think that’s a great idea to get an early ripening tomato off to a good start in an area that has warm soil to begin with, like a large container, like a half barrel, and just enjoy your harvest until the big boys come home to roost later on in the summer. But yeah, I’ll give the Bush Early Girl an A for its production. And Chef’s Choice Orange, well, I think that’s going to get an F since it came out in September. Sorry about that. Don Shor: [2:23] It’s not an F. Wait, wait, wait. It gets a C. You took it out after harvesting 30 tomatoes. RUGBY TOMATO Farmer Fred: [2:26] All right. Yeah, I know. Okay, I’ll change that to a C because it did produce some very beautiful Chef’s Choice Orange tomatoes throughout the season. And they were very tasty. And we ended up making some relish with it. So it’s very pretty, too. One of the surprise failures in my yard this year was the Rugby, which up until this year has been doing great. But it went kaput as far as production goes on October the 8th. Don Shor: [2:55] And generally, it’s a good, generally a good late producer for us. I had good results with Rugby, but it was middle of the pack in terms of total yield. Yeah, this was a mediocre year for a lot of people. Obviously, I don’t give everything an F or a C or an A, but there are a lot more lower graded fruit in terms of total yield. BODACIOUS TOMATO Don Shor Bodacious, for example, which I’ve done very well with for several years, only gave me about 15 or 20 fruit. Yes, they’re wonderful. They’re big, they’re firm. They were for slicing. I went out there, there’s three on there right now. We are recording this in early December. So, okay, I’ll brag about that one a little bit. But overall, in terms of the total yield, it wasn’t spectacular. And I think it goes back to actually how dry things were at the start of the season. We had our last significant rain fall on our side of the valley, first week of March. We had another light storm in April. But when people went out to plant, the soil was actually drier than usual. And all of our conversations with people who are having trouble with their tomatoes, not all of them, but let’s say 98% of them had to do with how they were irrigating. I’m reasonably sure that you know how to irrigate. So I don’t think that was your problem necessarily, but a lot of people use a drip irrigation system, they set it, and they leave it that way. And then we get to ask 20 questions with them. How often are you running it? How long are you running it? And they were not watering deeply enough. And in particular, this year, the tomatoes just never got their roots down in some cases. The soil was dry down further. And ordinarily, when you plant in March, well, you shouldn’t be planting in March. But when you plant April or May, there’s still enough moisture from the winter rains down there. And if you give them a good soaking, get them started, they can tap down and tap into some of that stored moisture. It just wasn’t there this year. So we were having a lot of conversations about plants that weren’t growing vigorously. CHARLIE’S MYSTERY RED DELICIOUS CHERRY TOMATO Farmer Fred: [4:44] This is only the second year where I have not had tomatoes on the Thanksgiving dinner table because I ended the production of the Jetstar and the Dr. Wyche, back on October the 29th. The last full size tomato to go out was Cupid. Plants were cut out. But the one that lasted the longest was a gift seed from our friend Charlie in Brooklyn. It was his mystery red delicious cherry tomato that hung on until mid-November. But for us not to have a tomato on the table on Thanksgiving is a defeat. What really broke my heart, too, is that I did harvest some breaking tomatoes, the ones that are turning yellow after being green for a while. So, you know, they’re going to ripen. And I harvested those in early November and I set them way back in the corner in the kitchen counter, hoping to preserve them until Thanksgiving. But somehow they all managed to get used before Thanksgiving. Don Shor: [5:46] Oh, I see. The problem wasn’t that they spoiled. The problem was that your household residents ate them. Farmer Fred: [5:51] Yes. Don Shor: [5:52] Okay, well, that’s a problem to have, yeah. Well, I just went outside earlier, getting ready to have this conversation with you, and there are six in my garden that are still fruiting. Admittedly, the turkeys and the squirrels are helping themselves to the ones down at the end of the garden. MARZINERA TOMATO Don Shor: [6:08] But I’m going to mention one that, boy, I was really impressed with this year, Marzinera. And there’s probably a dozen fruits still on this plant out there. Marzinera is one of the, Heirloom marriage tomatoes, these are where they’re hybridizing two heirloom varieties to get a, well, now it’s a hybrid that hopefully has the characteristics that made each of those heirlooms so desirable. And Marzinera, part of it is San Marzano. Now, San Marzano tomato has its own following, no question. But it’s got some issues. To me, it’s not the most useful tomato. There’s better sauce tomatoes. It’s kind of hollow and skinny and yields well. I mainly stock that one as a retailer just for my old Italian customers. But there’s Marzinera. He’s a bigger fruit, firmer, meaty. It’s a lot more like Roma, but on a plant that is indeterminate and extremely productive. And it was one of my first to produce. My notes through the season show it is good production. And there’s still probably a dozen that the turkeys haven’t gotten at out there that I could harvest right now. So that’s one that I’m watching for next year. I’ve never grown this one before. But these heirloom marriage tomatoes are kind of fascinating me. I did two of them this year. That one in particular did extremely well and is still producing late in the season. Farmer Fred: [7:18] Whenever I think of San Marzano, I immediately think blossom end rot. How did that do? Don Shor: [7:24] Well, that was one of the comments on many of the online resources about Barzinera. I did not have blossom end rot problem with it. I don’t generally get a lot of blossom end rot, and I think that’s partly because I water deeply and relatively infrequently, but nothing ever gets drought stressed in terms of tomato watering on my property. And I did not have that problem, But it has been noted, as I say in the comments, whenever you look this one up on various websites. So I’ve only given it one year. I also have a two-year rule. Am I recommending Marzinera? Not yet, but I’ll definitely be growing it again next year. Farmer Fred: [7:58] I want to point out that the Marzinera, that is a cross between, as you pointed out, the San Marzano and the Cream Sausage tomato, which I’ve also grown in the past and thought it was okay, but it really didn’t stick in my brain for very long. Don Shor: [8:13] San Marzano produces very well for me. I just have never found it as useful as, well, some of these old guys absolutely swear by it. My father loved San Marzano, did very well in coastal San Diego. So it does have a pretty wide range of adaptability. Don Shor: [8:25] But, you know, there’s an interesting book out there called Ten Tomatoes That Changed the World . I don’t know if you’ve seen that one. It came out about five years ago. So he gives a whole history of the San Marzano tomato and the whole region of Italy where it’s almost like French wine. You can only grow it here, and it’s this kind. It was bred for fitting in cans. It was bred to be skinny and for canning and all meat, and that’s what it is. It’s a great cooking tomato. But I get a lot of customers saying, I can’t really do anything else with it. Well, this one is meaty enough and thick enough that you could actually use it for salsa and other purposes. So I don’t know if it’s going to replace San Marzano because those old Italian customers, you know, they know their favorites. But my guess is Marzinera will be one of the heirloom marriage tomatoes that will catch on. GENUWINE TOMATO Don Shor: The other one I grew that’s in that category is Genuwine, and it impressed me early. Good early production. It’s a really good flavor. Now, this is a cross between Brandywine and Castelludo Genovese. So you’ve got two really good flavored tomatoes involved there. But when I see Brandywine as one of the parents, I get nervous because I know that one is not particularly heat tolerant with respect to fruit production. But this one did well early, did okay mid-season, and gave a pretty good crop late. So my guess is for this practice that you’re adopting here and there of planting an early producing one that you’re just going to harvest and process and be done with it, Genuwine might be a good one in that category. Again, first year for it, haven’t tried it a second year, so it’s going to be on my list absolutely to try next year. So those are two of the heirloom marriage tomatoes. Farmer Fred: [9:55] I want to know the ones that you can go out to your yard and pick right now in early December. CHAMPION II TOMATO Don Shor : [10:02] Champion. Champion won again. Once again, it’s a well-named tomato. Now I’m only growing Champion Two. That’s pretty much all I’m getting from my growers. I haven’t grown Champion side by side with Champion two. What the breeders are doing is breeding in better disease resistance on these new improved versions of Early Girl, Celebrity, Champion. So I’m assuming that the growth, yield, and productivity is all pretty much the same and that all I’m gaining is that disease resistance package with the new ones. Champion two got off to a slow start i didn’t even plant it until the end of june, and it was growing along great and set real heavily August, early September and I was picking very well off of that one in October there’s still some nice looking fruit out there and one of the advantages of Champion this is also a little bit of a drawback from the eating standpoint but it’s got a tougher skin and so my experience is even if we get rain, even if we get let’s say a week of very gloomy weather, such as we just experienced here before the broadcast, the fruit will still hang on there. It won’t just spoil right away. So it’s a good one for late production. Champion is a little more tart flavor. It’s one that definitely benefits from a little extended ripening on the counter. If it’s bright red, it may not actually be fully ripe. That’s something I’ve been mentioning to my customers, and they’ve been finding that three or four days on the counter, it actually gets sweeter and softens up a little bit. So Champion is a good one for your Christmastime harvest. Farmer Fred: [11:26] There are more. Don Shor: [11:28] What’s that? Farmer Fred: [11:28] Aren’t there more? I thought you said you had six that have survived until now. JETSTAR TOMATO Don Shor: [11:32] Oh, yes. One that you recommended to me, Jetstar. I have been very impressed with Jetstar and I only grew it for the first time this year. I don’t think it was on my notes from last year. Produced early, stopped mid-summer. I’m used to this with some varieties where it gets hotter and they stop production, but I don’t take them out. I deep watered it and it flushed out some more growth and it gave me some bloom in September and there’s still some fruit on my Jetstar. That’s one that I believe you introduced me to originally a couple of years ago. Where’s that one from? Do you know? Farmer Fred: [12:04] Oh, where did I get that? I’ll look it up (Harris Seeds) while you tell me some more that are going to make me hungry. What else is available in your garden right now? PORK CHOP TOMATO Don Shor: [12:13] All right. This is Wild Boar Farms, Brad Gates’ introductions. And one of his that goes way back to his very first product line, probably 25 years ago, was Pork Chop. Pork Chop is his yellow tomato. It’s, in my opinion, one of the best yellow tomatoes on the market. It does soften quickly, so you need to use it pretty much right away. But Pork Chop, every year I grow it, consistent yield, 40 to 50 fruit, good-sized fruit, and it seems to take the heat reasonably well. I know it’s from a few years back when we had a very hot summer. I noted Pork Chop that yielded well for me. RED FURRY BOAR TOMATO , COSMIC BURST TOMATO Don Shor: One of the Brad Gates Wild Boar Farms tomatoes that really impressed me this year once again is his Red Furry Boar, which is an old one that goes way back to when he first introduced the product line, also did very well for me. But one of his fairly new ones that impressed me and my staff love the flavor once we figured out when they were right is Cosmic Burst. And I don’t know if you’ve grown this one, but it’s one of these really pretty. He really likes fruit that has stripes and different colors. And honestly, the only issue I’ve had with those is figuring out the first time you grow them when they’re actually ripe. A lot of times they turn color and you can’t tell whether that’s really the full final color. This one is a gorgeous fruit. It’s striped. It’s got gold stripes in it. And it’s got a really interesting, rich, tangy flavor. It’s a two to three ounce fruit. So it’s one of those that’s bigger than a cherry but smaller than an Early Girl, consistent production been very good this year and i’m definitely going to grow it again next year and the description he has is great fruity flavor with a less acidic bite. i agree with that it’s sweet it’s rich it’s you can use it early if you want to but it’s going to be a little more harsh with that flavor some people seem to like that when i took them in fully ripe everybody on the staff is really raved about this one comment does decently in cool weather but does well above average in heat. So that’s a good one for the Valley and did very well for me this year. Farmer Fred: [14:09] And is it still producing? Don Shor: [14:11] It is. I have some out there. I’ll be taking them in. Farmer Fred: [14:14] All right. Don Shor: [14:15] Cosmic Burst is one to watch for. Farmer Fred: [14:17] Besides the ones you just mentioned, you mentioned the Jetstar, and that was from Harris Seeds. Don Shor: [14:24] Yeah. Okay. They’re easy to order from. BADA BING TOMATO Farmer Fred: [14:27] I was talking with Diane Blazek from the All-America Selections winners recently and talking about the 2026 AAS winners. And there is a new tomato on the 2026 list that is described as a cocktail tomato. It is called the Bada Bing. The Bada Bing. So it’s a small tomato, about an inch and a half wide and bright red. And they really like the Bada Bing enough to say that it would be a winner across most of the country. Don Shor: [15:05] Yeah, the All-America series, what’s great about those is you know that they’ve been tested in quite a range of areas. Yeah, Bada Bing here it is. 2026 edible vegetable winner. Unprecedented protection against septoria leaf spot, early blight, and late blight. What’s interesting is tomato varieties are now coming with this complete alphabet soup of disease resistance that’s on the label. I find myself having to explain this to people a lot. And a lot of the things that are on there are not a big concern for listeners here in the Valley. We don’t have a lot of problems with late blight or leaf spot diseases. What we typically are concerned about is verticillium, fusarium, and tolerance for nematodes. But there’s extended breeding now for a lot of these blights, and they do happen. You know, if we have a wet spring, we can get late blight or septoria. But this one, yeah, this looks great. I’ll definitely be adding this to my list for this coming year. Bada-bing. Manageable, 40 inches tall. Farmer Fred: [15:54] Yeah, I like that. Don Shor: [15:56] Does that mean it’s determinate? Farmer Fred: [15:58] No, it’s indeterminate. Don Shor: [16:00] Okay. So it’s a dwarf indeterminate. Got it. Farmer Fred: [16:03] Yeah. How often do you see that? Don Shor: [16:06] Well, let’s see. Well, it’s an increasing category, that’s for sure. The dwarf tomatoes, the miniature tomatoes are really an area of breeding and introduction. There’s a whole lot of new ones out there. I’m just beginning to try them because there’s so many to work from. There was a dwarf Brandywine that came on the market and I grew it. And guess what? It gave me one fruit. Farmer Fred: [16:25] Oh, yeah. By the way, what is the difference between a grape tomato and a cocktail tomato? Don Shor: [16:32] Marketing. Farmer Fred: [16:34] Okay, then what cocktails do you put a tomato in? Don Shor: [16:37] I think that’d be a Bloody Mary. That’s the only one I can think of. Farmer Fred: [16:40] Yeah. But anyway, so it’s a small tomato. It’s, like I said, it’s only about an inch and a half wide. Don Shor: [16:46] Yeah, to me, that’s a cherry tomato. But cherry tomato has a connotation. I have learned people expect them to be tart and juicy. And so if it’s not in that category, they’re sometimes disappointed by them. The cherry tomato, the classic red cherry, and the others like basket packs have been around for years and years, all had a particular pretty high acidity to them. And so that’s the expectation with cherry tomatoes. So it may be that these are sweeter. Maybe that’s the difference, a little lower acidity. Maybe, but again, I suspect it’s mostly marketing. I can see I’m going to have a lot of fun explaining what a dwarf indeterminate is if we bring these in and grow them, but we will do so if we possibly can. Good disease resistance, good garden performance, and unique and reliable, they say here. So why not? Let’s give it a try. I do have great respect for the All-America program. And I know that if they’ve gone to the trouble of putting this in there, it probably grows well pretty much anywhere someone is listening. =================== Farmer Fred: Hi, free subscribers to the Beyond the Garden Basics newsletter and podcast. If you want to hear the rest of our chat about tomatoes, as well as peppers, cucumbers, onion, and pumpkins, you need to become a paid subscriber. Don’t forget that paid subscribers also get access to the complete library of newsletter editions, which now number close to 300. And, the full newsletter and podcast features a human-powered transcription of the podcast, which puts those AI generated transcriptions to shame that you’re going to find on some podcast players. Plus, it let’s me know that I’m doing something worthwhile here, that you find of value, even if perhaps it’s only occasionally. The Beyond the Garden Basics podcast comes out twice a week, on Mondays and Fridays. Some are for paid subscribers, some are for everybody. So, thanks for becoming a paid subscriber. Just click on the Subscribe link in the newsletter to keep the good, research-based gardening information coming your way! And when you do, you’ll get the entire podcast and the complete newsletter, including the transcription. And look for the special Holiday offer for free subscribers in the newsletter. For the rest of December 2025, you can get a paid annual subscription to the Beyond the Garden Basics newsletter for 40% off, bring the yearly cost to just $30. Look for that offer in today’s newsletter. Thank you for listening…and reading the Beyond the Garden Basics newsletter and podcast.

Dec 8
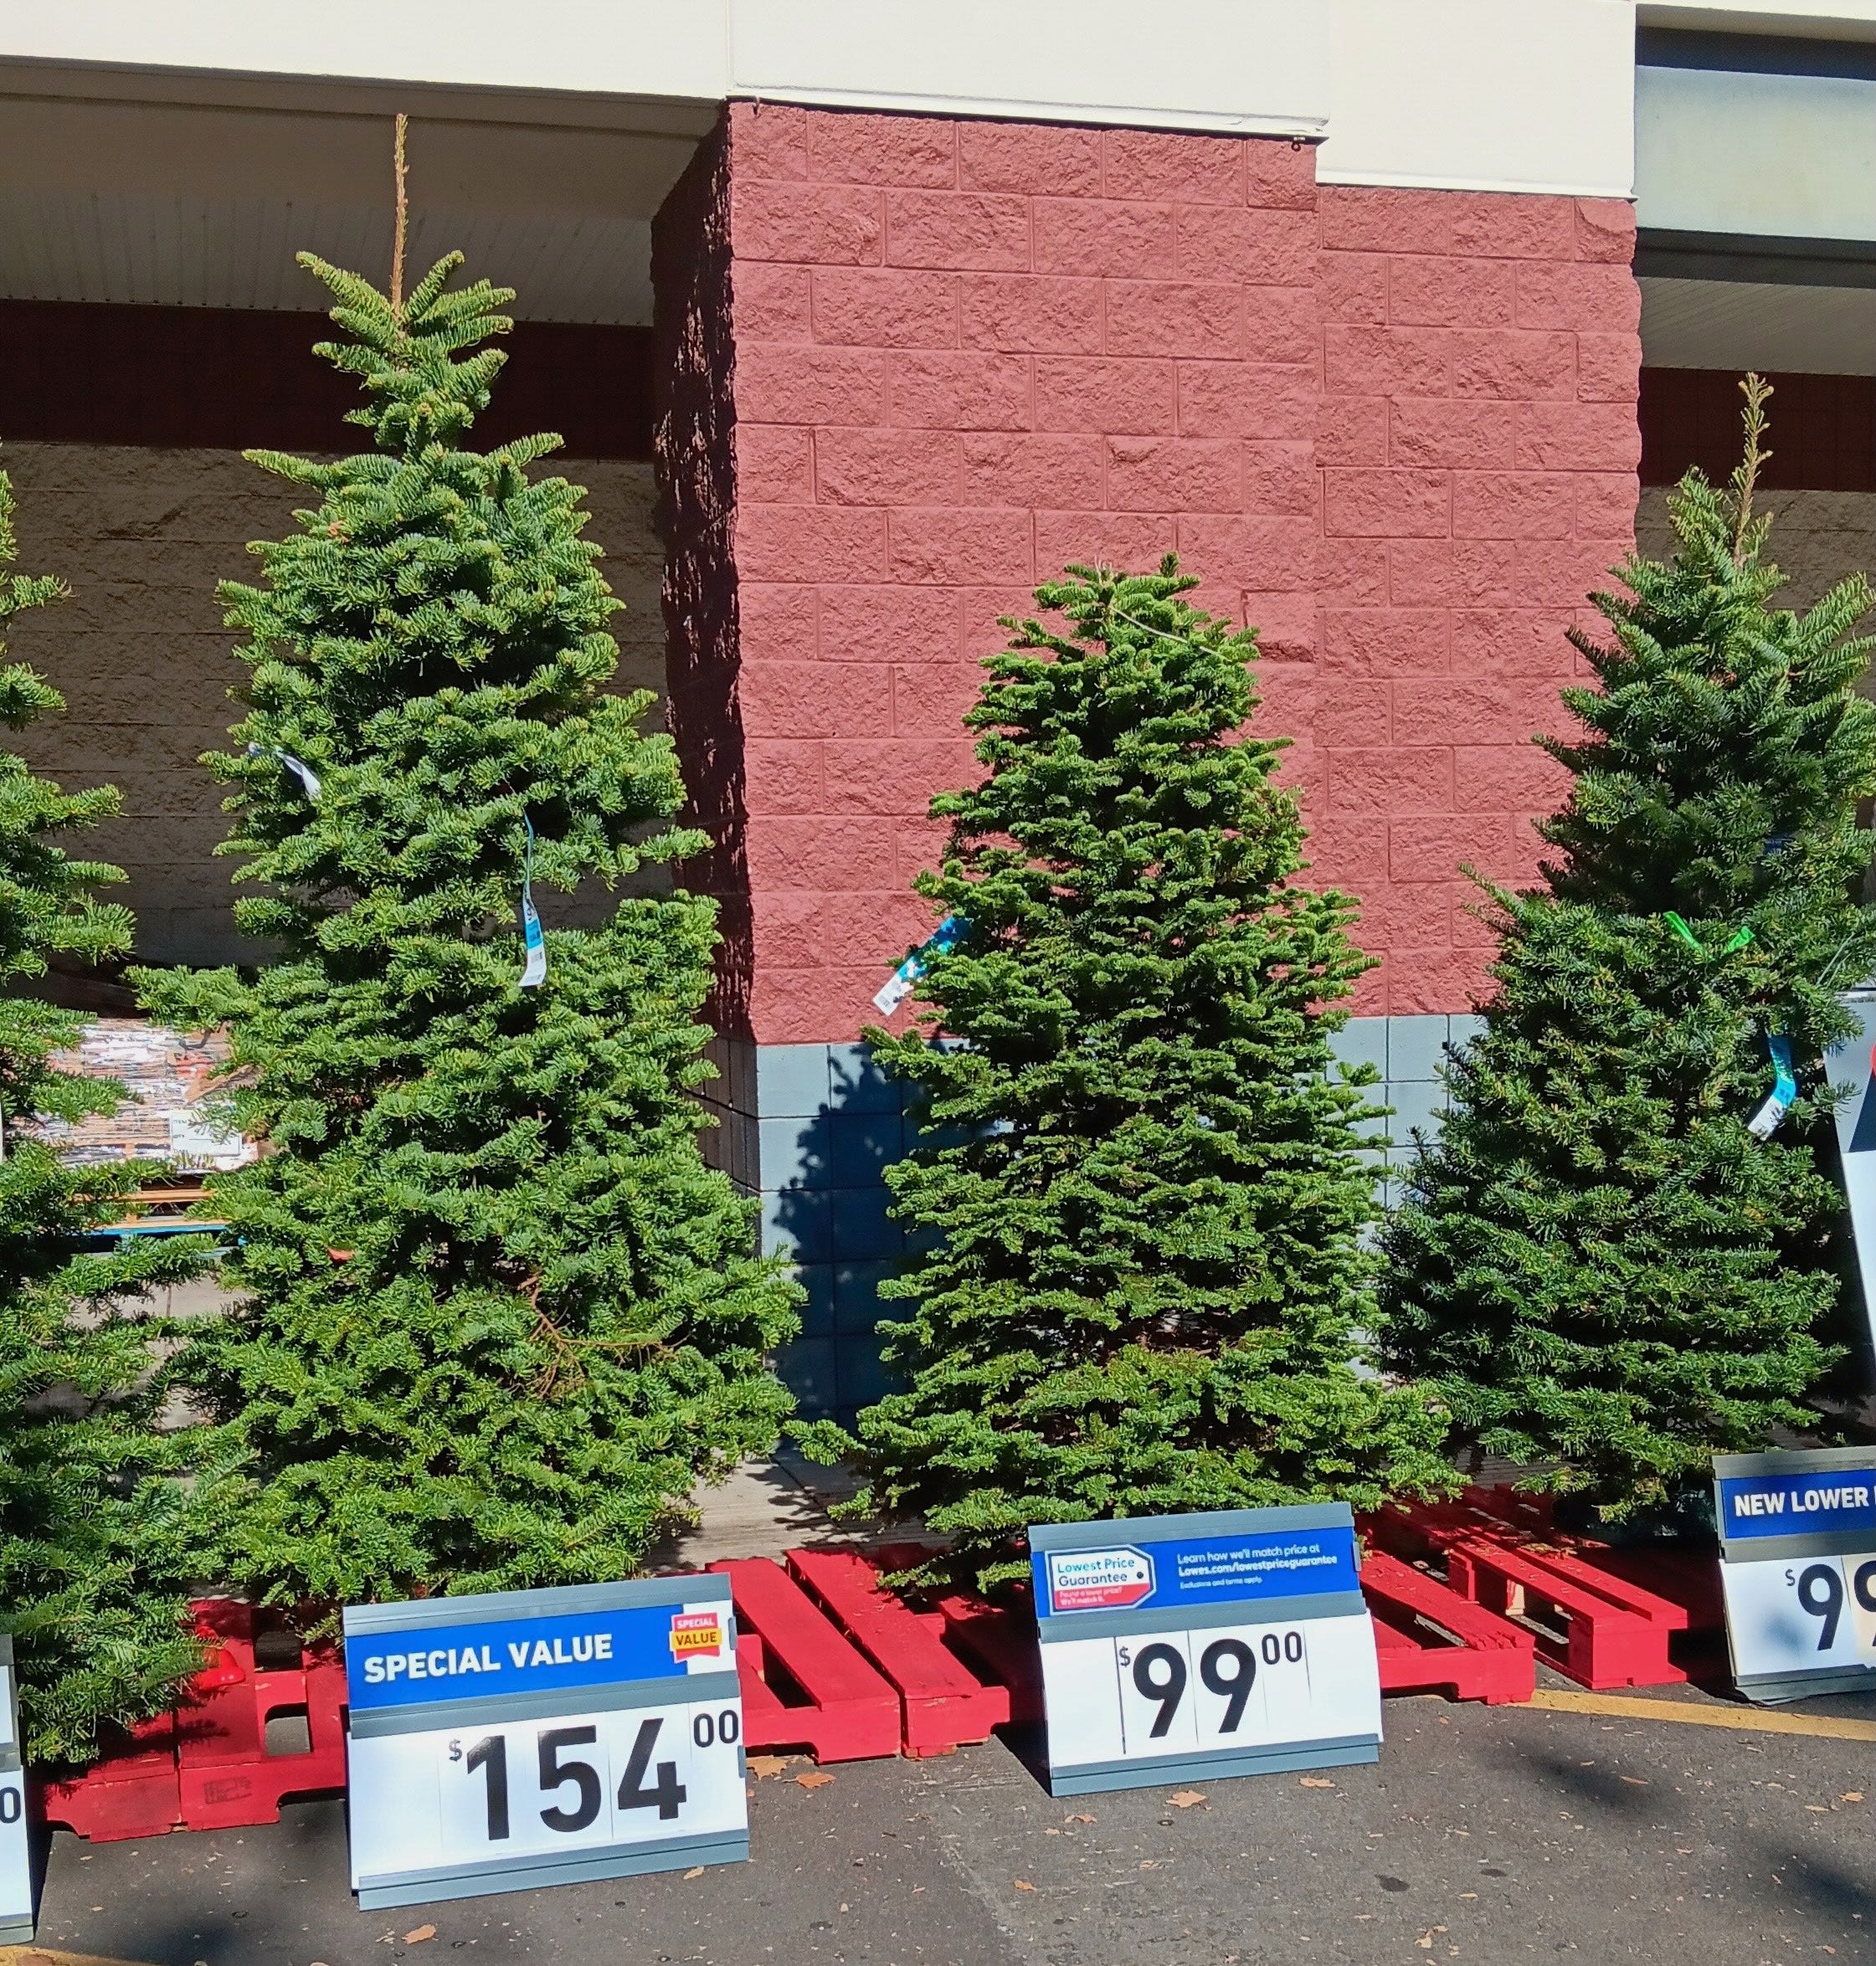
Cut Christmas Tree Care Tips
Thanks for reading Beyond The Garden Basics! This post is public so feel free to share it. Visiting a choose-and-cut Christmas tree farm or any of the corner lots or nurseries filled with already chopped cedars, pines and firs this weekend, in search of the perfect holiday tree? Here are some tips from the Michigan State University Cooperative Extension Departments of Horticulture and Forestry to keep your December living room centerpiece intact through the holidays: • You may cringe at this first tip, but it is one of the most important if you plan to keep the tree in the house for longer than two weeks: Keep the tree in a cool, sheltered location until a few days before Christmas, such as an unheated garage or carport. Otherwise, the warm, dry air of your living room or den can hasten needle drop. Storing it in an environment that more resembles a forest as long as possible will keep the branches more pliable. Take off a half inch to an inch from the base of the tree and keep it in a large bucket of water. • Before bringing the tree indoors, shake it vigorously to dislodge any loose needles or hitchhiking bugs. Check for ants, too. • Before you set up your Christmas tree, make a fresh, straight cut across the base of the tree and place the tree in a stand that holds a gallon of water or more. The end should be re-cut each day before it is placed in the stand. Make a straight cut across the trunk, removing a half inch or more from the bottom. • Cut Christmas trees will absorb a surprising amount of water, particularly during the first week. As a rule, for each inch of stem diameter the tree will need a quart of water per day. • Beware of stands that are too small for the tree. Try to find a tree stand with adequate water-holding capacity for your tree, between one and two gallons. The water capacity listed on a stand’s label or box can be misleading. Usually, they list the capacity of the reservoir when the stand is empty, but you also need to allow for water that will be displaced when the tree trunk is put in the stand. • Keep the tree away from dry, blowing heat. Position the tree away from direct sunlight, fireplaces, heaters, and other heat sources to prevent it from drying out. • Use LED lights. LED lights are cooler to the touch and less likely to dry out the needles. • Turn off the lights when you’re not there. Unplug the lights before you leave the house or go to bed. • Check your tree stand daily to make sure the container has enough water. Refill it often to make sure the water does not fall below the level of the trunk bottom. • What about additives to the water to make the Christmas tree last longer? Based on university studies in Washington and North Carolina, plain water is best. Some home concoctions such as bleach and aspirin cause heavy needle loss and should be avoided. Clean water and plenty of it is the only essential ingredient for success. Tips for a Living Christmas Tree If chosen wisely and treated correctly, a living Christmas tree can thrive in your yard for generations. The main thing to remember when choosing a living Christmas tree: pick a variety that will flourish in your area. As with everything to do with gardening, all Christmas conifers are localized. Choose one from a reputable local nursery or home center. They will have the best selections for your area. Usually. Among the conifers available at nurseries that will do well outdoors in most areas of USDA Zone 9 after their indoor holiday use: • Italian Stone Pine . A good choice for the interior valleys of USDA Zone 9. Can take heat and drought when established. Has a moderate rate of growth to 60 feet. • Aleppo, Mondell or Afghan Pine. Also called Pinus eldarica or Pinus halepensis. These evergreens can take sun and wind. As an added bonus for those who own acreage, these pines are good for windbreaks and erosion control. Rapid growers, these pines with gray-green needles can get to 30 to 60 feet tall with a 20 to 30 foot spread. They aren’t that thirsty, either; a deep, twice a month watering is all they require during the summer. • Colorado Blue Spruce. Can take sun, shade and cold, but is susceptible to spider mites. Likes most soils, as long as they’re well-drained. This tree with the bluish needles is a slow grower that will eventually get 60 to 80 feet tall with a 40 to 50 foot spread. • Deodar Cedar. A tree that actually prefers clay soil, as long as there’s no standing water. This evergreen can take sun, wind and heat. It’s a rapid grower that will reach 50-80 feet with a 40-foot spread. Aptly known as, “The California Christmas Tree”. • Incense Cedar. Not a true cedar (Calocedrus decurrens), but this California native tree will truly perform well in many USDA 9 yards. Although a slow grower at first, the incense cedar can get 80 feet tall, with a 15 foot spread at the base. It can take hot summers and poor soil, and doesn’t require a lot of water. It’‘s best characteristic: the wonderful aroma on a hot summer day. • Coast Redwood. Give this tree plenty of room in the yard, if you dare. The coast redwood can get 70 feet tall with a spread at the base of 30 feet. It can take our sun, but to thrive needs frequent, deep watering. Better suited to the cooler areas of USDA Zone 9 where there’s more coastal influence (fog, low clouds). Some tips for caring for a living Christmas tree: • Don’t keep it in the house for more than a week. • Keep it away from heating vents, wood stoves and fireplaces. • Water the tree every day while it’s in the house. A good way to insure a slow, thorough watering is to dump a tray or two of ice cubes into its container. • Decorate it with the smaller, cooler, flashing bulbs. • The tree can remain in a large container for a number of years, but you may need a furniture dolly to move it in and out of the house. • Marginal Living Christmas Trees: Given a little care, the dwarf Alberta Spruce can survive as an outdoor living Christmas tree in USDA Zone 9. Give it afternoon shade for best results. Limber Pines (Pinus flexilis), native to mountainous areas, tend to revert to rounded tops as they age. The exception is the “Vanderwolf Pyramid” variety, which keeps its Christmas tree shape. Another one to be wary of is the Grand Fir (Abies grandis). This tree could soon overwhelm a small yard, reaching heights of 200 feet. Other borderline trees that may have trouble here in USDA Zone 9 include the Tempelhof cypress (Chamaecyparis obtusa) and the Blue Point Juniper (doesn’t like too much water or slow draining soil). At the top of Santa’s horticulturally naughty list is the Monterey Pine, which is better for coastal environments; even in its native environment, Monterey pines are in decline due to pine pitch canker. Here in California’s Central valley, the Monterey pine is susceptible to pests and diseases, and sulks in our summer heat. Another Christmas-tree type plant that is widely available is the Norfolk Island Pine. Known as the Hawaiian Christmas Tree, this is best planted outdoors...in Hawaii. In most of the continental U.S., it makes a good house plant year round. When is a Christmas tree not really a tree? When it is a Rosemary plant, an evergreen shrub that’s been pruned into a pyramidal shape. This herb is a great addition to your outdoor garden for its culinary and bee attracting qualities (blooms in the winter and spring), but would require constant shearing to keep it looking like a Christmas tree...uh, bush. Transcript of today’s Podcast CHRISTMAS TREE CARE TIPS Farmer Fred So are you moving the new Christmas tree around? Or do you have one tied to your car right now, while you’re listening? Are you going to put it indoors? Where are you going to put that Christmas tree? And how do you keep a basically dead tree looking green? It just so happens that in a recent article in the Sacramento Digs Gardening newsletter , Debbie Arrington and Kathy Morrison, came up with some ideas on how to keep your Christmas tree looking green. Debbie Arrington is with us. And Debbie, how do you keep your Christmas tree looking healthy, merry and green? Debbie Arrington Think of your Christmas tree like you would any cut flower: it needs water. And the way to get water is to put it in a sturdy stand that can can hold about a quart of water, at least. The taller the tree, the more water it needs. According to the National Christmas Tree Association, you need one quart of water for every inch of trunk diameter. And so make sure that the stand can hold that much. And then check it every day. Because if the trunk dries out, resin starts forming and it blocks the uptake of more water. And the tree will just dry out like a flower would dry out if the vase ran out of water. Farmer Fred What about additives? Do they do any good? Debbie Arrington Apparently, research that the National Christmas Tree Association shared shows that clean water works best. Home remedies, like adding aspirin or bleach or corn syrup or sugar or a can of 7-Up or whatever didn’t make any difference. And in fact, the corn syrup and other stuff attracted bugs. Farmer Fred If you are driving home from the Christmas tree lot right now, with that tree tied to the roof of your car, one thing you need to do before you bring it in the house is to shake it out and get all the bugs off. But also maybe cut off a half inch or an inch off the bottom of the tree to allow some clean uptake from that water. Debbie Arrington Yes, because that resin can block the flow, the uptake of water. It’s already stopping its flow where that tree was sitting in a lot, waiting for somebody to take it home. The National Christmas Tree Association actually says that you should cut off at least one inch to restore the flow and let the water come back up. Farmer Fred And that water monitoring isn’t just an occasional check. That’s something that you have to check every day to make sure that the basin is full. Debbie Arrington Yes, check it every morning. And you’ll be surprised how much water that tree took up. Farmer Fred And that’s one of my big issues with a lot of Christmas tree stands. They aren’t big enough, so they don’t hold enough water. So I would choose a tree stand that could hold probably a gallon (or more) of water. Debbie Arrington Yeah, if you have a full size six foot tree, you probably do need a stand that will hold a gallon of water. And a gallon sounds like a lot. But if you’re looking at a gallon of milk, that’s how big of a reservoir you need on that stand. Farmer Fred Now you’ve got the tree off the car, you’ve cut off part of the bottom of the trunk, about one inch or so, and you’ve got the stand set up. Where is the best place in the house to put a Christmas tree? What should you avoid? Debbie Arrington The best place to put the tree is someplace that will stay cool and away from direct light. Lots of folks like to put their tree in the front window so everybody can see it. But if that window is facing west or south, it’s going to cook the tree. iI prefers having someplace where it is away from direct light and also away from heat. You don’t want it to be anywhere near a heater vent, because that just sucks the moisture right out of the tree. If the tree is in a nice cool corner, it will retain its needles much longer. Farmer Fred Yeah, that’s the key to keeping the needles on the tree. They haven’t come up with a cure yet on how to keep cats out of Christmas tree ornaments. Debbie Arrington No, that’s why we have a table top tree, and the cat knows that she can’t get up on that table or she’s in a lot of trouble. Farmer Fred And again, I guess the really big point is with the Christmas tree, be it a dead tree or even a living tree, make sure that there is water there. Debbie Arrington Yes. And that’s the thing with living trees. Evergreens don’t like to be indoors. And here you’ve got a big potted spruce or pine, and you’ve love to have it inside at Christmas. But it is not in its natural habitat. And it is desperate for light. Evergreens are all full sun trees. They are not meant to be inside where a tropical plant might live. And so if you do have a living tree, give it as much light as possible, preferably in a sunny window, and make sure it gets watered every day. And then get it outside as soon as possible, because it will be much happier outdoors. But when you return it outdoors, don’t just plunge it into full sun and freezing temperatures, you’ve got to gradually bring it back outside, probably on a covered patio, where it can readjust to outside temperatures and direct sunlight. Farmer Fred And you make a very good point. Here we’re talking about living Christmas trees that you want to perhaps bring back into the house for the following Christmas. You want to choose a tree variety that is going to like your neighborhood. So choose a variety that is adapted to your climate. And there are some interesting little Christmas trees out there, living Christmas trees that are actually Rosemary plants. Debbie Arrington Yes, your Christmas tree doesn’t have to be an evergreen. It can be some other kind of evergreen, that doesn’t lose its leaves. A rosemary plant doesn’t lose its leaves. It doesn’t have to necessarily be a conifer, I guess would be the proper term. You could have lots of different plants be your Christmas tree. I’ve seen Christmas tree that are really rosemary. And I’ve seen different herbal ones, topiary ones, where they they took a privet or some other type of hedging plant and then cut it into the shape of a Christmas tree. You know, Christmas trees are a decoration. And they are a way of bringing some of the life from outside to the inside, and make us merry and bright. You can be creative. You don’t have to necessarily have a fir as your Christmas tree. Farmer Fred Exactly. Just buy yourself a good pair of pruning shears, because if it is the rosemary or some other sort of hedging plant, it will need consistent pruning to maintain that Christmas tree shape. Debbie Arrington Yes. Farmer Fred So, put a pair of good pruners on your Christmas list. Debbie Arrington, Sacramentao Digs Gardening is their publication. It comes out every day. And if people want to check out Sacramento Digs Gardening , we’ll have a link in the show notes to it. But if you want to do an internet search, how do you do it? Debbie Arrington Look up Sacramento Digs Gardening. And we were formerly on blogspot, but we’re now on Cal local. So look for Sacramento Digs gardening dot California dot local dot com. Farmer Fred There you go. Debbie Arrington. Have Yourself a Merry Little Christmas. Debbie Arrington Thank you very much. Happy Holidays! Beyond The Garden Basics is a reader-supported publication. To receive complete, new posts and support my work, consider becoming a paid subscriber. Beyond The Garden Basics is a reader-supported publication. To receive complete new posts, access to all the previous editions of the newsletter, and help support my work, consider becoming a paid subscriber. Thank You. Fred Hoffman is also a University of California Cooperative Extension Master Gardener in Sacramento County. And he likes his bikes. This is a public episode. If you'd like to discuss this with other subscribers or get access to bonus episodes, visit gardenbasics.substack.com/subscribe
Dec 5
2026 All America Selections Plant Winners
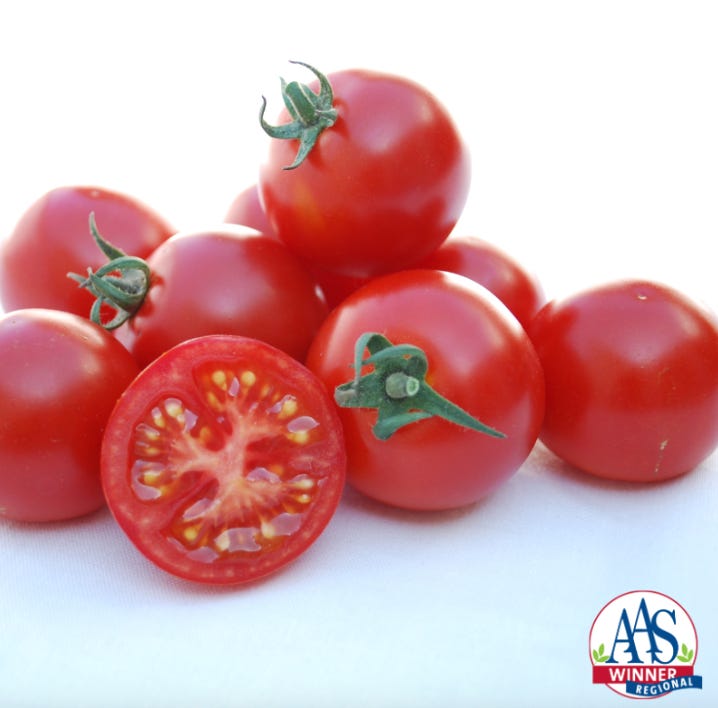
This is a free preview of a paid episode. To hear more, visit gardenbasics.substack.com In this week’s podcast, Diane Blazek, Executive Director of All America Selections (AAS), tells us about the upcoming 2026 gardening season’s latest award-winning plants. We highlight standout varieties like the Bada Bing tomato, Treviso basil, Majesty purple pole bean, and RubyBor kale, each recognized for their adaptability and exceptional qualities. Diane also introduces the Butter Lamp winter squash and Sun Globe coreopsis for ornamental gardens, and shares tips on plant care and spacing. Visit aaswinners.com for a complete list of top varieties and inspiration for your 2026 garden! Beyond The Garden Basics is a reader-supported publication. To receive new posts, get access to the entire newsletter library, listen to complete podcasts, and support my work, consider becoming a paid subscriber. Thank you. For those of us who prefer to read instead of listen, here’s the human-corrected transcript of today’s podcast (with pictures): Farmer Fred: [0:00] So by now, you’re probably looking at gardening catalogs, or scrolling online, trying to figure out what are you going to plant in 2026 among vegetables or flowers. One good place to start is with All America Selections to figure out… what are the winners? What are the good ones? All America Selections is an independent nonprofit organization that tests new, never before sold varieties for the home gardener. There’s a whole season of anonymous trialing that goes on by volunteer horticultural professionals, and only the top garden performers are giving the AAS winner award designation for their superior performance. And all the AAS proceeds go into conducting the trials and promoting AAS winners, both old and new. And there’s a lot of old AAS winners. This is an organization that goes back decades. Here to tell us more is Diane Blazek, the executive director of All America Selections. And golly, it’s getting close to 100 years of AAS winners, Diane. Diane Blazek: [1:05] Yes, it is. We were founded in 1932, so it’s not too much longer. We’ll be celebrating our century. Farmer Fred: [1:13] And it has expanded, I guess, to include a lot of other types of winners, like regional winners and gold medal winners. Diane Blazek: [1:21] Yes. So when the organization was founded, everything was grown from seed and it really was just annuals and edibles. So what we’ve done now is not only expanded from seed, but we also include vegetatively propagated annuals and perennials. And we also now have regional winners, as you mentioned. And what that means is if we get an entry in and it has some very specific regional benefits, when we look at the scores, we notice that it didn’t do well all over North America, but it did well in the Southeast or the Northeast or the Southwest. And that’s how we determine regional winners. Farmer Fred: [2:01] And you also have a category called gold medal winners, but there aren’t too many of those, are there? Diane Blazek: [2:08] No, no. There were way back in the beginnings in the 1930s and 40s, because that was considered, it had to be a breeding breakthrough, like just light years ahead of everything else that was being trialed or the comparisons. So we had quite a few in the beginning, and then we went through a lull. There was about 15 years we didn’t have any gold medal winners. And then just recently, we’ve started to have a few more, and we do have two to talk about today. So I will wait until we introduce those. Yes, there are two in this batch of AAS winners. ======================== BADA BING TOMATO Farmer Fred: [2:44] All right. Well, let’s get started then. Let’s talk about vegetables first. Now, of course, my priority this time of year is looking for interesting tomato varieties to try. I always try a couple of new ones as well as some old proven varieties that usually get repeat performances in my yard. And you do have a tomato in the 2026 vegetable winners list called the Bada Bing. Diane Blazek: [3:13] Yes, the tomato, Bada Bing. So it is a large cherry tomato. So we just put that notation in there in case people look at it and go, well, this is like a cocktail tomato. It’s kind of in between a cherry and a cocktail size. The main thing is it’s disease-resistant, but I don’t want to disregard the taste, the texture, the fact that it’s very, very crack-resistant, nice and juicy like you would expect from a cherry tomato. So we keep calling it the more bang-for-the-buck tomato. Farmer Fred: [3:49] It looks like, because it has an overall height of just 40 inches, with a large container, you could grow the Bada-Bing tomato. Diane Blazek: [3:57] Yes, you could. We did not trial it in containers, but you definitely could. In fact, just this morning, I placed an order for a trade show. I’m going to the summer and we always want to show our new winners. So I went ahead and ordered it in a either a 14 or 16 inch container. So hopefully it will be fine for that size plant. Farmer Fred: [4:19] And I guess if people were saying, well, what tomato variety is it like? I guess it’s pretty close to maybe the Sweet 100. Diane Blazek: [4:27] Exactly. Yeah, that’s one. And then there’s another AAS winner from a couple of years ago called Crockini, and it was compared against those two, the Sweet 100 and the Crockini. All right. Farmer Fred: [4:38] And again, like you pointed out, it has resistance to septoria leaf spot, early blight and late blight. Blight’s a big problem, especially in humid climates. Diane Blazek: [4:49] Exactly. Yeah. And this one did win in the southwest and the southeast, as well as the Great Lakes and Heartland that has a lot of humidity, seeing as how I live there. So we do know that it did perform very well in those regions. Farmer Fred: [5:05] How many days is it to harvest on this one? Diane Blazek: [5:08] That was something else I just went over this morning. From transplant, it would be 65 days. So I’m thinking if you’re sowing straight from seed, probably 80 to 90 days. Farmer Fred: [5:20] Okay. Yeah, usually, the good part about planting tomatoes from seed is they come up fairly quickly, usually within a week to 10 days, unlike pepper seeds. And once they’re up, they start growing fast. So it’s only a few weeks after they’re up and growing that you’d be able to transplant them. Diane Blazek: [5:37] Correct. Yes. Farmer Fred: [5:39] All right. So that again, the Bada Bing tomato. Now it’s not a national winner, but it sure sounds like it would be fairly adaptable across the country. Diane Blazek: [5:49] Exactly. It was four regions. And so, you know, usually when it gets to four regions, it’s very close to being a national winner. So, yeah, this one, you know, I would feel pretty confident in pretty much everywhere. We just know that it did superbly well in those four regions. After the paywall, paid subscribers get more words and pictures about the 2026 All-America Selection plant winners.
Nov 24
Rain-Draining Strategies for Your Yard and Garden
Today’s Podcast: Debbie Flower and I tackle the problem of a slow draining lawn. There are lots of strategies for improving a soggy lawn! Where does the water go?” That’s a question I frequently ask myself while bicycling throughout the region, staring at rain-soaked suburban yards. This is also a question homeowners should ask themselves before, during, and after the rainy season. One of the best pieces of advice I can offer any new homeowner: before you spend any time and money on landscaping projects or a garden, live with the existing property for a year. This allows you to take monthly pictures of the area where you want a future garden, perennials, shrubs and trees. When we moved to our new home nine years ago, that’s what we did before we embarked on a totally redesigned landscape. Taking a series of pictures on a regular basis on sunny days, especially at different times of the day (9am, 1pm, 5pm), will remind you how much shade your future plants will be dealing with, and you can plant accordingly. A plant labeled for “full sun” will need at least six hours (preferably eight hours) of direct sun a day. “Part Sun/Part Shade” plants, 4-6 hours of sun per day. “Shade” should be reserved for those plants that get little direct sun (less than four hours) and preferably dappled sun, such as protection from an overhanging deciduous tree. However, the more important reason to live with that new yard for a year before embarking on outdoor landscaping projects: figure out where water goes, both after regular irrigation and after rainstorms. In our case, we discovered that few of the yard sprinklers worked fully or accurately, and that a heavy downpour of rain ends up in the garage. And the basement would flood. As a result, the price of our landscape rehab zoomed upward, to include a complete drip irrigation system for both the front yard and backyard, as well as an underground hard pipe drain system to move roof gutter water away from the house and garage to another part of the yard. Home and Garden Pests That Sing in the Rain The other problem with wet weather: some home and garden pests love it when it’s wet; and others will seek refuge in drier quarters, such as in your home. The authors of the University of California Ag and Natural Resources publication, “Pests in the Urban Landscape,” offer some “Wet Weather Do’s and Don’ts” to ward off problems: • Check for snails and slugs. They like it moist and will sing in the rain. Unfortunately, their singing sounds a lot like, “chomp, chomp, chomp.” These garden leaf and flower munchers don’t like it too wet. They may be easily found headed for dry land – sidewalks and driveways – during a deluge. Find them under loose boards, as well. That’s the time for hand-picking or stomping them. Chemical controls for these mollusk family members are ineffective in the rain. • Remove weeds and unwanted plants. When the ground is wet, pulling them out goes much more quickly. Among the winter weeds spreading here right now are oxalis, nutsedge and groundsel. You may have other cool season weedy invaders in your yard. • Dump standing water. This wet winter is already favoring a big mosquito season ahead. Deprive breeding mosquitoes of water-nesting sites such as flowerpot saucers, wheelbarrows, buckets, clogged storm drains, and roof gutters. • Check for ants, cockroaches, and earwigs. These pests may invite themselves into your home when flooding or heavy rains make the outdoors unappealing to them. Seal any cracks or openings in your home. Outdoors, check the perimeter of your home as well as around doors and windows for insect entryways. Weather stripping, door sweeps, and traps placed beneath eave-protected walkways can help keep them outside. Indoors, keep food tightly sealed and the counters clean, especially near electrical outlets that might provide an entryway. • Remove yard mushrooms. Mild temperatures and wet soil are a combination that mushrooms and other fruiting bodies of fungi love. The good news is they are not harmful to your lawn and garden. The bad news? They can be poisonous to children and pets, when consumed. Rake them up. • Don’t apply outdoor fertilizer or pesticides now. Both are easily susceptible to being washed off the soil or plants and into our waterways. Wait for several days of dry weather before applying any sprays, dusts, liquids, or granules. • Avoid pruning plants unless it is to remove broken or damaged branches. Rainfall and open wounds in the winter on plants is a recipe for spreading diseases. Apricots, cherries, and olives should never be pruned during cool, wet, conditions, advises UCANR. • A common site on sidewalks after a rainstorm are worms, struggling to get out of the wet soil and onto dry land. If you have easy draining soil, you may see their mounds in lawns and gardens as they come up temporarily for air. Those mounds are a great fertilizer: worm castings. Just knock them down with your foot or a rake to feed the soil. • Tread lightly through the garden during or just after a rainstorm. Avoid walking, driving, or moving heavy equipment across wet soil. This compacts the soil, removing necessary air pockets, which are vital for healthy trees, shrubs, and other plants. • One other tip: if you have slow draining areas of your yard after a deluge, mark them. Stick a small stake or object on top of those areas to let you know that the area needs drainage help after the rainy season. Avoid planting in consistently wet areas. Consider putting in a drain system to move that water to another part of the yard to make it more habitable for plant life. Or, consider placing a large container or raised bed in that area for a successful garden. PODCAST TRANSCRIPT - LAWN DRAINAGE TIPS Farmer Fred We like to answer your garden questions. Debbie Flower is here, America’s favorite retired college horticultural professor. Evan writes us from San Jose, which is south of San Francisco, a very mild climate that used to be an area of a lot of fruit orchards, way back when. Now it’s the tech hub with million dollar, two bedroom homes. All right. Go figure. Anyway, Evan writes, “I live in San Jose and in my backyard, I have a very small patch of grass that is around 200 square feet. I want to keep this patch because my daughter practices her gymnastics on it. But in the rainy season, it becomes a swampy bog, so I have to fight the moisture for a few months. During that period, I tend to aerate it with my fork quite a bit. Usually I spend 15 minutes aerating it each week to help it dry out and de-compact it. I usually only disturb the top four to six inches of the soil. But I’m starting to worry that I’m doing too much. Is it possible to aerate the lawn too much? Can you recommend any non-destructive ways to fight moisture and compaction? On a small lawn?” My first comment to Evan is, if you’re using a fork, you’re not aerating the soil. You are compacting it. Debbie Flower Yeah, you’re creating holes, but pushing the soil to the side which is causing compaction on either side of that. And maybe creating more of a drainage issue. I assume he’s having success, or he wouldn’t be doing this over and over and over again. Farmer Fred Well, he says it’s a fork, but doesn’t give details about the fork. Debbie Flower I’m picturing a garden fork. Yeah. And that’s just just tines. Yes, aeration should be done with tubes, hollow tubes that take out a chunk of the soil and whatever roots are in it. And they look if you’ve ever seen goose poop, what they take out of the hole when they’re aerated with a hollow tine aerator looks like goose poop. Farmer Fred Yeah, if you want to aerate, I still like the idea of renting a power aerator because as it picks out those cores of soil, the device also eject them on top of the soil. And you want to be able to do that. I think with a hand aerator, it’s two motions. You punch down, and then when you bring it back up, you have to eject the cores of soil. Debbie Flower It’s a lot of work. Farmer Fred It’s a lot of work and Evan, you’re working too hard. Debbie Flower Right. You use a hollow tine aerator of some sort to aerate the soil. Then you want to collect those goose poops, that are about the size of my pinky finger, perhaps three inches long and maybe a quarter to a half an inch across. Then smash them up so that they’re just loose soil and then rake them in over the top. Or rake in some sand. Something that would hold those holes open and allow air and water to move through them. Farmer Fred And I guess you could do that with a spreader of some sort. I know that in a lot of situations where you’re rehabbing a lawn, and you’re dethatching and aerating, that’s the other thing you might consider, too, is dethatching your lawn. But people who have a rhizomatous... is that a word? Thank you. Rhizomatous or stoloniferous lawn... that can tend to build up a lot of dead material below the surface that you don’t ever see, until you bring in a dethatcher. And all of a sudden you’ve got two cubic yards of dead lawn material to dispose of. And that can help drainage quite a bit as well. Debbie Flower So those typical grasses that would have that problem are bluegrass, Bermuda grass, and creeping red fescue. Farmer Fred Yes, that’s why it’s usually a creeping grass. Exactly. Debbie Flower Yeah, they fill in really well. If you’re a golfer. You would love that because it fills in your divots you make but it’s a harder grass to maintain because of those stems that crawl across the surface and under the surface of the soil. Farmer Fred Fortunately Evan, it’s only 200 square feet. And maybe you can get through what you’re calling the aeration process in 15 minutes a week. But I have a funny feeling you’re just compacting the soil. Debbie Flower Right. My first question after reading his question is what’s causing the flooding? Is the lawn in the lowest part of that landscape so that water is flowing to it? Is it clay soil, so it just takes a longer time to drain? We’re getting more storms that are dropping a lot of rain in a short period of time. And clay soil absorbs water very slowly. So is that the problem? Or is it a perched water table, meaning there are soils with two different types of textures on top of each other, which often happens in new housing developments. That’s because they scrape the land clear, then they build the houses and drive heavy equipment all over the property around the house. And then they bring in, without touching that now compacted soil around the house, they bring in some sort of topsoil mix and throw sod on it. And so you’ve got the sod, which is always grown in a very loose soil, and then whatever they brought in, which is typically a very loose soil, and then this very compacted soil beneath it. That would slow down water penetration. So if you can figure out what’s causing the problem, it’s easier to fix it. Farmer Fred One way to do that would be to take out a fairly sizable core of your existing lawn using a flat headed shovel. And make a little square, maybe eight inches by eight inches by eight inches by eight inches, and go down about eight inches, and then bring up that whole block and see what it looks like. Look at the layers. I wouldn’t be surprised that there is this layer of dead stuff right under the green stuff. And then you’re going to have loose soil, and then you’re going to have the compacted soil, and you want to see how deep do the roots go? And if the roots are just going around the top because, who wants to go into compacted soil? Okay, well, that might be the issue right there, right. Debbie Flower And the damp season is the time to do it. Because the soil would be easier to dig in. It’ll stick together better when you pull it out. So if that’s the case, then you’ve got to create some penetration, some breaks some open spaces between the top of the soil, the stems we’re talking about that you would aerate and dethatch to get rid of, and the soil below. So vertical core aeration might fix that as your fork tines only go about four inches deep. So does vertical core aeration, only go four inches deep. If that doesn’t do the job. If your soil layers are deeper than that, the compacted one that you need to break open is deeper than that, then you’re gonna have to dig holes in places and allow the water to drain there. Farmer Fred Yes, or hardscaping? Yes. Well, there’s that. Debbie Flower One other process that may work but it will take years. Golf apparently was invented in Scotland. I am not a golfer. Maybe your wife knows this. But according to my turf professor at UC Davis, Golf was invented in Scotland and the best golf courses were right on the coast. I guess they’re called the moors. I’m not positive about that. But the reason they were so good is that the soil was quite well drained. And sand would blow up from the beaches below and basically the sand top dressed the lawns every year, with just a little bit of sand, and that is healthy for a lawn to top dress. There are reasons to do it. Usually the reasons are to either apply nutrition in the form of a compost or composted manure, and to fill in holes. If you’ve got a lumpy lawn, and you can fill in holes, you can do it every year, you can do it probably twice a year, but you’re only applying a quarter to a half an inch of top dress. And the top dress soil needs to be very close to the soil the grass is already growing in. The texture of the two need to match. So you may have to buy topsoil. At a topsoil place, you can mix it up to 1/3 to one half with sand, horticultural sand, and just spread a layer of quarter to half inch over the whole lawn. The grass will grow up into it, it will root into it. And so over time, you’re going to raise your lawn, the organic component of what you applied is going to break down, but the sand is going to stay there. So you’re gonna raise your lawn maybe a half an inch a year, and you might raise it right up out of that wet spot. Farmer Fred I have, I believe in the past, written on the Farmer Fred Rant blog page about rehabbing a lawn that included specific instructions on dethatching and aeration, as well as overseeding. And then covering with that top dress material. You can get some good ideas at the soil place on the machinery that makes it a lot easier, like a bigger roller. Actually, you probably want two rollers. If you’re overseeding, you got one that’s filled with water to get the seeds down into the soil, and then a rolling cage with small holes that you fill with compost and roll it across the lawn. And it does a very good job. And I have seen those at rental places. Hey, a good nursery will lend it to you know, for the day. There you go. Yeah, that’s the way to do it. But Evan, yeah, if you’re doing it every week, for 15 minutes, you’re doing it way too much. You throw out a phrase, Debbie of doing it, maybe twice a year. All right. But again, you’re removing cores. Unfortunately, but I’m glad to say we’re getting away from this scenario, of when people have a garden problem. They go into a nursery and say, “What can I buy to fix this?” We were at a nursery yesterday. Yes. And we saw a product that I would might think that a an employee who didn’t know better or was trying to make a sale might say, “Yeah, we got something we can sell you. It’s a natural soil food for lawns and hard soils it it loosens compacted soil that improves root penetration, mass and grass growth and also helps to stimulate microbial life and it’s only 30 bucks.” And, okay, what’s in it? Well, that’s a darn fine question. And we were looking at that bag yesterday. I don’t think we ever decided what was in it. Or were the ingredients even listed in the back. I should check my notes on that. Debbie Flower I think it was sulfur and calcium. Yeah. And iron. Yeah, that’s what it was. It was micronutrients. Yeah, grass needs those, but it’s not going to open your soil. The only kind of soil that this product will have any effect on his sodic soil. That is what it’s called. And it’s soil with salt in it. There are places where salt and I’m talking like table salt, but there are other salts as well. But tablesalt has sodium in it, where sodium naturally collects in the soil and binds it, making it tight. Calcium can be applied to such soils. And it binds where the sodium is, and releases the sodium and opens up the soil. And typically you apply calcium with sulfur because calcium will greatly change the pH or the alkalinity and acidity of your soil. Sulfur will prevent that from happening with this application. So there’s only one very limited situation where this product is going to do anything, other than provide nutrients. Farmer Fred You’d be better off spending your money on a fine compost and rolling that over the lawn. Yes. Debbie Flower And I was saying that this process, the top dressing, can be done twice a year. I wouldn’t dethatch and aerate more than once a year. Okay. You want to do the top dressing when the grass is actively growing. I like to topdress in spring when the forsythia shrubs bloom. That’s typically when the soil is warm enough for the spring weed seeds to germinate. And I like to top dress to cover up those baby seedlings so they can’t find the sun and they don’t grow. Debbie Flower I love horticultural phenology. And that’s what that is. You do garden chores based on what’s in bloom or what’s happening in the garden. And the forsythia bloom usually happens in late winter. Debbie Flower Or early spring when the soil is just getting warm enough for things to germinate. Or you find you’re mowing the lawn more often. Farmer Fred Yes, there’s that too. Again, most lawns, and we don’t know what type of lawn Evan has. So it could be a cool season lawn. It could be a warm season lawn. Yes. Debbie Flower And in San Jose, I would guess would be a cool season lawn. Farmer Fred yeah, but you never know. So, Evan, stay off your lawn. Debbie Flower Yeah, don’t walk on it when it’s really wet. That compacts the soil in and of itself. Farmer Fred Exactly. Now, it should be moist when you do this work, but not so soggy, not too soggy. That would actually compact the soil. Because when you compact the soil, you’re removing air, right? Air is a necessity for root growth. Debbie Flower Yes, it is. Good luck. Farmer Fred There’s a lot I would do in this situation, I think. Perhaps start over. Start over, get some professional equipment. I would first of all, I’d dig out that chunk that eight by eight inch chunk. Debbie Flower You got to know what’s going on down there. Yeah, identify the pest, if you will. If you do that send us a picture. Farmer Fred Yeah, it could be the thatch layer that needs to get removed, if you see a layer of dead stuff below the green stuff before it hits soil. If, on the other hand, when you dig that out and it’s just dripping water, well, then you’ve got a watering issue. That could be the flow from your neighbor’s sprinklers or your own sprinklers. And it just may be as you said, Debbie, just a low lying area. But if it’s supporting a lawn, lawns are amazingly resilient. Debbie Flower They are. That’s why people like them. You only have to know one set of instructions to care for a lawn. Yes. Yeah, I suspect there’s layers of soil in there that are impeding water flow. And if it smells, you really got a problem. Yes, it smells like low tide. Or dead fish. Farmer Fred Yeah, that means your soil is getting way too much water. And so think about where the water is coming from and how much you’re watering. It sounds like maybe you can turn off the sprinklers, if that’s the issue. Debbie Flower Yeah. And maybe your daughter needs a really nice mat or trampoline.. Farmer Fred Yeah, we don’t want to discourage your daughter, Evan, from practicing her gymnastics. But yeah, a mat. That makes sense, a 200 square foot mat. right? Yeah. And you’d save yourself a lot of work, it would be a worthwhile investment, right? Debbie Flower And then, when she’s done, or moved on, you can raise that soil level and have a lawn or whatever you want to grow in that location. Farmer Fred Or, you can leave the mat there and sleep out there at night because your wife kicked you out. So there’s always that. All right, so good luck with improving your lawn drainage there, Evan. Thanks for writing in to the Garden Basics podcast, and thank you, Debbie. Debbie Flower You’re welcome, Fred. Beyond The Garden Basics is a reader-supported publication. To receive complete, new posts, have access to past newsletters, and support my work, consider becoming a paid subscriber. Thank You. Thanks for Subscribing and Spreading the Word About the Beyond the Basics: The Garden Basics with Farmer Fred newsletter, I appreciate your support. Fred Hoffman is also a University of California Cooperative Extension Master Gardener in Sacramento County. And he likes his bikes. This is a public episode. If you'd like to discuss this with other subscribers or get access to bonus episodes, visit gardenbasics.substack.com/subscribe

Nov 21
2026 Garden Seed Price Sticker Shock Is Arriving
This is a free preview of a paid episode. To hear more, visit gardenbasics.substack.com In today’s newsletter podcast, we chat with Renee Shepherd of Renee’s Garden seed company about the worldwide journey of garden seeds, rising seed prices, and seed availability for 2026. We explore factors influencing market changes, including tariffs and supply chain issues. The discussion highlights the logistics of seed packaging and the importance of quality standards. She also differentiate between hybrids, heirlooms, and open-pollinated varieties, along with the complexities of seed saving. As we wrap up, Renee ends on an uplifting note, celebrating the joy of gardening and encouraging listeners to explore the diverse seeds available while enjoying their growing experiences. 2026 Seed Prices Go Up The good news: the 2026 seed catalogs are beginning to arrive! The bad news: you’ll be paying more for garden seeds. Just as the Halloween decorations are packed away at stores on the morning of November 1, the Christmas lights, trees, and wreaths start jamming the aisles. Don’t fret about Thanksgiving, though: there are usually a few shelves dedicated to inflatable front yard turkeys, and an end cap with flour, sugar, pumpkin pie filling, and canned cranberries to honor the Thanksgiving cook. And it seems that garden seed catalogs are arriving sooner than ever, with the first one hitting our mailbox this year in the second week of November. As you’re ogling the colorful, new hybrid seed and plant introductions for 2026 in those catalogs, your hair might turn a bit gray(er) when you glance at the prices for mail order seed packets (plus shipping). Yep, they’re up. So are the prices of the 2026 seed packets on racks at your local nursery and home centers. The discerning gardener will also note that those 2026 packets, although physically the same size as in years past, may contain fewer seeds. That discerning gardener may also need to brush up on their eighth grade math. Those seed packets can be measured in a number of ways, including ounces (rare these days), grams (getting fewer), milligrams (more common), and the most mind-bending of all, fractions of an ounce (1/64th of ounce! really?). Unfortunately, fewer seed varieties are sold by the actual number of seeds in the packet. And, for a good reason: not all seeds of one variety are necessarily the same size or weight. Still, for the backyard gardener, knowing the number of seeds you’re working with seems like a more common sense approach. So, let’s update our garden math book for when you’re comparison shopping: 1 ounce = 28 grams 1 gram = 1000 milligrams (mg) 1/64th of an ounce = 443 mg 1/16th of an ounce = 1.7 grams How much are prices going up? In the 2024 edition of one garden catalog company, the price for 1/64th of an ounce of Shishito pepper seeds sold for $5.55. In the 2026 catalog, that price - for the same weight - jumped to $6.55, an 18% jump. A flower example: “Golden Yellow” zinnia, in 2024, was $3.75 for 1/32nd of an ounce (that’s 886 mg, for those of you at home keeping score). In 2026, that same zinnia variety is selling for $4.15 for 1/32 of an ounce, about a 10% increase in price. Why, you ask? The cost of everything is up. Add to that, tariffs. Add to that, shipping charges. Who among us have purchased a seed packet of a coveted vegetable or flower variety, and ended up paying more than the packet price in shipping and handling charges? ✋✋✋ An understanding of the seed market is necessary, and after you read what’s below, you will quickly come to the conclusion: those seeds you’re taking out of the packet could have originated from any number of countries. One seed company executive, Andrea Tursini, the CEO of High Mowing Organic Seeds , explained the price jump in the 2026 edition of their catalog: “Last spring, when new tariffs were announced by the Trump administration, we shared the confusion and frustration of many consumers and small businesses. We also promised you transparency as we figured out what this meant for our independent seed company. This past summer, we began seeing the first of those tariff charges rolling in, and as a result, you’ll notice some price increases in our 2026 catalog. First, an important note about the global nature of the organic seed industry. At High Mowing, we’ve scoured the world in search of partners who share our values and commitment to organics. These relationships - and the seeds that come from them - allow us to continuously update our collection, offering improved varieties that meet the needs of our growers. These global relationships and not easily replaced. A reminder that tariffs are fees that American companies pay when importing goods; they are not paid by the exporting company. For example, when we buy tomato seeds from the Netherlands, we pay a 15% tariff. When we import broccoli seeds from Switzerland, we pay a 39% tariffs. Tariffs can be hard to track, showing up on carrier bills long after receiving the seed. This has required additional time and attention for us as a company. Which brings up back to our pricing. We did our best to minimize the increases, and in most cases passed on only a percentage of the increased costs to you.” Coming up after the paywall break: • The Top 10 countries that export seeds. • A deeper dive on how seeds get from a farmer - anywhere in the world - to you. • A chart that approximates the number of seeds of various vegetables per gram in a seed packet. • A library with an ongoing seed swap program. • A transcript of our podcast chat with Renee Shepherd, including which seed companies to avoid online; the decrease in diversity of varieties of flowers and vegetables; two ways to preserve your own seeds, for the short term and the long term; and, three mistakes that beginning gardeners make that can be avoided.

Nov 17
Home Weather Station Setup Tips
Today’s Podcast We interview climate scientist Daniel Swain, who, besides being a University of California Ag and Natural Resources employee at the California Institute for Water Resources, is well known on social media. Swain runs the Weather West website as well as his frequent presentations talking about extreme weather conditions in California and the west on YouTube , Bluesky , and other social media outlets. TIPS FOR SETTING UP A HOME WEATHER STATION One common topic when two gardeners meet: the weather. Gardeners are usually grousing about some aspect of whatever is happening with the current weather: the heat vs. their tomatoes; the threat of frost to their citrus or succulent plants; gusty springtime northerly winds drying out the soil prematurely; and let’s not forget comparing plant damage due to a freak hailstorm. Many gardeners are amateur meteorologists, with a yard full of devices that measure the air temperature, the rainfall, the humidity, the wind, and more. According to University of California Ag and Natural Resources climate scientist Daniel Swain, more care is needed as to where you place those weather sensors. After all, that thermometer that’s hanging outside your kitchen window may be reading much warmer than what is happening in your garden. “There are genuine microclimates that can vary over that distance. If the thermometer is attached to your house, it might be warmer,” says Swain, who runs the informative Weather West YouTube page and on other social media outlets. “Presumably if it’s a cold night, you have the heater on inside. Some of that’s going to bleed outside a little bit near your house. If you have it hanging on a wall or an eave somewhere, it is going to exert perhaps a bit of a warming effect. And irrigation can affect the reading. Most people who are farmers or gardeners know that once you put water in the soil, once you put water on the plants, you kind of dampen the range of temperatures that you’re going to experience. By having moisture in some places more than others, you’re also going to actively, in some cases, create a temperature differential that’s different than where you might be measuring at your house or out on the driveway.” Swain says more thought needs to go in to where you place that thermometer sensor for the most accurate readings for the plants of greatest concern. “You’re measuring, technically, the temperature of a small increment of air immediately surrounding that thermometer device,” says Swain. “Imagine two different scenarios, the same parcel of land, the same home, and two thermometers within, five feet of each other. There’s not really a meaningful meteorological difference between the temperature across those five feet under normal circumstances. The numbers should be the same. But imagine that one of those thermometers is just sitting out there in direct sunlight. Maybe you’ve mounted it on a pole above a dirt field or over a concrete or asphalt driveway. That thermometer is going to read some awfully high values in the daytime and potentially some awfully low values in the nighttime. And that’s because you have the sun directly shining on the thermometer, heating the thermometer itself because of the sunlight is landing on the device itself. That thermometer is going to read a very high value. On a hot day, you might even get a value of 120 degrees on that thermometer. But as we define the surface temperature, the temperature at two meter height, so right around the top of my head, since I’m a little over six feet tall, that’s kind of a standard meteorological temperature measurement that’s used not just in science, but also for practical purposes and in agriculture and any number of applied purposes, that temperature is actually supposed to be a shade temperature. What you’re measuring is something different than the number that you’re comparing to everyone else’s numbers. When you go to the National Weather Service website and get a temperature forecast or you look at observations from official weather service certified meteorological stations, the temperatures you’re seeing are taken at the six-foot height in the shade.” Beyond The Garden Basics is a reader-supported publication. Some editions are free, some have a paywall. Your paid subscription helps keep the good gardening information coming your way. Thank You! TRANSCRIPT: Home Weather Station Setup Tips with Daniel Swain Farmer Fred: If you’re a longtime gardener, you just might be a weather nerd. You may want to know what’s happening, especially around your garden area and greenhouse, about many things, such as what’s the high temperature? What’s the low temperature? What about humidity, wind, soil temperature, rainfall, evapotranspiration rate? Plus, there’s chill hours, growing degree days, heat index, UV radiation, and a lot more that can be affecting you and your plants. And your meteorological equipment right now may be as simple as a thermometer hanging outside your kitchen window, which may not be the best idea. We’ll have more about that in a minute. Or it could be as complex as a really nifty weather station that set you back $1,000 or $2,000 that sends a myriad of data to your computer or phone or your in-house monitor. So if you’re considering upgrading your backyard weather equipment, you also need to consider the placement of those various devices in your yard to get more accurate readings about what is really happening in your garden area, especially near your food crops. And you know something else? That upgrade that you’re thinking about with your weather equipment just might be a great move because of the recent cutbacks at the National Weather Service, where personnel and working hours have been slashed, including throughout a very wide swath of California. Today, we’re going to get some answers to those questions from Daniel Swain. If that name sounds familiar, you may know him as the man behind WeatherWest.com. He’s a climate scientist focused on the dynamics and impacts of extreme events, including droughts, floods, storms, and wildfires. Daniel holds joint appointments as a climate scientist within the California Institute for Water Resources, which is part of the University of California Ag and Natural Resources, as well as the Institute of the Environment and Sustainability at UCLA. And he’s a research fellow at the NSF National Center for Atmospheric Research. He’s an alumnus of Davis and Stanford, and he completed postdoctoral work at UCLA. And again, his Weather West blog is excellent reading wherever you might be on social media, especially Twitter, Blue Sky, and YouTube , where he does presentations all the time about upcoming weather events. I’ve been a fan of his for years. Daniel, I’m finally glad to be able to talk to you in person. Welcome to the Garden Basics podcast. Daniel Swain: Yes, thanks for the invitation to be here today. It’s great to be on the show. Farmer Fred: All right. I’d be curious about your own home weather setup. What’s that like? Daniel Swain: [3:30] Ah, yes. I actually am based physically in Boulder, Colorado these days because of that NCAR appointment, despite the primary one with the University of California. So we don’t own a home here. So I’m somewhat limited when I can personally install on this side of the Rocky Mountains. But back in California, back when I was in high school, believe it or not, I installed a weather station on my parents’ home in the North Bay. And that is something that I have maintained over the years on their roof. It’s still there. It still gets maintained. And I’m still trying to use, to the best extent possible, best practices for meteorological station sighting on that one. Farmer Fred: I understand completely. I think when I bought my first large parcel of land, I got myself a Davis Instruments weather station, which was at the time one of the best you could buy. And that let me know a lot of things like wind direction, the high temperature, the low temperature, rainfall amounts, things like that. But it has gotten so much better over the last 20 or 30 years. And the data is much easier to comprehend as well because of either in-house monitors or the data is shot straight to your phone or your computer, it makes it a lot easier. But as they say in the computer world, garbage in, garbage out. So where you put that home station, no matter what kind it is, where you put it in your yard is very important, isn’t it? Daniel Swain: Oh, it’s incredibly important. And this is actually something that I think is not always as obvious for a lot of folks as it might be to some meteorologists, although perhaps not even to all the meteorologists in the world who haven’t worked a lot with actual physical instrumentation. And I think this is because, as you say, exactly where you put these devices and where they are relative to other things that might be in the immediate vicinity can make a huge difference into the numbers of the data you’re actually seeing in front of you. And, as you mentioned, there’s any number of different companies that manufacture weather instrumentation or packages of weather stations. Daniel Swain: For my part, just as was the case with you, the one I installed was indeed, I think it was one of the Davis Vantage Pro stations, sort of the best consumer grade ones that they offered for many years. And it’s still there. It’s still chugging along. It’s been recalibrated a couple times over 20 years at the factory, but it is still the same original hardware from 20 years ago, and it’s still going strong with that careful maintenance. But the bigger issue, I think, is indeed where we put it. And the main reason for this is think about what you’re actually measuring, for example, with something as simple as a thermometer. You’re measuring, technically, the temperature of a small increment of air immediately surrounding that thermometer device, whatever the device is. If it’s an electronic one or an alcohol-based thermometer or a digital one, whatever the particular mechanism is, you’re measuring the immediate environment of that thermometer, right? Daniel Swain: So imagine two different scenarios, the same parcel of land, the same home, two thermometers within, say, five feet of each other. So there’s not really a meaningful meteorological difference between the temperature across those five feet under normal circumstances. So the numbers should be the same. But imagine that one of those thermometers is just sitting out there in direct sunlight. Daniel Swain: You’ve mounted it on a pole above, say, a dirt field or a concrete or asphalt parking lot. That thermometer is going to read some awfully high values in the daytime and potentially some awfully low values in the nighttime. And that’s because, of course, you have the sun when it’s sunny is going to be directly shining on the thermometer, heating the thermometer itself because of the sunlight is actually landing on the device itself. It’s also going to be warmer because you’ve put it in an environment that is itself a bit artificially warmer than it could be. You’ve got your own local heat island effect if you’re near that parking lot or that dirt field because that sun is also heating the ground there more than it would if it were, say, grass or some other surface that weren’t so solar radiation absorptive. So that thermometer is going to read a very high value on a hot day, say, you might even get a value of, 120, 130 degrees on that thermometer. And does that tell you that the ambient air temperature is actually 120, 130 degrees? Well, yes and no, because assuming the thermometer is correct, it is reading correctly the temperature of something in that environment. Daniel Swain: But as we define the surface temperature, for example, whether we’re talking about, the temperature at two meter height, so right around the top of my head, since I’m a little over six feet tall, that’s kind of a standard meteorological temperature measurement that’s used, not just in science, but also for practical purposes and in agriculture and any number of applied purposes. That temperature is actually supposed to be a shade temperature. So the temperature of the air at about six feet off the ground where you don’t have any direct sunlight. So if you’re measuring a temperature, out in your dirt field or near the asphalt parking lot or in direct sun even, even if you’re over grass or something, what you’re measuring is something different than the number that you’re actually comparing to everyone else’s numbers. So when you go to the weather service website and get a temperature forecast or you look at observations from official weather service certified meteorological stations, the temperatures you’re actually seeing are the two meter or the six foot height shade temperature. Daniel Swain: And if you’ve put your thermometer in one of those settings we were just talking about, what you’re measuring is something else entirely. You’re measuring essentially however hot a thermometer gets if you put it in direct sunlight over a very absorptive surface. Likewise, at night, the opposite can happen, where those places get a bit colder than the two-meter temperature, correctly defined, because they tend to radiate a lot of that energy back out to space if it’s a clear sky. And so you’re going to get a colder surface than one that has a little less variability day to night. So you might read a bit too hot or maybe a lot too hot in the daytime and potentially too cold at night. So your range is wider than the actual range of the temperature that we might define officially. And this is just for one specific, simple atmospheric variable, right? We’re just talking about the temperature. Things get even more complicated, and we start talking about things like precipitation or wind, and then things get just really, really complicated. We can dig into the details, but I just wanted to offer just how tricky it can be when we talk even about perhaps the simplest to measure atmospheric variable of temperature. And it’s why, for example, when you look at the temperature on your car thermometer, you know, when you’re out on a hot, sunny day or the bank thermometer, you might see it on the side of the road. Those will read values that might seem kind of patently ridiculous. And the reason is those are often thermometers that are sitting there in the direct sunlight on someone’s rooftop or in the case of your car thermometer, right on the hood of your car. And think about how uncomfortable it would be if you tried to put your hand on the hood of a car on a hot, sunny day in the Central Valley. It’s a lot hotter than the air, I’ll tell you that. Farmer Fred: For gardeners who may have only invested in maybe a remote thermometer that they can read indoors, and those units are widely available even at the big box stores. They sell for $20, $30, $40 or so. A practical application that they’re looking for is, how cold is it under my citrus trees? Do I need to put a frost cloth over them? Do I need to protect them in some way from temperatures? And if all you have is a thermometer, as I use in the example, outside your kitchen window, you’re not getting an accurate temperature of what is happening out where your citrus trees are. So to protect that sensor, that thermometer sensor that is in your yard, would one strategy be to hang it six feet up in a citrus tree? Daniel Swain: Well, I think, the key is it depends on what you’re trying to measure. If you are trying to do, for example, frost or freeze protection, then it really does matter what the temperature is at the level of the plant that you’re trying to protect. And, in the example of a citrus tree, it could be very different. The height of where you’re worried about, frost on the leaves or blossoms or fruit of a tree, as opposed to like a ground crop or even something like vineyards, which are often below head height at their highest point. And you get what’s known as a microclimate, especially in the vertical direction. So I mentioned that going five feet, six feet horizontally probably doesn’t affect things very much most of the time. Daniel Swain: But going five feet vertically actually can make a pretty big difference, particularly at night when you have what’s known as a temperature inversion, when temperatures actually increase with height instead of decreasing as they normally do in the lowest layer of the atmosphere. Sometimes that inversion can be noticeably important even within the first few feet off the surface of the ground. And that can matter if you’re talking about the top of a tomato plant or the top of your grapevines versus the top of a fruit tree or a nut tree or something. Daniel Swain : So you sort of got to measure exactly what you need to know in that case. How high are you actually measuring? Is it under the canopy or is it on the top of the canopy? All of that can matter a lot for something as subtle as making sure you’re not falling below a particular temperature threshold. Might it be good enough if you only need to get within a couple of degrees for your purpose, in any of these locations? That might be fine. But if you really care which side of 32 degrees Fahrenheit that the temperature is at a particular height, you probably got to measure it as close to that height and location as you possibly can because you have these huge variations. In fact, a lot of the frost protection systems that are used in larger scale agricultural settings are really based on the knowledge that you do have these huge variations. Think about when people historically have used things as wild as helicopter downdraft, rotor downwash to sort of mix up the air during freeze events in orchards or fans or windmills that mix the air. Daniel Swain: These aren’t hundreds of thousands of feet tall towers that are doing the mixing. A lot of them are just a few tens of feet tall, and yet mixing the air from 30, 40 feet up to the ground can give you enough of a difference to prevent a freeze in a case where there’s a huge difference between the very cold air right at ground level and the slightly less cold air 10, 20 feet up. So sometimes frost protection is even...Leveraging the fact that these vertical microclimates exist it’s why you see vineyards for example on steep slopes on some of the hills in in any place where you grow wine grapes part of that is because that cold air tends to kind of drain downhill into the the valley below or even the culverts and the rivulets below it doesn’t even need to be a big valley. So even just planting on a slope that’s you know five ten fifteen feet above the lowest point on the land gets you that extra degree or two of insulation. So a long way of saying that you got to measure what you actually want to measure. And if it’s something as sensitive as frost or freeze protection, you got to pinpoint exactly the height and the location where you’re trying to protect against that condition. Farmer Fred: So if I’m a gardener listening to this, it sounds like, well, if I’m really concerned about frost protection for my citrus trees, I’d want to hang that sensor a little bit lower in the tree, maybe only two feet off the ground, but in the shade of the canopy. But at night, that’s not that big of a concern, the shade from the sun. But there sure is a big difference if all you have is a thermometer hanging on the wall of your house outside. And what may be happening 10, 20, 30, 40 feet or more away in your yard where that tree is growing. In my own amateur experimentation with that, I’ve seen as much as a six to an eight degree difference where it’s warmer on that thermometer near the house than it is actually out in the orchard. Daniel Swain: Yeah, absolutely. I mean, I can believe it. Part of that, it’s, as we were talking about, there are genuine microclimates that can vary over that kind of distance. But it’s also because your house, for example, might actually be warmer. Presumably, if it’s a cold night, you have the heater on inside. And so some of that’s going to bleed outside a little bit near your house if you have it hanging on a wall or an eave somewhere. Even a tree, for example, is going to exert perhaps a bit of a warming effect. Because if you have the thermometer under the leaf canopy, for example, that leaf canopy itself is going to be both absorbing and radiating some of its own infrared wavelength energy that is keeping things a little bit warmer than it would be if it were just out in a bare dirt or an asphalt field with nothing above you, going out into the clear, cold winter sky at night with less moisture around too. This is where, whether or not you’ve irrigated. Most people who are farmers or gardeners know that once you put water in the soil, once you put water on the plants, once you irrigate, you kind of dampen the range of temperatures that you’re going to experience. So you have less hot afternoons because more of the sun’s energy is going into evaporating water or water transpiring through the plant’s leaves. But at night, even if you have less transpiration or evaporation, that water is still maintaining some thermal inertia in the tissues of the plant or in the soil because it has retained it from the daytime. And so it takes longer for damp soil, for example, to cool down than dry soil. So by having moisture in some places more than others, you’re also going to actively, in some cases, create a temperature differential that’s different than, you know, where you might be measuring at your house or out on the driveway or something else. Farmer Fred: This is a tip we’ve passed along for years to people who are, who have an orchard or citrus trees or whatever, is basically to test that sensor out in various locations to see where perhaps the coldest temperature might be. What’s nice is there are some inexpensive units that are available that will have multiple sensors that you can hook up to one indoor monitor that can tell you the various temperatures at various points in your yard. And that’s not a bad plan for any gardener before they plant anything is figure out, A, where most of the sun is if you really truly do need full sun, and also where the coldest parts are. So I always advise people, before you plant a garden, live with your house, live with your yard for a year and notice where the sun goes, where the shade goes and where the temperatures go on a month-to-month basis before you do anything. Farmer Fred: I’ve noticed with people who buy, we’ll say, the mid-range weather stations that have temperature, rainfall, and wind, a lot of these units, especially the wind part, is mounted on a rooftop. And I’ve often wondered, well, is that really accurate or not? Daniel Swain: Well, when it comes to wind, you know, the answer is unfortunately often going to be a pretty flat no. It’s not accurate. And there’s a number of reasons for this. One is that, first of all, commercial-grade wind sensors are very finicky. There are different ways you can measure wind. Most familiar is probably the spinning cup anemometer. So all wind gauges are anemometers, by the way. That’s the technical term. But the spinning cup variety, it’s exactly what it sounds like. It’s usually three plastic or metal cups that are sort of rotating along a vertical axis. And the stronger the wind, the faster the cups rotate. They’re sort of like mini ice cream scoops that sort of get caught by the wind and spin faster, the stronger it gets. And that gets converted into a wind speed based on the number of rotations per unit time. The tricky part with these is that they’re highly susceptible to getting dirty or to becoming degraded over time. So anything from spider webs to dust to bird droppings to just good old rust will really affect that kind of sensor. It will really bias its wind speed kind of probably low so you’re estimating winds that are too low relative to real winds and honestly some of the ones, especially the lower to mid-range ones that come straight out of the manufacturers from the warehouse, they already aren’t doing so well. So there is a challenge here where it’s actually pretty difficult to measure wind correctly, even if you’ve sighted the instrumentation correctly, because of the inherent challenges with getting that kind of physical instrument to operate and be fully calibrated correctly. Sometimes at the higher end of the consumer grade, as you get into professional-grade instrumentation, there are other forms of anemometers, of wind gauges, things like sonic anemometers, and those are becoming more common. Those are a little bit more resilient to that particular problem of friction, essentially, with the spinning cups, because there are no moving parts in a sonic anemometer. Essentially, the instrument is actively sending out sound waves between receivers, and it’s measuring the distortion of those sound waves between two relatively nearby points. So there are no moving parts. And if it’s calibrated correctly, that can be a decent option because it’s a little more impervious to things like, you know, you still got to clear the spiderweb off occasionally, but dust isn’t going to affect it as much rust, you know, and there’s no spinning wheel to spinning ball bearing situation that you have to worry about. So that can be, an improved option, although it’s usually more expensive. That’s not what you’re getting on your typical consumer grade station But then there is the problem of sighting. Even the very best professional anemometer is going to be in error if you put it in the wrong place. And the wrong place, as you mentioned, it could be the roof line. Now, a lot of people put anemometers along the roof line because it’s really just the most convenient spot. And I get it. Sometimes you do the best that you can. But the problem with putting it along the roof line is that if you have a gusty wind, for example, and you’re measuring it along the edge of a surface, think about what happens if, you were standing up on the roof on a windy, stormy day, you probably don’t want to stand too close to the edge because you get buffeted by all of these gusts and these eddies, these swirling, turbulent features. Because if you think about it, if the wind is hitting the side of your house, Hopefully it’s not going through your house unless you’re inside of a tornado or something. Instead of going through your house it’s hitting the side of the house and you know the air has mass and it has force and it has to go somewhere so where does it go but it goes up once it hits the side of your house it can’t go down to the ground it can’t go through your house unless you have all the windows open, hopefully not. so it’s going to go up and so now all of a sudden you’ve artificially generated wind in a different direction than the ambient wind. You have upward force of that wind, and as it approaches the edge of your roof, now all of a sudden there’s no barrier anymore, and so it’s going to start to move back in the direction that it wanted to go originally. It’s going to go back horizontally, but now you’re going from an upward wind to a 90-degree change to a horizontal wind again, and that induces rotation or swirls or random turbulent eddies. So what I’m getting at is that if you have an anemometer mounted on the side of your house, whether or not it’s a spinning cup or a sonic anemometer or something else, it’s going to be really measuring all the turbulent eddies that your house produced rather than the ambient wind speed. And so you’re going to be measuring, again, something other than what you actually want to measure. So ideally, what you do if you really want to know what the ambient winds are in a given location is you’d essentially mount your wind gauge, your anemometer, on a stick, on a post somewhere that’s as far from vertical obstacles as you possibly can. So out, ideally, in an open field somewhere, and far enough above the surface that you’re sort of getting away from the surface friction layer. So you want it to be, there’s actually a formula based on the height of the nearby objects or vegetation. You want it to sort of be above that. But in general, you know, we often talk about 2 meter or 10 meter winds. 10 meters is kind of tall. That’s like a 30 plus foot Tower. That is unrealistic for a lot of folks. But ideally, if you can mount it, in an open field or, even in an open lot, there’s less sensitivity than temperature, for example. So it’s a little bit less of a problem if there’s, you know, a paved surface or a dirt surface or water nearby, because you’re not trying to measure the temperature necessarily, you’re trying to measure the wind. And here, what you’re trying to optimize is the radius around the sensor where there’s no tall vertical obstacles that could induce artificial turbulence or either artificially enhance or reduce the ambient wind speed. So here, unlike thermometers where you’re trying to minimize the unwanted solar radiation exposure or the exposure to anomalously damp or heated or artificially cooled areas, here you’re trying to avoid proximity to tall objects that could cause eddies or reduce the speed of that wind. So the challenge is if you have one unit where these sensors are integrated into the same physical object, these can be kind of goals that are in opposition to each other. But ideally, what you might have are sensors that you can physically separate and potentially even put them in different locations, because it might be that optimizing for your most accurate sighting for your wind gauge is different than optimizing for your most accurate sighting for your thermometer, for example. Farmer Fred: And for those gardeners with a nice chunk of land where they can accomplish that, probably their first thing they’ll do is go to Amazon and see what’s available. And there’s a lot of those sonic wind measurement devices available at fairly reasonable prices in the hundreds of dollars, not the thousands of dollars. And that sounds like a much more reliable way to measure the wind other than spinning cups. Daniel Swain: Yeah, it certainly can be. It used to be the case that they were incredibly expensive, as you say, were the very cheapest ones from the thousands. But I think this is another place where technology has the technological curve mass adoption has made them a lot cheaper than they used to be. So they’re still not trivially inexpensive, but they’re also not nearly as financially out of reach as they once were, I think. So if I were, you know, if I were buying a new one right now, I would probably do just that and look for a sonic anemometer because they have, in general, you can imagine fewer moving parts, fewer problems. Farmer Fred: Daniel Swain, thank you so much. Daniel Swain: Thanks again for having me. Thanks for reading Beyond The Garden Basics! This post is public so feel free to share it. Broadcast journalist Fred Hoffman has been talking gardening with the residents of Northern California since 1982 on radio, tv, and podcasts. He is also a University of California Cooperative Extension Master Gardener in Sacramento County. And he has a wet weather bike. This Surly Long Haul Trucker was a gift to myself back in 2012, for surviving quadruple bypass heart surgery. This is a public episode. If you'd like to discuss this with other subscribers or get access to bonus episodes, visit gardenbasics.substack.com/subscribe

Nov 14
Trees vs Storms, Expanded
This is a free preview of a paid episode. To hear more, visit gardenbasics.substack.com Today’s newsletter podcast features an arborist discussing ways you can spot when your trees may be in danger of falling, especially in a wet, windy winter (recorded as the California drought was ending). Also: Consulting Arborist Michael Santos tells us about online resources for homeowners to get more information about the trees in their yard. More information about what was discussed in the podcast can be found at the University of California Ag and Natural Resources publication, “ Inspect Your Landscape Trees for Hazards ”. How to (Possibly) Thwart Tree Damage Before a Storm During or after a particularly violent fall or winter wind/rain/snow storm, TV news crews usually rush to the most photogenic damage during these rare occasions: downed trees, usually leaning against a house or crushing a car. Without the correct care of the trees on your property, winter storms and trees will not get along. Most susceptible are the trees that keep their leaves year round, including broadleaf evergreens, such as eucalyptus and camphor. Add the conifer family to that list: pines, firs, redwoods and cedars. All that mass of greenery acts as a sail in a heavy wind, bending trees at ridiculous angles. Another cause of winter tree failure is crown rot , which despite its name, refers to the deterioration of the root system near the base of the tree. Combine that with a couple of inches of rain onto already saturated soils, and you have tree roots heaving towards the surface, leading to pictures, such as the one above, popping up on the TV news. If this is the view from your window, the day after a major rain and wind storm is not necessarily the best day for the homeowner to tackle the hazardous task of cleaning up the remnants of trees, shrubs and other plants that took a beating. If wind and rain is still in the forecast, the prevalence of slippery conditions and the chance of more falling debris should limit your cleaning chores to dragging broken branches away from the scene of the crime. It is not a good day to be climbing ladders or scrambling into trees while balancing a chain saw. Leave that to the professionals. Signs of Potential Tree Failure Arborists offer this good piece of advice for those surveying the fallen aftermath of a major storm: Limb failure is largely a product of poor tree maintenance over time. Take care of your trees, or they may take care of themselves in ways you won’t appreciate. According to the University of California publication, “Inspect Your Landscape Trees for Hazards” , a nice day in autumn (or winter, spring or summer, for that matter) is the time to take an inventory of any possible future tree damage before you, your house or your car becomes the next victim of a falling tree or branch. Leaning Trees: Are your trees not as upright as the result of recent heavy winds? Can you see newly upheaved roots or soil around those trees? Then, immediate action is required: call in a professional, certified, bonded and insured arborist to do an onsite inspection and offer a solution (find one near you at treesaregood.org ). Newly leaning trees are an imminent hazard. If you have a tree that has leaned for a number of years, that tree can still be a hazard during wet, windy weather. Taking periodic photographs can help you determine if a greater lean is developing. Multiple Trunked Trees: This co-dominant condition can result in breakage of major tree parts during storms. Usually, these trunks are weakly attached. Inspect the point where the two trunks meet; if you see splitting beginning, call in an arborist. Weakly Attached Branches: Trees with many branches arising from the same point on the trunk are prone to breaking during wind storms. Prune out any split branches. Thin out multiple branches. Hanging or Broken Branches: If you see storm damaged branches hanging from the tree, remove them as soon as possible. This includes removing any completely broken branches that may be resting elsewhere in the tree’s canopy. Cracks in Trunks and Branches: Measure the depth of any cracks with a ruler. If those cracks are more than three inches deep, call in an arborist to determine the best course of action. Dead Branches/Trees: Branches or entire trees that have completely died are very likely to come tumbling down in a storm. Dead branches are most noticeable in the summer when the tree is in full leaf. Cavities and Decay: Large, open pockets where branches meet the trunk, or at the base of the trunk, can mean big trouble. The presence of mushrooms on the bark or on exposed roots may indicate wood decay. Call in an arborist. Beyond The Garden Basics is a reader-supported publication. To receive new posts and support my work, consider becoming a free or paid subscriber. The Arbor Day Foundation website has this guide to proper pruning techniques. Also: Tips for Hiring an Arborist . Beyond the Paywall: • Tree Pruning Advice • The Three-Cut Method for larger branches • Small Trees for Small Yards, Medium-Sized Trees for larger Suburban lots • How to Successfully Plant a Tree • The podcast transcript

Nov 7
Why There Should be a Chipper Shredder in your Garden
This is a free preview of a paid episode. To hear more, visit gardenbasics.substack.com Are you thinking about buying a rototiller? How about instead purchasing a chipper/shredder? Now, that’s a machine that’s going to make easy work of chopping up your garden clippings including tree limbs. it’s going to make it into the greatest mulch you could possibly own. The latest research shows that rototilling your soil actually damages soil structure and doesn’t do anything good for the soil biology. On the other hand, the end result of using a chipper/shredder is going to provide you with a quality of mulch that we like to call, “gardeners’ gold”. Northern California Organic Gardening Consultant Steve Zien has some rather strong thoughts on this subject. Go back and listen to his comments back in Episode 89 of the Garden Basics podcast , from 2021. Thinking that perhaps his opinions may have mellowed on the chipper-shredder vs rototiller choice over the last four years, I recently asked for his thoughts. Nope. No change. Here’s what he had to say (in bullets): Chipper shredder Pros: • Eliminates or dramatically reduces green waste • Helps eliminate the need for a rototiller • Provides material for mulch or compost • When shreddings are applied to soil surface: • Feeds soil biology – resulting in improvements in : • Soil structure (pore space diversity) • Improve movement in soil by water, air, roots, soil biology • Soil water holding capacity (drought resistance) • Nutrient holding capacity • Biological diversity of soil microbes • Greater variety of nutrients, vitamins etc. available to plants • Improves pest resistance • Plant health improves (drought resistance, pest resistance) • Nutrient availability to plants improve • Availability of natural growth hormones, vitamins improves • Nutrient content of vegetables improves • Sequesters carbon – contributes to the reversal of climate change • Weed management benefits • Mulch created by chipper/shredder moderates soil temperatures • Erosion protection (mulch slows the force of falling rain) • Mulch created by chipper/shredder repels some pests Cons: • Expensive • Hard work. And, when done, you then have to apply the mulch to soil surface • Don’t chip diseased material Rototiller: Pros: • Get to smell actinomycetes • Mental connection to past horticultural practices (although no longer recommended) • Creates fine seedbed – but soil quickly becomes compacted making it difficult for sprouts to develop Cons: • It’s hard work • Expensive • Destroys soil structure • Compacts soil (reducing aeration, drainage, limit root development) • Fine clays quickly fill in pore spaces • Increases runoff – transporting soil, nutrients and pesticides into our waterways • Kills beneficial soil biology • Makes it harder for your plants to grow • Harder to obtain water, nutrients, growth hormones, vitamins • Increases pest susceptibility due in part to: • Reduced crop health • Pest management provided by soil biology • Reduces nutrient content of food crops • Results in the need for additional irrigation, fertilization, pesticides • Mother Nature’s natural rototillers (earthworms) are killed by the blades. • Creates biological imbalance - abundance of bacteria vs. fungi (raises pH) • Loss in biological diversity in the soil • Reduction of soil health (results in reduction of plant health) • Reduces ability of soil to function • Releases greenhouse gasses (CO2) to atmosphere – contributing to global climate change • Reduces organic matter content • Reduces soils water holding capacity – need to irrigate more/more runoff…. • Makes plants more susceptible to drought • Reduces food for soil biology • Reduces soil productivity • Reduces soil cover • People feel they need to till every spring because previous tillage created a compacted, dead soil below • Brings up weed seeds so they can germinate Obviously, Steve has a bleak future as a salesman at Troy-Bilt . What About Electric Chipper/Shredders? For that, we turn to Debbie Flower, who owns an electric chipper-shredder, the 15 amp Sun Joe. Her review: My chipper is a Sun Joe 15 amp Electric Wood Chipper/Shredder plug-in, model #CJ602E. I have had the pleasure of using it a few times. It is a compact, easy to store machine. The 6” wheels and light weight make it easy to move around the yard. Debbie has a lot more thoughts about her electric chipper shredder, including the downsides of electric. Listen to today’s newsletter podcast to find out more. My thoughts about electric-chipper shredders are closely aligned with Brad Gay’s opinion (paid subscribers will hear his comments in the podcast). Reviewers of this electric chipper shredder say they have issues including the shredding problems mentioned by Debbie, and the overheating problem she mentioned. As Brad said, it’s cheaper to replace a belt on a gas chipper/shredder when the machine gets overwhelmed to the point of freezing up with material jammed in the hopper, than it is to replace a burned out electric motor. And make sure you plug the unit into a 20 amp outlet, not 15, to avoid tripping either the house circuit or the overload circuit on the machine. And as with any outdoor electric-powered garden implement, make sure you have the right gauge extension cord which is determined by the power pull of the unit as well as the length of the extension cord. Reviews of Sun Joe chipper shredders by owners on Amazon also complained about the unit’s inability to chop thin branches, as well as the difficulty to replace the blades, which need to be sharp to do an effective job. Still, most reviewers were very satisfied with this particular Sun Joe 15 amp chipper-shredder. One reviewer did offer a helpful suggestion to avoid clogging situations: “If you feed large branches up to 1” (or more) you really have to hold on to them and only let it take a little at a time, pull it up off the cutter (still inside the safe area) then feed more. One reason it jammed is that when it passes the safety cover it’s still several inches long, which is good safety wise, but it will fall over onto the cutters when you’re no longer holding on to it. That ends up turning that 1” diameter stick into a 1 1/2” + oval. (turn a cylinder on an angle and it’s a long oval) Feed something small along side it and it will keep it vertical. That can help. I learned to just chip smaller stuff.” Below the paywall, here’s what awaits paid subscribers: • Why choosing a chipper-shredder with the right sized flywheel is so important. • Replaceable exit chute screens can give you the size mulch you want. • How to protect yourself when shredding long vines, such as grapevines. • Information on PTO-powered chipper shredders.
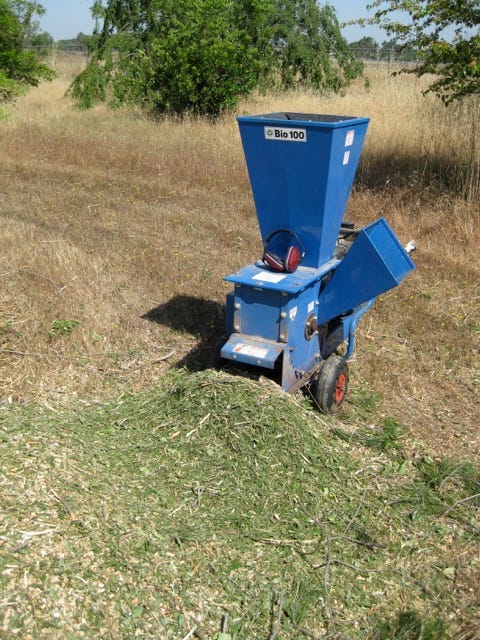
Nov 3
Ants!
This is a free preview of a paid episode. To hear more, visit gardenbasics.substack.com When it gets hot, the ants start marching indoors. When it rains, in come the ants. Too cold? The ants know where its nice and cozy: your kitchen, bathroom and pet food bowls. Outdoors, pet food and garbage cans are also ant attractants. Argentine ants , those busy little black ants, are in march formation year round. In years past, we would reach for the spray can and douse those little scavengers. But not anymore. Many of those spray pesticides are only effective with direct contact on the ants. And the stronger sprays, with residual action to thwart the next wave of ants, is potentially harmful to you, your kids, your pets. So, here is what we are doing now: following the recommendations of the UC Davis Integrated Pest Management Project for Ant Control. That includes: • Determine what the ants are attracted to and remove the food source• Vacuum trails, wipe them with soapy water, or spray with window cleaner• Locate entry points and caulk openings or plug with petroleum jelly• Put out bait stations with liquid ant bait or apply gel bait at entry points• Baits take time to work so continue to clean up trails• Indoor sprays are not usually necessary. • Avoid products packaged as granules that contain the active ingredients cyfluthrin or permethrin. Although these products may be mistaken for baits, they are actually contact insecticides that rapidly kill foragers and do not control the colony. Before wiping up (or wiping out) the little critters, follow their trail. Note their entry point into the house. Seal it up. We have found ants entering the house in a variety of small avenues: beneath moulding, cracks in the window frame, behind electrical outlet plates...and one of the ants’ favorite entries: that large holes beneath the sink where the pipes enter the house. According to the UC IPM page on ant control, “If ants can be thoroughly washed away and excluded from an area, an insecticide is probably not necessary. Vacuuming up ant trails or sponging or mopping them with soapy water may be as effective as an insecticide spray in temporarily removing foraging ants in a building because it removes the ant’s scent trail, especially if thorough cleaning is done at the entry points. Some soap products such as window cleaners can kill ants on contact but leave no residual toxicity. Certain plant-based oils are also applied for this purpose, but their odor can be offensive.” Coming Up After the Paywall • Highly effective liquid boric acid products for ant control. • How to control ants in a raised garden bed. • Debbie Flower’s home recipe for ant control • How outdoor ants are ecologically beneficial.
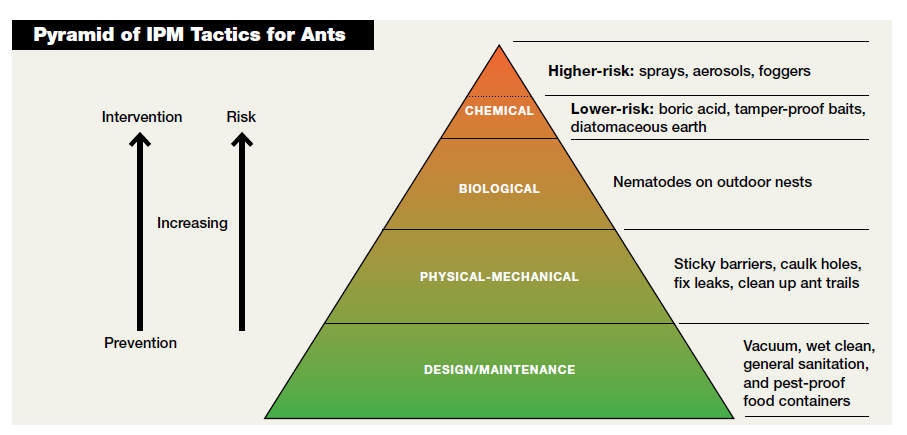
Oct 31
"How Am I Going to Feed My Family?"
One of my frequent bicycling routes takes me by a local food bank. Over the years as I pedal by in the morning, I’ve seen the line of cars increase while waiting for the 10 am food bank opening. Lines of a half block or more were common during the age of Covid (2021-2022). Lately, the line of cars has not only increased in length, it’s now 2 lanes of traffic stretching down the road waiting for a bag or two of food. Fortunately, the road widens out as it approaches the food bank, and the employees there have adopted the Dutch Brothers Coffee / In-and-Out Hamburger traffic facilitating tactic of walking the lines of cars, and getting the information they need (I’m still trying to figure out what Dutch Brothers is putting in their $6+ coffee drinks that brings in such a large crowd. Is it the sugar?). The number of households living paycheck to paycheck has risen dramatically - up to two-thirds of all households in the U.S. living on the edge - according to one report . There’s more hurt on the way because of recent job losses due to AI, governmental shutdown of services, increased food costs due to tariffs, housing costs, and all the other reasons that you don’t want to be reading about in a gardening column. GARDENERS CAN HELP Still, gardeners can help out their neighbors by donating their excess backyard produce - vegetables and fruit - to a nearby food bank or food pantry. For example, right now in late October, here in USDA Zone 9 (and I know I am not alone in this bounty), there’s a lot of sweet peppers waiting to be harvested - definitely more than we can eat or process into relish. And what are those bright orange orbs staring at me from that tree outside my window? Oh yeah, Fuyu persimmons, also more than we can eat or dehydrate, that will be ready to harvest in a week or two. Definitely, these are the prime mid-Autumn candidates for transporting to the local food bank. Coming up in winter, it will be the cornucopia of citrus - oranges, mandarins, lemons - that will be heading to the food bank, along with fresh greens. Don’t know where you’re nearest food bank is located? Go to AmpleHarvest.org , and find the food banks in your area. It’s quick, easy, and as far as I can tell in my own area, accurate. Your local food bank would probably welcome your donation of healthy, homegrown food (always check first). In this week’s newsletter podcast (above), Gary Oppenheimer, the founder of AmpleHarvest.org , talks about the need for more, fresh, wholesome foods getting into the hands (and mouths) of those who can’t afford to eat healthy, but want to. Give it a listen, or read the transcript, below. Thanks. There’s no paywall on today’s newsletter/podcast episode, because that would be counterproductive to helping get your excess garden harvest to the hungry. Still, thank you for your paid subscription to Beyond the Garden Basics! TRANSCRIPT Interview with Gary Oppenheimer of AmpleHarvest.org (recorded in 2020) Farmer Fred: [0:00] Every day in every corner of the United States, children and adults are worrying about finding enough food to put on the dinner table while thousands of pounds of food are being thrown away from backyard gardens, from small farms. Millions of Americans are unable to get enough fresh food to maintain proper health. The United States has a malnourished population that needs more than processed foods in order to thrive. So many incredible food banks, pantries, and other hunger organizations are working tirelessly to alleviate hunger in our communities, but they consistently lack in donations of fresh produce. Luckily, you can help. By making regular donations of unused fresh produce to your local food pantry, you can be a part of the solution to increase the health of people in your neighborhood. And you can donate food that you grow or food that you buy. It’s easy. Farmer Fred: [0:55] The trick is finding the food pantry nearest you, and you can do that through an incredible site called AmpleHarvest.org. We’re talking with Gary Oppenheimer. He’s with AmpleHarvest.org. He’s the founder. It’s a unique nationwide resource that is eliminating the waste of food, the outcome being a reduction in hunger and malnutrition, along with an improved environment. There’s something like 42 million Americans who grow food in home gardens, community gardens, and their small farmers as well, who could easily donate their excess harvest to one of over 8,600 registered local food pantries spread across all 50 states. And Gary, I want to tell you, first of all, about my experience with your website, ampleharvest.org. There is a page there where you can go and find the food pantry nearest you. And I set a search of 15-mile radius around my house. And up popped, I’m counting, 14 food pantries I never knew existed, including one that is within walking distance. And it’s amazing how easy it could be for people who have an excess of tomatoes or squash or peppers or melons or fruit, where to take it to and how convenient that is. What was your inspiration, Gary, for starting ampleharvest.org ? Gary Oppenheimer: [2:17] That’s a great question, actually. There are two things, two pieces of inspiration. One was I grew up hearing, “don’t waste food”. My grandparents always told me, you know, finish what’s on your plate. Kids are starving in Europe. So not wasting food was always inculcated into me. But as an adult and a master gardener, I was growing more food than I can use, and I couldn’t, I didn’t want to go to waste. My wife said, you can’t forget any more of this stuff in the house. Gary Oppenheimer: [2:42] And I struggled to find a place to donate the food to. It turns out I found a battered woman shelter in my town. I’m in Northern New Jersey. But when I had gone on Google to find out where their food pantries, Google said the nearest one was 25 miles away in another city. And I had an epiphany in March of 09. And I realized, wait a minute, this is an information problem. This is not a food problem. People aren’t hungry because America doesn’t have enough food. We actually throw away half the produce, never gets consumed. The problem gardeners across America have always had was miss and missing information. The misinformation was what we were all told at food drives, that you can only donate jars or cans or boxes, but no fresh food. We gardeners took away from that. You can’t donate the extra tomatoes. The missing information was where is a food pantry and what’s a good day of the week and time of day to donate it. When I realized that this was the information problem, I realized the solution was a web-based, an internet-based program that would both educate gardeners about their capacity, that they can indeed donate food. Gary Oppenheimer : [3:50] And to where to donate it near them, and the optimum day of the week and time of day. And that timing is super important because if a food pantry, for argument’s sake, was distributing food to hungry families on Sunday afternoons, the ideal time for you to bring it in is Sunday morning, which means the ideal time for you to harvest is either Sunday morning or Saturday night. So the food would go from your garden to the food pantry to a hungry family in hours, Number one, the food pantry didn’t have to buy refrigeration. And number two, the hungry family was getting food fresher than you and I can buy in a supermarket. It’s truly garden fresh food. And the whole thing came together for me in a one four-hour session on my computer. And seven weeks later, with the help of two volunteers, May 18, 2009, Ample Harvest Road rolled out. And it’s been growing in reach and impact ever since. Farmer Fred: [4:46] We’re going to be using a couple of terms here that people may get confused. I find it confusing as well. Maybe you can explain it. We will be talking about food banks and food pantries. What is the difference? Gary Oppenheimer: [4:57] Well, this is a fun question. All right. For most of America, for all of America, a food bank is a large industrial warehouse type operation, around 200 of them in America. They’re part of the Feeding America Network. These are large warehouses where large amounts of food come in and large amounts of food are then redistributed out to the local programs where hungry families go. So those local programs where hungry families go, there are around 33,500 across America, are usually called a food pantry and in some states a food cupboard or food shelf or food closet. The exception, as far as I know, was Oregon and Washington where those local programs are also called food banks. And you said a little bit ago that I think in Sacramento, they’re also sometimes called food banks. So in the vernacular, in the common language of food banks where a hungry family gets food, but in the real system, there’s a distinction. And the reason I had to create ampleharvest.org was because when the food went from a food drive to a food bank or a food pantry, it took too long. But when it went from a food drive or my garden, for that matter, to a food pantry, it could happen in 15 minutes. So this was an architectural discussion. This is great for a linguistic nerd, but it’s... If people want to use the word food bank, that’s perfectly fine. But I’ll use the word food pantry just to be more correct. Farmer Fred: [6:25] Ampleharvest.org is geared to a wide range of gardeners. You’ve got home gardeners, new gardeners, farmers and food producers, Master Gardeners, and school gardens. And boy, I’m thinking about food waste and all of a sudden, wow, school gardens. I wonder what they’re doing with all that excess food that they’re growing in their little school, especially when it may be happening in the summertime and there isn’t anybody there to harvest it? Gary Oppenheimer: [6:51] School gardens, you’re absolutely right. It’s also camp gardens, by the way. But a school garden, you’ve planted the stuff and then the kids are gone for the summer and who’s harvesting? Or the camp. The camp had a garden and come the end of August or September when kids go back to school, who’s harvesting? So they have the opportunity to also donate the food, by the way, as do other places that don’t think of themselves as gardens. You might have a golf course that has citrus fruits raining down. You might have a public park, for example. Gary Oppenheimer: [7:22] So there’s lots and lots of opportunity for food to be donated from different places. The work we’re doing is to enable as much wholesome, healthy, fresh, locally grown food to get to food pantries as possible, because that not only reduces hunger across America, but it also improves the nation’s health and well-being. The healthier your diet, obviously, the healthier you are. I’ll just give you one number which blew me away when I learned about it. Cisco Systems, the internet company, did an analysis of ampleharvest.org years ago. And it’s online at ampleharvest.org slash study if you want to see it. And their analysis was, if every gardener in America knew that he or she could donate food, surplus food. And if every food pantry in America was on Ample Harvest that were able to receive the food, the nation’s health care costs would drop $58 billion a year. Farmer Fred: [8:20] I always believe that the word pharmacy should be spelled F-A-R-M-A-C-Y because healthy, homegrown, fresh farm food is one of the best ways to get your health back. Gary Oppenheimer: [8:33] Absolutely. And when you think about two of the leading causes of ill health in America are obesity and diabetes, which are both costly in terms of your own well-being and costly in terms of just the medical care involved, those are both diet-impacted diseases. You improve the diet, you reduce those diseases, you have a healthier and, frankly, by extension, a wealthier nation. Farmer Fred: [8:59] One of the categories you have that you’re appealing to is called new gardeners, but there’s a subset of that that we were talking about before the interview called the accidental gardener, and they can also participate with ampleharvest.org. Gary Oppenheimer: [9:13] Yeah, I wrote a blog article about that, the accidental gardener, and people ask, well, what’s an accidental gardener? Either you’re a gardener or you’re not. And I had realized that if you buy a house... Gary Oppenheimer: [9:25] And the house came with a fruit tree that somebody previously planted, apples, oranges, what have you. You may not think of yourself as a gardener if you don’t get your fingers dirty and garden. But the reality is that every year, the tree is raining down on you, all this wonderful food, the apples and the oranges or what have you. And so I describe that person as the accidental gardener. That person, too, has the opportunity to donate the food. Gary Oppenheimer: [9:57] I was named CNN Hero in April 2010. The day I was named CNN Hero, I received an email from somebody in the Southwest who said that the prior year before he’d heard of AmpleHarvest.org, he had thrown away eight 55-gallon drums of citrus fruit because he didn’t know he could donate it. This is a huge opportunity for the country. And the reality is, we haven’t even started tackling that yet. So the $58 billion number was based on the gardeners who know they garden, not the accidental gardeners. So these numbers are going to be subject to change. And I also want to give you one other number subject to change. You started this with saying there are 42 million gardeners in America. That’s pre-COVID. The data we’re now seeing from partners in the industry speaks to 58 million people, and it may well be growing higher as millions more people start their own gardens. And I strongly believe that most of the people who started gardening are going to continue to garden. That means more people gardening and more healthy, fresh food for hungry families on a permanent basis. Look, one thing’s really important. When you grow a garden and have your own garden, you’re growing it for your own enjoyment. Gary Oppenheimer: [11:06] And for your own family. You should be enjoying that food first. The food, however, that you grow that’s in excess of what you can use or preserve or share with friends should never be going to waste. That’s the food that should be donated to a local food pantry. And that’s whether you’re a backyard gardener or maybe you got herbs growing in a kitchen window or in a community garden, it doesn’t really make any difference. And by the way, also the amount of surplus is not terribly important either. Don’t feel bad. I only got five tomatoes to donate. Donate your five tomatoes. It’ll be commingled with all the other people with five tomatoes and 500 pounds of tomatoes at the table. The important thing is that the food is eaten by somebody and nourishes somebody in the community. It’s good for the community. Gary Oppenheimer: [11:50] Frankly, it’s good for the planet because food waste is a contributing factor to climate change. And it’s a wonderful way of people helping their neighbors in need by reaching into their backyards when they can’t afford to reach into their back pocket. Today, we are at work, as you had said, in 50 states, in about 4,200 communities. And today, we’re approaching 9,000 food pantries, which is about a quarter of America’s food pantries, which is great. That means we have three quarters of America’s food pantries yet re-engage and work with and work with those surrounding gardeners. So, we have a lot of work ahead of us and your dollars certainly get us a long way towards succeeding on that. Farmer Fred: [12:28] If you’ve got excess food, you know where to go. Ampleharvest.org will aim you to the food pantry nearest you. Gary Oppenheimer is the founder of Ampleharvest.org. Gary, thanks for a few minutes of your time. Gary Oppenheimer: [12:41] It’s my pleasure. Thank you very, very much. Fred Hoffman is also a University of California Cooperative Extension Master Gardener in Sacramento County. And he’s loved bicycling for a long, long, time. This is a public episode. If you'd like to discuss this with other subscribers or get access to bonus episodes, visit gardenbasics.substack.com/subscribe

Oct 27
2025 Plant of the Year - Calendulas
This is a free preview of a paid episode. To hear more, visit gardenbasics.substack.com In the warm winter areas of the country, the calendula is the go-to source of bright garden color on those cold, cloudy, foggy days. In cooler growing zones, the calendula is a blooming staple during the summer. In the podcast (above), we explore the enchanting world of calendulas with Diane Blazek, the executive director of the National Garden Bureau, as we celebrate 2025 as the Year of the Calendula. We discuss their historical significance, medicinal properties, and culinary uses, while clarifying the confusion surrounding their classification as pot marigolds. Diane shares practical gardening tips for successfully growing calendulas, including seed sowing strategies for different climates and the benefits of dense planting for attracting pollinators. We emphasize the ease of growing these flowers, making them ideal for novice gardeners and families. The episode also highlights the best sources for high-quality calendula seeds. According to the National Garden Bureau : * Calendulas need at least 6 hours of daily sunshine to witness its radiant blooms unfurl. * Finding the Perfect Soil: Well-draining soil is key. While Calendula isn’t fussy about soil type, it prefers a slightly acidic to neutral pH. (6 to 7 pH) * Planting for Success: In colder areas of the country (USDA Zones 3-7) sow seeds directly outdoors, in spring, about an inch deep, after the last frost. In the warmer zones (7-10), plant them in early autumn. Space them 12-18 inches apart for ample room to flourish. * The Secret to Continuous Blooms: Regularly remove spent flowers (deadheading) to encourage new growth. This keeps your plant looking tidy and stimulates more blooms. * Natural Pest Control: Calendula is naturally resistant to pests, but keep an eye out for occasional visitors like aphids or caterpillars. * Garden Harmony: Calendulas act as a natural pest deterrent, attracting beneficial insects to your garden because of their easy to reach flower parts. * Harvesting Your Bounty: Pick Calendula flowers when fully open, preferably in the morning for the most concentrated oils. Dry them for later use in teas, salves, or potpourri. * Edible Delight: Surprise your palate! Calendula flowers are edible with a subtle peppery flavor, adding a vibrant touch to salads, soups, and stews. * DIY Potpourri : Dried Calendula blossoms infuse your space with a beautiful fragrance. * Soothing Salves: Calendula’s calming properties make it a popular ingredient in homemade salves. Calendula’s easy to reach flower parts attract pollinators like bees and butterflies, and pest predators such as ladybugs, lacewings, and hoverflies. These insects help control pests like aphids, whiteflies, and caterpillars. By attracting ladybugs, lacewings, and hoverflies, calendula helps control pest populations naturally. Acting like a trap crop, calendulas can attract pests like aphids, which then attract the beneficial predators. Beyond The Garden Basics is a reader-supported publication. To receive complete new posts and podcasts, and have access to the entire catalog of over 200 Beyond the Garden Basics newsletters, consider becoming a paid subscriber. Coming up after the paywall: Calendulas undergo “nyctinasty” every day, a visible change in the plant. We explain what that is in the newsletter and why it is so important for the calendula’s survival. Despite winning competitions internationally, why have there been no calendula winners in All-America Selections trials in its 90+ year history? The popular calendula varieties in California and USDA Zone 9. The popular calendula varieties in the midwest and east. And, the complete transcript of the Calendula podcast, which includes links and videos for more information!
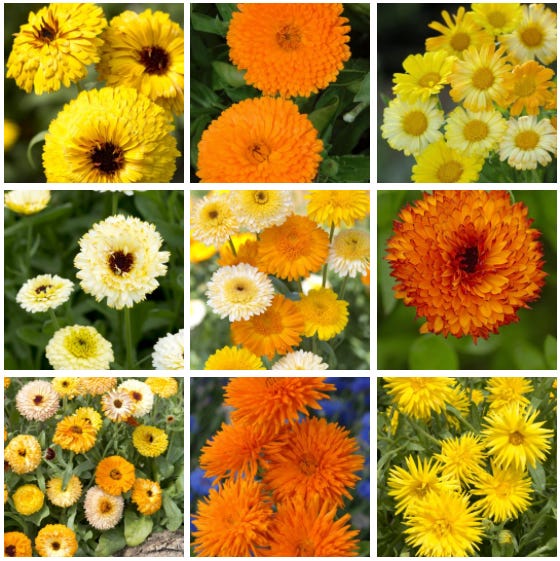
Oct 24
Grow Better Soil (and Plants) with Worm Castings
This is a free preview of a paid episode. To hear more, visit gardenbasics.substack.com If you have a worm bin, and are harvesting the worm castings (yes, it’s worm poop ), and you’re spreading those castings around your outdoor and indoor plants, you are helping to create some powerful soil, teeming with microbiology, that will supercharge your plants. According to Cal Recycle , the process of vermicomposting, which uses worms to break down organic material such as food scraps, will turn them into a nutrient-rich soil amendment that can nourish your house plants or garden. Some wormy facts: * Worms break food waste into compost faster, over 8-12 weeks. Traditional composting, on the other hand takes 6-9 months. * You can worm compost in your apartment or house, even under your kitchen sink. You can also vermicompost at school or the office. * Worms like to feed on food waste. * Worms break down food scraps efficiently. * Worms eat over half their body weight a day. * Worm manure contains beneficial microbes and nutrients for plants. What will worms eat? Worms eat a variety of organics, such as: * Paper. * Manure. * Fruit. * Vegetable. * Grains. * Coffee Grounds. * Ground Yard Wastes. Do not feed worms: * Meat. * Dairy. * Oily food. * Citrus scraps (toxic to worms). What Do Poop-Happy Worms Need? * Moist, organic bedding as damp as a wrung-out sponge, in a location that has a temperature range of 55-77 degrees F. * Darkness – they are sensitive to light. * Because they have no teeth, add 1 Tbs of grit, such as clean soil, sand, rock dust or oyster flour in bedding to help the worms grind the food. * Clean soil, sand, rock dust, or oyster flour with no foreign organisms. From the Fresno County Master Gardener publication , “About Worm Castings” : Castings contain rich microbiological colonies that help fight soil-borne plant diseases and repel insects. Worm castings are water-soluble allowing plants to quickly and easily absorb essential nutrients and trace minerals. When the manure passes through the worms digestive tract, it forms a coating around the grain which allows for the nutrients to “time release” into the soil. Nutrients are readily available to plant material over a greater length of time and will not burn even the most delicate plants. Analysis of earthworm castings reveals that they are rich in iron, sulfur, calcium, nitrogen, phosphorus and potassium (NPK rating: 5.5.3). They are much richer in nutrients than bulk compost, therefore application rates are much lower. Improved Growth: Extensive University testing has been performed by Ohio State, Cornell University, UC Davis and the Australian SIRO to prove the worth of worm castings. The tests have shown improved flower size, bloom quantity, quality and color. Fruit and vegetable tests have resulted in yield improvements from 57% to over 200% as well as improvement in taste and appearance. Worm Castings Are Great For Your Garden! Nutrient-rich soil: Worm castings, or vermicast, are rich in water-soluble nutrients like nitrogen, phosphorus, and potassium, as well as micronutrients like iron, zinc, and magnesium. These nutrients are in a highly bioavailable form that plants can readily absorb, boosting their growth. * Improved soil structure: Worm castings improve the physical structure of the soil, increasing its ability to retain moisture and improving aeration, which is crucial for root development. * Beneficial microorganisms: The castings contain beneficial bacteria and enzymes that help develop a strong immune system in plants, making them more resistant to pests and diseases. For a deeper dive into the benefits of worm castings, check out this excerpt about vermicomposting in the publication, “ Microbes at Work ”. After the paywall break: Are commercially bagged earthworm castings as good as homegrown or worm farm-purchased castings? In the podcast (above), America’s Favorite Retired Horticulture Professor, Debbie Flower, and Sacramento-based organic soils expert, Steve Zien, tackle that question (that portion only available to paid subscribers of the Beyond the Garden Basics) . Plus, after the paywall break, a complete transcript of today’s podcast!
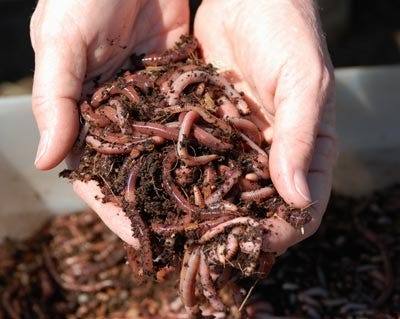
Oct 20
Garlic Planting Time is Here!
This is a free preview of a paid episode. To hear more, visit gardenbasics.substack.com I spent the weekend in a garlic frame of mind. I’ve been working one 4x8’ garden bed, harvesting the pumpkins, removing the vines, reworking the soil with worm castings and compost, and planting the garlic that just arrived last Friday from Territorial Seed Company . By the way, kudos to Territorial for all the information contained about the garlic varieties they sent that’s included on the label, which also has planting instructions. It is a handy label you can save to remind you of what varieties you planted come harvest time next spring, or take pictures of it for your garden diary. (By the way, they didn’t pay me to say that or plug them. I’m just happy with the service and the quality of the garlic that arrived.) I chose this year to plant Susanville and Silver White for their long storage capabilities. In the podcast, you’ll hear me and Debbie Flower discussing our garlic planting tips from October of 2023, mentioning several other varieties. In the newsletter below, even more varieties are mentioned. There’s a lot to choose from! The beauty of being a gardener…growing what you truly enjoy. Beyond The Garden Basics is a reader-supported publication. To receive complete posts, with access to the newsletter archives, and support my work promoting research-based gardening, please consider becoming a paid subscriber. Want to grow garlic? In milder climates (where the ground doesn’t freeze), now is the time to visit your favorite nursery, garden center or garden catalog company to choose the garlic varieties you want. Note I said, “varieties.” Grocery store garlic is primarily one or two varieties. Around here, it is usually California Early or California Late. And these two softneck, Artichoke varieties of garlic do grow well in USDA Zone 9. They take our late spring heat, are very productive, and can be stored (in a cool, dark room, in netted bags) for up to ten months. However, if you want a variety that has a deeper, full-bodied flavor, choose a hardneck variety, such as one of the Rocambole varieties, many of which do well in colder climates, where garlic is best planted two to four weeks before the ground freezes. In the past, I have had good luck with Killarney Red and German Red. Purple Stripe varieties are also quite flavorful, especially when used in baked dishes. Chesnok Red and FerganskiJ are two Purple Stripes that have done well here. Storage life for these varieties is much shorter, usually four to six months. The longest storing varieties – up to a year – are the Silverskins and Creoles, which include two of my favorites: Nootka Rose and Burgundy. Increasing in popularity because of their large size and tangy flavors are the Porcelain garlics, especially “Music”, with cloves as large as a Brazil nut. A well-stocked garden center or independent nursery may have a better supply right now than many garlic catalogs, which sell out of their stock quickly. For more information about garlic – including longer definitions than what is supplied here – check out online garlic company Filaree Farm in Washington State ( filareefarm.com ). Their site can answer many of your garlic questions. A very good book on the subject is “ Growing Great Garlic ” by Ron Engeland. A harder to find, out-of-print book, “ The Complete Book of Garlic ” by Ted Jordan, is a prized ($$$) reference for garlic aficionados (I think, if you shop around, you can find the book a lot cheaper than what it’s selling for on Amazon). University of California Cooperative Extension Master Gardener Advisor Emeritus Michelle Le Strange offers these garlic growing tips : * Below the paywall: A complete transcription of the newsletter podcast, plus: * How to choose and plant a clove a garlic. * How to tell when (and how) to harvest garlic. * Plus: A tasty, slow cooker recipe that uses a lot of garlic!
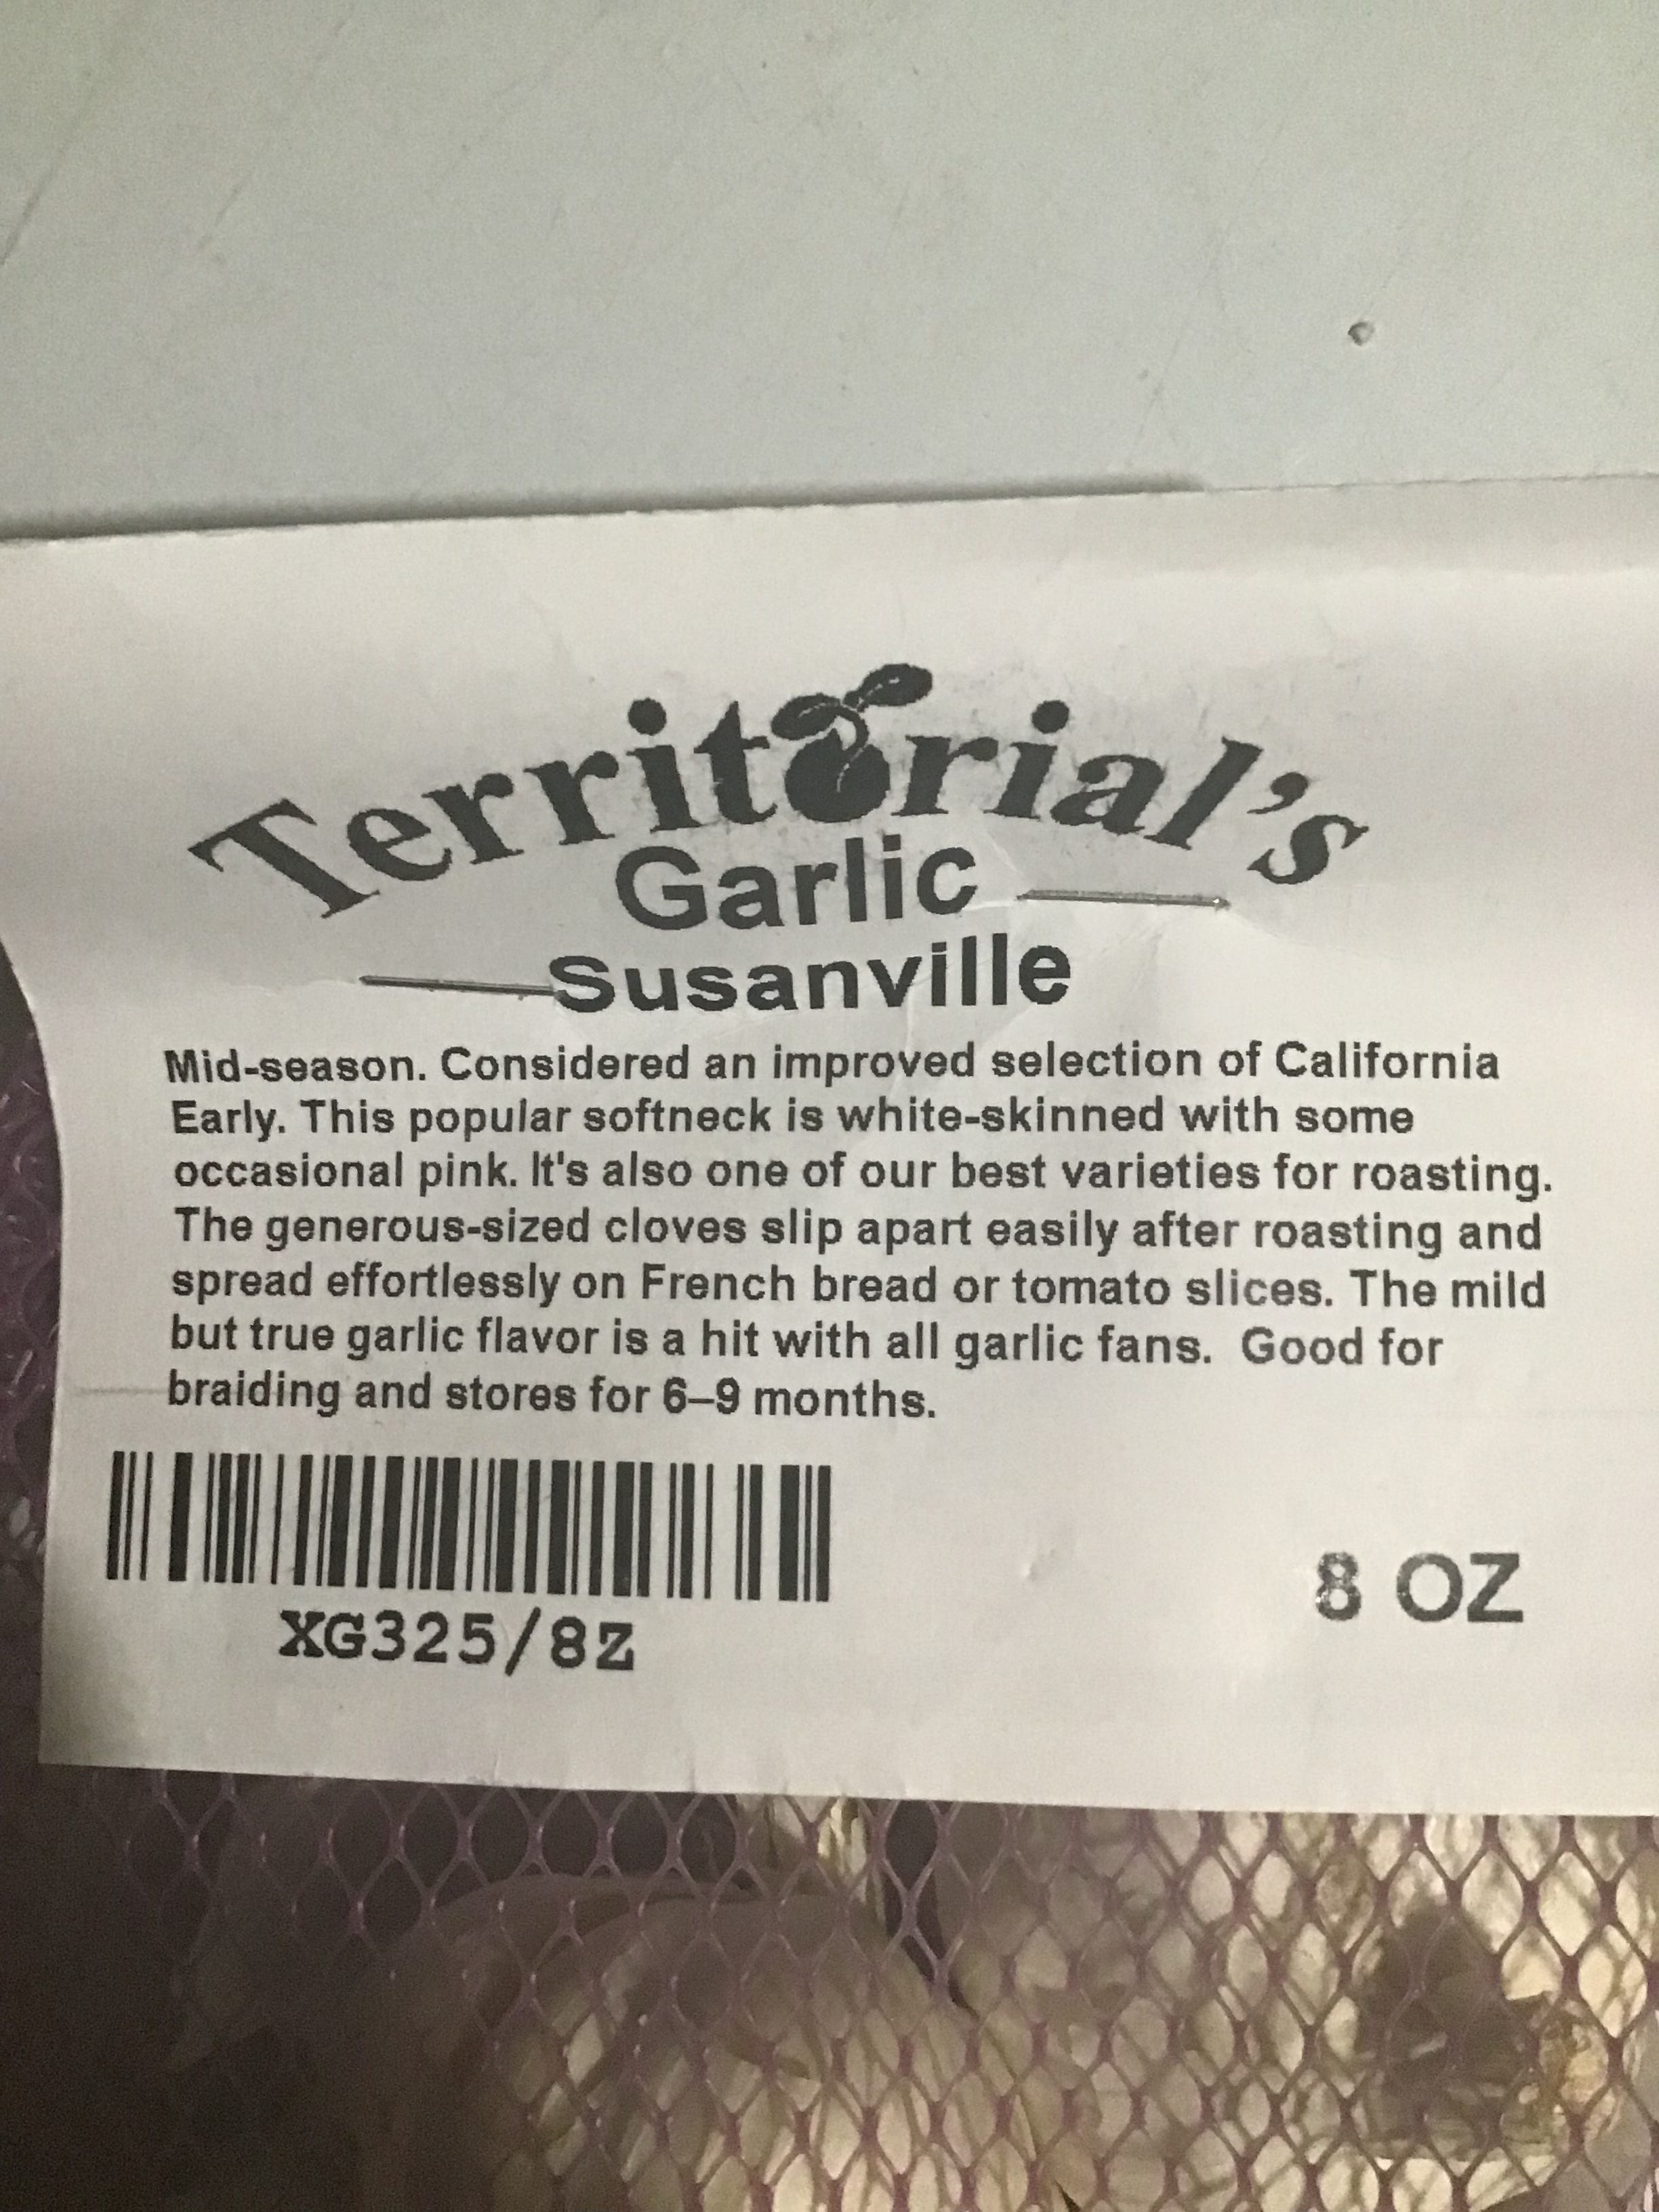
Oct 17
Understanding a Soil Report
This is a free preview of a paid episode. To hear more, visit gardenbasics.substack.com First of all, if you manage to get through this rather brain-taxing, soil-based, newsletter edition, you deserve a little love. How about 20% off a new paid subscription? Before diving into the deep end of how to read a soil report, check out this Overview on Soil Tests from the Alameda Co. (CA) Master Gardeners. It might help make the rest of this more comprehensible. Getting a soil test done is a great idea for your garden According to the Alameda County (CA) Master Gardeners, a soil test: * Provides detailed information about the nutrient content of the soil, enabling gardeners to apply the correct type and amount of fertilizer. * Knowing the soil’s pH level, which affects nutrient availability, allows gardeners to adjust it to the optimal range for their plants. * Tests can reveal the presence of harmful contaminants like lead or other heavy metals, ensuring the safety of your garden produce. * By applying only the necessary fertilizers and amendments, gardeners can save money and prevent environmental pollution. * Understanding soil health helps in making informed decisions, leading to better plant growth and yield. * If you’ve exhausted your attempts to amend soil with compost, a soil test can provide more detailed information to remedy the problem. However, if you listen to today’s newsletter podcast, you’ll find out that understanding that detailed information can be a problem on its own. Here is a soil test from a commercial, Ag-based soil analysis company, that was submitted by a harried backyard gardener, who wants to know what it all means: Commercial Soil Test Results for a Homeowner’s Garden (2 pages) Even University-conducted homeowner soil tests have a degree of difficulty (but at least they provide links at the end for more information). Soil Test Results for a Backyard Landscape from UMass/Amherst (Pgs 1 & 2) Have your eyes glazed over yet? Listen to today’s podcast at the top of this newsletter with America’s Favorite Retired College Horticulture Professor, Debbie Flower, to help wash the glaze out of your eyes. Coming up after the paywall break: A transcript of today’s podcast, including helpful charts, graphs, and links for more information to help relieve your brain fog regarding soil tests. Plus, a partial list of universities that offer home garden soil testing at reasonable prices. Paid subscribers get access to the entire library of previous Beyond the Garden Basics newsletters and podcasts, of which there are now over 200 editions/ And, you’ll get to hear today’s complete podcast!

Oct 13
What Causes Odd-Looking Vegetables?
This is a free preview of a paid episode. To hear more, visit gardenbasics.substack.com This journey into the odd and slightly obscene world of misshapen vegetables was inspired by Sacramento County Master Gardener Peter Horton, who wrote this article for the October 2025 Sacramento Co. Master Gardener newsletter. The article made me harken back to the days of the popularity of Richard Nixon lookalike vegetables, odd-shaped tomatoes, peppers, eggplants, and squash that had appendages - that to some - resembled the former President in profile. Eggplants, in particular, seem to favor this aberration, according to Facebook and Google AI: “Commenters who see Nixon in eggplants often cite specific aspects of his facial features that irregularly shaped eggplants can evoke: * Prominent nose: Nixon was known for his prominent, sometimes described as “ski slope,” nose. Certain eggplants can have a rounded, bulbous end that people interpret as a large nose. * Distinctive jowls: Nixon had sagging jowls, particularly later in his career. The shape of some eggplants, with a wider base and some lumps or folds, can be reminiscent of this feature. * Overall shape: A purplish, somewhat lumpy or distorted eggplant can vaguely suggest a human face, and for some, the specific characteristics align with the common caricature of Richard Nixon. This phenomenon is an example of pareidolia, where the human brain perceives familiar patterns, such as faces, in random or ambiguous stimuli.” At the very least, today’s newsletter has introduced you to a new word, “pareidolia”. The term, according to the National Institute of Health , originally implied the observer may be a bit touched in the head: “The term was coined by German psychiatrist Klaus Conrad in 1958 and comes from the Greek words “para” (beside or beyond) and “eidos” (form or shape). He used it to describe the initial stages of schizophrenia, though it is now understood as a normal cognitive function.” Are gardeners a bit touched in the head? If you see two baby chicks kissing in this photo, the only thing that will save you from a life of depravity and isolation is a paid subscription to the Beyond the Garden Basics Newsletter! After the paywall: More deformed vegetables! A transcript of our chat with Gail Pothour, who explains more about locules, and why they happen (hint: IT’S ALL YOUR FAULT). And, she answers the question: are those appendages edible?
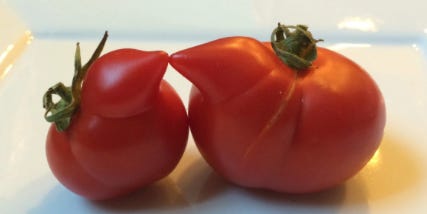
Oct 10
Can Vitamin B1 Help New Garden Transplants?
Beyond The Garden Basics with Farmer Fred is a reader-supported publication. To receive the complete posts, have access to over 200 previous editions, and help keep the good gardening information coming your way, please become a paid subscriber. Early fall is for planting, as we are fond of saying. The days are cooler, and the soil is still warm. Those are ideal conditions for a healthy start of new cool season annuals, perennials, trees, and shrubs. If you’re at the nursery this weekend checking out the latest in plants for your yard, you might just take a stroll down the garden chemical aisle. You may notice, on the shelf, a product of dubious value: Vitamin B-1. A typical label on such a bottle will tout its benefits for transplanting fruit trees, bare rootstock, flowers, vegetables and cuttings. Gardeners, their parents and their grandparents have heard this refrain at nurseries for decades: “Get a bottle of B-1, it will help reduce transplant shock for that new plant you are buying.”The truth, though, is the same as it has been for nearly 90 years: it isn’t the Vitamin B-1 (thiamine hydrochloride) in the bottle that reduces transplant shock. First a definition of “transplant shock” from Purdue University : “Transplant shock is a term that refers to a number of stresses occurring in recently transplanted trees and shrubs. It involves failure of the plant to root well, consequently the plant becomes poorly established in the landscape. New transplants do not have extensive root systems, and they are frequently stressed by lack of sufficient water. Plants suffering from water stress may be more susceptible to injury from other causes such as the weather, insects, or disease. When several stresses are being experienced, the plant may no longer be able to function properly.” And right there you have the answer to effectively reduce transplant shock: water correctly. Thiamine exists in nature, produced for plants via leaves and sunlight. Plants, as well as soil microbes, create their own Vitamin B1. Thiamine is a cofactor (molecule that binds to an enzyme to help/allow it to function) important in the construction and break down of carbohydrates for growth or energy storage/release. In the 1930’s, thiamine was shown to increase root development in plant tissue cultures - in the lab - especially in the dark. But those results couldn’t be replicated consistently in the field. Research at the University of California has shown that the addition of Vitamin B-1 to a plant doesn’t make any difference at all. Garden author Robert Kourik reported on his website : “The sun set on this persistent myth many years ago. Sunset Magazine reported in 1984 of studies which disproved the value of a vitamin B1 drench at transplant. Yet this horticultural “snake oil” still clutters many retail nursery shelves. What does work in that bottle prominently labeled “B-1”: the other ingredients - usually micronutrients or auxins - might make a difference in roots and growth of new plants. Back in the 1940’s, naturally occurring plant growth regulators, known as auxins, were isolated and tested. Auxins were found to stimulate cell elongation in roots and stem tissue. Bingo! Around that time, a commercial product, Transplantone, was developed that contained auxins and thiamine. Later research showed that it was certain auxins, not the thiamine, that encouraged roots. But the die was cast: gardeners got into the habit of getting vitamins for their plants. What does stimulate root growth? A rooting hormone containing auxins such as Indole Butyric Acid, Naphthylacetic acid or Paclobutryzol. Below the paywall: What’s inside a bottle of Superthrive? More information, including a transcript of today’s newsletter podcast, including more myth busting information about pot shards, landscape fabric, wood chips, and why you don’t want to pull out big weeds! Remember: subscribers also have access to the entire back catalog of Beyond the Garden Basics newsletters and podcasts. $5 a month or $50 a year. If you learned something, tip me! Thanks. One surprise that popped up in my research: the much-ridiculed Superthrive contains auxins...as well as, of course, Vitamin B-1. Anyone who has tried to pore through the densely hyperbolic endorsements on a Superthrive label looking for the ingredients, well...good luck. However, I did find the ingredients on a 20 year-old, unused bottle of Superthrive sitting in my greenhouse. Is it the same formulation today? I don’t know. But seeing how they haven’t apparently changed the outside of the bottle much over the years, I have a feeling the insides are still the same. The debate about the benefits of adding thiamine or other additives (including Superthrive) to plants still rage, with proponents citing research supporting their viewpoint. Bottom line: The benefits of root formation contained in a bottle of Vitamin B-1 or any other additive product are the auxins, if any, that are included. Small amounts of nitrogen can also encourage root development. Other fertilizer ingredients that might be contained do not necessarily reduce transplant shock, but may provide other plant benefits. Putting the right plant in the right place, with healthy soil, along with the proper amount of sun, water and fertilizer, is all most gardeners need for success. Today’s Newsletter Podcast Busts More Garden Myths In today’s newsletter podcast (above), Linda Chalker-Scott tells us: “Vitamin B1 - thiamine - does not reduce transplant shock”, says Chalker-Scott, who is also the author of the book about horticultural myths, “ The informed Gardener ”. “We tend to think of things in the context of what we do for ourselves, and especially when we take vitamin supplements - and many of us do take Vitamin B1 supplements,” says Chalker-Scott. “And so you just kind of extrapolate that and think, well, it must be good for the plants too. And what people don’t realize is plants make their own thiamine. So they certainly don’t need us to add that. iI’s just an extra cost and waste of resources.” There could be other ingredients, such as small amounts of nitrogen, phosphorus, or potassium in that B1 bottle on the nursery fertilizer shelf that actually may be good for your plants, says Chalker-Scott. “Sometimes there’s also a hormone, usually an auxin, such as IAA, or NAA or something like that. And those actually do have a stimulatory effect on rooting, so that type of rooting hormone or transplant hormone actually does do some good. And so those mixtures of transplant elixirs, if they happen to have a little bit of that hormone, they will have an effect. But it certainly is not the B1 that does it.” Today’s newsletter podcast is an interview with Linda Chalker-Scott who busts quite a few other garden myths, including: • Putting pot shards or other material in the bottom of a potted plant container will improve drainage (it doesn’t). • Using a breathable landscape fabric will keep the weeds out (Nope. Nor does that fabric remain able to move air and water through it for very long). • Arborist wood chips can transfer diseases to your yard (we busted that myth here recently in the “Disease Triangle” edition of the Beyond the Garden Basics newsletter). • Don’t yank out big weeds. Mow them as short as possible instead. Pulling destroys the soil structure. • Adding sand to clay soil improves the drainage. (No. You’re making adobe bricks, unless you’re adding over 50% sand by volume to the total volume of existing soil.) • Replacing native soil with potting mix in a new planting hole makes for a happier perennial, shrub, or tree. (No. It just leads to a pool of water that engulfs the plants’ roots for an extended period of time. (Sad, stinky, dying plant). Give a listen to the podcast above for more details. You can find a transcript available towards the bottom of this newsletter. Meanwhile, back at the B-1 nursery shelf… “Research has shown that the addition of Vitamin B-1 to a plant doesn’t make any difference at all,” echoes Fran Clarke, a University of California lifetime Master Gardener and Community Forester for the Sacramento Tree Foundation. “One test showed that plants given Vitamin B-1 didn’t do as well as plants given just plain water. The benefits to a plant contained in a bottle of Vitamin B-1 are the small amounts of fertilizer that are included. Diluted liquid fertilizer or fish emulsion would accomplish the same task at a fraction of the cost of a bottle of Vitamin B-1.” The addition of thiamine (Vitamin B-1) is unnecessary at transplanting time for another reason: plants, as well as soil microbes and organic mulch, manufacture their own Vitamin B1. How did Vitamin B-1 end up on the garden shelf? Its history goes back generations. In the 1930’s, thiamine was shown to increase root development in plant tissue cultures (in the lab), especially in the dark. That success, though, could not be replicated in the field. Back in the 1940’s, naturally occurring plant growth regulators, known as auxins, were isolated and tested. Auxins were found to stimulate cell elongation in roots and stem tissue. The benefits to a plant contained in a bottle of Vitamin B-1 are the small amounts of auxins, if any, that are included. Small amounts of nitrogen can also encourage root development. Which auxins stimulate root growth? As Chalker-Scott explained, a rooting hormone containing auxins such as Indole Butyric Acid, Naphthylacetic acid, or Paclobutryzol. An organic source of auxins? Seaweed extracts. The best way to lessen transplant shock? Install the right plant (one without a tangled mess of roots) in the right place (non-crowded, sun or shade? dry or wet? protection from winter cold or not?) at the right time (Fall is for planting…but not for summer annuals), using proper planting techniques (dig wider, not deeper). So if you still think B-1 (thiamine) is going to help reduce transplant shock, I can save you a lot of money. Just go to the grocery store, buy some generic brand Vitamin B1 in the pharmacy aisle, and throw a tablet in the soil when you plant. If it will make you feel better… Transcript of today’s Podcast: Garden Myths, with Linda Chalker-Scott of Wash St. U. Farmer Fred : There’s a couple of books that came out about a decade ago that are still sitting on my garden bookshelf and they’re excellent reference books. One is called the “Informed Gardener”, and the other is called “The Informed Gardener Blooms Again”, they both explode a lot of garden myths, and they’re written by Linda Chalker-Scott . Linda Chalker-Scott : Well, thank you, Fred. Glad to be here. Farmer Fred : And Linda Chalker-Scott works for Washington State University. She is a part of their horticulture department there. And as part of the WSU horticulture website she has maintained over the years, a list of so called truths that have damaged both plant and environmental health, things that you would think would be just common sense that you’ve heard for years, so they must be right. Well as the title of a 1970 Firesign Theater album, once proclaimed, Everything You Know Is Wrong . And it’s certainly very true when it comes to horticulture as things change, plant names change, chemicals change, research changes. Well, your book is certainly a compendium of information that is going to make people scratch their heads… Linda Chalker-Scott : or sometimes worse. Yes. Farmer Fred : But just looking through the index as far as the the myths that you tackle, there are several that I have checked marked that people may think, oh, that can’t be true. But it is. And first off, you deal with the myth of drainage material in containers. And for years and years and years, we have heard about when planting in containers put some gravel or some broken up shards of a pot at the bottom to improve drainage. And it always struck me that wouldn’t that actually clog up the drainage holes, but you take it a step further and look at the flow of water involved. Linda Chalker-Scott : You know, and Fred, I used to do the very same thing. In fact, many of these myths, if not all of them are things that I used to do. And this is even when I was getting my PhD in horticulture, so it’s not for lack of knowledge, it’s, it’s just understanding now a lot of a lot of these myths that have just come across as being fact and drainage one is a really interesting one, because intuitively, it just makes sense. You know, to all of us, if you think about water, you know, percolating through soil that all of a sudden when encompasses pebbles or, or pot shards, it’s gonna flow faster. And actually, what happens is that it stops flowing and starts moving horizontally through that same soil that it’s already in and creates this perched water table. Farmer Fred : And that would explain sometimes the white ring you might see around a ceramic pot. Linda Chalker-Scott : Exactly. Farmer Fred : But it’s interesting that it actually inhibits the flow of water through the drainage holes. Linda Chalker-Scott : Yeah, and the reason is because water moves really readily through soil or materials that had about the same particle size and pore size. And once it started to encounter something that A little bit smaller or bigger than it stops. And it’s not until you get a lot of gravitational force behind it, it continues to move downwards. Farmer Fred : And a lot of people complicate matters by having a few if any drain holes and there may be too small and then they put the pot straight on the ground, and that inhibits the outflow even more. Linda Chalker-Scott : Oh yeah, Farmer Fred : so it’s always a good idea to raise your containers off the ground by a quarter inch or a half inch or so on a plant stand or some container legs just to allow some airflow beneath it and also to help keep those holes unplugged Linda Chalker-Scott : right. Farmer Fred : And so I guess the bottom line would be to whatever you fill the container with be consistent. Unknown Speaker : Exactly. And it makes a little bit tough you know when you get down to those drain holes if you’re using some kind of potting media that is kind of run through the draining holes and what I’ve found is if you just take just a little piece of newspaper or tissue paper, something that’s going to break down pretty quickly and just to temporarily cover that hole. It’ll hold the soil in and then by the time that paper breaks down, you know the soil is not going to be moving through there anymore. Farmer Fred : Another myth that you explode in your book The informed gardener has to do with landscape fabric and and for years and years and years, a lot of us use landscape fabric because oh, it allows air and water to flow through. So just put down this plastic like material and cover it with mulch and you’ll never have any weeds again. Linda Chalker-Scott : Well, and you know, it does have its purposes as a temporary barrier. In fact, I think that using it between rows in your vegetable garden is a great way to keep that area of you know, weed free. But the problem is, is that those holes that are in those fabrics stay clear for about a day and then they start filling up with you know, bits of soil and other materials and then you’re restricting constantly the movement of water and air through that fabric. Plus, it doesn’t stop weeds from growing as you’ve probably seen in older landscapes where there’s been fabric down for a while, you know, dirt starts to settle on top of it. weed seeds blow in and then you have a nice crop of weeds going right on top of your fabric. Farmer Fred : And a lot of times too, you’ll see those weeds and You’re gonna yank them out and you bring up half the landscape fabric with it. Linda Chalker-Scott : That’s right. You have time for a little story. A little story. When we moved into the house we have right now I’d gone out to work a new bed, put some perennials in, it kept on hitting something hard about six inches below the surface of the soil, finally dug it all up. And it was fabric that the previous owners had put down to keep the weeds out. And it was just completely colonized with bind weed and with horse tail, it was just a mess. And so it obviously wasn’t keeping them out at all. But it was really inhibiting water movement, earthworm movement, you know, anything that needs to go up and down in the soil gets really bound up by these fabrics. Farmer Fred : One thing I have noticed in areas where I have put down a landscape fabric and then went to remove it when I removed it. roots from nearby shrubs were close to the surface. Linda Chalker-Scott : Well, yeah, and that’s and that’s partially because they’ll go through, you know, before you have edge seams of fabric coming together, you know, they’ll find those those breaks into go through them. And more damaging is when you do pull those fabric sets and you’re yanking up all those fine feeder roots from your trees and shrubs. Farmer Fred : The option then is what? Linda Chalker-Scott : Well, the option is not to use them in the first place. But if you do have them down and you want to remove them and use something that’s a little bit more root friendly, I would certainly not be removing it in the summer when you’re really going to be having a lot of water stress anyway, and wait till wintertime when trees have gone dormant and you can remove those fabrics and replace them with a different kind of mulch. Farmer Fred : Yeah, and that’s the key isn’t it putting down an organic mulch Exactly. And that can be maybe wood chips or wood your own trees chipped and shredded, sometimes it’s a good idea to invest in a chipper shredder, rather than a roto tiller because with a chipper shredder, you can take those fallen tree limbs or prunings and make a really nice mulch and you’re not importing somebody else’s problems into your yard with their chipped wood. Linda Chalker-Scott : You know I keep on saying that’s what I want for Christmas is my very own Shredder. reason because I would love to be able to use you know the downed limbs and other cuttings and shred them up and use them on my own landscape. Barring that, I do use arborists, wood chips for the very same reason. Although I don’t know where they come from at least they’re local. And it’s keeping them out of landfill and they make a really great organic mulch for landscape. Farmer Fred : Do you let them age before you use them? Linda Chalker-Scott : I personally don’t I’ve never had a problem and sometimes with some of the work that I was doing with students, we didn’t really have the luxury of letting them sit. We had to use them right away. And actually I love I love them because they smell so great when they’re fresh and I really like working with men. A lot of concerns with wood chips in terms of well would they have you know, if you have diseased Woods chipped up, is that going to be a problem? Research has shown that no, we don’t transmit disease from disease wood down through many inches of mulch down to roots. And I I always caution people you know if you’re concerned about pest pathogens now by all means let them sit on site. For a while, and compost, but I’ve seen no damage from anything using fresh chips. Farmer Fred : And being a lazy kind of gardener. I really like your advice when it comes to using wood chips as a mulch as far as you have to take the weeds or get the weeds down before you put the mulch on, obviously, but what I like is you say to prune or mow the perennial weeds at the root crown, because pulling them out destroys the soil structure. Linda Chalker-Scott : Exactly. And you’re just like me, I’m also a lazy gardener and a cheap gardener. So anything I can do to save myself some labor I do. Yeah. And if you wait until things are really starting to go dormant anyway, and then you’re mowing them down they have less of a chance of coming back. Farmer Fred : For years we have heard some rather unsound advice if you have clay soil add sand to improve its texture. But seems to me that’s a recipe for making bricks. Linda Chalker-Scott : That’s exactly right. That’s how you make concrete, isn’t it? Yeah. Farmer Fred : How did that ever start? Linda Chalker-Scott : it’s partially because of what the perfect soil consists of and if you look at a soil triangle, you know the ideal loamy soils are a certain mixture. sand and clay and silt. And that’s what makes a perfect loam. And so if somebody has a landscape that maybe isn’t as perfect, you know, they’re thinking, well, the easiest way to solve that is is to add, you know what they’re missing. But unfortunately, most of us don’t know exactly how much we would need. And the problem is, especially with a clay soil that you have to add about 50% more volume of sand just to get that to more Sandy texture. If you add just, a little bit of sand. It creates some, as you say, Adobe, and so you’d have to just add an awful lot of sand to really change the texture. And then the problem is, is that you know, you’re, you may you may understand the boundaries of your property, but your trees and shrubs roots don’t, and they’ll continue to grow outside your boundary. And if you’ve changed the texture, you know, dramatically from what the surrounding soil is like. You’re going to get to have a problem with water movement, air movement and root movement. Farmer Fred : We see that a lot with people who will dig a hole to plant a tree or a shrub and instead of using their native soil, go out and buy some premium potting soil And throw that in the hole and plant their tree or shrub in that. But as you just pointed out, what happens is the surrounding water will flow into that nice loose soil and it’s like a constantly flooded zone. Linda Chalker-Scott : Exactly, and then and it dries out faster too. So the summer when you’ve got the drier time of year, you’re gonna have that area evaporating water faster and surrounding soil doesn’t so the roots are exposed to constant drought or constant flooding. It’s not a great way to get your plants established. Farmer Fred : In your book, The informed gardener you also tackle an another myth and it’s one that I can’t believe is still around yet people will buy vitamin b1 and you talk to anybody and they’ll describe how they put in a new tree or a shrub or a plan this Oh yeah. And I added vitamin b1 to reduce transplant shock, Linda Chalker-Scott : right? Well, that’s what marketing will do for you and especially when we tend to think of things in the context of what we do for ourselves and, and you know, if we take vitamin supplements many of us do take Vitamin B supplements. And so you just kind of extrapolate that and think, well, it must be good for the plants too. And what people don’t realize is plants make their own. So they certainly don’t need us to add that it’s just an extra cost and waste of resources to add those kinds of fertilizers to plants. Farmer Fred : And it isn’t the vitamin B1 in that bottle that’s probably doing your plant any good. There’s a small amounts of nitrogen, phosphorus, potassium, and perhaps some micronutrients that are the real keys to that. Linda Chalker-Scott : Right. And sometimes there’s also a hormone, usually an auxin that might be IAA, or NAA or something like that. And those actually do have a stimulatory effect on rooting, so that that type of rooting hormone or transport hormone actually does do some good and so those mixtures of transplant elixirs, if they happen to have a little bit of that hormone, they will have an effect but it certainly is not the B1 that does it. Farmer Fred : So if you think thiamine is going to help reduce transplant shock, I can save you a lot of money. Just go to the grocery store, buy some vitamin b1, the generic brand and throw a tablet in them. If you pick up a copy of the informed gardener, you’re going to find all sorts of exploded myths, the myth of wound dressings. We talked about how we didn’t talk about hot weather watering, but briefly it talks about there really is no damage to a plant, if you will water your plant on a hot afternoon is there. Linda Chalker-Scott : As long as you’re not using saltwater, there’s absolutely no damage and you’re just going to reduce the shock to it of being drought stressed. What usually happens is what people do water watering when they see wilt and then of course, those leaves have been fatally wilted, they’re going to develop brown edges and so people tend to blame the watering rather than the lack of water for that brown development. That’s not the water that’s burning the leaves. Farmer Fred : And it’s why I like is a lot of your solutions: Apply mulch. Linda Chalker-Scott : That’s right, I like that. Yep, I did to you know, a decent healthy soil. You’re gonna have decent healthy roots and a decent healthy plant. Farmer Fred : Linda chalker Scott, author of two great books, the informed gardener and the informed gardener blooms again, thanks for a few minutes of your time. Linda Chalker-Scott : Thanks, Fred. I enjoyed it. As you may be aware, the Garden Basics with Farmer Fred podcast , after 412 episodes, has been retired. However, the Beyond The Garden Basics newsletter and podcast with Farmer Fred will continue publication! But the only way it will survive is through your support. Thank you for being a paid subscriber. =============================== Thank you for supporting Farmer Fred’s Ride for the Kids , a charity 100-mile bike ride in Sacramento County on Saturday, Oct 4, put on by the Rotary Club and supporting the Crisis Nursery Center of the Sacramento Children’s Home. Mission Accomplished! You helped the Sacramento Children’s Home with your nearly $3,000 in donations. Thank you! Fred Hoffman is a University of California Cooperative Extension Master Gardener in Sacramento County. Thanks for reading - and subscribing - to the Beyond The Garden Basics newsletter. Pass it along to your garden friends. This is a public episode. If you'd like to discuss this with other subscribers or get access to bonus episodes, visit gardenbasics.substack.com/subscribe
Oct 6
The Disease Triangle
This is a free preview of a paid episode. To hear more, visit gardenbasics.substack.com Back in elementary school in Southern California, there once was a visit from a local firefighter who had Smokey the Bear in tow with him (I felt sorry for whoever was in that outfit. It was a hot day). Because, as Smokey would remind us daily on TV public service announcements, “Remember, Only You Can Prevent Forest Fires.” The purpose was to explain to us fifth graders the fire triangle: that you need three elements to start a fire: fuel, oxygen, and heat. So, douse that campfire with water (to take away the oxygen), and separate the remains (the fuel) from each other (to lessen the heat), and don’t play with matches, kids. Turns out, the same sort of triangle can help you figure out how to control plant diseases in the garden. Debbie Flower, America’s Favorite Retired College Horticulture Professor, calls it “The Disease Triangle”. Debbie says, “If you know this, you can control diseases without chemicals.” She explains that intriguing statement in today’s newsletter podcast, above. For those of you who prefer to use your eyes, here’s the transcript, which includes links to more information about certain statements, and maybe a country song, too: With the closing of the Garden Basics with Farmer Fred podcast, the Beyond The Garden Basics newsletter/podcast is the new flagship publication for good gardening information. To receive new posts and support my work, consider becoming a paid subscriber. And for those who already paid, thank you!
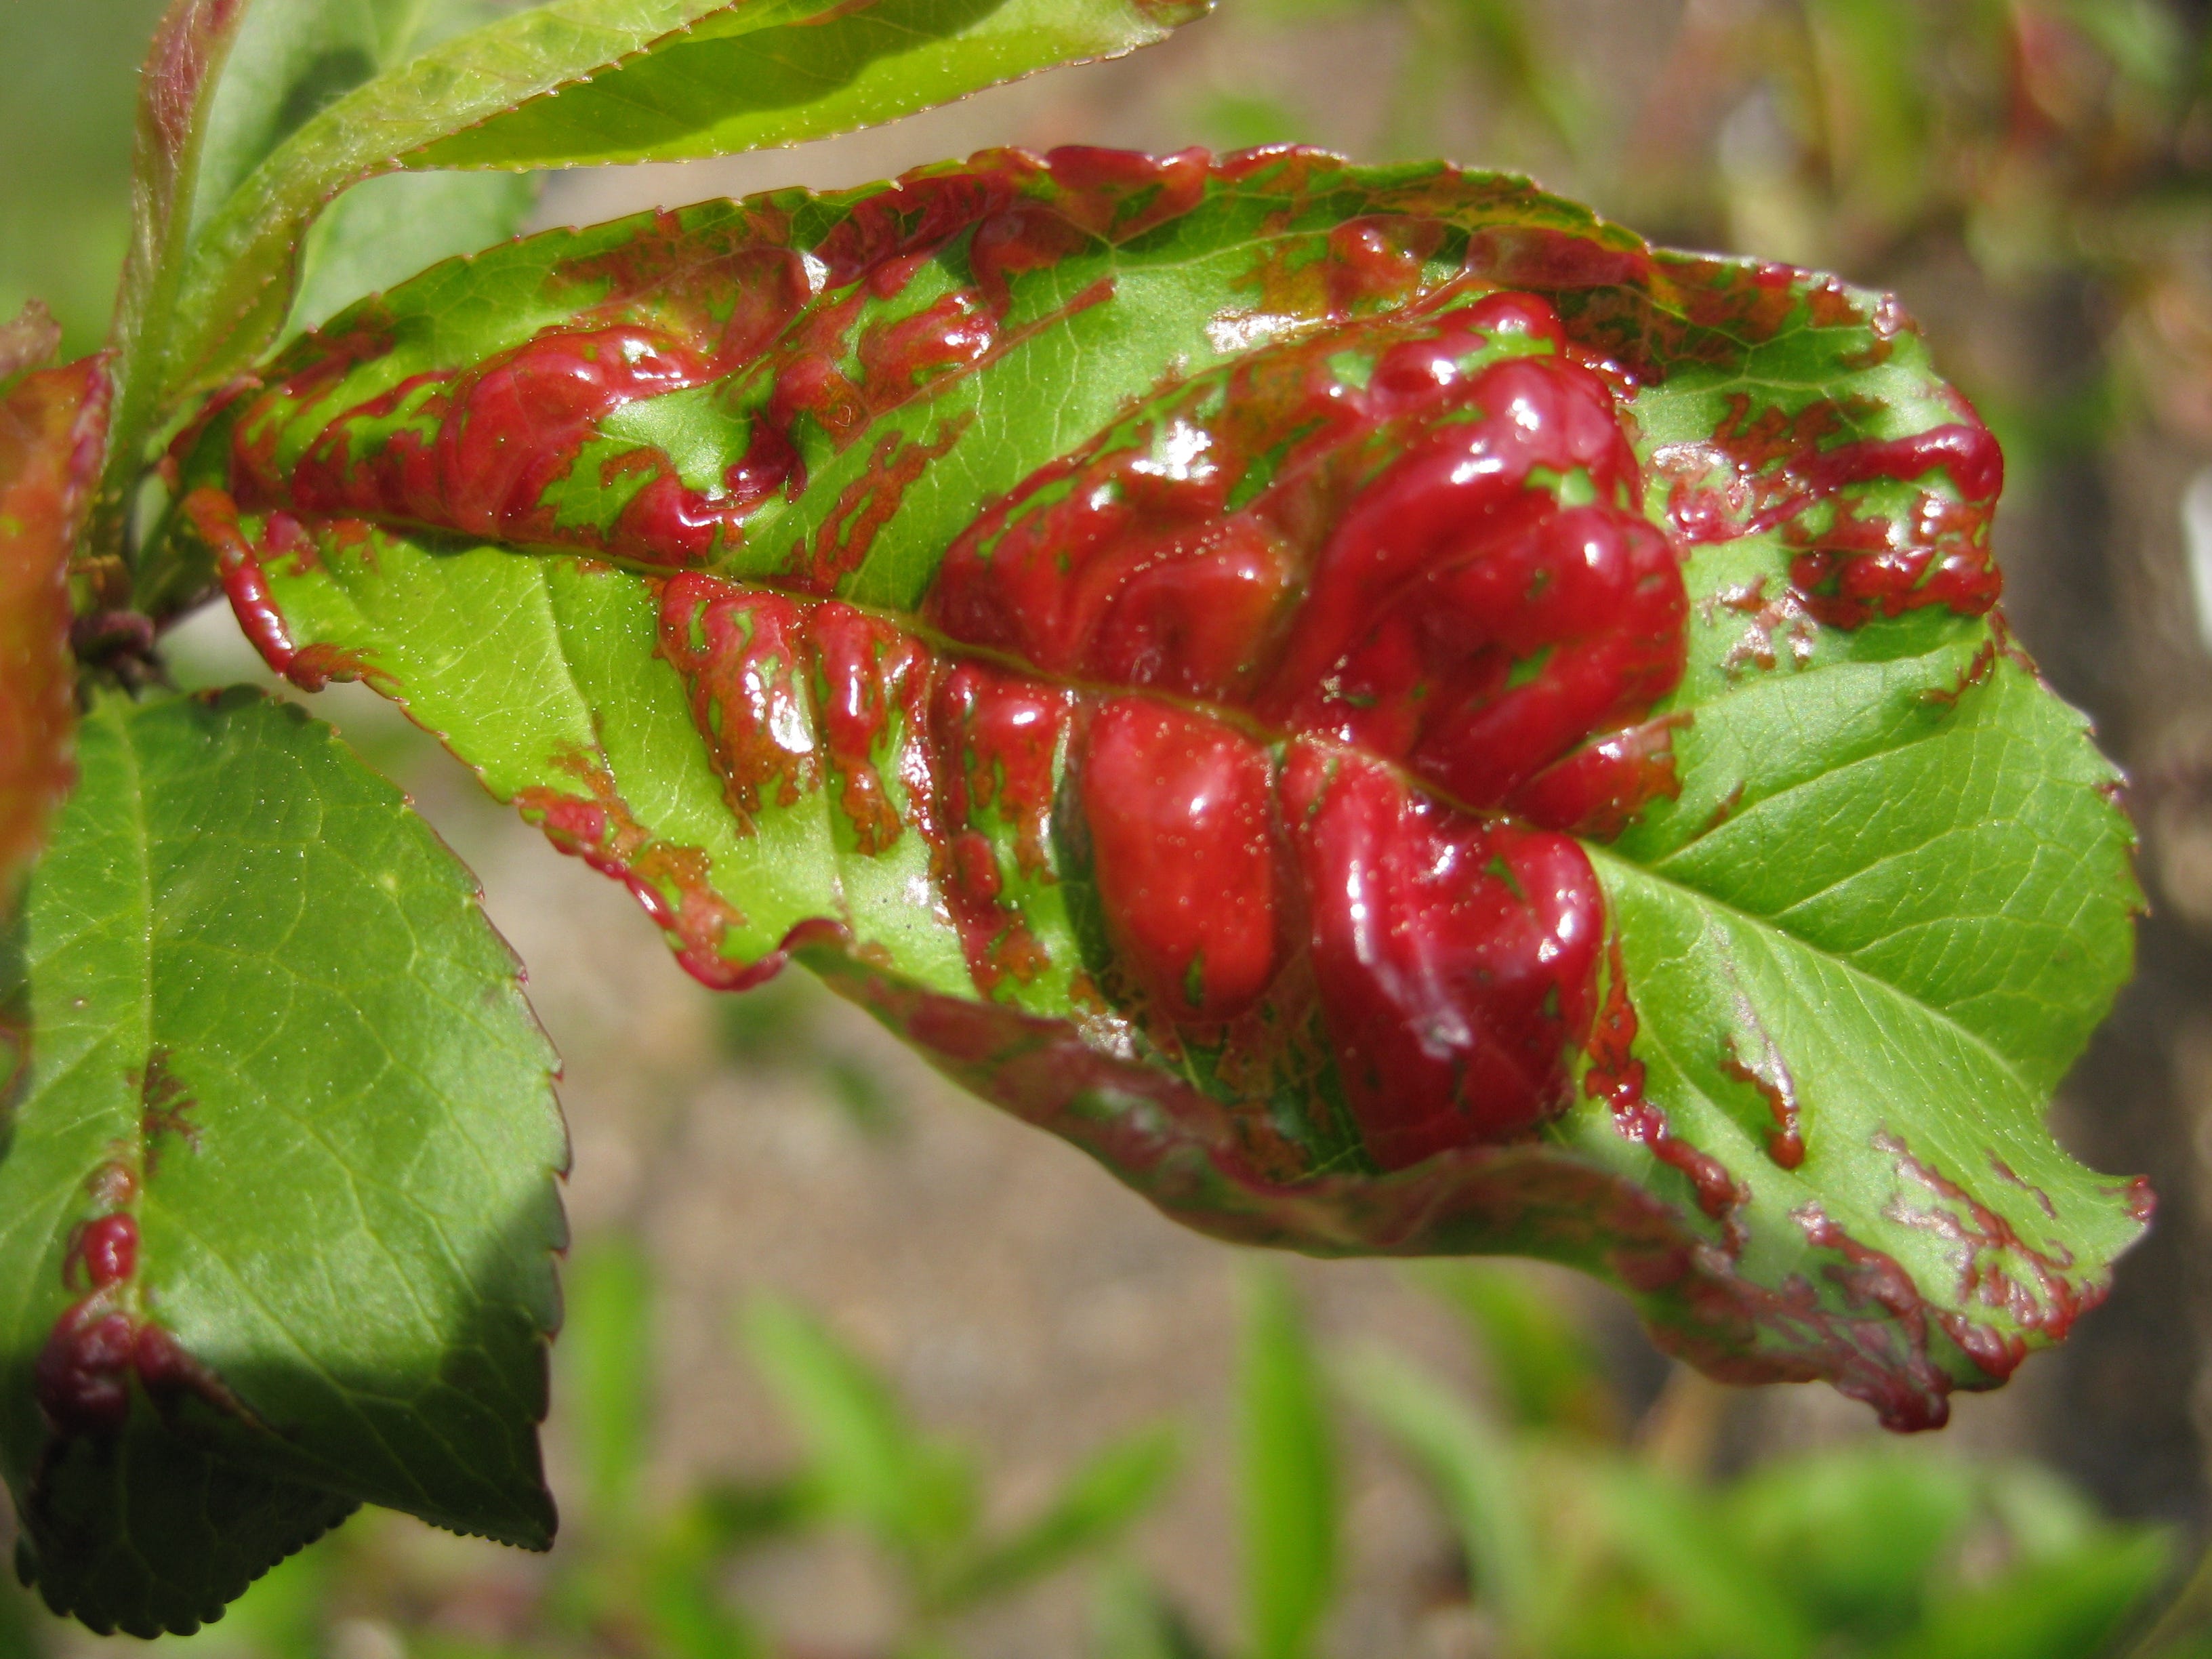
Oct 3
Grow A Yardful of Phytonutrients
Today’s newsletter and podcast originally appeared here back in September of 2022, and it was one of the most popular posts here in the Beyond the Garden Basics newsletter. Eating healthy food - and the healthiest food you can eat is the food you grow yourself - is a perennial concern. So, for those of you who didn’t hear or read this three years ago - or would like a refresher course - here it is again. Remember, paid subscribers have access to all the previous Beyond the Garden Basics newsletter editions… a very good reason to pony up a few dollars a month for a subscription! Beyond The Garden Basics with Farmer Fred is a reader-supported publication. To receive new posts and support my work, consider becoming paid subscriber. In today’s newsletter podcast, we continue our chat with Dr. Laura Varich , from FreshPhysician.com , a conversation that we began on Episode 228 of the Garden Basics with Farmer Fred podcast . Dr. Varich is a former pediatric radiologist who is now focused on what’s really the cause of so many of the diseases in our society: poor eating habits. Specifically, we are missing a critical element in our diet: phytonutrients. We’re eating too much of colorfully-packaged, highly-processed factory food and not enough fresh from-the-garden (or farmer’s market) colorful food. The result: rampant increases, across all ages, of heart disease, diabetes, high blood pressure, cancer, and other ailments. In both podcasts, she encourages getting out into the yard and growing fresh fruits and vegetables, which is also great exercise. The healthiest food you can eat is the food you grow yourself…and then consume it, fresh. Or, at least, make regular runs to the farmer’s market in your area. What are phytonutrients? Dr. Varich explains that in the podcasts. And, here’s the word from Harvard University : Phytonutrients: Paint your plate with the colors of the rainbow Did you know that adding color to your meals will help you live a longer, healthier life? Colorful fruits and vegetables can paint a beautiful picture of health because they contain phytonutrients, compounds that give plants their rich colors as well as their distinctive tastes and aromas. Phytonutrients also strengthen a plant’s immune system. They protect the plant from threats in their natural environment such as disease and excessive sun. When humans eat plant foods , phytonutrients protect us from chronic diseases. Phytonutrients have potent anti-cancer and anti-heart disease effects. And epidemiological research suggests that food patterns that include fruits and vegetables are associated with a reduced risk of many chronic diseases, including cardiovascular disease, and may be protective against certain types of cancers. The American Cancer Society recommends 2 1/2 cups per day of fruits and vegetables. The most recent US Dietary Guidelines recommend consuming even more: 2 1/2 cups of vegetables and 2 cups of fruit, based on a 2,000-calorie diet. To get started, try to include as many plant-based colors in your meals and snacks as possible. Each color provides various health benefits and no one color is superior to another, which is why a balance of all colors is most important. Getting the most phytonutrients also means eating the colorful skins, the richest sources of the phytonutrients, along with the paler flesh. Try to avoid peeling foods like apples, peaches and eggplant, lest you lose their most concentrated source of beneficial chemicals. Following is a rundown of fruits and vegetables sorted by color, along with the phytonutrients they contain, and which foods you’ll find them in. Red: Rich in the carotenoid lycopene, a potent scavenger of gene-damaging free radicals that seems to protect against prostate cancer as well as heart and lung disease.Found in: strawberries, cranberries, raspberries, tomatoes, cherries, apples, beets, watermelon, red grapes, red peppers, red onions. Orange and yellow : Provide beta cryptothanxin, which supports intracellular communication and may help prevent heart disease.Found in: carrots, sweet potatoes, yellow peppers, oranges, bananas, pineapple, tangerines, mango, pumpkin, apricots, winter squash (butternut, acorn), peaches, cantaloupe, corn Green: These foods are rich in cancer-blocking chemicals like sulforaphane, isocyanate, and indoles, which inhibit the action of carcinogens (cancer-causing compounds).Found in: spinach, avocados, asparagus, artichokes, broccoli, alfalfa sprouts, kale, cabbage, Brussels sprouts, kiwi fruit, collard greens, green tea, green herbs (mint, rosemary, sage, thyme, and basil) Blue and purple: Have powerful antioxidants called anthocyanins believed to delay cellular aging and help the heart by blocking the formation of blood clots.Found in: blueberries, blackberries, elderberries, Concord grapes, raisins, eggplant, plums, figs, prunes, lavender, purple cabbage White and brown: The onion family contains allicin, which has anti-tumor properties. Other foods in this group contain antioxidant flavonoids like quercetin and kaempferol.Found in: onions, cauliflower, garlic, leeks, parsnips, daikon radish, mushrooms Reach for the rainbow Reaching a total of 4 1/2 cups of colorful fruits and vegetable a day is the goal for a powerful plate. Here are some ways to make it happen: * Servings are not that big. 1/2 cup of chopped raw vegetables or fruit makes one serving. Leafy greens take up more space, so 1 cup chopped counts as a serving. 1/2 cup of dried fruit equals one serving. * Think in twos. Try to eat two servings in the morning, two in the afternoon, and two at night. * Snacks count, too. Feeling hungry between meals? Munch on a piece of fruit or grab some sliced raw vegetables to go. * When shopping, look at your cart. If you find most of your choices are the same one or two colors, swap out a few to increase the colors — and phytonutrients — in your cart. * Dine out colorfully. Start out with a cup of vegetable soup. Choose an arugula or spinach salad and see if they can add extra vegetables. Top off your meal with fresh fruit for dessert and a soothing cup of green tea. * Look local. Farmers markets, co-ops, buying clubs, and community supported farms are usually great sources of fresh produce. Ask a farmer for fresh ideas on how to prepare fruits and vegetables that are new to you. * Frozen produce is okay too! It is best to eat in season, but since seasonal produce may be limited, frozen fruits and vegetables count and are just as nutritious as fresh. Can Plants Reduce Incidents of Serious Covid? In the newsletter podcast, Dr. Varich made an interesting comment, one I had never heard before: in a study published in the British Medical Journal , patients who consumed mainly plants and fish had a 73% chance of not coming down with moderate to severe cases of COVID. Here’s a brief summary of that 2021 study, conducted by John Hopkins University and other institutions: Plant-based diets, pescatarian diets and COVID-19 severity: a population-based case–control study in six countries Abstract Background: Several studies have hypothesised that dietary habits may play an important role in COVID-19 infection, severity of symptoms, and duration of illness. However, no previous studies have investigated the association between dietary patterns and COVID-19. Methods : Healthcare workers (HCWs) from six countries (France, Germany, Italy, Spain, UK, USA) with substantial exposure to COVID-19 patients completed a web-based survey from 17 July to 25 September 2020. Participants provided information on demographic characteristics, dietary information, and COVID-19 outcomes. We used multivariable logistic regression models to evaluate the association between self-reported diets and COVID-19 infection, severity, and duration. Results: There were 568 COVID-19 cases and 2316 controls. Among the 568 cases, 138 individuals had moderate-to-severe COVID-19 severity whereas 430 individuals had very mild to mild COVID-19 severity. After adjusting for important confounders, participants who reported following ‘plant-based diets’ and ‘plant-based diets or pescatarian diets’ had 73% (OR 0.27, 95% CI 0.10 to 0.81) and 59% (OR 0.41, 95% CI 0.17 to 0.99) lower odds of moderate-to-severe COVID-19 severity, respectively, compared with participants who did not follow these diets. Compared with participants who reported following ‘plant-based diets’, those who reported following ‘low carbohydrate, high protein diets’ had greater odds of moderate-to-severe COVID-19 (OR 3.86, 95% CI 1.13 to 13.24). No association was observed between self-reported diets and COVID-19 infection or duration. Conclusion In six countries, plant-based diets or pescatarian diets were associated with lower odds of moderate-to-severe COVID-19. These dietary patterns may be considered for protection against severe COVID-19. After the harvest, where do you keep your crops to help preserve their nutrients? Available for free online, from the UC Davis Postharvest Technology department, their “ Storing Fresh Fruits and Vegetables for Better Taste ” chart. As you may be aware, the Garden Basics with Farmer Fred podcast, after 412 episodes, has been retired. However, the Beyond The Garden Basics newsletter and podcast with Farmer Fred will continue Friday publication! But the only way it will survive is through your support. Please consider becoming a paid subscriber. $5 a month, or $50 a year. Or more, if you feel so inclined. Thank you! Thank you for supporting Farmer Fred’s Ride for the Kids , a charity 100-mile bike ride in Sacramento County on Saturday, Oct 4, put on by the Rotary Club and supporting the Crisis Nursery Center of the Sacramento Children's Home. Wish me luck! Fred Hoffman is a University of California Cooperative Extension Master Gardener in Sacramento County. This is a public episode. If you'd like to discuss this with other subscribers or get access to bonus episodes, visit gardenbasics.substack.com/subscribe

Sep 26
Feed Your Soil, Cool Season Edition
We are transitioning from the summer gardening season to cool season vegetables and flowers. However, maybe you don’t want to put in cool season crops. A word to the wise: don’t leave your fading summer garden lingering (or drooping) in the garden; doing that invites insect and disease pests to overwinter in that standing debris. In its place, there are some inexpensive and easy things you can do that will not only minimize pest problems for the following year, but also feed your soil and make it even better for next year. In today’s newsletter podcast, soils expert Steve Zien explores how cultivating an environment that nurtures soil biology lays the groundwork for vibrant plants. Among the topics in the podcast: 0:05 Goodbye, tomatoes, squash and peppers 0:53 Feeding the Living Soil 3:56 What’s Missing from the Soil? 4:58 Understanding N-P-K 6:52 The Importance of pH 8:33 Adjusting Soil pH 9:25 Benefits of Mulching 10:23 Managing Soil Moisture 14:01 Fall Planting and Soil Care Tips for a Healthier Soil The University of Minnesota Extension has six tips for a healthier soil: • Get a soil test done to find out what nutrients your garden soil is missing. Some universities offer low-cost soil tests, including U. Mass/Amherst , Colorado State , Texas A&M , and Utah State . • Mix in organic matter. This could include fallen leaves, roots, and general plant litter. • Incorporate compost and worm castings to compacted soil to increase air, water holding capacity, and nutrients for plants. • Protect topsoil with mulch, leaves, or cover crops. • Don’t use chemicals unless there’s no alternative. • If possible, rotate crops. Soil pedologist Steve Zien concurs, saying if people want inexpensive, easy ways to improve their soil during the winter, and they don’t want to grow cool season cover crops, two easy tasks can greatly improve your soiI: cut off your summer crops at the soil level, but leave the root system in place. Then, cover that soil with several inches (six to ten inches) of mowed-over or chopped-up leaves that are beginning to fall from the trees. “Doing that is absolutely wonderful for your garden soil,” says Zien, who is based in Sacramento County. “It regulates the soil temperature, keeping it warmer. The fact that the leaves are ground up makes it easier for the worms that are in your soil to come up and feed, aerating your soil and taking that organic matter down into the soil. So, you will get nutrients moving down into the soil, increasing the nutrient value, and you will get more soil biology. And the more soil biology you have, the more diversity, the more numbers of beneficial microorganisms, the healthier your soil will be and the healthier your crops will be. That increase of beneficial soil biology will naturally combat pest problems.” Zien goes on to say that the root mass remaining in the garden will improve the soil, as well. “The roots will decompose quickly,” says Zien. “The biology will basically reduce them to nothing. And there will be large pore spaces where those roots were. When you irrigate, the water will go down very nicely, which is important, especially if you have a clay soil.” This breaking down process of the roots will happen quicker if you already have healthy soil, teeming with microbes. What can gardeners do to begin that process? “Leaving crop residue and leaf mulch on the soil surface will still be worthwhile,” explains Zien. “The mulch and the underground crop residue protect the soil from nature’s forces of wind and water, reducing erosion and the impact of raindrops on bare soil. When a raindrop hits bare soil it loosens the sand, silt and clay particles. That moves them around in a way that results in the creation of a hard crust that seals off the soil. Topping the soil with crop residue and mulch instead will conserve moisture, reduce the need for irrigation, prevent weed growth and will insulate the root zone from heat and cold, creating a more favorable environment for the development of beneficial soil biology.” Zien warns that part of building healthy soil may require a change in some of your gardening habits. “One must also realize that the good soil organisms are destroyed by synthetic fertilizers and pesticides, therefore their use must be eliminated or at least minimized,” says Zien. “The sooner you adopt these practices, the faster you will create a healthy soil food web with good soil structure and an abundance of organic matter capable of producing the garden and landscape of your dreams.” Beyond The Garden Basics with Farmer Fred is a reader-supported publication. To receive complete posts and support my work, consider becoming a paid subscriber. Here’s the complete transcript of the conversation with soil pedologist Steve Zien in today’s podcast (above): Farmer Fred: [0:00] Well, it’s the change of seasons, kind of, and you might be ripping out your summer vegetable garden. Goodbye, tomatoes, squash and peppers. Hello, broccoli, cauliflower, peas and whatever. But before you add your cool season vegetables to your garden, what about your soil? That would be what my guest would tell you. Steve Zien, pedologist, soil expert. We’ve talked before with Steve, and one of the most popular episodes in the Garden Basics series has been where he’s talked about feeding your soil. And Steve, as people change over to the seasons, to cool season, just like they would change into the spring season in March or April, this time of year, you got to feed the soil because taking out plants and putting in other plants, well, those new plants may be getting off to a weaker start unless you did something to the soil first. Steve Zien: [0:53] Yeah, exactly. And you’ve got to realize a lot of people when they’re thinking about putting things down for the soil, under the soil for feeding the plants, what we really have to realize is that the soil is alive. Teaspoon of soil contains more microscopic organisms than there are people on earth. And it’s these organisms that nurture your plants. They provide water, nutrients, and even pest management. And if you’ve got clay soil, and I suspect a few of your listeners have clay soils, these are the organisms that create soil structure that will open up that clay soil so that water and air and nutrients and roots and everything can move through and function. And they actually glue the sand, silt, and clay particles together and create a diversity of pore spaces so that you have these large pore spaces where air will exist in the soil. Without those large pore spaces, you don’t have any air and people have a lot of problems with their soil. You know, the goal of fertilizing and amending the soil is to create this healthy soil. You want to feed the living soil. We want to get away from the whole idea of feeding the plant. It’s all about creating a favorable environment for the soil biology, because that’s what takes care of your plant. Farmer Fred: [2:16] Now, most gardeners would think, OK, I’m taking out my summer vegetable garden. I know those plants used up a lot of nitrogen. So all I need to do is just add some nitrogen fertilizer and everything will be fine. In reality, if you did that, what would happen? Steve Zien: [2:31] Not much, especially depending upon what kind of fertilizer you use. But what you just talked about, actually, when I was in ag school 3,000 years ago, that’s what we were taught. But they did not realize at that point that the soil was alive and we need to feed the soil. And one of the things that you have to realize is that soil biology eat the most of is organic matter. And so you need to put in organic matter. And you do that not by tilling the soil. Killing the soil destroys the soil structure and actually ends up compacting the soil and kills the soil biology. So you just want to put these things on the soil surface. The best two things that you can put down are worm castings. Those are my favorite, especially if you’ve got clay soils because they contain a lot of different kinds of soil biology. And composting, just put it on top of the soil. And then as you irrigate this time of year, because we still have to irrigate, and then later on in the season when we get rains, the rains and the irrigation will work that organic matter into the soil. Also, by putting that organic matter on the soil surface, worms will come up every single night and feed on that material and go back down in the morning. And they’ll act as Mother Nature’s rototillers. And so they’re going to, you know, that organic material, the compost and the worm castings will eventually disappear because it’s going to be going into the soil, feeding the soil biology. And when you see that gone, time to add more. Farmer Fred: [4:12] What is missing from soil at the end of a growing season? Steve Zien: [4:17] Nitrogen is certainly one of them. And so you do want to add some sort of nitrogen source. Ideally, what I like to try and recommend people do is do a soil test. Ideally, you send your soil off to a lab and you get a full analysis, but that’s more expensive and more complicated than a lot of people want to do. But you can go to your local nursery and they have soil test kits that are relatively accurate, accurate enough for our purposes. And they will test the nitrogen, phosphorus, potash, and the pH. And then you will know whether you need to add more nitrogen, phosphorus, potash, or adjust the pH of your soil. Farmer Fred: [4:59] Let’s explain those terms before we go any further. I always thought our friend Giselle Schoniger of Kellogg Garden Products always put it best when explaining the roles of nitrogen, phosphorus, and potassium. She would say... Steve Zien: [5:12] Yeah, I like her little poem. Farmer Fred: [5:15] Oh, I don’t remember the poem, but for NPK, the three letters, it represents up, down, and all around. All right. Nitrogen gives you leafy green growth. The phosphorus improves the root structure of the plant. Yes. Steve Zien: [5:34] Phosphorus is also, though, important in flower and fruit development. Farmer Fred: [5:38] And then the K, the potassium, is basically for all around vigor and health. Steve Zien: [5:45] Yeah, it helps all of the various functions of the plant operate properly. Farmer Fred: [5:50] And pH is an interesting concept. It’s short for percent hydrogen. And it refers to the acidity or alkalinity of the soil, which I’ve tried to explain to people that for all those soil critters down there that are feeding your plant, These are the tunnels they run through to get to the plants, and the size of that tunnel for them to run through is determined by the pH of the soil. Steve Zien: [6:17] Right. And, you know, the pH where that funnel is widest, where the plants can get the most nutrients available, you know, that works for them, is when the pH is roughly somewhere in the vicinity of like 6.2 or 3, or maybe even 6.4, up to about 7. Which is actually 6.8. Farmer Fred: [6:40] Slightly acid to neutral, basically. Steve Zien: [6:42] Right. And the problem is with most of our soils in this area, because I’ve done lots of soil tests over the years. This area being… Farmer Fred: [6:50] The United States of America? Steve Zien: [6:52] No, in the Sacramento region, most of them. But in the Sacramento region, most of them are above 7.0. Most of them are above 7.2. And so that’s a little alkaline. And that does restrict some of the nutrients, in particular iron. And a lot of people in springtime, their leaves, especially of their acid-loving plants, turn yellow. And so they will go to the local nursery and say, you know, my gardenias or my blueberries, the leaves are turning yellow. And one of the issues is that the pH is just too high and the iron isn’t available. I mean, almost all of the soil tests that I’ve done, again, in this area, there’s plenty of iron in the soil. It’s just not available because the pH is too high. And so what I’ve been trying, I worked with an organization called Our Water, Our World , and we tried to educate the nursery folks on how to minimize the use of pesticides for their clients. And one of the things that people were having problems with is this yellowing of the acid-loving plants due to the high pH. And a lot of times people would just recommend iron. And the nursery folks would just recommend iron. Oh, your plants are deficient in iron. You need to add iron to your soil. And the fact of the matter is there’s plenty of iron in the soil. And so what I tried to convince them to do is buy a pH. Sell them a pH test kit. Let them test the pH of their soil. And then they need to adjust the pH of their soil. Farmer Fred: [8:33] So what do you add to soil to bring down that pH number? Steve Zien: [8:38] Some of the things include soybean meal, which would add nitrogen. Fish hydrolyzate, which is similar to fish emulsion. It’s just manufactured a little different. You actually get more bang for your buck. Compost made with a lot of brown material, earthworm castings, and paper, cardboard, cellulose. You can chop that up and just put it on the soil surface. Again, you’re not mixing this stuff in the soil. You’re just putting it on top. Farmer Fred: [9:09] You know, what you’re describing could also be called mulch as well. So if you put a woody mulch on the surface of your soil year-round, you’re going to have a more balanced soil. Steve Zien: [9:23] Yes. Farmer Fred: [9:24] Talk about that. Steve Zien: [9:25] Well, I mean, a lot of times people get these wood chips. And I really like the wood chips because they have a diversity of particle size. And so the small particles break down and enter the soil very, very quickly and start nourishing the soil biology, which then starts nourishing your plant. And then the bigger pieces last a little longer and will provide the cooling effect in the summertime, the warming effect in the wintertime, and help conserve some moisture in the soil as well. Farmer Fred: [10:00] And in fact, if you keep a four inch layer of a natural mulch like that, and that could be the chip shredded tree parts from your local arborist as well. Right. Yeah. By keeping that mulch on the soil, you are feeding the soil year round, which may mean you don’t have to use as much fertilizer as you may be used to. Steve Zien: [10:22] Exactly. All right. Farmer Fred: [10:23] So, we’ve lowered the pH. Now, for our friends listening where soils are naturally acidic, it’s a low number, and they’re always dealing with, okay, how do we raise the pH to get it more towards neutral? How do you raise the pH? Steve Zien: [10:39] That’s actually much easier. One thing that you can use is wood ash. Normally, for our soils, you don’t want to add wood ash because, like I said, most of our soils, the pH is too high. But you can also, if you’re trying to raise the pH, you can use different forms of lime. Oystershell lime and ground limestone work very, very well. There’s also a material called dolomite lime. And in our area, I generally don’t recommend that because in all the soil tests that I did, most of the soils have very high to excessive amounts of magnesium. And dolomite has not only lime, but it also has magnesium. And so it’s adding more magnesium to a soil that probably has too much already. So you’re better off with the oyster shell lime. And you can get that at any nursery. You can also use compost that has a lot of green materials, aged or compost manures, grass clippings. But make sure to don’t put them down thick or they will mat up. Farmer Fred: [11:40] Dry them out first. Steve Zien: [11:42] Pardon me? Farmer Fred: [11:44] Pardon you? Let them dry out first. Steve Zien: [11:47] Yeah, that’s a good idea. I mean, because it’s the soil biology, again, that helps a lot in the raising of the pH or lowering the pH. It’s the fungi. And what you’re trying to do when you’re trying to lower the pH, you’re trying to feed the fungi because they put out acid materials when they’re doing their thing. And then the bacteria, the excretions from the bacteria will help to raise the pH. And so you’re basically, by adding these various things, trying to get either more bacteria or more fungi active in your soil. It’s all about the soil biology. Farmer Fred: [12:29] Let’s go back to adding ashes to the soil, which can make your soil more alkaline. A couple of words of warning about that, especially if your soil is already near neutral or is already alkaline, is if you’re going to add ash from the wood stove, you would only want to add, I believe, one pound per 100 square feet in order to bring it up gradually. Steve Zien: [12:56] If your pH is, I think before you add any wood ash, you need to test the pH. And you can go to your local nursery and they sell just pH test kits. They’re very inexpensive. And I would say if your pH is 6.7 or above, don’t use wood ash. It makes a great present for your gardening friends that live back east because they have acidic soil. Farmer Fred: [13:21] All right. But now having established that, what about ash from the barbecue? Steve Zien: [13:27] Depending upon what they’re using, if they’re using the briquettes, which most people do, I certainly would not use that. Farmer Fred: [13:33] Because there’s other stuff in there you don’t want to put in the soil. Steve Zien: [13:36] There’s other stuff in there, yeah. I mean, I use mesquite when I barbecue. And if my pH was such that the wood ash would be appropriate, which it is not, I would not mind using that. But because my pH is high enough, I don’t want to raise it anymore. I dispose of the wood ash. Farmer Fred: [13:57] Basically, don’t use charcoal briquette ash in your garden. Steve Zien: [14:00] Definitely not. Farmer Fred: [14:02] All right. Question came in right up your alley and also pertinent to what we’re talking about here. It’s email from Kathy who says, I have a question about my fall planting boxes. Is it OK for them to be resting in an unwatered state? If the beds are empty, should you still be watering them? Steve Zien: [14:20] You know, that kind of depends. I mean, it’s helpful to, you know, keep the soil biology alive and active. What I would do is put down a mulch or my again, my favorite worm castings or compost and then, you know, water occasionally. keep that soil somewhat moist and active. And if you’ve got like a raised bed or a box and you’ve got worms in there, those would probably die. Most of the soil biology would probably go dormant, but it would take them a little while to come back. So if it’s just going to be for a couple of weeks or maybe a month, I would probably keep it moist. Farmer Fred: [14:58] And of course, if you live in an area that gets summer rain, you don’t have to pay attention to what we’re saying. But if you live in an area where it never rains in the summertime or it’s so seldom that people take a holiday when it happens. Basically, it needs to get moistened and fairly thoroughly moistened, too. I don’t think a drip system in a raised bed turned on is going to thoroughly saturate the soil. I think you’d be better off setting up a sprinkler inside of it and thoroughly saturating the soil that way. And if it’s been dry for any length of time, at least a week or so before you plant your cool season crops, man, oh man, put that sprinkler on and let it water and make sure that that water has penetrated the full depth of the bed or at least eight to 12 inches. Steve Zien: [15:47] Yeah, I personally, I think if you’ve got your drip system set up properly, the drip system will work just fine. It’s just you’ve got to make sure to leave it on long enough so that that water, you know, penetrates throughout that entire box. Farmer Fred: [16:02] It depends, as you would know, on the consistency of the soil. If it’s a really loose, friable potting mix straight out of the bag that’s in your raised beds, there’s very little cross motion in that soil. And if you have drip emitters, it’s going to be a very narrow cylinder that descends into the soil. Whereas in a garden bed that’s comprised of sand, silt, and clay, that footprint of water from each emitter is going to be probably twice as wide as what it would be in a raised bed. Steve Zien: [16:36] Yeah, yeah. What you want to do whenever you irrigate. I mean, it’s the only way, in my opinion, to know how to irrigate. When to irrigate, how much to irrigate. which is basically how long and whether if you’re using a drip system whether you’re getting good coverage and that’s to dig into your soil and in in your garden and landscape where you’re dealing with soil i think a soil probe is probably the better tool to utilize in a raised bed they’ve got what’s called a soil sleuth, both of them are available online the soil and basically what you do is you push these things on the ground, you pull them out, and there will be soil in these tools. And you will actually be able to look at them and feel them to find out whether they are moist. And by shoving them in various places, after you’re done irrigating, you will be able to see whether you’re getting good coverage, like we were just talking about throughout that raised bed. And if not, then you’re going to want to, you know, apply it over the top, like you were saying. Farmer Fred: [17:40] The Soil Sleuth is an interesting contraption. It is so simple to look at. It is ingenious in its design. It looks like a red candy cane. It’s got notches along the inside of the long arm. And basically, you just plunge that candy cane into the ground, give it a quarter turn, lift it out, and there are little pockets of soil on each of those notches that you can feel. Steve Zien: [18:10] Yeah, it’s very, very cool, and it works really well in loose soil. If you’re putting it into clay garden soil, it’ll break it. Farmer Fred: [18:20] And for the folks at Soil Sleuth, if you want to send me some money, I wouldn’t mind. Steve Zien: [18:25] I use both. I use both the soil sleuth and the soil probe. Farmer Fred: [18:30] Okay, explain how the soil probe works. Steve Zien: [18:32] A Soil probe basically is a tube and a portion of the side of it is like an open window. And you push that into the ground, give it a little twist and pull it out. And you will see, you know, the whole thing will be, the whole column of soil will be there. and you will be able to see whether the soil is moist at various depths as far down as you pushed it in. And so what I generally tell people is you use the soil probe to make sure before you irrigate that the soil is dry enough where it merits irrigation because one of the biggest problems people have in areas where you have to irrigate a lot in the summertime because they don’t get rain is they irrigate too frequently. And so the soil stays too wet, especially in like the Sacramento area where we get hot, sunny days. The surface of the soil, if you water in the morning, by the time you get home from work, that surface soil, if you don’t have a mulch on, will be bone dry. And people always think, oh, I need to irrigate again. But if you were to use your soil probe, you would find that you go down an eighth of an inch and that soil is probably moist, if not wet. And so it will, by putting it in the ground and pulling it out, it will indicate when the soil is dry enough for married irrigation. Then how much irrigation do you need? I tell people typically water half as long as you normally do. Wait an hour. Give gravity the chance to pull it down as far as it’s going to go. push the soil probe in the ground again, pull it out, and you will see how far down that water has penetrated. And if it’s gone down four inches and the roots of your plants are going down eight inches, you’ve got to double the amount of water. It does require a little bit of math. Farmer Fred: [20:23] We’ve learned a lot again from Steve Zien, pedologist, soil expert. Steve, thanks for your time. Steve Zien: [20:29] You’re welcome. It’s been fun. Farmer Fred’s Ride for the Kids! I’m fundraising on behalf of the 2025 Sac Century Challenge on Saturday, October 4 to raise money for the Sacramento Children’s Home Crisis Nursery, and I could use your support. Here’s the link. On that date, I’ll probably be riding (it arrived!) my new (and probably last) bike, the FRED OTL (a custom Haley titanium bike, NOT an e-bike). “OTL” - in bike race parlance - stands for “Outside Time Limit”…participants who were sent home for being “dead ass last”. I never said I was fast. But I do persevere to the end. The journey of 100 miles throughout the Sacramento area is to help out the Sacramento Children’s Home Crisis Nursery. I’ve ridden 100 miles in one day plenty of times…when I was younger. But at 74, and with a few health setbacks in 2025, I could use some moral support, and the Sacramento Children’s Home Crisis Nursery can use your pledge money. Because of those health setbacks, I’m having to prepare harder for this event. This will be the slowest century I’ve ever done, probably close to 10 hours on the bike. The doctors have not given their OK (yet) for me to do this, but to paraphrase Willie Nelson, “There’s more old bicyclists than there are old doctors, so I guess we should have another ride!” The Sacramento Children’s Home Crisis Nursery is the only program of its kind in Sacramento County and directly prevents child abuse and neglect by supporting families with small children at times of crisis. The nursery allows parents to bring their children ages newborn to five for emergency hourly or overnight care during difficult times, with the goal of keeping families together and reducing the number of children entering foster care. To care for our community’s most vulnerable children, we rely on support from community members like you. By donating, you empower us to provide a safe haven for children throughout the Sacramento area, offering respite to parents during times of crisis, and building a strong support system for the future. Your support helps provide a safe place to stay local kids in need. Again, here’s the link to make a donation to the Sacramento Children’s Home Crisis Nursery. Say “Hi!” if you see me pedaling like crazy out there on Saturday, October 4th! Thanks for reading Beyond The Garden Basics with Farmer Fred! And thanks for being a subscriber, I appreciate it! Fred Hoffman is also a University of California Cooperative Extension Master Gardener in Sacramento County. And he likes to ride his bike(s). Thank you for your paid support! This is a public episode. If you'd like to discuss this with other subscribers or get access to bonus episodes, visit gardenbasics.substack.com/subscribe
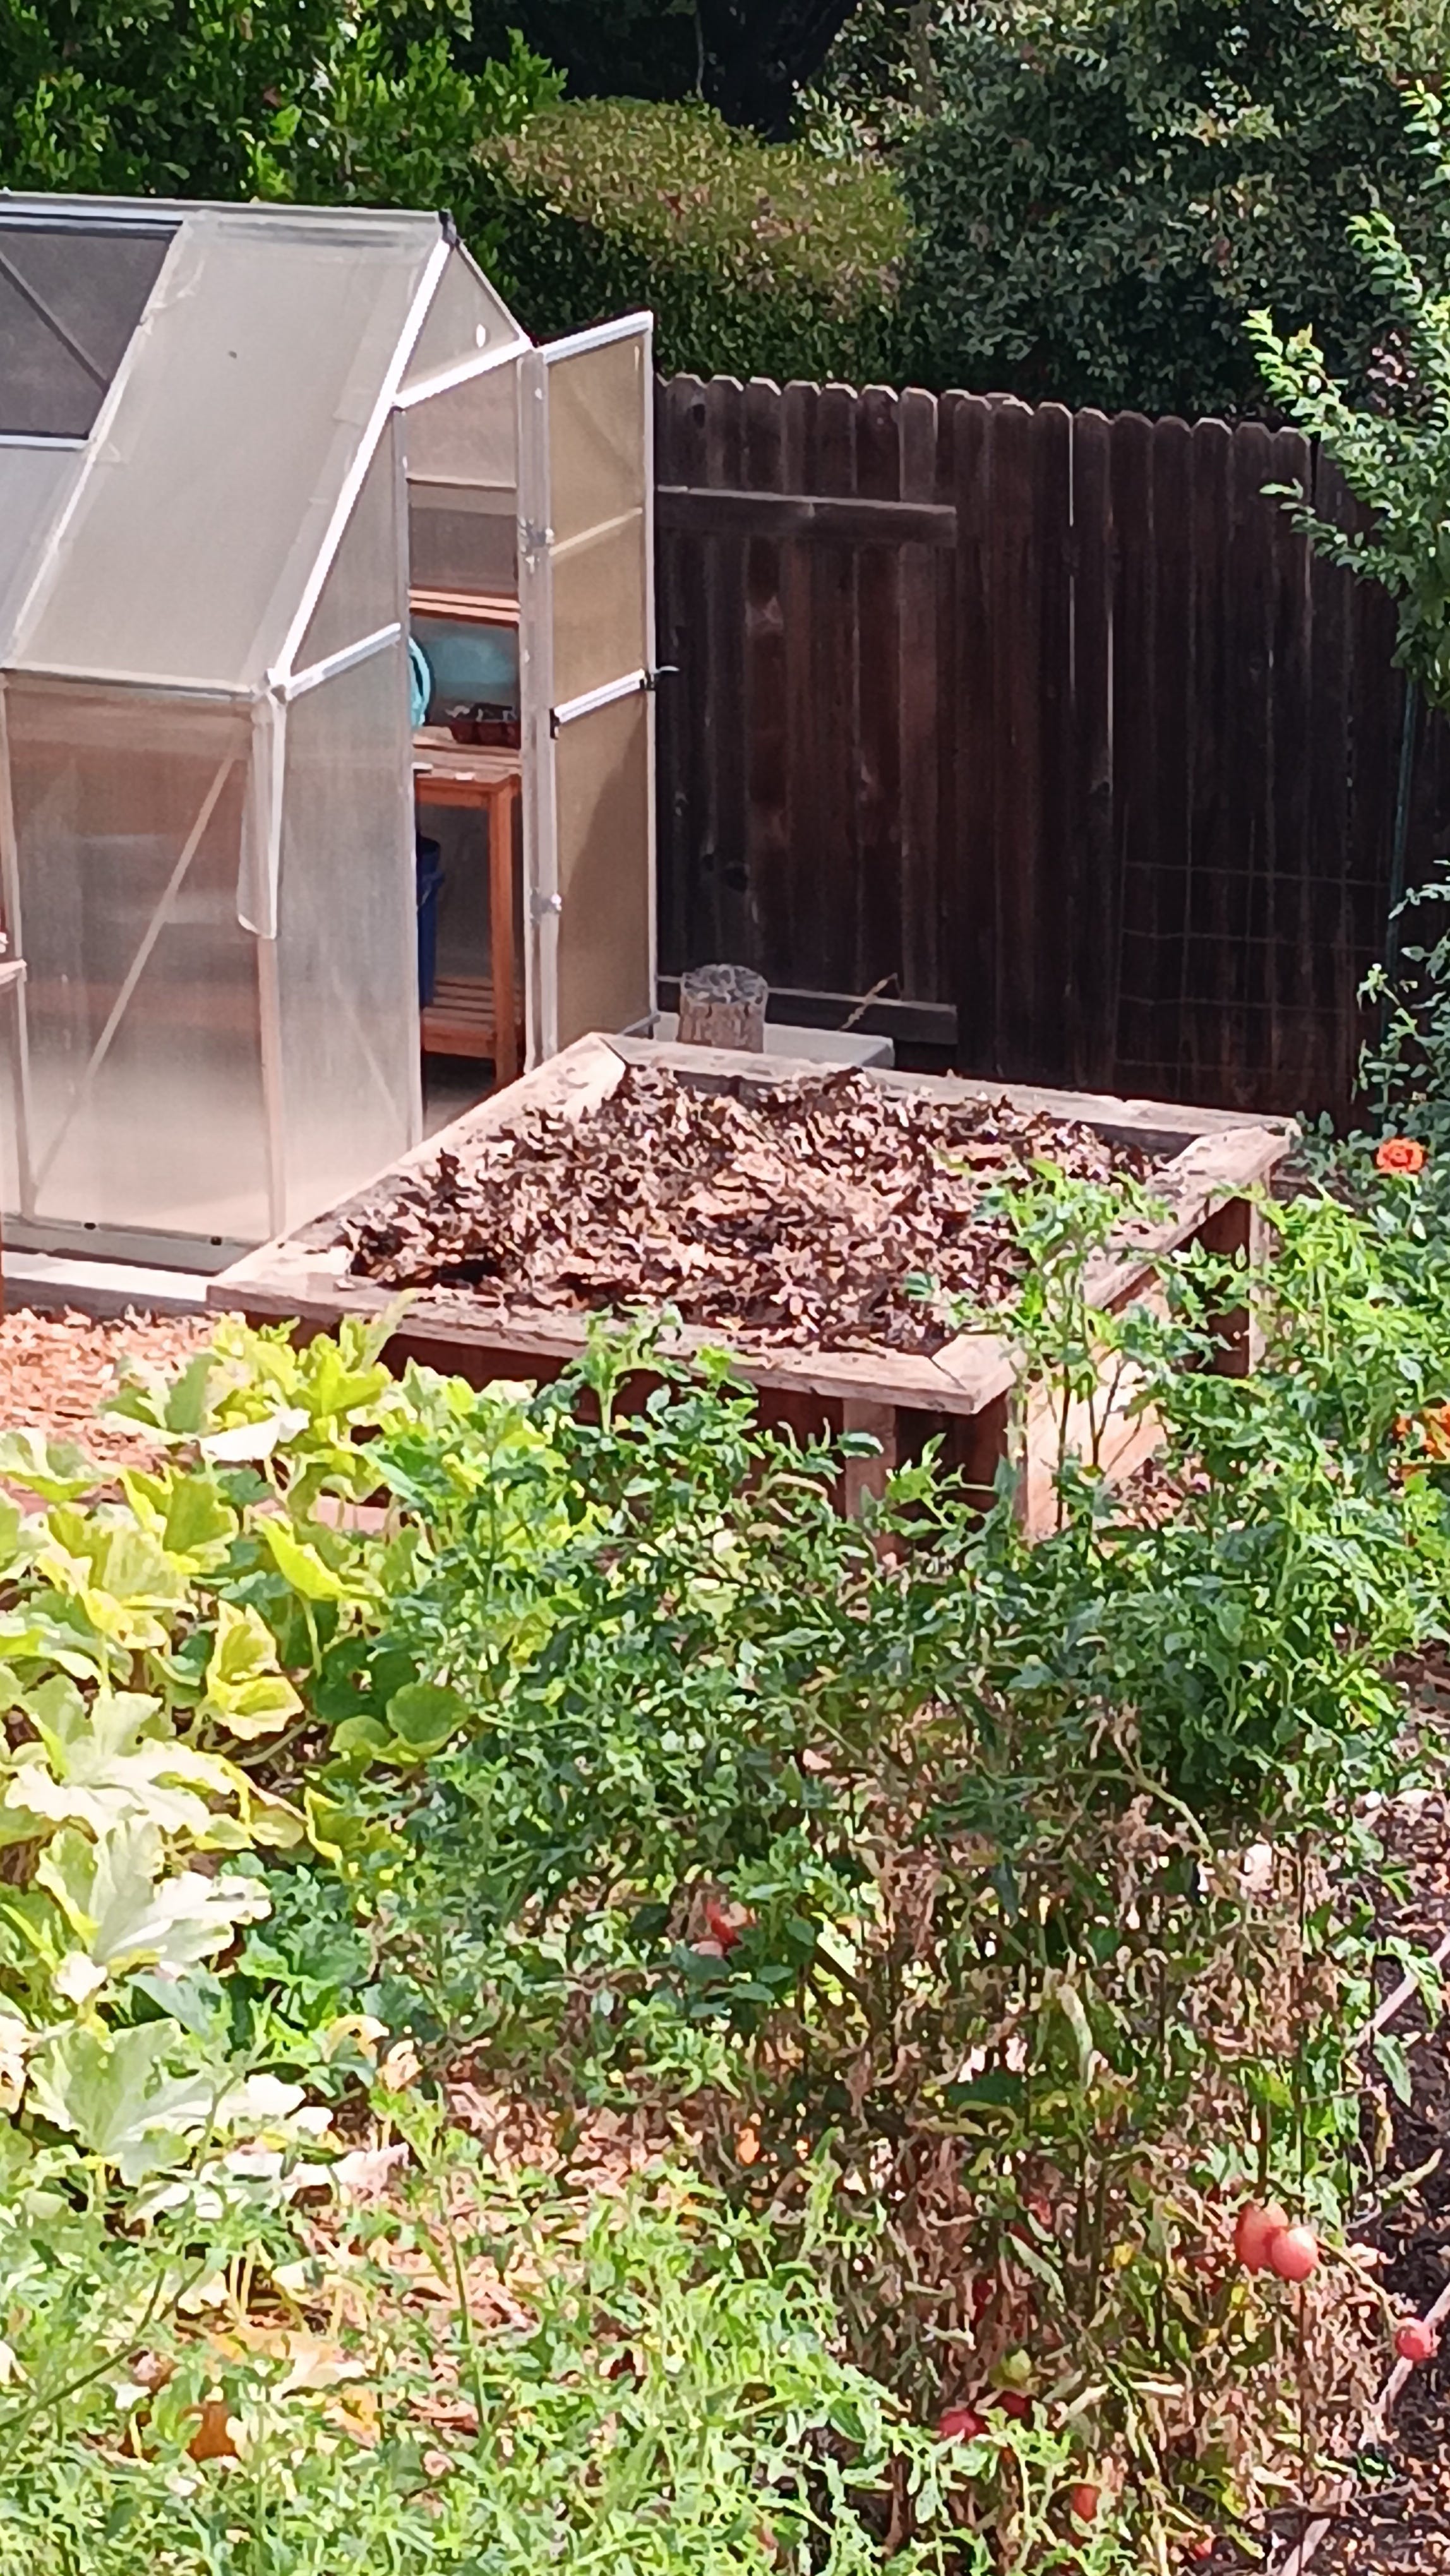
Sep 5
Who's Eating the Tomatoes?
Don from Indiana has a late summer visitor to his tomato plants. He is not pleased: “I flicked 10 of these “bad boys” off one of my tomato plants last night. Ten! I look at this plant every day. I water it every day. I pick and eat tomatoes off it every day. Every day! How did so many appear seemingly overnight? I believe it is a Tobacco Hornworm caterpillar (Manduca sexta). There were actually 11 of them on the plant, but I left the one that had been parasitized. That’s the one with what looks to be little pieces of rice sticking out of its back. I’ve heard you and Debbie Flower talk about this for years, but never witnessed it myself until yesterday. Thanks for the heads up!!” Doug from Sacramento chimes in:"As a first time tomato grower, I have two plants in pots (Patio & Bush Better Boy), and four in the ground (Roma, Sun Gold, Lemon Boy, & Black Krim). Something was eating the young tomatoes in the pots. Upon closer inspection I found three juicy, green caterpillars around the plants. I did some research and they seem to be tomato hornworm (Manduca quinquemaculata) - a common pest and best controlled by hand picking and dumping in soapy water, or allowing the beneficial wasps to do the job.Any other suggestions controlling these tomato eaters?" Doug, one option might be to stick that critter in the envelope that he’s resting on, and mail it to someone you don’t like. However, the envelope may require extra postage. Beyond The Garden Basics with Farmer Fred is a reader-supported publication. To receive new posts and support my work, consider becoming a free or paid subscriber. Either Tobacco or Tomato Hornworms will enjoy your September tomatoes. According to North Carolina St. University: Tomato and tobacco hornworms are closely related species that cause similar damage to the same host plants. Both are equivalent in size and appearance. Tomato hornworms are the larval stage of the fivespotted hawkmoth (Manduca quinquemaculata) and tobacco hornworms are the larval stage of the Carolina sphinx moth (Manduca sexta). Tomato and tobacco hornworms can both be found attacking host plants. Host plants of both species include members of the Solanaceae family such as tomato, pepper, potato, eggplant, along with various nightshade flowering plants. Additionally, tobacco is also targeted by tobacco hornworm. This time of year, many backyard gardeners, in addition to Don and Doug, are glaring at their partially eaten tomato plants, and muttering under their breath, "Just where do these blankety-blank tomato worms come from?" Contrary to a popular urban legend, the larvae of the tomato hornworm do not lurk inside tomato seeds, a diabolical plot between seed growers and chemical manufacturers to increase profits. Nor are the worms drawn by the scent of your tomato plants from deep within your garden soil, emerging forth to wreak havoc.The tomato and tobacco hornworm begin their life cycle as a small, singular, light green egg, about the size of a thick pinhead, laid in late spring and early summer on the underside of a tomato leaf. That egg got there courtesy of a flying culprit, the sphinx moth. Both the tomato hornworm sphinx moth and the tobacco hornworm sphinx moth have similar features: about a four-inch-wide wingspan, gray body, brown wing streaks as well as yellow and white body markings. The egg laid by the sphinx moth hatches within a week, and the emerging hornworm (technically, a caterpillar) begins eating. And eating. And growing. A full-grown hornworm, satiated by its tomato plant diet (supplemented with whatever else is handy, including potatoes, eggplants and peppers) can get up to four inches long. If you miss catching the tomato hornworms, these critters will descend into the soil at the end of the season, wrapping themselves into a cocoon: Disking or rototilling after harvest destroys their pupae in the soil and prevents the adult moths from developing and emerging from the soil the following spring. Again. Hand snipping the tomato worms with scissors or pruners can be a satisfying evening chore. The trick, as seasoned gardeners know, is trying to find the hornworms in the first place. Tracing their black, pellet-shaped excrement from the ground back up the plant usually yields successful results. The best time to find them is in the cool of the morning or evening. Another popular tomato worm hangout: the tender, new growth at the top and sides of tomato plants. If you prefer to douse tomato hornworms in chemicals, use one registered for use on this pest. Soaps and oils might slow them down but won’t kill them. What does work are stomach poisons that contain a bacterial insecticide, such as Bacillus thuringiensis (Bt) or spinosad . They can be applied directly to the offending hornworms. However, this works best while the worms are still small. The bigger ones are more problematic, but there may be help already at work in your yard. Encouraging birds to hang around your property is a good strategy. They enjoy these green treats. Dense, broadleaf evergreen shrubs are a favorite hangout of many birds. ( More info to attract birds )Besides birds, the tomato experts at UC Davis point out that there are a lot of garden good guys that can help you battle the hornworms. The UCD Integrated Pest Management website says: “Natural enemies normally keep tomato hornworm populations under control. Hornworm eggs are attacked by Trichogramma parasites (a small wasp); another small wasp, Hyposoter exiguae, attacks the larvae." There are also several general predators to keep hornworm populations under control, including green lacewings, damsel bugs, assassin bugs, big-eyed bugs, minute pirate bugs, soldier beetles, ground beetles, and spiders. Fred Hoffman is also a University of California Cooperative Extension Master Gardener in Sacramento County. And he likes to ride his bike(s). Farmer Fred’s Charity “Ride for the Kids” is coming up Saturday October 4. Thank you for your paid support! This is a public episode. If you'd like to discuss this with other subscribers or get access to bonus episodes, visit gardenbasics.substack.com/subscribe

Aug 22
More Tips for a Successful Garden
While editing Episode 406 of the Garden Basics with Farmer Fred podcast (out now), I was taking copious notes, about all the great garden tips Don Shor and I discussed in an episode that was ostensibly a chat about growing tomatoes this summer (we both like Cupid , despite its propensity to sprawl). In fact, it was the most notes I have ever taken for any episode. Were you taking notes, too, while listening? If so, I hope you weren’t driving. But I’ll make it easier for you: check out the transcript of today’s episode, especially the more accurate transcripts that you’ll find at our website, gardenbasics.net , or at our podcast uploader, Buzzsprout , and discover your own “Aha!” garden moments. TIP #1: START WITH EVENLY MOIST SOIL We have discussed this several times on the podcast. First, with America’s Favorite Retired College Horticulture Professor, Debbie Flower, when talking about reusing old potting soil for container planting, in Episode 172 in the Garden Basics podcast. Debbie stressed the importance of getting the soil thoroughly moistened before planting: Farmer Fred Debbie, it's that time of year or and people are going to go out to get plants, or they're going to get seed. And they may be buying soil. But before they buy soil, they may take a look around their yard and they see all these pots with no plants in them, but they're full of soil. There might be nurseries that might say, "Oh, you don't want to use that. You need to buy our new soil." But that old soil that you have, I guess it really depends what's in it and what it is, and what it needs. Right? And can it be reused? Debbie Flower Yes, I reuse potting soil all the time, I have many instances where I look around and there are pots with dead things in them. As I said to my cousin, I still kill plants, I just know how to do the autopsy. I typically know or have an idea of what killed them as well. I take out the what is left of the plant, there's often a decent root system, I'll bang it around on my potting bench and get off as much of the container media as I can from those roots. And notice I say container media. This is not field soil. I use kitty litter boxes that I bought specifically for the purpose of mixing media. And I dump it in there, mix it up with whatever else I have and reuse it. I very often add a rock component to that reusable media and some new bagged container media. Container media is not soil, it is organic matter. Plus some typically rock components. Peat Moss, coir or compost are usually the organic matter. And then the rock components are perlite, vermiculite, pumice, sand, something like that. And it's often one part of the organic matter to two parts of the sand component. And the reason for that is that over time the organic component breaks down. And as it breaks down, the particles get smaller. And the space between the particles where the air and water hang out in a container gets smaller and the plant starts to suffer. So a plant has died in the container media. It's been in there some period of time and a container, the organic component of that container media has broken down. So the pore spaces, the open spaces between the components of container media have gotten too small, or they've definitely gotten smaller, they may have gotten too small for roots to actively live in there. So I want to fix that. That's one thing I want to fix, is particle size. So I do that by adding some new media from a bag and usually more rock components. Mix them together, get the texture I do very much by feel and I don't have recipes, and then I'll reuse them. I will never reuse media to start seeds in. To start seeds, you want things sterile. You want the pots to be absolutely clean and you want the media to be unused. So I'm not using it for that. But I will move my houseplants up to a bigger size or my seedlings that I started in six packs all the way up to four inch pots, something like that, using this reused media. The other thing that I need to worry about with the media is the salt component. Salt is fertilizer. Fertilizer has to be in the salt form for the plant to be able to take it up. It has to be able to dissolve in water and move to the plants roots and enter the plants roots. And so that's the salt form. And if there's too much of that in there, the pH of the soil will go up, so the soil will be too alkaline. When that happens, then nutrients that are in the soil become unavailable to the plant. The easiest way to do that is just flush the the media with freshwater for several minutes and allow it to come out through the drain holes of the pot. But yes, I absolutely reuse media frequently. Farmer Fred To your last point there. One thing I do is, I get myself a five gallon bucket. And I will take that old container mix and put it in the bucket because usually peat moss is part of that. It is hard to rewet. So I put it in a bucket with no drain holes, I will put that soil mix and then fill the bucket with water and then go do something else. When I come back several hours later, that moisture has basically permeated throughout that entire body of that potting soil. And I then transfer the potting soil to large plastic containers with drain holes and let the whole thing drain. And then I can get in there with my hands and grab the soil and refill whatever pot I was going to do, knowing that it's thoroughly moist. Debbie Flower Yes, potting soil can dry out to beyond rewetting easily. And so you're right. You have to soak it or you can use if you're anxious, you can use warmer water and work with your hands and maybe just a drop, literally just a drop, of dish soap. And you want it to be soap it really would be better to use castile soap or ivory soap, not detergent. But that helps breaks down the surface tension of water and allows it to permeate the particles of the container media more easily. But I always have my soil moist before from top to bottom before I put it in a container. ======================= And that brings us to Episode 227 “Understanding Drip Irrigation ” and garden author Robert Kourik expanding upon the importance of starting with thoroughly moist raised bed soil, especially with a drip irrigation system. You can hear what he had to say specifically about prepping a raised bed with a drip irrigation system in the podcast excerpt at the top of this page. Or, read this abbreviated transcript of that topic: Robert Kourik Basically, if you turn on the drip on a regular basis, and keep the soil moisture consistent, the roots don't go into any shock. Now we're not talking about wet soil. Some people get carried away and turning the system on too long. We're talking about so moist as you can hardly see the color difference, but the water is there, the moisture is there for the roots, they know it's there. Whereas we may not be able to see it as much in a color difference. But the point being, if you maintain a consistent moisture level, for the whole growing season, things never dampened down or stress out from too much water or stress out from too much drought between cycles. So that's where people say, Oh, I'm going to water every Saturday or twice a month or once a month, well that puts you through these cycles where the soil gets dry enough that the roots aren't happy, then you have some run the system longer to get the soil moist again, and then oftentimes it gets too wet and the roots aren't happy because they're not able to get as much air. So the deal about getting greater yields is to turn the system on on a frequent basis. And this is really hard for people digest because they always heard Oh turn it on and off once a month or once a week or water infrequently but deep. Well, most of the roots are in the top six to 12 inches. So that's that's as deep as I worry about. Farmer Fred You do advise though, before you go to this daily watering regimen that you thoroughly soak the garden, especially if it's a raised bed, make sure that the whole area is saturated. And then you can do that daily spurt, if you will. Robert Kourik Yes. And so that means once you know how to base the irrigation on the weather, you adjust the system to come on every day but you just for tiny amounts of water. It's like a lot of systems I'm doing one to three minutes a day to keep things happening. At the most sometimes you only need 15 minutes a day depends on the amount of water you need to apply. But the point being that this way of approaching it, you can get at least on the average 20% increase in yields. There's a woman in India that did chili peppers, and she is 38% less water but she got a 48% increase in the yields. So it can be quite dramatic. ============================ And that brings us to the current Garden Basics podcast episode (406) in which Don Shor of Redwood Barn Nursery in Davis, CA advises the same, in the first of several great garden success tips mentioned in the episode: Don Shor: So raised planters have special issues that require some consideration, especially as you adopt your irrigation practices for the season. You put in your drip lines and you turn them on, and you just filled it with the fanciest soil you could buy from that rock yard and you're basically growing things in potting soil. So it is going to probably be necessary the first year, the second year that you have raised planters to water daily. That's just, it's frustrating to have to tell people that. When I say daily, I don't mean three minutes, seven minutes. I mean 35 or 40 minutes each day with a drip system that distributes properly. And I believe you discovered, for example, that a four foot wide bed needed more than four lines going down it. Farmer Fred: Yeah, woe to those who have only one or two lines in a four-foot-wide bed, but I basically space my lateral lines eight inches apart, so it's usually five lines in a four-foot-wide bed. Don: But the conversations I'm having with people about irrigation have been frustrating. Oftentimes, I find myself saying, okay, try this. Go home. You know how to bypass your timer, right? Okay, go out to the knob, turn on the drip system, and let it run all afternoon right now. What? All afternoon? That's overwatering. Well, first of all, that's a term we should just stop using because it doesn't have any specific meaning. Second, you need to get the soil back to field capacity. All right, I've jumped into soil science jargon there, but you need to saturate the soil completely, let it drain out, and then go back to the perhaps lighter irrigation pattern you had been doing. They all forget that the first part of drip irrigation is bringing the soil to field capacity. So sometimes when they bring in a sample of a plant that's showing clear drought stress, I'll say, I just want you to soak the heck out of your whole area. Not just the raised planter, soil around it, the shrubs nearby, the beneficial insects will appreciate it. Don Shor: Just give everything, pretend we're having a three inch rainstorm in the middle of June. Then you can go back to relatively light waterings if you have to do that, but you don't, you didn't bank enough moisture at the beginning of the season. It's really what it comes down to. Those of us with open garden beds, we can deep water because soil just goes as deep as we want. So I can go out there and set a drip line and run for two or three hours and give a really good soaking. And I don't have to do that again for three or four days, sometimes even longer, depending on where you're listening, what your soil is like. But raised planters, you do need to give it a very thorough watering and you have to do it more frequently. So that's the first thing right there. That's the negative part. People aren't watering enough. ========================== Tip #2: MODIFY THE RAISED BED SOIL TO RETAIN MORE MOISTURE Farmer Fred: That's why modifying the soil in a raised bed is so important by adding that compost, the worm castings, and the mulch. That mulch does a lot to preserve soil moisture. Don Shor: Yeah. And the other thing I do is I cut plants off, this is just a little trick I learned years ago, rather than pulling them at the end of the season, I'll pull one or two to check the roots. I like to look for nematodes and things like that. But the rest of them get cut off, and I take the top and pile it up. I don't have a formal compost pile, but if I did, it would go into that. Then the roots just disintegrate on site. They break down and make macro pores. They make actual channels that water and nutrients can go down and furthering via. So this is a simple method of building your soil the easy way. Rather than turning it, which we don't think is a great plan, mulch heavily, like you're talking about with leaves and let the roots break down naturally in situ and the plants will benefit in the spring as they explore the newly enriched soil that you created by fall and winter mulch. ======================== TIP #3: HARVEST TOMATOES EARLY WHEN WEATHER THREATENS (too hot or too cold) Don Shor: That gets into another thing, which is harvesting the fruit, to avoid weather problems and avoid injury from various predators, you know, getting out there and picking them just when they're beginning to ripen rather than letting, trying to let them go fully ripe on the vine. Get into October, November, the nights are getting colder. You're probably better off picking some of those and bringing them in and ripening them on the counter. Also, harvest tomatoes when extended heat waves are forecast, even if the tomatoes are not fully colored. We went into detail about that in the Aug. 25, 2023 newsletter edition, “ Tomatoes Not Ripening? Blame the Heat ”. =================== TIP #4 IMPORTANCE OF MID-SUMMER FERTILIZATION OF PEPPERS, EGGPLANTS Don Shor: You can get really good (autumn) yields here from your vegetable garden if you deep water in August and early September. One thing I would add is a little bit of fertilizer, especially on the peppers, eggplant, cucumbers maybe, but especially peppers and eggplant to keep them going can make a big difference. Whatever you prefer to use, liquid fertilizer, fish emulsion, your favorite granular fertilizer that they sell at the local garden center. Those are all fine. You don't generally need to feed your tomatoes to keep them going. I don't really push nitrogen for tomatoes, but for the peppers and eggplant, and I would say the cucumbers, a light feeding mid-August is actually very beneficial to get that late season crop that we've been talking about. Farmer Fred: A very good tip to end on here in mid-summer in 2025. ============================ Finally, a bit of info about that picture at the beginning of the newsletter, the Genuwine tomato, a part of a growing trend of hybridizing two different heirloom varieties, also discussed in Ep. 406: Don Shor: Now some of the companies have been hybridizing heirlooms. We want to confuse the public. Hybridizing heirlooms. Now what do we call them? But there are some that I tried this year. These heirloom marriage varieties. And a good example is one called Genuwine. Well, it's producing a lot of fruit for me. It's got 30 or 40 on it right now. It was one of the later ones I planted, end of March. And they're good size. They're beautiful fruit. And it's a cross between Costoluto Genovese and Brandywine. Don Shor: So the Costoluto Genovese part is fine. That's always done very well for me. It's an Italian heirloom and loves the heat. But Brandywine, no, that's one that I don't recommend at all because they generally, let's say I've been skunked by tomato varieties occasionally where I planted a plant and gotten zero or one or two fruit on a vigorous plant. Brandywine's done that to me every time I plant it. It just does not take the heat. So I was a little skeptical, but I figured I'll give this one a try. It has done very well, and it looks like it's going to be a very good producer this year, 2025, with a relatively mild summer. It's looking like a very good possibility. And it looks like a good slicer. It's got great flavor. And so I have good hopes for the Genuwine, one of the heirloom marriage types. Ball Seed Company seems to be the introducer on these, although I don't know if it's their product line. they're the ones that i got the information from so that looks like a good one. And then there's another one called Marzinera, Well, what is Marzinera? Marzinera is a cross between San Marzano, one of the best-known sauce tomatoes in the world, and another variety that I've never heard of, Cream Sausage is the other one. Farmer Fred: Oh, yeah, I've had that. I've actually planted that, yeah. Don Shor: Okay, and it's a firm, I gather, firm, meaty sauce-type tomato. So far, Marzinera is one of my top producers this season. Smaller fruit, Roma style, San Marzano style. The thing about San Marzano is that it's a skinny fruit. It's kind of hollow. It's got a lot of meat, but not a lot of juice. And so it takes a lot of it to make a sauce, but it's got a legendary reputation. I mean, it's been around forever. It's actually a special variety. You can only label your cans “San Marzano” if you're from a particular part of Italy, that kind of thing. This is a more useful fruit to me. It's got more meat to the fruit and it's got really good flavor. So Marzinera looks very promising in this heirloom marriage product line. Farmer Fred: Going back to the Genuwine tomato, since one of its parents is a Costoluto Genovese, one of the problems I've always had with the Costoluto Genovese is it gets soft on the vine very quickly. You have to go out there and squeeze it every day to figure out if it's ripe or not, and then don't leave it out there, but bring it in. Don Shor: And use it right away. It has to go right in the pot. Yeah. So this one looks firmer than that. It looks like it's got more of that Brandywine parentage in that regard. So I'll definitely give you, in a wrap-up program in the end of the fall or in the beginning of next spring, we'll talk about this one. But it looks real promising. It does not seem to have that quick softening characteristic of Costoluto Genovese, but it has the flavor and it has the rich appearance. In all, we probably discussed close to two dozen different tomato varieties in Episode 406 of the Garden Basics podcast . Check it out if you want something new and delicious for 2026. Of course, your weather - and success - may vary. Who was it that keeps saying “All Gardening is Local”?…oh, yeah. Beyond The Garden Basics with Farmer Fred is a reader-supported publication. To receive new posts and support my work, consider becoming a free or paid subscriber. Farmer Fred’s Ride for the Kids! I'm fundraising on behalf of the 2025 Sacramento Century Challenge on Saturday, October 4 to raise money for the Sacramento Children's Home Crisis Nursery, and I could use your support. Here’s the link. The journey of 100 miles along the Sacramento River is to help out the Sacramento Children’s Home Crisis Nursery. I’ve ridden 100 miles in one day plenty of times…when I was younger. But at 74, and with a few health setbacks in 2025, I could use some moral support, and the Sacramento Children’s Home Crisis Nursery can use your pledge money. So, how about it? Maybe pledge 10 cents a mile (that’s $10) along with a hearty, “You go, Fred!” Or a more generous one dollar a mile ($100), to give me the mental endurance for the entire ride, to dodge the pothole-filled levee roads and pedal harder in the ferocious headwinds that makes this ride a real challenge! The Sacramento Children's Home Crisis Nursery is the only program of its kind in Sacramento County and directly prevents child abuse and neglect by supporting families with small children at times of crisis. The nursery allows parents to bring their children ages newborn to five for emergency hourly or overnight care during difficult times, with the goal of keeping families together and reducing the number of children entering foster care. To care for our community's most vulnerable children, we rely on support from community members like you. By donating, you empower us to provide a safe haven for children throughout the Sacramento area, offering respite to parents during times of crisis, and building a strong support system for the future. Your support helps provide a safe place to stay local kids in need. Again, here’s the link to make a donation to the Sacramento Children’s Home Crisis Nursery. Thank you for your support, and say "Hi!" if you see me pedaling like crazy out there on Saturday, October 4th! Fred Hoffman is also a University of California Cooperative Extension Master Gardener in Sacramento County. And he likes to ride his bike(s). Thank you for your paid support! This is a public episode. If you'd like to discuss this with other subscribers or get access to bonus episodes, visit gardenbasics.substack.com/subscribe
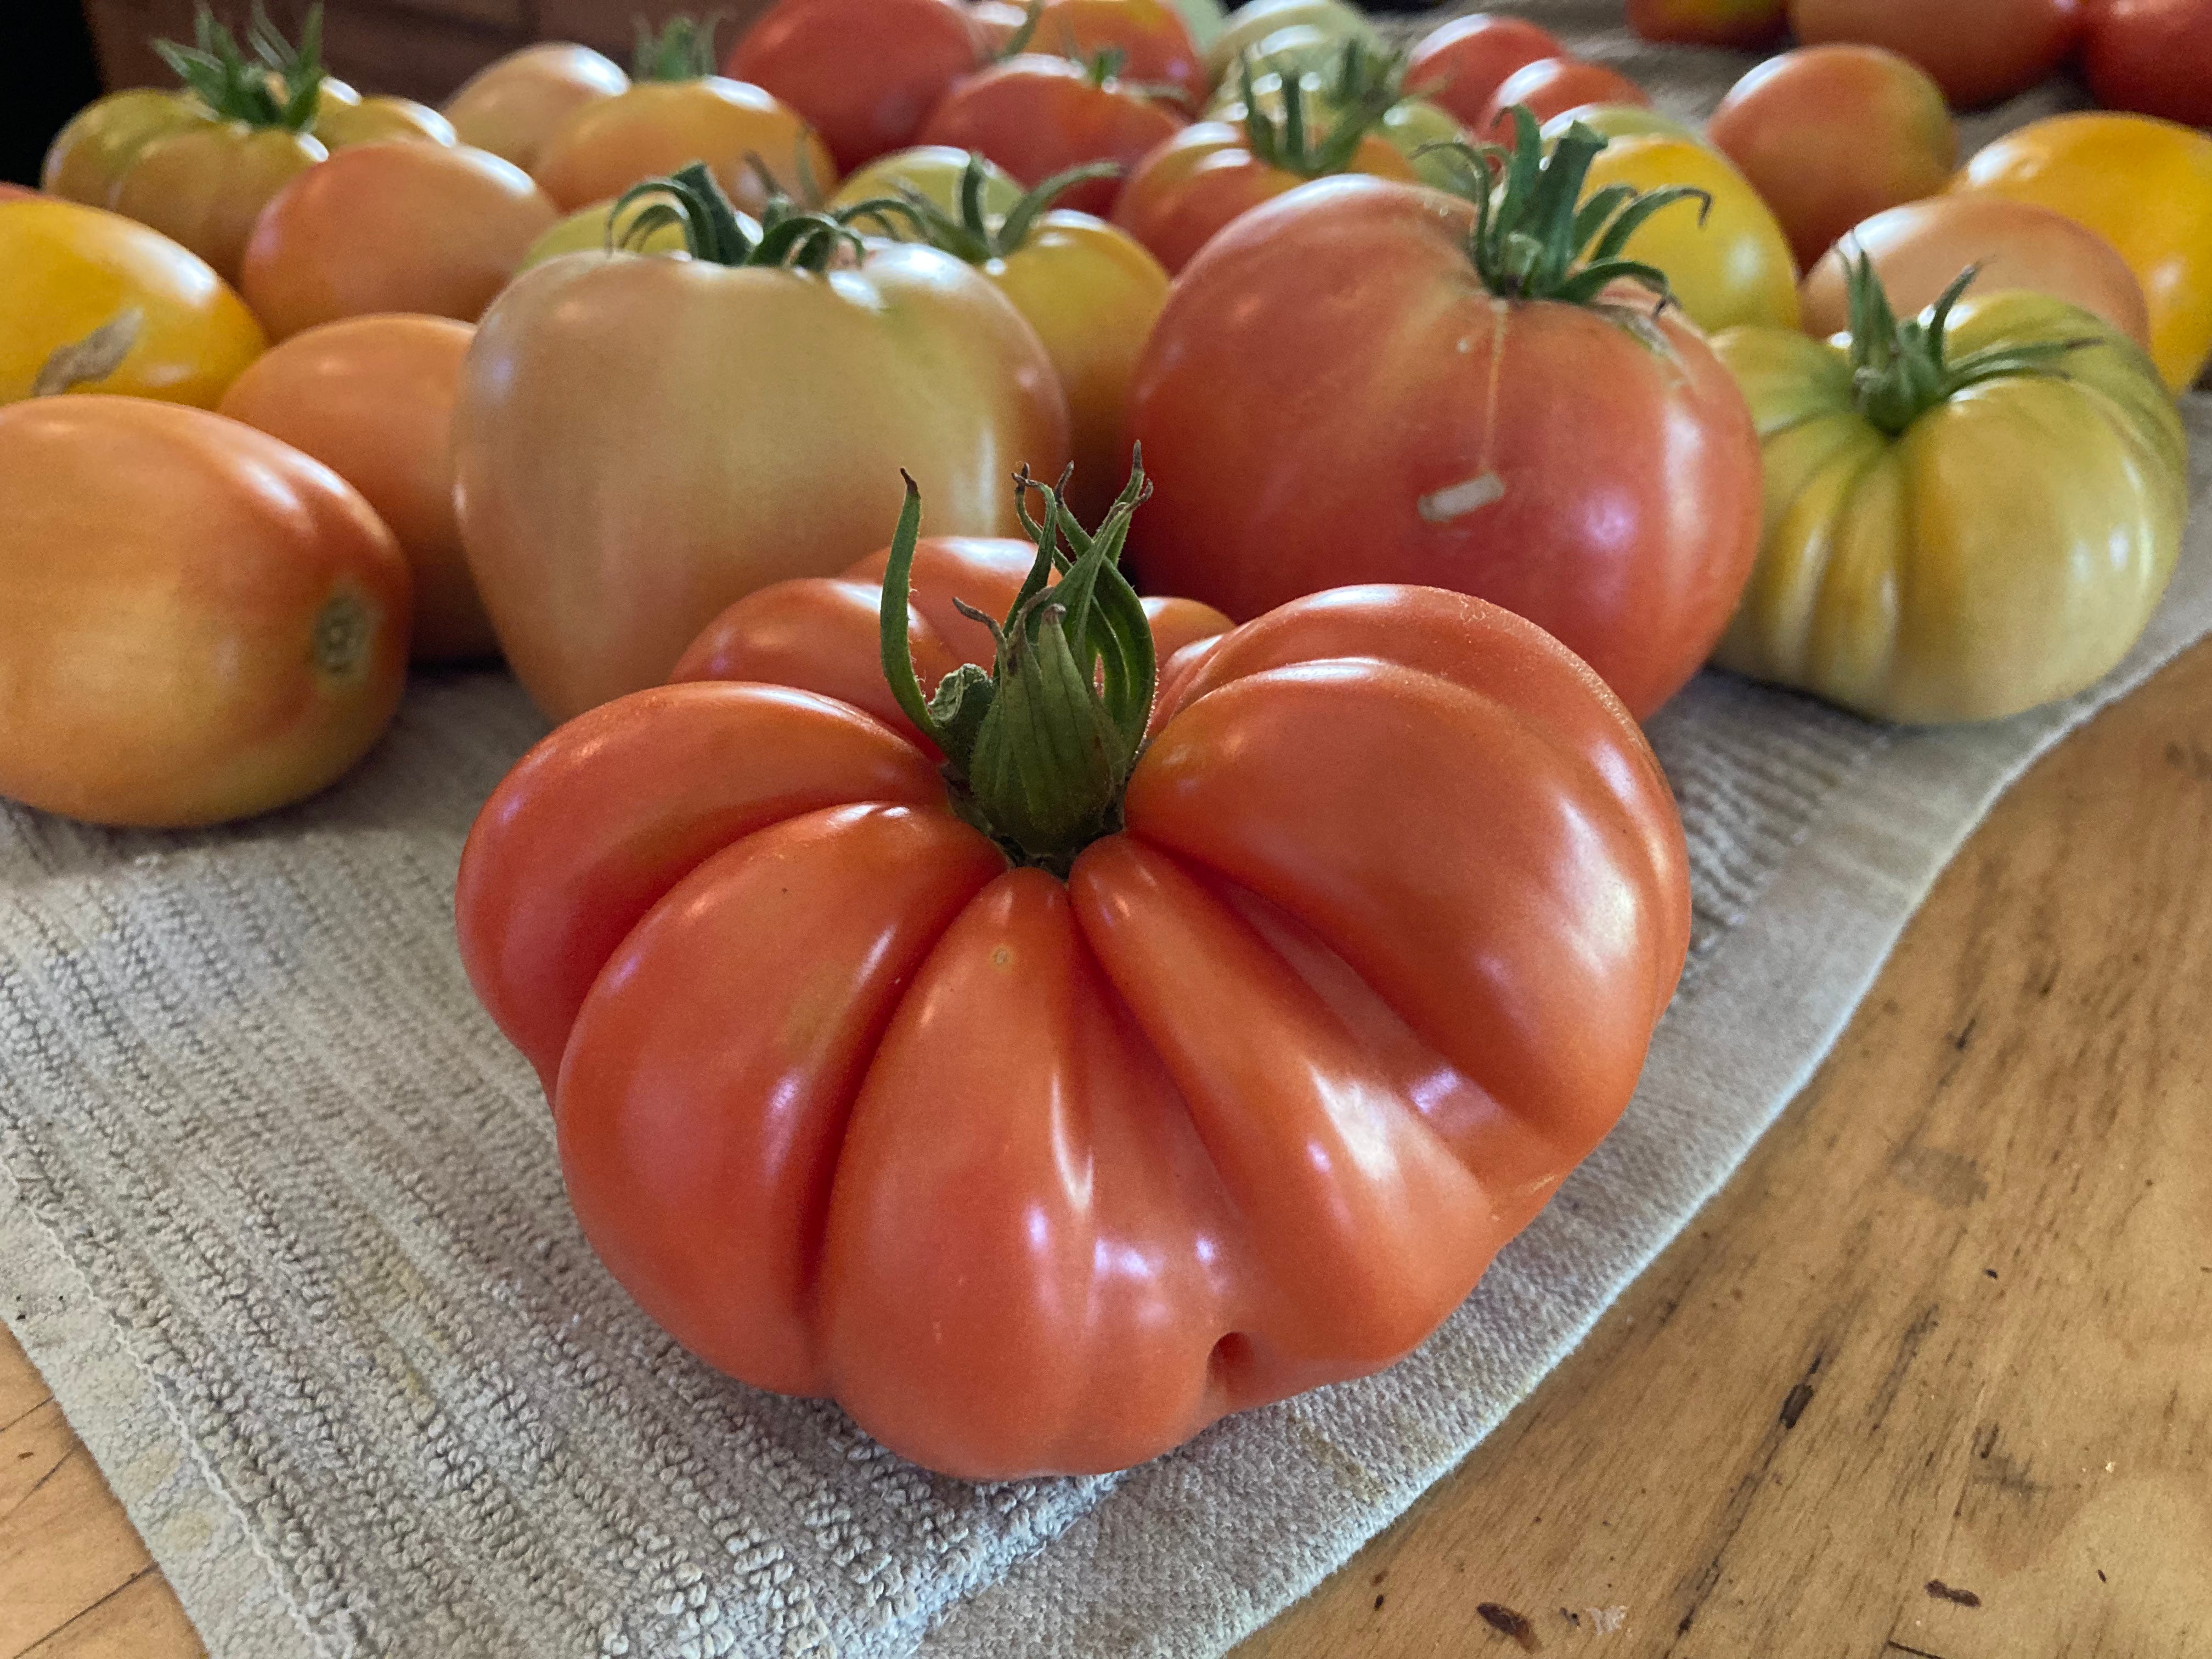
Aug 15
This Newsletter is for the Birds
In the podcast (above) retired UC Farm Advisor Rachel Long has tips for attracting songbirds to your property. They're nice to look at, sing wonderfully and eat insects. No, we're not talking about the Dixie Chicks on a fad diet. It's the gardener's best friends, a backyard filled with birds.We're talking about the family inhabited by warm-blooded egg-laying vertebrates, characterized by feathers and forelimbs modified as wings. Yes, real birds will nibble on your cherries and grapes (that's why there's bird netting), but birds can help control the bad bug population in your garden, especially tomato hornworms, cabbage loopers and redhumped caterpillars. Birds also control the spread of weeds by eating the seeds of unwanted plants; bigger birds, such as owls and hawks, will swoop down and devour rodents. Birds require little in return from you for their labors: trees and shrubs for shelter, perhaps some berry-filled plants (cotoneaster, pyracantha, toyon and more ) and fresh water. Bird Baths Attract Birds (especially with gently moving water) Birds aren't too particular about their watering sites. All they are looking for is a shallow pan, about two to three feet wide and no more than three inches deep, with sloping sides so they can ease their way in, placed in an area away from fence tops and foliage where they can keep an eye out for their main predator, Mr. Kitty. A birdbath can be as elegant as a thousand dollar, terracotta fountain with a waterfall; or, as simple as an old metal garbage can lid placed on the ground. Here are some tips for keeping the thirsty birds happy: • Keep the birdbath water fresh and filled during hot weather. On freezing mornings, adding hot water can help break up the thin sheet of ice. • Clean out birdbaths with a powerful jet of water from the hose; or, use a plastic scouring pad. • Do not add chemicals, such as bleach, to control algae. Do not add antifreeze to keep ice from forming. If you must use bleach to clean an algae-filled birdbath, cover it with screening for a few hours to keep the birds away. Empty and rinse the birdbath after that and refill with fresh water. • Birds are attracted by the sound of gently moving water. A simple drip irrigation mini-sprinkler installed adjacent to the birdbath will be a popular addition. Hanging a dripping bucket in a tree above a bird bath can attract birds, too. • An exposed rock placed in the middle of birdbaths with straight edges give birds a place to land and check things out. • If the only area you can place a birdbath is near dense shrubbery, it is important to put the bath on a pedestal for their protection. • Situate birdbaths in areas where you can enjoy them, near a faucet for easy cleaning and filling.• Then, sit back and enjoy the show! Beyond The Garden Basics with Farmer Fred is a reader-supported publication. To receive new posts and support my work, consider becoming a free or paid subscriber. Farmer Fred’s Ride for the Kids! I'm fundraising on behalf of the 2025 Sacramento Century Challenge on Saturday, October 4 to raise money for the Sacramento Children's Home Crisis Nursery, and I could use your support. Here’s the link. On that date, I’ll probably be riding my new (and probably last) bike, the FRED OTL (a custom Haley titanium bike, NOT an e-bike). “OTL” - in bike race parlance - stands for “Outside Time Limit”…participants who were sent home for being “dead ass last”. I never said I was fast. But I do try to persevere to the end. The journey of 100 miles along the Sacramento River is to help out the Sacramento Children’s Home Crisis Nursery. I’ve ridden 100 miles in one day plenty of times…when I was younger. But at 74, and with a few health setbacks in 2025, I could use some moral support, and the Sacramento Children’s Home Crisis Nursery can use your pledge money. So, how about it? Maybe pledge 10 cents a mile (that’s $10) along with a hearty, “You go, Fred!” Or a more generous one dollar a mile ($100), to give me the mental endurance for the entire ride, to dodge the pothole-filled levee roads and pedal harder in the ferocious headwinds that makes this ride a real challenge! The Sacramento Children's Home Crisis Nursery is the only program of its kind in Sacramento County and directly prevents child abuse and neglect by supporting families with small children at times of crisis. The nursery allows parents to bring their children ages newborn to five for emergency hourly or overnight care during difficult times, with the goal of keeping families together and reducing the number of children entering foster care. To care for our community's most vulnerable children, we rely on support from community members like you. By donating, you empower us to provide a safe haven for children throughout the Sacramento area, offering respite to parents during times of crisis, and building a strong support system for the future. Your support helps provide a safe place to stay local kids in need. Again, here’s the link to make a donation to the Sacramento Children’s Home Crisis Nursery. Thank you for your support, and say "Hi!" if you see me pedaling like crazy out there on Saturday, October 4th! This is a public episode. If you'd like to discuss this with other subscribers or get access to bonus episodes, visit gardenbasics.substack.com/subscribe

Aug 8
Garden Tips from the Experts
One of the best places to get your garden questions answered (or pick up the 2026 Sac Co Master Gardener Gardening Guide and Calendar ) is at the annual gathering of Master Gardeners, gardening professionals, and horticultural consultants at Harvest Day, held the first Saturday of August each year at the Fair Oaks Horticulture Center in Sacramento County. And last Saturday was no exception. A question I posed to several dozen of the pros there was this: “What is the one garden tip you would like people to know?” Here’s a sampling of their answers. You can listen to all the tips in the podcast, above, which is a copy of the entire Episode 404 of the Garden Basics podcast. • Dave Roberts, of the Sacramento Cactus and Succulent Society: “You got to have excellent drainage for cactus and succulents. They thrive on soils that will drain right through, with low amounts of organic material. And if you have that formula, you're going to be successful. Cactus and succulents are not heavy feeders. I feed my potted cactus and succulents two to three times at most during the growing season. Very lightly, not a heavy dose. It’s different from the way we treat our vegetables and flowering plants. Those rules do not apply to succulents. So, if you have heavy clay soil, you may want to consider growing cactus and succulents in containers.” • Charlotte Owendyk, Master Rosarian – Sierra Foothills Rose Society : “One of the things I like to suggest to anyone who has potted plants is to use a fish emulsion fertilizer periodically. Perhaps once a week or so. Fertilizing with fish emulsion really makes your potted roses or any potted plant do well.” • Chris Aycock, El Dorado Nursery and Garden, Shingle Springs : “If you really want to keep the deer out, you do need to build a fence. You can spray all the repellents all you want, and it will deter them, temporarily. You need to switch off repellents so that they don't get used to one thing. But fencing is your best friend for keeping the deer out. Enjoy the view of those deer, from the other side of the fence. Trap crops on the outer perimeter of your yard – which are plants the deer will enjoy, will not keep them from coming in any further. Anytime you put a food source out there for them, you're just inviting them in saying, ‘hey, look this dining room's open for grazing!’ They can sustain themselves. You don't need to feed them.” • Anita Clevenger, Master Gardener, perennial plant expert : “Cutting plants back in the summer will help them bloom again. We have plants here in the perennial garden like the catmint and the Santa Barbara daisy. And they just love a refresher light pruning earlier in the summer after their first bloom. You cut them back hard generally in the winter, along with many other perennials. But for these plants, after they've done their spring bloom, if you cut them back, they will get a whole new fresh breath and a fresh flush of flowers and leaves.” • Garry Chin, Sierra Foothills Rose Society : “If you are interested in growing roses, one of my recommendations is to join a local rose society wherever you live. And then join the national organizations, such as the American Rose Society. Do that and you'll find out about the latest things that are going on with roses at the national level.” • Grace Amico, Miridae Mobile Nursery , which specializes in California Native plants: “With native plants, you must be careful with watering. In their first two or three years, you will need to add more water than you might think. And then after that first few years, you can kind of taper off and let them become more drought tolerant. And with California native plants, you must be patient with them. It could take three years before you see a large spurt of growth.” Beyond The Garden Basics with Farmer Fred is a reader-supported publication. To receive new posts and support my work, consider becoming a free or paid subscriber. Farmer Fred’s Ride for the Kids! I'm fundraising on behalf of the 2025 Sacramento Century Challenge on Saturday, October 4 to raise money for the Sacramento Children's Home Crisis Nursery, and I could use your support. Here’s the link. On that date, I’ll probably be riding my new (and probably last) bike, the FRED OTL (a custom Haley titanium bike, NOT an e-bike). “OTL” - in bike race parlance - stands for “Outside Time Limit”…participants who were sent home for being “dead ass last”. I never said I was fast. But I do try to persevere to the end. The journey of 100 miles along the Sacramento River is to help out the Sacramento Children’s Home Crisis Nursery. I’ve ridden 100 miles in one day plenty of times…when I was younger. But at 74, and with a few health setbacks in 2025, I could use some moral support, and the Sacramento Children’s Home Crisis Nursery can use your pledge money. So, how about it? Maybe pledge 10 cents a mile (that’s $10) along with a hearty, “You go, Fred!” Or a more generous one dollar a mile ($100), to give me the mental endurance for the entire ride, to dodge the pothole-filled levee roads and pedal harder in the ferocious headwinds that makes this ride a real challenge! The Sacramento Children's Home Crisis Nursery is the only program of its kind in Sacramento County and directly prevents child abuse and neglect by supporting families with small children at times of crisis. The nursery allows parents to bring their children ages newborn to five for emergency hourly or overnight care during difficult times, with the goal of keeping families together and reducing the number of children entering foster care. To care for our community's most vulnerable children, we rely on support from community members like you. By donating, you empower us to provide a safe haven for children throughout the Sacramento area, offering respite to parents during times of crisis, and building a strong support system for the future. Your support helps provide a safe place to stay local kids in need. Again, here’s the link to make a donation to the Sacramento Children’s Home Crisis Nursery. Thank you for your support, and say "Hi!" if you see me pedaling like crazy out there on Saturday, October 4th! This is a public episode. If you'd like to discuss this with other subscribers or get access to bonus episodes, visit gardenbasics.substack.com/subscribe
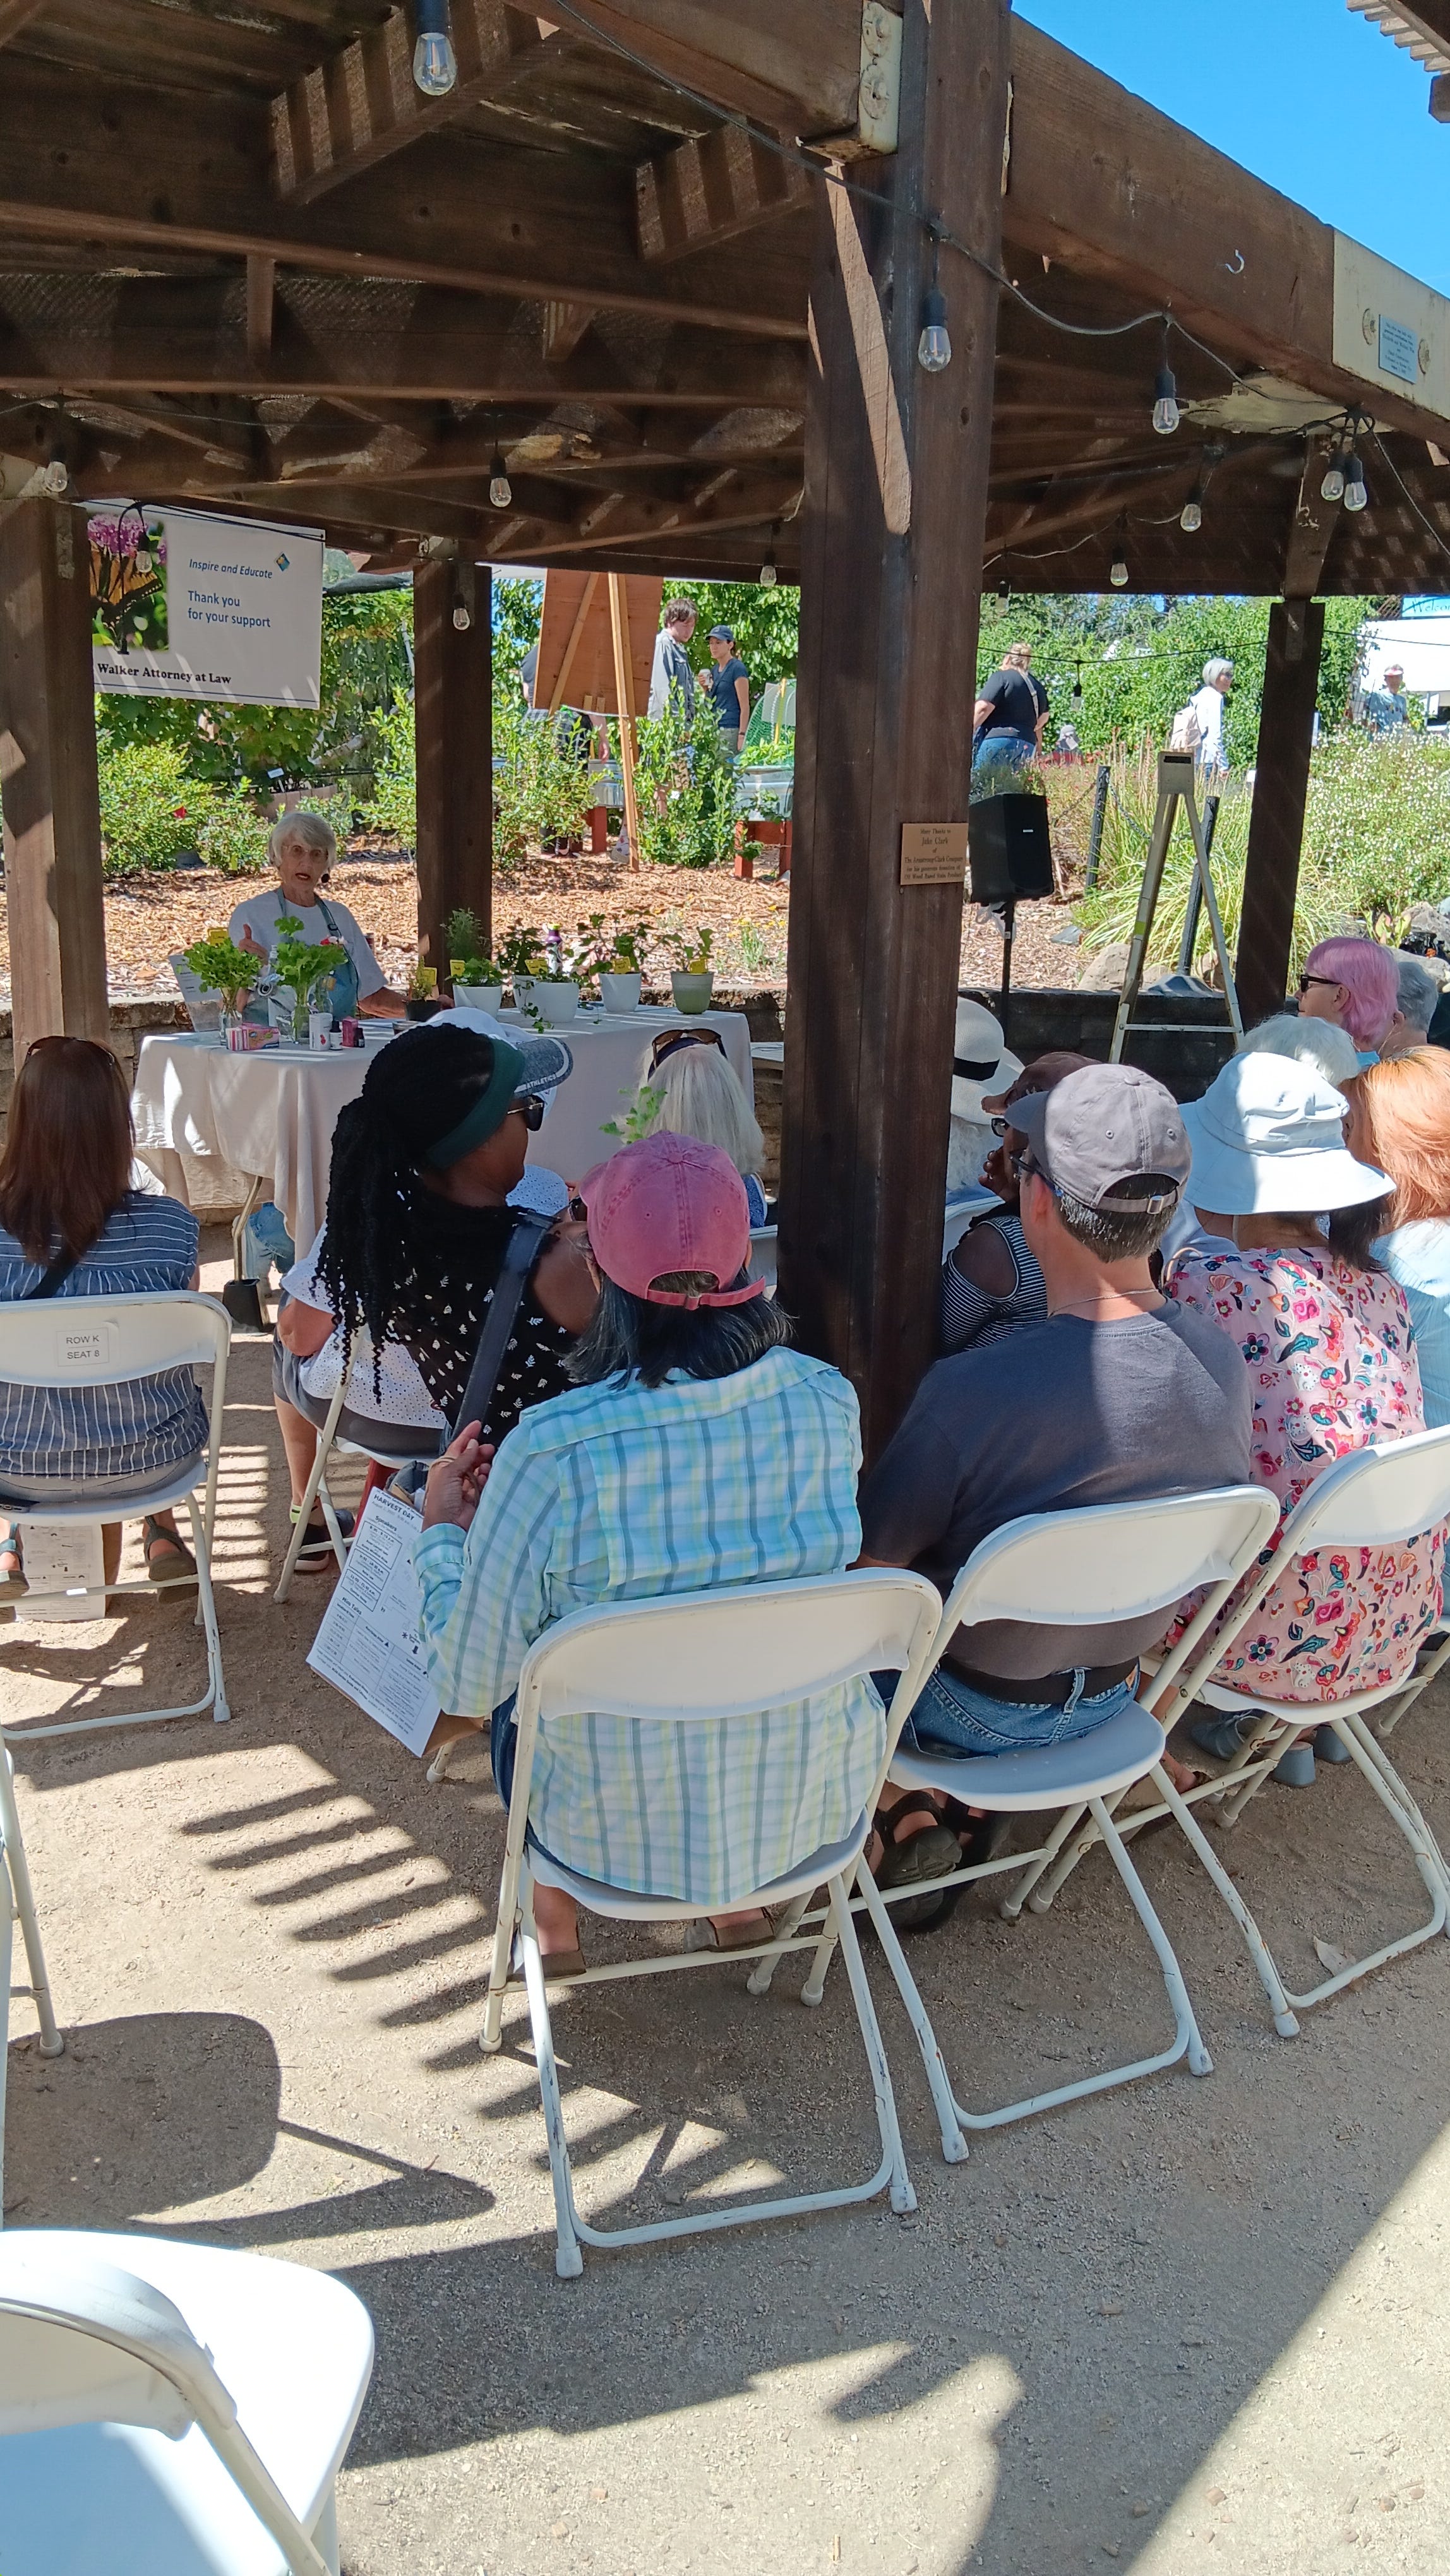
Jul 25
Drip Irrigation: How Long Do I Water?
90% of all plant problems are water related, either too much or too little . Compounding the problem: gardeners who are operating a drip irrigation system but using a sprinkler mentality. The Beyond The Garden Basics with Farmer Fred newsletter is a reader-supported publication. Both free and paid subscribers are welcome here! Talking to gardeners, after describing a plant problem, they will be asked: "How are you watering that plant?" More often than not, if the answer is, "drip irrigation", they will follow that with, "And I run it for five minutes a day, everyday."And therein lies the problem. A drip irrigation system puts out water much slower than a sprinkler system, usually a gallon or two an hour versus a sprinkler system's output of a gallon or two A MINUTE . In five minutes, a 1 gallon per hour (gph) drip emitter will put out about 10 ounces of water...slightly more than a cupful. Not only will that pittance of water not saturate the width of the plant's root zone (which can extend beyond the canopy of the plant), it won't penetrate more than an inch or two. And then not stay there very long. What happens to a plant with a shallow watering program? The roots stay very near the surface, where they are more subject to drying out quickly. This boom and bust cycle stresses the plant, opening up the possibility of disease and insect invasions. With a drip irrigation system, don't think "minutes". Think: "hours". And water deeply, but infrequently (once or twice a week). However, that instruction can be and should be modified based on the type of soil you have. If you’re doing in-ground planting and have heavy clay soil, you may be able to get away with that formula. Irrigating a raised bed, where the imported soil amendments may be lighter and fluffier, with a greater sand content, more frequent irrigations with drip will be necessary. More horizontal tubing will be necessary as well, perhaps 8-10 inches separating the lines of half-inch tubing. In sandier soil, the water footprint is much more narrow than in clay soil. Listen to Robert Kourik , author of the book, Drip Irrigation for Every Landscape and All Climates . In the podcast at the top of this edition of the Beyond the Garden Basics newsletter, he talks about watering with a drip system, a little bit, every day. HOWEVER…he also mentions that his preseason watering regimen includes saturating the entire soil mass in his raised bed, and then only adding enough water each day to make up for any loss. You can try this at home, but…don’t try this at home unless you are dedicated to the craft of measuring your soil moisture in the root zone on a regular basis in your raised beds. Your goal is to apply enough water to penetrate the soil to a depth of at least 6 inches, preferably more. The day after you water, either dig down 8 inches by hand or with a soil sampling tube ; or, stick a moisture meter down to that depth to determine if the soil is moist (not dry, and not soggy). Battery-operated soil moisture meters tend to have a longer life. In our raised bed vegetable garden, the summer watering regimen is with an inline drip irrigation system (1 gph emitters along the line, with emitters spaced 12" apart) which is run twice a week, about an hour and a half at a time, per circuit. Your weather, soil type, slope and crops may need a slightly different watering schedule. In our 4'x8' raised beds, five inline emitter lines run the length of each bed. The lines are spaced about 9" apart. The big reason why I can get away with a once or twice a week application of water via drip irrigation: the soil is amended each growing season, covered with a half inch of worm castings, a couple of inches of fine compost, and finally three to four inches of shredded oak leaves as the top mulch. No digging is necessary (digging and tilling destroys soil structure and the necessary air pockets). The end result of doing this after a few years: soil that retains moisture better, longer. And, more beneficial microbial activity, as well as more worms (worms are good). Consider using microsprinklers or sprayers to thoroughly wet the root area for trees and shrubs. These put out more water, usually between 8 and 20 gallons per hour. We have these on our shrubs and fruit trees, and during the summer will run them for about an hour, once or twice a week, depending on how hot it is. The other part of the drip irrigation equation that a lot of gardeners miss: not enough emitters for the plant. Placing one emitter next to a new tree or shrub is not enough. Remember, plant roots tend to grow out horizontally. Emitters should be spaced evenly around the tree or shrub, in a spiraled circle, halfway between the trunk and the outer canopy of the newly installed plant. The spacing between the emitters will depend on your soil type: for sandy soils, use a 12" spacing; for heavy clay, 18-24" spacing. Add emitters towards the outer canopy of the plant as the plant grows. • Soaker hoses need maintenance, too. Flush them monthly. The Dramm soaker hose , pictured here, is the most reliable, even-flowing soaker hose I have ever used. One of my favorite aisles at the big box stores is the drip irrigation aisle (also known as “Purgatory on Earth”). It’s almost like a church in that section of the store. People are silent, staring straight ahead at the morass of bins containing strange looking drip irrigation parts…and those people are more than likely praying for guidance that they can unravel the mysteries surrounding drip irrigation installation and repair. A great online tutorial about drip irrigation: the Dripworks website. This site has helpful tips and videos that can help beginner and pro alike solve their drip irrigation and yard watering woes. The Dripworks catalog is also great resource for anyone tackling the problems associated with drip irritation...uh, irrigation. Just thumbing through the catalog can give you several "Aha!" moments for improving your own yard watering procedures, especially if you are looking to replace your residential sprinkler systems with a drip irrigation system , which can work with your existing automatic sprinkler system control box. A final warning about drip irrigation systems: they will need maintenance. Lines can separate from their fittings . Emitters can clog. Micro-sprayers can jam. Shovels, trowels, weed whackers, spading forks, squirrels and rats can pierce a half-inch or quarter-inch drip feeder line. Turn the system on manually at least once a month and walk the circuit. Look for unusual wet spots, dry spots and geysers. Have the necessary repair parts handy. Know where the end caps are for each line. Remove those caps and flush the system for several minutes at the least at the beginning and end of each season, especially if you are on well water. And to answer your question: “Is it worth it?” Yes. Because of its pinpoint accuracy, drip systems use far less water than ordinary sprinklers, and that accuracy insures the roots of the plant will get the water they need. Plus, you’ll be spending more time in “church”. Fred Hoffman is also a University of California Cooperative Extension Master Gardener in Sacramento County. And he likes to ride his bike(s) Beyond The Garden Basics with Farmer Fred is a reader-supported publication. To receive new posts and support my work, consider becoming a free or paid subscriber. Tariff-Free! This is a public episode. If you'd like to discuss this with other subscribers or get access to bonus episodes, visit gardenbasics.substack.com/subscribe

Jun 27
Aromatic Plants, and Roses Too!
This edition of the newsletter is a deeper dive into this week’s Garden Basics with Farmer Fred podcast, Episode 398, “Aromatic Plants, Plus Roses! ” Here, we’ll see what these “shows for the nose” look like, along with more details about these aromatic plants, as selected by a group of Sacramento County (CA) Master Gardeners. Plus we take a look at some of the most fragrant roses, as selected by Master Rosarian Charlotte Owendyk. Beyond The Garden Basics with Farmer Fred is a reader-supported publication. To receive new posts and support my work, consider becoming a free or paid subscriber. In the portion of the Garden Basics podcast with Charlotte, I mentioned that in an earlier episode, another Master Rosarian, Debbie Arrington, has told us about the tastiest roses, which she said tended to be the most fragrant old red roses. So, as an added bonus, the interview at the top of this newsletter is Debbie Arrington talking about edible rose petals and rose hips, including which ones to choose and how to serve them. Debbie Arrington and Master Gardener Kathy Hellensen (who told us about her favorite fragrant plant in this week’s podcast, Lemon Verbena), also put out a daily newsletter for gardeners entitled “ Sacramento Digs Gardening ”, which includes tips and recipes that anyone anywhere might enjoy. Check it out. Master Gardeners and Their Choices for Aromatic Plants Master Gardener Collete Armao - Scented Geraniums , including the Rose Geranium, the Skeleton Geranium, and the Mosquito Shocker, which may - or may not - repel mosquitoes. Collete says: “The reason I like them is they are delicious smelling and they're pretty plants, they're easy care and you can use so many things with them. The flowers are edible, you can dry the leaves, you can make beautiful sachets and potpourris. In the summertime when it's hot, make a tea of the different leaves and flowers together. And they make a wonderful foot soak!” According to the UC Marin Master Gardeners : Scented geraniums are tender perennials loved by hummingbirds and butterflies. Popular scents include rose, lemon, chocolate, orange, apple, apricot, coconut, ginger, and nutmeg. Foliage is textured, sometimes variegated and bursts with fragrance and colorful blooms. Deer avoid them. ============================ Master Gardener Dan Vierria - the Tuberose . Dan says: “I have it planted right next to my patio sliding door. So every time I go out when it's in bloom, it has an amazing fragrance.” According to the Missouri Botanical Garden : Polianthes tuberosa , commonly called tuberose, is probably native to Mexico although it is not known to exist naturally in the wild today. It is considered to be a cultigen and has a long history of cultivation dating back to pre-Columbian times. Growing from a tuberous rooted rhizome, it is perhaps best known for the extremely intense fragrance emitted by its waxy white funnel-shaped flowers that appear in elongated spikes atop scapes rising to 30” tall in late summer. Grass-like basal green leaves to 18” long form a grassy foliage clump. Tuberose is a very popular commercially grown cut flower. =================================== Master Gardener Kathy Hellesen - Lemon Verbena . Kathy says: “It is just lovely. And you cannot walk up to this thing and stick your nose in it and not be surprised and happy and joyful. It is so lovely. The lemon smell is just wonderful. And it makes wonderful tea or cookies or whatever you want to do with it. It's great.” More about Lemon Verbena, according to the Marin County (CA) Master Gardeners: Scientific Name Aloysia triphylla (Lippia citriodora) General Information Lemon verbena is a popular shrub that grows 15 feet tall in the tropics, usually shorter in northern California. Evergreen in frost-free areas. Foliage is cherished for sweet, fresh, lemony scent. Leaves and flowers are used for culinary purposes, perfumes, cosmetics, potpourris, and herbal medicines. Native to Chile and Argentina. ================================================= Master Gardener Greta Lacin - Sage (Salvia), especially sages for cooking (such as the Salvia officinalis ). Greta says: “I'd have to say the cooking variety (Salvia officianalis) is my favorite because I cook a lot. But, any of the salvias are just beautiful!” More about Salvia officinalis from North Carolina State Cooperative Extension : Common sage is an aromatic, edible, short-lived, bushy, spreading, semi-woody perennial shrub. It is a member of the mint family (Lamiaceae). The plant is native to the Mediterranean region, where it grows in shrublands or grasslands on hillsides and mountains. The species epithet, officinalis , references the plant's medicinal use and was sold in herb stores or pharmacies. Common sage prefers full sun and well-drained, medium to dry soils that mimic those of its Mediterranean homeland. It is intolerant of wet or poorly drained soils. It will tolerate drought and poor soils. The species can grow up to 2 feet tall and 2 to 3 feet wide. Many cultivars may be shorter. Pruning is recommended in the spring and during the growing season to keep the plant from becoming leggy and to control flowering when used as a culinary herb. Do not prune into mature woody stems, as these seldom sprout new growth. Tall plants may require staking. =========================================================== Master Gardener Teri Van Airsdale - the banana shrub (Magnolia figo), including the variety ‘Port Wine’. Teri says: “The variety ‘Port wine’ is beautiful. It's cream-colored with kind of burgundy colors on it. And I just got a brand new red one that's spectacular. It also smells really, really good.” More info about the banana shrub from the Missouri Botanical Garden : Winter hardy to USDA Zones 8-10 where this magnolia is best grown in evenly moist, fertile, slightly acidic, organically rich, well-drained loams in part shade. Tolerates full sun, but foliage may turn a less attractive yellow green. Also tolerates substantial shade, but plant foliage tends to open up. Site in locations protected from strong winds. In areas near the northern edge of the growing range, avoid locating plants in southern exposures close to houses where the buds may be induced to open too early in spring. Plants appreciate consistent and regular moisture throughout the year, and are generally intolerant of soil extremes (dry or wet). Mulch root zone. Noteworthy Characteristics Magnolia figo , commonly called banana shrub, is a dense, rounded, multi-stemmed, broadleaf evergreen shrub that typically matures over time to 6-10' tall and as wide. It is native to China. Cup-shaped, creamy pale yellow flowers (to 1 1/2" diameter) bloom from spring to summer (April-June). Each flower is made up of six tepals (petal-like sepals) with very thin red margins. Glossy, oblong, evergreen, dark green leaves (to 3-5" long) are attractive throughout the year. Synonymous with and formerly known as Michelia figo . The name banana shrub refers to the intense banana-like fragrance of the blooms. No serious insect or disease problems. Watch for scale. Late frosts may damage flowers. Excellent understory magnolia for part-shade areas of the landscape. Bushy foundation plant for privacy hedge. Specimen/accent. Shrub borders. Plant in areas where the fragrant flowers can easily be appreciated. Master Rosarian Charlotte Owendyk’s Top Fragrant Roses Master Rosarian Charlotte Owendyk of the Sierra Foothills Rose Society offered her Top 10 roses that are a show for noses in this week’s Garden Basics with Farmer Fred podcast . And below, is part of Charlotte’s article for the Sacramento/Sierra Foothills Rose Society’s newsletter about the history of fragrant roses. Clear your nose, let’s go! Fragrant Roses…A Few That I Grow by Charlotte Owendyk (excerpted from the June 2021 Rose Reflections Newsletter) Watch someone walk by roses displayed at a rose show. First, there'll be an exclamation over color or beauty, but, inevitably, the head will lean in towards the rose in order to sniff its scent and rise with either a smile or expression of disappointment. Yep, we all want fragrance in our roses. This usually is especially important if you only have space for a few roses in your garden. The aroma of roses is due to more than 300+ volatile chemical compounds. In addition, there are times when roses are more fragrant than other times. The best time to smell your roses is in the morning when the temperature is about 65 - 70 degrees (F). As the day gets warmer, the fragrance oils evaporate. Another factor in fragrance perception is the fact that no two noses are the same! When the hybrid tea rose became the rage earlier last century, breeders aimed for large, high-centered hybrid tea blooms as well as new and different colors. Cut-flower rose cultivars for florists were selected for long vase life, flower shape, and color. In both cases, fragrance was incidental. However, the old garden roses (OGRs) continued to sell because they were great garden plants and many of them have outstanding fragrance. In many cases, it was the fragrance that sold the rose. And many of these OGRs, unlike hybrid teas which bloom all season long, only bloom once a season. In 1985 a paradigm shift occurred; David Austin, a farmer in England, succeeded in breeding fragrant OGRs with repeat blooming roses to produce a whole new generation of fragrant repeat bloomers. Currently, David Austin Roses is a major hybridizer of repeat blooming roses that have fragrance and luscious bloom form. A typical example is Golden Celebration. Many members have a soft spot for these roses. Hybridizers in the last 10-20 years have been working to incorporate disease resistance into roses. (It takes a minimum of 10 years for a rose to come to market.) Many of recent roses introduced are disease resistant to most fungal diseases. Fragrance took a backseat to disease resistance. Now, breeders are more focused on including fragrance in roses. Charlotte’s Top 3 Fragrant Roses (you’ll have to listen to this week’s Garden Basics Podcast to hear about the other 7) Pope John Paul II . “Beautiful clear white blooms with approximately 45 petals de-light the nose with a strong citrus fragrance. Dark green glossy foliage is diseaseresistant. The bushy plants tops at 4 feet. DO NOT prune hard. Just de-twig and kind of shape the bush. Next season you will be surprised at the results. This is my #3 favorite rose.” Memorial Day. “ Lovely orchid pink hybrid tea rose with enormous old-fashioned full 5-6" flowers (petals 50+) saturated with super-strong classic old rose fragrance. Long, almost thornless stems are lushly adorned with clean green leaves on a continual blooming plant. Just one flower perfumes an entire room. All-American Award winner. This is my #2 favorite rose.” Secret – “My favorite rose! Produces lots of lovely creamy blooms with pink on the edges of the blooms when the petals reflex shows a touch of gold which provide aglow to the fragrant strong spicy scented blooms. Secret repeats blooms quickly and has glossy bright green foliage that is very disease resistant. Great cut flower.” Charlotte Owendyk's List of Fragrant Roses (in no particular order) : Julia Child Firefighter Francis Meilland Memorial Day Pope John Paul II Secret Princess Alexandra of Kent Mr. Lincoln Double Delight Beverly Falling in Love Golden Celebration Thank you for also listening to the Garden Basics with Farmer Fred podcast! It’s available wherever you get your podcasts. Please share it with your garden friends. And your subscription to this newsletter helps keep the Garden Basics podcast alive, as well. Thank you for your support. Fred Hoffman is also a University of California Cooperative Extension Master Gardener in Sacramento County. And he likes to ride his bike(s). Consider becoming a paid subscriber to help keep this newsletter, as well as the Garden Basics with Farmer Fred podcast alive and well! Thank you. This is a public episode. If you'd like to discuss this with other subscribers or get access to bonus episodes, visit gardenbasics.substack.com/subscribe

Jun 20
Grow a Gratitude Garden
The above audio track is from a long time ago, when things were - at the very least -tense. It was during the initial panic as COVID-19 struck the United States, back in May of 2020. The confusion around COVID-19 was my impetus for starting the Garden Basics with Farmer Fred podcast. At that time, there were a lot of people developing a sudden interest in gardening, thinking they might be stuck at home for who knows how long? And, people were stressed. That was my reason for recording the segment (above) for Episode 9 of the Garden Basics podcast. It was all about calming down, and embracing gardening and gratitude. Maybe we are in another era of high stress now? If you have 5 million people gathering for protests against the government across America in towns and cities large and small - like what happened last week - that answer is fairly obvious. Participating in last week’s protests did help calm a lot of people across the country. And that’s no outlier. The isolation and stress of the COVID pandemic in 2020 inspired a lot of university research into ways to reduce that stress. One of those studies, recently released, was mentioned in Mike McPhate’s excellent California Sun newsletter recently: 11. Admiring a flower does a surprising amount of good. (Timothy L Brock) “A new UC San Francisco study found that so-called micro-acts of joy can have an outsize effect on people’s moods . Researchers had study participants practice seven tasks over seven days, then answer questions about their emotional and physical health. They included: doing a nice thing for a friend, sharing a moment of celebration with someone else, and making a gratitude list. The results were surprisingly robust, said Elissa Epel, a study author. “We were quite taken aback by the size of the improvements to people’s emotional well-being.” S.F. Chronicle ” That study released by the National Institute of Health, has the wonky title: “Scaling a Brief Digital Well-Being Intervention (the Big Joy Project) and Sociodemographic Moderators: Single-Group Pre-Post Study” We’ll call it the “Big Joy Project” for short. From that study: Background: Emotional well-being interventions lead to better mental and physical health. However, most of these interventions have been tested on relatively homogeneous samples, with few interventions large enough to examine whether key sociodemographic factors impact outcomes. In addition, barriers to engagement include access and high participant burden. We developed a brief web-based intervention to address these barriers and tested the effects across sociodemographic groups. Objective: The study aims to examine the effectiveness of a brief, low-burden digital well-being intervention in improving emotional well-being and health-related outcomes across a diverse global sample. Results: …participants who engaged in more daily practices showed greater improvements. There was a strong pattern of social disadvantage moderating these effects, with groups experiencing greater social disadvantage showing larger benefits across most outcomes. For example, those with lower education, greater financial strain, or lower subjective social status and those identifying as individuals from racial or ethnic minority groups (Black or Hispanic) all showed larger improvements across well-being outcomes. Furthermore, younger people had greater increases in emotional well-being and greater decreases in perceived stress compared to older people. Conclusions: A brief, low-intensity intervention showed meaningful improvements in well-being and stress, comparable to those seen in longer, more intensive digital well-being interventions. To quote my long gone Mother: “What does that have to do with the price of tea in China?” Thanks, Mom, for the reminder (I am the king of the scenic bypass, after all). I’ll circle back to gardening…and gratitude. The Garden Basics podcast began at the same time the ramifications of the Coronavirus epidemic started to hit home. April of 2020. Back then, we were coming to grips with phrases such as “Quarantine in Place” or “Shelter at Home”. What could you do around the house to keep from going stir crazy? Many of you began gardening for the first time. And that was a good thing for many reasons. You were getting outside. You were moving your body. You were creating beauty. And, you were cultivating gratitude for your new, living creations. You were planting flowers, shrubs, trees, and growing food. You liked it. Brown Eyes, the feral cat, guards the garden burial location of Argus, the Wonder Dog Grow Some Gratitude Since that pandemic five years ago, many of you are continuing to garden. Good for you, you’re cultivating gratitude! Psychiatrists across the country now are dealing with a lot of disappointment, fear, and burnout. There are steps you can take to help your own mental health. By working in your garden, you’re cultivating gratitude. And gratitude is good for you. The Harvard Medical School newsletter wrote in 2021: “Gratitude is strongly and consistently associated with greater happiness. Gratitude helps people feel more positive emotions, relish good experiences, improve their health, deal with adversity and build strong relationships.” One way mental health experts advise to kickstart your gratitude is to keep a gratitude journal. Write down the positive moments of the day, the people and things you saw or interacted with that brought a smile to your face. As a gardener, keeping a garden diary is a great idea. Not only because it helps you keep track of what you planted, where you planted it, and its success or failure; a garden diary can also be your gratitude journal where you write down about the beautiful flowers, interesting perennials and tasty food that you’re growing. Take a walk through your garden each day. You’ll see a lot to be grateful for: a flower in bloom; the foliage on a tree; the fruit on a shrub; interesting insects (is it a good guy or a bad guy?); even the interesting looking weeds that pop up this time of year. Plant yourself a gratitude garden plot. Put in plants that you find particularly pleasing or those that have a long blooming or fruiting season in a spot where you can see it easily from inside the house. Outside my office window, I’ve planted flowering maples, the abutilon, the Tiger Eye variety, which produces interesting, red and yellow chinese lantern-shaped flowers that attract the humming birds, year round, here in California. The dense foliage of the plant also attracts other small birds such as finches, that enjoy hopping through the branches. One time, during a live radio show, a bird that we had never seen in our area, a hooded Oriole, paid a visit to the abutilon jungle. The garden conversation between myself and Debbie Flower stopped and immediately turned to scurrying through my bird ID books to identify the bird. We were grateful for the interruption and tickled that the hooded oriole should pay us a visit at that moment. Besides what you see, don’t forget to be grateful for all that your garden attracts that appeals to your other senses: the aromas of a fragrant plant, such as winter daphne; the pleasant sounds of all the birds and bees that visit; and, the warmth of the sun. Reminding yourself, every day, what you’re grateful for can boost your mental spirits and help deal with the stress on the ongoing pandemic. And you can cultivate that gratitude with your garden. Share the Joy As I mentioned in the podcast at the top of the page, sharing that joy with the neighborhood is one of those “brief, low-burden digital well-being interventions” that is easy for a gardener. Rip out or reduce the size of your front lawn, and put in flowering plants, or perennials, shrubs and trees with interesting structure for all those that walk or drive by your home. Recently, a car stopped in front of our driveway. A young woman jumped out with a large bag, apparently making a delivery next door. A few minutes passed, and the car, with its engine idling, was still there, with no one in the car. Out of concern (or curiosity), I went outside to see if there was a problem. And there, sprawled on her belly on the sidewalk, the young woman was aiming her IPhone camera for a closeup of a blooming annual I had planted in the narrow strip between the two driveways: a “Zowie Yellow Flame” zinnia. “Are you OK?” I asked. She jumped up, startled. But happy. “Oh, I love to take pictures of the plants I see while delivering meals,” she said, with a big smile on her face. “I live in an apartment, I wish I had a garden.” I smiled, and said: “Oh, I think you will someday.” Thank you for also listening to the Garden Basics with Farmer Fred podcast! It’s available wherever you get your podcasts. Please share it with your garden friends. And your subscription to this newsletter helps keep the Garden Basics podcast alive, as well. Thank you for your support. Fred Hoffman is also a University of California Cooperative Extension Master Gardener in Sacramento County. And he likes to ride his bike(s). Consider becoming a paid subscriber to help keep this newsletter, as well as the Garden Basics with Farmer Fred podcast alive and well! Thank you. This is a public episode. If you'd like to discuss this with other subscribers or get access to bonus episodes, visit gardenbasics.substack.com/subscribe

Jun 13
Prune Off Tomato Flowers?
One question I have been getting a lot of lately: Should I prune off (snip off, pinch out) the first tomato flowers that appear, in order to get more tomatoes later? Those early tomato flowers, especially if the weather doesn’t cooperate, will fall all by themselves, thank you. Your assistance is not needed. In today’s newsletter podcast (above), Sacramento County Master Gardener and vegetable expert Gail Pothour explains the myths behind pruning off tomato flowers. Flower drop and tomato fruit set failure can happen in May and June for a number of reasons, including night temperatures below 55; daytime temperatures above 90; excess nitrogen fertilizer, too much shade, too much smog, plants set out too early in spring, or planting the wrong variety for your area (a Beefsteak tomato attempting to grow in cool, damp San Francisco is not a match made in heaven). However, by removing those flowers once they are in a situation where they can be pollinated successfully, what is accomplished by removing those flowers? FEWER TOMATOES! And, unless you are trying to stop production, it would be counterproductive to your ultimate goal: shoving that beautiful red orb into the face of your non-gardening neighbor on the Fourth of July, singing, “Nyah, nyah, nyah!” Wow, where did this tomato flower pruning fallacy begin? One questioner offered a clue when he prefaced that question with, “Last night, the local TV Weatherman said…” Bad move, taking gardening advice from a person who guesses for a living. Still, that piece of poor advice must have some historic legs to it. And sure enough, there are many people at social media garden pages who are passing on this wrong-headed notion. And as far as I can tell, it’s the result of one gardener reading a piece of research on tomato pruning, and mangling the retelling of that research. For example, wholesale tomato plant grower Bonnie Plants offers this online piece of advice at their website page, “ How to Prune Tomatoes for a Big Harvest. ” As the growing season draws to a close, tomato plants are often still loaded with fruit. To speed ripening late in the season, remove the growing tip of each main stem about four weeks before the first expected fall frost . Called "topping," this type of pruning causes the plant to stop flowering and setting new fruit, and instead directs all sugars to the remaining fruit. This way, the fruit will ripen faster, plus it becomes more likely that the green tomatoes you pick before frost will actually ripen when you bring them indoors. It may be hard to bring yourself to do this, but it will be worth it if you wish for ripe tomatoes! Of course, if you prefer your tomatoes to remain green for use in frying and jelly, you can certainly skip this step. Gardener A reads this, and then retells the story to Gardener B, omitting the fact that this advice applies to late season, indeterminate tomatoes only. Gardener B then tells Gardener C: “Pruning tomato flower buds is recommended by Bonnie Plants.” Gardener C then goes online and writes: “Remove flower buds on tomato plants to increase the number of tomatoes.” Or something like that. And another digital gardening virus is born. Please become a paid subscriber to the “Beyond the Garden Basics” newsletter. I would like my own chair. Thank you. When and how should you prune tomatoes? Very little, only when necessary, to keep the plants within bounds. If you grow your tomatoes in cages (recommended), you would only need to remove those branches that escape and are threatening to wrap itself around a nearby pepper plant…or your head. If you grow your tomatoes using stakes for support, you may need to do some pruning, according to the University of California Sonoma County Master Gardeners : “ The Traditional One Stake Method features a stake 6–8 foot tall, which is used to tie tomato stems to. Requires pruning out all but about three main stems.” And, it should be pointed out, that if you follow those pruning guidelines for staked tomatoes, you are sacrificing about 25% of your eventual tomato crop. An that’s yet another good argument to cage, not stake your tomatoes. Cages can be made from sheets or rolls of concrete reinforcement wire with a six inch mesh (the six inch opening makes it easier to reach those tomatoes). The sheets are usually 42” by 84”. Bend it into a circle, secure the ends with zip ties, and you have a tomato cage that’s 42” tall and about 27” in diameter. And it will last for decades. Some retail nurseries have gotten wise to this and offer huge tapered cylinders, some of them eight feet tall, constructed of heavy duty livestock panels, that you could afford to buy if you give up your daily Starbucks habit for a month…or longer. Cornell University says hacking back your tomato plants is not necessary: You can grow great tomatoes without pruning, but if you want to prune, here are a few guidelines. For determinate types, don’t bother pruning. It will only reduce your harvest. For indeterminate types, allow one, two, or three suckers to grow from the base of the plant. Clip or snap off the rest. It’s helpful to find the first flower cluster on the plant. It will be small but obvious. Always leave the first sucker below the flowers. Then it’s up to you whether you want to leave one or two more suckers below the first. Each of these will become main stems with lots of fruit. Remove suckers below these and any above the flower cluster. The best time to remove the suckers is when they are 2 to 3 inches long. If larger, you can sometimes damage the main stem. The book, “ Ortho’s All About Tomatoes ”, puts it more succinctly, quoting the late Dr. Phillip Minges of Cornell: “Tomato yields per plant may be lowered by pruning. Removing the leaves or shoots does not conserve food for the crop, it tends to reduce the total food supply…use training methods that require little pruning.” A final hint when searching for garden answers on the Internet. Be leery of advice from gardening social media sites, unless that advice is linked to a study or research that you can also access. When using a search engine, include the words to identify a prominent agricultural school where the advice is reviewed by multiple parties before publication: UC (University of California), WSU (Washington State), Cornell, TAMU (Texas and M), etc. For example Googling the phrase “tomato worm UC” will lead you to the University of California Integrated Pest Management website first. If you were to just enter the words, “ tomato worm ”, well…good luck. Thank you for also listening to the Garden Basics with Farmer Fred podcast! It’s available wherever you get your podcasts. Please share it with your garden friends. And your subscription to this newsletter helps keep the Garden Basics podcast alive, as well. Thank you for your support. Fred Hoffman is also a University of California Cooperative Extension Master Gardener in Sacramento County. And he likes to ride his bike(s). Consider becoming a paid subscriber to help keep this newsletter, as well as the Garden Basics with Farmer Fred podcast alive and well! Thank you. This is a public episode. If you'd like to discuss this with other subscribers or get access to bonus episodes, visit gardenbasics.substack.com/subscribe

Jun 6
Growing Microgreens
Today’s Beyond the Garden Basics Newsletter expands upon a topic we were briefly discussing in Episode 395 of the Garden Basics Podcast, “Survival Garden Basics” . In this case, the short chat was about the value of microgreens, and how they are easy to grow, and because of their small size, super-packed with nutrients. In today’s “Beyond the Garden Basics” newsletter podcast (above), Sacramento County (CA) Master Gardener Gail Pothour discusses how to grow and harvest microgreens, and how they can be used in various dishes. This conversation originally aired on a Garden Basics podcast back in 2020. Beyond The Garden Basics with Farmer Fred is a reader-supported publication. To receive new posts and support my work, consider becoming a paid subscriber. It will also help feed these two hungry rescues…and this (formerly) stray cat. The ABCs of Microgreens One great resource for gardeners about microgreens comes from Penn State Extension, entitled, “ The ABCs of Microgreens ”. Among the highlights of that article: Many edible plant species can be used to produce microgreens. Among the standard vegetable species, the most popular ones are those belonging to the broccoli family ( Brassicaceae ), such as broccoli, radish, cauliflower, arugula, cabbage, kale, kohlrabi, mustard, mizuna, cress, broccoli raab, etc., which are characterized by a very short growth cycle (7–8 days maximum) and by the typical pungent taste of cole crops which is primarily due to their content of glucosinolates, natural compounds considered anti-cancer per excellence. Other vegetable species commonly grown as microgreens include beet, Swiss chard, spinach, amaranth, lettuce, chicory, endive, carrot, celery, fennel, leek, onion, and cucumber. Microgreens are produced by also sprouting cereals such as barley, oat, wheat, corn, and pseudo-cereals like quinoa, legumes such as pea, alfalfa, bean, fava bean, lentil, clover, chickpea, and fenugreek, and even oleaginous and fiber species like sunflower and flax, respectively. Interesting microgreens are also produced using the seeds of aromatic herbs such as basil, cilantro, dill, chives, and cumin, or using the seeds of some wild edible species such as borage ( Borago officinalis L.), wild chicory ( Cichorium intybus L.), common dandelion ( Taraxacum officinale Weber), sea asparagus ( Salicornia patula Duval-Jouve), etc. In some cases, mixes of different species are used to obtain specific color or taste combinations. When mixes are used it is very important to balance the seed density as well as to make sure that seeds of different species or cultivars will germinate and grow at the same time. Some common vegetable crops like tomato, pepper, eggplant, and potato are not edible at the seedling stage and are not suitable to produce microgreens because they contain alkaloids, which at high levels, are toxic for humans. If using wild species, it is very important to recognize the plants from which seeds are collected because many spontaneous species contain toxic compounds while they may look like edible plants. Therefore, if you are not a plant expert, refrain from using wild plants to produce microgreens. Also, you should exclude any species for which you may have an allergic reaction. That Penn State Extension article did point out one very important fact about growing microgreens at home: remember, different seed varieties grow at differing rates, so be cautious if using a mix of microgreens. Probably better to purchase each variety separately and grow each in its own container. And, a good portion of the article dealt with the microgreen mathematics involved: because you should sow the seeds thickly, how many seeds should you sow in a single container? No worries. There’s a link to an Excel file that does the calculation for you. How Nutritious are Microgreens? I’ve often heard from dietitians and health food aficionados that consuming microgreens and baby greens provide more nutrition than their full grown counterparts. Is that true? In a 2021 published study of two greens - spinach and roselle - researchers discovered that these plants - when harvested within 20 days of sowing - have some critical nutritional benefits greater than the full grown plant, according to the National Library of Medicine: “Compared to field grown mature foliage, greenhouse-grown micro/baby-greens were lower in digestible carbohydrates and CA (calcium) but higher in digestible protein, P (phosphorus), K (potassium), Mg (magnesium), Fe (iron), Mn (manganese), and Zn (zinc).” From the National Library of Medicine (Nov. 2021): Nutrient Content of Micro/Baby-Green and Field-Grown Mature Foliage of Tropical Spinach ( Amaranthus sp.) and Roselle ( Hibiscus sabdariffa L.) Note: “DAS” - Days After Sowing So, for certain nutritive boosts, nature’s “fast food” (greens harvested at microgreen or baby green stage) is the way to go. Better yet, it’s quick from the garden to the plate, reaching cutting stage in 10 to 20 days after sowing in optimum conditions and temperatures. Thank you for also listening to the Garden Basics with Farmer Fred podcast! It’s available wherever you get your podcasts. Please share it with your garden friends. And your subscription to this newsletter helps keep the Garden Basics podcast alive, as well. Thank you for your support. Fred Hoffman is also a University of California Cooperative Extension Master Gardener in Sacramento County. And he likes to ride his bike(s). Consider becoming a paid subscriber to help keep this newsletter, as well as the Garden Basics with Farmer Fred podcast alive and well! Thank you. This is a public episode. If you'd like to discuss this with other subscribers or get access to bonus episodes, visit gardenbasics.substack.com/subscribe

May 30
What Exactly is a Grocery Store "Vine-Ripened" Tomato?
If you’re reading this as May turns into June, and you live in the West, you know you’re going through a heat wave, including triple digit temperatures in parts of California. A more widespread - and longer - heat wave is expected in mid-June. And, long range forecasts are calling for a much hotter summer (July through September) than usual throughout most of North America. This is not good news for your south and west facing backyard tomatoes, especially. Give a listen to today’s newsletter podcast clip (a short one) from Episode 383 of last March, the 2025 Tomato Preview Show. Don Shor of Redwood Barn Nursery in Davis offers tips on protecting your young, west-facing tomatoes (as well as bell peppers) from developing sunscald or sunburn during an extended heatwave. It’s a technique that allows commercial tomatoes to be picked early in their life, stored, possibly treated with ethylene gas, and then shipped to grocery stores after they’ve reddened up and gotten a bit soft…with parts of their stem still attached. These tomatoes receive a premium price, because they are labeled as “vine-ripened”. Processors and grocery stores insist this fits the definition of “vine-ripened”. Actually, there is no legal definition of “vine-ripened”, according to the USDA. The closest they come is in their “standards” for a mature tomato, which might come as a shock to you who grow backyard tomatoes. Thank you for becoming a paid subscriber. It helps me feed the animals that reside here. And the people who are building me a new bike. From the USDA’s “ United States Standards for Grades of Tomatoes on the Vine ”: §51.2172 Mature. ''Mature'' means that the contents of two or more seed cavities have developed a jellylike consistency and the seeds are well developed. External color shows at least a definite break from green to tannish-yellow, pink or red color on not less than 10 percent of the surface. You may have assumed that those grocery store “vine-ripened” tomatoes were picked red and shipped immediately. You may have noticed that the tomatoes had a “tomato aroma”. Actually, if they still have a piece of the vine attached to them, that is the part that is emitting the aroma, according to “ America’s Test Kitchen ”. They also quickly point out, however, that “…in blind side-by-side tastings, my colleagues and I have never been able to consistently find a difference in flavor” between on-the-vine and ethylene-ripened tomatoes. They quote a study that reaffirms their findings. That study was published in “The Journal of Food Science - a Publication of the Institute of Food Technologists”. It was conducted primarily by the staff of Rutgers University Food Science and Plant Science Departments, with support from the New Jersey-NASA Specialized Center of Research and Training. Do any of these firms have ties to the commercial tomato industry? I’ll let a newspaper or magazine with a team of researchers try to track down that answer. The title of the study was: “Quality Comparison of Hydroponic Tomatoes ( Lycopersicon esculentum ) Ripened On and Off Vine”. Before moving on, a clarification for you real tomato heads from NeetPrep.com (which bills itself as “India’s #1 Classroom Test Series”) regarding the question of the correct biological name for the tomato: “In 1753, Linnaeus placed the tomato in the genus Solanum (alongside the potato) as Solanum lycopersicum . In 1768, Philip Miller moved it to its own genus, naming it Lycopersicon esculentum . Genetic evidence has now shown that Linnaeus was correct to put the tomato in the genus Solanum, making Solanum lycopersicum the correct name. Both names, however, will probably be found in the literature for some time.” OK, lets ask the first obvious, basic question about this tomato taste test: What is the difference between the taste of a hydroponically-grown indoor tomato and an in-ground outdoor grown tomato? Although I was entertained by the variety of answers I read at crowd-aggregation site Quora, primarily from hydroponic enthusiasts, permaculturists, and way too many people not clear on the concept, I will rely on Google’s AI summary of the difference, which may have problems of its own: * Hydroponic Tomatoes: * Controlled Environment: Hydroponic systems allow for precise control over nutrient levels, light, temperature, and humidity, which can lead to larger, juicier fruits but sometimes with a less complex flavor. * Less Soil Interactions: Soil-grown tomatoes benefit from interactions with beneficial bacteria and fungi, which can contribute to unique flavors and compounds. * Potential for Bland Taste: Hydroponically grown tomatoes may have a lower concentration of certain flavor compounds, leading to a more muted taste. * Sweeter Taste: Some studies have shown that hydroponic tomatoes can be sweeter due to increased water and sugar content. * Soil-Grown Tomatoes: * Complex Flavors: Soil provides a diverse environment with organic matter, beneficial microbes, and minerals that can contribute to a more complex and nuanced flavor profile. * Natural Conditions: Soil-grown tomatoes are exposed to natural variations in weather, sunlight, and nutrient availability, which can affect their flavor. * Tangy or Earthy Notes: Soil-grown tomatoes may exhibit more tangy or earthy notes due to the complex interactions in the soil. * Lower Sugar Content: Soil-grown tomatoes may have less sugar content than hydroponic tomatoes. In summary: While hydroponic tomatoes can be convenient and productive, their flavor may not be as complex or intense as those grown in soil, though some varieties are being developed to address this. =========================== When I die and go to Purgatory to burn off my sins, I am sure I will be placed on a panel that does nothing but taste-test hydroponically grown tomatoes, trying to differentiate between bland and blander. In other words, that’s not a study that backyard tomato growers could relate to. The look, aroma, taste and juiciness of a freshly picked, homegrown heirloom tomato will have you saying what my wife says every winter: “I WILL NEVER BUY A GROCERY STORE TOMATO THIS TIME OF YEAR!” Yes, after growing backyard tomatoes for every year of our 45 year marriage, I’ve created my own personal tomato Frankenstein. Hell, she won’t even touch grocery store tomatoes in the summer. Well, frankly, in this household, there’s no reason to buy a tomato in the summer. Just step into the back yard with your snippers, and have at it! For those who have never grown tomatoes in the back yard (or front yard), your best chance for really tasting what a tomato is supposed to taste like is to head to a farmers’ market this mid-summer, and purchase a just-picked-that-day, mid-size heirloom tomato (not a one-ounce cherry tomato; not a 16-ounce supersized beefsteak-style tomato) and eat it as soon as possible. Your next stop after the farmers’ market just might be at a well-appointed nursery, to get an heirloom tomato plant that has been upsized from a four inch pot into a 2-gallon pot and is selling for $20. Or better yet, prepare your yard for planting a few tomatoes next Spring. You’ll find plenty of info on how to do that, including the tastiest tomato varieties, in the archives of the Beyond the Garden Basics newsletter as well as several podcast episodes at Garden Basics with Farmer Fred . Oh, you want to check out past editions of the Beyond The Garden Basics newsletter? Although the current edition is free to all subscribers, only paid and Founding Members get access to past issues. Be Your Own Tomato Junior Scientist! Here is where we nicely dovetail the topics of upcoming heatwaves and tomato tasting: When an extended heatwave, especially the ones where temperatures that will exceed 100 degrees are forecast, do what Don Shor suggests in today’s newsletter podcast: • Before the onset of heat, help protect your tomato crop from sunburn or sunscald damage by harvesting those exposed tomatoes that are at the breaker stage of development (just beginning to turn from green to yellow/pink) that are located on the west side of the plant (for those areas of the country where the heat builds up throughout the day) or the south side (if your heat tends to peak midday). • Place the tomatoes in a shady spot on your kitchen counter. Don Shor says they will ripen to red in seven to ten days. Other sources say it may take a couple of weeks. • Whenever they develop a nice shade of red and have a bit of “give” to them when you gently squeeze them, cut them open, examine and taste them. Note their look, aroma, flavor, and sweetness or acidity. Give each of those categories a score of 1 to 5 (5 being the highest grade). •Perhaps at the end of that two week waiting period, there may be other tomatoes of the same variety growing in the yard that have reached full redness and feel ready to pick. You may have to wait longer than two weeks to do this portion of the taste test, hence the reason for writing the scores down. • Pick them, examine them, taste them, and then grade those garden-ripened tomatoes. • Was there any difference in the scores of look, aroma, flavor, and sweetness or acidity between a counter-ripened tomato and a garden ripened tomato? Let us know in the comments which tomato varieties you used in this experiment, and the scores! Thank you for also listening to the Garden Basics with Farmer Fred podcast! It’s available wherever you get your podcasts. Please share it with your garden friends. And your subscription to this newsletter helps keep the Garden Basics podcast alive, as well. Thank you for your support. Fred Hoffman is also a University of California Cooperative Extension Master Gardener in Sacramento County. And he likes to ride his bike(s) Beyond The Garden Basics with Farmer Fred is a reader-supported publication. To receive new posts and support my work, including the Garden Basics podcast, consider becoming a free or paid subscriber. Tariff-Free! This is a public episode. If you'd like to discuss this with other subscribers or get access to bonus episodes, visit gardenbasics.substack.com/subscribe

May 16
More Effective Raised Bed Drip Irrigation Techniques
Both free and paid subscribers have full access to the Friday edition of the Beyond the Garden Basics newsletter. Because cutting off free subscribers in the middle of a newsletter isn’t a nice thing to do. At the top of the page: an excerpt of a conversation with Don Shor of Redwood Barn Nursery about growing tomatoes with drip irrigation in raised beds from Episode 288 of the Garden Basics with Farmer Fred podcast. Another podcast episode that really delves into drip irrigation was Episode 227, Understanding Drip Irrigation ”. That featured an in-depth chat with author Robert Kourik, who literally wrote the book about good drip irrigation techniques and equipment. Give that a listen. Drip Irrigation Lessons Learned the Hard Way After working with drip irritation systems in the garden for more than 40 years, consider this my “Lessons learned the Hard Way.” Example One: my original raised beds, from the early ‘90’s featured three parallel drip lines with inline emitters running the length of a four foot wide bed. Also lacking: no individual on-off valves for each bed. All the beds were, in effect, running on a single circuit simultaneously. The irrigation was running for two to three hours a day, four or five days a week, to achieve plant growing success. The problem was the lack of water during a single irrigation flowing from the one-gallon inline emitters spaced 12 inches apart, on lines that were 18 inches apart in the raised beds. Complicating the matter: no attention was given to the cross-spacing of the emitters between lines. If all the emitters were lined up like little soldiers on those three lines, there were large areas of soil that had a hard time getting water. The biggest lesson I’ve learned about raised bed gardening is something that Don Shor of Redwood Barn Nursery has pounded into our heads for decades: you have to consider a raised bed as just a large plant container, with all the limitations involved of dealing with potted plants: • It dries out quicker. • Drainage could be problematic. • Tall plants, such as corn, tend to fall down and go boom much more readily in a raised bed than in an in-ground planting during a summer windstorm. A couple of reasons for that: the raised bed soil is not very good at anchoring roots. The water pattern in a raised bed does not encourage a wider plant root system. Roots will follow the water, not vice-versa. Water tends to go straight down in a raised bed instead of spreading out, due to a higher content of loose, friable, potting mix-like sandy soil. In the backyard garden, there is probably a higher content of clay, which allows water to spread out. For example, in a freshly filled new raised bed with a premium potting mix, the water released from a drip emitter may only have a diameter of 8 inches across, as it descends through this mix. In your backyard soil, that probably has a lot more clay? That water diameter may spread out 18 inches as it trickles downward. Did you know that the paid subscribers to the Beyond the Garden Basics newsletter are helping to keep the neighborhood abandoned cats happy by distracting them from the garden? Cut Your Drip Irrigation Woes with These Tips The solution? Add more parallel lines. Add mulch. Solution number two: Stagger the lines so that emitters were not side by side. But there was one more trick to employ to help preserve soil moisture: grind up fallen leaves from neighborhood oak trees, and use it as a mulch, several inches thick, year round. Mulch, as I have reminded you for decades: • Retains moisture. • Keeps soil temperature constant, reducing plant stress. • Suppresses weeds. • Gradually increases soil organic matter, feeding the soil. • Attracts beneficial organisms that improve soil fertility and porosity. • Encourages healthier plants, reducing the needs for pesticides and fertilizers. • Protects roots and plants from mechanical injury. • On hillsides and around rural homes, certain mulches can suppress the spread of brush fires. One solution occurred to be early on in my adventures in drip irrigation of raised beds. Using 4’x5’ sheets of concrete reinforcement screening, with six inch mesh spacing, to keep the dogs and cats out of the raised beds. Note as well that even though you can bury the in-line emitter drip tubing beneath the mulch, I like to keep the end caps visible. That’s a reminder to occasionally undo them and flush any debris or impurities out of the lines. Paid subscribers to the Beyond the Garden Basics newsletter can read the archives of over 200 editions of this newsletter! And they get a special Monday edition, as well. And besides, I need a new bike. Thank you. Thank you for also listening to the Garden Basics with Farmer Fred podcast! It’s available wherever you get your podcasts. Please share it with your garden friends. And your subscription to this newsletter helps keep the Garden Basics podcast alive, as well. Thank you for your support. Fred Hoffman is also a University of California Cooperative Extension Master Gardener in Sacramento County. And he likes to ride his bike(s). This is a public episode. If you'd like to discuss this with other subscribers or get access to bonus episodes, visit gardenbasics.substack.com/subscribe

May 2
Peppers Worth a Try
In Episode 390 of the Garden Basics podcast , Master Gardener Gail Pothour offered some great tips for growing peppers this spring and summer. We also discussed sweet, warm and hot pepper varieties that might be worth a try in your own garden. That portion of our discussion is also in the newsletter podcast at the top of the page. Also in today’s newsletter podcast, Diane Blazek, the Executive Director of the All America Selections plant winners, talks about her favorite award-winning, not-so-hot peppers . Gail Pothour did share a little gardening secret of hers: if she is in doubt about the quality of the bargain potting soil she’s using, she will toss in her “fertility mix”: a concoction of organic materials to give a boost to that potting soil. Gail explains: “The organic fertility mix recipe is from John Greenler of Zephyr Community Farm in Stoughton, Wisconsin (who I believe may be, or previously was, a professor at the University of Wisconsin at Madison with a PhD focused on plant biology). I found it in a book, “Great Garden Formulas - The Ultimate Book of Mix-It-Yourself Concoctions for Your Garden” (Rodale Press). The recipe for Zephyr Farms Original Organic Fertility Mix is as follows: 2 cups rock phosphate 2 cups greensand 2 cups blood meal 1/2 cup bone meal 1/4 cup kelp meal Mix all ingredients together. Makes 6 1/4 cups of fertility mix. Sprinkle mix over 15 gallons of commercial potting soil. (Note: a 2 cubic foot bag of potting soil = **Rock phosphate provides phosphorus **Greensand and kelp meal provide potassium and trace minerals **Blood meal provides nitrogen **Bone meal provides phosphorus and calcium I generally am not a proponent of DIY concoctions, but this fertility mix seems to provide a good blend of nutrients to potting soil that is sometimes lacking in nutrition. In my opinion, you get what you pay for when it comes to potting soil. But I am also always looking for a bargain, so if what I have purchased does not have a long list of good quality organic ingredients, then I add this fertility mix.” Peppers Worth a Try Peppers worth a try, from the conversation between myself and Gail. Most of these are sweet to mildly hot. Sweet peppers generally come in at 0 Scoville Units. The exceptionally hot ones are noted, as well. Pot-a-Peno (mildly hot. 5000 Scoville Units) “Plentiful small, green jalapeño fruits have a traditional spicy zip that is great in any dish where you want a little punch of spice. Simply leave the fruit on the vine a few extra weeks and they will ripen to red for a sweet, spicy flavor. This variety is earlier to mature than other jalapenos giving you a head start on your garden’s harvest. A unique trait of Pot-a-peno is how the fruit hangs down beneath the plant making it very easy to harvest without damaging the appearance or productivity of the plant. A dense foliage canopy makes for an attractive addition to your patio or balcony garden.” Tricked You “90 Days. An improved version of the very popular Fooled You that is sure to become a favorite in its own right. Easy-to-grow, 4" fruits have excellent jalapeno flavor without the heat. Great for combining with hot jalapenos to customize the level of heat in homemade salsa and hot sauce. An X3R® variety.” Red Impact “Lamuyo-type peppers are notoriously difficult to grow, but the new Red Impact variety is here to change that. This AAS Winning pepper is easy to grow and produces thick, sweet walls, even when green. It is also much sweeter than other varieties and loaded with fruits for a high yielding gem. Red Impact plants are upright and tidy, with a strong disease package that protects your investment. The fruit is dark red, highly uniform in shape and size.” Sheepnose Pimento “80 Days. A tried-and-true heirloom. Pimento-shaped, 3 by 4" fruits are very sweet and meaty, making them ideal for canning, freezing and eating fresh. Plants are very productive, and fruits keep for weeks in the refrigerator.” Flamingo From Harris Seeds: “The vigorous hybrid pepper plant is resistant to TMV and prolific. Its smooth, tapered fruit are a good size (3-1/2 x 3-1/2" ) They have a waxy finish and turn from ivory-yellow to orange-red. Flamingo is a beautiful, sweet salad pepper with a bright color. If you are using Gypsy in your program, you should grow Flamingo for its improved yields and much larger size.” Gypsy “The early and heavy production of the yellow sweet pepper Gypsy provides color and flavor variety to your salads and dips. The 3-4 inch wedge-shaped fruits are very tender, crunchy and sweet. The plants average 18-20 inches in height with a 14-18 inch spread and are resistant to tobacco mosaic virus disease.” Mariach i mildly hot. 500-2000 Scoville Units “Mariachi sets fruits and produces an abundant crop of high quality, mild chile peppers. The chile peppers are pendant meaning they will hang below the stem. It is a fleshy pepper that ripens from creamy white to rose, then red. Some people may wait for the mature red pepper, but because its flavor is delicate and complex, having fruity undertones reminiscent of melons, the gardeners will harvest them at the creamy white stage. Mariachi peppers are moderately pungent, with Scoville readings in the 500 to 600 range when grown under non-stressful conditions. Add stress, such as extremely hot weather or overly dry soil, and Scoville readings may rocket to 1500 or 2000. Mariachi chiles can be used in salsas or sauces and are especially flavorful when roasted whole on the grill or under the broiler.” MexiBell mildly hot. 100-2500 Scoville Units “MexiBell looks like a sweet pepper, but it’s not. This bell pepper has an entirely new flavor – pungent. It combines a 3 to 4 lobed blocky bell fruit shape with the flavor similar to an Anaheim pepper. If desired, you can control the heat by cutting out the entire seed core, removing all seeds and white ribs. The productive 24-inch MexiBell plants are tolerant of Tobacco Mosaic Virus. Foliage provides an excellent canopy over the peppers that can be harvested in 120 days from seed when mature green or at 140 days to red.” Tequila “75 Days. A true purple sweet bell, deep in color with early maturity. Its 3 to 4-lobed fruits mature to a medium red. Attractive fruits make excellent stuffed peppers and stir-fries. Resists Tobacco Mosaic Virus.” A Farmer Fred Favorite! NuMex Joe E. Parker mildly hot. 500-2500 Scoville Units “Renee’s Garden favorite authentic New Mexico style chile with long, straight, 6-7 inch meaty pods, a medium heat level and rich, full flavor. Early-producing plants have heavy, consistent yields, and dense foliage that protects pods from sunburn. Harvest thick-walled, juicy pods at either the green or red stage. Perfect for memorable green or red chile, wonderful salsas, or for grilling, sautéing or adding gentle heat to any dish.” Jimmy Nardello According to the Baker Creek catalog: “This fine (sweet) Italian pepper was grown each year by Giuseppe and Angella Nardello at their garden in the village of Ruoti, in Southern Italy. In 1887 they set sail with their one-year-old daughter Anna for a new life in the U.S. When they reached these shores, they settled and gardened in Naugatuck, Connecticut, and grew this same pepper that was named for their fourth son, Jimmy. This long, thin-skinned frying pepper dries easily and has such a rich flavor that this variety has been placed in “The Ark of Taste” by the Slow Food organization. It ripens to a deep red, is very prolific, and does well in most areas.” Orange Blaze “This variety proved itself a winner in AAS Trialing Grounds across North America due to early maturity, sweet flavor, and disease resistance. It matured to a beautiful orange color earlier than the comparisons. Expect a very sweet flavor at full orange color about 65-70 days from transplant. Orange Blaze F1 produces 3 to 4-inch long fruits about 1 1/2 inches wide with 2-3 lobes.” Candy Cane Chocolate Cherry According to the Gurney’s catalog: “For gardeners, Candy Cane Chocolate Cherry Hybrid Sweet Pepper is like Christmas in July! Very ornamental plants bears lots of deliciously sweet, striped fruits! This early maturing variety produces attractive green fruits with unique white stripes that change to chocolate and cherry red as they mature. The mini bells are deliciously crisp and sweet—and can be eaten at any stage of ripeness. They're great for snacking, raw vegetable trays or cut up in salads. Growing 18-24 in. tall, the compact plants have variegated foliage and are very ornamental, so they're ideal for the edible landscape, tucked into a perennial bed or even grown in a container. 70-75 DAYS.” Pick-n-Pop Yellow “These are cute, snack-sized mini peppers that are extra sweet with just the right amount of juiciness and crunch. They produce continuously on a moderate sized plant with outstanding bacterial leaf spot resistance and produce a prolific number of bright, canary yellow-colored, uniformly shaped peppers.” Orange Habanero (very hot. 200,000-350,000 Scoville Units) According to the Pepper Joe’s catalog: “The orange habanero pepper plant is very productive producing large amounts of 1-3" shiny, scorching peppers, and will stand out beautifully in your garden or patio. The plants are very tolerant to cool conditions and perform well in cooler climates like the Northeast. This orange habanero pepper has a Scotch Bonnet shape that matures to a gorgeous, bright orange color that will not be hard to find in your garden. It will take 80 days to mature to green, and 100 days to mature to orange. The Habanero Orange chili contains fruity flavors that make it perfect for hot sauces, chili powder, and even add to your Jamaican jerk sauce.” Trinidad Scorpion (very, very, hot. 1,200,000-2,009,000 Scoville Units) According to Pepper Joe’s catalog: “The Trinidad Scorpion is a super hot variety that was once one of the hottest peppers in the world ! It held the distinguished honor as the world's hottest pepper, before it was dethroned by the Carolina Reaper. It is still a highly respected pepper for its volcano-level heat. The heat on this pepper is so strong, it may feel like your tongue is being stung by a scorpion! Heat levels can reach as high as 2,000,000 SHUs. Ghost pepper (hot, hot, hot. 900,000-1,000,000 Scoville Units) According to the Pepper Joe’s catalog: “The Red Ghost Pepper, also known as the Bhut Jolokia chili, is an heirloom variety originating from India that was once the hottest pepper in the world. The hot Ghost Pepper chili took the crown in 2007 and held the record for 4 years. Most ghost peppers run around the 900,000 SHU (Scoville Heat Units) mark but have been recorded at over 1,000,000 SHUs. As one of the spiciest peppers in the world, the Indian Army onceweaponized these to make chili hand grenades!” Jalafuego (hot. 4000-8000 Scoville Units) According to the Pepper Joe’s catalog: “The Jalafuego hybrid is noticeably more robust in its size and its flavor than other Jalapeno varieties, which make them a must have for growers and chefs. Plant these pepper seeds into the ground and watch them grow into 3 ft. tall, sturdy Jalafuego plants. You will see 4-6” long fruits form, starting out a deep green and ripening to a mature red. Jalafuego peppers are extra wide with smooth and glossy skin. These plants are more productive than other Jalapeno varieties , so be prepared for heavy yields. What you’ll get is more heat and flavor with these peppers. Jalafuegos can be harvested at their green stage (70 days) or when they ripen to red (90 days). Green Jalafuego peppers will have less heat and a lighter flavor best used in fresh foods and for cooking. Red Jalafuegos have more of a bite and peppery flavor to them, making them ideal for drying, salsa, and sauce.” Inferno (kind of hot. 2500-4500 Scoville Units ) According to the Pepper Joe’s catalog: “The Inferno F1 is a very productive hybrid pepper plant with high yields. Easy to grow, the Inferno pepper plant will produce approximately 8" long pods, which will be one of the bigger peppers you’ll grow. The smooth-skinned pods look identical to longer slender hot peppers like the Red Long Cayenne Peppers , or are even shaped like bananas. The large Inferno pepper will ripen from pale-lime/green, yellow, to then turning red. You can harvest the Inferno hot pepper at any stage depending on the level of spiciness you want, but we recommend harvesting them when they turn yellow or red because they have more unforgettable flavors! The Inferno chili is great for roasting, pickling, and frying, and to use as a topping like pizzas and burgers.” Roulette Habanero “Roulette F1 resembles a traditional habanero pepper in every way (fruit shape, size and color, and plant type) with one exception – No Heat! This AAS National Winner’s one-ounce fruits are red with thick walls when it matures and a nice citrusy (no heat) habanero flavor! Gardeners will be delighted with the earlier production of large, uniform fruit and a very high yield. One judge noted that each plant easily produces 10-11 fruits at one time and up to 100 per season so there are plenty to eat fresh, cook with, and enjoy! For an early fruit production of a habanero pepper that will charm even those that don’t like it hot, take your chances…Roulette is the perfect choice.” ======================================= The Robots at Substack are telling me I write too much and to shut it down. So, I will save the pepper variety pictures and comments that we discussed with Diane Blazek for the Monday Beyond the Garden Basics Newsletter. Which is available only for paid subscribers. You could become one today! Especially if you found anything here that helped you out. Tip your server! Thank you. Paid Subscribers get a special extra newsletter each week, along with access to our backlog of nearly 200 Beyond the Garden Basics newsletters. And I promise never to delve into politics. Doesn’t that make it worth $5? Thank you for also listening to the Garden Basics with Farmer Fred podcast! It’s available wherever you get your podcasts. Please share it with your garden friends. And your subscription to this newsletter helps keep the Garden Basics podcast alive, as well. Thank you for your support. Fred Hoffman is also a University of California Cooperative Extension Master Gardener in Sacramento County. And he likes to ride his bike(s). This is a public episode. If you'd like to discuss this with other subscribers or get access to bonus episodes, visit gardenbasics.substack.com/subscribe

Mar 7
Indoor/Outdoor Ant Control Tips
A bout of colder, wetter weather means ants will have begun their march towards the warmth and comfort of your house, greenhouse or outbuildings. In today’s newsletter podcast, America’s Favorite Retired College Horticulture Professor, Debbie Flower, lists many ways to control ant populations, both indoors and outdoors. She includes her home recipe for a lethal (but only lethal for ants) outdoor ant bait: 1 part boric acid (1 teaspoon, e.g.) - available at most garden centers 9 or 10 parts sugar (9 or 10 teaspoons sugar) Add enough water to make a slurry. Put slurry in a small container, tuna can size. Add 2 or 3 cotton balls and rotate them until they are completely covered in the slurry. Put a lid on the container. Lid must have holes big enough for ants to crawl through (about 1/8”). Bury in soil so lid is at soil level. Leave it alone. You won't see dead ants. They visit, take the bait back to the colony, and kill the entire colony. Commercial boric-acid ant baits are available, as well, for placing near outdoor plants where you see ants climbing up and down, herding aphids or gathering nectar. A word of praise for ants. Ants are a beneficial part of any successful garden. According to “ Ants Are Ecologically Beneficial ”, a publication of Iowa State University: “It is hard to imagine any other insect or animal that has a more important and positive impact on the terrestrial environment that sustains us. Ants are among the leading predators of other insects, helping to keep pest populations low. Ants move approximately the same amount of soil as earthworms, loosening the soil in the process and increasing air and water movement into the ground. They keep the ecosystem clean of dead insect carcasses and aid in the destruction and decomposition of plant and animal matter. By carrying bits of plants and animal remains into their nests, the soil is fertilized, and nutrients recycled through the world’s ecosystems. They carry seeds and help plants disperse into new areas.” However, as any gardener will swear, there are a couple of double-edged swords in that statement. Ant tunnels beneath the surface of a garden bed could move water too quickly to lower levels, making it unavailable to plant roots, especially in sandier soils. The solution for that: mix in compost on a regular basis. And those plant seeds that ants can disperse into new areas? There might be weed seeds in that mix. Yet another reason to own a long-handled hoe.It’s when ants start invading your house that homeowners need to act. Homeowners might reach for the spray can to douse those little scavengers. Many of those spray pesticides are only effective with direct contact on the ants. In addition, the stronger sprays, with residual action to thwart the next wave of ants, are potentially harmful to you, your children, and your pets. Here are some more modern, family-friendly indoor ant control methods from the University of California Ag and Natural Resources’ “Home, Garden, Turf, and Landscape Pests” publication, “Ants” : • Find where the ants are entering the house, then caulk any cracks and crevices both indoors and out. • Wipe up ant trails with soapy water when you see them. • Store food that is attractive to ants in closed containers. • Ant-proof kitchen garbage pails with sticky barriers like petroleum jelly. • Clean up grease and spills, pet food, and other possible food sources for ants. • Place pet food dishes in a moat of water with a drop of dishwashing liquid. The soap will keep the ants from floating. • If you decide to use a pesticide, choose prepackaged or refillable bait stations instead of sprays. Place them near ant trails and nest openings. Ant bait stations take time to work. It can take five to 10 days before you start seeing fewer ants. In the meantime, keep washing away the ant trails. In my experience, weak liquid boric acid combined with water in specially designed, refillable ant bait stations have proven effective, if given time. Boric acid powders and outdoor refillable ant bait stations are also available for outdoor ant control, especially if they have taken up residence in a long-neglected mulch pile of chipped/shredded tree parts. You’ll discover them in your first shovel full when you finally get around to using that mulch. Put down the shovel and pick up the powdered boric acid. Sprinkle it on the mulch pile and turn it into the middle of the pile. The ants will find it. But give them a couple of weeks before you return to that mulching task. Around the outer foundation of the house, the UC Integrated Pest Management team reports that several refillable bait stations are recommended, including the Ant Café, Antopia, Ant-No-More, and KM AntPro. A slow, but effective way to control Argentine ant populations is with a diluted, liquid boric acid product in a reusable ant bait station. Place the station outdoors near foundations where you see ants on the march. (A version of this appeared in the Dec. 30, 2022 edition of Beyond the Garden Basics) Thank you, also, for listening to the Garden Basics with Farmer Fred podcast! It’s available wherever you get your podcasts. Please share it with your garden friends. Fred Hoffman is also a University of California Cooperative Extension Master Gardener in Sacramento County. And he likes to ride his bike(s). This is a public episode. If you'd like to discuss this with other subscribers or get access to bonus episodes, visit gardenbasics.substack.com/subscribe

Feb 28
Backyard Chickens - How to Choose Them, How to Protect Them
In Ep. 381 of the Garden Basics with Farmer Fred podcast , Urban Chicken Consultant Cherie Sintes-Glover offered tips on how to protect your backyard chicken flock against the spread of the current version of avian influenza, the deadly H5N1, also known as the Bird Flu. The discussion on the Garden Basics podcast about protecting your flock from the bird flu took up about a half hour. At the top of this newsletter is our full conversation, which is over an hour in length, and touches on many aspects of being a backyard chicken flock owner. In this newsletter podcast, Urban Chicken Consultant and poultry health inspector Cherie Sintes-Glover of ChickensForEggs.com delves into the numerous variables that come into play for first-time chicken owners, including decisions around housing, feeding, and the necessary care and attention required. A significant point we cover is the myth that raising chickens is easy and low-cost; rather, it requires a solid understanding of animal husbandry and commitment to regular care. Cherie warns against believing everything we read online regarding chicken raising, stressing the necessity of consulting reliable sources. In addition, we tackle various questions, including how to differentiate between laying hens and roosters when purchasing chicks, and the importance of understanding the risks associated with chicken health, especially in the context of recent avian flu outbreaks. The discussion also outlines best practices for maintaining biosecurity, including the steps to take when introducing new birds to an existing flock and how to monitor them for signs of illness. Furthermore, we take a closer look at the environmental factors affecting chicken health, from extreme weather conditions to predator threats that can jeopardize backyard flocks. Cherie emphasizes constructing a predator-proof chicken coop while providing ample outdoor space for the birds to thrive. Alongside practical advice, Cherie shares insights into handling sick birds—detailing symptoms to look for, quarantine measures, and where to find local veterinary resources for poultry diagnostics. We address the societal ramifications of the bird flu crisis, particularly on the future of poultry show circuits with youth programs like 4-H and FFA, which are vital in cultivating a new generation of knowledgeable poultry enthusiasts. Bird Flu Infographics from the Center for Disease Control Cherie Sintes-Glover has appeared several times on the Garden Basics podcast over the years. Among the topics of interest to backyard chicken owners: Ep. 315 Choosing Backyard Chickens Ep. 310 Homegrown Chicken Food? Ep. 220 Chickens vs. Summer Heat Ep. 204 Backyard Chicken Care Ep. 006 Backyard Chickens! (Beginner’s basic info) Thanks for reading Beyond Basics: The Garden Basics with Farmer Fred Newsletter! Subscribe to receive new posts and support my work. Thank you for also listening to the Garden Basics with Farmer Fred podcast! It’s available wherever you get your podcasts. Please share it with your garden friends. Fred Hoffman is also a University of California Cooperative Extension Master Gardener in Sacramento County. And he likes to ride his bike(s). This is a public episode. If you'd like to discuss this with other subscribers or get access to bonus episodes, visit gardenbasics.substack.com/subscribe

Feb 14
Valentine's Day Garden Gifts
If you’re reading this today, Friday morning, a gentle reminder: did you forget today is Valentine’s Day? Oops. If you are about to scurry out the door for a "run to the supermarket" or "the trip to the hardware store" to find something romantic for your gardening sweetheart, take your phone with you, especially if you’re headed to the flower shop. You may need to call 9-1-1 for an ambulance when you see the cost of a florist’s bouquet. A dozen long-stemmed roses, in a nice vase, can easily cost you over $100. A more reasonably priced alternative: living plants , currently in bloom. Widely available at nurseries, home centers and florists, these plants will not only save you money, but look nice in the home or office for a lot longer: • One colorful Valentine’s Day present: orchids . Reasonably priced and easy to grow, choose the Phalaenopsis orchid, also known as the moth orchid . It’s not fussy about light or temperature and comes in a wide variety of flower colors, which tend to bloom primarily in winter and spring. Include a tray and small gravel. Set the plant on a tray of gravel, partially filled with water. Be sure the pot is slightly elevated on the gravel so that it isn’t sitting in water. Add a high-phosphorus, water-soluble orchid fertilizer to your gift package. • African violets . Not as temperamental as you might believe, African violets can bloom several times a year, given the right environment: bright, indirect light (such as a south window protected by a sheer curtain), regular water and high humidity, which can be provided by placing the pot on a watery bed of gravel. If in doubt about your sweetheart's gardening luck, choose the easier-to-grow varieties of African violets with solid green leaves, instead of the more difficult kinds that have variegated leaves. • Azaleas . Both evergreen and deciduous varieties come in a wide array of flower colors, from white to deep purple, and just about every shade in between. Transfer these to a permanent home in the garden after the blooms drop, in an area that is protected from our hot, afternoon sun, in well-drained soil that gets regular water. No garden? No problem. Small evergreen varieties make suitable houseplants. Just be sure to give them curtain-filtered sunlight at least four hours a day, out of the direct path of heaters and air conditioners. • Begonias . Rex begonias are noted for their striking, multi-colored leaves, and are sure to look spectacular on the dining room table during a candlelight dinner. Just be sure to place it in an area that gets bright, indirect light afterwards. Since the begonia thrives in high humidity, rest the pot in a tray that contains a layer of gravel and water. Keep the pot just above the surface of the water, though. • Cyclamen . The heart-shaped variegated green leaves are topped with white, pink and red blooms that resemble butterfly wings. When the plant dies back, transplant the tuber outdoors to a raised bed or pot on the shady, north side of the house. The plant will regenerate next winter, producing more blooms. • Nursery shopping for other colorful plants for Valentine’s Day? Don’t overlook the containers of mixed succulents . Combinations of sedums, sempervivums, and echeverias have shallow roots and stay in bounds for quite a while. • Among the colorful shrubs available now are camellias and azaleas . • Although this may not sound romantic, the hard-core gardener in your life will hug you tightly if you return from your morning dash to the nursery with bags of high quality potting soil, compost, mulch, seed starting mix , or… worm castings . • You’ll get bonus points if you convince a tree company to drop off several yards of a mulch consisting of chipped/shredded tree trimmings onto your driveway today. Top it with a heart-shaped, red balloon. And you can earn a gold star if you help shovel it into the raised beds, garden areas, and walkways tomorrow. Thanks for reading Beyond Basics: The Garden Basics with Farmer Fred Newsletter! Subscribe to receive new posts and pledge a subscription to help support my work. Thank you for also listening to the Garden Basics with Farmer Fred podcast! It’s available wherever you get your podcasts. Please share it with your garden friends. Fred Hoffman is also a University of California Cooperative Extension Master Gardener in Sacramento County. And he likes to ride his bike(s). This is a public episode. If you'd like to discuss this with other subscribers or get access to bonus episodes, visit gardenbasics.substack.com/subscribe

Feb 7
Persimmon Tips from the Pros
Recently, a listener’s question did not get fully answered on Episode 378 of the Garden Basics podcast. Katie was asking about how to thwart the squirrels and raccoons that attacked her persimmon tree fruit. But she included this little scenic bypass: “So when the persimmon tree we’ve waited on for NINE years to fruit (it did get fruit in years 6, 7, and 8, but they all dropped. Overwatering? Underwatering?) — when said persimmon developed abundant fruit this year and it began to ripen, I decided to try to ward off the squirrels with stainless steel fruit sleeves.” Debbie Flower and I immediately delved into pest control techniques, but totally overlooked her question about the fallen fruit and watering. Thus the purpose of this edition of the Beyond the Garden Basics newsletter. You can find a good explanation of correct persimmon watering techniques below, answered by the California Rare Fruit Growers. Before that, though, here’s more about persimmons: California's Central Valley was ablaze in October and early November with the other “orange” fruit tree: the brightly colored persimmon. And it's not just the fruit. Persimmon tree leaves can turn a brilliant hue of red before the first big wind and rain storm of late November washes them off their branches. What's left behind is the unpicked fruit, dangling like holiday ornaments during December. That's a feast for our eyes...as well as a banquet for hungry birds and squirrels. Persimmons have adapted well to our California climate: warm, dry summers and mild winters. At least 500 different Japanese persimmon (Diospyros kaki) varieties were brought to California during a major planting spree from 1870 to 1920. In 1877 alone, more than 5,000 plants in 19 varieties were imported from Japan. As a result, 99% of the U.S. commercial persimmon crop is grown here in California.Persimmons are quite nutritious, as well, loaded with Vitamin A, Vitamin C, Fiber, and antioxidants such as Beta-Carotene and Lycopene. If you live in the Central Valley, Southern California, Bay Area or low foothills as well as throughout USDA Zones 8 and 9 ... you can grow that! Japanese persimmon trees will be available at local nurseries throughout late winter. Give them full sun and regular irrigation in the dry months for best production. Persimmon trees can tolerate partial shade.As Warren Roberts explained in the newsletter podcast, persimmons are usually classified as either astringent or non-astringent. For fresh eating straight from the tree, choose a non-astringent, self-pollinating variety such as Fuyu, Giant Fuyu, Yemon or Izu. Astrigent varieties, which need to soften thoroughly before they sweeten, include Hachiya, Chocolate or Tamopan. Those varieties are self-fruitful, as well. Persimmon growing advice (including irrigation info) from the California Rare Fruit Growers (CRFG): Location: Full sun with some air movement is recommended for persimmon trees in inland areas, although they will tolerate some partial shade. Persimmons grown in cooler areas should have full sun with protection from cooling breezes. As an attractive ornamental the tree fits well in the landscape. It does not compete well with eucalyptus. Soil: Persimmons can withstand a wide rage of conditions as long as the soil is not overly salty, but does best in deep, well drained loam. A pH range of 6.5 to 7.5 is preferred. The tree has a strong tap root which may mean digging a deeper hole than usual when planting (when on D. kaki stock). Irrigation: Persimmon trees will withstand short periods of drought, but the fruit will be larger and of higher quality with regular watering. Extreme drought will cause the leaves and fruit to drop prematurely. Any fruit left on the tree will probably sunburn. Some 36 to 48 inches of water are needed annually, applied gradually in spring and tapering off in the fall. Hot inland areas may require 2 or 3 applications weekly, while coastal areas may need watering only once every 6 weeks, depending on the soil. If a drip system is is used, the emitters should be moved away from the trunk as the tree matures. Fertilization: Most trees do well with a minimum of fertilizing. Excess nitrogen can cause fruit drop. If mature leaves are not deep green and shoot growth is less than a foot per year, apply a balanced fertilizer such as a 10-10-10 at a rate of 1 pound per inch of trunk diameter at ground level. Spread the fertilizer evenly under the canopy in late winter or early spring. Pruning: Prune persimmon trees to develop a strong framework of main branches while the tree is young. Otherwise the fruit, which is borne at the tips of the branches, may be too heavy and cause breakage. A regular program of removal of some new growth and heading others each year will improve structure and reduce alternate bearing. An open vase system is probably best. Even though the trees grow well on their own, persimmons can be pruned heavily as a hedge, as a screen, or to control size. They even make a nice espalier. Cut young trees back to 1/2 high (or about 3 feet) at the time of planting. Pests and Diseases: Persimmons are relatively problem-free, although mealybug and scale in association with ants can sometimes cause problems. Ant control will usually take care of these pests. Other occasional pests include white flies, thrips which can cause skin blemishes and a mite that is blamed for the "brown lace collar" near the calyx. Waterlogging can also cause root rot. Vertebrate pests such as squirrels, deer, coyotes, rats, opossums and birds are fond of the fruit and gophers will attack the roots. Other problems include blossom and young fruit shedding, especially on young trees. This is not usually a serious problem, but if the drop is excessive, it may be useful to try girdling a few branches. Over watering or over fertilization may also be responsible. Large quantities of small fruit on an otherwise healthy tree can be remedied by removing all but one or two fruit per twig in May or June. Harvest: Harvest astringent varieties when they are hard but fully colored. They will soften on the tree and improve in quality, but you will probably lose many fruit to the birds. Astringent persimmons will ripen off the tree if stored at room temperature. Nonastringent persimmons are ready to harvest when they are fully colored, but for best flavor, allow them to soften slightly after harvest. Both kinds of persimmons should be cut from the tree with hand-held pruning shears, leaving the calyx intact Unless the fruit is to be used for drying whole, the stems should be cut as close to the fruit as possible. Even though the fruit is relatively hard when harvested, it will bruise easily, so handle with care. Storage: Mature, hard astringent persimmons can be stored in the refrigerator for at least a month. They can also be frozen for 6 to 8 months. Nonastringent persimmons can be stored for a short period at room temperature. They will soften if kept with other fruit in the refrigerator. Persimmons also make an excellent dried fruit. They can either be peeled and dried whole or cut into slices (peeled or unpeeled) and dried that way. When firm astringent persimmons are peeled and dried whole they lose all their astringency and develop a sweet, datelike consistency. And we are in total agreement with the CRFG: persimmons make an excellent dried fruit, a great sweet snack or for use in cookies or breads, or as a homemade holiday gift.According to our favorite book on dehydration techniques, "How to Dry Foods" by Deanna DeLong: • Wash and remove the stem cap. Cut fruit in half and then into 3/8-1/2" slices.• Place on a dehydrator sheet in single layers.• Dry at 140 degrees for 1-2 hours, then reduce heat to 135 degrees for an additional 7 hours (approximate).• When done, they should be tender and pliable, but not sticky.At that point, you can either vacuum seal them in plastic bags for long term preservation, or store the dried persimmons in a canning jar for quick use.Backyard gardeners who do a lot of drying are passionate about their choice of dehydrators. Some prefer the rectangular Excalibur dehydrator or other rectangular models. Others (including our household) enjoy the circular Nesco American Harvest or Garden Harvest Dehydrator . Our largest complaint about the Excalibur: the fan blows from the back to the front, which can rearrange any lightweight herb leaves that you might be trying to dry. The Nesco dehydrator's fan moves warm air from the bottom up, offering less disturbance to the drying crops. Still, the Excalibur is a good choice for most fruit and vegetable drying. Thank you for listening to the Garden Basics with Farmer Fred podcast! It’s available wherever you get your podcasts. Please share it with your garden friends. Fred Hoffman is also a University of California Cooperative Extension Master Gardener in Sacramento County. And he likes to ride his bike(s). This is a public episode. If you'd like to discuss this with other subscribers or get access to bonus episodes, visit gardenbasics.substack.com/subscribe

Jan 31
The Best Roses for America? One Master Rosarian's List.
Podcast Bonus: High Scoring Roses for Most of the United States We like to check in with Master Rosarian Charlotte Owendyk of the Sierra Foothills Rose Society, to find out which roses have captured her fancy in the last year or two. And beyond that, which roses she recommends because they can be easy to grow in a variety of climates. The Sierra Foothill Rose Society, after all, has California members from near sea level in Sacramento and Roseville all the way up to Lake Tahoe, more than a mile up in the Sierra Nevada mountains. Is there a rose that can be grown in such varied climates? Sure enough, Owendyk has a list that she likes to call, “Bulletproof Roses”. Owendyk didn’t hesitate to respond about her favorite, widely adaptable rose. “One rose that can really take the heat and the cold is ‘Distant Drums’, which has a very distinct coloration,” she says. “The petals are apricot-colored in the center, surrounded by lavender on the outer petals. It’s hardy down to USDA Zone 4, and has a wonderful strong scent with great disease resistance.” We here are considered to be in USDA Zone 9, where winter lows seldom drop below the upper 20’s. USDA Zone 4, on the other hand, has seen lows dip down to 31 below zero in the winter. Yet, ‘Distant Drums’ can do well for your aunt and uncle in North Dakota. Lake Tahoe (USDA Zone 6) is relatively balmy in comparison, where January overnight lows average about 26 degrees above zero. Another top performing rose for most of the United States, according to Owendyk is the floribunda rose, ‘Iceberg”, and its close relative ‘Burgundy Iceberg’. Floribunda roses are noted for their massive, long-lasting, colorful displays of large clusters of white flowers. However, when it comes to a quick turnaround for getting new blossoms, nothing beats “Secret”, says Owendyk. “Normally, hybrid tea roses take five or six weeks to rebloom after deadheading,” says Owendyk. “For ‘Secret’, it’s only four to five weeks. That’s why it’s one of my favorite roses. Plus, it’s very fragrant.” Other rose varieties that Owendyk is fond of in 2022, the ones she recommends for rose growers across the country, include: • “Belinda’s Dream”, a shrub rose (“A tough, soft pink rose, with great disease and heat resistance” says Owendyk.) • “Cinco De Mayo” (“Wonderful ruffled, smoky lavender flowers”). • “Lyda Rose” (“The flowers look like apple blossoms, absolutely stunning”). • ”Gemini” (“This All-America hybrid tea rose winner is very vigorous, with coral-and-cream colored petals”). • “Memorial Day” (“Extremely fragrant rose that blooms all summer, plus the canes don’t have many prickles or thorns”). • “Sally Holmes” (“A shrub rose that can get seven feet tall and is tolerant of some shade”). Other honorable mentions in Owendyk’s list of roses for everyone include “Betty Boop”, “Dick Clark”, Cherry Parfait“, “Julia Child”, “Marilyn Monroe”, “Playgirl”, “Rock N Roll”, and “Quietness”.“Floribunda? What’s That?” A Modern Rose Glossary Master Rosarian Charlotte Owendyk and I talked rose pruning in both Episode 162 and was repeated in Episode 377 of the “Garden Basics with Farmer Fred” podcast. The episode may have had you wishing for The American Rose Society’s “Handbook for Selecting Roses” , a great, pocket-sized encyclopedia of roses, and rose information, perfect for anyone shopping for good rose varieties. Plus, it has a lot of handy definitions when trying to decipher head-scratching questions such as, “What’s the difference between a floribunda and a grandiflora rose?” Here then, is a brief glossary of rose varieties, courtesy of the ARS: GRANDIFLORA ROSE In 1954, the introduction of a rose crossing between the ‘Charlotte Armstrong’ (a hybrid tea rose) and the floribunda rose, ‘Floradora’, resulted in a flower with carmine rose and dawn pink coloration. The cross had the characteristics of a hybrid tea rose, but also the ability to bear clusters or trusses and grow to a commanding height of six to eight feet or more. Thus, the class of Grandiflora was born. The first Grandiflora was named “Queen Elizabeth” in honor of the (at the time) very young queen of England. FLORIBUNDA ROSE The floribunda class of roses is characterized by its profuse ability to bear flowers in large clusters or trusses with more than one bloom in flower at any one time. Floribundas provide massive, colorful, long-lasting garden displays. Floribundas have the edge on hybrid tea roses. Hybrid teas bloom in cycles every six or seven weeks. Floribundas, on the other hand, can bloom continuously. One standout floribunda, with an ARS rating of 8.6, is ‘Lavaglut’. HYBRID TEA ROSES Probably the most recognizable class of roses, due to the large, shapely blooms, with each flower containing 30 to 50 petals. Flowers are borne on long stems either singly or with several sidebuds. One highly rated hybrid tea rose that is widely available at nurseries is ‘Mr. Lincoln’. MINIATURE ROSES The height of the average miniature rose is about 15 to 30 inches, making them ideal for edging beds and containers. Miniatures have been developed from many hybrid tea and floribunda roses. My favorite? ‘Joy’. CLIMBING ROSES Their long, arching canes have the ability to climb up fences, over walls and through trellises, arbors and pergolas. They offer a wide range of flower forms, shapes and colors. Among the highly rated climbing roses: ‘Don Juan’. SHRUB ROSES If you’re looking for easy care roses, consider the shrub roses. They can grow five to fifteen feet in every direction, depending on the climate. Shrub roses are noted for their hardiness, vigor, and large quantities of clusters of flowers. The ‘Knock Out’ varieties of shrub roses are especially hardy and highly rated. And you have to be hardy to thrive next to the drive-thru lane at Jack in the Box. How to Prune a Climbing Rose If you listened to Episode 162 of the '“Garden Basics with Farmer Fred” podcast (which was repeated in Episode 377) “‘PRUNE’-ciples: Tips for Pruning Roses”, you know Charlotte and I came to a grinding halt when it came time to talk about pruning climbing roses. It’s not a subject that lends itself very well to an audio format. You need to see it in action to better understand the nuances of training climbers. We mutually decided on one very good Youtube video on pruning climbers you might want to watch. Enjoy . If you listened to the podcast episode , you know Charlotte and I did a deep dive into the proper tools and clothing required to take on the somewhat dangerous task of pruning roses. To that conversation I would like to add a fairly new addition to the armor for rose growers: prickle (thorn) resistant protective sleeves , that run up the length of your arm and hook around your thumb. Pruning gloves, arm protectors for working around roses Bypass-style Hand Pruners Bypass-Style Loppers Rechargeable Reciprocating Saw By the way, here on Substack, I do not get a commission from Amazon for recommending any of their products. But I do use the Amazon links so you can get a better idea of what the products strengths and weaknesses are, as well as the opinions of those who have used the products. P.S. Those sharp things on rose canes? They’re not thorns. They’re prickles. Really. Debbie Flower, retired college horticulture professor, explains . Thanks for Subscribing and Spreading the Word About the Garden Basics with Farmer Fred newsletter, I appreciate your support. And thank you for listening to the Garden Basics with Farmer Fred podcast ! It’s available wherever you get your podcasts. Please share it with your garden friends. Fred Hoffman is also a University of California Cooperative Extension Master Gardener in Sacramento County. This is a public episode. If you'd like to discuss this with other subscribers or get access to bonus episodes, visit gardenbasics.substack.com/subscribe

Jan 10
Protecting Your Home with a Fire Resistant Landscape
In today’s “Beyond the Garden Basics” podcast, we talk with Douglas Kent , author of “ Firescaping: Protecting Your Home with A Fire-Resistant Landscape ”. He has a slightly different view of thwarting home and yard damage for residents of the urban-wildland interface, who are increasingly keeping a wary eye - and nose - in the air for smoke and flames. This is a public episode. If you'd like to discuss this with other subscribers or get access to bonus episodes, visit gardenbasics.substack.com/subscribe

Dec 27, 2024
2024 Tomato Winners (and losers)
Previous episodes of the podcast, show notes, links, product information, and transcripts at the home site for Garden Basics with Farmer Fred, GardenBasics.net . Transcripts and episode chapters also available at Buzzsprout . This is a public episode. If you'd like to discuss this with other subscribers or get access to bonus episodes, visit gardenbasics.substack.com/subscribe

Oct 22, 2024
Home Grown Tomatoes with Thanksgiving Dinner?
I read an intriguing garden column (many years ago) in the Redding, CA newspaper that suggested one way to get tomatoes to ripen outdoors in Autumn. It said: "A rule of thumb is, in the fall, take off all leaves and stems and all fruit that will not have time to develop before frost. You'll end up with skeletal vines and bare fruit, which is exactly what you want, since now all the plant's energy will go into ripening that fruit."That might work in the mild climate areas of southern California or south Florida, but here in Northern California (and Redding is in far Northern California), you're asking for a quicker end to tomato season if you do that. November temperatures will typically dip down into the 40's here; in late November, nighttime lows in the 30's are quite likely here. When nighttime temperatures are in the 40's and below, fruit development slows to a crawl and causes other problematic issues. Even here in the milder USDA Zone 9 Sacramento region, harvesting red tomatoes in mid-November is an iffy proposition, at best. The typical Sacramento gardener Thanksgiving trick: harvest the remaining tomatoes the day before. Immediately cut off the damaged, ugly portions. Serve the miniscule, pretty remains to Thursday's dinner guests, chopped and mixed into a salad. "Why yes, we can harvest tomatoes on Thanksgiving!" Please don't ask to see the whole tomatoes, though. You might lose your appetite. As the fall weather finally begins to turn cooler, gardeners are faced with this annual dilemma: will those green tomatoes in the garden ripen before temperatures start plummeting into the low 30’s? Depending upon where you are located, that question might start occurring to you in September, in the colder regions of the U.S. In many areas of California and other USDA Zone 9 climates, and perhaps parts of Zone 8, fresh garden tomatoes remain edible until late October or early November. They may not be pretty...but they are still a heckuva lot tastier than any tomato you'll find in a grocery store. By mid-November, remaining tomatoes are subject to harsher, colder, wetter weather leading to more outbreaks of blight diseases, insect infestations and bird pecking. Are you tempted to harvest those green tomatoes, now, hoping they'll ripen up indoors? Here are a few tips.From the horticulture department at Texas A and M : How do you tell when a green tomato, harvested early to prevent freeze damage, will ever turn red and ripen? This can simply be done with a sharp kitchen knife. Harvest a tomato typical of the majority of green tomatoes on your plants. Look at size but pay particular attention to fruit color. Slice through the center of the tomato. Closely examine the seed within the fruit. If the seeds are covered with a clear gel which cause them to move away from the knife, then that fruit will eventually turn red and ripen. If the seeds are cut by the knife then those fruit will never properly ripen. Compare the color and size of the tested fruit when harvesting tomatoes on your plants. Most similar fruit will eventually ripen and turn red.From Colorado State University :Cooler September temperatures help fruit to ripen because the red tomato pigments, lycopene and carotene, are not produced above 85 degrees F; nor is lycopene below 50 degrees F.As late September approaches, gardeners often try to extend the life of their plants by covering with cloth or plastic. Covering plants works well for nearly red tomatoes, but not as well for mature green ones. Though foliage may sometimes be saved, research shows that chilling injury on green fruit occurs at temperatures of 50 degrees and decay losses rise markedly on fruit exposed to 40 degrees F. Red ones well on their way to ripening tolerate colder temperatures.Before frost hits and plants go down, pick and bring fruit indoors to ripen. Clip fruit with a very short stem piece left on but one that’s not long enough to punch holes in other tomatoes. Stems ripped out of fruit will open them to decay. Eliminate (immature) green fruit, as research shows it’s more likely to spoil than ripen and never develops the flavor consumers want anyway. Mature green fruit will develop good flavor. Mature green tomatoes are well sized and have turned light green to white. If cut open, seeds are encased in gel and no empty cavity space is present. In addition to mature green, sort and store fruit by these groups as they will ripen at similar speeds. Fruit may be "turning" with a tinge of pink color showing, "pink" with 30 to 60 percent color showing, "light red" with 60 to 90 percent color present, and others "fully red" but not soft. Store mature green tomatoes at 55 to 70 degrees F. Once fruit is fully ripe, it can be stored at 45 to 50 degrees F with a relative humidity of 90 – 95%. Recommended refrigerator operating temperatures of 40 degrees are certainly too cool to ripen mature green tomatoes and are colder than desired for ripe ones. Ripening enzymes are destroyed by cold temperatures whether in the garden or in a refrigerator. Ripen tomatoes in well-ventilated, open cardboard boxes at room temperature checking them every few days to eliminate those that may have spoiled. Mature green tomatoes will ripen in 14 days at 70 degrees F and 28 days at 55 degrees F. The tomato heads at UC Davis recommend storing a small amount of green tomatoes in a carton box on fiber trays or paper layers. One way to add some air circulation to the bottom, especially in warm conditions: store the tomatoes in a fruit box that contains a perforated plastic liner.Hobby farmer Linsey Knerl offers these ideas for saving green tomatoes: Get a rope. By pulling up your plants (root and all, if possible) and hanging them right-side up in a garage or basement, you can prolong their time on the vine for a few more weeks. Just string up some clothesline or heavy rope across one wall, and clip the tops of the plant to the rope with clothespins or binder clips. Try to avoid too much sunlight, or your tomatoes will spoil or ripen unevenly. A temperature of 60-72 degrees is ideal. Go the paper route. My grandma used this trick to ripen up green ones over a period of a week or two. Pick only the green tomatoes without cracks, holes, or blight, wrap them individually in newspaper, and place them in a single layer in the bottom of a wooden crate or basket. Save the plant, or take cuttings . Depending on your latitude, this may require some alternative sources of bright light. For everyone, propagating a tomato cutting or saving the plant can benefit from adding bottom heat by using a propagation mat . Cuttings or plants should be placed in a room or greenhouse where the temperature stays above 50 degrees, ideally between 60 and 70 degrees. Saving an entire tomato plant takes some forethought. Planting them originally in a container can ease the process. Using a container that lessens the chances of that plant getting overgrown with encircling roots is ideal. Click on the Smart Pots info page about how Smart Pots fabric containers “air-prune” plant roots to keep them from choking your plant. Yes, that is a blatant plug for one of my sponsors…but it works! When you’re ready to move the plant indoors or to a greenhouse in a sunny location, think about the obstacles that lie ahead (other than lugging a plant indoors). Dig around the soil, looking for ant colonies or insect/tomato worm eggs/pupae. If you find them, I would advise against saving that plant. You may have an ongoing battle with ants, aphids, whiteflies and tomato worms. Indoors! Don’t worry about trying to save any existing tomatoes on the plant. You won’t. That’s a lot of stress on a plant. The existing fruit and flowers will probably fall off or not ripen very quickly. Before your move the tomato plant, cut back the entire plant so that it’s only about 12 inches tall. Thoroughly clean off the remaining leaves and stems with a good blast of water. You may want to invest in a package of yellow sticky traps to monitor for whitefly infestations, especially. If you are still keen about growing a tomato plant indoors in the winter, read this post from the Farmer Fred Rant blog page that goes into the best varieties to grow indoors during the winter. Oh, and one other thing: the taste of winter-grown tomatoes is just one notch above supermarket quality. It’s nowhere near that delicious, juicy, aromatic tomato that grows in your garden in the summer. Now that I have discouraged you from lugging insect-laden plants into your home, how about… How to take tomato cuttings: 1. Using four-inch pots, fill with a dampened, commercial potting soil, preferably a seed starting mix. Your backyard soil is too iffy, because of possible pathogens and poor drainage. 2. Using your finger, a dibble or a round pencil, make a hole in the dampened soil, a few inches deep. 3. Take 5-7 inch-long cuttings from the tips of the tomato plants. Make the cut just below a side branch. Take off any flowers or juvenile fruit as well as the bottom leaves. That cutting only needs the two top leaves. 4. Drop the cuttings into the hole in the soil and gently press the soil around the cuttings, burying at least two of the side branch cuts. 5. For these new cuttings, direct sun should be avoided until you see new growth. Again, bottom heat and a room where the temperatures are at least 50 degrees. Temperatures between 60-70 degrees can speed up the process. 6. Don’t let the soil dry out, but make sure there is a place for the water to drain out from the container. A ribbed, plastic plant tray below the pots is ideal. 7. When you see new growth (in a week or two), you can slowly increase the light. After a couple of weeks, 12 to 14 hours of direct light will help. 8. Transplant into the garden when soil temperatures are above 50 degrees. Using a hot cap or Walls of Water initially after transplanting can help them adapt to their new outdoor home in early spring. ===============And you can always cook green tomatoes, such as with this recipe for Fried Green Tomatoes from allrecipes.com : 4 large green tomatoes 2 eggs 1/2 cup milk 1 cup all-purpose flour 1/2 cup cornmeal 1/2 cup bread crumbs 2 teaspoons coarse kosher salt 1/4 teaspoon ground black pepper 1 quart vegetable oil for frying 1. Slice tomatoes 1/2 inch thick. Discard the ends. 2. Whisk eggs and milk together in a medium-size bowl. Scoop flour onto a plate. Mix cornmeal, bread crumbs and salt and pepper on another plate. Dip tomatoes into flour to coat. Then dip the tomatoes into milk and egg mixture. Dredge in breadcrumbs to completely coat. 3. In a large skillet, pour vegetable oil (enough so that there is 1/2 inch of oil in the pan) and heat over a medium heat. Place tomatoes into the frying pan in batches of 4 or 5, depending on the size of your skillet. Do not crowd the tomatoes, they should not touch each other. When the tomatoes are browned, flip and fry them on the other side. Drain them on paper towels.FOR A HEALTHIER ALTERNATIVE...(and you knew this was coming) try this vegan green tomato recipe from the Fat Free Vegan Kitchen Blog :Oven-Fried Green TomatoesIngredients1/2 cup water1 1/2 teaspoon ground flax seed1/2 cup cornmeal1/4 cup quinoa flour (or other flour)1 teaspoon cornstarch (or other starch)1/2 teaspoon black pepper freshly ground1/2 teaspoon salt4 large green tomatoesInstructionsPreheat oven to 425. Spray a baking sheet lightly with canola oil or non-stick spray or line with parchment paper.Combine the water and ground flax seeds in a blender and blend at high speed for 30 seconds. Pour into a wide, shallow bowl and allow to sit for a few minutes to thicken slightly.In another wide bowl or plate, combine remaining ingredients (except tomatoes). Cut tomatoes into slices about 1/4 to 1/2-inch thick. Submerge a tomato slice in the flax-water, allow excess to drip off, and place slice into cornmeal mixture. Press lightly to make sure that bottom of slice is covered with cornmeal and turn to coat other side. Place on prepared baking sheet.When all tomato slices are coated, bake for 15 minutes, or until bottoms are golden brown. Turn and bake another 15 minutes to brown other side. Remove from oven and serve immediately.Preparation time: 25 minute(s) | Cooking time: 30 minute(s)Number of servings (yield): 6Nutrition (per serving): 94 calories, 12 calories from fat, 1.4g total fat, 0mg cholesterol, 214.6mg sodium, 287.3mg potassium, 18.7g carbohydrates, 2.8g fiber, 5.1g sugar, 3.2g protein. ======================================= Publication of the “Beyond the Garden Basics” newsletter will be taking a break for awhile. Thanks for reading…and listening. ===================================== Thank you for also listening to the Garden Basics with Farmer Fred podcast! It’s available wherever you get your podcasts. Please share it with your garden friends. Fred Hoffman is also a University of California Cooperative Extension Master Gardener in Sacramento County. And he likes to ride his bike(s). This is a public episode. If you'd like to discuss this with other subscribers or get access to bonus episodes, visit gardenbasics.substack.com/subscribe

Oct 15, 2024
Who's Eating My Persimmons and Popcorn?
Mid-October is usually the time here in Northern California to harvest two of my favorite backyard crops: popcorn and persimmons. But what if the roof rats beat you to the harvest? Today - roof rat control tips! This is a public episode. If you'd like to discuss this with other subscribers or get access to bonus episodes, visit gardenbasics.substack.com/subscribe

Oct 8, 2024
What Are The Best Tasting Avocados?
If you listened to the full interview with avocado grower/Master Gardener Greg Alder in Ep. 360 of the Garden Basics podcast , you got a good fundamental education on growing backyard avocados. We covered such topics as: * Growing Conditions for Avocados * Fertilization Tips * The importance of watering avocado trees * The Role of Mulch * Soil Testing for Success * Cold Tolerant Avocado Varieties * The Flavor Profile of Avocado varieties * Top Avocado Varieties to Grow * Understanding Avocado Pollination * The “Single Tree” productivity of avocado trees * Growing Avocados in Different USDA Zones * Avocado Growing across the U.S. * Managing Greenhouse Conditions for Avocado Trees Again, go back and listen to the original interview in the Garden Basics podcast, Episode 360 . The part of our chat with Greg Alder that intrigued me the most, though, was our brief discussion of the flavors of various avocado varieties. It is that part that is excerpted above, at the top of the newsletter. After all, why plant something you wouldn’t be thrilled to eat? His choices for the best tasting avocados included the Hass, Gwen, Sharwil, Reed, GEM, and Fuerte. The newsletter podcast includes the ravings of another fruit-oriented lunatic, Ed Laivo , who has spent most of his adult life talking about, growing, and selling fruit trees. His latest venture is a fruit-based You Tube page “ Ed Able Solutions ”. The excerpt above includes the audio of one of his You Tube postings, praising the Reed avocado. Another fruit fanatic whose opinion I respect is Tom Spellman, the Southern California representative for Dave Wilson Nursery . When posed with the question, “What are your favorite tasting avocados?”, Tom replied: “Fred, I agree with all of Greg’s picks. Some other favorites of mine are Pinkerton, Jan Boyce, and Stewart. Best recommendations for California home growers is to plant a small collection of varieties including both A and B flowering types that will give you fruit year round. For example, If you had the Fuerte, Hass, Reed, and Stewart, you would have four overlapping varieties so you can almost always be able to harvest from two. Right now I still have Hass and am starting on the Reeds. Hass will finish about the time Stewart comes on. However, in Northern California, you also have to consider adaptability.” Oh yeah, adaptability to other areas. As Greg Alder pointed out in our Garden Basics interview , avocados have a narrow sweet spot for growing conditions: not too hot, not too cold, the correct humidity, minimal drying winds, the right amount of water. Parts of the San Francisco Bay Area come the closest to providing that avocado ideal climate. Here in the Central Valley of California, where temperatures have a wider swing, a successful backyard avocado tree usually has these conditions in common: afternoon shade, protection from heavy winds, lots of mulch, reflective surfaces for winter heat, such as a nearby concrete patio, or a nearby west or south-facing fence. And of course, plenty of water to maintain evenness of the soil moisture. Oh, and that soil - preferably not too much clay - should drain fairly quickly. Years ago, as the area’s chief Avocado Skeptic, I pointed out in a Farmer Fred Rant! Blog Post entitled: “ Avocados in Sacramento? Good Luck! ” that the varieties that seem to have the best success here are Bacon, Zutano, Mexicola, Fuerte, Pinkerton, Jim, Sir Prize, and Stewart. However, “success” does not necessarily equate “outstanding taste”. But trying to choose avocado varieties based on the information regarding their heat and cold tolerances is not an easy task, nor the complete criteria. From Greg Alder : “There is very little info out there on cold and heat tolerance of avocado varieties because the assessment of this is more complicated than it would seem. One, varieties tolerate cold and heat in different ways. For example, sometimes one variety's leaves get burned in heat while they hold on to their fruit (Pinkerton) whereas another variety's leaves do not get burned but they drop their fruit (Reed). So which is more heat tolerant? Two, many factors beyond the scion variety affect an individual tree's performance in cold or heat: rootstock, timing of the cold/heat, underlying (invisible) health of tree, crop load, and more. So you can see a row of trees all of the same variety with variable damage after a hot or cold spell. But here is what I can say: My place (in Ramona, east of San Diego) is both slightly too hot and too cold for avocados every year. My trees get some cold damage and some heat damage every single year. In this kind of environment, I have learned two main lessons: * Protect trees until they are about six feet tall, and then they can recover well from cold or heat damage. Avocado trees are wimps when young, but they get surprisingly resilient after that size. * All the best varieties are worth trying. There is not a large difference in heat or cold tolerance among the varieties that have the best fruit. Here are a few links to posts Greg has written where he describes or show some minor differences between varieties and ways to protect from heat and cold: Protecting avocado trees from cold Protecting avocado trees from heat Heat tolerance of avocado varieties Avocado varieties in the cold Growing avocados in California's Central Valley Avocados, Australian Style Did you know that on a per capita basis, the country that consumes the most avocados is Australia? At least, that’s what the marketing department of Australia’s avocado growers, Avolution , claims. So, it’s only right we get their input on the best tasting avocados, along with their PR spiel: Avocado lovers are spoiled for choice when it comes to the variety of this delicious and nutritious fruit. In Australia, avocados are produced all year round due to the range of climates and conditions across eight major avocado growing regions. The country’s diverse production landscape has led to the cultivation of numerous avocado varieties, each with its unique characteristics. This article will introduce some of the best avocado varieties to try, with a focus on the Australian market. I. Hass: The Dominant Variety Hass is the main avocado variety in Australia, representing 83% of production in 2021/22. This popular cultivar is produced almost all year round across the country’s production regions. Hass avocados are known for their thick, pebbly skin that turns from green to a dark purplish-black when ripe. The fruit has a creamy, buttery texture and a rich, nutty flavour, making it a versatile choice for various dishes, from guacamole to avocado toast. II. Shepard: The Late Summer and Autumn Star Shepard avocados , harvested in Queensland through late Summer and Autumn, make up 14% of Australia’s total avocado production. During this time of year, they become the dominant variety on the Australian market. Shepard avocados have smooth, green skin that remains green even when ripe. Their flesh is also buttery and smooth, with a slightly sweeter taste compared to Hass avocados. This variety is ideal for salads, as its firmer texture helps it maintain its shape when sliced or diced. III. Unique Varieties Worth Exploring While Hass and Shepard avocados dominate the Australian market, there is a multitude of other varieties worth trying, accounting for the remaining 3% of the country’s avocado production. Some of these unique cultivars include: Reed : This large, round avocado has a thick, slightly pebbled skin and a rich, creamy texture. Reed avocados are known for their exceptional taste and are often considered a gourmet variety. Fuerte : With its smooth, green skin and pear-like shape, Fuerte avocados have a creamy texture and a delicate, nutty flavor. This variety is excellent for slicing and adding to sandwiches or salads. Pinkerton : Pinkerton avocados have a distinctive elongated shape, smooth green skin, and a small seed. The fruit boasts a creamy texture and a mild, nutty flavor.p GEM : A relative of the Hass avocado, GEM avocados have a similar taste and texture but are slightly smaller in size. They are known for their high oil content, making them a delicious and nutritious option. Australians are the highest consumers, per capita, of avocados in the English-speaking world, a title they have proudly maintained. According to “Facts at a Glance,” a report compiled by Avocados Australia, Australian avocado production is forecast to increase significantly over the next few years, with at least 115,000 tonnes per annum expected to be produced by 2025. This growth reflects the country’s ongoing love affair with avocados and the diverse range of varieties available. Conclusion Australia’s avocado market offers an impressive selection of varieties for consumers to enjoy. While the popular Hass and Shepard avocados dominate the market, other unique cultivars like Reed, Fuerte, Pinkerton, and Gem are worth exploring for their distinct flavours and textures. As the Australian avocado industry continues to grow, avocado enthusiasts can look forward to trying even more delicious varieties in the future. Finally, no survey of the best tasting varieties would be complete without consulting America’s new favorite expert on everything, Google Generative AI: • Hass The most popular and widely available variety, Hass avocados are known for their buttery, meaty texture and subtly nutty flavor. • Fuerte With a pear-like shape and smooth green skin, Fuerte avocados are sweeter and fruitier than Hass avocados, with a creamy texture and delicate, nutty flavor. • Reed This large, round avocado has a thick, slightly pebbled skin and a rich, creamy texture. • Shepard This avocado has a milder flavor than Hass avocados and firm flesh that maintains its structure well. • GEM A relative of the Hass avocado, GEM avocados have a similar taste and texture but are slightly smaller in size. So, backyard gardeners…do you feel lucky? Thanks for reading Beyond Basics: The Garden Basics with Farmer Fred Newsletter! Subscribe for free to receive new posts and support my work. Thank you for also listening to the Garden Basics with Farmer Fred podcast! It’s available wherever you get your podcasts. Please share it with your garden friends. Fred Hoffman is also a University of California Cooperative Extension Master Gardener in Sacramento County. And he likes to ride his bike(s). This is a public episode. If you'd like to discuss this with other subscribers or get access to bonus episodes, visit gardenbasics.substack.com/subscribe

Oct 1, 2024
Why is It That Fall is For Planting?
In this insightful conversation (above), Farmer Fred speaks with Diane Blazek, executive director of All-America Selections and the National Garden Bureau , about the seasonal transition from summer to fall and how it presents an opportunity for gardeners to refresh their landscapes with vibrant fall colors and cool season blooming plants. Diane's extensive experience in the horticultural industry positions her uniquely to share knowledge on regional and national plant varieties, particularly those achieving popularity across the United States. Diane highlights the significance of fall planting, emphasizing it as an ideal time for gardeners. With the energy from the summer season still lingering and the ground remaining warm, fall allows for planting before the onset of hard freezes in the colder USDA Zones. This period often fits well within planting guidelines since it enables various plants, especially perennials and bulbs, to establish robust root systems before going dormant. Diane insists that successful fall planting leads not just to immediate gratification but also ensures future blooms and growth come spring. She suggests that novice gardeners pay attention to hardiness zones and engage with local gardening experts to choose suitable plants for their specific climate. The discussion navigates through practical tips for gardeners, such as understanding the appropriate timelines for planting in areas with cold winters, where the ground may freeze. Diane advises that planting six weeks prior to the ground freezing is optimal for perennials and shrubs, whereas bulbs may have a bit more leeway. The seasoned gardener might experiment with plants that extend beyond their hardiness zone, but careful consideration of a plant's specific requirements is important for beginners seeking reliable results. Farmer Fred and Diane share insights into the benefits of local nurseries and local cooperative extension offices as critical resources for regionally appropriate plant selections. To further aid gardeners, Diane explains the biological aspects of fall planting—specifically, that initial growth is often underground, with plants focusing on root establishment rather than leaf growth in cooler temperatures. This foundational growth is vital for ensuring a plant's health and successful blooming in future seasons. They also address winter protection strategies for hardy perennials in colder USDA zones, emphasizing that mulching can be an effective way to insulate plants during freezing periods. The conversation highlights several flowering plants that are particularly well-suited for fall planting, with Diane showcasing some recent standouts like the ‘Yellow, My Darling’ Echinacea and various cultivars of Buddleja, which bear aesthetic appeal but come with regional considerations due to their invasive potential in certain areas. Diane also outlines several other standout plants, including hardy hibiscus, highlighted by its vibrant blooms and the exciting new hybrid, ‘Holy Grail,’ which features stunning scarlet flowers. The distinctive and visually appealing ‘Backdraft’ Kniphofia, reminiscent of Halloween candy corn, adds further enthusiasm to the list of recommended plants. Ornamental grasses are mentioned for their diverse utility; they add seasonal color, elegance, and even provide habitats for beneficial insects like ladybugs during the winter months. Diane concludes by reinforcing the importance of fall planting, particularly focusing on perennials, as they set the stage for vibrant gardens come spring. She encourages listeners to explore more about these plants through the National Garden Bureau’s resources for further inspiration and guidance. The synergy between seasonal gardening, plant selection, and ecological benefits forms a compelling narrative aimed at empowering new and experienced gardeners alike to embrace the opportunities that fall planting presents. Written by Fred, with a little AI help from Auphonic . ============================================== With your help, we raised over $2,000 for the Sacramento Children’s Home Crisis Nursery during the “ Farmer Fred’s Ride for the Kids ” on Saturday, Sept. 28. 100-mile bike ride was a success. Mission accomplished! ============================================================= Thanks for reading Beyond Basics: The Garden Basics with Farmer Fred Newsletter! Subscribe for free to receive new posts and support my work. Thank you for also listening to the Garden Basics with Farmer Fred podcast! It’s available wherever you get your podcasts. Please share it with your garden friends. Fred Hoffman is also a University of California Cooperative Extension Master Gardener in Sacramento County. And he likes to ride his bike(s). This is a public episode. If you'd like to discuss this with other subscribers or get access to bonus episodes, visit gardenbasics.substack.com/subscribe

Sep 24, 2024
Weed Killers Just Got More Confusing
In this episode of the Beyond the Garden Basics newsletter/podcast, we engage in an in-depth discussion about weed killers with Debbie Flower, America’s favorite retired college horticultural professor. We delve right into the complexities of weed management, addressing the various options available while navigating the maze of products at our local big box stores. As we stand before a daunting wall of weed killers, the conversation brings clarity to the overwhelming choices, shedding light on the distinctions between the products and their formulations. We start by tackling the widespread confusion surrounding Roundup, a brand historically synonymous with glyphosate. As glyphosate is being phased out, we explore the newer formulations that have replaced it. Many consumers may assume that Roundup still contains glyphosate, but Debbie explains that consumers must be vigilant in understanding the fine prints of these products. According to the University of Tennessee publication, “ Update on Roundup-Branded Herbicides for Consumers ”, Roundup weed-killing products now encompass a range of active ingredients that may vary significantly in toxicity and efficacy. We emphasize the importance of reading labels thoroughly, highlighting the legal implications of using herbicides incorrectly. Debbie expands on the shift in chemical composition within Roundup by introducing us to several active ingredients like Diquat, Fluazipop, and Triclopyr. We discuss the implications of using these chemicals, including their varying half-lives and their potential effects on soil and nearby desirable plants. Notably, Debbie reminds us that some products can render soil inhospitable for new planting for extended periods, which is crucial information for gardeners planning their next steps after weed control. Throughout our discussion, we touch on the critical aspect of safety. Both Debbie and I stress the significance of protecting oneself when applying any chemical herbicide. We explain how understanding the signal words such as “caution,” “warning,” and “danger” on product labels can help consumers navigate the toxicity levels of different herbicides. The conversation leads us to the point that, while chemical weed control can be effective, many gardeners often overlook traditional methods, like manual weeding and mulching, which can be safer and more environmentally friendly. We tackle alternative options popular on some Internet gardening sites, including vinegar as a natural weed killer but quickly highlight the hazards of using 30% vinegar, which is often found in the cleaning aisle rather than the gardening section. This topic was also covered in depth in the September 3, 2024 edition of the “Beyond the Garden Basics” newsletter. We caution gardeners about the need to treat such products with care, as they can be more harmful than conventional herbicides. This well-rounded dialogue between us brings to light both the benefits and the risks associated with various gardening techniques and products. As we progress, we dig into the technical side of weed killers—discussing how different chemicals are absorbed by plants, persistence in soil, and the necessary wait times before replanting. Debbie provides valuable insights into the environmental impact of chemicals leaching into the soil and waterways and how this can affect crops and landscaping efforts. Our conversation is not merely about identifying the right products but also understanding their broader implications on health and the environment. Finally, we encourage listeners to be proactive and informed gardeners by seeking out educational resources on reading and understanding product labels , as well as considering effective non-chemical alternatives to weed management. With all these insights shared, the overarching message is clear: informed decision-making is paramount in effective and safe gardening practices. We leave you equipped to tackle weed problems while fostering a safe and flourishing garden. And, one more excellent weed suppressant: (authors: Fred and his pal, AI ) Farmer Fred's Ride For the Kids! I'm fundraising on behalf of the 2024 Sac Century Challenge on September 28th to raise money for the Sacramento Children's Home Crisis Nursery and I could use your support. Here’s the link for making a donation. On that date, I’ll be riding my bike, a Surly Midnight Special (NOT an e-bike) 100 miles along the Sacramento River to help out the Sacramento Children’s Home Crisis Nursery. I’ve ridden 100 miles in one day plenty of times…when I was younger. But at 73, I could use some moral support, and the Sacramento Children’s Home Crisis Nursery can use your pledge money. So, how about it? Maybe pledge 10 cents a mile (that’s $10) along with a hearty, “You go, Fred!” Or a more generous one dollar a mile ($100), to give me the mental endurance for the entire ride, to dodge the pothole-filled levee roads and pedal harder in the ferocious headwinds that makes this ride a real challenge! The Sacramento Children's Home Crisis Nursery is the only program of its kind in Sacramento County and directly prevents child abuse and neglect by supporting families with small children at times of crisis. The nursery allows parents to bring their children ages newborn to five for emergency hourly or overnight care during difficult times, with the goal of keeping families together and reducing the number of children entering foster care. To care for our community's most vulnerable children, we rely on support from community members like you. By donating, you empower us to provide a safe haven for children throughout the Sacramento area, offering respite to parents during times of crisis, and building a strong support system for the future. Your support helps provide a safe place to stay local kids in need. Again, here’s the link to make a donation to the Sacramento Children’s Home Crisis Nursery. Thank you for your support, and say "Hi!" if you see me pedaling like crazy into a headwind out there on Saturday, September 28th! Thanks for reading Beyond Basics: The Garden Basics with Farmer Fred Newsletter! Subscribe for free to receive new posts and support my work. Thank you for also listening to the Garden Basics with Farmer Fred podcast! It’s available wherever you get your podcasts. Please share it with your garden friends. Fred Hoffman is also a University of California Cooperative Extension Master Gardener in Sacramento County. And he likes to ride his bike(s). This is a public episode. If you'd like to discuss this with other subscribers or get access to bonus episodes, visit gardenbasics.substack.com/subscribe

Sep 17, 2024
The Catalina Cherry Tree. The Fruit is for the Birds.
Autumn officially begins on Sunday. Fall planting season, however, is already here. The cooler air temperatures, combined with the still-warm soil, are the perfect growing conditions for a new plant. Increasing in popularity, thanks to increased production by wholesale nurseries and the plants’ needs for less water once established, are an increasing number of California native plants. From the garden e-mail, Evan of San Jose, California wants to know about an evergreen tree or shrub that is native to coastal Southern California but does well in most mild coastal areas of the West Coast that stay above 20 degrees in the winter: “I just ordered a Catalina cherry for my backyard,” writes Evan. “And I remembered that cherry trees need a pollinizing partner to produce fruit. Unfortunately, I can't find any information about which other cherry varieties are compatible with Catalina cherry. I was wondering if you could help me find a second tree to put in my backyard to pollinize the Catalina cherry. And I was hoping for more of an eating cherry other than the Catalina cherry. So, if there's a variety that my kids might like a little more that I can plant next to this one, I would appreciate it. This will be the first cherry in my backyard.” The Catalina cherry (Prunus illicifolia subsp. ‘Lyonii’) is a California native shrub or tree, and it does quite well in coastal zones up and down the Pacific coast from San Diego to Seattle (Sunset Zone 5). And perhaps even a wider range. The “Sunset Western Garden Book” says the Catalina cherry’s progenitor, the Prunus illcifolia (the Hollyleaf Cherry), has a range from Sunset Zones 5-9 and 12-24, which would include areas ranging from the hot valleys of California into the Sierra foothills. The tree can survive cold temperatures down to about 20 degrees. I know that some of you like to experiment with growing species that are outside of your area’s normal plant palette. This might be one of them. But, as always, gardener beware. I hope you have more success with this than I had, attempting to get rhubarb seed to germinate. Some specimens of the Catalina cherry on the coastal Southern California mainland tend to grow on slopes, and that might be a tip for where to plant it, in an area that gets good drainage. And cherry trees are notorious for needing good drainage. The Catalina cherry can be a tree or a shrub, because it only gets 15 to 20 feet tall, in gardens; but it can get twice that size in the wild. And, it is a true cherry, even though the dark red-to-black cherries themselves are not very tasty. Calscape.org , which is a plant finder service of the California Native Plant Society, says that “the fruit on the tree is best left for the birds” and parts may be poisonous. From Wikipedia: The pulp of the (hollyleaf) cherry is edible. [4] However, the seeds of the hollyleaf cherry are considered to be toxic, and the plant must undergo certain leaching processes to make it safe for consumption. [24] Native Americans fermented the fruit into an intoxicating drink. [4] Some also cracked the dried cherries and made meal from the seeds after grinding and leaching them. [25] It has also been made into jam. [26] The method of preparation for the cherry was to first extract and crush the kernel in a mortar, and the resulting powder would then be leached in order to eliminate remaining bad chemicals. The final step was to boil the leached powder into an atole. [24] Once this process was completed, Native Californians would then make soup base, tortillas, or tamale-like foods using the resulting ground meal. Other times, the kernel would be kept whole, leached to remove its hydrocyanic acid content, roasted for a couple hours, and then used to make cakes or balls. [27] Aside from food, the hollyleaf cherry was also used for medicinal purposes by some Native Californian tribes, including the Diegueño and the Cahuilla. Specifically, infusions made from the bark and roots of hollyleaf cherry plants would be used as treatment for common colds and coughs. [27] However, the Catalina cherry tree is quite showy, with spikes of five inch-long white to cream-colored flowers in spring, followed by the cherries. As far as getting more of that fruit that the birds will enjoy, be aware of this: the fruit can stain many hard surfaces. So, plant it well away from the patio or driveway. What would be a good cherry variety to use as a pollenizer? As you are probably aware as a parental gardener, you never want your children to utter the phrase, “the cherries we bought at the grocery store are better than the cherries we're getting in our backyard”. So, get them a sweet, tasty cherry tree that is self-fertile, but also serves well as a pollenizer for other cherry varieties. And one of the best for doing that is the Stella cherry . The Stella cherry is a popular tree that does quite well throughout most cherry growing regions, such as ours. It's good for canning, preserves, cooking, and fresh eating. The Stella takes about two to five years after planting to bear fruit. The mature size of the tree isn't that large, perhaps 12 to 16 feet. As far as the watering requirements, it does need regular water, about 12 to 15 gallons per week, May through September. The problem with having a fruiting cherry tree where you're harvesting for the fruit versus a Catalina cherry where you're using it more as a beautiful, blooming, evergreen screening plant is the fact that the Catalina cherry is drought tolerant when mature. It doesn't like a lot of summer water once it's established, perhaps only once every three weeks or so during the summer. However, you will need to water it regularly to get it off to a strong initial growth through its first year. The Stella cherry tree, on the other hand, will need regular weekly watering during the dry season for its lifetime. So, what do you do? If that Stella cherry is upwind of the Catalina cherry, you'll be okay to plant it well away from the root zone of the drought tolerant Catalina cherry, on its own irrigation circuit, about 30 feet away. Farmer Fred’s Ride for the Kids! I'm fundraising on behalf of the 2024 Sac Century Challenge on September 28th to raise money for the Sacramento Children's Home Crisis Nursery and I could use your support. Here’s the link. On that date, I’ll be riding my bike, a Surly Midnight Special (NOT an e-bike) 100 miles along the Sacramento River to help out the Sacramento Children’s Home Crisis Nursery. I’ve ridden 100 miles in one day plenty of times…when I was younger. But at 73, I could use some moral support, and the Sacramento Children’s Home Crisis Nursery can use your pledge money. So, how about it? Maybe pledge 10 cents a mile (that’s $10) along with a hearty, “You go, Fred!” Or a more generous one dollar a mile ($100), to give me the mental endurance for the entire ride, to dodge the pothole-filled levee roads and pedal harder in the ferocious headwinds that makes this ride a real challenge! The Sacramento Children's Home Crisis Nursery is the only program of its kind in Sacramento County and directly prevents child abuse and neglect by supporting families with small children at times of crisis. The nursery allows parents to bring their children ages newborn to five for emergency hourly or overnight care during difficult times, with the goal of keeping families together and reducing the number of children entering foster care. To care for our community's most vulnerable children, we rely on support from community members like you. By donating, you empower us to provide a safe haven for children throughout the Sacramento area, offering respite to parents during times of crisis, and building a strong support system for the future. Your support helps provide a safe place to stay local kids in need. Again, here’s the link to make a donation to the Sacramento Children’s Home Crisis Nursery. Thank you for your support, and say "Hi!" if you see me pedaling like crazy out there on Saturday, September 28th! Thanks for reading Beyond Basics: The Garden Basics with Farmer Fred Newsletter! Subscribe for free to receive new posts and support my work. Thank you for also listening to the Garden Basics with Farmer Fred podcast! It’s available wherever you get your podcasts. Please share it with your garden friends. Fred Hoffman is also a University of California Cooperative Extension Master Gardener in Sacramento County. And he likes to ride his bike(s). This is a public episode. If you'd like to discuss this with other subscribers or get access to bonus episodes, visit gardenbasics.substack.com/subscribe

Sep 10, 2024
What is a Crisis Nursery?
Today’s newsletter podcast talks about a Crisis Nursery. No, it’s not an emergency room for sickly looking houseplants; although, the gardening entrepreneurs among you may be thinking…”hmm, that may not be a bad idea!” The Crisis Nursery we are talking about today deals with the safety of children, and the role the Sacramento Children’s Home has in its survival. Oh, listen! I hear my dead mother saying, “And what exactly does that have to do with the price of tea in China?” That would be her way of saying, “stay in your lane, Freddie Joe.” Adding, “stick to gardening.” Sharp-eyed readers of this digital scenic bypass-laden newsletter, ostensibly dealing with horticulture, may know that I include a picture of a bicycle in just about every issue. Because, if I am not in the garden, I’m on my bike. And sharper-eyed, highly caffeinated readers will recall that I have been plugging “ Farmer Fred’s Ride for the Kids ” for a few weeks now. At least, that’s what I’m calling it. The Sacramento Rotary Club would prefer to call it by its actual name, the Sacramento Century Challenge , a fundraising 100-mile bike ride (plus shorter rides) on September 28 to raise funds to support the Sacramento Children’s Home Crisis Nursery program . Now, I know you came for the gardening here. But thanks for letting me talk about the Crisis Nursery in today’s newsletter podcast with the Sacramento Children’s Home Director of Philanthropy, Todd Koolakian. And if you are adverse to listening to podcasts, a transcript of our conversation is below. The internet links mentioned in the podcast are underlined in the above paragraphs. And below the transcript, is my garden gift to you for sticking with me all these years: a chart from the UC Davis Post Harvest Technology Department, “ Storing Fresh Fruits and Vegetables for Better Taste ”, which answers the question: where do all the tomatoes and zucchini (and other backyard garden favorites) go when you bring them into the house? The counter, the refrigerator, or a combination of the two? You’ll want to print this chart out and hang it inside a kitchen cabinet door, for easy reference. At this point, the sharpest-eyed, super-caffeinated, hyper-critical readers of this newsletter might remark, “Didn’t you publish this in a newsletter two years ago?” Hey, quit waving your trowel at me, Columbo. That time around, it was only the first page of a two page document. Today, it’s both pages of information on storing fresh fruits and vegetables. But no matter your caffeine intake, thanks for listening and reading all these years. What is a Crisis Nursery? The Transcript Farmer Fred Coming up Saturday, September 28th, I'm gonna be riding my bike. That is not so unusual. If I'm not in the garden, I'm usually on my bike. Well, on September 28th, that happens to be the date for the Sacramento Century Challenge. It's a 100-mile bike ride along the Sacramento River. It starts in downtown Sacramento (on Capitol Mall), heads south through the Delta Farmland region, and then back to downtown Sacramento. And yes, 100 miles is part of the challenge, as is the bike I'll be riding on. I'm not cheating you. I'll be on an analog bike, not an e -bike. It's my good, trusty, steel-framed Surly Midnight Special. And adding to the challenge, of course, is the route. It's not a very hilly route, the 100 mile route, but it goes along the river on the levee roads, which are full of potholes. And usually in past events in doing this ride, there are some ferocious headwinds, usually on the way back. And making it more of a challenge, and this is where you come in, folks, is helping out the Sacramento Rotary Club raise money for the Sacramento Children's Home Crisis Nursery by spurring me on with a donation for the Crisis Nursery. The Sacramento Children's Home Crisis Nursery is the only program of its kind in Sacramento County. Exactly what do they do? You probably saw the little headline in the newsletter or the podcast that asked the question, “what is a crisis nursery?” And you might be thinking, “some plants are in danger!” It's better than that. We're talking with Todd Koolakian. He is with the Sacramento Children's Home and the Crisis Nursery. And Todd, tell us a little bit about the Sacramento Children's Home and the Crisis Nursery. The Children's Home has been around since what, the 1800’s? Todd Koolakian That is true. Yes, we've been around since 1867. We originated as an orphanage at that time. During the gold rush days, we were started by a group of volunteer women and we've been continuously operating for 157 years. First, thanks Fred, for having me on to share a little bit more about our events and the beneficiary, the Sacramento Children’s Home Crisis Nursery. I'm also a member of the Rotary Club of Sacramento and I am the immediate past president. So I had the pleasure of leading the organization last year and now in my retirement of being the president of the club, but still a proud member of the Rotary Club of Sacramento. And we've been doing this event in partnership together, our two organizations, for 11 years and so proud to benefit from this event and folks like you that are going out and raising money on our behalf. The Crisis Nursery is a fairly unique program. There's only five crisis nurseries in the state of California. We operate two of them here in Sacramento County. It's a 24 -7 program that serves families with young children that are going through a crisis. And that crisis could really be anything. It could be a medical or mental health emergency. It could be homelessness, an employment crisis, just going through a time of despair and not having somewhere else to turn. So the crisis nursery is there for families going through any number of those crisis. They can turn to the nursery as a resource to bring their children for anywhere from a few hours up to 30 days, completely free of charge. The nursery can take those small children into their care, providing all the essentials they need. Everything is free, from clothing, food. It’s just a warm, loving place to stay. And then during that time, we work with the families to help solve their crisis. A lot of the families that we care for don't have a great support system. There's that age old African proverb that says “it takes a village to raise a child”. For a lot of the families that we serve, they don't have that village. And so we provide that village for them and provide some of the supports that they need during their time of crisis. And it's a really great program. We operate the only crisis nursery in Sacramento County. And like I said, one of only a handful in the state of California. And we're really proud to operate that program. We started it in 1996 and have had it ever since. And we opened up our second location in 2002. So really, it’s a great program. And we really appreciate all the generous support that comes from the Sac Century Challenge. Each year it raises about $100,000 to support our program. Farmer Fred That's great. What age of children are eligible to be in the crisis nursery? Todd Koolakian Great question. The idea behind crisis nurseries is to serve families with children, infant through age five. So a child from just a few days old all the way up to the day before their sixth birthday, all qualify to come and stay at the nursery. We can assist families with older children, with other resources. We just can't take them per our licensing in to stay at the facility. So some of the other resources we can provide families with older children, there is all sorts of other supports. You know, our organization, the Sacramento Children's Home, has programs that serve children of all different ages. So we have a lot of other resources, but as far as kids that can actually stay at the nursery, it is from a few days old all the way up to a day before their sixth birthday. Farmer Fred Yeah, it's interesting the number of reasons that people would want to avail themselves of your services. I noticed in your annual report that one of the stories cited was about a shooting outside of a bedroom window of a home where a family lived, and they wanted to get their children to safety. And they came to you. Todd Koolakian Exactly. It really runs the gamut on the types of reasons that clients come and utilize the crisis nursery. And there really is no right or wrong reason. We are open to anybody and everybody that may need our resource. There's all sorts of scenarios. What I would say is the connection between all of the different reasons is wanting to ensure that their young children are safe and that they're in a safe place. I think we've all unfortunately heard about some of the terrible news over the years of young children at times being left in vulnerable situations. That's what we're trying to avoid with the crisis nursery. And that's why the program's there. We don't want parents to be in a situation where they leave their child with unsafe people or in an unsafe environment. And so that's why the nursery is there. Really, there is no wrong reason to come to the nursery. There's no judgment on our part. Really, any reason is a good reason to come in and utilize that program. Farmer Fred What do you tell the parents - or parent - when they come in with a child and want the child to stay there? Do you explain to them that if we see a situation where there's abuse, we will bring in the authorities? Or do you not do that? Todd Koolakian All of our programs under the Sacramento Children's Home umbrella really are required to be mandated reporters. So if there's ever in any of our programs any sign of abuse, neglect, anything of that sort, we do have to report that to the authorities. What I will say though is the nursery is intended to be a program that families can use to avoid those situations to prevent child abuse and neglect. So we want the nursery to be a program that parents can use so that those sorts of things don't happen. And that's really why the nursery is there. It's a critical prevention tool for local families. It's a proven child abuse prevention tool that many of our partners and collaborators in the area know is a proven tool to avoid child abuse and neglect. So that's what we hope parents will use as a means to prevent those situations. Now, what I'll also tell you is we let all of the parents know that are utilizing the program, that there's nothing wrong with them for utilizing the program, that they shouldn't be ashamed, they shouldn't feel like they've done anything wrong as a parent. One of the greatest things that you can do to be a wonderful parent is to know when you need to seek help. And that's what we really try to drive home with clients that utilize the nursery. It's okay to ask for help. That's actually a really good thing. It means that you're wanting your kids to have the best possible outcome. And that sometimes all of us need a little bit of helping hand and the nursery is there judgment free to assist those sorts of families that might just need a short -term helping hand. Farmer Fred And the helping hand is to be extended as well to the Crisis Nursery itself. The reason behind this ride, the Sacramento Century Challenge that I'll be participating in on Saturday, September 28th, is raising funds for the Sacramento Children's Home Crisis Nursery. We'll have a link in the show notes and here in the newsletter about how you can donate to the Crisis Nursery through “Farmer Fred's Ride for the Kids”, I'm calling it. It's through an organization called Just Giving. So if you go to JustGiving.com and type in “Farmer Fred” in the search engine, you'll find Farmer Fred's Ride for the Kids, the 2024 Sacramento Century Challenge, right there, where you can help by making a donation. Not to lay any guilt on you folks, but do I ever ask for money when I answer your garden questions? No, no. I'm asking you now, to perhaps share some of your money with the Sacramento Children's Home Crisis Nursery. Thank you very much. Todd Koolakian, we have certainly learned a lot about the Sacramento Children's Home Crisis Nursery. Best of luck. Are you going to be out riding on September 28th? Todd Koolakian I won't be riding, but I will be out there as a volunteer. So for folks that are going to ride such as yourself, Fred, and go to the post ride festival, I'll be out there at that event, helping out with manpower. But we'll have a lot of great Rotarians out along the way to assist riders. And it should be a really great event, as it always is year after year. Farmer Fred And I would think that you take signups for the ride up to the day of the ride. Todd Koolakian We do. We will take people the morning of. And we also have an early registration that folks can do on the Friday before the ride. We'll take signups there as well. All are welcome. We love to have folks even up until the very last minute show up and ride with us. We'd be happy to have you. It's a well supported event. We have several rest stops along the ride route, as well as safety vehicles that are driving around throughout the event to assist riders that may have a snag in their bike. We never hope that happens, but sometimes things arise and we have folks going around to assist with that. Farmer Fred For folks that like to ride, hope to see you out there. Yeah, I should point out that it's not just the 100 mile ride. There's a few other rides involved with the Sacramento Century Challenge. There's the Metric Century, which is 62.1 miles. There's a Half Century, which is 50 miles. And then there's the Fun Rides (36 miles, and 16 miles long). And they all start at a little different time, but all on the morning of September the 28th, a Saturday. So if you're in the Sacramento area and you want to do a nice bike ride along the Sacramento River, you might consider the Sacramento Century Challenge, which begins and ends downtown on the Capitol Mall (on Capitol Avenue adjacent to the state Capitol building.) You can find out more information about the ride and the routes at sacramentocentury.com and we'll have a link to that as well, in the show and newsletter notes. Todd Koolokian, thank you so much for your help and best of luck with the Sacramento Children's Home Crisis Nursery. Todd Koolakian Thank you, Fred. Really appreciate your support. After the Harvest, Where Do You Store It? This time of year, no one walks in from the garden without a handful (or bucketful) of fresh fruits and vegetables. Usually, they end up next to the kitchen sink. For those just-picked fruits and vegetables to last the longest, where should you put them? On the counter? The refrigerator? Both? Neither? It’s all neatly displayed in the two graphics further down this column, “Storing Fresh Fruits and Vegetables for Better Taste” from the UC Davis Post Harvest Technology Department and UCANR. It includes this information on proper storage of fresh fruits and vegetables at home, either from the garden or the grocery store: Store on Counter at Room Temperature : apples (for less than 7 days), bananas, grapefruit, lemons, limes, mandarins, mangoes, melons, oranges, papayas, persimmons, pineapple, plantain, pomegranates, watermelons, basil (in water), cucumbers (refrigerator is OK for 1 to 3 days), dry onions (well ventilated), eggplant (refrigerator OK for 1 to 3 days), garlic (well ventilated), ginger, jicama, peppers (refrigerator OK for 1 to 3 days), potatoes (well ventilated), pumpkins, sweet potatoes, tomatoes, winter squash. Ripen on Counter, Then Store in Refrigerator - avocadoes, kiwifruit, nectarines, peaches, pears, plums, plumcots (and I would imagine pluots would be in this category). Store in Refrigerator - apples, apricots, Asian pears, blackberries, blueberries, cherries, cut fruits, figs, grapes, raspberries, strawberries, artichokes, asparagus, green beans, beets, Belgian endive, broccoli, Brussels sprouts, cabbage, carrots, cauliflower, celery, cut vegetables, green onions, herbs (not basil), leafy greens, leeks, lettuce, mushrooms, peas, radishes, spinach, sprouts, summer squashes, and sweet corn. And, as promised… Storing Fresh Fruits and Vegetables for Better Taste …The Chart And one more time, the link to donate to the Sacramento Children’s Home Crisis Nursery to support and encourage my 100-mile bike adventure during the Sacramento Century Challenge on Sept. 28, “ Farmer Fred’s Ride for the Kids ” . Thanks for reading Beyond Basics: The Garden Basics with Farmer Fred Newsletter! Subscribe for free to receive new posts and support my work. Thank you for also listening to the Garden Basics with Farmer Fred podcast! It’s available wherever you get your podcasts. Please share it with your garden friends. Fred Hoffman is also a University of California Cooperative Extension Master Gardener in Sacramento County. And he likes to ride his bike(s). This is a public episode. If you'd like to discuss this with other subscribers or get access to bonus episodes, visit gardenbasics.substack.com/subscribe
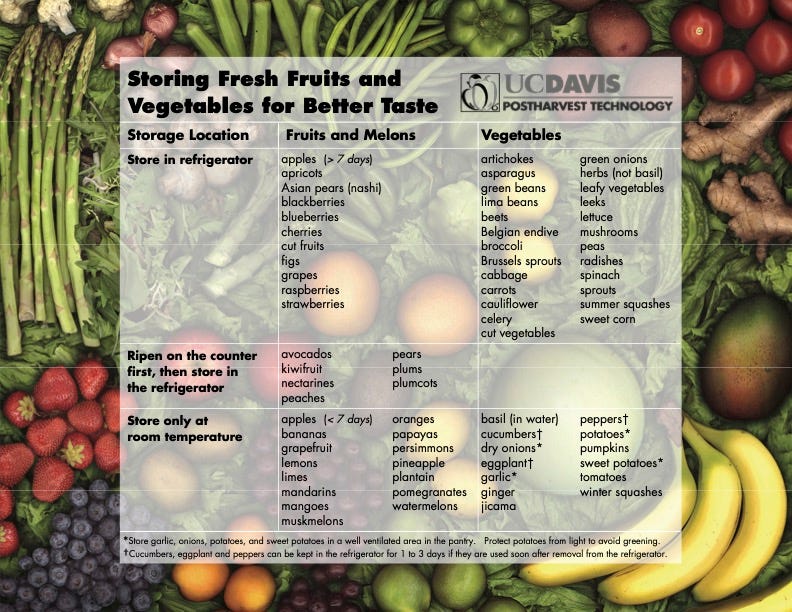
Aug 27, 2024
Why You Want a Chipper/Shredder, and not a Rototiller.
With fall approaching, now might be a good time to invest in some equipment to ease autumn and winter chores as well as improve your soil: making mulch from tree branches with a chipper/shredder, or easing raking chores by gathering the fallen leaves with a device that blows them into a pile, sucks them into a 30-gallon bag, and chops them up into little pieces as they head to the bag, where you can then spread those chopped-up leaves as mulch. In today’s podcast (above) we talk with Brad Gay of JB’s Power Equipment in Davis, California about what to look for when shopping for a chipper/shredder as well as the niftiness of owning a piece of equipment such as a Shred n Vac that can reduce those piles of leaves into gardener’s gold: mulch! These segments were recorded during the first wave of Covid, so there may be mask references. However, I bet we all still have a box of masks somewhere handy. What You May Have Missed on This Week’s Garden Basics Podcast But first, a not-so-subtle plug for the latest episode (#354) of the Garden Basics with Farmer Fred podcast, Lawn Substitutes . Ripping out or reducing a lawn come fall? In this episode, Fred and America’s Favorite Retired College Horticulture Professor, Debbie Flower, discuss lawn elimination and alternative landscape options. They address the challenges of transitioning from lawns to alternative landscapes, including weed management and aesthetics. They explore lawn alternatives that require less maintenance and water, such as no-mow lawns, fescue varieties, and ground cover like dymondia and clover. They caution against over-reliance on artificial turf and emphasize the importance of localized advice and education about plants that thrive in unique ecosystems. They also discuss the need for proper maintenance in all types of landscapes. Chipper-Shredder vs Rototiller Are you thinking about buying a rototiller? How about instead purchasing a chipper/shredder? Now, that's a machine that's going to make easy work of chopping up your garden clippings including tree limbs. it's going to make it into the greatest mulch you could possibly own. The latest research shows that rototilling your soil actually damages soil structure and doesn't do anything good for the soil biology. On the other hand, the end result of using a chipper/shredder is going to provide you with a quality of mulch that we like to call, "gardeners' gold". Northern California Organic Gardening Consultant Steve Zien has some rather strong thoughts on this subject. Go back and listen to his comments back in Episode 89 of the Garden Basics podcast , from 2021. Thinking that perhaps his opinions may have mellowed on the chipper-shredder vs rototiller choice over the last three and a half years, I recently asked for his thoughts. Nope. No change. Here’s what he had to say (in bullets): Chipper shredder Pros: • Eliminates or dramatically reduces green waste • Helps eliminate the need for a rototiller • Provides material for mulch or compost • When shreddings are applied to soil surface: • Feeds soil biology – resulting in improvements in : • Soil structure (pore space diversity) • Improve movement in soil by water, air, roots, soil biology • Soil water holding capacity (drought resistance) • Nutrient holding capacity • Biological diversity of soil microbes • Greater variety of nutrients, vitamins etc. available to plants • Improves pest resistance • Plant health improves (drought resistance, pest resistance) • Nutrient availability to plants improve • Availability of natural growth hormones, vitamins improves • Nutrient content of vegetables improves • Sequesters carbon – contributes to the reversal of climate change • Weed management benefits • Mulch created by chipper/shredder moderates soil temperatures • Erosion protection (mulch slows the force of falling rain) • Mulch created by chipper/shredder repels some pests Cons: • Expensive • Hard work. And, when done, you then have to apply the mulch to soil surface • Don’t chip diseased material Rototiller: Pros: • Get to smell actinomycetes • Mental connection to past horticultural practices (although no longer recommended) • Creates fine seedbed – but soil quickly becomes compacted making it difficult for sprouts to develop Cons: • It’s hard work • Expensive • Destroys soil structure • Compacts soil (reducing aeration, drainage, limit root development) • Fine clays quickly fill in pore spaces • Increases runoff – transporting soil, nutrients and pesticides into our waterways • Kills beneficial soil biology • Makes it harder for your plants to grow • Harder to obtain water, nutrients, growth hormones, vitamins • Increases pest susceptibility due in part to: • Reduced crop health • Pest management provided by soil biology • Reduces nutrient content of food crops • Results in the need for additional irrigation, fertilization, pesticides • Mother Nature’s natural rototillers (earthworms) are killed by the blades. • Creates biological imbalance - abundance of bacteria vs. fungi (raises pH) • Loss in biological diversity in the soil • Reduction of soil health (results in reduction of plant health) • Reduces ability of soil to function • Releases greenhouse gasses (CO2) to atmosphere – contributing to global climate change • Reduces organic matter content • Reduces soils water holding capacity – need to irrigate more/more runoff…. • Makes plants more susceptible to drought • Reduces food for soil biology • Reduces soil productivity • Reduces soil cover • People feel they need to till every spring because previous tillage created a compacted, dead soil below • Brings up weed seeds so they can germinate Obviously, Steve has a bleak future as a salesman at Troy-Bilt . How to Choose a Chipper-Shredder (Originally aired in Ep. 51 of the Garden Basics with Farmer Fred podcast, “Chipper-Shredder Basics”) Farmer Fred We're talking with Brad Gay, he owns JBS power equipment in Davis, California. What are the benefits of owning your own Chipper/Shredder? Brad Gay The big, big thing if you're into gardening or if you're just starting out in gardening or whatever level of gardening you're at, the chipper shredder is going to give you a means of changing the soil quality of your garden and you're going to be able to get rid of stuff that you would maybe put in a container that the city or county would pick up; or you would have to haul it off. With this, you can maintain your yard and get rid of your trimmings, your limbs that have fallen down, and will chip them up to a size that is used as a mulch or as a top dressing. You can make your own mulch. If you're just even using them for small pots, you can get mulch and create a good high quality mulch and I can't think of anything better to accomplish that then a chipper-shredder. Farmer Fred Chipper shredders are great especially if you have a lot of trees on your property and you're constantly pruning your trees. Instead of throwing those branches away, chop them, shred them. Just add them to the top of your soil as a four inch layer of mulch on your soil. It moderates soil temperature, it inhibits weed production. As it breaks down it feeds the soil, making it richer. It's amazing too if you put four inches of mulch or even four inches of shredded leaves on your garden surface over the winter, and you go back in the spring you move it aside, and you dig down a few inches you'll be amazed at the number of earthworms that are saying thank you for doing that. And earthworms improve the soil too. Brad Gay But that's the fun of it. I mean I've been doing my garden for 20-25 years and I can go out and see the change. I don't have weeds, that’s one big thing. But I can actually go into my soil even after it's been watered and planted in there, I can still take my hand and kind of move it into the soil because it's porous enough. That because of the mulch and all the good ingredients have been added to it. To be able to do that takes a while, so a good chipper shredder is like is a very good startup, getting good quality soil going for you. Farmer Fred So let's talk about chipper shredder basics, what people should look for when buying a chipper-shredder. I would of course recommend buying it from a known entity, some company that you've heard of before, that has produced lawn and garden equipment as opposed to going online and seeing a bunch of names you don't know. But when you're looking at the specs of a chipper shredder, what are the specs you should pay attention to? Brad Gay Well, the big one I look at is what's driving your chipper, what's driving the shredder apart. These are two different entities there that are combined and one is a wheel typically, that has a cutter blade. Probably about four inches long but it's very hard steel. Probably two of them on what I call a wheel. And then the other part is on the other side. It has a bunch of little edger blades that are on small half inch shaft that spin around, and they will shred leaves. But the chipper part is very important because that reel that you have on there that's holding those blades, you want that to have some weight, because when they have that weight on there, that's what's going to pull the limb in and chop chop, chop it up. If you notice if you have somebody in your neighborhood who has been around and you'll hear that whirring sound that's going on, they have this huge flywheel turning. That's probably a commercial chipper, and it has some pretty good sized blades in there that can eat up like a nine inch limb or something like that. But you can get that same technology as a gardener for your smaller chipper Shredder. And I usually recommend about a 40 pound flywheel will be just about a good place to start. You have to look in to see if that entity exists on what you're going to buy. And you're not going to get it in your cheaper versions, like you say, you'll get something that's labeled a chipper shredder, but you're talking about things...well, I've been there. And believe me I've had things that have turned my fingernails black and blue because I'm trying to force a limb through there like I got a baseball bat hitting a steel post, it just rattles around. So you want to get something that's got a big flywheel, 40 pounds plus, and it'll help suck those limbs in through with very little effort and grind up a hardwood versus the softer wood. It does a great job. Farmer Fred What size branch diameter branch can a 40 pound flywheel handle? Brad Gay Well, depending on what you've got, usually I'm gonna say three inches, in some cases it's four inches, I think on a BCS model, it can take a four inch limb on there. But what's nice is you can take a good three, four inch limb, shove it down into the chipper shredder and I usually get it from where it is to the point where that now you're having the branches which with which would have leaves or smaller limbs and then when it gets to that point, you can take it out and then pick it up and put it over into your Shredder. And then that shredder will go in take care of the rest of the stuff the smaller limbs that if there's leaves on there, it'll take care of that as well and it just turns it into a fine, finer mulch. And a good chipper shredder, it will actually have plates where that mulch exits through, after it's been chipped, through a grid. And you can put in whatever size you want in there to make those pieces what size you want. Or if you're just doing corn stalks and you just want to reduce... like you grow popcorn, now you got to get rid of the stalks. Instead of throwing it into the greenwaste, you can instead shred that down. Well I take that grid out just to beat them up to go, so I can actually work it back in there. But they do have grids that you can install and it can make that mulch whatever size you want. It's actually a nice feature and that's what's pertinent in getting the good soil and mulch that you want for your gardens. Farmer Fred You know you brought up a very good point there, and the fact that we've been talking about chipping and shredding tree limbs, but for your vegetable waste in your garden, your corn stalks, or even your tomato branches, you could put those through a chipper shredder, probably the shredder portion. Brad Gay Oh I take all my grapes. I got these runners off of my grape plant that is trellised along a 300 foot fence that goes alongside of my yard and I put it all into grapes. And it's all table grapes. So you know grapes, and the grapes are one of those plants where you can literally watch it grow. So you've got these runners that are you know 10-15 feet long. And I'll just cut those off in the fall and I'll bring those over and get rid of all of that. And you have to make sure when you're using your chipper shredder, by the way, if you're doing this because if you get you put a bunch of these grape vines that you're sticking in your shredder, it is like sucking spaghetti into your mouth. This “Spaghetti” starts spinning around and flipping around, except this is a like a whip. So you have to wear eye protection, hearing protection, long sleeves, leather gloves so that you don't get smacked. And it gets rid of a lot of stuff you just never thought of before: all your fruit tree trimmings, when you prune trees in the winter to get things ready for your peach trees and apricot trees. All those trimmings you can put through a chipper shredder too. And what you have in pile there will reduce it to at least 12 to one or more. It's amazing what comes out after you do that. Farmer Fred I would like to reinforce your safety comments because anybody who's ever owned a chipper shredder and attempted to throw in some thinner, but longer branches. Like grape branches, for example, yes, they will whip at you because of the friction, the sucking action of the shredder that just basically tries to suck it all in. And in the meantime, you've lost hold of those branches and they start whipping around. Brad Gay Oh, yeah, you just let it go. It's like I got a bunch of whips. So yeah, you just want to protect yourself. I would say protect yourself. Like you're gonna go into a beehive. You know, you don't have to have that big big helmet on but you know, have eyeglasses on the helmet or a hat or something? I wear headphones for my ears just for the noise and all that that it deals with. So I protect myself quite well when I go out there. Farmer Fred And please do wear gloves and take off any jewelry or wristwatches you might have as well. Brad Gay Oh yeah, and keep track of your pruning shears. Farmer Fred Yes, yes. Yeah, don't keep your eyeglasses in your top breast pocket. Yeah, it's, it's follow all safety instructions when you get a chipper Shredder. The cost of a chipper shredder is not cheap, but I'd rather see people invest in a chipper shredder than a rototiller. More and more research coming out about roto-tilling soil is that it does the soil no good at all, you're better off doing no tilling whatsoever, and more and more farmers are going that route as well. So take that money that you might want to spend on a rototiller and put it into a chipper shredder. what is the price range for a decent chipper shredder? Brad Gay Well, it starts at about I would say about 800 bucks with entry level if you get a Bearcat. And that’s in the near and dear two inch to three inch chipper shredder range. That's light use. And that's a good starter. And it certainly will do the job and it doesn't take care of what the next level is, which is about 1200 a little over 1200 dollars. And it will take on a three inch limb and everything I've been talking about. I've had my chipper shredder for years, it's got to be 25 years plus. And you just have to maintain it. But it's one of the most useful things when you need it. And then you don't have to deal with a pile of trimmings and try to get it to the garbage can or get it out of the yard on the curb, if they still do that where you live; or have to haul it off somewhere. Now you can take that and make it into a very useful product that will benefit your own garden. It starts about 800 bucks. And you can go up to in the two to three inch range. For $2000-$3000 you go into four inch range. Farmer Fred Talk a little about the different brands that are available. You mentioned Bear Cat, I own a BCS and they are both high quality chipper shredders. Brad Gay Oh, BCS is an excellent chipper Shredder. that's what I have. Go to BCS America website if anybody wants to go into it. That is a great site just to visually see what a chipper shredder can do for you and your garden. I mean it's amazing, the gentleman who did the video. He incorporates a lot of stuff in his in the mulch and cardboard for instance, he's taken cardboard, newspaper and those leaves of limbs and everything else has been debris that normally you would throw in a trash can or try to get, you have to get rid of it somehow. Or leave it in a big pile and let the rodents get in there and live healthy. But the best way is running all of it through a chipper Shredder. But that's a very good video, just go to that site, BCS America, a very good quality chipper shredder. Bearcat is very good. We also sell DR, which is Country Homes Products, they offer very good chipper shredders, we have accessibility for Bear Cat locally. So that’s for people who want something that they can actually come in and buy it locally. I can get it rapidly. If I have to get DR that takes usually seven to 10 days. And BCS takes me about five days to get their stuff. So those are three of the top names that are out there that I would recommend. Farmer Fred When one goes online and sees the array of chipper shredders. They're going to, I think, see the majority of them, unfortunately, are electric powered. I don't know if, "unfortunately" is the right word or not. But it just seems to me that a gas powered chipper shredder has more power than something that's powered by 110 volt electric. Brad Gay We used to sell the electric, this was some years ago. And in Davis, there was a viable need because most of the gardens there, are relatively small, I would consider. And they were using for table scraps and clippings and leaves and stuff like that. And they work well. But the problem with it, it had to fit in a slot to get it to go down into this chipper shredder contraption. The opening is about the size of a medium size book, it was only like two inches, two and a half inches wide, and maybe 12 inches long. And it was like you're trying to squish things down into this slot to get it in there to work. They've improved it quite a bit better. But with gas powered units, a lot of my problems are, if you get something in there, you get too much in there and it starts to plug up. And then you need to stop it. With gas power, you can shut the engine off. But if electric, if you do cause that thing to run and not be, actually turning over, you can cook those motors pretty easily. And we found that there was not a substantial amount of electric failures. But it's like a an electric lawnmower, if you use electric lawnmower, and you're out there trying to cut grass that's 12 inches tall, you're slowing that motor down, a lot those motors overheat. And because you're plugged into the grid, it's just endless energy and those motors overheat. And so I don't give them a real thumbs up on quality. I know electric products have really kind of taken over the imagination for most people out there as far as tools and that, but I don't think this is money well spent, at least at this point. Farmer Fred And whichever unit you get, you want to follow all the instructions in the booklet that it comes with. And you mentioned a problem that all chipper shredders have be they electric or gas: they can sometimes jam up. And yes, very important to turn that motor off as soon as you sense that it is not chipping or shredding. Brad Gay Yeah, you'll lose a belt or you'll cook a motor is what will happen if it's electric. But the belt, if you lose the belt, now you're done. And you got to go get a belt. We do restock belts for what we sell and we have access to them fairly rapidly. But you're done for the day, you just don't go down to a hardware store or auto parts store and buy another belt. That's just a mess. It's not gonna happen. So you got to stop those things relatively quickly. Farmer Fred All right, chipper shredder, great investment for making your own mulch from not only tree branches, but your garden, your grape vines, your corn stalks, any sort of woody material can become your mulch in your garden. Brad Gay Oh yeah, it's tremendous. Yeah, what it is I would recommend that I agree with you about the roto tiller and the chipper Shredder. I would spend the money on the chipper shredder first and then if you need a roto tiller I use a roto tiller but I've got a pretty good sized piece of ground but it's not used as much as I did before. I don't need to do that. Farmer Fred We've been talking with Brad Gay from JB's power equipment in Davis, California. Chipper shredders: every gardener should own one. Thanks, Brad. Brad Gay Thanks, Fred. Good talking to you. What About Electric Chipper/Shredders? For that, we turn to Debbie Flower, who owns an electric chipper-shredder, the 15 amp Sun Joe. Her review: My chipper is a Sun Joe 15 amp Electric Wood Chipper/Shredder plug-in, model #CJ602E. I have had the pleasure of using it only a few times. It is a compact, easy to store machine. The 6” wheels and light weight make it easy to move around the yard. The hopper at the top accepts material to be chipped, and a plastic device that fits in the hopper is attached making it safe to push wood into the chopper. Chips come out the bottom. To collect the chips I put a larger grow pot, about 12” tall, under the output hole. Chips are smaller than those of arborist chippings and great to add mulch to the garden. The Sun Joe makes quick work of wood that is stiff and up to 1.5” diameter, the maximum suggested to put in it. Letting fresh prunings from live plants dry a day or two makes it easier to chip them. Fresh prunings do get chipped but the thinnest of these and any leaves attached are more likely to clog the machine then they do if they are a bit drier. I have tested the machine by pushing branches larger than the suggested limit through the hopper. They did go through and get chipped, but the strain on the machine was evident by the noises it made and, eventually, how hot it got. I am somewhat disappointed in how poorly it handles the thinnest branches. They go in the hopper and either come out the bottom in long, maybe a foot long, pieces, or they clog the machine. The machine does not successfully chip soft plant material like dead stems of herbaceous perennials. Because of this I have not tried to shred leaves using the Sun Joe. I am not one to purchase every new-fangled garden tool but am happy to have this one in my garage. It was not expensive, is very easy to use, requires little maintenance, and the chips I get from the it add to the mulch in my garden. My thoughts about electric-chipper shredders are closely aligned with Brad Gay’s opinion (above). Reviewers of this electric chipper shredder say they have issues including the shredding problems mentioned by Debbie, and the overheating problem she mentioned. As Brad said, it’s cheaper to replace a belt on a gas chipper/shredder when the machine gets overwhelmed to the point of freezing up with material jammed in the hopper, than it is to replace a burned out electric motor. And make sure you plug the unit into a 20 amp outlet, not 15, to avoid tripping either the house circuit or the overload circuit on the machine. And as with any outdoor electric-powered garden implement, make sure you have the right gauge extension cord which is determined by the power pull of the unit as well as the length of the extension cord. Reviews of Sun Joe chipper shredders by owners on Amazon also complained about the unit’s inability to chop thin branches, as well as the difficulty to replace the blades, which need to be sharp to do an effective job. Still, most reviewers were very satisfied with this particular Sun Joe 15 amp chipper-shredder. One reviewer did offer a helpful suggestion to avoid clogging situations: “If you feed large branches up to 1" (or more) you really have to hold on to them and only let it take a little at a time, pull it up off the cutter (still inside the safe area) then feed more. One reason it jammed is that when it passes the safety cover it's still several inches long, which is good safety wise, but it will fall over onto the cutters when you're no longer holding on to it. That ends up turning that 1" diameter stick into a 1 1/2" + oval. (turn a cylinder on an angle and it's a long oval) Feed something small along side it and it will keep it vertical. That can help. I learned to just chip smaller stuff.” Farmer Fred’s Ride for the Kids! I'm fundraising on behalf of the Sacramento Rotary Club’s 2024 Sacraamento Century Challenge bike ride on September 28th to raise money for the Sacramento Children's Home Crisis Nursery and I could use your support. Here’s the link. On that date, I’ll be riding my bike, a Surly Midnight Special (NOT an e-bike) 100 miles along the Sacramento River to help out the Sacramento Children’s Home Crisis Nursery. I’ve ridden 100 miles in one day plenty of times…when I was younger. But at 73, I could use some moral support, and the Sacramento Children’s Home Crisis Nursery can use your pledge money. So, how about it? Maybe pledge 10 cents a mile (that’s $10) along with a hearty, “You go, Fred!” Or a more generous one dollar a mile ($100), to give me the mental endurance for the entire ride, to dodge the pothole-filled levee roads and pedal harder in the ferocious headwinds that makes this ride a real challenge! The Sacramento Children's Home Crisis Nursery is the only program of its kind in Sacramento County and directly prevents child abuse and neglect by supporting families with small children at times of crisis. The nursery allows parents to bring their children ages newborn to five for emergency hourly or overnight care during difficult times, with the goal of keeping families together and reducing the number of children entering foster care. To care for our community's most vulnerable children, we rely on support from community members like you. By donating, you empower us to provide a safe haven for children throughout the Sacramento area, offering respite to parents during times of crisis, and building a strong support system for the future. Your support helps provide a safe place to stay local kids in need. Again, here’s the link to make a donation to the Sacramento Children’s Home Crisis Nursery. Or do it because this newsletter is still free (for now). Thank you for your support, and say "Hi!" if you see me pedaling like crazy out there along the Sacramento River on Saturday, September 28th! Here’s the link to help support the Sacramento Children’s Home Crisis Nursery. All About Leaf Mulchers (Originally aired in Episode 54 of the Garden Basics podcast, “Easy Leaf Mulch”) EASY LEAF MULCHING Farmer Fred: We're talking with Brad Gay from JB's Power Equipment in Davis. And if you're a gardener, every fall, if you have leaves or if your neighbors have trees with leaves, those leaves make an excellent mulch, they can improve your garden soil, and it's pretty easy to improve your soil. If you don't have a winter garden. When those leaves fall in October, November, December. you grind them up, you put them on your garden bed, stack it up as tall as you want, four inches, eight inches, 12 inches. and then the following spring, you've got improved soil, no question about it. The problem is, all right, how do you gather up those leaves? How do you grind them up? In the past, what I've done is use the leaves from my neighbor’s 60 foot Pin Oak tree. So I'll go over there, rake her leaves, put them in a metal 30 Gallon Trash Can, stick my string trimmer down into that metal trashcan and sort of whip it around and grind up those leaves. It does an okay job but not really a great job of making all those leaves smaller. There's something on the market that if you want to do that, too, it makes it a heck of a lot easier. We're talking with Brad Gay from JB's Power Equipment in Davis. And Brad, I like the idea of having a tool that sucks up the leaves and grinds them and then I can just dump it onto the garden bed. That sounds pretty darn easy. What are those instruments of destruction? Brad Gay: Well, it's a great tool, it's a conversion of your handheld blower, is what it amounts to. And they've gone in and adapted the front of the blower that brings in the air for the blower to blow out the pipe to blow your leaves. Well they put a tube on that so now it becomes a vacuum. And the blower exit you would be blowing has a curved tube to it. that attaches to a bag before you put that tool on, If you look on the inside of that blower, there are little metal shredders, something you wouldn't want to touch. Farmer Fred: Thank you. Brad Gay: That way you can't run it with that tube off. Farmer Fred: Yeah, that's great. Brad Gay: So that's a very strong safety feature. But it's metal, like a mower blade, but a real small version of it. That's a shredder. So now you can go in and suck up all the leaves in these areas. And it hits that shredder device and puts it in your bag and it's a 12 to one ratio reduction. So in areas like under shrubs that you've got that you can't get to as easily or let's say your around a pool and you're in corners where leaves are collected. In my case I have large Sycamore leaves. So now you got to reduce that to be able to use it. So by using this, by sucking that debris up and going through that shredder, it reduces that down. And most of the pieces are about less than the size of a dime, which is pretty good considering how big that leaf was originally. Brad Gay: I've been very satisfied with it, you save a few steps, you just take it out, dump it. You can use it right then as long as you don't have to go shred it up. I live in a house that has two huge sycamore trees. And before I had a chipper shredder, or had a vac and sack or a shredder vac, I had tarps that I would hold in my backyard and put them on my garden. And I'd have piles back there. Well, it reduced really well. But for corn leaves, which are a pretty good sized leaf. So in the spring, I'd go out there, and there at the bottom of the pile there's still some of those leaves in their original configuration. Wow, since I've started doing the chipping and the shredding and reducing that and then putting it on a yard, it's done. it's mulch. it's ready to use right then. There's no big piles anymore. So that vac and sack, That's a great tool to have. Farmer Fred: Yeah, I noticed on your website, JBSpower.com, that the Echo people have one called a shredding vac. And actually, it's three units in one because it's a blower, like a typical leaf blower, it's a vacuum. And it's a shredder mulcher. Brad Gay: Yeah, that's the whole thing. But it's got a nice bag on it so that when the bag has a strap that goes over your shoulder, it's like you're carrying it. it has a rear handle to it. So usually you have an upper handle on a blower or a handheld blower, well, this actually has a rear handle, so you can hold it and the upper handle, so you got two hands on there. And then you have a strap that's on the bag that you put over, like a backpack kind of sling that goes over your back. So then you power the leaves in that bag. Well, when that starts getting heavy, that's about time for you to go dump it. So I'm gonna say it’s about a 30 gallon, plastic bag container. Not quite that but it's a good amount that you can pick up and get rid of all that debris in a timely fashion. So you can go do other things in your garden. Farmer Fred: Now we're talking here about the Echo shredding vac. But I imagine there's other manufacturers with very similar items. Brad Gay: yeah, there is. Stihl has one, there's is the same idea. We also sell that , which is competitively priced. The same thing, there's no difference. everybody's producing stuff like that. But both of these companies are top of the line. And they're run by people that if you do have a problem with this piece of equipment, you've got someplace to go to which is a good thing to fall back on. That's what I meant. Buy the best and cry only once, a little bit. But you generally just don't have the problem. Farmer Fred: The Echo unit we're talking about and I imagine the Stihl unit as well. They're both two stroke gas engines, correct? Brad Gay: That's correct. Wear a dust mask when you're doing this. Farmer Fred: Yeah, we got plenty of masks these days. Brad Gay: Well, yeah, everybody has access to those for some reason. Yes. Farmer Fred: All right. garden mulch. I've preached it for years. It's the one of the best things to add to your garden and you don't have to till it in. you can just lay it on top. You can plant around it. garden mulch has numerous benefits. It blocks weed seeds from sunlight so they don't germinate. It promotes better water retention. It provides needed nutrients as it decomposes. It moderates soil temperatures as well. Mulch is wonderful. Why not make it yourself from the things that are around you, that are falling, tree branches or leaves. I think a shredding vac is the way to go for just about every gardener. Brad Gay: I've been using it for about three years now. But you know when I'm so glad that I got a number of friends that have similar landscapes and they have it and they use them quite a bit themselves too. It's really a nice handy tool. There you go. If you need a blower you've got a blower too. So if you want to just blow things around, get it into a pile and then put the bag on there and the other hose and now you can shred everything up out of your pile. So it's a two in one, three in one device. Farmer Fred: Well, I thank you and my next door neighbor with the 60 foot tall Pin Oak Tree thanks you as well, with this information about the shred and vacuum. If you're going to have one garden tool that might set you back a couple hundred bucks, this would be the one to have, to make your own mulch and improve your soil. We've been talking with Brad Gay from JBS Power Equipment in Davis, California. Brad, thanks so much. Brad Gay: Fred, it's always a pleasure talking to you. Subscribed Thanks for reading Beyond Basics: The Garden Basics with Farmer Fred Newsletter! Subscribe for free to receive new posts and support my work. Thank you for also listening to the Garden Basics with Farmer Fred podcast! It’s available wherever you get your podcasts. Please share it with your garden friends. Fred Hoffman is also a University of California Cooperative Extension Master Gardener in Sacramento County. And he likes to ride his bike(s). This is a public episode. If you'd like to discuss this with other subscribers or get access to bonus episodes, visit gardenbasics.substack.com/subscribe
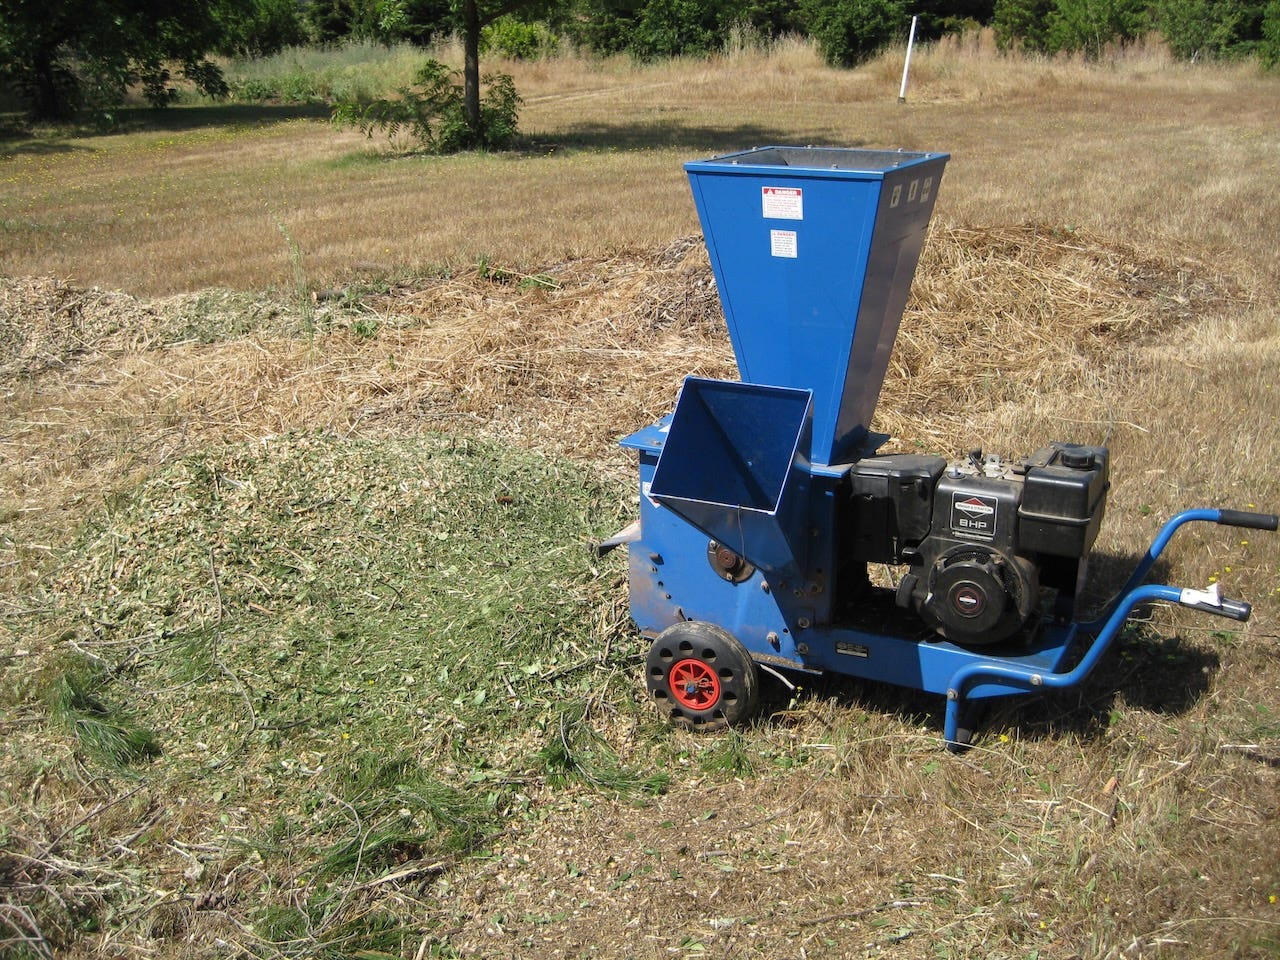
Aug 20, 2024
Can You Grow Rhubarb in a Warm to Hot Climate? Yes!
If you’re a transplant from a colder USDA Zone to a warmer zone, you may have fond memories of rhubarb pie, strawberry-rhubarb jam, rhubarb crisp, or something more exotic, such as Rhubarb-Blueberry Upside Down Cake . But if you now live in USDA Zones 9 or 10, you may be wondering, is it too hot here in the summer to grow rhubarb? Is it too warm in the winter here to grow rhubarb? Yes you can! But leave your rhubarb growing techniques back in Wisconsin. The trick to growing rhubarb here is: start from seed, not roots; use varieties that are developed for milder climates; and grow them in the shade. In the podcast above, we talk with Ronni Kern of the West Los Angeles chapter of the California Rare Fruit Growers Association. She has all the details for growing it successfully here in California and in other milder climates. But before we dive into the pit of endless rhubarb, a bit of business: “It’s All About the Soil (for a Successful Garden!)” Did you listen to Episode 353 of the Garden Basics with Farmer Fred podcast ? It’s entitled, “It’s All About the Soil (for a successful garden!)”. We chat with Kevin Marini, a community education specialist with UC Cooperative Extension in Placer and Nevada Counties, about the topic of soil and gardening. We discuss the pros and cons of using native soil versus commercial soil, the importance of improving native soil, the use of bagged mixes and raised beds, and the role of organic matter and fertilizers in gardening. We also touch on the benefits of mulch and the importance of proper watering techniques. Overall, the conversation emphasizes the importance of understanding and improving soil for successful gardening. You’ll want to listen to it twice, as well as reading the transcript, for all the handy gardening tips and tricks we mention to achieve an outstanding garden. The podcast (along with a transcript) is available now wherever you get your podcasts. But if you want an accurate, corrected transcript along with the podcast, go to GardenBasics.net . Thank you for listening (and/or reading!) Farmer Fred’s Ride for the Kids! I'm fundraising on behalf of the Sacramento Rotary Club’s 2024 Sac Century Challenge bike ride on September 28th to raise money for the Sacramento Children's Home Crisis Nursery and I could use your support. Here’s the link. On that date, I’ll be riding my bike, a Surly Midnight Special (NOT an e-bike) 100 miles along the Sacramento River to help out the Sacramento Children’s Home Crisis Nursery. I’ve ridden 100 miles in one day plenty of times…when I was younger. But at 73, I could use some moral support, and the Sacramento Children’s Home Crisis Nursery can use your pledge money. So, how about it? Maybe pledge 10 cents a mile (that’s $10) along with a hearty, “You go, Fred!” Or a more generous one dollar a mile ($100), to give me the mental endurance for the entire ride, to dodge the pothole-filled levee roads and pedal harder in the ferocious headwinds that makes this ride a real challenge! The Sacramento Children's Home Crisis Nursery is the only program of its kind in Sacramento County and directly prevents child abuse and neglect by supporting families with small children at times of crisis. The nursery allows parents to bring their children ages newborn to five for emergency hourly or overnight care during difficult times, with the goal of keeping families together and reducing the number of children entering foster care. To care for our community's most vulnerable children, we rely on support from community members like you. By donating, you empower us to provide a safe haven for children throughout the Sacramento area, offering respite to parents during times of crisis, and building a strong support system for the future. Your support helps provide a safe place to stay local kids in need. Again, here’s the link to make a donation to the Sacramento Children’s Home Crisis Nursery. Or do it because this newsletter is still free (for now). Thank you for your support, and say "Hi!" if you see me pedaling like crazy out there along the Sacramento River on Saturday, September 28th! Can You Grow Rhubarb? Yes! Here’s the transcript of the podcast (above) chat with Ronni Kern of the West L.A. California Rare Fruit Growers. There are lots and lots of hot links in the transcript to get you to more information about rhubarb and more! TRANSCRIPT - How To Grow Rhubarb in USDA Zones 9 and 10. Farmer Fred: As you are probably very aware, I've been answering garden questions here in Northern California for, well over 40 years, actually. And nobody ever asked me about rhubarb until I visited the eye doctor a few months ago. And besides her questions, which are usually, “Which is clearer, the first one or the second one?” “One or two?” Her other question was, “Can you grow rhubarb here?” And nobody in all those years has ever asked me about growing rhubarb before. And I mentioned that to her and I said, well, I'll look into it and see what it is. Now, this was back about five months ago. And since then, what an adventure it has been about the history of rhubarb, the history of rhubarb in California, and how to grow it, and all the varieties. And the short answer to my eye doctor's question is, “yes,” with a few reservations. But to even add more to this story, at a recent gathering of the Master Gardeners of Sacramento County, of which I'm one, I came across a Master Gardener who is growing it here in Sacramento, and she sent me a picture of it. And it is gorgeous. It is growing in full sun, which to find out, can be chancy. But it's doing great. It's a variety called “Success” that she found in Australia, in a seed catalog, French Harvest . We'll get into that, too, because this little voyage with rhubarb is going to take us around the world. Farmer Fred: It's an amazing journey, so stick around and you'll find out a lot. We are talking with Ronni Kern. Ronni Kern is with the California Rare Fruit Growers Association, and she is down in West Los Angeles for that chapter. And I'm very familiar with the California Rare Fruit Growers here in the Sacramento area. And one thing I know about them, they love to experiment. They love to try new things. That's the whole idea of being a gardener. And the California Rare Fruit Growers Association is full of very curious gardeners. And Ronni is one of those. Ronni Kern also had the same issue I had with finding rhe answer to the question, can you grow rhubarb in California? Farmer Fred: And for years, it was like, no, you can't. It gets too hot here. It doesn't get cold enough in the wintertime. Well, California has a lot of climates. And in fact, in her research about growing rhubarb in California, she discovered that actually it was a thriving crop at one time here. Actually, the rhubarb seeds that were developed here, that grew here, came from a very famous seedsman, and you know him well, Luther Burbank, who farmed in Santa Rosa, which, as you may know, gets rather hot as well, over 100 degrees in the summertime. And he was very effusive about the varieties of rhubarb that he was growing. When I start mentioning this about rhubarb to people, if they're from the Midwest, oh, their eyes light up because they remember, oh, yeah, yeah, yeah. I used to love rhubarb pie, fresh rhubarb, jellies and jams. Farmer Fred: And they're usually from the Midwest or back east, as is Ronni Kern. Ronnie, you were born and raised in Rhode Island? Ronni Kern: Well, actually, I was born in Brooklyn, but I was raised in Rhode Island. Farmer Fred: It sounds like your parents, though, would have no business being in New York City, considering how much they loved fresh picked fruit. Ronni Kern: Well, my mother loved fruit. My dad was the one from Brooklyn. My dad was not much of an eater until lwhen I was in my 20s, I had a huge organic garden in Vermont and suddenly discovered, oh, “vegetables have taste”. Because when he was growing up, his mother didn’t cook. And my mother cooked frozen vegetables. So he basically was not an eater. My mother was. So it was my mother who was the fruit person. My dad, not so much. Steak, a couple of vegetables. That was it. And I went to college without knowing what a cauliflower was. I mean, to give you some idea of New England upbringing in the 50s. But no, I mean, fruit growing, fruit was a huge part of my childhood because of my mother and because of New England and where I lived. A lot of fruit grew there back then. And I guess it still does. I'm not there now, I've been in California for over 50 years. Farmer Fred: Well, rhubarb has sort of the same kind of legal history as tomatoes, in that it took a court in New York to decide that rhubarb should be considered a fruit, because it is primarily used in desserts. Ronni Kern: Right. Well, you know, the actual name they used to call it in England was “pie plant” because it was the first thing to come up in the spring when there was snow was on the ground. So people could make pies out of it. And yeah, they consider it definitely a fruit. Though one of my main propagator friends in the West LA chapter, Charles Portney, actually doesn't use it as a fruit because he is pre-diabetic. So he roasts it and cooks it with onion and garlic and olive oil. And he loves it that way. So you can consider it a vegetable. It isn't a vegetable. Burbank considered it a vegetable, but most of us consider it a fruit. And the California Rare Fruit Growers, all right, we're growing it as a fruit. Others grow it as a vegetable. Farmer Fred: It has quite the history here in the United States. Allegedly, Ben Franklin brought it over from France. The history of rhubarb goes back to ancient China, where they found it in the mountains of China. So it has a very good cold tolerance. I think here in the United States, it can grow down into USDA Zone 2, which would be probably where my relatives were farming back in North Dakota. But the problem with growing rhubarb, though, has to do with summertime heat, which can really can knock it back for certain varieties. And tell us about your adventure and how you came upon Luther Burbank and all these other rhubarb varieties. Ronni Kern : Well, you know, when I came to California, I wanted to grow rhubarb. I mean, that's what I grew up eating. And so I go to the nursery, but all they sell is Victoria. Victoria, some people can grow, but does not really do well in Southern California. It grows as an annual. You put it in the ground, you get a crop, and it dies. And I was frustrated because it never got really big. It never got really sweet. And rhubarb, actually, if it's good, it's sweet. But I gave up on it. Ronni Kern: Basically, I said, all right, this is not working. I grew other things. And then four or five years ago, five years ago, I got cancer. And after that, I said, I've got to really figure out rhubarb. You know, time is limited here. So I started researching, and that's when I came upon Burbank and his book, “Luther Burbank, his Methods and Discoveries” has a big chapter on rhubarb. And he said it can be grown, his could be grown in arid, warm, arid climates. I thought, oh, I need some of that stuff. And I thought, okay, no big deal. He was in Santa Rosa. I'll get some of his roots. Ronni Kern: Unfortunately, the more I researched, the more I discovered, the roots had disappeared. Somebody bought the patent when he died, and then they got moved on and moved on. But the land was more valuable for housing development or industrial development. And ultimately, his roots were all plowed under, which broke my heart, broke the heart of David Karp, who was a great writer on fruit, well-known around the country. I knew that there were people who must have still had the roots. I bought rhubarb at the farmer's market here from a woman from Valley Center (near San Diego), which is where the last commercial fields were. I have friends who live in Valley Center, but I couldn't find any. And nobody knew about any of that. They had other varieties, cherry and this and that, but nobody knew if they were actually Burbanks. And so that's when I went back to his book and discovered he'd gone to New Zealand to get the roots. And I couldn't get roots then. It was during COVID. I found this wonderful company, French Harvest in Australia. Ronni Kern: It's a family that's been growing rhubarb for four generations. Colin Clayton (and his wife, Tina) is the last generation. He wrote a book on rhubarb , which I have in front of me. I started ordering seeds from them. And I passed them out to my members who were interested in propagating. Mostly Charles and I produced most of the plants that have now been spread across Southern California. And people are just going crazy for the stuff because it does grow year round. It does grow in our heat. I do grow it in shade. I have it on my north side of my house where it's happier. But people are growing it almost anywhere. And it's doing really, really well. And we're now in year four and it keeps coming. It's perpetual. It doesn't ever really die back entirely. It slows down. This time of year, it's already starting to curl up. Probably September, October, it'll be looking pretty peaked. And then November when the rains come, hopefully it'll start coming back again. In fact, my big problem is figuring out how to divide roots here because you normally divide divide roots when they're dormant in the winter on the East Coast or Midwest or wherever. And we don't really have that season. I'm a stubborn person. I've been researching my whole life. I was a writer my whole life. A lot of my work was historical, and I just got into the habit of doing a lot of research. And so finding Burbank's book on archive.org or the old news articles that would announce his latest discovery. I mean, he grew strawberry-flavored rhubarb. He grew raspberry. He was a lunatic, and I don't know how much of it was just hype and marketing and how much of it was real. Ronni Kern: I don't want to diss Luther Burbank, obviously, but other people were growing it. Farmer Fred: I can do that. I can diss him for you if you would like. You made a reference to an old newspaper clipping, and you had it posted in one of the West LA CRFG chapter newsletters , which is online. And it was from the Los Angeles Herald newspaper of 1904. Thank you. And it says, “concerning an improvement on the Australian crimson winter rhubarb, so highly prized by all who have used it, Luther Burbank of Santa Rosa answers an inquiry from the California fruit growers as follows. He said, my last new rhubarb is a variety which produces luscious, juicy stalks perpetually throughout the year, and which do not have the rank strong acid taste, or as some express it, ground flavor, which we naturally associate with the older rhubarb. In place of this is a mild but pronounced fruity flavor, very much resembling strawberries or raspberries, so much so that when this rhubarb is once tasted, no one ever cares to taste the old kind.” Now there's a salesman. Ronni Kern: Right. The wonderful thing about this is something called the California Digital Newspaper , whatever it's called, collection at UC Riverside. So you can find all these old California newspapers in there, including something called the Pacific Rural Press, which goes back to 1905(?), where they're talking about his winter, crimson winter rhubarb . And it's coming into great prominence in California. And they were growing hundreds of thousands of acres of rhubarb at a certain time in California. They were shipping it all over the country because it was growing so well here. That's what is so heart-threatening. Now there's almost none, almost none being grown, just backyard gardeners and a couple of commercial, small, small-scale commercial gardeners. Farmer Fred: You mentioned David Karp, and he pointed out, I think this was about 10 years ago, so the number may have grown since then. He pointed out back then that there's only four commercial acres left in California of rhubarb, whereas back in the 1920s and 30s, it was over 1,000 acres. Ronni Kern: Right. And, you know, I just gave some roots of my Tina's Noble to Dominic Shainer, who's part of Shainer Farms down in Valley Center, the original place where the roots went. And he works with Gray Martin a lot on growing interesting things. And I'm hoping maybe they're commercial growers. I'm hoping maybe they'll get... Them growing again commercially but even at the farmer's market there are maybe two people that sell them and one sells the green stuff which never gets soft and you feel like you're eating celery when you're eating it in a dessert and then this other woman from the valley center was actually growing the really good red stuff but i haven't seen her in years so i don't think there are very many commercial growers. What's one of the things that california fruit growers do we kind of pick up the slack and the same thing with rhubarb. we're going to get rhubarb growing. I must have, I don't know, 25 people growing it now around mostly Southern California. Farmer Fred: Do you have any growing it in the Central Valley of California? Ronni Kern: I personally don't know. Even though it can handle heat, I would say if you were going to grow it in where you are, I would put it in shade. I would put it either under shade cloth. I actually threw a shade cloth over one of my plants, which is not in shade and was looking kind of, eh. Some of the people that are growing it here said, it's not looking good. I said, put a shade cloth both on it. And it helps. I mean, it makes a huge difference. It seems to be surviving and it's grown well. And some of these, Especially the variety “ Success ”, the woman that you talked about growing. Success is one that I have. It's one of my favorites because it is the sweetest of the ones I grow. And that comes from Sydney, which is actually much more a climate like we have down here in Southern California. Farmer Fred: Sydney, Australia. Ronni Kern: Yeah, Sydney, Australia. Whereas the Claytons live in Melbourne, which is further south, which means it gets colder. It definitely gets colder there. I think Colin brought in seeds from Greenland, for Pete's sakes, Who found it in Greenland. I don't need that. I don't have a Greenland climate, but I do have a Sydney climate. Farmer Fred: For the sake of those who don't know where Valley Center, California is, where is Valley Center, California? Ronni Kern: That's outside San Diego. That's North San Diego County. It's a prime growing area. Most of the avocados come from there. Citrus come from there. It's a wonderful, wonderful growing area. It's just a really good agricultural area. Farmer Fred: That's a rather Impolite name then, for an area that is close to the Garden on Eden, calling it Valley Center. Ronni Kern: I don't know Where the name came from. It must have been derived from something else. And that's where the last sighting down here of the Burbank roots were. Farmer Fred: Well, let's go back to those Burbank roots, because you've been doing updates just about every year on the California Rare Fruit Growers website newsletter for West LA. Farmer Fred: You always have something to add every year. And we were talking beforehand that you just discovered that if you go to Santa Rosa, to the Luther Burbank Farm and Gardens , and it's in downtown Santa Rosa, they're back to selling the original roots. Ronni Kern: Well, they may be. That's what I was told. And their website seems to indicate that they have located them. Whether you can get them today, I don't know. And I've been tempted to call them and say, are you still selling them? But I haven't done that. But yes, two different chapter chairs have obtained them from the Burbank. Farmer Fred: Do we know what varieties are available? Ronni Kern: They just call it Burbank Perpetual . That's the name. It's a single variety. Even though he ultimately developed 36 varieties, these are all called just Burbank Perpetual. So I assume that they... Basically have found one variety or they're not distinguishing among them after all this time i sometimes get sounded on the growing fruit forum for saying oh i'm growing glasgow perpetual or i'm growing this one i say well you're not really, because glasgow's been dead 100 years so lord knows what's happened to those seeds over time and it's true. and actually colin when he sent me the seeds the first time he said, “grow them up and if you decide to grow seeds name them whatever you want. these are going to be your california seeds and the ones that do best for you, name them what you want to call them, because they'll be specific to your area.” Farmer Fred: Well, that brings up a very good question about what do these seeds develop as? If you buy the Success seed of rhubarb, is it going to come up as Success? Or because it is a hybrid, is it going to be some combination of a lot of different ones? Ronni Kern: They are seedlings. They are seedlings, so they are not going to be 100% true. But I think Colin actually has some statistics in his book. I actually glanced at it this morning … But he said basically 50% true, 10% will be even better than they should have been, 10% will be worse than they should have been, and the rest is somewhere in between. So his suggestion is you grow a lot of them and that's why he sends you 100 seeds in a packet for like 15 bucks. He keeps telling me to pull out my Success because it keeps trying to send up seed pods. And you don't want to send up seed pods because then you lose the energy to the roots and then you don't get the rhubarb. But it makes the best rhubarb. So I just cut the seeds off, I don't worry about it, and then have the rhubarb. But I actually have a Tina's Noble that has now formed three different heads. And I'm actually going to separate those out at one point and let one of them go to seed because it is an exceptional plant. And some of the other Tina's I've had have been, they're all been good, but some have not been quite as vigorous as this one. So that's worth perpetuating. I was expecting us just to be sending out, planting out roots and selling roots. But if I can get one of these to go to seed, it seems like pretty easy. Then yeah, we would try that. Back at the Venice Learning Center at the Venice High School, they have a seed bank and they were really big on saving seeds that do well for them there. And they do have some rhubarb seeds of just a sort of generic variety. And I looked at them, then I was big as mine, so I don't care. Farmer Fred: But you really do want to grow the colored variety, like the red leaf rhubarb. Ronni Kern : The red ones, yeah. Yeah. Well, not the red leaf, the red stalk. Farmer Fred: Red petiole, yeah. Ronni Kern: There is a red leaf one called Ace of Hearts, but that's really just an ornamental one. You don't need it. It's just a pretty guy. Farmer Fred: Yeah, you're right. I should say red stalked. Ronni Kern: Red stalk. And yeah, The Glasgow Perpetual, for example, is a green stalked one. It's an excellent, excellent rhubarb. I just happen to like the red ones, when you cook them up, they stay red and you don't have this sort of muddy looking, whatever, compote. You have a nice red compote. You don't have to put cherries or strawberries or raspberries in it. It just is red. I like that. And also, as I said, Success is sweet. The Success is a sweet one, sweeter than any of them. I haven't tasted Crimson Sunrise yet. That's my newest one. But Tinas is a delicious one, but it's not really sweet. You have to add sugar to it. Whereas Success, not so much. You know, it's pretty amazing. Farmer Fred: I had mentioned that I came across a master gardener here in Sacramento County, Ruth Ostroff, who is growing Success rhubarb in the Sacramento area. The plant is in full sun. She sent me a picture of it. It is gorgeous. It is large. And it strikes me that rhubarb is a crop that is sort of like asparagus. You want to put it at the back of the garden. Ronni Kern: Yeah, it's big. It can be, well, I keep having members say, can I grow this in a pot? And Colin does sell a couple of varieties. I'm actually trying to get one to come up now called Urban Harvest, which is smaller and can be grown in a pot. But these guys, by and large, are big. Crimson sunrise is huge. It needs wind protection. And yeah, so you want them at the back of your plot. Or in my case, I just have it in its own plot all by itself. Farmer Fred: And where it's getting, what, afternoon shade? You said it's on the north side of the house. So it's getting afternoon shade. Ronni Kern: It gets mostly permanent shade. Oh, okay. It's permanent shade. This time of year, the middle of the day gets sun. But it does fine. You know, the leaves do crinkle up a little bit. I mean, my Tina's Noble is starting to turn a little brown on the leaves. But yeah, it's doing great. Farmer Fred: We should mention who Clayton and Tina are. They're the ones that are running French Harvest, the seed company, down in Australia, and they truly are rhubarb heads. And I just ordered a container rhubarb from them, Ruby Red, and the seeds will be arriving soon. If you can find seeds locally, that would be the way to go, because ordering seeds from Australia, while the seeds are cheap, it's like $10 for 100 seeds, but then there's a $25 shipping charge. Ronni Kern: This is why this woman in Orange asked me if we could go in together. I bought four packages. And the shipping was finally less than the seeds were. Ronni Kern: And also, the other reason why I like to order a lot is because the U.S. Postal Service uses these automated things to cancel the packages, and Tina sends them in an envelope. I've had a lot of seeds arrived crushed. And Tina, she's great about replacing them, but it's a hassle. You wait months to get them, and then they're crushed. And this time, I had my Tina’s Noble and my Crimson Sunrisers just exploded out of the germination beds. And the Urban Harvest and the Success, which has always done well for me, did nothing. And I suspect that they were crushed. It's not anything on the Claytons. They grow great seeds. It should sometimes the vagaries of getting them in from overseas is if you can get them locally, that would be the best. That's why I'm hoping at some point to start growing seeds. And if your friend, the master gardener who's grown success can get seeds off hers, that would be fantastic. Success goes to seed really easily. So she should be able to do that. Farmer Fred: As a matter of fact, I have. We try many different varieties here. I mean, that's what gardeners do, too. So let's get into the nuts and bolts of planting rhubarb seeds. When do you plant them here in California? How do you care for them? Ronni Kern: I basically plant them year round. Since I'm getting mine from Australia, they're coming in. This is their winter. So fall is when they're harvesting and putting them up. So any time after I got mine, I ordered mine in June, tend to order mine usually around June, partially because we have our plant sale in December every here so i like to grow them up so we can sell them sell the plants at our plant sale i tend to be a very conservative person in terms of putting things into the ground i want them to be really good strong plants so i let them and make sure they have a lot of leaves i basically get them into one gallon pots before i put them in the ground but i've tried many many different ways of germinating them. it really depends sometimes. i used to float them in water on a heat mat until they formed a little seedling and then then put them in my standard one-third sand, one-third perlite, one-third peat starting mix. i've tried this last batch i tried some of that. i just started another batch in what i happen to have around which was pumice, perlite, and peat, and then just one thing that Colin says is that in nature rhubarb seeds just fall on the ground and germinate, so he says you don't have to bury them. you can just put them on top of your planting mix and then put maybe a little light something on that. i put some perlite on mostly because there's a guy in Eagle Rock who germinates really hard seeds from Brazil, and that's what he does. It's just a very light coating of perlite, very easy for the plants to come up through, doesn't get them overly wet. Ronni Kern: Colin keeps saying, do not get them too wet, do not get them cold. They do not like that. As I said, some of these things with Tina’s Noble that have like 90% germination, Success usually had excellent germination, this time not so much. And the Crimson Sunrise also has excellent germination. Farmer Fred: I didn't soak my rhubarb seeds, as some instructions might imply. There are several states that are facing the same issue we are as far as growing rhubarb. Down in Texas, they have a great publication about growing rhubarb , especially around the Austin, Texas area. and they talk about the fact that you're better off just growing it as an annual because it just gets too hot there in the summertime. And they have fungal issues too, which can be a detriment to rhubarb because of their higher humidity levels in Texas. Whereas here in California, for the most part, we don't have humidity issues. Of course, it depends where you live. Ronni Kern: Right. So this year, the humidity has been insane, but I do plant them up a little high. Some places, they actually plant the rhubarb on mounds. I think even Colin plants his on mounds, so you can walk between the mounds to harvest. Any plant that you're worried about, root rot, whether it's a tropical tree or perhaps a rhubarb, there's no harm in planting it on a mound that sort of protects you from too much water. Mostly, I just planted it. I had a birch tree die. The house was 100 years old. The birch had been here 100 years. It died. I had the people who took it down ship it and leave it there. So the rhubarb was planted in birch chips and did very well there. Farmer Fred: Yeah, Colin points out that they send a nice little piece of literature with every order of rhubarb seeds, and they mention, “rhubarb seed hates to be wet and cold. Rhubarb seeds should not be treated like other seeds. Use high-grade propagation mix. Water once when first sown, then don't water again until the seed starts to germinate in approximately 10 days. Depending upon the air temperature, if the soil becomes really, really dry, then water very lightly if absolutely necessary.” I took a chance and I took some of those seeds. I had a blank spot in a raised bed that is in full sun. I scattered some seed. I put on maybe an eighth of an inch of vermiculite on top of it. And it all germinated within three days. Ronni Kern: Wow. And that's the ruby, the ruby red? Farmer Fred: No, that was the Success. Ronni Kern: The Success. Yeah, because the Ruby Red, we've had a terrible time. I think the smaller the seed, the more likely it is that it's going to get crushed. These are the Success seeds from your friend or from Australia? Farmer Fred: These are the ones from Australia. And I grew a second batch of rhubarb seed, the ones from the Master Gardener and the ones that are also from French Harvest. I grew them as suggested in containers, in seed starting mix, in a protected area, and they never sprouted. Ronni Kern: that's interesting. So the ones that you planted outside in the sun, in a raised bed, sprouted. My problem is animals eat everything, including my dog. I tend not to start things in the ground because they just disappear. Farmer Fred: I mentioned this publication out of Texas, How to Grow Rhubarb Texas Style , and they talk about it as growing it as a winter annual. And so I would think that planting the seeds for that would be similar to what it would be in Texas throughout most of California. And that would be to start those rhubarb seeds in August or September. Ronni Kern: Well, again, if you're going to grow it as an annual, you can. I mean, I started this batch. The ones in the garden, I've got Crimson Sunrise and a Success of new ones. I planted the seeds in June of 2023. and then I think in July, my granddaughter was here and we up-potted them out of the little seed things to bigger pots. And then I must have put them in the ground in September. And they're huge now. They're absolutely huge. I tend not to harvest my first year because I want good roots. I want these things to be around. But I could have harvested them if I wanted them as an annual crop. Actually, in all honesty, you can grow them anytime in California. We're not going to get the the deep winter so it's not going to go dormant and if you're growing them especially if you're starting them inside you're not going to get the killing heat when they're just little tiny seedlings actually that's the problem for me if you started them now and put them out in time for the Santa Ana’s (heavy winds) down here. Do you get santa anna's up there? Farmer Fred: No, we have delta breezes. Ronni Kern: Yeah my brother lived in Sacramento for decades and you've got of course you've got uc davis. you've got the mothership of growing fruit. you could probably follow the Texas thing and start them in the fall. Because of wanting to be able to sell them in December, I start them usually around June, July. And by December, they're definitely big. One of my friends, Charles, actually starts his earlier and then they get too big by December. They're actually, they've outgrown their pots. I don't like to sell plants that have outgrown their pots. Farmer Fred: Talk about how you harvest the leaves because I understand you don't cut it, you yank it. Ronni Kern: Yank it. And this is a problem because I'm not a young kitty cat anymore. And it requires a certain amount of arm strength because you pull it and twist it at the same time. And some of these plants, if they're not really well rooted, you will pull up the whole plant. I have done that with Tina’s Noble a couple of times. And that's why I give plants away because I accidentally pull them out. But you technically don't want to cut them. But Colin has said, if you have to, you can. You know, it's not going to kill the plant. Again, the big issue if you cut them is the risk of rot. If you left a stub and it rots, then it can affect the plant. But at least down here, even where you are, it's so dry. We don't really have the same issues with rot that other places have. But the correct way is to pull it and twist it at the same time. Usually, there's one way to twist it, and you learn faster because it's different. Each stalk, whether you want to twist right or left, and that sort of signals the roots to grow some more. If you cut it, it doesn't get that same signal to grow some more stalks. So, theoretically, you want to pull it and twist it. I did it as a kid. I just can't do it so well anymore. Farmer Fred: Did you eat the leaves as a child? Ronni Kern: No, no. I was not dumb. I always have people say, oh, is that charred? Can I eat the leaves? No. The leaves are poisonous. The leaves of rhubarb is full of oxalic acid, great rust remover if you have a rust, but you do not want to eat it. When I pull the stalks up, I just break the leaves off and drop them right down back in the garden for mulch. Some people say you have to cut down two, three inches from the leaves. Ronni Kern: I don't worry about that. Farmer Fred: So what you're preparing in the kitchen then is that petiole, the center part of the leaf, the spine of the leaf. Ronni Kern: I just shy away from any mention of eating any part of the leaf because people, I don't want anybody to die. Farmer Fred: So basically, you rip off the green part and eat the middle. Ronni Kern: Right. Absolutely right. Farmer Fred: There. Okay. Ronni Kern: And according to Colin, if you catch it in time, when the thing is starting to put up a seed pod, it'll actually have this little lumpy looking thing. He says, you can actually eat that too. Oh, okay. But I never find it in time. But by the time I see it, it's already got flowers. It's like, okay, I got to get this out of here before they sap my root strength. Farmer Fred: And if you want a recipe for rhubarb, just ask anybody from the Midwest or back East. Ronni Kern: Right. Well, I mean, we have a couple on our website, but there's East Coast. It was always strawberry rhubarb pie. I'm sure that's the Midwest too, because those are the two fruits that ripened in spring, and they were both red. And especially if you had green rhubarb, you wanted that nice red strawberry to make it look not quite so disgusting. My husband actually prefers raspberry rhubarb cobbler. As I said, Charles prefers to roast it, eat it as a vegetable. And most of us who are obsessive are from either the East Coast or the Midwest. And there's a couple of guys from Connecticut who drove all the way up here to get plants for me. I think they've now put in a big order with Colin themselves because they just really wanted rhubarb. And Steve's always sending me recipes for everything that he finds, beverages and desserts and main courses. Farmer Fred: I saw one for snacks for kids where you take that center stem and you chop it into little pieces and you cover it in sugar and serve those little pieces as candy. Ronni Kern: Well, when I was a kid, that's what I did. I’d steal the rhubarb from this neighbor. I was not a good kid. And we'd run to somebody's steps and with a lap holding a napkin full of sugar in our laps, we would just dip the rhubarb stem in the sugar and eat it. And that's that's that was our happiness and inexpensive treat. Well, the sugar was cheap back then. Not so much now. Farmer Fred: And there is a very short harvest season, isn't there? Ronni Kern: Well, no, see, that's the thing. There's a short harvest season if you are in Rhode Island, because it's a spring crop. But here, no, I've been harvesting. I can't even remember when I first started harvesting this year. Basically, it starts November, December. I'm still harvesting. In fact, if I hadn't just harvested 200 bananas, I'd be harvesting now. But right now we're trying to eat our way through the bananas. I can't tell what's a rhubarb. Farmer Fred: We should point out we're talking in August. You're talking eight, nine months you've been harvesting from the same plant. Ronni Kern: And I think, I think that I probably will be able to... I mean, I have some big stems out there. I'll probably be able to harvest right into September. And then I'll probably stop September, October. November is when it starts to cool down and they'll start to... That's probably when I'll start dividing them. I think I got to talk to Colin about when I should do that. And yeah, so it's basically a nine-month... I mean, I wouldn't call it entirely perpetual. Though I suspect if I had a lot of different varieties under shade, I probably could stretch it out. Because Success and Tina's Noble tend to be strong at different times of year. Crimson Harvest, Sunrise, I don't quite know because it's new to me, but it's looking huge and very healthy. I'm willing to see what it's going to do for me. Farmer Fred: Is all that work worth it? Ronni Kern: It's not a lot of work. I mean, the starting of the seeds is a hassle just because I'm not a seed person. I'm not very good with little tiny things. I like to be able to dig in big holes. Once you put them in the ground, it's sort of easy to take care of. They don't have bugs. We don't have the diseases. I guess people talk about the fungus. We don't have that. You give them a big, good snack at the beginning of every growing season, some people use manure, I don't use animal products, but I use fish bones, maybe. Give them a good snack at the beginning of the growing season. That's it. And then you harvest them and you eat them. Or you cook them and eat them, depending on what you want to do. Farmer Fred: So one warning that I've seen in several places is don't overwater them. Ronni Kern: Yeah, well, you don't want them to rot. You want to water them enough that they don't look wilty. But I just have them on the same drip system as the rest of my yard. I water them the same as I water my avocado trees and my lemon trees and my banana trees. Well, my bananas are also on gray water, but everything just basically gets the same amount of water because in California, at least, I don't know where you are, but down here, we can only water twice a week. It's actually, of all the plants I grow, it's probably the least high maintenance because once you get the seeds up and in the ground, they do it themselves. You just have to keep an eye out for the seeds. You don't want them to go to seed. That's it. Farmer Fred: So the answer to the question, can you grow rhubarb in California? Ronni Kern would give you a resounding yes, you can. Ronni Kern: Absolutely. Absolutely. Do not hesitate. Just give them some shade. That's the only thing I would say. Farmer Fred: Ronni Kern is with the West Los Angeles California Rare Fruit Growers Association . We'll have links in the notes today about where you can read her literature. And it's very enlightening. So if you have a relative from back east and or you're from back east and you fondly want some rhubarb, well, get to it and start growing it. Ronni Kern, thank you so much for all this great information. Ronni Kern: Well, thank you, Fred, for finding me. I have no idea how you did it, but you did your research. That's for sure. Thanks for reading Beyond Basics: The Garden Basics with Farmer Fred Newsletter! Subscribe for free to receive new posts and support my work. Thank you for also listening to the Garden Basics with Farmer Fred podcast! It’s available wherever you get your podcasts. Please share it with your garden friends. Fred Hoffman is also a University of California Cooperative Extension Master Gardener in Sacramento County. And he likes to ride his bike(s). This is a public episode. If you'd like to discuss this with other subscribers or get access to bonus episodes, visit gardenbasics.substack.com/subscribe
Aug 13, 2024
Dealing with Fruit Tree Varmints
In today’s newsletter podcast, fruit tree expert Ed Laivo of Ed Able Solutions gives us tips for dealing with varmints that get to your tree fruit before you’ve had a chance to sample it. And, he has tips for growing fruit trees in containers. I mentioned in the podcast that we would have a video link to Ed’s Harvest Day 2024 presentation at the Fair Oaks Horticulture Center on August 3, which was about growing fruit trees in containers. That video is not yet available; but here, enjoy Ed talking about that topic on his YouTube page . In the typed remarks below, we get into another way to thwart the crawling, walking, hopping, flying pests that get into your fruit trees, and that is to skirt prune those trees that have low hanging branches, that reach the ground. For those of you who were hoping for stories of the high school girls at U.S. Grant High School in Van Nuys who would surreptitiously raise the hem of their mandatory skirts above the knee near the end of lunch period because the vice principal would leave the premises after one lap through the cafeteria area, sorry. And yes, it was a public school. And yes, skirts were mandatory for the female students. Except for one school day a year (Senior Day) in June, when the senior girls got to wear slacks (but not blue jeans!). How long ago was that? An up and coming band was the entertainment in the high school auditorium that Senior day, Three Dog Night. When to Prune, When Not to Prune, Citrus Trees If your citrus trees – the oranges, lemons, limes, mandarins, grapefruit, and more – are looking a bit overgrown and bushy, pruning can help reinvigorate them to produce more fruit. But don’t prune them now. Cindy Fake is the Horticulture and Small Farms Advisor for the University of California Ag and Natural Resources in Placer County, who wrote their “ Pruning Citrus” webpage. She agrees there are benefits to pruning citrus trees, but the timing is important. “Citrus trees are evergreen trees, generally requiring less pruning than deciduous trees. However, they do need to be pruned regularly for optimal fruit quality and productivity. Pruning can improve fruit quality through increasing light in the canopy. In some cases, pruning out water sprouts (vertical shoots) may improve yields. Reducing tree height facilitates harvesting as well as risk of injury from ladders.” However, Fake adds: “Pruning citrus trees is best accomplished in spring and early summer, after it sets flowers and then again when the small fruit appears.” Retired citrus grower Lance Walheim , author of the book “Citrus”, seconds that motion. “Late summer and early fall citrus pruning is discouraged. Late pruning often stimulates vigorous tender growth, which doesn't have enough time to harden off before cold weather, increasing chances of frost damage. Pruning in late summer, especially here, where triple digit temperatures are common, can cause citrus bark and fruit to become exposed to too much intense sunlight. Citrus bark is highly sensitive to sunburn. The bark can be killed, which can girdle the tree, especially if the tree is in a south or west exposure. Whenever bark is newly exposed to intense sunlight, paint the exposed area with a whitewash, made of 50% water and 50% interior white latex paint.” However, there are a few minor citrus pruning chores that can be done anytime of the year: removing the suckers that begin below the bud union just above ground level; and skirt pruning the citrus tree. “Skirt pruning” is exactly what it sounds like, removing any branches that reach the ground. “Skirt pruning facilitates weeding, mulch laying, and other cultural practices, as well as reducing risk of soil borne pathogens affecting the fruit,” explains Fake. “The pruning may also reduce insect and disease pest problems.” And, as Laivo points out in the podcast, netting the tree can be a somewhat effective pest deterrent, especially if you drape the netting completely over the tree to the ground, and tie it around the trunk of the tree. Try doing that with a non-skirted tree! Fake says to keep an eye out for low-lying branches on mandarin trees, especially. “Satsuma mandarins tend to have pendulous branches that hang to the ground. These are called skirt branches, and they can impede weeding, fertilizer, and compost application, as well as provide pathways for ant populations to use the trees. With heavy fruit loads, these branches can bend, and fruit may touch the ground. Fruit may then be contaminated by soil borne pathogens. These pathogens may be plant disease-causing such as Brown rot, or potential food safety risks.” The Department of Agriculture and Food in Western Australia (actually, it’s the Department of Primary Industries and Regional Development) offers these reasons for commercial growers of citrus to skirt prune their citrus trees (warning: their dates are for the Southern Hemisphere, where summer there is winter here and winter there is summer here): Skirting (skirt pruning) Skirting is the removal of branches and limbs which hang down to the ground. It should be done as soon after harvest as possible. Skirting of Valencias and summer navels is more difficult as the trees are carrying two crops. Some crop loss is inevitable whenever late varieties are skirted. Skirting in October or November after fruit set is probably the best option. Mature trees should be skirted to a height of at least 75cm (29 inches). This allows for branches dropping lower when fruit develops. Machine skirting is quick and easy (I didn’t see any tree skirting machines on Amazon, but they did have a parking lot striping machine!). Skirting provides the following advantages: * better air movement under the trees * easy application of below-tree herbicides and fertilizers * reduced access into the tree for insects and pests such as Fuller’s rose weevil and snails * clear throw of irrigation water from mini-sprinklers and ease of checking on the operation of mini-sprinklers and drippers * no splashing of soil-borne fungi into the canopy from rain or irrigation * better access when harvesting * prevents lower set fruit from hanging in the dirt * required practice as part of the market access protocol for some export markets. Dress for the Occasion As a general rule, Citrus trees should be skirted up about 18 to 24 inches above the ground every couple of years. And before you tackle any pruning chores with citrus, Walheim says to dress for the occasion. “Before you prune citrus, take measures to protect yourself from the sharp thorns, warns Walheim. “Wear thick gloves, a long-sleeved shirt (or thorn-resistant sleeves) and protective glasses. Wear a hard hat, too.” Young citrus trees are especially prone to gangly growth says Walheim. “These younger citrus trees produce highly vigorous shoots, the water sprouts, that give the tree and unkempt, out of balance appearance. These shoots can be cut back to maintain a more uniform shape. Also, remove suckers that originate from below the graft union, known as the suckers. They are nonproductive and only sap strength from the tree.” During prime citrus pruning time – late winter and early spring – that’s the best time to control the height of your citrus trees. “The most vigorous types of citrus trees, especially lemons, are often trimmed or cut back 20 to 30 percent every year or two,” says Walheim. “Keeping the centers of citrus trees open by selectively thinning branches (the total removal of the branch) can improve their health. Remove branches that crisscross or crowd one another; prune out any dead limbs. By allowing sunlight to reach the center of the tree, the inner portions remain productive.” Skirt pruning is also a good idea for deciduous fruit trees, as well, Removing low hanging branches as well as any rootstock suckers from peach, nectarine, pear, apple, cherry and more fruit tree varieties makes it a heck of a lot easier for monitoring your irrigation system, applying fertilizer, weeding, cleaning up fallen fruit, and spreading mulch. Thanks for reading Beyond Basics: The Garden Basics with Farmer Fred Newsletter! Subscribe for free to receive new posts and support my work. Thank you for also listening to the Garden Basics with Farmer Fred podcast! It’s available wherever you get your podcasts. Please share it with your garden friends. Fred Hoffman is also a University of California Cooperative Extension Master Gardener in Sacramento County. And he likes to ride his bike(s). This is a public episode. If you'd like to discuss this with other subscribers or get access to bonus episodes, visit gardenbasics.substack.com/subscribe
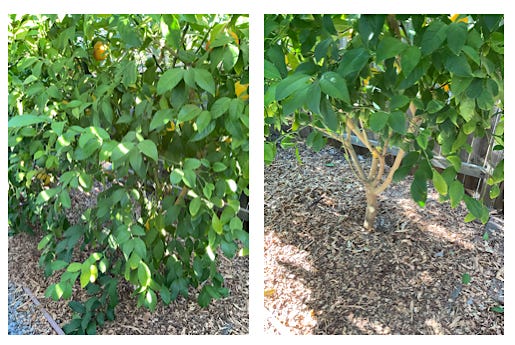
Aug 6, 2024
Fruit Tree Pruning Steps
Today’s Newsletter Podcast features Ann Ralph, author of the book, “ Grow a Little Fruit Tree ”. Fruit Tree Pruning, Step by Step Last Friday’s Garden Basics with Farmer Fred podcast, Episode 351 - “ Honey I Shrunk the Fruit Trees ” also dealt with the benefits of keeping the height of fruit trees to no taller than you can reach to the top of the tree to pick fruit. Because, who wants to fall off a ladder? UC Cooperative Extension Communications Specialist - and Consulting Arborist - Kevin Marini walked us through the steps of keeping your fruit trees healthy, and at a reasonable height ( listen to the episode for his tree reduction tips). Among our topics: • Maintaining the height of fruit trees at a manageable level allows for easier fruit harvesting and reduces the risk of broken branches. • Thinning fruit trees is necessary to remove crowded fruit and allow the tree to breathe, resulting in bigger and juicier fruit. • Bringing down the height of a fruit tree can be done gradually over a few years to avoid stressing the tree. • Using the right pruning cuts, such as reduction cuts and thinning cuts, helps maintain the structure of the tree and promotes better fruit production. • Cutting newly planted fruit trees at the knees stimulates the growth of lower branches and makes fruit more accessible. • Rootstock selection is important for controlling the height and spread of fruit trees. • Thinning cuts are essential for improving air circulation within the tree and ensuring fruit production in lower areas of the branches. Pruning suckers and water sprouts is essential to maintain the structure of fruit trees. • Removing branches that grow towards the center of the tree helps prevent overcrowding and disease. • Cutting dead, dying, and diseased branches is important to maintain the overall health of the tree. • Proper pruning cuts, including the three-cut method for larger branches, help prevent damage and decay. • Using sharp pruning tools and cleaning them regularly improves the efficiency and effectiveness of pruning. You can listen to our complete conversation here. And one more pruning term, according to the U. Of Florida: Reduction Cut A reduction cut (also referred to as a drop-crotch cut) shortens a branch by removing a stem back to a lateral branch that is large enough to resist extensive disfunction and decay behind the cut. This is generally interpreted as cutting back to a lateral branch that is at least one-third the diameter of the cut stem. Sprouts commonly follow a reduction cut. In most cases these should not be removed because they help the retained portion of the branch retard decay. When the branch that remains is less than about one-third the diameter of the cut stem, the cut is considered a heading cut. Heading cuts are not considered appropriate in most instances in the landscape. Heading cuts are sometimes necessary when attempting to restore trees following storm damage. Kevin Marini’s Steps for Pruning Your Fruit Trees For Better Health From the Ep. 351 podcast transcript: Farmer Fred Kevin, you mentioned there are some steps, like four or five steps, when it comes to reducing the height of a fruit tree? Kevin Marini 35:28 Yeah, well, let's start with one that maybe doesn't reduce the height, but it's the easiest step. And everyone could do this any time of year. And they don't even have to be very careful about where they make the cut. And that is the suckers. Because fruit trees are grafted on to a root stock, you get suckers that grow up from the ground from the root stock. Believe it or not, this can be a big problem. Because if you let those suckers continue to grow, they can eventually convince you that they're part of your fruit tree until you actually see this weird looking fruit on them. And you realize, Wait, what's that all about? Prune out those suckers. Step number one, go out to your fruit tree anytime during the year. If they're shooting from the ground, obviously, from the root stock below the graft union, cut them out, do not let them take over your tree. So that's easy. Step number one. Farmer Fred 36:21 Yeah, let's define that. First. For people who are trying to find the bud union, if a tree was planted properly, that's going to be like a little lump or a little bump that should be just a few inches above the surface of the soil. And so anything that is emanating from below that point, can be removed completely and safely. Kevin Marini 36:39 Yes, I'm actually glad you drilled down on that a little bit, because one thing that I have encountered quite a bit is that people bury the graft union. So they buy their fruit tree in a container. And the graft union is above the soil line when they bring it home. But when they pop it out of the container and put it into the ground, many times they'd bury it too deep. And if that graft union is subsurface, if it's underneath the ground, it can absolutely quickly rot. And then you can lose your fruit tree in a nice stiff wind down the road. That's super important, The graft has to be above ground. It has to be daylighted. You really have to take care of that, right? Ideally, you don't want it facing west, where the afternoon sun is hammering it, you kind of want it facing the other way. It's not a deal breaker, if you didn't do that. Don't worry, folks. But having that graft union up above ground and then controlling any sucker growth from below that coming from the ground, from the rootstock, or just beneath the graft on the stem, is important. Farmer Fred 37:44 Yep, there are other suckers - I don't know if this is unique to citrus or not - they're called water sprouts, that can just spring up almost anywhere in the tree. But the thing with them is they're growing straight up. And they're easy to spot and easy to remove. Kevin Marini 37:59 So that is I would say your step number two. So you start with your suckers down below, get rid of all those, get them out of the way. Some of them can be quite thorny, and vicious as well, especially on citrus. And so then you're looking for these other type of suckers called water sprouts. They generally occur as vigorous vertical shoots on lateral branches. So branches that are going out relatively in a horizontal fashion, they will have these sprouts that vertically shoot up to the sky. On certain plums and cherries, sometimes these water sprouts can be seven, eight feet in length. I mean, they can completely destroy this beautiful structure that you're trying to work on with this fruit tree. Identifying those water sprouts and getting them out of there is super important. You know, some people will use water sprouts to rejuvenate fruit trees. That would be getting really technical here. We're not going to go into that, but I just want to point out that they could have a use in certain circumstances. But overwhelmingly in our backyard orchard, you see a waterspout, it should be taken out. So, let's talk about number three. Okay, so you've got your suckers, got your waterspouts right. So now you're going to start actually looking for some problem children. Okay, what are the problem children? Well, those shoots that are going into the middle of the tree that you spoke about earlier, are probably I call them problem children. By themselves. They're just little shoots the branches and you might not think anything of them. But for me, trying to maintain a certain structure to the fruit tree, those can really muck it up very quickly. They really become cumbersome to deal with, if you really let them grow in there, you really have to get in there and find their origin and cut them out and yank them out. And it can be a little troubling. So I say, stay on top of this, those branches that are crossing, rubbing, and then going from branches into the middle of the fruit tree, get those out of there. They are pretty easy to identify and remove. Now, of course, there's also I mentioned the crossing, rubbing, those aren't necessarily only branches that are going towards the middle of the fruit tree, those are branches that are just growing too close together. And if they're touching already, with a fruit load, it's even going to be worse. And they can create wounds, which then of course lead to potential disease. So you don't want that. And then of course, the next step is those dead, dying, diseased branches. If you know a branch is dead, cut it out of there, don't let it be a host for other bacteria or fungi that could reinfect the live tissue somewhere on the planet from the tree. If it's dying, if you see something dying back, sometimes the best thing to do is to prune that puppy out quickly, potentially stopping the infection in its tracks. Right? Those four or five quick tips, if everyone just did those, the fruit trees would be in good shape. For the most part, you still would probably have to do what we talked about in the beginning, which is reduction cuts, and a mix of dormant and summer pruning to keep that height down. But those easy steps - like walk out to the tree - and take out suckers, water sprouts, branches going towards the center, dead, dying, diseased, crossing, rubbing. Five. So there it is, you do those five things, you are doing way more than most people do. A Few Q&A’s about fruit tree pruning: • How far back should I prune my deciduous fruit trees? The latest trend for backyard orchardists: keep your fruit trees no taller than you can reach. All the fruit above your extended arms, after all, is for the birds. For fruit trees five years old and less, this is fairly easy to do. For older, taller established fruit trees, remove one-third of the total tree height each year until the desired height (under ten feet) is achieved. • How much of a branch should I cut? Never cut back a healthy branch of any tree by more than one-third its entire length. Don't make a "flush cut" (removing a branch right next to the stem). Leave the nub or "branch collar" that protrudes out less than an inch from the stem. That area contains the chemicals necessary for the tree wound to heal. If in doubt what to cut, especially when the branches are out of easy reach, don't hesitate to call in a tree pruning professional. • How Do I Prune a Thick Branch? Don't try to get rid of any branch thicker than an inch with just a single pass of the saw; you could end up with a fallen branch that may have removed more than you had anticipated, such as a strip of the main stem. When tackling the big branches, use the three-cut method with a pruning saw: •Cut number one: make a cut halfway through the underside of the branch to be removed, about one foot out from the collar where the branch attaches to the main stem. •Cut number two: Saw through the top of the branch, about two inches farther out from cut number one. The branch should give way about half way through this cut, with the undercut portion preventing any damage to the tree along the stem. •Cut number three is the clean up cut, sawing through the remaining stub of the branch you want to remove. Make this cut close to the collar (the enlarged portion encircling the branch that attaches to the main stem) but do not make the cut flush with the stem; damage to the vascular system (a tree's pipeline for nutrients) may result. How to Sharpen Hand Pruners Thanks for reading Beyond Basics: The Garden Basics with Farmer Fred Newsletter! Subscribe for free to receive new posts and support my work. Thank you for also listening to the Garden Basics with Farmer Fred podcast! It’s available wherever you get your podcasts. Please share it with your garden friends. Fred Hoffman is also a University of California Cooperative Extension Master Gardener in Sacramento County. And he likes to ride his bike(s). This is a public episode. If you'd like to discuss this with other subscribers or get access to bonus episodes, visit gardenbasics.substack.com/subscribe

Jul 30, 2024
The Soil Texture Triangle
The newsletter podcast (above) is an excerpt from last Friday’s Garden Basics with Farmer Fred podcast, #350, “ New Home? First Garden Tips ”. America’s Favorite Retired College Horticulture Professor(℠), Debbie Flower and myself, help out a very rhythmic listener figure out how to prep a garden space at her new home. And one of the first steps to take is to do a home analysis of the soil, referred to as the “Soil Texture Triangle Test”. Although it might look like something designed by a Freemason on Acid, the Soil Texture Triangle is quite ingenious in its design, as well as the ability to give you an insight into many of the qualities of the soil you are attempting to garden in. But before we get into the “why” and the “how” of the Soil Texture Triangle, here’s what you may have missed if you didn't listen to Episode 350 of the podcast in its entirety: • Get a soil test done to determine the texture of your soil and its nutrient levels. • Plan your garden carefully, considering the spacing of plants and the eventual growth of trees. • Hydro-zone your vegetables in raised beds to meet their specific watering needs. • Limiting factors if using raised beds on concrete for gardening in partial sun spaces. The Soil Texture Triangle Test: Why do it? Ahhh, the things you will learn about your soil when you figure out if you have sandy loam, silty loam, clay loam, sandy clay (great name for a Top 40 DJ), something in between, or - Heaven forfend - all sand or all clay. Christine Anne Clark is a soil health specialist with the Crops and Soils Division of the Extension Service of the University of Wisconsin-Madison. She works with farmers, researchers and agricultural industry experts, to help the farmers in Northeast Wisconsin better understand their soils. In this University of Wisconsin publication - “ The important role of soil texture on water ” - she points out the obviously most important part of understanding the Soil Texture Triangle right there in the title. Know your soil, and you’ll know where the water is going (or not going) in your crops: “It is not nitrogen, but water, that is the most limiting factor in crop production. Soil texture, structure, percent organic matter (OM) and management practices also influence the amount water and nutrients a soil can retain for crop use. You can better understand your farmland’s strengths and weaknesses by digging deeper into the physical characteristics of your soil and where different soil types are located on your farm. Soil texture refers to the feel of soil. Soils are made up of different amounts of sand, silt, and clay. There are 12 soil textural classes according to the USDA classification system. Each soil texture has varying responses to water, affecting major crops like corn, soybeans, wheat, and alfalfa differently. Here’s a general overview: 1. Sand : Sandy soils have the largest particle size, which allows water to drain quickly. As a result, sandy soils tend to dry out faster. Sandy soils have low water and nutrient-holding capacity and struggle to retain sufficient amounts for crops. Shallow-rooted crops are more susceptible to drought stress in sandy soils, as they may experience water deficits that hinder their growth and yield. 2. Silt : Silty soils have medium-sized particles, providing better water retention than sandy soils. They have moderate water-holding capacity and drainage characteristics. During drought, silty soils can retain moisture for longer periods compared to sandy soils. Silty soils have more plant-available water capacity than clayey soils. 3. Clay : Clay soils have lots of small fine particles with many inner layers creating lots of surface areas that hold water and nutrients tightly. They have higher water and nutrient holding capacity but lower drainage, resulting in slower water movement and potential waterlogging. Also, they have lower plant available water capacity than silty soils because clays hold water tightly as they dry. During drought, clay soils can retain moisture relatively well, which benefits crops like corn, soybeans, and wheat. However, excessive water retention in clay soils can also lead to root oxygen deprivation and negatively impact crop growth in wet years. Any crop with a deeper root system may perform better in clay soils during drought as it can access the stored water. Water infiltration speed and plant water availability are dependent on soil texture. In coarse sandy soils the bigger pore spaces increase the rate of water movement and have higher infiltration rates than fine textured soils. Coarse soils can “soak” up a drenching rain or recharge quickly but is unable to hold as much water as finer textured soils. A coarse sand infiltrates very fast, up to 10 inches per hour, while a clay is the slowest can be less than 0.05 inches per hour. However, sandy soils have a low water holding capacity compared to loamy or clayey soils. On the opposite end, soils with very high clay contents hold water tightly and provide less water storage for plants than loamy soils. The table below illustrates the water that can be absorbed by soil that is available to plants, which varies with soil texture. Organic matter increases water retention Clark continues: Typical Wisconsin soils have 1.5- 4% organic matter. Peat or muck soils can be over 20%. The organic portion of soil is important, it improves soil properties that help plants grow by promoting structure, pore space, and a home and source of food for soil life. Yet anytime you till and mix oxygen into the soil, organic matter is burned off a bit. Over time this can decrease the amount of organic matter in soil. Increasing soil organic matter can take 5 to 8 years depending on soil type, climate, and management. Organic matter has a natural attraction to water. Organic matter acts as a sponge in the soil, capable of holding and storing water. It has a high water-holding capacity due to its porous structure and ability to absorb and retain moisture, plus it helps aggregation and pore space where water can be stored. Here are some general examples of the impact of organic matter on soil water: * For each 1 % increase in soil organic matter helps soil hold 20,000 gallons more water per acre. * An ideal soil with 4-5% organic matter can soak up a 4-6” rain event. * A 1994 study by Hudson showed that a silt loam soil with 4% organic matter holds more than twice the water of a silt loam with 1% organic matter. Understanding the role of soil texture in water-holding capacity, and that organic matter significantly improves water-holding capacity can help us understand the strengths and weaknesses of a field during rainfall, irrigation, and during flood or drought conditions. Wisconsin has a wide range of soil textures. The challenge in managing sandy soils is to improve water retention or water holding capacity. In fine texture soils, however, the challenge can be to remove excess water depending on drainage conditions. Both goals can mean increased profit. Farmers cannot change the soil texture that mother nature has provided them. Although increasing organic matter content takes time, practices such as adding compost or manure, using cover crops, and practicing organic farming methods can enhance the soil’s ability to retain water and support healthy soil and healthy plant growth .” So, there you go. Even if you have achieved “Soil Nirvana” (see below), you would still need to regularly add compost, cover crops, mulch, and practice no-till gardening to keep the area thriving with microbial activity and a consistent supply of water that’s available for your plants. Marin County (CA) Master Gardener Nanette Londeree puts it succinctly in the UCANR Publication, “ Garden Good Guys - Soil ”: “An ideal soil would be made up of 45% minerals (sand, clay, silt), 5 % organic (plant and animal) material, 25% air and 25% water. The mineral portion would be loam (20 – 30% clay, 30 – 50% silt and 30 – 50% sand). It would be crumbly, relatively dark in color, smell earthy and rich, teem with microorganisms and earthworms, have plenty of nutrients and a pH between 6.5 and 7.5. This soil would be described as having good tilth. Tilth is to soil what health is to people. If you have this kind of soil now, you don’t need to read any further.” And now you know what “tilth” is! Memorize that. It might be on the Final. Especially if St. Peter is a gardener. So, How Do You Shake it Up, Shake it Up, Shake it Up, Shake it Up? For that, we turn to Clemson University’s College of Agriculture, Forestry and Life Sciences’ horticulture and natural resources agent, Andrew “Drew” Jeffers. This is from the aptly named publication, “ The Jar Test .” Materials: * Straight-edged, clear jar * Permanent marker * Ruler * Watch or stopwatch * Mesh sieve or old colander Procedure: 1) Using a mesh sieve or old colander, sift the soil to remove any debris, rocks, and large organic matter (leaves, sticks, roots, etc.). 2) Fill the jar ⅓ full of the soil to be tested 3) Fill the remainder of the jar with clean water, but leave some space at the top. (At this point, I am sure Debbie Flower is mumbling at her phone: “And add a drop of dish soap!”) 4) Cap the jar and shake vigorously (“For 10 minutes!”, yells Debbie) until the soil turns into a uniform slurry. 5) Set on a level surface and time for one minute. (“Not two minutes?” questions Debbie) 6) Place a mark on the outside of the jar, showing the coarse sand layer settled at the bottom of the jar. 7) Leave the jar in a level spot for 2 hours. (“Finally! Something I agree with!”, says Debbie) 8) Mark the top of the next settled layer with the permanent marker. This is the silt layer. 9) Leave the jar on a level spot for 48 hours. (“I concur!”, says Debbie) 10) Mark the top of the next settled layer with the permanent marker. This clay layer has settled on top of the silt layer. 11) Using a ruler, measure and record the height of each layer and the total height of all three layers. Use the soil texture analysis worksheet below to record the results. 12) Use the soil texture triangle to estimate the soil type for the site. a) The clay percentages are listed on the triangle’s left side. Lines corresponding to clay percentages extend from the percentages reading left to right (see red line). b) The silt percentage is on the right side, with lines extending downwardly, diagonally from right to left (see green line). c) The sand percentage is on the bottom side, with lines extending upwardly, diagonally from right to left (see blue line). 13) Track the lines with the percentages measured and find the spot on the triangle where all three lines intersect. The region where these lines intersect indicates the soil type present. The example shown represents a loam soil texture. Adding organic matter to clay and sandy soil can help with: * Nutrient holding capacity * Improved drainage * Reducing compaction Soil Texture Analysis “The Jar Test” Worksheet Measurements Height of sand layer ________inches / cm Height of silt layer ________inches / cm Height of clay layer ________inches / cm TOTAL HEIGHT OF LAYERS ________inches / cm % SAND=(sand height)/(total height) x 100 =___________ % SAND % SILT=(silt height)/(total height) x 100 =____________ % SILT % CLAY=(clay height)/(total height) x 100 =____________ % SILT Thanks for reading Beyond The Garden Basics Newsletter. Subscribe for free to receive new posts. Pledge Your Support, thank you! Thank you for also listening to the Garden Basics with Farmer Fred podcast! It’s available wherever you get your podcasts. Please share it with your garden friends. Fred Hoffman is also a University of California Cooperative Extension Master Gardener in Sacramento County. And he likes to ride his bike(s). This is a public episode. If you'd like to discuss this with other subscribers or get access to bonus episodes, visit gardenbasics.substack.com/subscribe
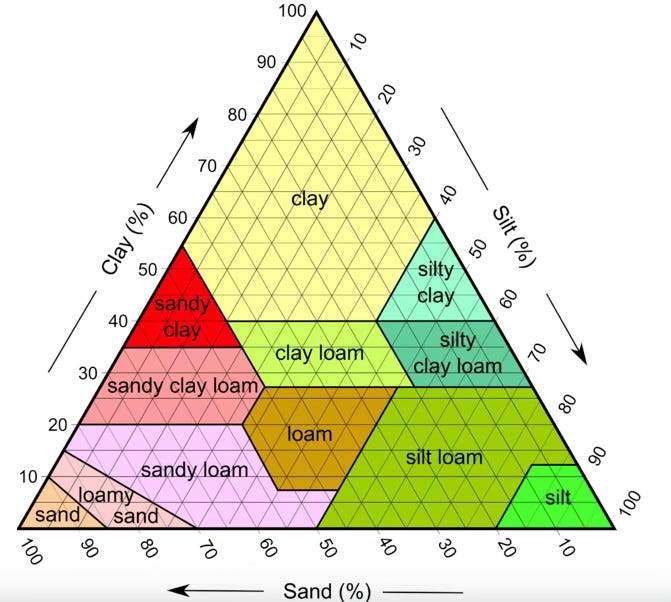
Jul 23, 2024
Why Are the Blackberries Turning White?
If you’re wondering about blackberry discoloration this summer, you won’t find that information in the podcast (above). What you will find for your ears: great information about superior blackberry varieties to grow, along with tips for pruning and trellising blackberries. As to why you might start seeing some discoloration in your blackberry patch right now might be due to the weather. But before we shine a light on that, here’s what you may have missed in last Friday’s Garden Basics with Farmer Fred podcast, Ep. 349: “Stressed? Your Garden Can Help .” And haven’t we all seen an increase in the stress levels this past couple of weeks. One easy way to soothe the worried mind: single malt Scotch Take a whiff of the garden. Really! America’s Favorite Retired College Horticulture Professor, Debbie Flower, and myself sniff out the answers that may be in your own yard. • Gardening and spending time in nature can help reduce stress and anxiety. • Forest bathing, or enjoying a slow walk or sit in a natural environment, can have calming effects. • Having a garden or indoor plants can provide stress relief and improve mental well-being. • Aromatic plants, such as jasmine, lavender, and mint, can have a soothing effect on the mind and body. Why Are the Blackberries Turning White? From the garden e-mail bag, Teri asks: "What is wrong with my blackberries?" Dewey & Ann write: "What is causing this problem with my Chester blackberries? This is on the majority of them. I had it last year too. I checked with the local Hmong community farmers, and they also had it and said it was the 111 degrees we had in Oroville. We are at 2500 feet and 10 degrees cooler, but it wasn’t this hot last year. My Black Satin Blackberries were forming and doing well and I thought the problem was only with the Chester. Well, pretty soon I see it on them also. Am I missing something in our soil? It’s not on every one of them. It’s a dried seed eventually, but goes from a pink to beige and then worse if you don’t pick them. I would like to get to bottom of this. Can you help me?" Your local Hmong are wise horticulturists. The recent week of very sunny 100+ temperatures, along with several of triple digit scorchers in the first week of July, could very well be the culprit.Usually when we think of heat stressed plants, the cool season ones that tend to croak when it gets hot come to mind, such as lettuce plants in early summer or snow pea vines by Memorial Day weekend.Even warm season vegetables that like sunlight, especially tomatoes, can be adversely effected by too much high intensity sun. Abiotic disorders such as cracking, solar yellowing or green shoulders are common this time of year on young tomato crops. One remedy for those tomatoes: don't prune off any of the leaf canopy of tomato plants; or, cover with a lightweight row cover to provide some more shade. And now, you can add blackberries to the list of crops that develop problems when it gets too sunny, too hot, dry and windy, especially because of extended heatwaves. The problem is known as White Drupelet Disorder (WDD). According to the UC Integrated Pest Management Guidelines for Caneberries :"White drupelet is a tan-to-white discoloration of one to many drupelets on the fruit. Most often, white drupelets will appear when there has been an abrupt increase in temperature accompanied by a drop in humidity; it is especially pronounced when there is wind. In the Monterey Bay area, white drupelet typically occurs when temperatures that are fairly steady around 70 degrees suddenly go above 90 degrees, and there is an absence of fog.While white drupelets may seem to be directly caused by weather, they are actually caused by ultra-violet (UV) radiation. Weather conditions modulate this by the effect they have on penetration of UV radiation into the fruit. Cool, humid air scatters and absorbs UV radiation, while hot dry air has the opposite effect and allows more direct UV rays to reach the fruit. The movement of humidity away from the canopy by wind only heightens the effect of hot dry air. Additionally, as humidity is moved away from the plant canopy, more UV rays penetrate the canopy and damage fruit that may not even have been exposed to the sun. Fruit inside of the canopy is not acclimatized to UV radiation and is subsequently more susceptible when it reaches them.Some growers of caneberries in the Willamette Valley of Oregon, where rapid changes from a normally mild climate to temperatures up to and above 100 degrees occur through the summer, use overhead irrigation to minimize fruit loss to white drupelet. This is not merely to mist the fruit; instead, large amounts of water are applied to thoroughly wet the canopy and maintain cool temperatures and high canopy humidity for as long as possible. Sprinkling is not done too late in the evening to allow fruit to dry before nightfall.While some varieties, such as Apache blackberry, Kiowa blackberry, and Caroline red raspberry tend to get white drupelets more frequently than others, almost all caneberry varieties are susceptible to white drupelet to some degree." From North Carolina State University : White drupelet disorder (WDD) is a discoloration of some of the drueplets on developing blackberry fruit. The drupes appear as tan to white and can be concentrated in patches or randomly distributed on the fruit. The causes of WDD in blackberries are attributed to multiple factors. Environmental factors include the exposure of the drupelets to ultraviolet-B (UV-B) light or high light intensities, low humidity, wind, rainfall, and interactions of these factors. WDD is often observed earlier in the fruiting season when the canopy is less dense. We know that there are some cultivars are particularly prone to displaying this disorder, so there is a genetic factor as well. The blackberry cultivar Apache appears to be especially vulnerable. From the University of Arkansas : Thoughts on White Drupes on Blackberries by Dr. John R. Clark - Fruit Breeder “I would like to make a few comments on white drupes (WD) and related topics in the early part of this blackberry season in Arkansas. My experience is from the research plots in the Arkansas breeding program, based in West-Central Arkansas, and are based on observations from early June until June 17, 2013. I have seen more white drupes this year than normal, and I think it is due to several factors. A primary one is that our environment shifted quickly, from daytime high temperatures in the upper 70s and nights in the upper 50s to daytime highs near the mid-90s, with above 70 nights (all are Fahrenheit temperatures). I think the plants were rather shocked with this change and responded with more susceptibility to this increased heat and possibly sunlight. I also saw more true sunburned berries during this time –the whole sides of berries burned red or white. The problem appears to have lessened somewhat as fruit maturity has moved along, and I suspect the plants may have adjusted to some degree. One cultivar I noted to have no white drupes was Prime-Ark®45. As I was looking closely at cultivar and new breeding developments I could not find any white drupes on it while some selections were covered with WD berries. Natchez had a few white drupelets with the first ripe berries, while Ouachita had no ripe berries. Note this was in the floricane fruit of PA 45, and it began ripening about June 5 (our season is running 7- 9 days late this year). Prior to this heat, we saw a tremendous amount of dry drupe berries, often concentrated at the tips of berries. I am not sure if this was anthracnose or another problem, but the weather was very wet several weeks prior to this, the plants were only sprayed with liquid lime sulfur at bud break, and heavy foliar anthracnose was seen during this time. I don’t have a solution to this problem other than as a breeder to try to select and advance selections to release that have less or none of the WD problem, and not spraying to try to identify the most resistant plants to the dry drupe issue. I still feel this WD event is associated with wet periods and sunlight damage; it can be much worse on berries located lower on the plant and closer to the ground that stay wetter longer.” From the University of Missouri’s Integrated Pest Management Program : July is the prime time for harvesting and enjoying blackberries. The fruit is ripe when the drupelets are uniformly black. However, sometimes individual or multiple drupelets on a blackberry are off-colored. White, tan, red, or brown drupelet discoloration can be caused by various factors during the growing season. White drupelet disorder on blackberry often occurs during hot, dry summers. Although drupelets enlarge during the growing season, they fail to turn red. These white or tan drupelets can be interspersed individually among dark-colored ones or in groups. In the past, white drupelet disorder was attributed to stinkbug feeding. However, white drupelets are caused by ultraviolet radiation and high temperatures. In studies conducted on red raspberry, unpigmented or white drupelets developed when fruit was exposed to temperatures of 107°F or higher with four or more hours of ultraviolet radiation. In another study, researchers found that the use of 30% shade cloth during the growing season reduced white drupelet disorder by 63%, but the total soluble solids (i.e., sugars) concentration of shaded fruit was 1% lower than non-shaded fruit, which slightly reduced blackberry sweetness. Some of the older blackberry cultivars, such as Kiowa and Apache, are more prone to developing this disorder than others, but several are susceptible. While white drupelets on blackberries may not be aesthetically pleasing, affected fruit are edible. Interspersed red drupelets on ripe blackberry fruit can develop before or after harvest. Excessive rainfall before harvest has been associated with red drupelets that are soft and never turn black. In 2020, red drupelets were observed on the floricane crop Prime-Ark 45 blackberries grown in the field and in high tunnels in North Carolina. Also, a tiny eriophyid mite (Acalitus essigi) is known to cause "redberry" fruit on blackberry. Late-maturing blackberry cultivars are particularly prone to redberry mite infestations. These mites feed on the fruit core and at the base of berry drupelets. However, these mites are not common in the eastern United States. Reversion is the most common cause of red drupelets on blackberry fruit after harvest. With this disorder, some of the black drupelets at harvest change to a red color. Reversion occurs on blackberries that are damaged by bruising or fruit compression during harvest or shipping. Also, blackberries that have a core temperature above 73°F at harvest tend to have a higher incidence of red drupelet than cooler fruit, especially during the early part of the season. Thus, a step-cooling process to lower fruit temperature is used to reduce the incidence of this disorder. Anthracnose is a fungal disease that produces brown, shrunken drupelets on infected blackberries. Infection occurs in the spring during warm, wet conditions. Pruning to enhance air circulation among plants and removal of old fruiting canes in the dormant season reduces the amount of overwintering inoculum in the planting. Also, weed control improves air flow through the planting during the growing season and helps reduce disease infection. An application of liquid lime sulfur (Sulforix) can also be applied to dormant blackberry buds just before they begin to produce new growth will control anthracnose. Blackberries infected with this disease are off-flavored and are unfit for sale. All those Universities agree: blame it on our “Heatdome” weather. Thanks for reading Beyond Basics: The Garden Basics with Farmer Fred Newsletter! Subscribe for free to receive new posts and support my work. Thank you for also listening to the Garden Basics with Farmer Fred podcast! It’s available wherever you get your podcasts. Please share it with your garden friends. Fred Hoffman is also a University of California Cooperative Extension Master Gardener in Sacramento County. And he likes to ride his bike(s). This is a public episode. If you'd like to discuss this with other subscribers or get access to bonus episodes, visit gardenbasics.substack.com/subscribe
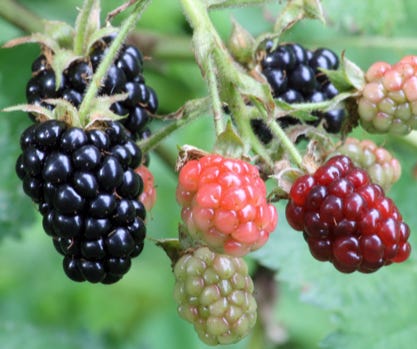
Jul 16, 2024
How to Grow Cilantro in the Summer in Hot Climates
Are you trying to grow a salsa garden? It's great that most of the ingredients for salsa ripen at about the same time in the backyard garden. The main salsa ingredients - tomatoes, peppers, onions, and garlic - are ready this time of year. And if you wait until September or October to make the salsa, there might be some limes ready from a backyard lime tree in citrus growing regions. But there is one ingredient that throws off that salsa recipe timing: cilantro. Cilantro is easy to grow in hot climates in fall, winter, and early spring. But in hot summers? You can forget about it being ready when the rest of your salsa ingredients are all growing fine. Because of the rising frequency of extended, triple digit summer temperatures (“heat dome” seems to be the 2024 phrase that pays), cilantro is going to turn bitter and send up flower stalks (which, by the way, the beneficial insects love). You could buy cilantro at the store or farmer’s market. But the aroma and tangy taste of fresh, homegrown, just-picked cilantro can’t be beat. Before we delve into the solution for getting fresh homegrown cilantro in the summer, here’s what you may have missed in last Friday’s Garden Basics with Farmer Fred Podcast, #348 : Right now - mid-summer - is peach and plum harvest time for most of us. Phil Pursel of Dave Wilson Nursery talks about choosing the tastiest peach and plum tree varieties, along with care tips, including watering and fertilization. Phil points out the difference between freestone and cling peaches, the importance of chill hours for peach trees, and the major insect pests of peach trees. Phil’s favorite peach: the Red Baron. Fred’s favorite: a dwarf variety, the Garden Gold peach. Phil’s favorite plum: the Emerald Beaut. Fred’s tastiest favorite plum: The weeping Santa Rosa plum. We’ve talked in the past about ways to improve clay soil; but what about sandy soil? Maser Gardener Gail Pothour offers tips for a listener in Michigan on what to add to that sandy soil to help it retain nutrients and water. And it turns out, Gail is also knowledgeable about how parts of Michigan got its sandy soil to begin with! The episode concludes with our America’s Favorite Retired College Horticulture Professor, Debbie Flower, dissecting a listener’s plan for adding sticks to the bottom of a new raised bed. Even though it’s counterintuitive, that can actually slow down the flow of water through the bed, leading to possible wet soil problems for the plant roots. Unlike what water does above ground (fall through the air, downward). Underground, water must travel along soil particles, not air particles - to head downward. Thus, the importance of using a uniform soil type throughout the container or raised bed. Find out more when you listen to Ep. 348, The Tastiest Peaches and Plums. Improving Sandy Soil. Raised Bed Drainage Tips. How To Grow Cilantro in a Hot Summer Climate There is a solution for cilantro lovers who garden in a hot climate, according to Renee Shepherd, owner of Renee’s Garden seed catalog: Grow cilantro as a microgreen. “Pick it when it's very young, just a few inches tall,” advises Shepherd, based in Santa Cruz County, CA. “The hotter the weather, the younger you pick it. I have seen it growing that way in the Napa Valley. I work with a grower there who besides growing the cilantro seed for us, grows very fancy greens for upscale restaurants in San Francisco. And it's very hot in Napa, just as hot as where you are. He's successful growing cilantro as a microgreen. He uses row covers for protection and grows it in an area that gets afternoon shade through the summer.” Shepherd says it is a quick, easy crop to grow as a microgreen in just a couple of weeks. The seeds will sprout in five to ten days. But even though you're harvesting the cilantro at a very young age after just a few weeks of growing, you increase your chances of success by planting it where it gets afternoon shade. That’s just one of the crops Renee discusses in today’s newsletter podcast (above). At Renee’s Garden seed catalog, the Cut & Come Again Salad Garden is prominently featured. Here is a sampler of carefully chosen varieties for growing in the Cut & Come Again Salad Garden from Renee’s Garden , especially when gardening in containers or small space gardens: There are replacements for cilantro that may complement your homemade salsa. Some common substitutes mentioned online include mint, basil, parsley and chives, all of which grow well here this time of year. However, there are herbs that ripen in the summer that contain a more cilantro-like flavor. Most of these herbs originate in Southeast Asia, usually Vietnam, and they're available at better nurseries that have a wider range of herbs. According to Rose Loveall-Sale of Morningsun Herb Farm in Vacaville, CA: “One of the best cilantro substitutes is Vietnamese coriander (Polygonum odoratum), which is also called Rau Ram . The flavor is very similar to cilantro, with a hint of lemon and without the soap flavor that's often associated with cilantro. It makes a great cilantro substitute during the summer when other cilantro species suffer and die under the hot dry conditions.” Morningsun Herb Farm will be one of the participating vendors at the UC Sacramento County Master Gardener’s big free event, Harvest Day, at the Fair Oaks Horticulture Center on Saturday, August 3. If you bought cilantro seeds today, you could be harvesting it by August for your salsa recipes, by growing it as a microgreen. The UC Master Gardeners of Sonoma County offer these cilantro microgreens growing tips : • Grow microgreens indoors in pots or trays that are a few inches deep; outdoors grow them in a flat that gets afternoon shade and is protected with a row cover. • Make sure all containers have good drainage. • Use a commercial seed starting soil mix to avoid soil pathogens. • Sow seeds 1/8 of an inch deep. Mix seeds with fine sand to help with even distribution. • Water regularly with a spray mister to avoid disturbing seeds. Maintain moist, but not wet, soil. • Growing indoors? You can start the seeds in a container in low light, but move the pot or flat to an eastern, western, or south-facing window after germination. • Provide six to eight hours of sunlight as soon as sprouts appear. Indoors, if lacking a sunny window, use specialized grow lights over the trays, about 12 hours a day, with the lights 6-12 in. above the sprouted greens. • Harvest microgreens after they develop their first set of true leaves and are about 2-4 inches tall. • Snip small clusters of stems with scissors a little above the soil level; rinse before eating. Thanks for reading Beyond Basics: The Garden Basics with Farmer Fred Newsletter! Subscribe for free to receive new posts and support my work. Thank you for also listening to the Garden Basics with Farmer Fred podcast! It’s available wherever you get your podcasts. Please share it with your garden friends. Fred Hoffman is also a University of California Cooperative Extension Master Gardener in Sacramento County. And he likes to ride his bike(s). This is a public episode. If you'd like to discuss this with other subscribers or get access to bonus episodes, visit gardenbasics.substack.com/subscribe

Jul 9, 2024
In search of a Heat-Tolerant Leafy Green Vegetable
Today’s podcast deals with any hot climate vegetable gardener’s dilemma: what greens can I grow in the summer that are bolt resistant and won’t end up tasting bitter? We talk with Sacramento County Master Gardener and avid vegetable grower Gail Pothour, who talks about the finalists in the heat-resistant greens growing trial held at the Fair Oaks Horticulture Center. And the Fresh Physician (and avid gardener), Florida-based Dr. Laura Varich, who extols the virtues of a diet loaded with green, leafy vegetables. And she has a favorite leafy green vegetable that (in her own yard) can withstand the Florida summer heat. But before we delve into the delicious, nutritious, easy to grow world of leafy green vegetables, here’s what you may have missed in last Friday’s Garden Basics with Farmer Fred podcast, Episode 347: The Garden Basics travel playlist -“Top 5 All Time Episodes” (which was also featured in last week’s newsletter), “Growing Raspberries and Boysenberries”, and “Getting Rid of Slugs in a Compost Pile”. The Take-aways: • Proper spacing, irrigation, and pruning are important for growing berries successfully. • Slugs can be managed in compost bins by ensuring proper moisture levels and using barriers like iron phosphate or copper. Why, thank you, AI, for that succinct, bland recap of a 40 minute-plus podcast! Please, take a WD-40 break and I’ll add the flowers. The ever-ebullient and knowledgeable Master Gardener Pam Bone loves to grow raspberries and boysenberries. And with 40 years of backyard growing experience of those vining sweet treats, she’s got the keys to success down pat. Originally aired in April of 2022. Susan Muckey, Master Gardener and worm whisperer, volunteers at the Fair Oaks Horticulture Center’s Composting/Vermicomposting Demonstration area. And she was surprised, amused and befuddled that a question from a listener asked: “There are slugs in my compost! How do I get rid of them?” We both wondered, how did those slugs get in there? We went through our litany of slug and snail control suggestions, although Susan has one unique take: “Turn the pile at night, so you won’t see them.” Again, all that, plus that Garden Basics playlist of 5 episodes for long car trips, is in last Friday’s episode 347 of the Garden Basics with Farmer Fred podcast. In Search of a Heat Resistant Green (Today’s Podcast Transcript) Originally aired on Garden Basics Ep. 264, “Top 10 Homegrown Vegetables, Part 2” Farmer Fred I have been on a lifelong garden search for a lettuce variety, a loose leaf lettuce variety, that can take the heat. Some are better than others as far as getting through July, perhaps. But it seems like when July turns into August, they all start bolting. Gail Pothour Right. And actually, several years ago, we did an experiment two years in a row at the Fair Oaks Horticulture Center. Because we get this question a lot, “Why can't I grow lettuce in the summer?”. So we thought okay, let's find some varieties, and grow them through the heat of summer and see how they do. First off, you need to start with some varieties that are heat resistant, like Jericho that was bred in Israel, so it's a little more heat resistant. And we tried half dozen or so different varieties we monitored when we planted them, how many weeks it was before they started bolting. Some did better than others. Some did pretty well. But what we found is you need to mulch heavily to keep the moisture in, to keep them well watered, provide shade during their entire lifespan in the summer, and then be prepared as soon as one starts to bolt, take it out and then replant with another transplant. So kind of a succession planting. It is possible but it's a lot of work. It takes a lot of water and shading and monitoring. Not sure if it's worth it or not. Grow it in the shade if you have a shady location but often it's not just the sunlight, it is the heat and that’s true even in the shade in Sacramento. We can be fairly warm in the summertime. So it's a tough thing to do. Farmer Fred The closest green I found that can be grown year round and especially if you do it in the shade it does okay here, and that’s swiss chard. Gail Pothour right yeah, that can be grown year round. I have done it in an area of my yard where it got some afternoon shade in the summertime. And it was able to survive over summer. But yeah, any of the other leafy greens are going to be a little tough. One of my favorites or absolute favorite lettuce is called Pomegranate Crunch . It's a red romaine. And it is very good. I get it as pelleted seeds, which makes it a little bit easier to germinate. Lettuce can have a difficult time germinating. Lettuce does need light in order to germinate. So don't plant the seed too deeply. Pelleted seeds don't have that problem. But I think sometimes if people have difficulty getting lettuce to germinate, it’s because maybe they buried it too deep. It needs light. It's one of the few vegetables that needs light to germinate. Farmer Fred And I believe it's one of those seeds that will not germinate in heat. Gail Pothour Right, right. If you tried sowing lettuce seed in the summer, maybe for a fall crop, it is difficult. If your soil temperatures are too warm, the lettuce seed can go dormant. So if you're also starting it indoors, whereas I use a heating mat to get a lot of my seeds to germinate, you don't use a heating mat for lettuce because the soil will be too warm and lettuce seed will go dormant in heat. Farmer Fred Some of the varieties that have been recommended as heat tolerant lettuces that I've grown over the years, and they're barely heat tolerant, are Black Seeded Simpson and Amish Deer Tongue . They're pretty good. But like I said, they do eventually bolt. But I think one good rule to remember is if you want lettuce to last in the yard as long as possible, grow loose leaf varieties, not head lettuce. Gail Pothour Right. And of the ones that we did in our heat tolerant trial, the ones that did well besides Jericho was Year Round Bronze . It's an oak leaf variety, and it was late to bolt in the summer so it actually did very well. Red Cross is a red butterhead, Merlot is a dark red leaf lettuce, and “Paradai”, a red oak leaf. That's one of my favorites, but I can no longer find seeds for it. And then Nevada . It's a green loose leaf, kind of a semi heading type. So all those did well as well as completely expected in our summer heat. So they did better than a lot of other varieties. Farmer Fred I'm glad you mentioned Nevada because I have grown that one before and it it was pretty good. But I think if you want a dependable green, do the Swiss chard. Gail Pothour Right, I agree. Link : Sacramento County Master Gardeners’ Warm Weather Lettuce Trials ============================ Dr. Laura’s Tip for a Heat Resistant Leafy Green Vegetable Originally aired on Garden Basics Ep. 327, “The Heart Healthy Garden ” Guest: Dr. Laura Varich, the Fresh Physician Farmer Fred I have been on a search for a bolt resistant lettuce, and you gave me that tip last year when we talked last June. I believe it was episode 269 about a healthy diet. You said you need to try the Chinese cabbage, the Tokyo Bekana Chinese cabbage . It is bolt resistant. It can take the heat. And I go, well, gee, I'll try that because I've been searching for years for a summertime lettuce, a green, that I can grow and have with just about every meal. And sure enough, that Tokyo Bekana Chinese cabbage, which isn't really a cabbage, it's more lettuce-like, it has a crunchy flavor, it's a loose leaf variety. Grow it in the shade in the summertime. Grow it in the winter in full sun. And it is delicious. It grows easily. You can plant a short row every month and you can cut it and it comes back and eventually it wears out. But you can still plant it several times a year. Try it. Thank you, thank you, thank you so much. And you even said to try it! it's a game changer. And it really is for anybody searching for a bolt resistant, leafy green that can take the heat. Try that Tokyo Bekana Chinese Cabbage. Dr. Laura Varich You get a nice big head of that growing and you could just cut off the outer leaves like you said and keep it going and keep it going. And for some reason, the cabbage pests don't seem to like it that much. I haven't had trouble with them, whereas I have trouble with some of the other cabbages. Another one I want to tip you off to, in case you haven't tried it, is one called Devil's Ear lettuce . Have you tried that? Farmer Fred No. OK, I'm writing it down. Devil's Ear lettuce . Dr. Laura Varich That's another one that I feel like it probably goes a lot longer before bolting than the rest of them. And it's kind of got a long skinny leaf. It's a smallish kind of head with a long skinny leaf. It's a loose leaf. And it's got some purple on the edges. Super wonderful, very nice flavor. And it doesn't bolt, at least not for a long time. So I love that about it. Farmer Fred They've done some trials out at the Fair Oaks Horticulture Center , the Sacramento County Master Gardener Demonstration Garden, and one summer they did try a lot of different heat tolerant lettuce or allegedly heat tolerant lettuces. And their final verdict was, well, they're barely heat tolerant. And they included things like black seeded Simpson, Amish deer tongue, Red Cross, Jericho, Year Round Bronze and a dark red leaf lettuce called Paradai, P -A -R -A -D -A -I, which is a red oak leaf lettuce. And also they tested Nevada, which is a green loose leaf. And it's kind of a semi -heading type. Again, they did as well as expected in summer heat, but as expected means, well, it might get you to August, but that's about it. So you think Devil's Ear lettuce can last through August? Dr. Laura Varich Oh, I don't know if I'd say that. But it seems to go longer than the rest of mine as far as before it bolts. Farmer Fred All right. Well, I will definitely pick up some devil's ear lettuce and give that a try this summer and see how it does. Great. Let's talk a little bit about greens. They're so good for you. They're low calorie and you can serve them in a variety of ways. You can serve them raw in a salad. You can saute them. You can mix it up in stir fries. There's just so much you can do with greens. Dr. Laura Varich Yeah, and they really are good for you. If you think about healthy foods, they're probably our number one healthy food. They have the most nutrients, again, that nutrient density that we were talking about. So yeah, greens are terrific for us. And some of the things that are really, really good for us in the foods that we eat. I know we talked about this a little bit before, the strong colors and the strong flavors in our food. And greens have both of those things going for them. Those dark green colors are really a combination of colors. It's a whole smattering of colors that's making that dark green. So they've got a lot of phytonutrients there and they do have some of those stronger flavors, right? Some of that bitterness to it and things like that. That tells us that there's a lot of those are really good phytonutrients in there. So yeah, greens, we can do so much with them. And it's just a matter of finding the ones that you really love. Thanks for reading Beyond Basics: The Garden Basics with Farmer Fred Newsletter! Subscribe for free to receive new posts and support my work. Thank you for also listening to the Garden Basics with Farmer Fred podcast! It’s available wherever you get your podcasts. Please share it with your garden friends. Fred Hoffman is also a University of California Cooperative Extension Master Gardener in Sacramento County. And he likes to ride his bike(s). Uphill. This is a public episode. If you'd like to discuss this with other subscribers or get access to bonus episodes, visit gardenbasics.substack.com/subscribe

Jul 2, 2024
Can Termites Live in Mulch?
Before we start digging through the mulch looking for termites, here is what you may have missed in last Friday’s (June 28) Garden Basics with Farmer Fred Podcast, Ep. 346: All About Soil Thermometers, Soil pH, and Cardboard Mulch. • Soil thermometers are precise measuring devices that need to be taken care of properly. They should not be left sitting in the soil or exposed to direct sunlight. • The depth at which you measure soil temperature depends on what you are planting. For seeds, measure at a shallow depth, while for transplants, measure at a deeper depth. • Some soil thermometers have a calibration nut that allows you to calibrate the temperature reading. This can be done by placing the thermometer in a glass of ice water and adjusting the arrow to read 32 degrees. • Soil pH can vary at different depths, especially when using layered mulching techniques. It is important to wait for the layers to break down and mix together before relying on pH readings. • Professional soil tests from reputable labs can provide accurate information about soil pH and nutrient levels. It is recommended to follow the specific instructions provided by the lab when taking soil samples. • Cardboard can be used to smother grass and weeds when starting a new garden bed. It should be plain and unadulterated, and watered before being placed on the soil. It takes time for the cardboard to break down and create a suitable planting environment. ========= After nearly five years of podcasts, here are the five most listened-to episodes of the Garden Basics with Farmer Fred podcast: #5. Ep. 263 The Top Homegrown Vegetables, Pt 1 Farmer Fred and Master Gardener/vegetable expert Gail Pothour discuss the top 5 homegrown vegetables. They cover topics such as growing tomatoes, cucumbers, sweet peppers, beans, and carrots. They provide tips for beginners, including starting with easy-to-grow varieties and using supports for indeterminate tomatoes. They also discuss favorite tomato and pepper varieties and share tips for growing cilantro in the summer. #4 Ep. 258 10 More Garden Quick Tips Fred presents 10 more garden quick tips. The topics covered include creating a container garden, making a cheaper seed starting mix, storing and washing chicken eggs, taking better pictures of garden insects, growing small apples, and growing the Suncrest peach tree. The episode also features interviews with experts in the gardening field who provide valuable insights and advice. In this conversation, Fred discusses various gardening topics, including growing fruit trees in small spaces, warding off pests, propagating strawberry runners, improving drainage, and growing popcorn. He provides tips and advice on each topic, sharing insights from experts and personal experiences. The conversation covers a range of gardening techniques and practices that can be helpful for both beginners and experienced gardeners. #3 Ep. 256 Container Gardening Basics Fred interviews Pam Farley , author of the book ' The First Time Gardener, Container Food Gardening. ' They discuss container gardening for beginners, including tips on choosing the right containers, ensuring proper drainage, and selecting the right plants. They also cover troubleshooting common issues in container gardening and provide a quick planting guide for vegetables, fruits, and herbs. #2 Ep. 266 Cucumber Growing Basics This conversation with America’s Favorite Retired College Horticulture Professor (and cucumber aficionado), Debbie Flower, covers topics such as cucumber varieties, growing techniques, harvesting tips, and how to prevent bitterness in cucumbers. The episode also touches on the importance of bees in pollinating cucumber flowers and discusses common pests and diseases that can affect cucumber plants. They provide recommendations for trellising cucumbers and share favorite cucumber varieties. In this conversation, Fred also provides recommendations for further reading and resources. #1 Ep. 319 How to Plant and Care for a Shade Tree Consulting arborist Gordon Mann joins Fred and shares his expertise on planting and caring for shade trees. They discuss the importance of choosing the right spot with good soil, proper planting techniques, and the long-term care required for tree health. They also emphasize the role of soil in tree growth and the need for organic matter and mulch. The conversation covers topics such as tree watering, root pruning, and the correct way to plant a tree. Overall, the episode provides valuable information for homeowners looking to plant and care for shade trees. They also delve into the topic of tree pruning, emphasizing the need for proper pruning techniques and debunking common misconceptions. The conversation concludes with a discussion on the importance of tree diversity and the role of water management in tree care. Mulch vs Termites From the garden e-mail bag, Carol wants to know: “ We mulch all over the place, but all those wood chips got me thinking about termites! Has anyone mentioned a problem with the little guys? We keep the chips away from the wood siding, but how far is far enough? Any thoughts? ” My first thought is: mulch is good. A layer of organic mulch, such as wood chips, chipped/shredded tree limbs, compost, or straw, applied a few inches thick around (but not touching) the plants in your garden and walkways, has a lot of benefits. Mulch retains moisture; it keeps soil temperature constant; it reduces plant stress; mulch suppresses weeds; organic mulch will gradually increase soil organic matter; it attracts beneficial organisms that improve soil fertility and porosity; mulch encourages healthier plants; it reduces the needs for pesticides and fertilizers; mulch protects roots and plants from mechanical injury; and applied on a hillside to thwart the development of flammable weeds, mulch can suppress the spread of brush fires. Worrying about introducing termites to your yard via a load of mulch is a waste of worry wrinkles. Former college horticulture professor Debbie Flower and I talked about this in an episode of the Garden Basics podcast ( Ep. 284 “Ranking Garden Mulches” ), because it is a good question for anyone wondering if that load of chipped/shredded tree parts (my favorite form of mulch) that is dropped off in front of your house might contain termites. “There could have been a pest or disease in that plant that was taken down,” explained Flower. “But all research has shown that those diseases and insect pests, as well as fungus and bacteria, do not survive the process of the chipping and then the moving of the pile. They rely on the intact plant to live. Termites don't live in wood mulch. They rely on bigger pieces of wood, not on this chipped-up stuff that's piled up with lots of air between it. It gets wet, it dries out, it's a very different environment that termites don’t like. The diseases, as well as the insect pests that may have caused the demise of the tree do not survive this process, so they don't come to your house.” You can hear our entire conversation about mulch in today’s newsletter podcast (above). University research agrees with that assessment. However, there are some warnings. The University of Florida cautions users of mulch to only apply a thin layer of mulch – or none at all – next to the foundation of the house or outbuildings. Thick, consistently wet mulch can provide a living bridge from the mulch pile to the wood foundation of a house. Iowa State University points out a problem with termite species that might live in the soil in that state, but still say mulch is a good thing. “Does this mean, as some pest control advertisements claim, that mulch attracts termites to your home or that the mulch somehow causes termites? The answer to both questions is, ‘no.’ In the field, termites were detected with equal frequency beneath mulches of eucalyptus, hardwood, pine bark and pea gravel, as well as bare, uncovered soil. Sustained activity over time was significantly higher beneath gravel mulch.” Linda Chalker-Scott of Washington State University agrees, but also warns about using cardboard as mulch, which can attract termites: “Many people believe that they shouldn’t use wood chip mulches around their house for fear of attracting termites to their home. This is not true. Termites are not attracted to wood-based mulches, they prefer higher nutrient woody materials like cardboard. If termites were in the tree when it was chipped to make mulch, the termites would have died through the process and will not be introduced into your garden from the mulch. However, if you have an established termite population in the ground surrounding your garden, wood chip mulch can be a bridge from the soil to the structure. If you are concerned with termites around your garden, it would be best to consult a professional to set up monitoring or barrier control methods around your home.” I would add that keeping mulch 12 inches away from the foundation, allowing that area to occasionally dry out, will dissuade termites from entering that non-moist environment. Thanks for reading Beyond Basics: The Garden Basics with Farmer Fred Newsletter! Subscribe for free to receive new posts and support my work. Thank you for also listening to the Garden Basics with Farmer Fred podcast! It’s available wherever you get your podcasts. Please share it with your garden friends. Fred Hoffman is also a University of California Cooperative Extension Master Gardener in Sacramento County. And he likes to ride his bike(s). This is a public episode. If you'd like to discuss this with other subscribers or get access to bonus episodes, visit gardenbasics.substack.com/subscribe
Jun 25, 2024
Helping Your Garden Cope with the Heat
Before we delve into the sweaty details of getting your garden through the summer, here’s what you may have missed in last Friday’s Garden Basics with Farmer Fred podcast, the Heart Healthy Garden , recorded live at the Sacramento Rose Society in February of 2024: • Eating a heart-healthy diet and exercising regularly can help improve heart health and reduce the need for medications. • Fiber is an important component of a heart-healthy diet and can be found in a variety of fruits, vegetables, and whole grains. • Growing your own fruits and vegetables allows you to have a constant supply of fresh, fiber-rich produce. • Choosing heirloom varieties of vegetables can provide higher nutritional content compared to hybrid varieties. • Seeking information from reliable sources, such as university websites, can help ensure accurate and trustworthy gardening advice. What’s in Today’s Podcast at the top of this page? The perfect companion piece to the information below, Debbie Flower and myself discussed more container planting tips, recorded last summer at Harvest Day at the Fair Oaks Horticulture Center, a free community event held the first Saturday of August every year, including this August, on Saturday, August 3. Details here about Harvest Day. This segment originally aired in Episode 278 of the Garden Basics Podcast. Among its highlights: • Why you don’t want to use garden soil in containers. • The best potting mix to use for a container plant. • What’s happening to the roots of plants in containers on a 100-degree day. • How to better protect your outdoor potted plants in a heatwave. • The differences in shade cloth, and how to use it. • How to reuse old potting soil. • Are you watering your container plants effectively? Probably not. • What do you put in the bottom of a plant container to aid drainage? Nothing! We tell you why. • How to save garden seeds to last for years. • And, how to get pepper seeds to germinate in half the time. Helping Plants Cope with the Heat Much like most of the country, our area here in Northern California just went through the first real heat wave of the season, with temperatures hovering around the century mark for several days this past week. The “Excessive Heat Warning” issued by the National Weather Service for Tuesday through Thursday predicted, “Dangerously hot conditions with temperatures 95 to 108 possible and widespread major heat risk.” As if that was not enough, try getting a good night’s rest with “limited overnight relief with temperatures in the 60s to mid 70s.” My apologies to those of you who normally try to sleep at night when summer nighttime temperatures are above 70. Several meteorologists are calling for more intense heatwaves for the United States this summer. What’s a gardener to do to make their lawn and garden more heat-tolerable? Here are some tips for having a thriving garden during the summer’s upcoming heat waves, as well as save water: • Mulch like mad. Create a one to three-inch layer of organic material such as bark, shredded leaves, or chipped/shredded tree branches, laid on top of the soil. This will reduce moisture loss from soil, moderate soil temperatures, control weeds which compete for water, and will return nutrients to the soil as it breaks down. Be sure to keep mulch a few inches away from the stems or trunks of plants. • Count on compost. Mix compost into the soil to increase the soil’s ability to absorb and hold water, and to slowly release nutrients to plants. This reduces stress, making them less susceptible to pests. • Plant early ripening varieties of vegetables that are mostly harvestable after only 60-65 days of growth. Plant in blocks instead of rows to create shade for roots and reduce evaporation. • Choose vegetable varieties that will produce a lot of food from one plant, such as tomatoes, squash, and peppers. Corn, on the other hand, is a thirsty crop that may only give you one or two ears per stalk, depending on the variety. • Hot afternoons can kill a container plant in a single day. Consider grouping potted plants together in an area that gets some afternoon shade. Or slip that pot into a larger pot so the sun isn’t beating down on the sides of the pot containing the soil. • If you feed plants, use a slow release, organic fertilizer to discourage excessive plant growth that attracts pests and increases water needs. • Hold off on major planting chores. When working on a large planting project, remember that the best time to plant is in the fall when the weather starts to cool. Winter rains will help these plants establish deep, healthy root systems before they are exposed to the summer heat. • The less lawn, the better. Lawns need more water than most other landscaping, so consider reducing or replacing your lawn with water-wise groundcovers, low maintenance perennials or a porous hardscape. If you plant a lawn, chose drought resistant varieties. • Mow lawns less often and raise the height of your mower blade to 3 inches. The longer grass will shade roots, lessen evaporation, and inhibit weed growth. • Get wise to the weeds. Keep up with controlling these unwanted plants since weeds compete for water. The combination of a drip irrigation system and several inches of mulch will help prevent weeds. • Go with the low flow. Use soaker hoses for irrigation. Or invest in a drip system or micro sprayers that can cut down on water waste. This allows the slower trickle of water to penetrate further into the soil without running off. • Consider installing a ‘smart controller’ for your irrigation system. This can save water by helping to calculate your water requirements and automatically adjust as the weather changes. • Irrigate early in the day. Watering early in the morning with cooler temperatures and lighter winds will minimize evaporation. • Go deep. Water less often, but more deeply. This encourages deeper root systems that can better tolerate dry periods. • Get in the zone. Group plants with similar water needs together to make watering easier and more efficient. • Go native. Consider replacing declining plants with a species better suited to your climate, such as plants native to your area. Once established, many of these plants can survive on rainfall alone. Thanks for reading Beyond Basics: The Garden Basics with Farmer Fred Newsletter! Subscribe for free to receive new posts and support my work. Thank you for also listening to the Garden Basics with Farmer Fred podcast! It’s available wherever you get your podcasts. Please share it with your garden friends. Fred Hoffman is also a University of California Cooperative Extension Master Gardener in Sacramento County. And he likes to ride his bike(s). This is a public episode. If you'd like to discuss this with other subscribers or get access to bonus episodes, visit gardenbasics.substack.com/subscribe
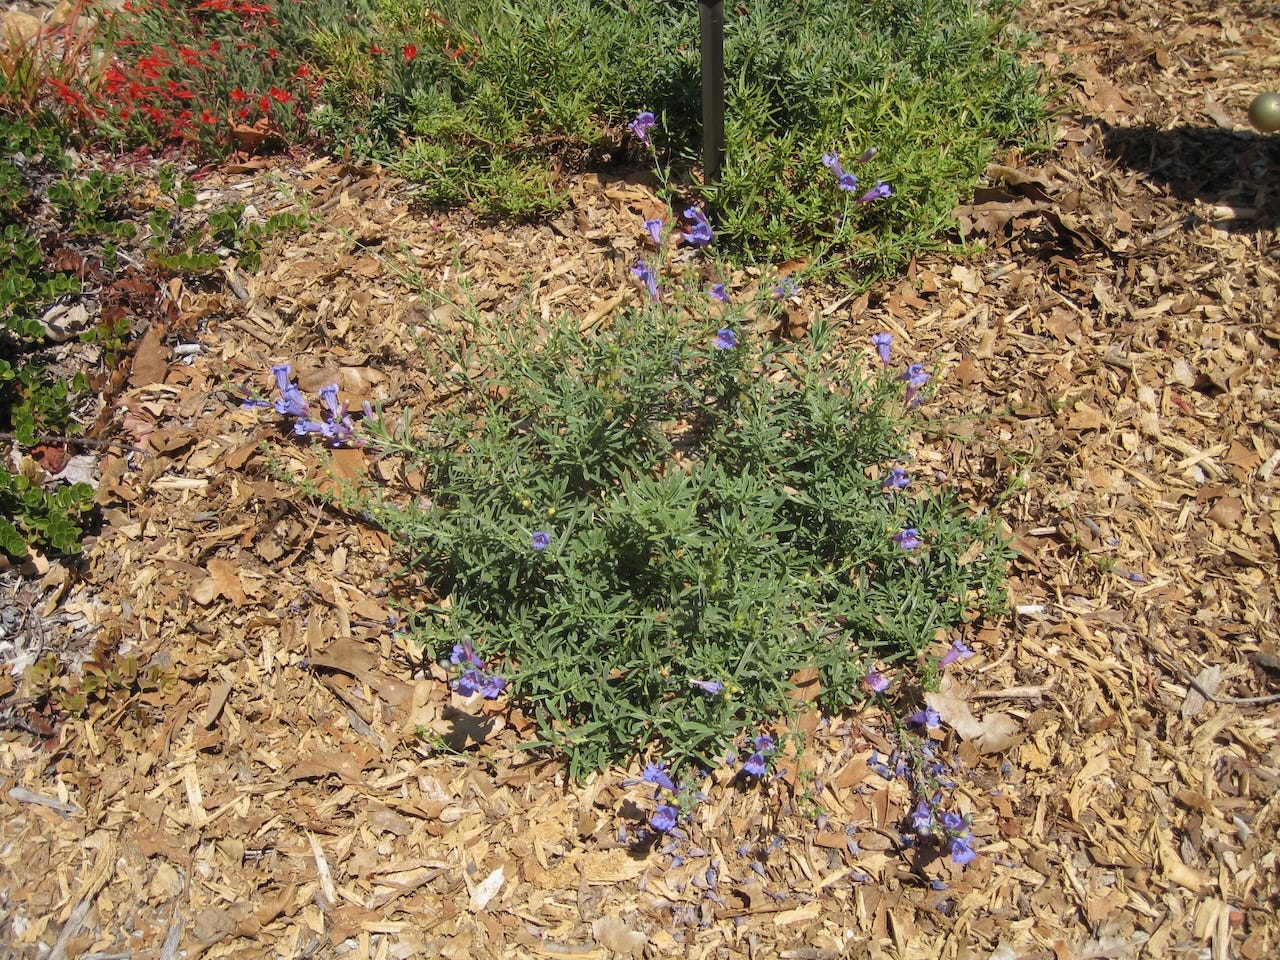
Jun 14, 2024
A Tour of Debbie Flower's Garden
Last week, we did a little podcast tour of my garden, with Debbie Flower asking the questions. Turnabout is fair play, so this episode features Debbie’s unique, water-saving landscape and her collections of plants and garden tools that have some very interesting stories. But again, an audio tour is missing the picture. Pictures, to be more exact. So, while you’re listening to this repurposing of Episode 343 of the Garden Basics with Farmer Fred podcast, scroll down to enjoy the visuals that go along with the stories of Debbie Flower’s landscape. But first, here’s a link to what you might have missed on Tuesday’s Garden Basics podcast (Ep. 342) - our weekly Q&A session, this time tackling the challenges of planting carrots in hot climates; and, the pros and cons of using landscape fabric/weed cloth in your garden (the “pros” list will be quite short). Word of Warning: Latin Used Here Today A word of warning: a lot of Latin-based botanical names are tossed around here. Some people think we’re just bein’ highfalutin’ elitists, jabbering in a dead language. Actually, the botanical names can be very accurate in pinpointing the exact plant. For example, according to the Sunset Western Garden Book, the plant known commonly as “Dusty Miller” could refer to any of five distinct plants with differing growth habits: Artemisia stelleriana , Centaurea cineraria , Lychnis coronaria , Senecio cineraria/Jacobaea maritima (old name/new name), and Tanacetum ptarmiciflorum . The “Dusty Miller” Debbie refers to as a plant she remembers from her youth in New Jersey was the Lychnis; and to avoid any confusion, she only used the term, “Lychnis”. Here in California, I grew up with Senecio cineraria in the front yard, which was always referred to as, “Dusty Miller.” “What Does That Have to Do with the Price of Tea in China?” That was a favorite saying of my mother, to prod me to get to the point of whatever I was talking about. OK, here’s the point: After listening to this, you may be intrigued by one or more of the plants in Debbie’s garden, perhaps the California native plant, Eriogonum grande rubescens that she mentions towards the end of our chat. But, just hearing her say, “ Eriogonum grande rubescens ” may have you wondering… “What the hell? How do you spell that?” At least, that is what I was thinking when she said it. But I’m too polite to interrupt. Besides, if I had asked the question, “What is the common name for that plant?” There’s a darn good chance the answer would be a variation of, “I don’t keep common names in my brain,” bringing the chat to a standstill, while we ponder the answer. In the interest of keeping the conversational ball rolling, I move forward, knowing I can solve this issue easily enough: CHECK THE OFFICIAL TRANSCRIPT! Don’t check the Substack transcript. Don’t check the Apple or Spotify transcripts. Unless you want a good laugh. And it’s why I include my own edited transcript for each episode of the Garden Basics podcast available at either GardenBasics.net or via my podcast uploader, Buzzsprout . Not only will you get the correct plant spelling (usually), but you will also get the common name, usually (but not always) in parenthesis. For example, here is the portion of the Eriogonum plant chat from the transcript provided at GardenBasics.net : Farmer Fred But this is quite the view, sitting here on your front porch, especially this time of year with the Palo Verde in bloom, and just the understory of all the plants and the flowers of the sage peeking up over the the wall. Debbie Flower And the Eriogonum grande rubescens (red or rosy buckwheat) that's flowering red right now, with the lavenders in front of it. And then the yellow calendulas. I like that combination too. And the pink Pelargonium behind. Now, here is the same portion, generated by AI and used by many podcast transcription services: Farmer Fred this is quite the view sitting here on your front porch, especially this time of year with the Palo Verde in bloom, and just the understory of all the plants and the flowers on the stage peeking up over the the wall Debbie Flower and the Areoginum grandrubescens. That's an flowering read right now with the lavenders in front of it. And then the yellow color Angelus. I like that combination too. And the pink Pelargonium behind, see And this is why we are safe from world domination by Artificial Intelligence. It’s just a robot that has never pulled a weed or smelled a rose in its mechanical life. Nor, even after five years of manually correcting their transcripts to make them more gardener friendly, have they figured out the difference between “root” (as in, a tree root) and “route” (as in, “Get Your Kicks on Route 66”). Even though Oklahoma City is “oh, so pretty,” you’d think they could figure out after all these years, I am probably referring to that bulge in your lawn, not offering melodious praise to Amarillo, TX or Gallup, NM. Or Flagstaff, AZ. (P.S. “Angelus” is not a plant. It’s daily church bells at noon and 6 p.m.) Again, just punch play above, and begin scrolling through the pictures of Debbie’s Garden: “Native fescue lawn in foreground, Leymus condensatus ‘Canyon Prince’ grey-green grass behind. Pink flowering shrub is my neighbors. It’s probably an oleander” “Hollywood juniper at the end, far right, Matilia poppy next (Romneya coulteri) Butterfly weed with white blooms (Asclepia speciosa), Meyer Lemon on right, perhaps the dead remains of a young Tower of Jewel plant in the bottom. Three Tower of Jewel plants (2 in their second year, one in its first year) (Echium wildpretti). Scarlet Oak in back. Unnamed “Governor’s Mansion” pelargonium on left. Closer look at the “Governor’s Mansion” pelargonium. Palo Verde ‘Desert Museum’ tree “Fat Albert” Colorado Blue Spruce with Verbena bonariensis in front, desert willow on right Eleagnus x Ebbingei cultivar. Commonly called oleaster or Ebbing's silverberry, it’s a cross between Elaeagnus macrophylla × Elaeagnus pungens (according to the Missouri Botanical Garden ) Eleagnus, Muhlenbergia rigens (deergrass), toyon, Fat Albert Colorado blue spruce In a hot climate, it makes sense to put a greenhouse in afternoon shade Asparagus aethiopicus, Sprenger’s day (Sprenger's asparagus fern) Dymondia margaretae (Silver Carpet). An interesting story about this groundcover. Birdbath with high-spout dripper. Caged for cat deterrence. The gardener’s path. On right: calendula, abutilon, Eriogonum giganteum (St. Catherine’s Lace buckwheat). On left, around birdbath: liriope (lilyturf) Smart Pot with vegetable seeds planted and bamboo sticks to deter animals. Green Cone composter. Strawflower and Borage behind. lavender, Eriogonum grande rubescens (red or rosy buckwheat) on right, calendula in back. Upside down wine bottle is in a small olla at base of newly planted lavender. closeup of wine bottle in olla . Counterclockwise from front left: Palo verde, Euphorbia charisma’s ‘Wolfenii’, Hesperaloe parviflora, sulfur buckwheat, white pacific coast Iris, salvia leucantha, another salvia leucantha. “This is one of the dryest parts of my garden,” says Debbie. Thanks for reading Beyond Basics: The Garden Basics with Farmer Fred Newsletter! Subscribe for free to receive new posts and support my work. Thank you for also listening to the Garden Basics with Farmer Fred podcast! It’s available wherever you get your podcasts. Please share it with your garden friends. Fred Hoffman is also a University of California Cooperative Extension Master Gardener in Sacramento County. And he likes to ride his bike(s). This is a public episode. If you'd like to discuss this with other subscribers or get access to bonus episodes, visit gardenbasics.substack.com/subscribe

Jun 7, 2024
A Tour of Fred's Garden, with Debbie Flower
If this newsletter podcast sounds familiar, it should. It is also the current (Ep. 341) Garden Basics podcast where myself and America’s Favorite Retired College Horticulture Professor, Debbie Flower, take a late May stroll through my garden, discussing the plants, as well as gardening techniques. But wouldn’t it be nice to see those plants and garden accoutrements? Well, here you go. But first, a recap of what you may have missed on this week’s two Garden Basics podcasts: Tuesday, June 4: Ep. 340 -Q&A Cross Pollination Concerns. What is the Best City or State for Gardening? • Understanding cross-pollination and its implications for seed saving and plant breeding. • The importance of local conditions and location-specific knowledge in gardening. • The impact of climate and weather on gardening success. • Different perspectives on the best US cities for gardening, highlighting the influence of location on gardening success. Thank you, AI, for your dry summary. Debbie Flower and I are more warm and endearing than that. Friday, June 7: Ep. 341 - Fred’s Yard Tour with Debbie . Or, listen above and scroll below. But we are definitely more entertaining and informative than AI would have you believe: Takeaways • The importance of selecting heat-resistant greens for summer gardening • Strategies for dealing with garden pests like tomato hornworms and cabbage worms • Tips for growing determinate tomatoes and managing peach trees • Insights on using raised beds and root cellars for gardening • The benefits of using vermiculite for seed planting and the use of worm bins for fertilizer • The significance of providing shade for certain plants and the value of using row covers for protection. SmartPot compost sacks are a convenient and effective way to create rich compost for gardening (golly, AI, thanks for plugging the sponsor!) • Clover is resistant to dog urine and can be used as a ground cover in areas frequented by pets. • Fruit trees can be grown in containers, and it's important to control the width and height of the tree to manage root growth. • Different soil types, such as raised bed soil planter mix and pumice, can be used for gardening in containers. • Citrus, blueberries, and potatoes can be successfully grown in containers, providing a versatile option for home gardeners. Again, just punch play above, and begin scrolling here: Thanks for reading Beyond Basics: The Garden Basics with Farmer Fred Newsletter! Subscribe for free to receive new posts and support my work. Thank you for also listening to the Garden Basics with Farmer Fred podcast! It’s available wherever you get your podcasts. Please share it with your garden friends. Fred Hoffman is also a University of California Cooperative Extension Master Gardener in Sacramento County. And he likes to ride his bike(s). This is a public episode. If you'd like to discuss this with other subscribers or get access to bonus episodes, visit gardenbasics.substack.com/subscribe

May 31, 2024
When Should You Fertilize Your Plants?
Before we delve into the soil, fertilizer in hand, a quick review of what was on the Garden Basics with Farmer Fred podcast this past week; Tuesday, May 28 , Ep. 338: Zucchini Sex! Which cherries are best for cooking? Questions tackled on this episode include answering questions about squash that is slow to produce healthy looking fruit (it’s due to the lousy sex life of male and female squash flowers this time of year: “it’s too hot!”, “it’s too cold!” “I’m hungry!” “I’m too full!” (See? Plants are just like us. Except they don’t get headaches.) And, some kind words about growing tart/sour cherry trees. They’re great in pies! Takeaways from Ep. 338 • Squash, melons, and cucumbers have male and female flowers on the same plant, and successful pollination requires synchronized flowering. • Pollinators like bees play a crucial role in transferring pollen between male and female flowers. • When fertilizing plants, it's important to consider the temperature and nutrient concentration, especially with synthetic fertilizers. • Organic fertilizers tend to have lower nutrient concentrations and are less likely to cause burning or osmotic problems. • Cherry trees, particularly tart cherries, require good drainage to prevent root rot. Friday, May 31 - Ep. 339 How to Water Clay Soil (and more tips for gardening in clay!) In this episode of Garden Basics with Farmer Fred, the focus is on how to water clay soil and other tips for gardening in clay. Debbie Flower, America’s Favorite Retired College Horticultural Professor, shares valuable insights on the topic. The episode covers the characteristics of clay soil, the importance of organic matter, watering techniques, mulching, and the use of cover crops. The conversation also delves into the impact of soil structure on crop production and the benefits of no-till and cover cropping practices. Takeaways From Ep. 339 • Understanding the characteristics of clay soil and the importance of organic matter in improving its quality. • Learning effective watering techniques for clay soil, including surge irrigation and the use of moisture meters. • Recognizing the benefits of mulching and the use of cover crops to enhance soil structure and promote healthy plant growth. When Should You Fertilize Your Plants? From the garden e-mail bag, Danny has been thinking about fertilizing, probably a little bit harder than most of us gardeners: “I am wondering if at a particular temperature, plants can’t feed themselves. Do they just need water if it’s too hot? What time of day is best for feeding the plants: during the day, or at night? Or do they need the sun to eat?” Those were good questions, which we took up on the Garden Basics podcast. You can hear that segment in today’s newsletter podcast post. According to retired college horticulture professor Debbie Flower, Danny is on to a very important aspect of correct fertilization techniques in the garden: plants can’t absorb fertilizer, if it’s too hot. “Research shows that above 86 degrees Fahrenheit, plants don't use fertilizer, don't absorb nutrients,” explains Flower. “They're just pumping water through their system to keep themselves cool, much like a human would sweat in a very hot situation. He asks if they need sun to eat. Plants do need sun to make food. Plants are autotrophs, meaning they feed themselves. ‘Auto’ means self. And they use nutrients which are gathered primarily through the roots and some from the air through the stoma on the leaves to make their own food. And that food would only happen when the plant can collect the energy from the sun or other light source.” Flower also explains that when we fertilize, that food is being processed and absorbed primarily underground, by the plant roots. “When we fertilize, we are just putting nutrients into the growing media. That growing media, in most cases, is the soil outdoors. It can also be the soilless mix in a container you have for a houseplant. Whatever the roots are growing in, that is the media I'm talking about. And that's where the nutrients need to be, that the plant will then absorb. We can apply those nutrients at pretty much any time of day or night. But we really want to apply the nutrients when it's cooler. All we're doing is loading the root zone with the nutrients that the plant then will collect when it's ready to make its own food. The one caveat is it's recommended we not fertilize at very high temperatures, above 86 degrees. If we get any fertilizer on the leaves of the plant, we might cause burning, especially if we applied too much fertilizer at any one time. We can cause burning, because the plant only has a limited ability to choose what it absorbs. If the growing media is just completely full of nutrients, and it's above 86 degrees and the plant is trying to just pump water through itself, it may not be able to get just water if there's too much of the nutrients in the root zone or too much when applying it. Those are the reasons we don't apply when temperatures are very high. We want the plant to be able to get just water to keep itself cool when it’s hot.” The source of the fertilizer is also critical. “Plant injury can happen more easily when applying synthetic fertilizers in hot weather,” says Flower. “When we apply organic fertilizer, however, they tend to have a much lower concentration of nutrients in them. And they are in larger molecular sizes and need to be broken down by natural processes before the plant can get them. So, it's a slow release. It happens over time. It happens with the activity of weather as well as microorganisms and macro-organisms like worms, that break down that organic material and release those nutrients more slowly. So, we tend to be safer applying the organic ones. We tend to have less fertilizer burning with organic fertilizers.” But if you're using lots of mulch, you may not even need to apply any fertilizer at all, says Flower. “Using organic matter can apply all the nutrients that you need,” says Flower. Remember that the source of the nutrients for the plant is in the growing media. We put the nutrients in, or nature does, by digesting the dropped leaves, for example, creating a natural compost below the plant. Put it in the growing media and then the plant will take that up when the plant needs it.” Good sources of mulch for the garden include chipped/shredded tree parts, straw, fallen and shredded leaves, or aged compost. Thanks for reading Beyond Basics: The Garden Basics with Farmer Fred Newsletter! Subscribe for free to receive new posts and support my work. Thank you for also listening to the Garden Basics with Farmer Fred podcast! It’s available wherever you get your podcasts. Please share it with your garden friends. Fred Hoffman is also a University of California Cooperative Extension Master Gardener in Sacramento County. And he likes to ride his bike(s). This is a public episode. If you'd like to discuss this with other subscribers or get access to bonus episodes, visit gardenbasics.substack.com/subscribe

May 24, 2024
Composting Kitchen Scraps, Both Indoors and in the Garden. Is That a Good Idea?
Composting, Indoors and Out Today’s newsletter podcast deals with options for indoor food scrap composting equipment, specifically kitchen composters (originally aired in Episode 196 of the Garden Basics with Farmer Fred podcast in May of 2022. In our conversation with America’s Favorite Retired College Horticulture Professor, Debbie Flower, she took a scenic bypass to talk about her outdoor garden kitchen scrap composter device, the Green Cone Composter . More information about that is below. But before we get to that, let’s recap what you may have missed on this week’s two Garden Basics podcast, which includes another deep dive into the “kitchen scraps in the garden” debate: Tuesday, May 21: Episode 336 - Q&A Kitchen Scraps in the Garden? When Should You Plant a Flowering Magnolia Tree, Spring or Fall? Takeaways • Burying kitchen scraps in the garden can attract scavengers like rats, gophers, voles, and ants, and may affect the quality of the soil microbiology. • Composting kitchen scraps first or using alternative methods like African keyhole-style gardens or the Green Cone composter are recommended. • The best time to plant a flowering tree like the Magnolia Genie is in the fall, but it can also be planted in the spring with extra care and regular watering. • Keeping a tree in a container over the summer requires frequent watering and protection from heat damage. • Using Smart Pots can help maintain cooler soil temperatures and reduce evaporation in container gardening. Friday, May 24: Garden Basics Podcast, Episode 337 - How to Choose Nursery Plants. Tips for Starting a School Garden Takeaways Choosing Nursery Plants: • Read the signs and make sure the plant will fit in your garden and take the conditions you have in mind. • Check the plant for health, including good color, no holes or spots on the leaves, and no stickiness or mushiness. • Inspect the media the plant is growing in, looking for weeds, the height of the media, and the presence of roots. • Consider direct seeding certain vegetables like cucumbers and squash, as transplanting them when they have too many leaves can hinder their growth. • Pot up plants in larger containers if you're not immediately planting them in the ground, especially for tomatoes, peppers, and other summer vegetables. Tips for Starting a School Garden: • School gardens can be a valuable educational tool and a source of community involvement. • Getting the school on board and finding funding can be challenges, but reaching out to the principal and parent groups can help. • Students play an active role in maintaining the garden and learn valuable gardening skills. • The garden provides opportunities for hands-on learning, including lessons on composting, integrated pest management, and plant care. • The garden also serves as a gathering place for the community, hosting farmers markets and lunch pop-ups. Burying Kitchen Scraps in the Garden: Is That a Good Idea? Recently, we received a question wondering about the pros and cons of burying kitchen scraps to feed the garden soil. From the garden e-mail bag, Alice confesses: “I am a lazy composter. What we do is bury our kitchen scraps in different holes, all throughout our raised beds, all winter long. And it ends up making truly beautiful soil over the years. And there's lots of earthworms and other microorganisms I can't even see. Anyway, I'm wondering if there would be any problems with that. We do have raccoons, skunks, and possums because we live in the country. But they don't visit the garden. Apparently, they have resources elsewhere. And except for them, I don't see that there's an issue because the soil looks very nice. But you never mention burying garbage in your columns or podcasts. So, I'm wondering if there's some problem that I'm not aware of.” Alice, other possible scavengers of kitchen scraps buried in the garden might include rats, gophers, voles and ants. Especially ants, which could create tunnels throughout your raised bed which could siphon the irrigation water away from plant roots and out the bottom of the bed, or wherever their tunnels might lead. However, whatever you're doing seems to be working. But beware, there are a lot of variables. You want to bury it deep, certainly deeper than 12 inches to keep the four-legged varmints, including the household dogs, away from it. You don’t want to bury meat scraps. Also, avoid any foods soaked in oils, salts or sugars, which can attract smaller pests and possibly effect the quality of your soil. For even more opinions, and they are just that - opinions - the National Gardening Association has a thread at their website (garden.org) entitled, “Kitchen Waste Buried in Garden Soil?” Many people have weighed in on their experience doing that very thing, and it appears to be evenly divided as to whether they like it or not. Some of the comments and opinions: From Florida : “My mother in law (who lived to be 97 years old) had wonderful vegetable and flower gardens and she'd always take kitchen waste out to her garden, dig a hole and bury it. Just be sure to bury it deep enough that night time critters (raccoons, possums) don't dig it up.” From Nevada: “Short answer: No. Decomposition is an aerobic process, it needs oxygen to happen - that's why we continually turn our composts piles. Well preserved fossils were formed in an anaerobic environment - without oxygen, instead of decomposing, they turned into rocks. You won't really have fossils in your garden, you will have a landfill. Although archeologists do get pretty excited when they find an old dump. If you choose to leave your kitchen waste on the surface of the soil, it will decompose but, the bacteria will be using nitrogen in the process. So, the soil will be low in nitrogen until the decomposing process is completely finished. When the bacteria finish the job and die, the nutrients will be put back into the soil. In the meantime, you will have a messy, rat filled garden.” And, From Western Massachusetts, my favorite: “I do this. Well, I was doing it, but the dogs drove me insane so I have stopped for now. I was using this method and won't know how it works until I plant that bed in May (it will be tomatoes next year):-Dug a trench 12-18" deep and piled the soil to the right of it. -started keeping a separate wastebasket for kleenex, paper towels ("browns"). It's actually kind of amazing how much garbage is composed of that stuff....toilet paper rolls and so on. -go out and dump the kitchen compost bucket & coffee grounds in the trench, throw on some browns, cover with an inch or so of soil-repeat until the whole mound was about ten inches off the surface of the bed, then dig another trenchThis was great for me and also great for the dogs who were like, 'did someone bury a Kleenex somewhere???? IT IS WAITING FOR ME'And I had to cover the three rows I'd done with chicken wire. If it weren't for those bozos though I would totally have kept it up. I think the freezing and thawing over the winter would have compressed that to a normal soil level and by the time I transplanted tomatoes into it in late May, it would be unrecognizable. Unfortunately I was unable to complete my testing on this theory.” Many of the other answers were variations of what is known as the African Keyhole Garden, a subject we explored in depth in a previous edition of this newsletter. The African Keyhole Garden There is also the African Keyhole Garden, which is another way to incorporate kitchen waste in the garden using a container – with plenty of small holes – to allow worms to go in and out of it, sort of like a real time, secure worm bin where the worms can spread their castings throughout the garden bed. The garden is shaped like a keyhole, to allow you to get to the middle of a six-foot bed to deposit the scraps in a container, which could be as simple as a trash can with a lid, with holes drilled in the sides that are buried in the garden. “The African keyhole garden was designed by CARE in Zimbabwe during the mid-1990’s to encourage people to grow their own food,” explains Napa County Master Gardener Penny Pawl . “The design relied on materials that were close at hand—such as bricks, stones, branches, hay, ashes, manure and soil—to create an easy-care garden for disabled people. The plan became so popular that many Africans began growing kitchen gardens. More than 20,000 of these have been built in Africa.” An Alternative Way to Bury Kitchen Scraps in the Garden Another person with experience of burying kitchen waste in the garden is our frequent contributor to the podcast, retired college horticulture professor Debbie Flower. She has a device that is buried in her garden that hold kitchen scraps and keeps the four-legged critters out: the Green Cone Solar Waste Digester/Compost Bin . “It's tall enough - about three feet tall - that a raccoon, which was my initial fear, cannot get into it,” says Flower. “It has a lid with a hinge and a lock. I have to say I've broken every hinge and lock that has come on them. That's kind of the weak point of the thing, but I just put a rock on top. And only because the lid might blow away. Nothing has tried to get into it. I have lots of worms that go in and out of it. Everything in it just disappears because the worms come to it and take it away to the rest of the garden. I had my last one for 15 or more years.” I believe the best place to break down those kitchen scraps for use in the garden is in a compost pile or a worm bin, where the worms will make some of the best soil amendments around, worm castings. Thanks for reading Beyond Basics: The Garden Basics with Farmer Fred Newsletter! Subscribe for free to receive new posts and support my work. Thank you for also listening to the Garden Basics with Farmer Fred podcast! It’s available wherever you get your podcasts. Please share it with your garden friends. Fred Hoffman is also a University of California Cooperative Extension Master Gardener in Sacramento County. And he likes to ride his bike(s). This is a public episode. If you'd like to discuss this with other subscribers or get access to bonus episodes, visit gardenbasics.substack.com/subscribe
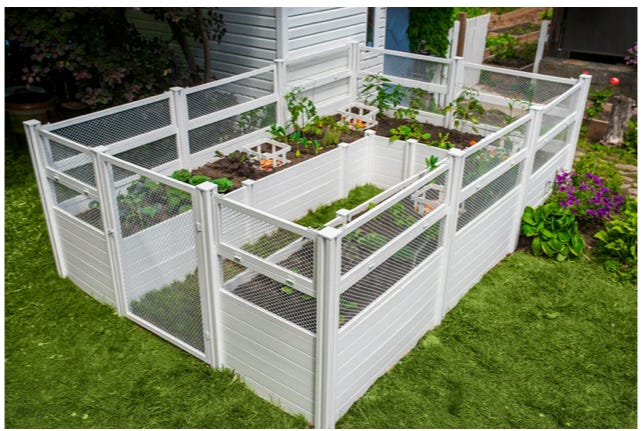
May 17, 2024
Roly Polys, Sowbugs, Earwigs - Which One Is Guilty of Garden Destruction?
In today’s newsletter podcast, our America’s Favorite Retired College Horticulture Professor, Debbie Flower, talks about earwigs, a garden scavenger that probably does more damage than you might want a “neutral” garden critter to do. Probably the most famous “neutral” garden insect is the non-selective praying mantis, who doesn’t mind chowing down on your aphids for dinner, with a ladybug for dessert. The big takeaway from that earwig chat? “Don't wear loose clothing in an earwig infested garden.” We also touch on (in a manner of speaking) roly polys (aka, pillbugs). This Week on the Garden Basics Podcast Before we delve into the answer to that question posed in the headline, here is what is going on in the Garden Basics with Farmer Fred podcast this week: Tuesday, May 14: Episode 334 Q&A Rhubarb for Hot Climates? Lights for Seedlings? In this episode, we answer garden questions from listeners. The first question is about growing rhubarb in hot weather. Master Gardeners Ruth Ostroff and Kathy Morrison (of the Sacramento Digs Gardening newsletter ) discuss their experiences with growing rhubarb in Sacramento, which is challenging in a hot climate. (Ruth also names the rhubarb variety she has had success with in the hot Sacramento Valley.) Kathy shares a rhubarb recipe , made as an upside-down cake. The second question is about grow lights for starting tomato and pepper seeds indoors. Debbie Flower and I explain the importance of using a light system that is big enough to cover all the seedlings equally, as well as mixing different bulb spectrum colors. Of course, Debbie also emphasizes the need for air circulation and movement for young plants. We’re old, so we recommend using fluorescent lights, but we discuss the different options available in the market. Friday, May 17: Ep. 335 Roof Rat Control Tips. Asparagus-Lemon Recipes In this episode of the Garden Basics with Farmer Fred podcast, the main topic of discussion with retired UC Cooperative Extension Farm Advisor Rachael Long is roof rats and their impact on gardens and orchards. The conversation covers the behavior and habits of roof rats, their diet, nesting habits, and the damage they can cause to fruit trees. The episode also includes tips for controlling roof rats, such as trapping and using bait stations. Additionally, the episode features a segment on recipes using garden fresh asparagus and lemons, with Master Food Preserver Myrna Undajon-Haskell. Takeaways: • Roof rats are nocturnal creatures that can cause significant damage to fruit trees and orchards. • They have a preference for heights and are known to nest in attics and burrow underground. • Roof rats can be controlled through trapping and the use of bait stations. • Recipes using garden fresh asparagus and lemons are provided. • Preserving lemons and dehydrating citrus are also discussed. So, Who is Eating Your Seedlings? Controlling Sowbugs, Pillbugs and Earwigs in the Garden…and Indoors From the garden e-mail bag, Jessica wants to know: “I have a crazy amount of roly-polys and pincher bugs this year. And the pincher bugs keep making their way into my house, too. Help! Is there anything I can do to drive them away other than bug spray? And can the roly-polys cause damage to my plants? I normally don't have a green thumb but my plants are doing great this year and I'm finally feeling like a good ‘plant mom’ so I don't want anything to mess them up.” Jessica, generally roly-polys (pillbugs) and sowbugs cause few issues with thriving plants. They prefer the dead organic matter on the ground. But if their favorite foods aren’t around, they will go after your plants. According to the creepy, crawly experts at the UC Integrated Pest Management Department, sowbugs and pillbugs feed primarily on decaying plant material and are important decomposers of organic matter. However, they occasionally feed on seedlings, new roots, lower leaves, and fruits or vegetables touching the soil. They sometimes come indoors, which can be nuisance. If pillbugs or sowbugs are a problem, reduce the amount of decaying organic matter on the soil and minimize the wetness of the soil surface. Irrigate early in the day so surfaces are drier by evening. Keep compost and mulch back from plants and building foundations to keep them outdoors. Using raised beds or planting boxes and drip or furrow irrigation instead of sprinklers usually keeps pillbugs and sowbugs from becoming serious problems. Pincher bugs (earwigs) are also a mixed blessing. They will munch on garden plants, but they also eat aphids! Despite their ferocious appearance, earwigs generally don’t attack humans, although they are capable of biting if trapped in clothing or sat upon. Should you be concerned about earwigs in your garden? Yes, and no. If your yard is primarily lawn, trees, woody ornamentals or native plants, let the earwigs do their job, going after aphids. However, if you are growing vegetables, herbaceous flowering plants, sweet corn or plants with soft fruits such as strawberries or apricots…yes, take action. Earwigs feed at night and hide during the day in dark, cool, moist places in the yard as well as within flowers and vegetables. Your job is to reduce their hiding places and surrounding moist areas, as well as employing vigilant trapping. Some tips for earwig control from the UC Integrated Pest Management Program : • Eliminate dense undergrowth of vines, ground cover, and weeds around vegetable and flower gardens. • Clear weeds away from the base of fruit trees and prune out any fruit tree suckers near the ground that earwigs could use as a ladder. Harvest fruit as soon as it’s ready. Pick up any fallen fruit. • Remove leaves, boards, boxes, and other debris from the planting areas. • Move flowerpots and other garden objects that can harbor earwigs. • Reduce moisture in the area. Use drip irrigation instead of sprinklers. Indoors, earwigs can be swept or vacuumed up. If earwigs are a regular problem in a building, inspect the area to see how they are getting into the house and seal up cracks and entry points. Remove materials outside the perimeter of the building that could provide hiding places, such as ivy growing up walls, ground cover, bark mulches, debris (especially leaves in gutters), wood piles, leaf litter, piles of newspapers, or other organic matter. Also, keep water and moisture away from the structure by repairing drain spouts. Grade the area so water drains away from the structure. Pillbug and Sowbug Fun Facts! ( courtesy of Butte Co. (CA) Master Gardener Michelle Ramsey ) • It’s hard to believe, but sowbugs and pillbugs are more closely related to lobsters and crayfish than they are to insects. These soil-dwelling crustaceans belong to the Isopoda order. • Because they are crustaceans they breathe through plate-like gills located on the underside of the abdomen. • These bugs are the only crustaceans that have adapted to living their entire life on land. • Sowbugs and pillbugs are similar in appearance and their names are sometimes used interchangeably. • However, the sowbug has a pair of tail-like appendages which project out from the rear of its body. • The pillbug has no extreme posterior appendages, and can roll up into a tight ball when disturbed. This is why pillbugs are sometimes called “Roly-Poly” bugs • Females have marsupial-like pouches on the undersides of their bodies that can hold up to 100 developing eggs. • The immature isopod can remain in the pouch for up to 2 months after hatching. • Full development to an adult takes about 1 year. During this time, the isopod will molt 4-5 times. Molting occurs in two stages: first the back half of the exoskeleton molts, then, two to three days later, the front half molts. • The life span of both pillbugs and sowbugs is about three years. • Sowbugs and pillbugs are most active at night. They spend daylight hours in moist, dark habitats. • Because they breathe through gills, they require a very moist environment. That’s why you will find them hidden underneath rocks, in ground litter, or between the edges of moist grass and sidewalk areas during the day. • They do not bite, sting or transmit disease. They are harmless to humans. Thanks for reading Beyond Basics: The Garden Basics with Farmer Fred Newsletter! Thank you for supporting my work with your pledge. I really could use some new handlebar tape. Thank you for also listening to the Garden Basics with Farmer Fred podcast! It’s available wherever you get your podcasts. Please share it with your garden friends. Fred Hoffman is also a University of California Cooperative Extension Master Gardener in Sacramento County. And he likes to ride his bike(s). This is a public episode. If you'd like to discuss this with other subscribers or get access to bonus episodes, visit gardenbasics.substack.com/subscribe

May 10, 2024
Thin Crowded Fruit Now, For a Lot of Good Reasons
If you’re looking to harvest bigger pieces of fruit from your trees and vines this summer, now's the time to get out your hand pruners and thin off the overcrowded fruit. Other good reasons for thinning lots of little fruit from trees now can also thwart bigger problems later this year, such as undersized fruit, excessive fruit drop, and broken fruit tree branches. Here are some tips for thinning from the fruit tree experts at UCANR : • For apples, European and Asian pears, apricots, peaches, nectarines, plums, pluots, kiwifruits, and persimmons: Remove some of the fruit. Space fruit evenly along each branch, with perhaps six inches between each piece of fruit. More importantly, be sure to leave the largest sized fruits on the tree or vine. Although the trees might appreciate a light feeding now, the best time to fertilize these crops is in July and August, when the trees are setting their fruit buds for the following year. An exception would be peach and nectarine trees attempting to recover from peach leaf curl. For those varieties, thinning and fertilizing now can help redirect the tree’s energy into producing more leaves to replace the fallen ones. • For table grapes, remove grape bunches so that there is at least six inches of space between each remaining bunch of table grapes. Cut off the "tails" from the remaining bunches at that same time. This is the lower one-quarter to one third of the bunch, where it begins to taper down in size. This will send more energy to the remaining grapes on the bunch. The book, " The California Master Gardener Handbook " advises that fertilizer can be applied for each grapevine when the berries are about a quarter-inch big, usually in May. The same book advises gardeners to apply about 50 gallons of water per week per vine, during the hottest months (June through August) here in the Central Valley. Apply less (about 35 gallons a week) during May and September. Adding a few inches of mulch to the top of the soil beneath the vines will help preserve soil moisture. • Because of their small size, cherries are not usually thinned from backyard trees. In addition, nut crops, such as almonds and walnuts, are not thinned. • What about blueberries? The amount of thinning will depend upon the blueberry variety and fruit load relative to the vegetative area of the plant. Larger plants and branches that are more vigorous can support a heavier fruit load. • Citrus trees tend to thin themselves, a phenomenon called “June Drop.” However, citrus fruit thinning now can help a tree drop fewer fruit in late spring. Certain citrus types such as Valencia oranges or some mandarins have tendencies towards alternate bearing. That’s a year with heavy fruit production followed by a year with sparse production. You can reduce the potential of a tree to alternate bear by reducing the fruit load in a heavy fruit set year by thinning out some of the fruit. Pruning the tree will also help to offset alternate bearing. Also, fertilize less in light years and more in heavy years so that the trees needs are met according to the demands of the fruit load. Despite using these strategies, some varieties will just alternate bear. • Do not allow the old citrus fruit to stay on the tree longer than necessary. This may contribute to a smaller crop and perhaps, more fruit drop, for the next crop. And, as you may have noticed, those oranges and mandarins that usually produce ripe fruit in the winter but still have some left on the branches may taste dry, with little or no flavor. Cleaning up fall fruit now beneath citrus trees can help cut down on future pest and disease issues, as well. The University of California’s “California Backyard Orchard” website goes into the science of the benefits of thinning deciduous fruits: Removal of flowers or young, immature fruits early in the spring can lead to increases in fruit size by limiting the number of fruits that continue growing to harvest. It increases the leaf-to-fruit ratio and removes smaller fruit that would never reach optimum size or quality. Apples, European and Asian pears, apricots, peaches, plums, kiwifruits, and persimmons are almost always thinned until the leaf to fruit ratio is favorable for supporting growth of adequately sized fruits. Typically, nut crops and cherries are not thinned. Large fruit come from strong flower buds that grew in full sunlight, and on trees that have a favorable leaf to fruit ratio; not too many fruit per branch. In order to manipulate the tree into having just the right amount of crop that will size well and develop adequate flower buds for next year’s crop the fruits are hand thinned, removed in the dormant pruning process, or both. Apples, European and Asian pears, apricots, peaches, plums, kiwifruits, and persimmons are almost always thinned. Fruits on non-thinned trees are still edible, just smaller. The earlier that fruits are thinned and the leaf to fruit ratio is increased, the larger the fruits will be at harvest and the greater the effect on next year’s bloom. The home fruit gardener needs to use judgment regarding spacing of the fruit as well as removal of small and damaged fruit. Spacing fruits evenly along a branch or leaving only one fruit per spur is a good practice, but leaving the largest fruit is more important. The small ones even well spaced will never become as large as the big ones closer together or in clusters. Leave the same number of fruit per branch, but leave the big ones no matter how they are spaced. This will lead to larger fruit. Most home fruit producers do not thin enough fruit off. It hurts to drop all that potential fruit on the ground. It usually takes 2–3 years of experiencing small fruit from inadequate thinning to get it right. Blossom thinning also increases the leaf to fruit ratio because competition among developing fruits and elongating shoots and roots is relieved early; however, risk can be associated with blossom thinning because bad weather during bloom and postbloom may reduce fruit set even more. Standard apple and peach cultivars require leaf to fruit ratios between 40:1 and 75:1 (40 to 75 leaves per single fruit) to reach typical size at harvest. Early varieties need a larger ratio of leaves to fruit. Spur-type apple varieties require a smaller leaf to fruit ratio of 25:1 to attain good crop size. This result seems to be related to the fact that photosynthates and stored food reserves are distributed more for fruit growth relative to vegetative growth in trees of this growth habit. Leaves of dwarf trees seem to be more efficient in exporting photosynthates because they are exposed to direct sunlight for more hours of the day than those on standard trees. Nut crops are not thinned because kernel size is not an important factor. Thanks for reading Beyond Basics: The Garden Basics with Farmer Fred Newsletter! Subscribe for free to receive new posts and support my work. Thank you for also listening to the Garden Basics with Farmer Fred podcast! It’s available wherever you get your podcasts. Please share it with your garden friends. Fred Hoffman is also a University of California Cooperative Extension Master Gardener in Sacramento County. And he likes to ride his bike(s). This is a public episode. If you'd like to discuss this with other subscribers or get access to bonus episodes, visit gardenbasics.substack.com/subscribe
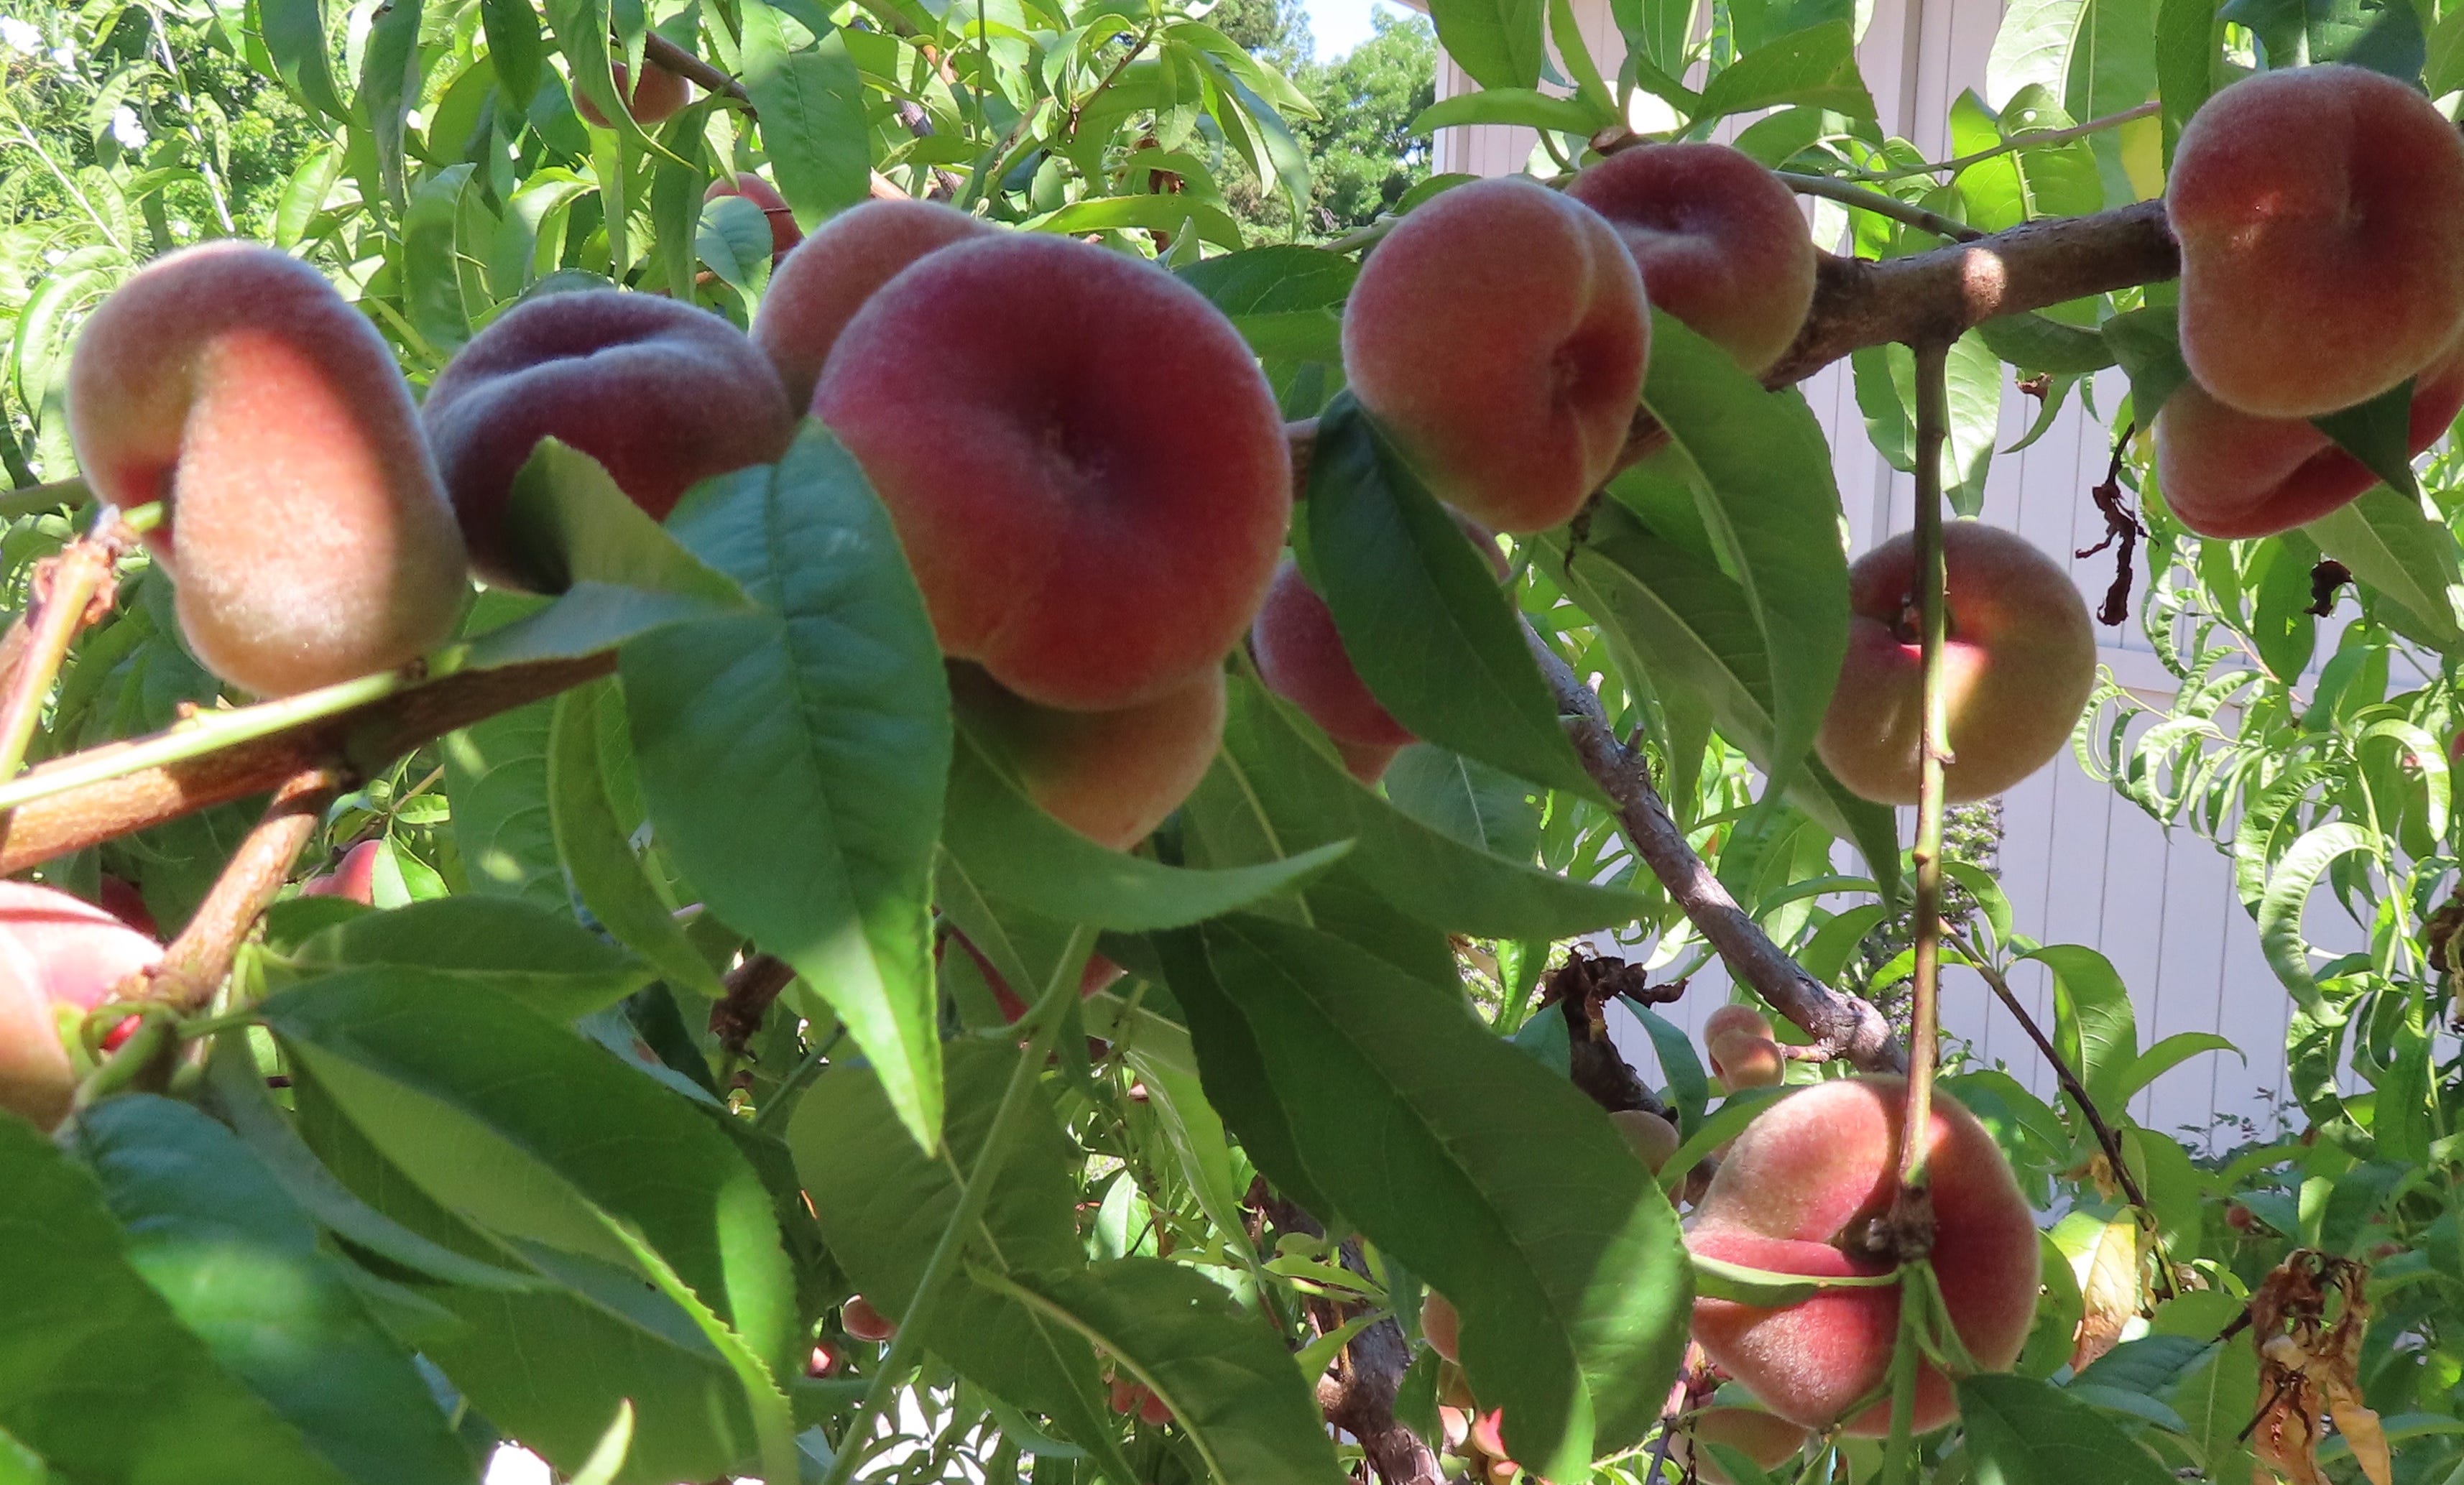
May 3, 2024
Meet the Garden Beneficials, Pt. 2 (and Barn Owls!)
The podcast included with this newsletter features an interview with Rachael Long, University of California Cooperative Extension Farm Advisor Emeritus, and one of the nation’s best sources of information on the benefits of having barn owls prowling over your property to control rodents. Rachael mentions the UC Publication, “Songbird, Bat and Owl Boxes” which is a paid publication. Here’s a link for more information on barn owl boxes ; and, another link with specific barn owl box building instructions. This chat originally aired in Episode 40 of the Garden Basics podcast in August of 2020. Before we continue with our beneficial insect hit parade, here’s what has happened this week on the Garden Basics with Farmer Fred podcast: Tuesday, April 30: Ep. 330 - Q&A Controlling Bermudagrass; What about using black plastic in the garden ? Gail from California wants to start a vegetable and flower garden in her backyard, which is currently covered in Bermuda grass. Fred and Debbie suggest waiting a year and using soil solarization to kill off the Bermuda grass. They also recommend starting small with container gardening. They discuss the challenges of dealing with Bermuda grass and the benefits of solarization. They also touch on the use of black plastic mulch in the garden. Friday, May 3: Ep. 331 Cucumber Starting and Training Tips In this episode, Fred and Debbie Flower discuss cucumber planting advice, including starting cucumbers from seed or nursery transplants, training cucumber growth, and choosing the right cucumber plants. They also cover topics such as soil temperature, soil type, watering, trellising, pollination, and harvesting cucumbers. They provide tips for preventing cucumber diseases and pests, as well as suggestions for different cucumber varieties to try. Meet the Garden Beneficials, Part 2 Last week, we discussed three of the best beneficial insects to have in your garden: lacewings, ladybugs, and hoverflies. Today, we cover several more garden good guys worth putting to work in your yard to subdue the pests, and the “Welcome Mat” plants they need for extra food and shelter. Soldier Beetles (leather-winged beetles) Like many of the beneficials, it is the larval stage of soldier beetles that do most of the munching on the bad bugs. Whereas the adult soldier beetles feed mostly on the pollen and nectar of flowers - as well as the occasional aphid, insect eggs and larvae - young soldier beetles can be found under the bark of the plant or in soil or litter. There, they feed primarily on the eggs and larvae of beetles, butterflies, moths and other insects. Plants That Attract Soldier Beetles * Celosia Cockscomb * Coreopsis * Daucus carota Queen Anne’s Lace * Echinacea purpurea Purple Coneflower * Pycnanthemum Mountain Mint * Rosa Roses * Solidago Goldenrod Parasitic Mini-Wasps Mini-wasps are parasites of a variety of insects. They do not sting! The stingers have been adapted to allow the females to lay their eggs in the bodies of insect pests. The eggs then hatch, and the young feed on the pests from the inside, killing them. After they have killed the pests, they leave hollow “mummies.” Among the parasitic mini-wasps: Braconid Wasps Braconid wasps feed on moth, beetle and fly larvae, moth eggs, various insect pupae and adults. If you see lots of white capsules on the backs of a caterpillar, these are the braconid cocoons. Leave the dying caterpillar alone! Ichneumonid wasps control moth, butterfly, beetle and fly larvae and pupae. Trichogramma wasps lay their own eggs in moth eggs (hungry caterpillars-to-be), killing them and turning them black. Plants that attract parasitic mini-wasps :• Achillea filipendulina Fern-leaf yarrow• Achillea millefolium Common yarrow• Allium tanguticum Lavender globe lily• Anethum graveolens Dill• Anthemis tinctoria Golden marguerite• Astrantia major Masterwort• Callirhoe involucrata Purple poppy mallow• Carum carvi Caraway• Coriandrum sativum Coriander• Cosmos bipinnatus Cosmos white sensation• Daucus carota Queen Anne’s lace• Foeniculum vulgare Fennel• Limonium latifolium Statice• Linaria vulgaris Butter and eggs• Lobelia erinus Edging lobelia• Lobularia maritima Sweet alyssum - white• Melissa officinalis Lemon balm• Mentha pulegium Pennyroyal• Petroselinum crispum Parsley• Potentilla recta ‘warrenii’ Sulfur cinquefoil• Potentilla villosa Alpine cinquefoil• Sedum kamtschaticum Orange stonecrop• Sweet alyssum - white• Tagetes tenuifolia Marigold ‘lemon gem’• Tanacetum vulgare Tansy• Thymus serpylum coccineus Crimson thyme• Zinnia elegans Zinnia - 'liliput' TACHINID FLIES Parasites of caterpillars (corn earworm, imported cabbage worm, cabbage loopers, cutworms, armyworms), stink bugs, squash bug nymphs, beetle and fly larvae, some true bugs, and beetles. Adults are 1/3 to 1/2 inch long. White eggs are deposited on foliage or on the body of the host. Larvae are internal parasites, feeding within the body of the host, sucking its body fluids to the point that the pest dies. Plants that attract tachinid flies :• Anthemis tinctoria Golden marguerite• Eriogonum fasciculatum California Buckwheat• Melissa officinalis Lemon balm• Mentha pulegium Pennyroyal• Petroselinum crispum Parsley• Phacelia tanacetifolia Phacelia• Tanacetum vulgare Tansy• Thymus serpyllum coccineus Crimson thyme MINUTE PIRATE BUGS (Orius spp.) True to their name, minute pirate bugs are tiny (1/20 inch long) bugs that feed on almost any small insect or mite, including thrips, aphids, mites, scales, whiteflies and soft-bodied arthropods, but are particularly attracted to thrips in spring. DAMSEL BUGS (Nabis spp.) Damsel bugs feed on aphids, leafhoppers, plant bugs, and small caterpillars. They are usually dull brown and resemble other plant bugs that are pests. Their heads are usually longer and narrower then most plant feeding species (the better to eat with!). BIG EYED BUGS (Geocoris spp.) Big eyed bugs are small (1/4 inch long), grayish-beige, oval shaped) bugs with large eyes that feed on many small insects (e.g., leaf hoppers, spider mites), insect eggs, and mites, as both nymphs and adults. Eggs are football shaped, whitish-gray with red spots. Plants that attract minute pirate bugs, damsel bugs and big eyed bugs: •Carum carvi Caraway•Cosmos bipinnatus Cosmos “white sensation”•Foeniculum vulgare Fennel•Medicago sativa Alfalfa•Mentha spicata Spearmint•Solidago virgaurea Peter Pan goldenrod•Tagetes tenuifolia Marigold “lemon gem” Thank you also for listening to the Garden Basics with Farmer Fred podcast . It’s available wherever you get your podcasts. Please share it with your gardening friends. Fred Hoffman is also a University of California Cooperative Extension Master Gardener in Sacramento County, California. And he likes to ride his bike(s). This is a public episode. If you'd like to discuss this with other subscribers or get access to bonus episodes, visit gardenbasics.substack.com/subscribe

Apr 26, 2024
Meet the Garden Beneficials (and Bats, Too!)
The podcast included with this newsletter features an interview with Rachael Long, University of California Cooperative Extension Farm Advisor Emeritus, and one of the nation’s best sources of information on the benefits of having bats, which are flying mammals (not rodents), in your neighborhood. Originally aired in Episode 180 of the Garden Basics podcast in March of 2022. Before we begin bug hunting, here’s what has happened this week on the Garden Basics with Farmer Fred podcast: Ep. 328 Q&A - Should you add fertilizer to a compost pile? Can planting late-ripening peaches thwart peach leaf curl disease? In this episode of the Garden Basics Podcast, Fred Hoffman and Master Gardener Susan Muckey discuss composting and answer a listener's question about adding nitrogen to a compost pile. They explain that adding nitrogen is not necessary for most compost piles and discuss the ideal carbon-nitrogen ratio. They also provide tips for turning a compost pile and maintaining the right temperature. In the second part of the episode, Quentyn Young, Master Gardener and orchard specialist, joins the conversation to discuss strategies for dealing with peach leaf curl, including planting late ripening peach varieties. • Adding nitrogen to a compost pile is not necessary for most composting methods. • The ideal carbon-nitrogen ratio for a compost pile is 30 parts carbon to one part nitrogen. • Turning a compost pile helps to introduce air and maintain the right temperature. • Late ripening peach varieties can be a good strategy for preventing peach leaf curl. ======================================================= Ep. 329 How to Water In this conversation, Farmer Fred and America’s Favorite Retired College Horticulture Professor (and former nurseryperson), Debbie Flower, discuss various methods of watering plants, including watering seeds, young plants in containers, mature plants in containers, and lawns. They also touch on the use of sprinklers versus drip irrigation, the benefits of rainwater, and the ancient practice of using Oyas for irrigation. The conversation emphasizes the importance of finding a watering system that works best for each individual and regularly checking plants for signs of distress. • Watering seeds requires keeping the seed bed evenly moist, and watering from the bottom can be an effective method. • When watering young plants in containers, it's important to water each container individually and ensure that the entire column of soil is wet. • For mature plants in containers, using a watering wand with a fine breaker can provide a gentle and effective watering method. • Lawns can be watered using sprinklers or more efficient methods like MP Rotators, and it's important to turn off the water when runoff occurs. • Drip irrigation is a cost-effective method for irrigating crops, but it requires monitoring for breaks and securing the drip tape to the ground. • Oyas, an ancient irrigation method, can be used to slowly release water to plants, but their effectiveness depends on soil type and plant needs. • Regularly checking plants for signs of distress and maintaining irrigation systems is crucial for healthy plant growth. =============================================================== Meet the Garden Good Guys and Gals Nature wants to make your job as a gardener as easy as possible; but you have to help. We've talked about putting in plants that attract insects whose primary job is to pollinate your garden, helping to insure a bountiful harvest of food and flowers. But what about attracting those other "good bugs", the crawling and flying creatures whose diet includes pests that are ravaging your garden plants? These beneficial predatory insects do not live on aphid steaks alone. They need other natural sources of food and shelter for their entire life cycle before they call your backyard a permanent home. What are these "Welcome Mat" plants and the beneficial insects they attract? Here is a list of three of those good bugs and some of the plants that they like to visit for shelter and as another source of food for their diet and their children. Next week, we’ll have even more beneficials and plants. For best results, group these plants nearby or along the garden border to attract the garden beneficials. P.S. Readers with a long memory will recall much of this information from an earlier post here in May 2022. LADYBUGS (Ladybeetles) Easily recognized when they are adults by most gardeners. However, the young larvae, black with orange markings, eat more pests than the adults, and they can’t fly. Yellowish eggs are laid in clusters usually on the undersides of leaves. Plants that attract ladybugs: •Achillea millefolium Common yarrow•Ajuga reptans Carpet bugleweed•Alyssum saxatilis Basket of Gold•Anethum graveolens Dill•Anthemis tinctoria Golden marguerite•Asclepias tuberosa Butterfly weed•Atriplex canescens Four-wing saltbush•Coriandrum sativum Coriander•Daucus carota Queen Anne’s lace•Eriogonum fasciculatum CA Buckwheat•Foeniculum vulgare Fennel•Helianthus maximilianii Prairie sunflower•Penstemon strictus Rocky Mt. penstemon•Tagetes tenuifolia Marigold “lemon gem”•Tanacetum vulgare Tansy•Taraxacum officinale Dandelion•Veronica spicata Spike speedwell•Vicia villosa Hairy vetch Another planting tip to keep ladybugs around throughout the year in mild climates: put in ornamental grasses, especially deer grass (Muhlenbergia). Don’t prune it back until spring. You just might witness the newest crop of ladybugs emerging from this winter hideaway on a warm, sunny day! LACEWINGS Beautiful, little (3/4”) green or brown insects with large lacy wings. Individual white eggs of lacewings are found laid on the ends of inch-long, stiff threads, usually along the undersides of leaves. It is the larvae (which look like little alligators) that destroy most of the pests. They are sometimes called “aphid lions” for their habit of dining on aphids. They also feed on mites, other small insects and insect eggs. On spring and summer evenings, lacewings can sometimes be seen clinging to porch lights, screens or windows. Plants that attract lacewings: •Achillea filipendulina Fern-leaf yarrow•Anethum graveolens Dill•Angelica gigas Angelica•Anthemis tinctoria Golden marguerite•Atriplex canescens Four-wing saltbush•Callirhoe involucrata Purple poppy mallow•Carum carvi Caraway•Coriandrum sativum Coriander•Cosmos bipinnatus Cosmos white sensation•Daucus carota Queen Anne’s lace•Foeniculum vulgare Fennel•Helianthus maximilianii Prairie sunflower•Tanacetum vulgare Tansy•Taraxacum officinale Dandelion HOVERFLIES (incl. syrphid flies, predatory aphid flies, flower flies) Also known as syrphid fly, predatory aphid fly or flower fly. Adults look like little bees that hover over and dart quickly away. They don’t sting! They lay eggs (white, oval, laid singly or in groups on leaves) which hatch into green, yellow, brown, orange, or white half-inch maggots that look like caterpillars. They raise up on their hind legs to catch and feed on aphids, mealybugs and others. Plants that attract hoverflies: •Achillea filipendulina Fern-leaf yarrow•Achillea millefolium Common yarrow•Ajuga reptans Carpet bugleweed•Allium tanguticum Lavender globe lily•Alyssum saxatilis Basket of Gold•Anethum graveolens Dill•Anthemis tinctoria Golden marguerite•Aster alpinus Dwarf alpine aster•Astrantia major Masterwort•Atriplex canescens Four-wing saltbush•Callirhoe involucrata Purple poppy mallow•Carum carvi Caraway•Chrysanthemum parthenium Feverfew•Coriandrum sativum Coriander•Cosmos bipinnatus Cosmos white sensation•Daucus carota Queen Anne’s lace•Eriogonum fasciculatum CA Buckwheat•Foeniculum vulgare Fennel•Lavandula angustifolia English lavender•Limnanthes douglasii Poached egg plant•Limonium latifolium Statice•Linaria vulgaris Butter and eggs•Lobelia erinus Edging lobelia•Lobularia maritima Sweet alyssum white•Melissa officinalis Lemon balm•Mentha pulegium Pennyroyal•Mentha spicata Spearmint•Monarda fistulosa Wild bergamot•Penstemon strictus Rocky Mt. penstemon•Petroselinum crispum Parsley•Potentilla recta ‘warrenii’ Sulfur cinquefoil•Potentilla villosa Alpine cinquefoil•Rudbeckia•Rudbeckia fulgida Gloriosa daisy•Sedum kamtschaticum Orange stonecrop•Sedum spurium Stonecrops•Solidago virgaurea Peter Pan goldenrod•Stachys officinalis Wood betony•Tagetes tenuifolia Marigold “lemon gem”•Thymus serpylum coccineus Crimson thyme•Veronica spicata Spike speedwell•Zinnia elegans Zinnia "liliput" In the Next Newsletter: More Beneficial Insects Including parasitic mini wasps, tachinid flies, minute pirate bugs, damsel bugs, big-eyed bugs - and the plants they need to build a home and raise a family. Thanks for Subscribing and Spreading the Word About the Garden Basics with Farmer Fred newsletter, I appreciate your support. And thank you for listening to the Garden Basics with Farmer Fred podcast! It’s available wherever you get your podcasts. Please share it with your garden friends. Fred Hoffman is also a University of California Cooperative Extension Master Gardener in Sacramento County. This is a public episode. If you'd like to discuss this with other subscribers or get access to bonus episodes, visit gardenbasics.substack.com/subscribe

Mar 15, 2024
2024 Tomato Preview
Our cohort in all things tomato, Don Shor of Redwood Barn Nursery in Davis, got into a lot of helpful information for tomato gardeners besides just talking about tomato varieties in Episode 317 of the Garden Basics podcast, The 2024 Tomato Preview Show . The mini-podcast (above) highlights four tips we discussed that can make you a more successful gardening tomato-head. Among Don’s tips: • The first thing you should do when you when bring that tomato plant home from the nursery. • And, if you are growing tomato plants from seed, what you need to do before you plant it outdoors. • How to save tomato seeds from open pollinated varieties for next year. • How to save your tomatoes when it gets really, really hot. • How to improve the flavor and texture of supermarket tomatoes. • Plus, I threw in an extra tip on growing fruit trees in containers for a longer fruit production life in tight quarters. The Tomatoes of the 2024 Tomato Preview Show (with links for more info) Rugby Chef’s Choice Orange Juliet Bodacious New Girl Tough Boy Blue Ribbon Pineapple Champion Purple Boy Bush Early Girl Itz a Keeper Super Fantastic Jet Star Principe Borghese Riesetomate tomato Sungold Barry’s Crazy Cherry Sweet Carneros Pink Pork Chop Michael Pollan Gardener’s Delight Big Beef 4th of July Sweet Million Super Sauce Orange Wellington Dr. Wyche’s Yellow Purple Tomato (a GMO variety) A sampling of our comments of each of those tomato varieties ( listen to the full episode for even more tomatoey details) Fred: the big winner last year for me was Rugby , based on your endorsement of that tomato over the last couple of years. And Rugby is just a wonderful tomato. Don: it grows very, very well and a very good producer here. So yes, you and I definitely agree on Rugby. ======================= Don: I still highly recommend the Chef's Choice series and I strongly recommend Chef's Choice Orange based on previous years. That's still in my top ten. Fred: Several of the Chef's Choice tomatoes have been All-America Selections winners, as well. ====================== Don: I have to say every year I have one plant that just grows incredibly robust compared to all the others. It's never the same one, of course, and it produces really, really heavily. And in 2023 for me, that was Juliet. Now I recommend Juliet very highly for a lot of reasons. I did a quick count, just trying to figure out how many fruit my Juliet plant produced. It was something close to 400. ==================== Fred: One that you have recommended over the years. And I finally broke down and tried it and it was actually it was successful the second year I tried it. And that's another Don Shor rule about planting tomatoes. Give them three years, plant them for three years and see if you still like it. And Bodacious did quite well for me in 2023. It was the the last plant to give up, and I harvested the remaining green ones in November and I finally finished the green ones as they ripen slowly in the garage. I finished those off in late February. Don: Yeah, it's been a very good performer. If you're looking for something in what we sometimes call the beefsteak category, a large slicing tomato with good connective tissue that you could use in a sandwich, Bodacious is probably your best bet here in the Sacramento Valley. Bodacious has great flavor all as well, has taken heat very well for me. Continues to be a good performer for me. ====================== Fred: Another one of your perennial favorites - and I've been planting it now for like three or four years - well, I finally ran out of the seed. I'm going have to get some fresh seed. The New Girl tomato. Don: Yes, New Girl has been out yielding Early Girl for me for the last two years. ============================ Don: There's another one out there called Tough Boy . Some people are doing that one and have had very good results. Tough Boy is another one where they're trying for that same 4 to 6 ounce fruit size, nice round red tomato, good flavor, a good all-purpose tomato. That's another good one. ============================= Don: There's one that I've been recommending and it's going to be a hard one to find unless the nursery start it themselves. It’s Blue Ribbon . It doesn't crack, it doesn't split. It didn't get blossom and rot. The fruit is always 12 ounces or so, a good size all the way up to a pound. Sometimes it didn't get sunburned. It just performs really well. It's not just attractive. I mean, the Blue Ribbon refers to the fact it's a very, very good looking tomato. It also has really good flavor, and holds well on the vine. ========================= Don: So here's my big surprise from last year. Every year there's one variety that surprises me. Pineapple . The name refers to the rather tangy flavor. This year I got 14 very large fruit on the one plant, each of them about one and a half to two pounds. Fred: An oldie but a goodie. Don: I don't usually tell people heirlooms are going to be your highest yield, but the Pineapple really, really surprised me how much it produced. Great quality. I recommend if you have room for four or five tomato plants, try Pineapple. Fred: You're right, it's beautiful, with sort of a golden orange color. Don: And red striations in the flesh. It slices great, it cooks great. ======================== Fred: How did Champion perform for you last year? You seem to plant it every year. Don: It was just fine, as usual. You know, I got a lot of fruit on it. It's a really good red tomato. ========================== Don: There's a whole group of tomatoes I'm getting pretty fed up with, and that is the purple, blue and black tomatoes, Black Beauty, Blue whatever. We're just finding some of them really, really don't soften. And the flavor is, in my opinion, rather astringent. And I don't know what it takes to get them to have good flavor. If someone out there has come up with a new hybrid purple or blue tomato with good flavor. I'd love to know what it is because so far, I'm not impressed. Fred: I did ask the Facebook people who follow the Get Growing with Farmer Fred page, “What tomato did you really like from 2023?” And I did get a reply from one follower whose opinion I respect. He's a high school horticulture teacher and he said he loved Purple Boy. Said it was very productive. And that's good enough for me. I'll give that a shot. So I've got some Purple Boy seedlings coming up. Don: I'm writing it down as we speak. ============================ Fred: I have actually picked for 2024 an oldie but a goody container-sized tomato, called Bush Early Girl . It produces fairly good sized tomatoes, but on a plant that only gets 18 inches tall. Don: The dwarf tomato series varieties are becoming very popular. I have grown some of these. I haven't grown that particular one. You'll find the yields are okay for what they are. This is a small plant. There's a bunch of little miniature tomatoes, Little Napoli, Little Sicily . One of my growers handed me a Mini Marzano . The plant grew 16 inches by 16 inches. Produced about 12 fruit, each of which was about one ounce. You know, if you're in an apartment and you have a balcony, that's a fun thing to do. Many of these are not going to give you the yields you're expecting. Fred: The Bush Early Girl, by the way, is a compact determinant, which means it's going to set most of its crop once and then you can pull it out. But it ripens in only 54 days. =================== Fred: I think the seed catalogs especially the specialty tomato seed catalogs like Totally Tomatoes are getting wise to me because they're starting to throw packets of other tomato seeds in with my order, things that I didn't order. Because they think, “he'll plant anything, just send it.” Don: They did that to us, what, two or three years ago? They sent this one out. It was just a number at the time and I remember sending a note to the owner of Seeds ’N Such. “What is this one? We need to know. This is really a great performer. It stayed firm late in the season. It produced well. It was a compact plant.” He goes, Oh yeah, we're going to send that out next year with a name, It’z a Keeper . And that turned out to be an outstanding variety and I really do highly recommend it. It is really firm. It's one of those tomatoes that you just wonder if it's ever going to ripen. It is ripe. It's just very, very solid. The name, “It’z a Keeper” refers to the fact that it can sit on your counter for awhile. Pick it in mid-October, three or four weeks later, it is still just fine and still has very good flavor. Again, you're going to have to find it yourself, because hardly any retailers are going to have that one available as a plant. But It’z a Keeper is an interesting new variety that I think has a lot to recommend for it. Fred: I’ve got a couple of those questionable freebies growing now. One is called Super Fantastic and the other is called Jetstar. if you live in Canada, you would like Super Fantastic, even though I’ve started that seed. It produces ten ounce tomatoes, an indeterminate. According to West Coast Seeds, which is based in British Columbia, “Super Fantastic tomato seeds produce hearty, vigorous vines that adapt well to a variety of climates, immensely popular and an excellent producer on the West coast of British Columbia. These rich, meaty beefsteak tomatoes are very versatile.” Don: the West Coast of British Columbia is a pretty wet, cool place. Wherever your live, look for particular varieties that are recommended by your local garden centers. Fred: The Jetstar one that I'm growing that I know nothing about is advertised as being “a prolific producer of big globe shaped fruits that ripen all the way through.”Well, that's good to know. “Excellent flavor with low acidity, nice compact habit, indeterminate. It gets 3 to 5 feet tall.” It does not state the size of the tomatoes though. So I don't know. =================== Don: We mentioned compact varieties. There is one that I find myself recommending more and more year after year and I think you're going to grow it this year. When I first read about it, it was described as the classic tomato for sun drying and it is very, very good for that. In fact, I started growing it just for that purpose because one of my staff people just loves to take them and cut them in half and dry them. It's Principe Borghese . Fred: Yeah, you wore me down on that one. Don: It also happens to be very good for sauces and salsas, things like that. And it's a very compact variety. So people who are limited for space that really like a rich flavored, almost gourmet quality tomato, look into Principe Borghese. ==================== Don: Late last year I remember we talked about a very strange tomato that I was growing and I told you, I'll give you a report card on this one again. Riesetomate . It looks like a bunch of grapes. It's a single tomato with numerous lobes. They look like, as I say, a bunch of red grapes, all one fruit with all these lobes on it. It produced at least 80 fruit for me. These are very, very rich flavors. It's the kind of thing where you just break off a piece and eat some fresh. It made amazing salsa and it was one of the strangest looking tomatoes I have actually ever grown. So if you have room in your garden and you want to grow something truly weird, look for the Riesetomate tomato. Fred: I just went online to see what a Riesetomate looks like and there are all these other Riesetomate types. There's a Riese that I'm looking at from Rare Seeds that looks like a very deep red cluster of grape sized tomatoes. ======================== Don: Sungold is still the most popular cherry tomato that's out there, beating older more established varieties such as Sweet 100 , Sweet Million, that whole category. Kids seem to really like Sungold. Don: one group of cherry tomatoes that you might want to look into are the ones that are being produced by Brad Gates, who you've had on your show many times, from Wild Boar Farms. His cherry tomatoes are phenomenal producers and very, very sweet, including Barry’s Crazy Cherry , which produces hundreds of fruit. I always plant Sweet Carneros Pink . I always plant Pork Chop , that's a very good yellow tomato. Another reliable producer is Michael Pollan , named after the author. It's a very good producer. Very interesting. I do recommend trying some of his. They're different. =================== Don: you mentioned Gardeners Delight . Usually that is a very reliable tomato and I have customers that swear by it. So I want to see a new gardener getting some that we know are going to do well for them. ====================== Don: One that I was reintroduced to a couple of years ago was Big Beef. We talked about not doing beefsteak types. Well, Big Beef can go in early, it sets early, makes a really good size, good quality fruit and seems to be very well adapted. It was an All-America selections winner in the 1990s. So I've added that to my top 20. And I have customers that swear by it now because they've gotten very good large fruit as early as the first week of July. ====================== Don: Here in Yolo County, UC Davis’ Dr. Robert Norris, who has been advising Master gardeners here for decades, strongly recommends 4th of July as an early ripening, very good fruiting tomato. And that's done very well for a lot of people. So that's a case where it's a local variety that has a lot of people that have tried it. It's a tried and true in our region. Wherever you're listening, there probably is one like that. ======================= Fred: So to recap, this year I will be planting the Principe Borghese, Rugby, Gardeners Delight, Bodacious, New Girl, Purple Boy, Super Fantastic, Bush Early Girl, Jetstar and one of my favorite cherry tomatoes, Sweet Million . Don: We'll have Rugby. I'm doing a second year of one called Super Sauce , which was extremely good producer, bigger than Rugby, very similar. And I'll have my usual red and yellow and orange tomatoes from Chef's Choice series, and I'm going to do Orange Wellington next to Chef's Choice Orange, because I've had both and they're both very good. And I'm curious if Orange Wellington, which I found in the Burpee catalogue, is as good a producer as they say it is, and good flavour as they say it is. Fred: I still like Dr. Wyche’s Yellow . It’s one of my favorite yellow-orange beefsteaks to grow. ========================== Don: there is one other blue tomato on the horizon you've probably been reading about. It's the Purple Tomato , the first genetically modified plant that the public can buy. It is a purple fleshed tomato. It got a lot of publicity. All you do is Google “purple tomato”, and the information about this will all come up. It costs about two bucks a seed. You're not going to find that a whole lot of garden centers, but some of your friends will probably be growing it. It should be interesting to see what it's like. And my first reaction was, why do they do a purple one? Those are terrible. Fred: Now wait a minute. It’s a seed. Don: You can get seed of this purple fleshed tomato, two bucks a piece and they're out there. You can certainly buy them. It is the first in the United States. There was a genetically modified tomato introduced in Japan last year, which has enriched nutrient status. It has higher something, vitamin A probably. This one is purple, not just purple skin, but vivid purple flesh all the way through. And I can't remember right off the top of my head the name, but you can find it quite easily. Yes, you can buy the seed, as I say, two bucks a seed and you can grow yourself. And so for years I have I have customers who don't want GMOs. They have customers who think they're interesting. Never was an issue. They would say, Are any of these GMOs? I would say there are no GMOs in the nursery industry or in the garden industry. That's no longer true. This one is out there, but you have to buy direct from the supplier. So this purple fleshed tomato, there is going to be certainly a lot of conversation about it. I would be great if someone would grow it and let us know how the flavor is and who knows? It might actually get into the trade, as the price comes down. But for two bucks a seed, you're not going to see a whole lot of plant growers jump into that one. Fred: I just looked it up. It has a very clever name. Purple Tomato . Don: Quite interesting looking. And I'm guessing some people have already bought the seed. So we'd like to hear your reports on it. Fred: The Purple Tomato, as described by its developer, who is Norfolk Plant Sciences, the Purple Tomato contains high levels of antioxidants and anthocyanins normally found in fruits such as blueberries and blackberries. Don: Yes. And so far my experience has been that makes them taste pretty astringent. But we'll find out with this one. Maybe they've figured a way around that problem. Thanks for reading Beyond Basics: The Garden Basics with Farmer Fred Newsletter! Subscribe for free to receive new posts and support my work. Thank you for also listening to the Garden Basics with Farmer Fred podcast! It’s available wherever you get your podcasts. Please share it with your garden friends. Fred Hoffman is also a University of California Cooperative Extension Master Gardener in Sacramento County. And he likes to ride his bike(s). This is a public episode. If you'd like to discuss this with other subscribers or get access to bonus episodes, visit gardenbasics.substack.com/subscribe
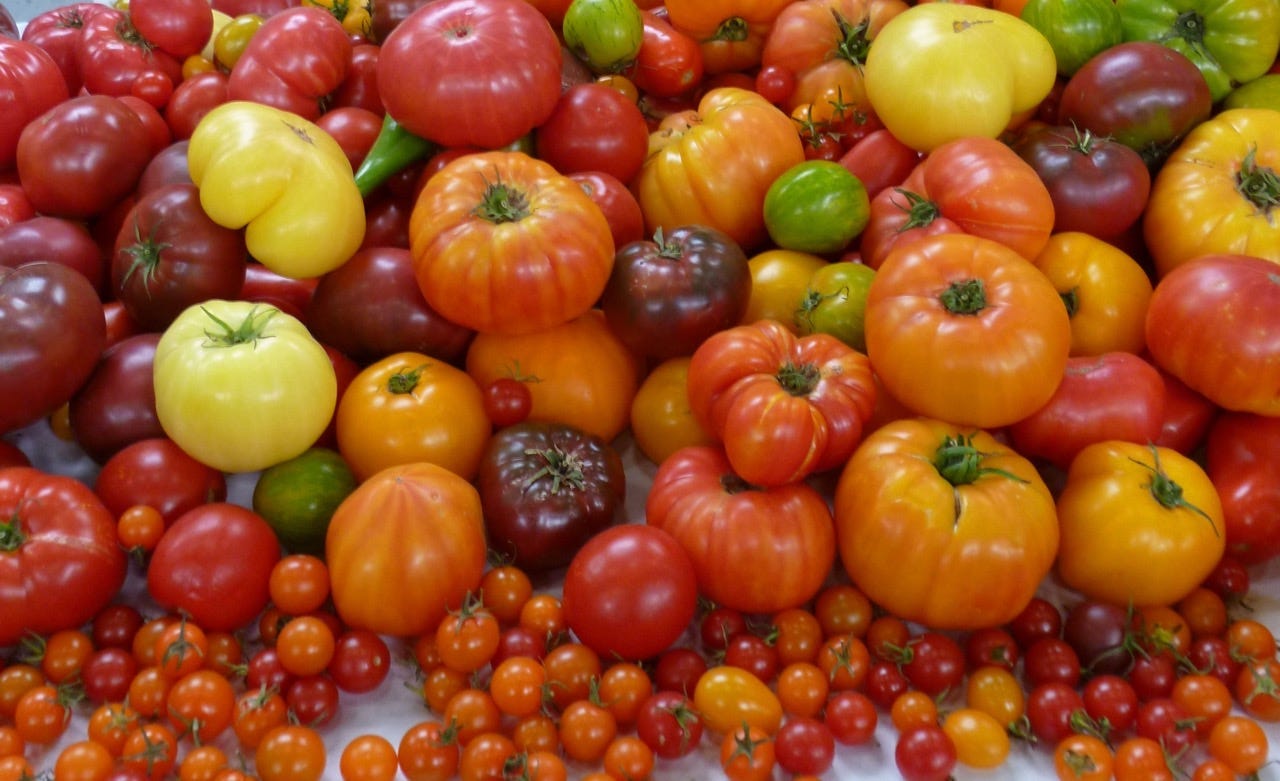
Nov 3, 2023
Small Trees for Small Yards. Medium-Sized Trees for Suburban Lots. Avoid a Tree Disaster in a Storm.
Today’s newsletter podcast (recorded in January 2021) features an arborist discussing ways you can spot when your trees may be in danger of falling, especially in a wet, windy winter. More information about what was discussed in the podcast can be found at the University of California Ag and Natural Resources publication, “ Inspect Your Landscape Trees for Hazards ”. Small Trees for Small Yards In this era of "Big House, Small Yard", choosing the right size tree can not only enhance the beauty of your backyard, it can forestall serious and expensive pavement problems that might force you to crack open your wallet in five to ten years. Planting a tree with a future height and spread of more than 40 feet in a small backyard will eventually make you recall that old TV show title, "Dark Shadows". Even spookier will be the repair bills when the extensive root systems of these larger trees start heaving and cracking your concrete patio, driveway, sidewalk and foundation. The Sacramento Tree Foundation recommends planting large trees at least 15 feet away from any hardscaping or construction. If the site you've picked out for a new tree can't be situated that far away from any concrete, electrical systems or sewer pipes, here are some good, small trees that need only six feet of planting distance from building foundations, walks and driveways. Most of these trees will get no taller than 25 feet: Amur maple, Japanese maple , eastern redbud , flowering dogwood , Washington hawthorn , crape myrtle , saucer magnolia and Bechtel crabapple . Needing only 10 feet of "growing room" from tree to concrete are these medium-sized (25-40 feet) ornamental plants: trident maple , hedge maple , Japanese white birch , goldenrain tree , capital pear and chanticleer pear. Before your shovel hits the ground, here is an easier way to plant your tree or shrub: instead of digging deep, dig wide. Then, refill that crater with the native soil. Current research from the University of California has shown that digging a hole an inch or two less than the depth of the tree's root ball (the portion in the container) is more beneficial than digging a deeper, narrow planting hole. The trick to a successful planting also includes loosening the surrounding soil at the planting site. Loosen up the soil (again, to the depth of the root ball) in an area at least twice as wide as the container (for young trees and shrubs) or the entire diameter of the tree canopy. Even better, rototill out to six feet from the location of the tree trunk. A tree that can easily send out its lateral root system will have better access to water and nutrients. Check the tree for girdled roots before planting. If the roots are encircling the rootball, slice through the length of the root ball on four sides about an inch deep. This will help the roots to spread down and out, not round and round. Plant the tree so that the top of the root ball rests on solid soil, one to two inches higher that the surrounding soil; this allows for settling and helps avoid crown rot. Avoid soil amendments; by refilling the hole with the original soil, the tree more quickly adapts to the native environment where it will have to reach out in order to be successful. Staking should only be done if the tree can't stand on its own. And by all means, remove the single stake that comes with the tree from the nursery. Use two stakes, one on either side of the root ball. Tie the tree to the stakes using old nylons or another flat, wide, ribbon-like article. Tie loosely at the lowest point on the trunk where the tree will stand upright. Remove the stakes as soon as the tree will stand on its own, usually not more than one year. Beyond The Garden Basics is a reader-supported publication. To receive complete new posts, have access to past newsletter issues, and support my work, consider becoming a paid subscriber. Lower Your Tree Size Expectations. Freakish high gusts of wind are becoming more commonplace throughout Northern and Central California, especially with the change of the seasons. Last weekend, a Red Flag warning was posted by the National Weather Service for the danger posed by the combination of high winds and dry landscapes that might ignite wildfires. Sure enough, the high winds swept into several sections of our state. The Bay Area office of the National Weather Service reported high winds exceeding 50 and 60 miles per hour in several coastal areas. In Southern California, wind gusts of 50 miles per hour buffeted high profile vehicle traffic on Interstate 5, north of Los Angeles. And a wildfire broke out in Riverside County, which, at press time, was still only 20% controlled. A bit closer to home, we nervously look at our neighbors’ huge conifers shedding small branches on windy days throughout the year. That’s a not so gentle reminder of last January, when one of their 60-foot-tall Atlas cedar giants fell into our yard during a windstorm here in suburbia, a fallen tree that was so large that it caused damage in three different backyards. If you are considering planting a tree, and you have a typically sized urban or suburban yard, you can minimize future damage from flying tree limbs to your property and your neighbors by choosing a medium sized tree. Generally, these are trees that grow between 25 and 40 feet tall. And November is still an excellent time for planting new trees in our area. Shop for smaller trees that have minimal invasive roots and have several eye-catching traits such as colorful leaves, flowers, or distinctive bark. Two trees that are underutilized in current landscapes that have minimal problems include: • ‘Emerald Sunshine’ Elm ( Ulmus propinqua ). The ‘Emerald Sunshine’ elm is resistant to many of the problems of older elm varieties while maintaining a more reasonable eventual height: about 35 feet tall, with a spread of 25 feet tall. This elm has deep green leaves that turn yellow in the fall. ‘Emerald Sunshine’ is reportedly tolerant of hot, windy conditions, making it a good candidate for cities in warm summer areas with low humidity. • ‘Redpointe’ Red Maple (Acer rubrum ‘Redpointe’). There are a lot of new red maple hybrids that have proven themselves in our area, especially the ‘October Glory’ red maple. The ‘Redpointe’ has many positive traits as well, although it does get a bit larger than the Chinese Fringe tree or the “Emerald Sunshine” elm, yet it still is much smaller that the ‘October Glory’ maple, which can get to 50 feet tall. The ‘Redpointe’ is described as a maple that is upright with a broadly pyramidal shape that requires little pruning. ‘Redpointe’ will reach 40 feet with a 20-foot spread. Its deeply lobed leaves are deep green from spring to fall when they turn a brilliant shade of red. Here are a few more suggestions for trees that fit well in small to medium yards: • Chinese Fringe Tree ( Chionanthus retusus ). Perfect for small yards, as it only gets about 20 feet tall with a spread of 10 to 15 feet. UC Master Gardener Cathy Ronk of Tulare County says the Chinese Fringe Tree has clusters of showy, lightly fragrant, fringe-like white blooms. The Chinese Fringe Tree is also one of UC Davis’ “Arboretum All-Stars ,” notable for its yellow fall leaves and moderate water needs. Trees recommended, along with comments, from the Sacramento Tree Foundation : • Chinese pistache ( Pistacia chinensis ). 30-45 feet tall and wide. The Sacramento Tree Foundation says this tree has the “Best fall color show in our region. Nice round shape, and a low water user.” Choose a male variety such as the ‘Keith Davey’ to avoid the messy berries. • Shantung Maple ‘Pacific Sunset’ ( Acer truncatum ‘Pacific Sunset’). 25-30 feet tall and wide. “Hearty and fine textured, with larger leaves than regular Shantung maples.” • Sweet Bay ( Laurus nobilis ). An evergreen tree or shrub, the Sweet Bay can get 30-40 feet tall, but takes well to pruning. “Dark green, dense form makes a good screen. Small yellow flowers in clusters followed by small black berries. Leaves are bay leaves used in cooking.” • And again, a very popular tree for its summertime flowers is the crape myrtle (Lagerstroemia indica and its hybrids). This Chinese native gets about 25 feet tall, with a distinctive gray-light brown, exfoliating (peeling) bark that reveals a smooth whitish inner bark in the winter. It blooms best in warm summer climates, and is subject to mildew in moist climates. However, hybrid varieties have been bred for hardiness and mildew resistance. Look for varieties with names of native American tribes such as Arapaho, Hopi, Muskogee, Natchez, and Zuni. Fred Hoffman is also a University of California Cooperative Extension Master Gardener in Sacramento County. This is a public episode. If you'd like to discuss this with other subscribers or get access to bonus episodes, visit gardenbasics.substack.com/subscribe

Oct 27, 2023
How to Stake a New Tree
Simple instructions from the Placer County (CA) Master Gardeners on proper tree staking: Q: I just planted a new tree and want to know the best way to stake it. A: It’s important to know that not all newly planted trees need to be staked. In fact, improper staking can harm rather than help. The more freely a tree can move, the stronger its trunk will become and the more likely it will be to withstand storms. There are three situations in which staking is necessary: to protect against damage from equipment, vehicles or animals; to anchor trees whose roots cannot support the tree upright in the wind; and to support trunks unable to stand upright by themselves. Protective stakes only need to be tall enough to be seen and avoided by equipment operators. Three stakes are generally enough and they should not be attached to the tree. Netting or wire fencing can be attached to the stakes to exclude animals. Anchor stakes should be firmly set in the surrounding soil outside the root ball. Short stakes used for protection can do double duty as anchoring stakes by attaching the lower part of the tree to them with broad, flexible ties. The idea is to restrict root ball movement, while allowing the top of the tree to move in the wind. Trees trained properly at the nursery should not need support staking. Most reputable tree growers no longer remove lower branches to create top-heavy, “lollipop” trees. They know that leaving these “nurse branches” on the young tree will help it develop a thicker trunk with healthy taper. To determine if your newly purchased tree requires support staking, remove the stake that came with the tree from the nursery. If the tree stands upright on its own, you should not stake it. However if the trunk flops over, place two stakes in the ground outside the root ball on opposite sides of the tree so that prevailing winds will blow through the stakes. Starting about 2 feet above the ground, use two fingers, one on either side, to support the trunk. Move your fingers slowly up the trunk until the tree stands upright. Flexible ties that allow movement should go 6 inches above this point. Cut the stakes 2 to 3 inches above the ties so that the trunk and upper branches will not be damaged by blowing into or rubbing on the stakes. Check the ties regularly to make sure they are not constricting the trunk. Remove stakes and ties as soon as they are no longer needed. Thanks for reading Beyond Basics: The Garden Basics with Farmer Fred Newsletter! Subscribe for free to receive new posts and support my work. Thank you for also listening to the Garden Basics with Farmer Fred podcast! It’s available wherever you get your podcasts. Please share it with your garden friends. Fred Hoffman is also a University of California Cooperative Extension Master Gardener in Sacramento County. And he likes to ride his bike(s). This is a public episode. If you'd like to discuss this with other subscribers or get access to bonus episodes, visit gardenbasics.substack.com/subscribe
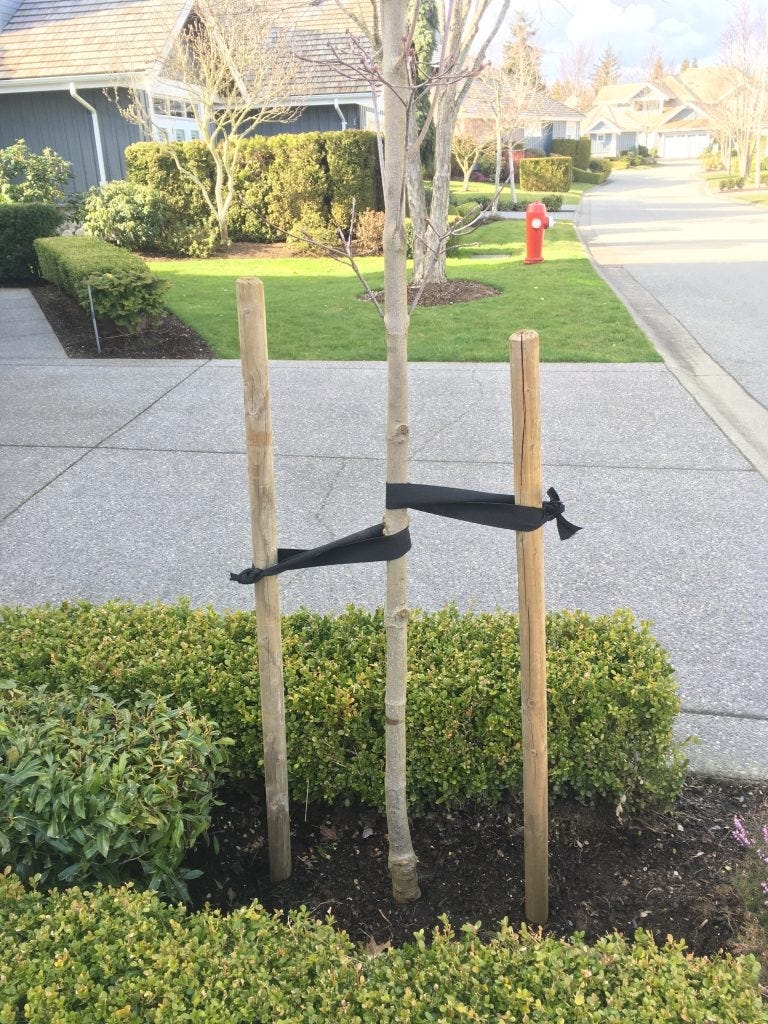
Oct 20, 2023
The Benefits of Lingering in the Garden
In today’s newsletter podcast, Debbie Flower, America’s Favorite Retired College Horticultural Professor, extols the benefits of spending time in the garden, and closely observing your plants. And, I talk about how those who took up gardening during the Covid epidemic found out that gardening is good for the gardener, too, in a myriad of ways. Do some gardeners have a natural green thumb? Although there can be a lot said for patience and perseverance when it comes to landscaping tasks, perhaps there are some habits that seasoned gardeners have in common. Such a list was published by the Santa Clara and San Joaquin County Master Gardeners here in California a few years ago entitled, “ The Top 10 Habits of Happy and Successful Gardeners .” It is a list that is worth reviewing from time to time, to see which habits you’ve made a normal part of the garden day, along with those habits that might need a bit of refreshing. For those of you that like the quick list, the Top 10 included: “Feed the Soil”, “Learn Before Lopping”, “Embrace Failure”, “Shop Carefully”, “Put the Right Plant in the Right Place”, “Water Intentionally with Both Hands”, “Control Snails and Slugs”, “Never Let a Weed Go to Seed,” “Attract Beneficial Insects”, and “Linger in the Garden”. Successful Habits of Happy Gardeners , by Louise Christy, Santa Clara Co MG (Summer 2018, San Joaquin MG Garden Notes) (Habits 1-5) Habit Number 1: FEED THE SOIL Happy and successful gardeners know that taking care of the soil (and learning to love our clay soil) is the first priority. Soil has three main parts. The first is the mineral component, which soil scientists divide into sand, silt, and clay based on particle size. The important thing to know about sand, slit, and clay is that the clay particles are the smallest, and they are really small. The super-small size of the particles makes clay soils highly nutritious for plants. The second component of soil is the organic matter. Good, healthy soil is teeming with life, from big earthworms and pill bugs, to billions of living micro-organisms, fungi, and bacteria. Healthy soil also contains a lot of organic mat- ter, for example decomposing leaves or grass clippings. It is the job of the living organisms in the soil to breakdown the organic matter and return its nutrients, especially nitrogen, to the soil. The third component of soil is the space in-between the mineral and organic particles. This pore space is filled with water and air which are both essential to healthy soil. Plant roots need oxygen in addition to water and all those worms and beetles and protozoa and bacteria that are busy breaking down organic matter need water and air to stay alive. "Feeding the soil" means replacing the water and organic matter and preserving the air by not overwatering or compacting the soil. Happy and successful gardeners follow this maxim for improving soil: compost, compost, compost, mulch, mulch, mulch.Compost improves the structure of the soil and makes it crumbly and easier to work. Spread compost all over the soil a couple times per year. If the soil has not been gardened recently, you may want to dig the compost into the soil several inches down. The other key to feeding your soil and increasing the organic matter is to use organic mulch. The most popular mulches seem to be wood chips or bark, but you can also use grass clippings, leaves, straw, or once again, compost. When working with clay soil, avoid overwatering, and let it dry until it is moist and crumbly before you dig. Do not add sand to clay soil. Sand plus clay equals concrete.Great garden soil with lots of clay, organic matter, and microorganisms will be dark brown and crumbly and will smell earthy. It can be dug easily with a trowel, and it will have worms. Be patient and persistent. Building great soil can take years, but with careful treatment and feeding, “impossible clay” can become lovely garden soil. Habit Number 2: LEARN BEFORE LOPPING Happy and successful gardeners know pruning is a good thing and fun to do, but it can be complicated, so they make a point to learn before lopping.Many gardeners have pruners with them constantly for clipping and trimming their plants. There are many good reasons to prune and clip plants including training young plants, grooming for appearance, to control the shape and size of a plant, to influence flowering and fruiting, to invigorate stagnant growth, and to remove damaged or infested growth. However, improper pruning can ruin or destroy plants.Not all plants respond to pruning in the same way. Happy and successful gardeners are careful to research and learn how their plants will respond to pruning before they prune. This is especially important when talking about a large and valuable tree. Badly pruned large trees may drop branches or die, resulting in hazardous situations and expensive removal costs. Habit Number 3: Embrace Failure Gardening is a learned skill. Compare it to medicine. Just like no one is born knowing how to perform a liver transplant, no one is born knowing how to garden. Like any other skill, there is a world of knowledge and technique that when learned, over time, will lead to success.Happy and successful gardeners like to experiment in the garden and have learned to embrace failure. A dead or sick plant is a learning opportunity. They're always curious, always wondering what's going on in the garden, and eager to learn. For the most part, happy and successful gardeners aren't very sentimental about their plants. If a plant is sickly, a good gardener knows it's time to move it or remove it---which means, it's time to go shopping! Habit Number 4: Shop Carefully There is nothing more delightful than a few hours at a great nursery. It's like having all the benefits of a garden without the work. Experienced gardeners look for specific things when buying plants. 1) Look for plants that are healthy and vigorous. The plant should have sturdy stems or branches, show evidence of new growth with no sign of insect infestations, disease, or injuries. 2) Look for plants with good shape and structure.3) When choosing annuals and vegetable transplants in small pots, look for young, small plants, not ones that seem to be mature or already have flowers.4) Buy transplants when there is only one plant per pot. Experienced gardeners have learned to recognize crowded transplants and avoid buying them.5) Look for a healthy, well-developed root system. Roots should usually be white or light colored, not brown, slimy or mushy. If there is a small mat of roots at the bottom, but otherwise the plant looks vigorous, it's probably OK. Habit Number 5: Put the Right Plant in the Right Place If you ask experienced gardeners for their favorite gardening tip, it is usually "Right plant, right place."Plants that are well suited to the location where they are planted will be faster to put out new roots and new growth. They will be healthier and better able to withstand insect pests and diseases than if they were planted in the wrong place. They will perform well, grow well, look better, and require less attention from you.We have what's called a Mediterranean climate which means dry summers, rainy winters, some frost, and minimal freezing. The majority of San Joaquin Valley is in Sunset Zone 14 and USDA Hardiness Zone 9. Evaluate the planting spot by thinking about the following questions: Does the area get full sun, part sun, or shade? Is the area more wet or dry? Where is the water source? Does the spot get high traffic or is it out of the way? Is the area near a wall or fence that reflects heat? What is the amount of horizontal and vertical space available? Is the space on a hillside? Check the Sunset Western Garden Book, the nursery label, or books and sources online to determine the right plant for your place. Part 2 Top Ten Habits of Happy and Successful Gardeners by Sue Davis, Master Gardener (Habits 6-10, Fall 2018 SJ MG Garden Notes) Habit Number 6: Water Intentionally and With Both Hands Hand water your garden occasionally. It allows you to see the level of moisture in the soil firsthand, so you can adjust watering accordingly. Water with both hands. Carry a trowel or cultivator in one hand, and the hose in the other. Water the area, and let the water sink in. Then, with the trowel or cultivator, dig down into the soil in several places. Be sure to check down that they work properly. Dig down several inches. Has the water penetrated all the soil? Often, especially when watering soil that has been dry for a while, we grossly underestimate the amount of water needed to really soak the soil. Your goal with intentional watering is to get the water to penetrate the root zone of the plant. Watering intentionally means you should pay attention to your sprinkler and drip systems. Reset the timers as appropriate for the season. Maintain them, make sure broken or clogged parts are fixed. With containers, often the water simply slides right down between the root-ball and the side of the pot. If the soil is very dry, the root-ball shrinks and repels water. The best solution for watering very dry containers is to put the whole pot into a bucket, fill it with water to the top of the root-ball, and leave it overnight. Habit Number 7: Control snails and slugs When you see your plants ravaged with huge raggedy holes in the leaves or silvery traces crisscrossing the driveway in the morning, you have snails. Many happy and successful gardeners go out in the night to hunt snails. A successful snail hunter says, " If you have insomnia, you can either think about the snails eating your garden, or you can get up and put a stop to it."· Hunt at night with a flashlight or a headlamp.· Have a bucket half full of water with a squirt of dish detergent.· Search your entire yard. Do this often. You will soon discover the snail “hot spots.”· Pick them up and drop in the bucket.· Night hunting is best after a spring rain when the snails are most active.· When you are done with the hunt, leave the bucket outside overnight. In the morning dump it in the compost or in the garden. The soap is not harmful. If you are diligent, after several hunts you will have reduced the population considerably. After a few years, you will have very little snail problem at all, and your hunts will be short and much less disgusting. Slugs present a slightly different problem. Slugs don't have convenient handles, so picking them up is hard. Beer traps work well for slugs, but be sure to clean them out and fill with new beer after a few days. What about snail bait? SLUGGO is made of an iron phosphate active ingredient with bait additives. Go ahead and use it if you prefer--it is safe and effective, and non-toxic to wildlife and pets. Avoid using metaldehyde baits (Correy’s, Deadline) which are highly toxic to animals. Habit Number 8: Never Let a Weed Go To Seed Weeds are survivors. Weeds often have high rates of seed production, hard seed coats, or underground rhizomes or bulbs that allow them to remain viable for years. There are many types of weeds. Like your garden plants, they can be classified into annuals and perennials, even shrubs and trees. Annual weeds pop up in your garden over and over. When these weeds are little they look just like baby garden seedlings. They compete with garden plants for light, water and nutrition, and they will win the fight if you don't join the battle. In most soil there is a collection of weed seeds that have accumulated over decades. weed ecologists call this a ‘seed bank.’ Weed seeds can lie dormant in the soil for years until conditions favor germination. For example, seeds of chickweed and mustards can remain viable for 10 years, purslane up to 40 years and curled dock over 80 years! Keep the weed seed bank in mind as you garden. Whenever you see a weed about to go to seed, remember that one weed's deposit to the seed bank is thousands of seeds that may last in the soil for many years. That thought alone should be enough to get you to pull that weed out of the ground. Chemicals for weed control should be the last resort. Never use them in a vegetable garden. If you do choose to go that route, follow all label directions. Habit Number 9: Attract Beneficial Insects Among the insects in your garden there are basically two kinds of eaters: vegetarians and carnivores. When we see a bug eating our roses, our first instinct is to kill it, often with some kind of noxious chemical spray. Nature offers a better route. What we need to do is to invite the carnivorous insects back into the garden. These voracious little creatures will eat the aphids and parasitize the hornworms, mangle the mites, and crunch the caterpillar eggs, killing them so they do less damage to our plants. In gardeners' parlance, you want a balance between the "good bugs" (beneficials), and the "bad bugs" (pests). When balance is achieved, there will be much less damage to plants. Beneficial insects can be encouraged by providing sources of nectar and pollen--in other words, flowers. Most beneficial insects are very small, they appreciate tiny flowers in their scale. Many of the "bad bugs" are actually the larval stage of "good bugs." The syrphid fly larvae look like tiny green worms, and the larvae of lacewings and lady beetles look almost like tiny alligators. Larvae eat the most aphids! Learn to tolerate some insect damage as a minor but necessary evil for attracting beneficials. When you spot aphids on a plant, don't immediately kill them all off. Aphids appear first, then the carnivorous insects move in to eat them. Above all, do not use toxic pesticides. They kill the beneficials as well as the pests, completely defeating your purpose. Often use of pesticides results in rebound or secondary infestations that are worse than the original problem. Habit Number 10: Linger in the Garden "Linger: to stay in a place longer than necessary, typically because of a reluctance to leave." One habit I have noted among the successful gardeners I know: have patience with a new plant. Lots of patience. “Sleep, creep, leap” is a gardener’s way of saying to give a perennial or shrub at least three years before it puts on a show. And this is especially true with California native plants. For its first year, it will just sit there. All the action is happening underground, developing a robust root system. In the second year, you’ll note more growth. To convince yourself that it is growing, put a stake next to the plant in its first year. The stake should be the exact height of the plant. By year two, the plant should be a bit taller than that stake. Thanks for reading Beyond Basics: The Garden Basics with Farmer Fred Newsletter! Subscribe for free to receive new posts and support my work. Thank you for also listening to the Garden Basics with Farmer Fred podcast! It’s available wherever you get your podcasts. Please share it with your garden friends. Fred Hoffman is also a University of California Cooperative Extension Master Gardener in Sacramento County. And he likes to ride his bike(s). This is a public episode. If you'd like to discuss this with other subscribers or get access to bonus episodes, visit gardenbasics.substack.com/subscribe

Oct 13, 2023
How Was Your Tomato Crop This Year?
In today’s newsletter podcast, nursery owner Don Shor and I share success and failure stories from our 2023 tomato gardens. We both agree that one of the best tomatoes this year that we grew from seed was Rugby F1, a sauce/paste tomato that is large, meaty, and tasty. In our own yard, Rugby was the overall winner for us. Although it is described in several seed catalogs as a Roma-type tomato, don’t be fooled. Rugby is much larger than other Roma canning tomatoes, about seven ounces each. Pink-red in color, Rugby has meaty flesh that is good for canning. But unlike smaller Roma tomatoes such as San Marzano or Roma VF, Rugby takes well to slicing and can be served on a sandwich or in a salad. Rugby is an indeterminate tomato, and did produce throughout the growing season, with great foliage cover to protect fruits from too much sun. There were few – if any – weather related issues with cracking or sunburn. Rugby is also resistant to diseases such as tomato mosaic virus, leaf mold, fusarium and verticillium wilt, crown and root rots, as well as bacterial speck. We will be planting Rugby again in 2024. My tomato failure this year was the industry’s fault: a victim of a seed mixup. Here is the purchased, mismarked, packet. Gardener’s Delight, is an indeterminate German heirloom small tomato, a favorite for years in our garden, with a long growing season and a grape-like shape, a bit larger than a cherry tomato. Oddly enough, although the name on the “Gardener’s Delight” tomato seed package (above) is wrong, the picture was EXACTLY correct. The tomatoes that these seeds produced resembled a run-of-the-mill, red, cherry tomato. That should have been a red flag to me. Whatever variety of cherry tomato that came from the packet of seeds was certainly not one that was a keeper: very little production that ended mid-summer. This is what a Gardener’s Delight tomato is supposed to look like: a bit larger than a cherry tomato, nor perfectly round, as it tapers a bit on the blossom end. Nor does it grow in tight clusters, as some cherry varieties do. Chalk it up to another victim of “Jalapeno-gate”, a country-wide (if not world-wide) seed mixup issue that was initially noted by many pepper aficianados - as well as retail and wholesale nurseries this past summer. Read about it here . However, we enjoy Gardener’s Delight so much, that my plan for 2024 will be to purchase seed of that variety from two different seed catalogs and plant a few from each. I’ll be avoiding the seed catalog source of this year’s Gardener’s Delight failure. More 2023 Tomato Winners and Losers Which varieties were successful for you this year? Which tomatoes were a bust? Let me know how yours did. Meanwhile, over at the Fair Oaks Horticulture Center, the Sacramento County Master Gardeners conducted their own tomato trials this year. They grew three very popular varieties: Big Beef, Lemon Boy, and Celebrity. And for comparison, they grew the newer, alleged improvements of those three: Big Beef Plus, Lemon Boy Plus, and Celebrity Plus. Were the newer varieties really an improvement? The results were mixed. During a 30-day period of harvesting in July and August, the original Big Beef tomato plant produced 84 tomatoes with an average weight of 15 ounces. Big Beef Plus, however, only produced 75 tomatoes with an average weight of 8 ounces. Still, the taste testers among the Master Gardeners preferred the taste and texture of the Big Beef Plus, 75% to 25%. Both Lemon Boy and Lemon Boy Plus tomatoes that were harvested in that same time frame, and produced about the same number (132 to 111) and size (6.8 ounces to 7.5 ounces), although the Lemon Boy Plus had a few larger tomatoes that were beset with cracking. Lemon Boy was preferred by the taste testers to Lemon Boy Plus, by about a three to two ratio. Celebrity Plus (50 pounds) outproduced the Celebrity tomato (40 pounds), with both varieties having about the same size of tomatoes. The judges were divided on the taste and texture, with 71% preferring the flavor of Celebrity Plus. For texture, Celebrity was favored by 75%. The big difference was the size of the plant: Celebrity stayed fairly compact, about three to four feet tall, while the Celebrity Plus climbed up to the top and over the five-foot cage. “In our limited demonstration, all plants grew well and had no disease issues,” says the Master Gardener’s final report on the tomato trial. “We will probably keep all of the cultivars on our list to grow again.” Thanks for reading Beyond Basics: The Garden Basics with Farmer Fred Newsletter! Subscribe for free to receive new posts and support my work. Thank you for also listening to the Garden Basics with Farmer Fred podcast! It’s available wherever you get your podcasts. Please share it with your garden friends. Fred Hoffman is also a University of California Cooperative Extension Master Gardener in Sacramento County. And he likes to ride his bike(s). This is a public episode. If you'd like to discuss this with other subscribers or get access to bonus episodes, visit gardenbasics.substack.com/subscribe
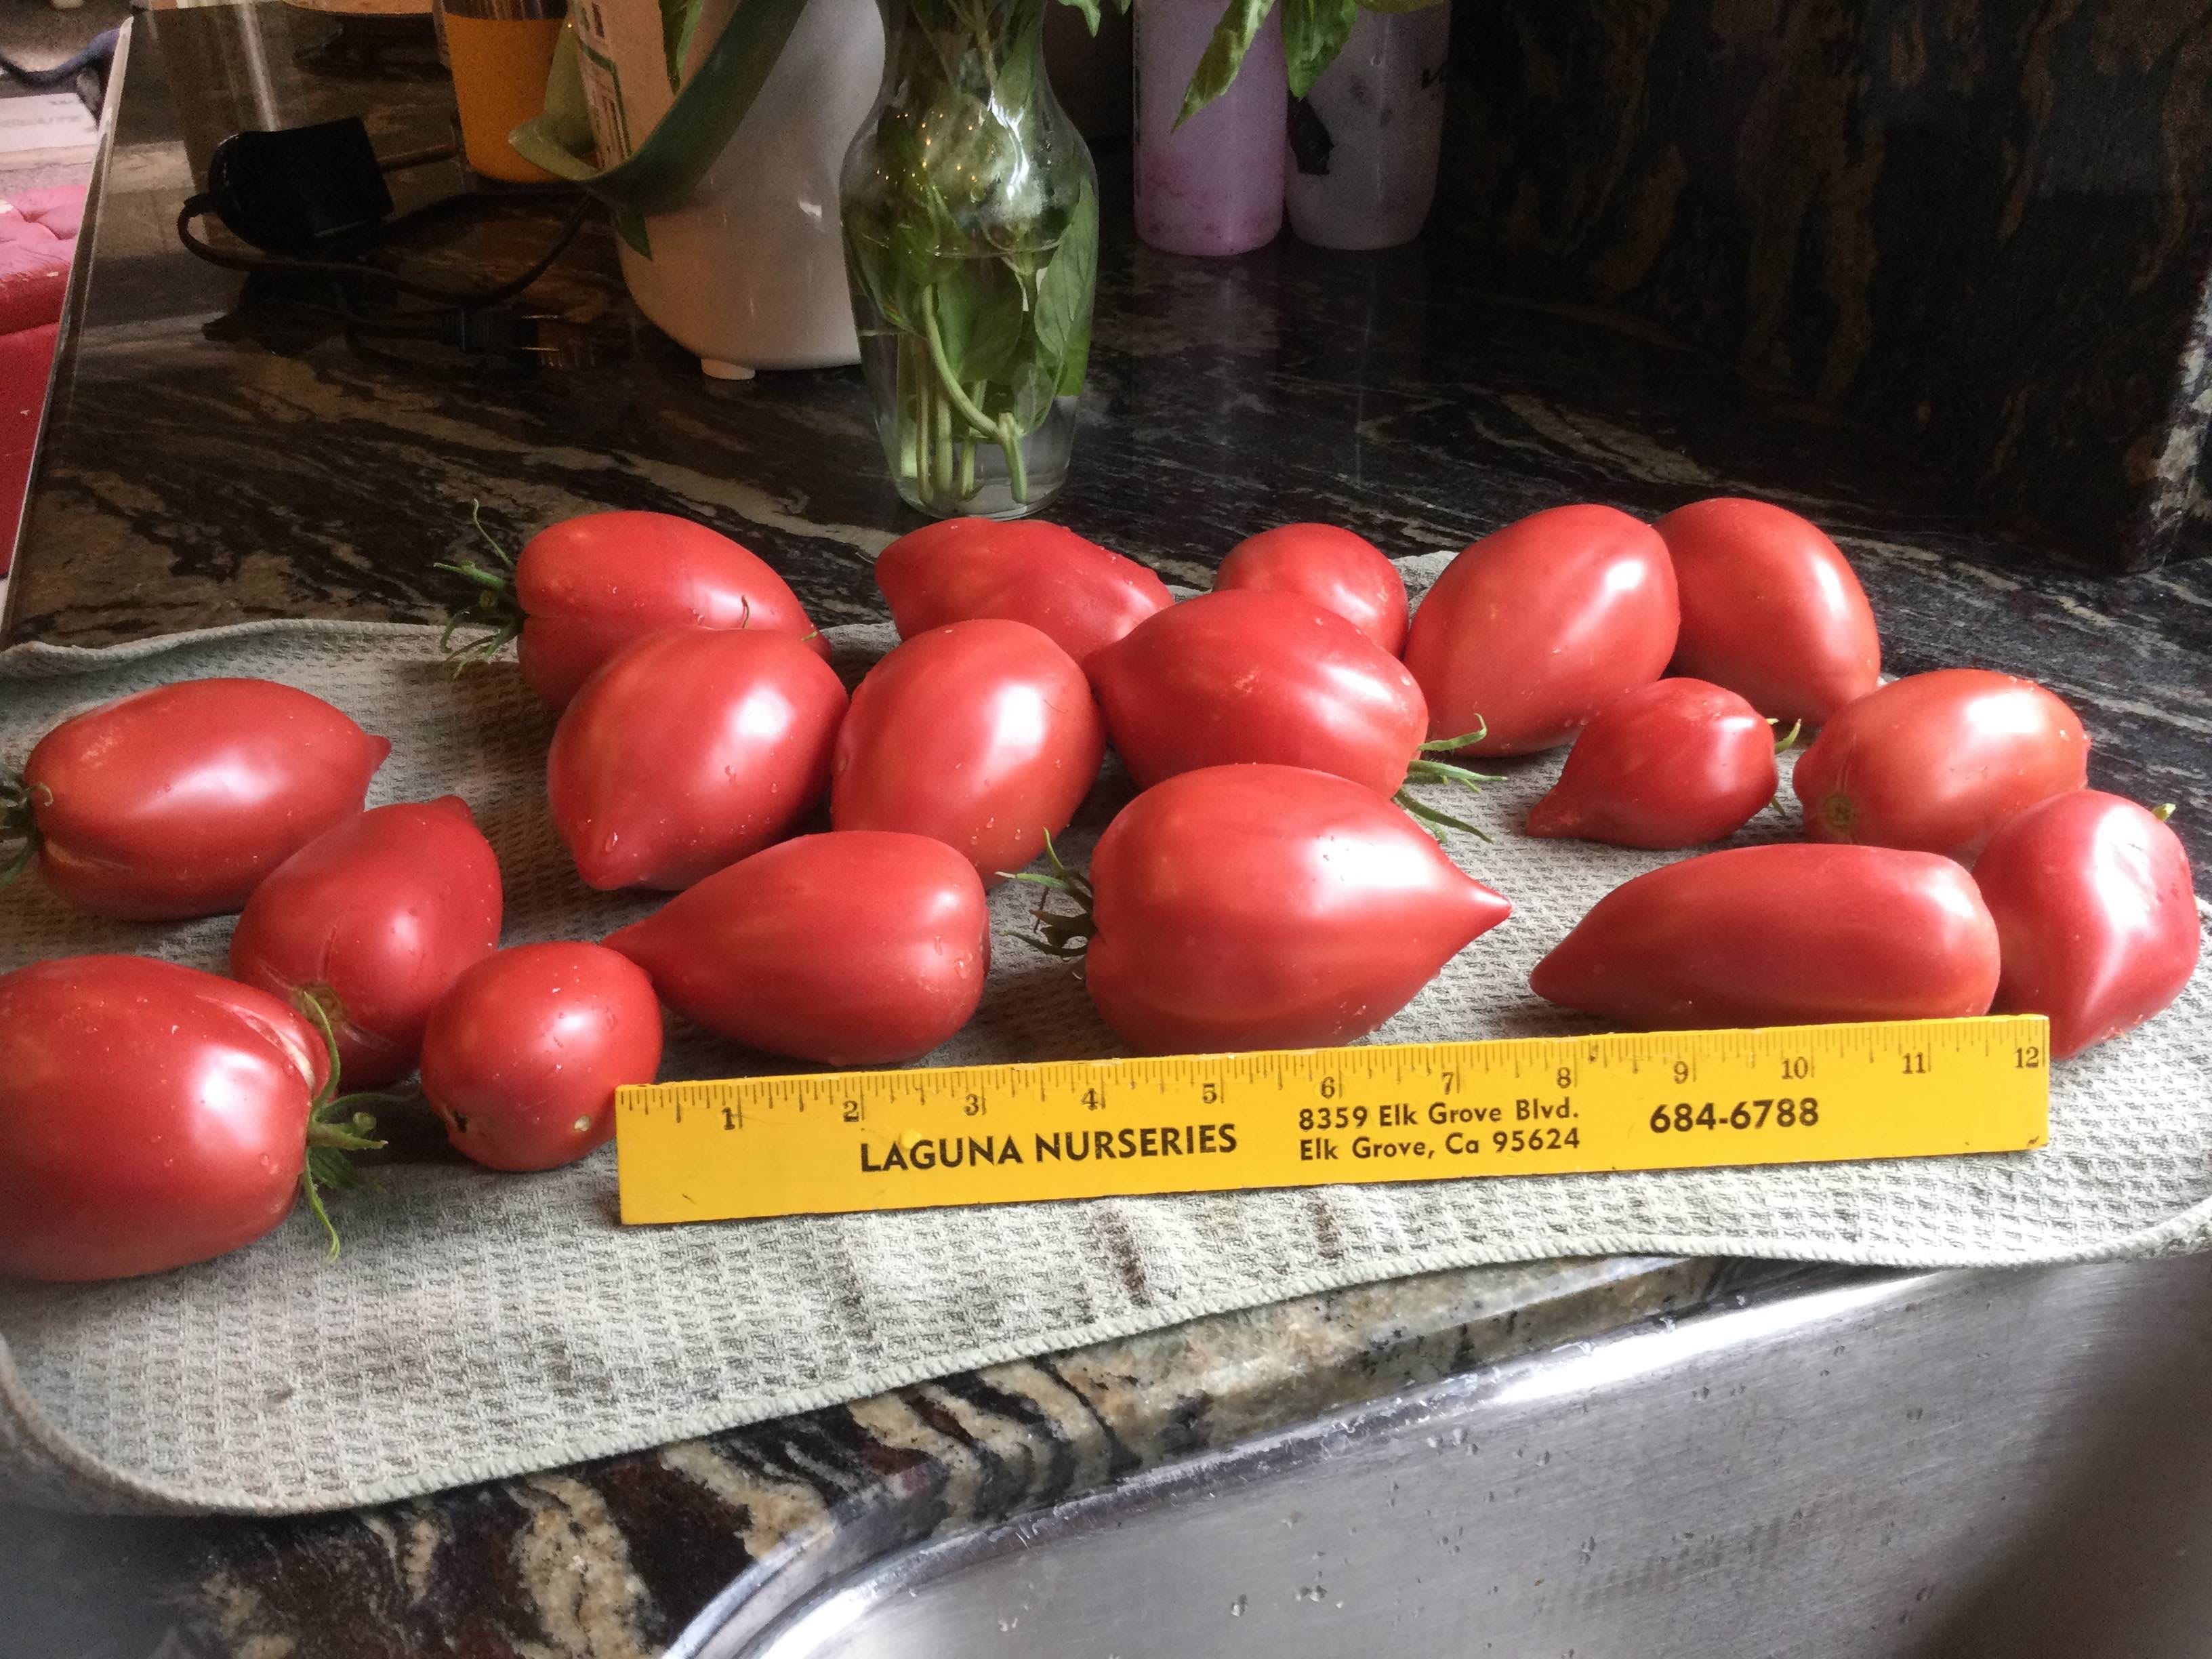
Oct 6, 2023
Planting Wildflowers or Cover Crops: Wait for Rain? Or Do It Now?
In today’s newsletter podcast (above), we get tips on starting a wildflower garden from Marina LaForgia, of the Gremer Lab at UC Davis. LaForgia, a 2019 PhD graduate of Davis, is now doing research on seed dispersal and persistence. If you live in an area of the country where you can plant wildflowers or cover crops in the fall, especially in a drought-prone area, you’ll want to listen. Thinking about planting cover crops this fall? The range of cover crop success in the U.S. is rather wide: USDA Zones 10 down to 6B. According to a cover crop study conducted by the Natural Resources Conservation Service in Pullman, Washington (USDA Zone 6B), it really depended on how cold it gets in a particular winter. Peaceful Valley Farm Supply has a cover crop solutions chart that lists many varieties that are reported to take the cold down to 25 degrees. A very informative video from Peaceful Valley Farm Supply about planting wildflower seeds can be found here . (Note: Peaceful Valley is not an advertiser here. They just know their stuff. That’s good enough for me.) What’s Your USDA Zone? Want more zone details? Here’s a link to an eye-numbingly detailed USDA Zone Map from Wikipedia. Fall is for Sowing Cover Crops and Wildflowers. But Should You Wait for the Rain? Early fall - October through mid-November - is usually the time for planting a wildflower garden or sowing cover crop seeds on your bare garden beds here in USDA Zone 9, including most of California. “Usually” being the operative word; “rain” being the wild card. You can increase the chances of germination if the soil bed is prepared by thoroughly moistening it to depth of a few inches. Follow that up with weekly, thorough irrigations until the seeds sprout. However, the shorter, cooler days of October sometimes can fool a gardener into not watering enough, thinking that the rains will soon be coming. Some native plant experts, such as LaForgia, say to wait for the rains before planting wildflower seeds. That event seems to be a long way off, especially with temperatures lately reaching the 90’s. In that wildflower video from Peaceful Valley, Trish recommends waiting until after the first hard frost in her area, which, because of the hilly terrain of Nevada City, could be anywhere from USDA Zones 9B to 7B. This will help the seeds achieve winter dormancy, and then come alive in the following Spring. Meteorologists seem divided on what the next three or four months will bring to much of the U.S., especially for Northern California: no rain until heavy storms begin in late December (according to Weather West meteorologist Daniel Swain); a typical amount of rain, over the next 90 days ( the National Weather Service’s Climate Prediction Center ); or, we don’t know: “Quite a bit of uncertainty exists during the upcoming 4-months due to widely varying oceanic-atmospheric teleconnection patterns that should create highly changeable weather patterns.”( National Interagency Fire Center ). Again, you can try to plant seeds of some wildflowers and cover crops now... Just keep the soil bed moist (not soggy) until germination. And if no rain has begun by that time, irrigate weekly. Peaceful Valley Farm Supply in Nevada City, who are the cover crop experts in the Sierra foothills, urges their customers to plant cover crops at the correct time, rain, or no rain: “Do not delay planting to wait for the rain. It is better to have the seed in the ground waiting for the rain than to plant after fall rains begin. If possible, irrigation should be applied immediately after planting. The irrigation should be long enough to at least wet the soil to one to two inches below the seeding depth, with two or three subsequent irrigations to supplement the early growth if rains don’t happen in the Fall. The more growth these cover crops make in the Fall, the better.” In the University of California publication, “ Cover Cropping in Home Vegetable Gardens ”, Sacramento County Master Gardener Gail Pothour explains that a cover crop is planted for the purpose of improving soil quality and nutrition as well as attracting beneficial insects. Cover crops add nitrogen to the soil, improve water penetration (due to long roots), suppresses weeds, and adds organic matter to the soil. Drawbacks to cover crops may be obvious, some not so obvious. Although you are taking a portion of the garden out of production of cool season vegetables and flowers, you are improving the soil. The not-so-obvious drawback: cover crops can be a bit of work in late winter and early spring. For maximum benefits, cover crops need to be cut back as flowering begins to keep that nitrogen in the soil. Then, the entire plants need to be chopped into little pieces and worked into the soil for maximum benefits three to six weeks before planting your spring vegetables or flowers. In addition to clover, Pothour suggests using bell or fava beans as a cover crop. “For an upright cool season cover crop that is easy to cut down in the spring, use bell beans, or fava beans,” explains Pothour. “The large, round, flat-seeded ‘horse bean’ or fava bean plants are nearly identical to bell bean plants, but bell beans are usually planted as a cover crop because the seed is smaller and therefore cheaper. Of course, you can use fava beans as a cover crop, but remember that a fair amount of nitrogen (in proteins) will be removed when you harvest the seed, making less nitrogen available for the succeeding crop.” For best results, cut back the bean plants when they begin to flower if your goal is soil improvement. Thanks for reading Beyond Basics: The Garden Basics with Farmer Fred Newsletter! Subscribe for free to receive new posts and support my work. Thank you for also listening to the Garden Basics with Farmer Fred podcast! It’s available wherever you get your podcasts. Please share it with your garden friends. Fred Hoffman is also a University of California Cooperative Extension Master Gardener in Sacramento County. And he likes to ride his bike(s), despite the flat tires, due to Humboldt County potholes. This is a public episode. If you'd like to discuss this with other subscribers or get access to bonus episodes, visit gardenbasics.substack.com/subscribe
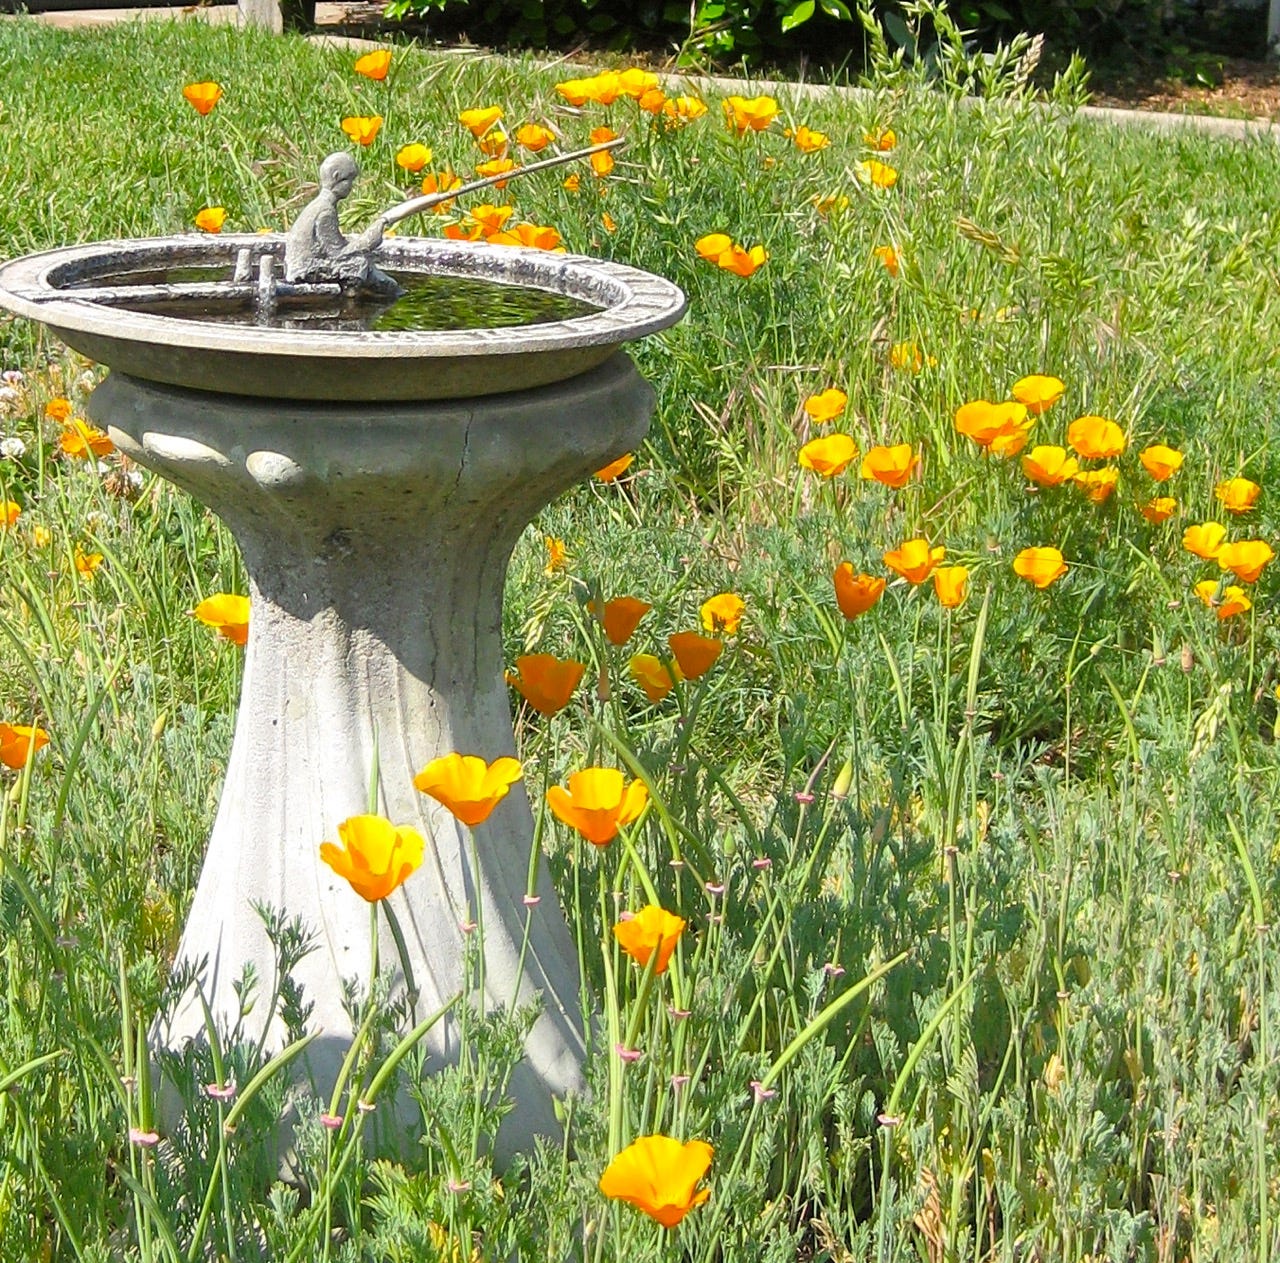
Sep 29, 2023
Potato Planting Tips
In today’s newsletter podcast, retired college horticulture professor Debbie Flower and Master Gardener Gail Pothour offer tips for growing potatoes. We also talk about the best months of the year to plant potatoes. That answer? It depends where you are. Give it a listen (above). More Potato Planting Tips From the garden e-mail bag, Alan asks: “What varieties of potatoes are best to grow here in California?” There are dozens of varieties a potato gardener in California can choose. Among the favorites of the University of California potato experts are Norgold Russet, Red la Soda, Kennebec, and White Rose. One of my favorites is Yukon Gold. Local nurseries and California-based garden catalogs, such as Renee’s Garden , will be getting in and shipping out seed potato varieties such as Colorado Rose, Heirloom Russet Burbank, Purple Majesty, French Fingerling, and Heirloom German Butterball in the winter. One of the keys to homegrown potato success is planting at the right time, to avoid frost damage to young plants. We just passed the summer potato planting season of August and September. However, winter or early spring planting of potatoes is good, January through March in milder areas of California. A general rule of thumb: plant potato pieces about three to four weeks before the final frost. At California’s lower elevations, frost season is usually December and January. Planting in March, though, is good insurance against a wayward frost. Throughout the United States, planting seed potato pieces three to four weeks before the final frost is a good rule of thumb. Find your average first and last frost dates here . Your local nursery is a good barometer for the top potato varieties to grow in your area. Seed catalogs , as well, offer a wide variety of tasty and unusual potatoes that can do well in many climates. Is there a difference between 'eating potatoes' and 'seed potatoes'? Why plant “seed potatoes”? These are certified disease-free varieties, available from nurseries and catalogs. Using grocery store potatoes for planting have two drawbacks: they may have been treated with a sprout inhibitor to increase their shelf life; and, although the potato may be safe to eat, it may still transmit a disease to your soil. Which brings us to another query from the garden e-mail bag. Bill asks: "What's wrong with using some of the potatoes from our earlier harvest to plant a new crop? Is there a difference between 'eating potatoes' and 'seed potatoes'?" Each potato-growing state has tests to certify seed potatoes. These tests include field and storage inspections as well as demanding potato criteria. The seed potatoes are certified to be free of some diseases that can ravage an entire garden, including early blight, late blight, damping off, verticillium wilt and nematodes. Diseases can spread easily, via the wind, plants, soil, and tools. As a precaution, you shouldn't plant potatoes and tomatoes in the same soil within three years of each other. To avoid this issue entirely, heirloom potato growers can plant in large containers, at least 15 gallons in size, using bagged soil. Whether you grow in the ground or in containers, here are some potato planting tips: • Cut seed potatoes into pieces weighing from one and a half to two ounces, each having one or two eyes. • Store cut pieces at room temperature and preferably in a humid place for one or two days before planting to allow the cut surface to form a callus. This decreases the chances of rotting. • In the garden, prepare a planting furrow about four inches deep. Drop seed pieces into the furrows, and cover with two inches of soil. • Leave the furrow this way for 4 to 6 weeks. When the sprouts are a couple of inches high, add 2 more inches of soil so that the seed pieces will be covered at the original ground level. • If planting in containers, start with a couple of inches of soil in the bottom, lay the seed potato pieces on the top, and cover with two inches of soil. As the sprouts grow, repeat that process until you are within a couple of inches of the container top. • With either method, if a frost threatens the sprouts, cover with a permeable frost cloth. Most of the potato crop can be harvested when the vines die, or the skin of the tubers is firm, not flaky. Thanks for reading Beyond Basics: The Garden Basics with Farmer Fred Newsletter! Subscribe for free to receive new posts and support my work. Thank you for also listening to the Garden Basics with Farmer Fred podcast! It’s available wherever you get your podcasts. Please share it with your garden friends. Fred Hoffman is also a University of California Cooperative Extension Master Gardener in Sacramento County. And he likes to ride his bike(s). This is a public episode. If you'd like to discuss this with other subscribers or get access to bonus episodes, visit gardenbasics.substack.com/subscribe

Sep 22, 2023
The "Fast Food" Garden: Microgreens & Baby Greens
I’ve often heard from dietitians and health food aficionados that consuming microgreens and baby greens provide more nutrition than their full grown counterparts. Is that true? In a 2021 published study of two greens - spinach and roselle - researchers discovered that these plants - when harvested within 20 days of sowing - have some critical nutritional benefits greater than the full grown plant, according to the National Library of Medicine: “Compared to field grown mature foliage, greenhouse-grown micro/baby-greens were lower in digestible carbohydrates and CA (calcium) but higher in digestible protein, P (phosphorus), K (potassium), Mg (magnesium), Fe (iron), Mn (manganese), and Zn (zinc).” From the National Library of Medicine (Nov. 2021): Nutrient Content of Micro/Baby-Green and Field-Grown Mature Foliage of Tropical Spinach ( Amaranthus sp.) and Roselle ( Hibiscus sabdariffa L.) So, for certain nutritive boosts, nature’s “fast food” (greens harvested at microgreen or baby green stage) is the way to go. Better yet, it’s quick from the garden to the plate, reaching cutting stage in 10 to 20 days after sowing in optimum conditions and temperatures. In today’s “Beyond the Garden Basics” newsletter podcast (above), Master Gardener Gail Pothour discusses how to grow and harvest microgreens, and how they can be used in various dishes. Below, Renee Shepherd shares her secrets for growing and harvesting baby greens, perfect for the freshest salad and other recipes. This is a transcript of a conversation we had with Renee, back in Episode 282 of the Garden Basics with Farmer Fred podcast . THE CUT AND COME AGAIN FOOD GARDEN Farmer Fred One of the healthiest garden plants that you can grow our greens. But if you live in a hot climate, maybe you're limited to only growing greens during the cool season. Or if you live in a cold climate, it's your summer crop. But because greens are so healthy, you should be able to grow them year round. And, you know something? You can, with the advice of our guest today. It’s Renee Shepherd, the founder of Reneesgarden.com . She is widely regarded as a pioneering innovator in introducing international vegetables, flowers, and herbs to home gardeners and gourmet restaurants. She founded the Shepherd's Garden Seeds back in 1985. And she sold the company later on, and then established Renee's Garden to do what she likes best: searching out the very best seeds from around the world, testing them in her own garden, cooking and developing recipes around their unique characteristics, and sharing them with other gardeners. I've been a Renee's customer for years and years. I love her choices and introductions, especially the Sunset Mix sweet pepper. Renee is the one who gave me a tip a few years ago when I was bemoaning the lack of cilantro to make salsa in the summertime. Cilantro, here in USDA zone nine, is basically a cool season crop. But you'd like to have some cilantro when you're making salsa in the summer, when the tomatoes and garlic and peppers and onions are ready. She said all you got to do is cut and come again with cilantro. Just grow it from seed in a shady spot. Then, when it gets a couple inches tall, you cut it and use it. Isn't that right, Renee? Renee Shepherd That's the cut and come again method. It gives you a way to get several harvests of a lot of things that really wouldn't be able to take the heat. Farmer Fred Actually, I think it's perfect for anybody who wants to garden. With a cut and come garden of greens, all you probably need, if you're starting it now, is a shady spot to grow it in, a large container, or if you have the room, a garden bed. But I would imagine, too, in a sunny window inside you could grow this. Renee Shepherd Well, I'm not 100% sure that you would have great results on a windowsill, because it needs so much more light. You might get one cutting out of it. I suggest you grow it outside for the best result. Farmer Fred How about indoors with grow lights? Renee Shepherd Indoors with grow lights? That's certainly a possibility. Farmer Fred All right, we've just sold some more equipment there. But there's a lot of greens that take well to the cut and come again method. You have a YouTube video at Reneesgarden.com that explains how you do that. So go ahead and explain it for our podcast audience. How exactly do you grow leafy greens that will come back after you cut them? Renee Shepherd We think the cut and come again method is the way to grow the most greens in the smallest space in the shortest time. So it works for all lettuce mixes. And it works for spinach, chard and kale, Asian greens, a lot of different things. It's not just for hot weather, it's really a way to get a lot of results from a small space and it's a different way of growing things. So either in a bed or in a large container. You prepare the soil. You get a seed mix and you pour out the seed in your hand. And then you shake the seeds through your fingers so it kind of goes into the bed like grass seeds. Don’t pack them in too thickly, but you try to spread them out, ideally, so the seeds are about a half an inch apart. And then you water it in. And when it gets about four to five inches tall at the most, you want to take kitchen scissors or snips, and just cut off the top few inches, leaving a one inch crown. So you want to leave a one inch crown in the ground and cut the rest. So you have three to five inches of greens. You harvest as much as you need for a meal that day. In other words, the greens are going to come up densely. And you wouldn't grow them to maturity, because they would be way too crowded and they wouldn't grow well. They would get long and lanky. But if you harvest them at the baby stage, they're young and tender and delicious. So let's say you had a garden bed that’s about a couple of feet on each side, like two or three feet across and two or three feet wide. You could grow enough mesclun mix or baby lettuce mix there to give you a lot of meals. You cut just as much as you needed. After you cut it, you fertilize again with a high nitrogen fertilizer, like fish emulsion, if you're an organic gardener, which we are. You’ll then get a second growth. But in really hot weather, you would not get a third growth. But in the cold season, you could sometimes even get a third cutting. So it's cut and come again. Farmer Fred And how long does it take to produce the first crop? And then how long is it before you get a second crop? Renee Shepherd I would say for the first crop, you're talking 30 to 45 days. And the second crop depends on the weather. But probably another couple weeks. Farmer Fred Would you grow it in sun or shade? Renee Shepherd If it's very hot weather, I would certainly grow it where it gets afternoon shade. Or you can also cover it with shade cloth. But I'm not kind of claiming that you're going to get much of a crop if it's 100 degrees, and baking in the sun. But I have seen growers in California up in the Sonoma area, grow it under a shade cloth - which is mesh - that you cover your bed with. That reduces the amount of UV going in. But generally speaking, if it's getting really warm, then you should ideally grow it where it gets morning sun and afternoon shade. In the cool season, it doesn't really matter. It'll grow just fine, I would say. up until late spring. Start it as soon as the weather starts to cool down. Farmer Fred I really like the idea of using the shade cloth for a very different reason: to keep the pests away. To keep the aphids, the white flies, the cabbage looper moth from laying eggs on those greens. Renee Shepherd Well, the other nice thing about using the cut and come again method, you're only growing something four or five inches tall. And you're growing it safely from pests, because the plants are not in the garden long enough. You know what I mean? Farmer Fred You have a lot of different mixes that you can use and I imagine that you can kind of mix and match all the various spicy greens as well as the mild greens. That would be very nice, and very colorful as well, in a salad mix or however you want to use greens. Renee Shepherd You want to use two containers or two places on your garden bed. Grow one with mesclun or baby leaf lettuce, which is all kind of sweet reds and greens that are either either smooth and buttery and crunchy. We make up our mixes by growing the varieties individually and then combining them so you've got not just the flavor and color, but a good mouthfeel, because you don't want all soft lettuces and you don't want all crispy lettuces. It's nice to have both. Let's say we're talking about lettuce. You grow one baby leaf lettuce mix. And next to it you can grow a spicy greens mix that has arugula and mustard and spicy things. And then you go out to make a salad for dinner. You harvest two thirds lettuce and 1/3 spicy greens. You can tailor it to your own tastes. And you can certainly grow arugula as a cut and come again and you can grow lots of different things. Arugula is very fast growing. And frankly, it's not bitter when it's young. So you want to harvest it no more than four inches tall. Farmer Fred And at that height, the plant has developed its own character. It's got that shape that you recognize. It’s going to be very colorful, too. Renee Shepherd Most stores now sell mixes of baby leaf greens. Everyone knows what that is. But you can also buy baby kale, and baby arugula. All these things can be grown in the cut and come method yourself. It's much cheaper and it's really easy to do, especially for people in limited spaces. You can grow a really nice salad garden and greens gardens in containers in this fashion. Farmer Fred I would think, then, if you can get maybe two or three crops with the “cut and come again” for a bowl of lettuce in a portion of the garden, you'd want to have about two or three going at the same time. Maybe plant the second batch about a week or two after the first batch? Renee Shepherd I would say a couple of weeks. But you know, you don't have to have a big patch because it produces a big quantity of greens. So it's a good strategy for having long term salads. Farmer Fred I noticed in your video , when you were harvesting the greens when they're only four or five inches tall, all you did was you simply grabbed a handful of them, and then cut it one inch above the soil line beneath your hand and took that in for dinner. Renee Shepherd Yeah, you wrap your hand around a bunch of tops, and you cut underneath your hand leaving one end. And then you take that in for dinner that night. It's really tender and delicious when it's fresh. Just make a real simple vinaigrette, like with a mild rice vinegar, or whatever kind of vinegar you like, and really good olive oil. And that's really all you need. Farmer Fred You know, speaking of that, you have recipe books . Renee Shepherd Well, that's true. We have a huge trial garden where we trial and evaluate new varieties and grow many different kinds of the same variety. So we've always come up with recipes and what to do with it. Because if we have convinced you to grow radicchio, you're going to need some radicchio recipes. And if you grow pole beans, and you've used up the three ways you always made beans, you might want some new ideas. So all the cookbooks I've written are all alphabetical by vegetable, so you can look up whatever you're harvesting. Farmer Fred And you can find those cookbooks online at Reneesgarden.com Renee Shepherd We’re growing lots of basil, we planted a second crop of basil, so we'll have it ripe, when more tomatoes ripen. Farmer Fred There you go. Yeah, basil can last quite a while, as well. I'm always amazed at parsley, because it's a biennial. And so you can get two years worth of harvest from that. Renee Shepherd Well, that's true. We usually plant two crops a year, we are in USDA Zone 8. One will overwinter. And then we plant another one. So yes. I like Italian large leaf parsley better than most others. It’s my favorite. It's very healthy, too, and tastes so good. Farmer Fred Not only that, but in its second year when parsley does start to flower, it attracts a whole host of beneficial insects. Renee Shepherd Yes, and that's certainly something that a lot of gardeners are really getting into, seeing their gardens as a way to create backyard habitat, and encourage pollinators and solitary bees and all kinds of beneficial insects and songbirds. Not just feeding them, but feeding nature. It's really important and something all gardeners can really do. Farmer Fred It behooves every gardener to build the good bug hotel. Renee Shepherd Well, absolutely. That just means to plant lots of wonderful annual flowers that they all can feast upon. Farmer Fred That's right. And a wide variety of plants, too. You want birds in your yard? They need some evergreen shrubs where they can they can hide out in. Renee Shepherd Yes, thinking of your garden as a habitat, and source of food and pleasure not only for you, but by everything that surrounds you in nature. It is really an important concept because I think we are the source of a lot of habitat in our suburban and city gardens, more than we know, and it’s becoming more and more important. Farmer Fred Anything else you want to cover in this? Renee Shepherd We're getting into the real end of summer. So as soon as the weather starts to cool down would be a good time to launch another round of cut and come again greens, it's something you can do really quickly and easily. And if you're a beginning gardener, it's a great way to get going and besides lettuces, because I mostly talk about that. But you can grow - and it really is fun to grow - baby chard and baby kale, which is really more tender than mature kale, and spinach. So there's really quite a few greens that can be grown in this fashion. Farmer Fred Is green kale, in your estimation, tastier than ornamental kale? Renee Shepherd Oh about 1,000%. Ornamental kale was bred for ornamental purposes, mostly in Japan, originally. It really is designed to be pretty. Is it also edible? Yeah. Is it delicious? Not particularly. Farmer Fred We should point out that at Reneesgarden.com, you can find all sorts of seeds available, mixes available, for the container kitchen garden. So indeed if you do have a limited space to work with - maybe a sunny patio or less - there's a lot of good mixes that will work for you in containers. Renee Shepherd We specialize in varieties for containers . So we have container chilies and container peppers and container cucumbers and container eggplants and containers zucchini, including a really nice French variety that really does well in a container. As well as watermelons. We have lots of these container cut and come again mixes, because that's something we really look for. And our other varieties all tend to be in vegetables at least, varieties chosen for wide adaptability and great flavor, because we eat them ourselves. Farmer Fred You test them yourselves too. Renee Shepherd Yes, we have a large trial garden both here in Northern California near Santa Cruz and also in Vermont. Farmer Fred Talk a little bit about the Ortalana di Faenza zucchini . And I'm sure I butchered that name. Renee Shepherd That is not the container variety. That is a very traditional Italian striped zucchini, characterized by a very nutty taste, just really sweet and nutty and custardy. It's a very delicious one. The French seed that we get, which is the container varieties, is called Astia (?). And then last year, we introduced the opposite, which is a climbing zucchini, which will crawl up a trellis and I really liked because then you can break off the fruits off the vine standing up. You don't have to go looking bending over and trying to find them and they don't hide. So we've got one for a zucchini for any use. Farmer Fred Yeah, the climbing zucchini, by the way has the obvious name of Incredible Escalator . Renee Shepherd Yes, it's from a German company and they just had a number for it. So they allowed me to name it, and since it moved quickly up I thought I'd name it escalator. Farmer Fred Well, just in my own defense, I am growing that Ortalana di Faenza zucchini in a large barrel, and it's doing just fine. Renee Shepherd That's one of my favorites, actually, flavor wise. And they make just beautiful fruit. And if you roast them whole, they're just wonderful with olive oil and garlic. They're just delicious any other way you can think to enjoy them. They just have a really really excellent flavor. Container zucchini works well because it doesn't, it's non-vining. It's grows like a bush. And the zucchini are all easily pickable and it's a very beautiful plant. It's very ornamental. Farmer Fred I would be remiss if I did not ask you at this time of the year, what can you do with an overgrown zucchini that you found hiding under the leaves? Renee Shepherd Well, I don't get them too often. Because I'm too greedy. I always go out and look, almost every other day. I am not an expert on overgrown zucchini. So I don't think I'll have anything really new and exciting to tell you. You can cut them in half and scoop out the insides and make a filling with the zucchini and sauteed with rice and Italian sausage and basil and then stuff the shell. Bake it topped with olive oil and a Italian kind of seasonings. That's nice. Farmer Fred I guess I'll just continue feeding the big ones to the worms. Renee Shepherd Yeah, or get a neighbor with chickens. I would say that is the highest use of overgrown zucchini and trade them with people with chickens in return for an egg or two once in a while. Farmer Fred Oh, I used to trade them to the neighbors to feed their cows. Renee Shepherd Amen to that. Farmer Fred Fall is for planting, August and September is for planning, and thinking about what your family will eat. Try some new varieties as well. Don't start too big, start with a small patch if you've never grown something before, see if your family likes it and experience something new. USDA zones nine and eight and even seven can have a cool season garden, perhaps with some protection. But there's no reason why you can't be out there gardening most of the year. Renee Shepherd Well, I do have to tell you that I used to get invited to this one family’s Thanksgiving feast every year, and I really never saw them much, and didn't know them very well. And I couldn't figure out why they wanted me to come to Thanksgiving. And I found out it was because of the fall garden produce I brought. I brought a great big salad, with all those wonderful fall greens. And that's why they invited me. So obviously everybody can grow lots of delicious things for fall. It's really worth doing, and fun. And it's easier, because as the weather cools down, there's less pest problems. Plants stay well in the garden. You can have another crop of root vegetables, lots of greens. Some of the healthiest things can be grown in the cooler fall weather, and they don't take as much energy because they’re not as many weeds. It is actually the easiest time of year. Farmer Fred Exactly. And with your international expertise in the world of vegetables, the wide variety of bok choi, Chinese cabbages, is amazing. Renee Shepherd Yes, we we've had more and more Asian greens just because they're fast and easy and so healthy. We really try to look and feature things that are high nutrition. Most of all, deliciousness is our highest criteria. Farmer Fred There you go. So find out more at Reneesgarden.com. Noted seeds woman, Renee Shepherd, has been our guest. Renee, thanks for all the good advice about the cut and come again garden. Renee Shepherd Well thank you very much for talking with me. I've really enjoyed it. This is a public episode. If you'd like to discuss this with other subscribers or get access to bonus episodes, visit gardenbasics.substack.com/subscribe

Sep 15, 2023
Fall Worm Bin Care and Feeding
One of the best soil amendments to add for happy plants are worm castings, also known as worm poop. However, the price of a bag of worm castings approaches twenty dollars, so you may want to tack on a new “to-do” item for the soil in your garden: vermicomposting, which is raising worms, usually in a worm bin. Those worms will feast on many of your kitchen scraps, giving you back a soil amendment teeming with microbial activity, perfect for plant roots to enjoy. And you don’t have to worry about the worms if you go on a three-week vacation. Give them some extra food before you leave and re-dampen the bedding. They won’t complain. Worms do best at temperatures slightly less than room temperature. Putting them in a cool indoor room or basement is an excellent idea. If you maintain the right balance of food, the bins won’t smell, either. Here are tips from the Sacramento County Master Gardeners on starting and maintaining a worm composting bin: • All you need to create worm castings is a worm box, bedding material, red wriggler worms (not earth worms) and food scraps. • Bins can be purchased or homemade. Use a solid color (not clear) plastic storage box or a sturdy wooden box with a tight-fitting lid to keep out pests and protect your worms. If making your own bin, be sure to drill ¼-inch holes in the bottom to allow for drainage. • Worms will not escape; they dislike light and will migrate toward the center of the box. • A commercial vermicomposting system that feature stackable bins take up a house-friendly smaller footprint, perhaps 24 by 24 inches. • Moistened, shredded newspaper or corrugated cardboard, shredded leaves, purchased pine shavings, or coconut fiber (coir) bedding provides worms with a balanced diet as well as a damp, aerated place to live. • Always keep the bedding as moist as a wrung-out sponge. • Place the worm bin in the shade or indoors. The worms will tolerate a wide range of temperatures, but the best temperatures are between 55° and 75°F. However, today’s newsletter podcast guest, Sacramento County Master Gardener Susan Muckey, prefers to be more of a “tough love” worm parent. She lets her worms deal with temperatures that range from 40 to 80 degrees. Listen to what she has to say in the podcast at the top of the page. • Worms love most fruits and vegetables, used tea bags, used coffee grounds and filters. Do not feed them animal products, dairy, onions, or processed foods. Limit citrus peels to less than 20% of the food. Some worm parents say that the total citrus contribution to the worm bin should be closer to zero percent. • Chopping the food into small pieces, one inch or less in size, will speed up the composting process. • To avoid fruit flies and odors, cover the food with at least one inch of bedding. • Use red wigglers or red worms. They can be purchased at some nurseries, worm farms, and fishing supply stores. • The castings are ready when they are dark and fine in texture. Separate the worms from the castings. Place the worm castings in your garden bed before planting. Work the castings lightly into the soil with a rake. Cover with mulch or compost. If you soil could talk, it would thank you! Thanks for reading Beyond Basics: The Garden Basics with Farmer Fred Newsletter! Subscribe for free to receive new posts and support my work. Thank you for also listening to the Garden Basics with Farmer Fred podcast! It’s available wherever you get your podcasts. Please share it with your garden friends. Fred Hoffman is also a University of California Cooperative Extension Master Gardener in Sacramento County. And he likes to ride his bike(s). This is a public episode. If you'd like to discuss this with other subscribers or get access to bonus episodes, visit gardenbasics.substack.com/subscribe

Sep 8, 2023
What is Organic Gardening?
If I was to ask you, “What is organic gardening?” You might squint a little, and say something along the lines of, “Well, organic gardeners don’t use chemicals in the garden”. That wouldn't be correct. After all, water is a chemical, and all gardeners probably use water. And, there are chemicals used in organic gardening, including manufactured fertilizers that are OMRI certified as organic. OMRI - the Organic Materials Review Institute - is a nonprofit organization that provides an independent review of products, such as fertilizers, pest controls, livestock health care products, and numerous other inputs that are intended for use in certified organic production and processing. Pondering the question, “What is Organic Gardening?”, is interesting. If you go online and search for a definition of organic gardening, it runs the gamut. The University of Massachusetts , for one, says even among those claiming to be organic gardeners, it differs as to exactly what constitutes organic gardening. “In general, organic gardening differs from traditional gardening in two important ways, use of agricultural chemicals and use of artificial or processed fertilizers.” However, they don't say exactly what “agricultural chemicals” are. Then, UC Davis’ Sustainable Agriculture Research and Education Program states, “Organic agriculture is the practice of growing, raising, or processing goods using methods that avoid the use of most synthetic pesticides and fertilizers, as well as bioengineering, ionizing radiation, and sewage sludge.” Alright, now we're starting to narrow down the definition of “organic gardening”. The University of Georgia says that a generally accepted definition of organic gardening is: “The use of cultural practices to improve soil and plant health in order to reduce plant problems without the use of synthetic fertilizers and pesticides.” This is becoming very interesting. So we turn to the Royal Horticultural Society in jolly old England, and they say: “Organic gardening is commonly used to describe cultivation systems which make minimal use of manufactured chemical substances. These are practical elements of a broader philosophy which takes a holistic view of gardening, emphasizing the interdependence of life forms.” That “broader philosophy” may include the tenets of permaculture . And then we have the thoughts of a man we had as a guest about a month ago. IHeart was there discussing phosphorus, a soil macronutrient, and some of the possible dangers or cautions one should employ if using phosphorus fertilizers. It was garden book author, Robert Kourik . And I wondered about the manufacturing of phosphorus . I asked him, “Is the process that makes phosphorus fertilizers, in your estimation, not organic, even though phosphorus fertilizer is considered organic?” And he said, “I like to think of it as considering a cradle-to-grave review of organics.” Well, that needed some expansion. So back for his expansion time is Robert Kourik, author of the book, Sustainable Food Gardens as well as many other garden books. “The way I define organic gardening is what I call a full-cycle ecosystem,” says Kourik. “In other words, using as few external inputs as possible, while harvesting as much as possible. If you have an organic garden and you truck everything in from five miles away, and you buy bone meal, and you buy blood meal, and you buy phosphate fertilizers and more, you have a tremendous amount of inputs coming from near or far. That doesn’t reflect what would naturally happen if you weren't bringing in that nutrition and those other products. I’m trying to keep it as a closed loop as much as possible. So when I talk about ‘cradle to grave”, let's look at what it costs to produce these inputs, how they’re produced, what it takes to truck them around, as well as what do you get out of it, and what are the alternatives that you could use in your own garden, instead.” Listen to the podcast (above) about how you can transition to a more self-sustaining organic garden. Perhaps it won’t be a fully self-sufficient ecosystem, but you will have lessened your carbon footprint, if you’re a big-picture kind of person. Perhaps closer to your own reality, you will have saved some money, one cover crop or mulch pile, at a time. Thanks for reading Beyond Basics: The Garden Basics with Farmer Fred Newsletter! Subscribe for free to receive new posts and support my work. Thank you for also listening to the Garden Basics with Farmer Fred podcast! It’s available wherever you get your podcasts. Please share it with your garden friends. Fred Hoffman is also a University of California Cooperative Extension Master Gardener in Sacramento County. And he likes to ride his bike(s). This is a public episode. If you'd like to discuss this with other subscribers or get access to bonus episodes, visit gardenbasics.substack.com/subscribe

Sep 1, 2023
What's Stressing Your Dogwood Tree? It Could Be You.
A dogwood tree is easy to love: flowers in the spring, beautiful orange/pink/red fall leaf color; a small to medium height tree, perfect for a patio area. The University of Florida lists the dogwood tree’s strengths and weaknesses: “The state tree of Virginia, the flowering dogwood grows 20 to 30 feet tall and spreads 25 to 30 feet. It can be trained with one central trunk or as a picturesque multi-trunked tree. The flowers consist of four bracts which subtend the small head of yellow flowers. The bracts may be pink or red depending on cultivar but the species color is white. The fall color depends on site and seed source but on most sun grown plants will be red to maroon. The bright red fruits are often eaten by birds. Fall color is more vivid in USDA hardiness zones 5 to 8a. Branches on the lower half of the crown grow horizontally, those in the upper half are more upright. In time, this can lend a strikingly horizontal impact to the landscape, particularly if some branches are thinned to open up the crown. Lower branches left on the trunk will droop to the ground, creating a wonderful landscape feature. “The tree is not suited for parking lot planting but can be grown in a wide street median, if provided with less than full-day sun and irrigation. Dogwood is a standard tree in many gardens where it is used by the patio for light shade, in the shrub border to add spring and fall color or as a specimen in the lawn or groundcover bed. It can be grown in sun or shade but shaded trees will be less dense, grow more quickly and taller, have poor fall color, and less flowers. Trees prefer part shade (preferably in the afternoon) in the southern end of its range. Many nurseries grow the trees in full sun, but they are irrigated regularly. Flowering dogwood prefers a deep, rich, well-drained, sandy, or clay soil and has a moderately long life. It is not recommended in the New Orleans area and other heavy, wet soils unless it is grown on a raised bed to keep roots on the dry side. The roots will rot in soils without adequate drainage. Several of the cultivars listed are not readily available. Pink-flowering cultivars grow poorly in USDA hardiness zones 8 and 9. 'Apple Blossom'—pink bracts; 'Cherokee Chief'—red bracts; 'Cherokee Princess'—white bracts; 'Cloud 9'—white bracts, many blooms, flowers at early age; 'Fastigiata'—upright growth while young, spreading with age; 'First Lady'—leaves variegated with yellow turning red and maroon in the fall; 'Gigantea'—bracts 6-inches from tip of one bract to tip of opposite bract; 'Magnifica'—bracts rounded, 4-inch diameter pairs of bracts; 'Multibracteata'—double flowers; 'New Hampshire'—flower buds cold hardy; 'Pendula'—weeping or drooping branches; 'Plena'—double flowers; var. rubra —pink bracts; 'Spring Song'—bracts rose red; 'Springtime'—bracts white, large, blooms at an early age; 'Sunset'—supposedly resistant to anthracnose; 'Sweetwater Red'—bracts red; 'Weaver's White'—large white flowers, adapted to the south; 'Welchii'—leaves variegated with yellow and red; 'White Cloud'—flowers more numerous, bracts white; 'Xanthocarpa'—fruit yellow. “Aphids may be controlled by spraying them with a strong stream of water from the garden hose. Several borers will attack dogwood. Try to keep the trees healthy with regular fertilization, and irrigation during dry weather. Indications of borer problems are holes in the trunk, leaves smaller than normal, and dieback of the crown. Dogwood club gall midge causes galls at the branch tips. The leaves on affected branch tips may be distorted and the branch may fail to form a flower bud. Prune out the galls as soon as they are seen. Leaf miners cause brown blister-like mines on the undersides of leaves. The adult leaf miner skeletonizes the leaves. Scales can build up to large numbers before being detected. Horticultural oil will help control overwintering stages. Twig girdlers prune the tips of small branches. They are more of an annoyance than a serious problem unless you are a nursery operator. “Dogwood anthracnose may be the biggest concern with growing flowering dogwood. Infection is favored by cool, wet spring or fall weather. Drought and stressed trees appear to be most affected, as are those at higher elevations. Trees on the coastal plain may be much less likely to become affected. Consecutive years of infection can kill trees. Keep the tree healthy with regular irrigation in dry weather but avoid overhead irrigation. Plant the tree in an area which allows the leaves to stay as dry as possible. Consult a local pathologist for the latest in control measures. Cornus kousa is thought to be resistant to anthracnose and it can be planted in areas where anthracnose is a problem. It is a very beautiful tree. Early symptoms of dogwood canker are smaller and paler leaves than normal. Leaves on infected branches are red earlier in the fall. At first the symptoms appear only on the infected side of the tree but become more general as the canker enlarges. There is no chemical control for the disease. Avoid trunk wounds during and after planting. Crown canker is associated with wet soils and can be controlled with appropriate fungicides. Flower and leaf blight attacks fading bracts, especially during wet weather. Infected flower parts fall on the leaves spreading the infection. A large number of leaf spots attack dogwood. Clean up and dispose of infected leaves. Powdery mildew covers the leaves with a fine white coating. Leaf scorch occurs during hot, dry, windy weather. This condition looks like a disease. Scorch symptoms are drying and browning of the leaf margins, or, in more serious cases, drying and browning of the interveinal area.” What does driving a British sports car, dating Kim Kardashian, and growing a Dogwood tree have in common? High maintenance. If you’ve made it this far, you probably have come to realize that a dogwood tree - especially in a climate not conducive to its happiness - may require regular, proper maintenance. Which brings us to listener Katie’s question about her stressed-out dogwood tree that seems to be sprouting everywhere. Listen to the podcast (above) for our take on the topic. The astute among you may see some possibilities for stress in this picture of her dogwood: The University of California’s Ag and Natural Resources Department lists the optimum conditions for a dogwood tree: “Dogwoods can grow in several different climatic zones depending on species. They prefer generally acid soils with high organic content. Dogwoods generally need adequate moisture. They do best in areas with partial shade to full sun. In hot, arid climates, partial shade is preferred to protect them from leaf scorch.” The University of California likes to make lists of a plant’s possible problems . The list for the dogwood? A 1961 Jaguar E-Type (British Racing Green, of course) might be easier to keep healthy. But just like that fellow down the street from you who is always tinkering in the garage on some past love in his internal combustion life, there are gardeners throughout the country who will suffer any dogwood setbacks gladly, nursing them back to health, just to enjoy the spring flower show and the fall color. For gardeners, the pain is worth the pleasure. Thanks for reading Beyond Basics: The Garden Basics with Farmer Fred Newsletter! Subscribe for free to receive new posts and support my work. Thank you for also listening to the Garden Basics with Farmer Fred podcast! It’s available wherever you get your podcasts. Please share it with your garden friends. Fred Hoffman is also a University of California Cooperative Extension Master Gardener in Sacramento County. And he likes to ride his bike(s). This is a public episode. If you'd like to discuss this with other subscribers or get access to bonus episodes, visit gardenbasics.substack.com/subscribe
Aug 25, 2023
Tomatoes Not Ripening? Blame the Heat.
Back in July, we discussed “Six Common Tomato Problems.” Among those maladies were abiotic disorders (problems that are caused by factors such as weather, soils, chemicals, mechanical injuries, or cultural practices; and, not caused by insects or disease). Tomato abiotic disorders include blossom end rot, fruit cracking, leaf rolling, solar yellowing, sunburn, and tomato flower drop…all related to weather or watering issues. In that column, I mentioned we would tackle an annual tomato-related issue, tomato worms, in a future edition. Well, here it is, in the podcast, above. America’s Favorite Retired College Horticulture Professor, Debbie Flower, waxes rhapsodic about the three “worms” (caterpillars, really) that can damage your tomato plants: Tomato/Tobacco hornworm, tomato fruit worm, and tomato pinworm, along with the moths that laid those eggs. She reassures us that nature has supplied us with plenty of “good guys” to help control these munchers and burrowers. Links that are listed in the notes for that podcast include: descriptions of tomato hornworm, fruit worm, and pinworm; and two posts from the Farmer Fred Rant blog, “Plants that Attract Beneficial Insects”; and, “The Good Bug Hotel”. Today’s Beyond the Garden Basics newsletter tackles another abiotic disorder: tomatoes that are slow to ripen because of heat spikes this summer. And who hasn’t suffered through that this year? (Put your hand down, San Francisco.) Why Are My Tomatoes Slow to Ripen? From the garden e-mail bag , Vinnie asks: “My tomatoes are very slow to turn from orange to red, and several have yellowing as my bushes are not as leafy as I would like. They also are rather firm, though the plants have done well up to this point, with a decent amount of fruit as well as setting new tomatoes higher up on the plant. My “Sweet Million” cherry tomatoes also are having difficulty turning red, the same with the “Early Girl” and “Champion” full-size tomatoes. I planted the tomatoes in mid-April. They only get about six to eight hours of direct sun, depending on the season. But it seems I’ve had tomatoes for weeks at the same state of not turning fully red in color, so I was a little curious and disappointed in that. The plants are healthy, but not very bushy.” You are not alone, Vinnie. Many area gardeners are wondering about the lack of color of their tomatoes now, in late summer. Blame the triple-digit heat spikes that have occurred coast to coast for the slowdown this summer. Researchers from across the country have studied the effect of excess heat on ripening tomatoes. Their consensus: don’t worry, be happy. Those tomatoes will still be edible. And if you want to speed up the ripening process, harvest those tomatoes that are beginning to show color before the next forecast triple digit heatwave hits. Let them ripen indoors, in a dark place on the kitchen counter. However, too much shade or lack of foliage on outdoor plants can also impede ripening tomatoes. The University of California’s Contra Costa County Master Gardeners Newsletter says: “A key resource that tomatoes need for ripening is plenty of leaf surface for photosynthesis. Often by late summer, some of the leaves on the tomato have started to dry up and wither and are no longer helping to nourish the plant. The plant is less vigorous than it was earlier in the season, so it takes longer for the green tomatoes to ripen. If you've run out of patience with slow ripening tomatoes, one thing you can do to speed up ripening is to remove some of the green tomatoes. Then the tomato plant can put all its energy into ripening the tomatoes that remain on the plant. “Soil temperatures are also important. For optimal growth, tomatoes need soil temperatures that are less than 80 degrees. Hot air temperatures raise the soil temperature. Containers may be particularly vulnerable to soil temperature rise if they sit in the hot afternoon sun. Mulching can help keep soil temperatures lower. Also, if your tomatoes are hit by afternoon sunshine, you might consider erecting some shade barriers to keep the sun off the containers. “If you've run out of patience with slow ripening tomatoes, one thing you can do to speed up ripening is to remove some of the green tomatoes. Then the tomato plant can put all its energy into ripening the tomatoes that remain on the plant. You can ripen the green tomatoes you remove on your kitchen counter. They won't be as yummy as the ones that ripen on the vine, but they're still better than store bought tomatoes.”As a final caution, don't be tempted to fertilize the tomato plant thinking it will speed up production. Fertilizing now will probably just cause the tomato to go into a vegetative growth mode that is too late in the season to be helpful.” Kansas State University chimes in: “Tomato color can also be affected by heat. When temperatures rise above 95 degrees, red pigments don’t form properly, though the orange and yellow pigments do. This results in orange fruit. It doesn’t affect the edibility of the tomato, but often gardeners want that deep, red color back.” The report goes on to state that high heat also will cause poor fruit to set, especially on slicer tomatoes. “Cherry tomatoes seem to be more heat tolerant,” Kansas State Horticulturist Ward Upham said. “But for slicers, high temperatures seem to interfere with pollen viability or can cause excessive style growth, leading to a lack of pollination. Tomatoes that have already formed (before excessive heat) are not affected.” The “style” of a flower is the stem inside the flower that is part of the pistil. This question will not be on the Final. Upham said it takes about three weeks for tomato flowers to develop into fruit that is about the size of a golf ball. After that, growth is usually more rapid over the following three to six weeks, and then just a few more days to change color. “Though there are ‘heat-set’ slicing tomato varieties that will set fruit at higher temperatures, that difference is normally only two to three degrees,” Upham said. “Once cooler temperatures arrive, tomato flowers will resume setting fruit.” Cornell University says not to worry about letting those harvested, not-quite-red tomatoes sit in a dark, cool place indoors: “Light conditions have very little to do with ripening. Tomatoes do not require light to ripen and in fact, fruit exposed to direct sunlight will heat to levels that inhibit pigment synthesis. If temperatures remain high outdoors, these picked fruit will ripen more quickly, perhaps by as much as five days. As far as flavor, the greener fruit should develop flavor and color like what you would get if field ripened. The key is picking them when they are showing the first signs of ripening (no earlier) and keeping them at room temperature. Do not refrigerate, as this will absolutely destroy their flavor. Outside, direct sun can also lead to sunscald of fruit. Because of that, do not remove plant leaves to help ripen the fruit. Also, soil fertility doesn't play much of a role. We do know that high levels of magnesium and low levels of potassium can lead to conditions like blotchy or uneven ripening or yellow shoulder disorder. But the slowness to ripen is not likely due to soil conditions. Adding additional fertilizer will do nothing to quicken ripening.” Remember, too: we have a long tomato growing season here in USDA Zone 9. Fresh garden tomatoes are not uncommon in our area on Thanksgiving; some gardeners here have even reported Christmas tomatoes (yes, they were cherry tomatoes, but you wouldn’t want to see what the plant looks like on Dec. 25). Don’t worry. Be happy! Thanks for reading Beyond Basics: The Garden Basics with Farmer Fred Newsletter! Subscribe for free to receive new posts and support my work. Thank you for also listening to the Garden Basics with Farmer Fred podcast! It’s available wherever you get your podcasts. Please share it with your garden friends. Fred Hoffman is also a University of California Cooperative Extension Master Gardener in Sacramento County. And he likes to ride his bike(s). This is a public episode. If you'd like to discuss this with other subscribers or get access to bonus episodes, visit gardenbasics.substack.com/subscribe
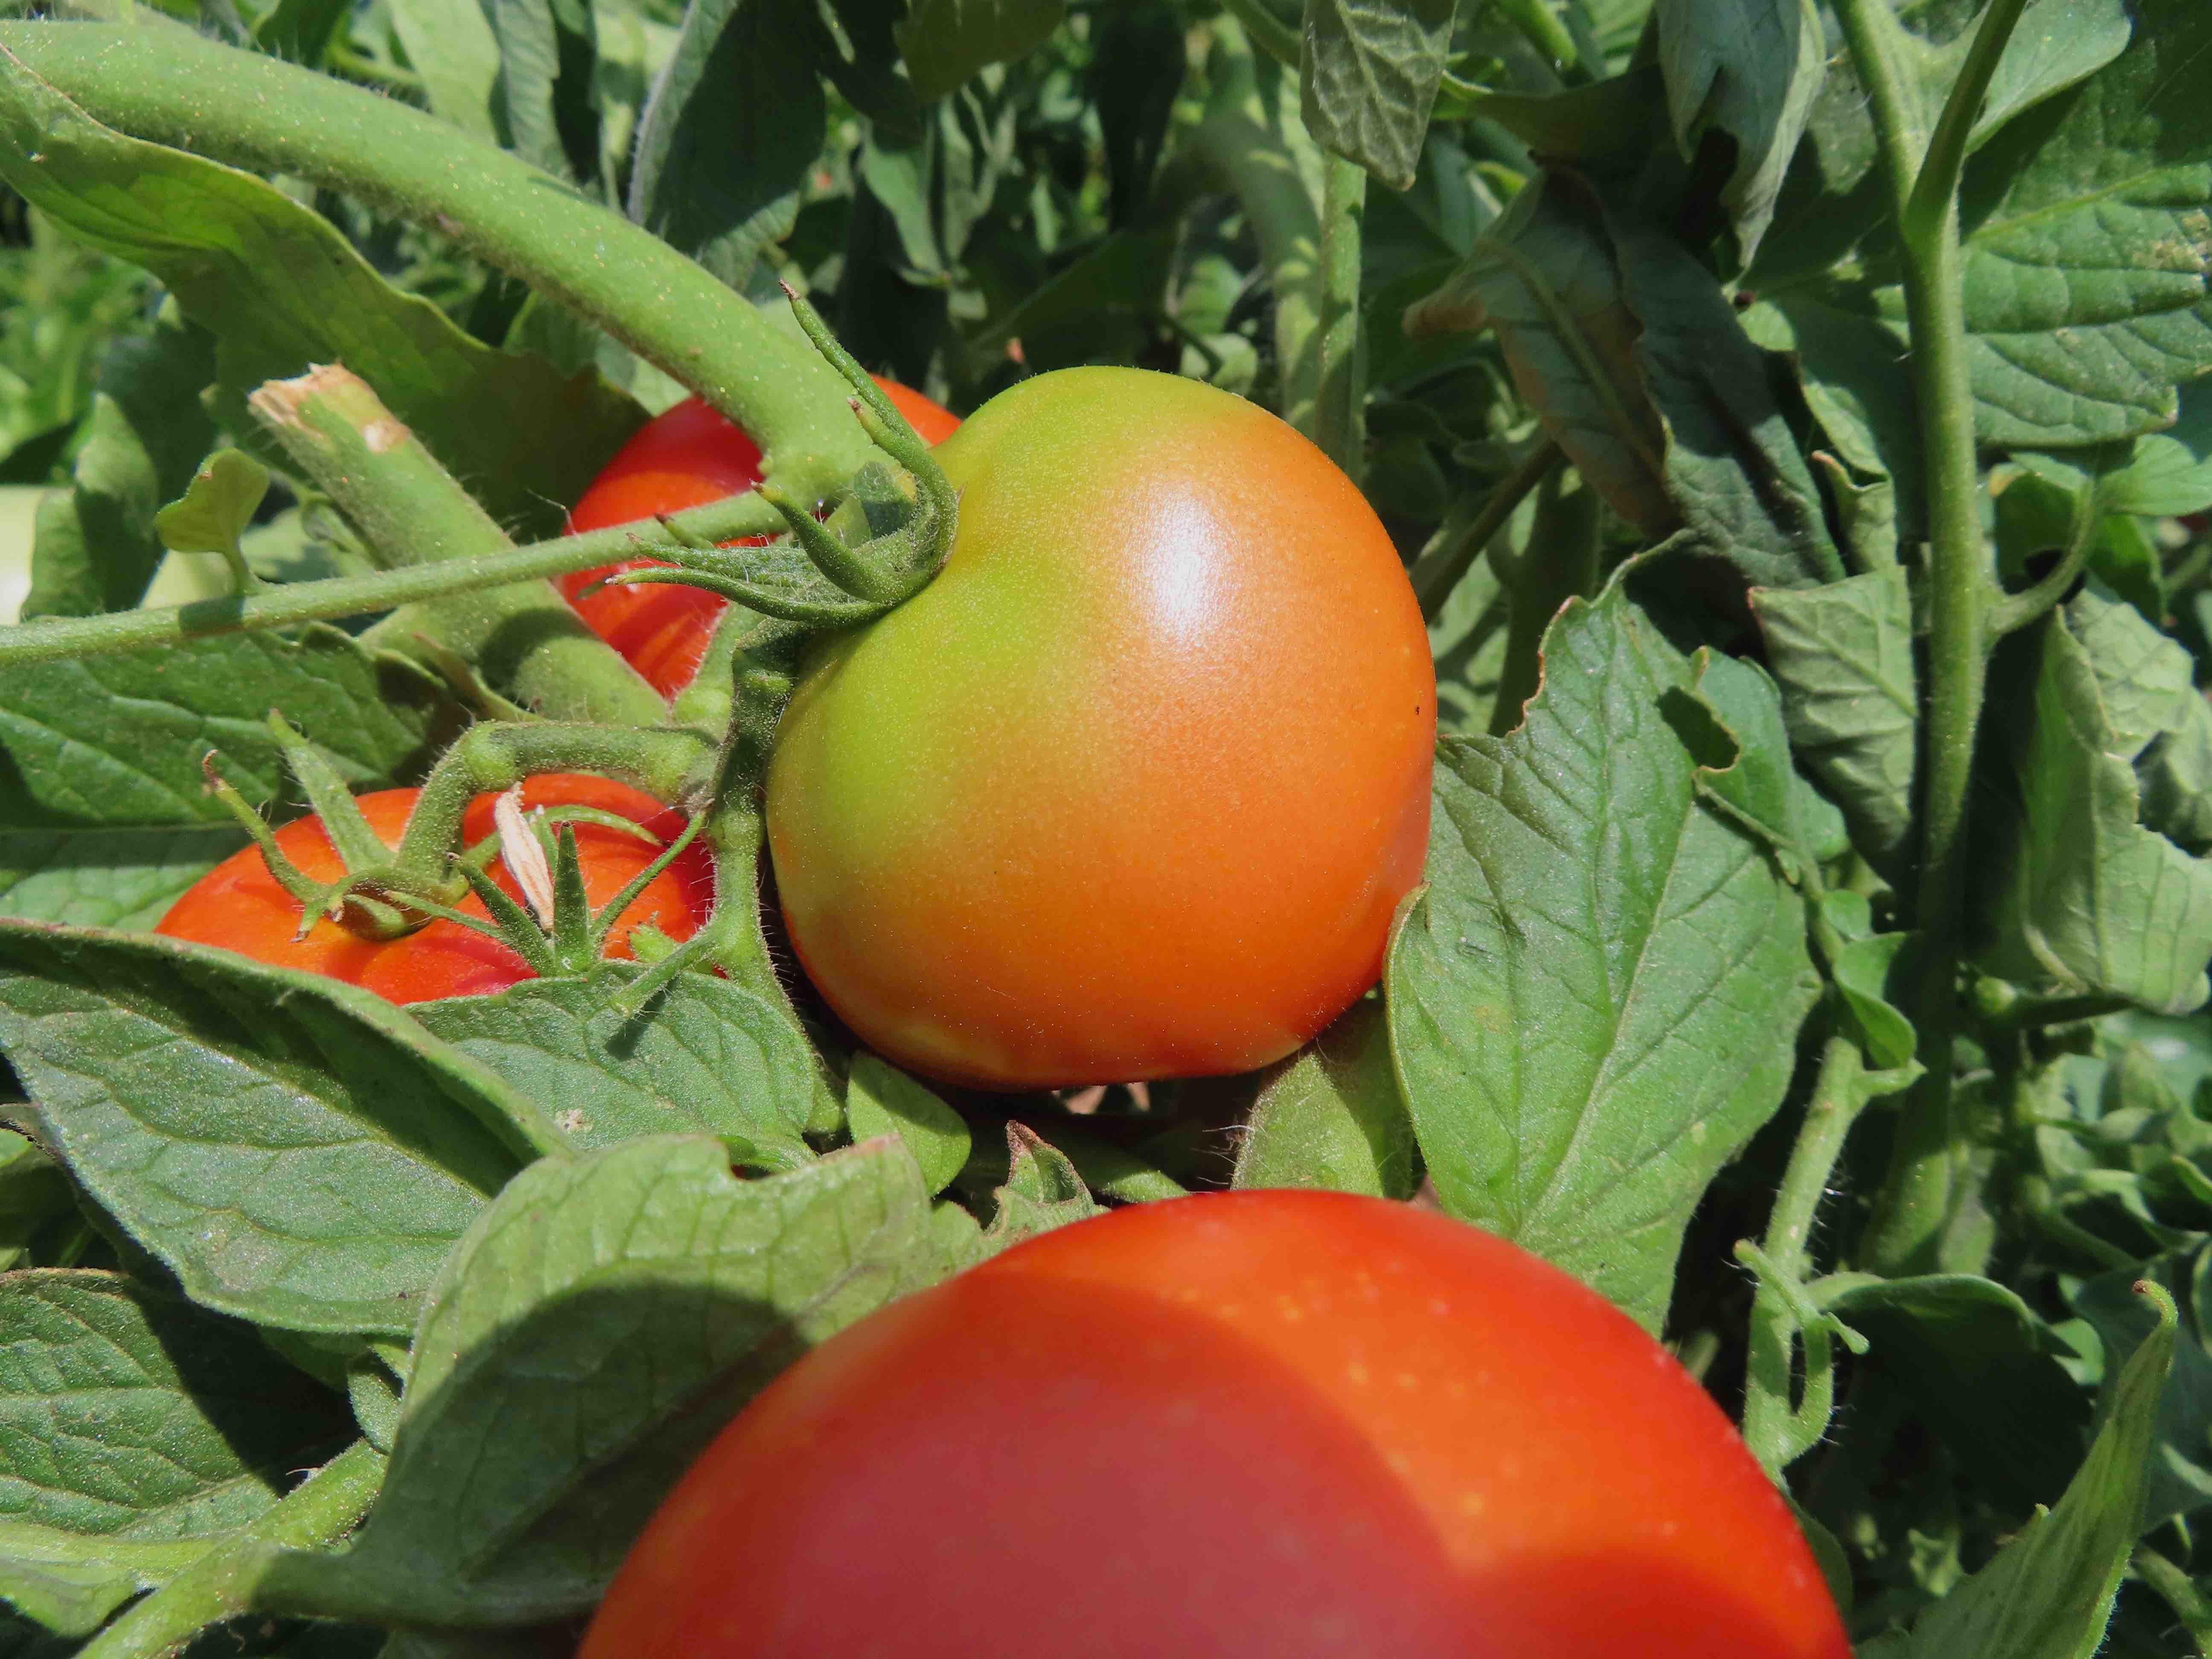
Aug 18, 2023
Japanese Maples vs. the Heat of Summer
If you own a Japanese maple tree, or pass by one on your daily strolls, check the leaves. Are they getting a little brown around the edges? Are the leaves beginning to fall off? Welcome to late August and early September, where the quadruple whammy of triple digit temperatures, hot dry winds, reflected heat from a nearby wall/concrete surface, or irregular watering can make many Japanese maples start to suffer. Note the location of those Japanese maple trees. Are they in full sun more than six or eight hours a day? Is it facing a direction where winds are common in the hot afternoon? Around here, it is primarily west and southwest winds. Although most Japanese maples prefer morning sun and afternoon shade, there are several varieties that can take the full sun. Chris Aycock of El Dorado Nursery and Gardens in Shingle Springs, CA has his favorite Japanese maples for sun or partial sun. “An old standard is the ‘Bloodgood’ Japanese maple,” says Aycock. “It gets about 20 feet tall and wide. If you want something smaller, ‘Fireglow’ is a nice 12 to 15 foot, upright growing variety. If you're looking for a lace-leaf Japanese maple, ‘Orangeola’ is one of my favorites. It's a very fast growing, cascading lace-leaf-style Japanese maple, with orange-red foliage. It’s very tough and very vigorous.” Hear more of Aycock’s comments and tips about Japanese maple trees in today’s newsletter podcast (above). Scott Paris of High Hand Nursery in Loomis, CA says he has found three Japanese maples for sunny areas in Northern California: ‘Seiryu’, ‘Pine Bark’, and ‘Tobiosho’. “The ‘Seiryu’ is amazing,” says Paris. “It is the only upright growing lace-leaf variety. With its beautiful red fall color, it is a showstopper. When stressed in the heat, it is very rare that it flags. Instead, it gets a cinnamon hue.” Paris is also high on the ‘Pine Bark’ Japanese maple. “This has cool-looking leaves, and the bark resembles a pine tree, with stunning red fall color.” One of Paris’ most consistent performers among Japanese maple trees is the ‘Tobiosho’. “It’s a basic green maple in the summer,” Paris explains. “People usually cruise by it and yawn. But no, this maple is a consistent grower with outstanding fall color.” That’s good information if planting a Japanese maple is on your fall to-do list. But for those with suffering Japanese maples right now, here are some do’s and don’ts. • If the leaves on the Japanese maple tree are browning, fight the urge to pull them off. Those browning leaves, while hanging on the tree, can help the tree avoid sunburn to the branches and trunks. • Be careful with watering. Check the soil moisture at a depth of eight or 10 inches before you irrigate. Japanese maples need regular watering, but too much standing water can lead to soil-borne diseases in the root area. • Remove any lawn beneath the tree that is competing for the water. Because turf roots are shallower, they will get first dibs on any water from sprinklers or drip irrigation systems. • Add mulch beneath the tree to help preserve a more consistent soil moisture level. Arborist Anne Fenkner of Davey Tree Company suggests the “4-4-4” rule for mulching beneath trees: “Place wood chips that are four inches deep, starting four inches away from the trunk of the tree, and extend that mulch four feet out all around the tree.” • Aycock seconds that mulching motion, with an added tip: “Mulching is very critical, it helps keep the roots cool. Although we will recommend full sun for quite a few of the varieties, we will tell you to plant it away from the house so there's no reflective heat. You're better to have it out in the open rather than up against a hot wall.” • Don’t fertilize a suffering Japanese maple in the heat of the summer. The best season for a single application of fertilizer for Japanese maples, according to Paris, is spring. “Japanese maple trees are not greedy,” says Paris. “But maples resent quick-release ammonium sources of fertilizer. Apply in early spring and not more than once a year.” All-purpose, slow-release organic fertilizers, usually with nitrogen, phosphorus, and potassium content in the single digits, are widely available. Remember, too, that as the mulch layer around your Japanese maple tree breaks down, it is feeding the soil, too. Thanks for reading Beyond Basics: The Garden Basics with Farmer Fred Newsletter! Subscribe for free to receive new posts and support my work. Thank you for also listening to the Garden Basics with Farmer Fred podcast! It’s available wherever you get your podcasts, including our home page, GardenBasics.net . Please share it with your gardening friends. Fred Hoffman is also a University of California Cooperative Extension Master Gardener in Sacramento County. And he likes to ride his bike(s). This is a public episode. If you'd like to discuss this with other subscribers or get access to bonus episodes, visit gardenbasics.substack.com/subscribe
Aug 11, 2023
More Hot Weather Garden Tips
In today’s Beyond the Garden Basics Newsletter podcast (above), Debbie Flower and I tackle a question from Liz, who asks: “I just purchased from the local nursery, a lavender plant and also a sage. I'm sorry, I don't know the exact name. But they're common. The plants were in pots. Each plant is about one foot tall. I already planted them in the yard early yesterday morning. They were fine all day yesterday. Everything was moist, the soil was prepped. Today is 100 degree weather. They are not looking like they're happy campers. So I'm wondering about these drought tolerant plants. I don't want to overwater them. Is this wilting natural, or should I be doing something else?” We have tips for Liz. Tip #1: Heat Protection for Your Plants Bursts of triple-digit temperatures are occurring across the United States this summer, lasting anywhere from a couple of days in a row, to weeks on end (hello, Phoenix!). However, even for short periods, the combination of too much bright sun, too much heat and not enough water are enough to vex the garden as well as the most experienced gardeners when they encounter sickly-looking plants this time of year. First of all, take care of yourself in the heat. Work early in the morning in the sunny areas, work in the shade in late mornings, then wrap things up for the day (if possible). Wear sun protection and take plenty of water breaks. According to the garden experts at the University of California’s Agriculture and Natural Resources Division, here are four quick and easy ways to help make sure your perennials, shrubs and trees not only survive, but also thrive in the summer heat. • Add mulch, mulch, and more mulch. When temperatures get extreme, having a good layer of mulch prevents soil from heating up excessively and losing water to evaporation. Apply four inches of a medium shredded bark mulch to insulate the soil. This protects the fine roots that plants use to feed from the surrounding soil. Mulch also helps maintain healthy soil ecology with earthworms and other de-composers that promote nutrients and oxygen in soil. Mulch will pay for itself by maintaining more consistent soil moisture so you can water less and have better success with your plants. Be sure to maintain the depth of your mulch to ensure you can benefit from all the services it provides. • Don't fertilize permanent plants during hot summer months. When a fertilizer is applied, especially one that is high in nitrogen, a plant is triggered to produce more green growth. An increase in growth means an increase in water and nutrient needs. During hot spells, it is especially hard to keep up with plant water and nutrient needs as soils dry out quickly and water may not be readily available. Save your plants from stress by stopping fertilizer application when triple digit temperatures are forecast. However, warm season annuals should continue to be fertilized. • Water trees deeply and less frequently. “When watering trees you want to consider the roots below the tree and you want to encourage a network of deep roots. If you are only watering for short periods at a higher frequency, the roots will remain shallow since that is where the tree finds its water supply,” said Janet Hartin, UC ANR environmental horticulture advisor. “Deep roots mean a healthier tree that is less susceptible to disease.” In general, young plants or new transplants require more water than older, more established plants. Clay soils absorb water slowly so watering can take longer but is typically done less frequently. This is a contrast to sandy soils that moisten and drain quickly. Typically, watering sandy soils is done more frequently. • Wait to introduce new shrubs or trees until the fall when the weather is cooler. Because root systems on new plants are smaller and need time to develop, these plants require more water, more frequently. New plants introduced into a landscape during hot summer months have a significantly higher rate of failure. On the other hand, plants will take root more easily when air temperatures are in the 70’s, yet soil temperatures are still warm. Container Plants vs Heat? Smart Pots is a Winner Another tip (self-serving, but true, based on personal experience): Keep the soil from overheating in container plants located in full sun by growing them in Smart Pots, whose porous, yet sturdy fabric structure allows the soil to remain as much as 30 degrees cooler than plants grown in plastic pots; 10-15 degrees cooler than plants grown in fiber or terracotta pots. This is why we like say, “Fall is for gardening!” For more hot weather gardening tips, check out the July 21st edition of this newsletter. Thank you for also listening to the Garden Basics with Farmer Fred podcast! It’s available wherever you get your podcasts. Please share it with your garden friends. Fred Hoffman is also a University of California Cooperative Extension Master Gardener in Sacramento County. And he likes to ride his bike(s). This is a public episode. If you'd like to discuss this with other subscribers or get access to bonus episodes, visit gardenbasics.substack.com/subscribe
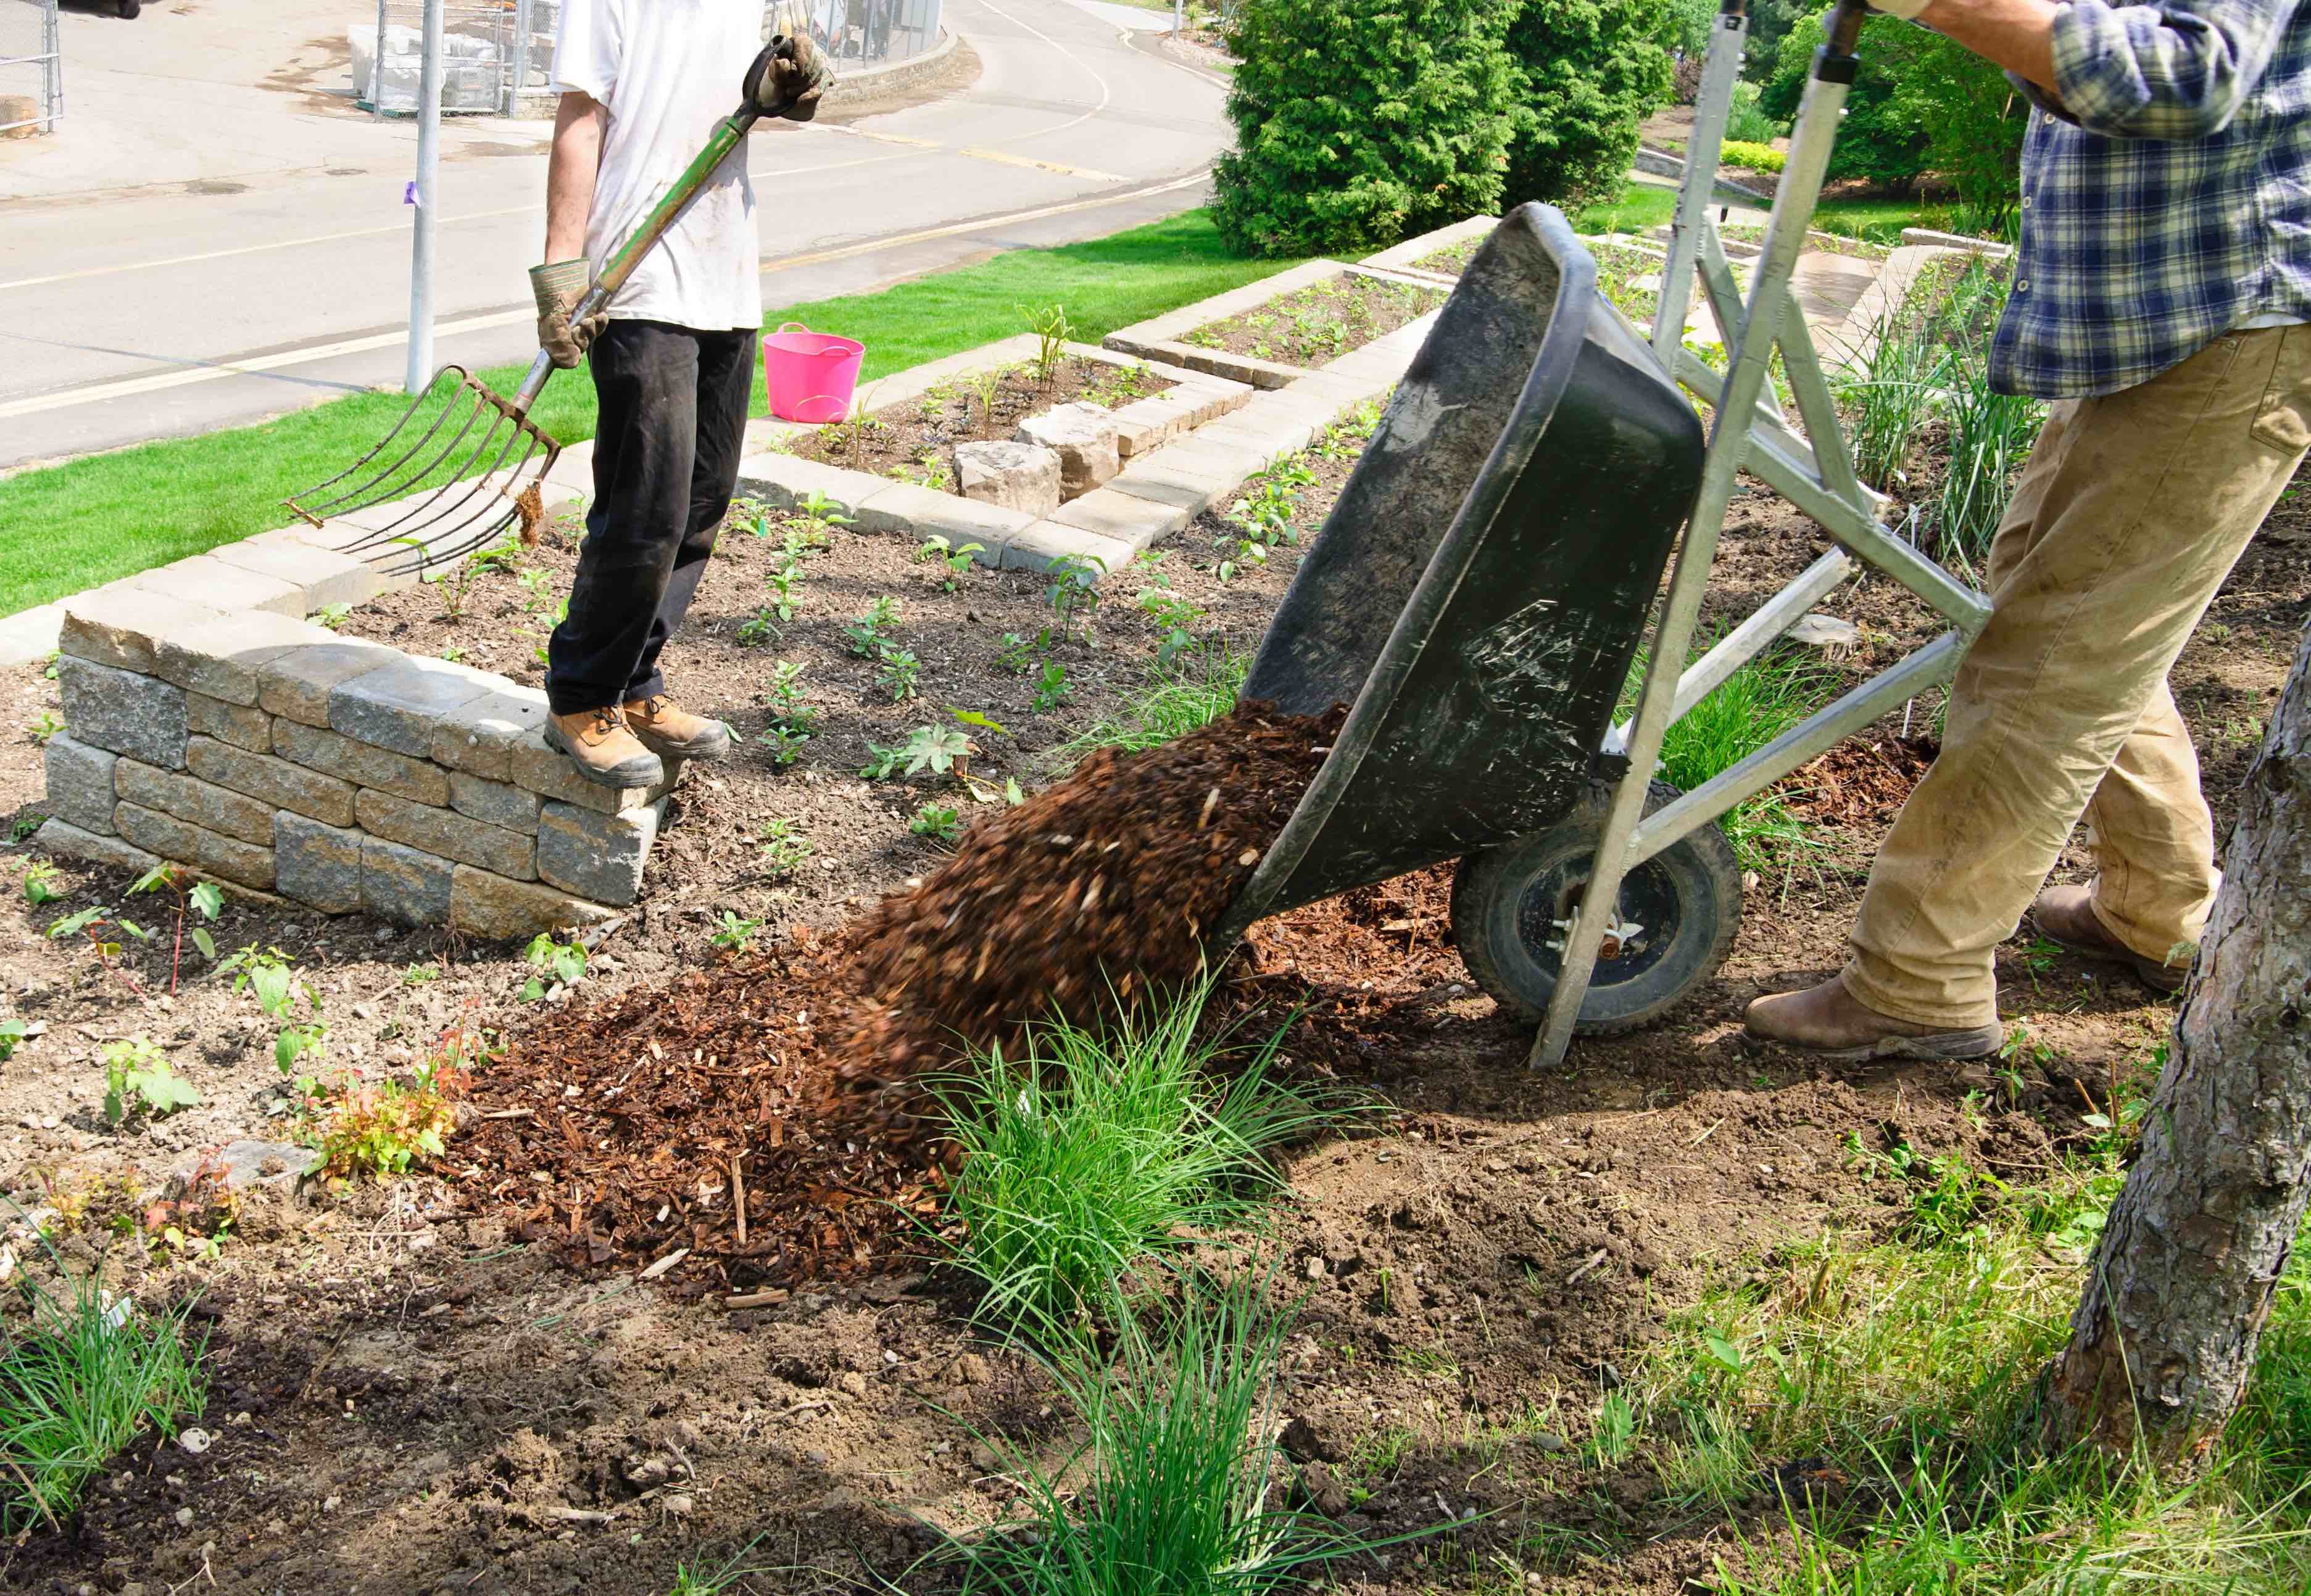
Aug 4, 2023
Late Summer is the Time to Start the Fall Vegetable Garden
In today’s newsletter podcast (above), Don Shor of Redwood Barn Nursery in Davis explains why now is the best time to be planting your vegetables for autumn and winter (in milder areas of the country). For those of you who live in the West, the South, parts of the Midwest and mid-Atlantic states, (USDA Zones 7, 8, and 9) we get down to specifics in this audio episode on the best varieties of vegetables to grow during the cooler months of fall and winter: lettuce, spinach, Swiss chard, cabbage, Chinese cabbage, cilantro, broccoli, cauliflower, beets, snow peas, fava beans, carrots, celery, onions, garlic, parsnips, shallots and turnips.We’ll tell you about some tasty, easy to grow varieties that maybe you’ve never eaten, such as pak choi, black seeded simpson lettuce, Danvers half long carrots, and Romanesco broccoli. What’s that? Give a listen. Fall Vegetable Gardening Basics Do you want your family to eat healthy year-round? The healthiest, freshest foods are the fruits and vegetables you grow yourself. And in many areas of the West and South, the 365-day vegetable garden is easy to achieve. And now, late summer (August and September), is the time to be planting the seeds and transplants for the vegetables your family will enjoy throughout the fall, winter and following spring. Although we are still in mid-summer, this is the time to start your winter vegetable garden here in Northern California, as well as other mild-winter areas around the state and the nation. Most of this planting can be done during the milder months of September and October (along with mid-August for some winter crops). For specific crop planting times for the various areas of California, refer to the UC Master Gardening Vegetable Planting webpage . Designing Your Cool Season Garden Bed The winter garden bed should have many of the same characteristics as the summer garden: a sunny and level location close to the house; a convenient water source; and, soil that drains easily. Because of possible heavy rains in winter, raised beds can solve that drainage problem for homeowners living with clay soil. Mix in other soil amendments, such as compost and manure, to improve crop production in the foggy, wet, cold days that await. For foothill gardeners, a raised bed with wooden sides has an added benefit. Those structures can support a hinged, translucent top, such as glass, polyethelene or fiberglass… an instant cold frame to protect winter vegetables from low temperatures or heavy wind and rain. Starting vegetables in the heat of the summer, especially from seed, requires a consistently moist seedbed until the plants are up and growing. An automatic garden watering system, such as a battery operated timer that attaches to a faucet, can ease that process. Cool Season Vegetable Varieties Here are some of the winter vegetable varieties that do well in Northern California, how much room to leave between the plants in each row, and how much to plant for a family of four (with moderate appetites): Artichokes: A bit of a challenge in the interior valleys. Easy to grow in coastal areas. Plant from roots, not seed. Green Globe; 4 feet apart; 5-10 plants. Broccoli: Green Goliath, Green Duke, Waltham 29; 10 inches apart; 20 foot row. Brussels sprouts: Jade Cross Hybrid; 24 inches apart; 20 foot row. Cabbage: Earliana, Copenhagen Market, Savoy King, Burpee Hybrid; 24 inches apart;15 plants. Cauliflower: Snowcrown, Snowball Y, Purple Head; 24 inches apart; 15 plants. Carrots: Nantes or Danvers half long, Short n' Sweet; 2 inches apart; 25 footrow. Chinese cabbage: Michili, Pak Choi; 6 inches apart; 10 foot row. Garlic: California Late, California Early, Elephant Garlic; 6 inches apart; 20 foot row. Kale: Dwarf Blue Curled Vates, Dwarf Curled Scotch; 10 inches apart; 12 plants. Kohlrabi: Early White Vienna, Sweet Vienna; 3 inches apart; 10 foot row. Loose leaf lettuce : Ruby, Bibb, Salad Bowl, Green Ice; 6 inches apart; 15 foot row. Peas: Mammoth Melting Sugar, Sugar Ann, Sugar Snap. 2 inches apart; 5 foot row. Onions: Stockton Red, Stockton Yellow, Walla Walla, Texas White; 4 inches apart; 20 foot row. Radish: Champion, Watermelon, Crimson Giant, Cherry Belle; 5 inches apart; 20 foot row. Rutabaga: Victoria, Valentine, Strawberry; 3 inches apart; 15 foot row. Spinach: Melody Hybrid, America, Bloomsdale Long Standing; 6 inches apart; 15 foot row. Turnips: Purple Top White Globe, Shogoin (greens); 2 inches apart; 10 foot row. Perennial Vegetables that need a lot of room: Asparagus: Mary Washington, UC72, UC157, 500w; 12 inches apart; 20 foot row. Rhubarb: Victoria, German Wine, Crimson Cherry; 2 feet apart ; 20 foot row. “It’s the Best Garden Event in Northern California!” (I said that) Harvest Day at the Fair Oaks Horticulture Center Saturday, August 5, 8am-2pm. Free! Debbie Flower and I will be talking about “Garden Tips to Save Time, Money and Water” at Harvest Day at 830 am. The Fair Oaks Horticulture Center is located at 11549 Fair Oaks Blvd, in Fair Oaks Park, Sacramento County, California. Hope to see you there! More details here. Presented by the U.C. Master Gardeners of Sacramento County. Thank you for also listening to the Garden Basics with Farmer Fred podcast! It’s available wherever you get your podcasts. Please share it with your garden friends. Fred Hoffman is also a University of California Cooperative Extension Master Gardener in Sacramento County. And he likes to ride his bike. This is a public episode. If you'd like to discuss this with other subscribers or get access to bonus episodes, visit gardenbasics.substack.com/subscribe
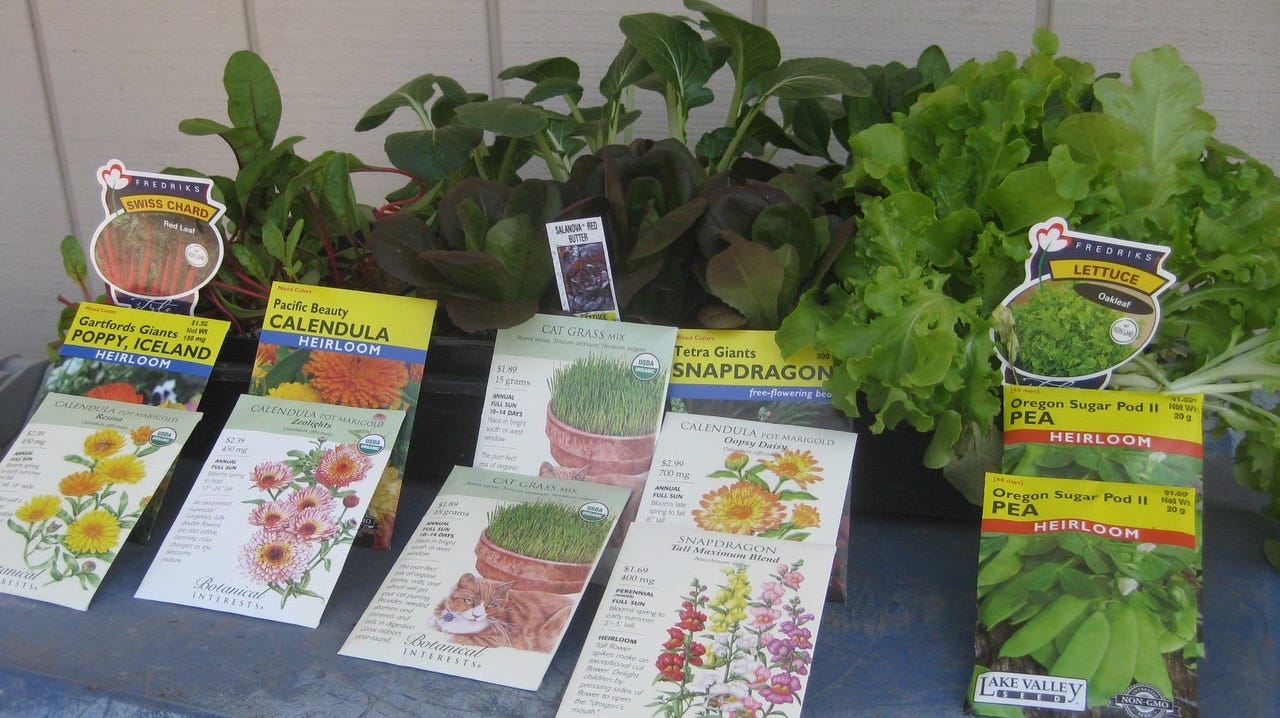
Jul 28, 2023
Jalapenogate
In today’s newsletter podcast, Debbie Arrington of the publication, “Sacramento Digs Gardening”, discusses why jalapeño pepper as well as other pepper seeds and plants may have been mismarked this year. Read her original story on the topic here. Did you ever grow a plant that wasn’t what you thought it would be, due to a mismarked tag or a seed packet that was incorrectly packed? It happens every year, with varieties of annual or perennial ornamentals that do not produce the exact color flower that was promised, or a vegetable variety that looks and tastes slightly different. Or, it could be the home gardener who saves seeds and grows them out in the following years. In that case, “home operator error” could be to blame, due to a mixup while sorting personal collections of harvested seeds, or attempting to save certain hybrid seeds that have a high probability of producing something different in the subsequent growing seasons. Or, it could have resulted from a surprise in the mail after placing a seed order, especially in a marketplace such as Amazon, Etsy or another vendor that you know very little about. A few years ago, I was on the hunt for a particular gaillardia, also known as blanketflower. The particular variety I was searching for was “Arizona Apricot”. This red-yellow colorful perennial (or annual, in colder climates) puts on its best show of daisy-like flowers in the summer. I finally found a source for this particular seed via Amazon. Imagine my surprise when the seed arrived, in a nondescript small plastic bag, labeled “Gaillardia seed from Qatar.” Qatar? What the heck, let’s try it. When it blossomed the next summer, it was not “Arizona Apricot.” Oh well, an inexpensive mistake on my part, shopping in a lightly regulated, on-line marketplace. But imagine this scenario playing out on a much larger scale: an American seed distributor who purchases seeds overseas for their clients here, which include home gardeners, wholesale and retail nurseries, as well as farmers growing particular varieties for restaurants and canneries. That is the current situation in the world of Jalapeño peppers - as well as a myriad of other vegetable and ornamental seeds - where seeds grown overseas (in this case, some suspect China) were mixed up before shipment. And it’s only after the plants grown from those seeds started fruiting that the alarm bells went off. Right now, there appears to be five mislabeled pepper plants - hot as well as sweet - that have ticked off home gardeners in 14 states (or more, by now) and sent larger shockwaves among those in the business of buying, selling and growing those pepper seeds. John Porter is a University of Nebraska Cooperative Extension Urban Agriculture specialist who wrote about this brouhaha from a Midwest perspective for the Garden Professors website. His research brought out this information: Getting a sweet banana pepper instead of a Jalapeño ‘Tam’, for the home gardener, is a disappointment. But for the home gardener growing sweet bell peppers, to have a “Purple Beauty” pepper turn out to be a Hungarian Hot Wax pepper could instigate a mad dash to the kitchen for a glass of burn-soothing whole milk (Pro tip: whole milk or ice cream douses the heat after eating a too-hot pepper; drinking water spreads the heat). But, then again, a gardener with any sort of wariness to hot peppers should not be taste-testing an elongated yellow pepper when they were expecting a blocky purple bell pepper. For your future reference at pepper tasting parties: It’s a Small World, After All As you might imagine, American growers are concerned about the future for seed mixups. Was this a one-off event, or will we see more of this in the years ahead? Michael Fiore of Smith’s Gardentown nursery in Wichita Falls, Texas is worried, and has some practical advice: save your own seed. Seed Security: It’s a Real Problem in China The Wall Street Journal, in a July 24, 2023 story, brought up an interesting angle to JalapeñoGate, without mentioning it: Corruption in the Chinese Seed Trading Business . The article states: “(Chinese) Officials say the goal is to stop the proliferation of fake and substandard seeds that could jeopardize food production and safety, while punishing officials, merchants and farmers who siphon agricultural subsidies and peddle low-grade seeds. The Farmers’ Daily newspaper cited a case where a seed company paid more than 80 local officials to sell substandard seeds across nearly 30 villages in the southwestern province of Sichuan, causing ‘severe losses for farmers’ who found that the seeds germinated at a rate far below state benchmarks.” Bottom Line: Learn the basics about seed saving . “It’s the Best Garden Event in Northern California!” (I said that) Harvest Day at the Fair Oaks Horticulture Center Saturday, August 5, 8am-2pm. Free! Debbie Flower and I will be talking about “Garden Tips to Save Time, Money and Water” at Harvest Day at 830 am. The Fair Oaks Horticulture Center is located at 11549 Fair Oaks Blvd, in Fair Oaks Park, Sacramento County, California. Hope to see you there! More details here. Presented by the U.C. Master Gardeners of Sacramento County. Thank you for also listening to the Garden Basics with Farmer Fred podcast! It’s available wherever you get your podcasts. Please share it with your garden friends. Fred Hoffman is also a University of California Cooperative Extension Master Gardener in Sacramento County. And he likes to ride his bike. This is a public episode. If you'd like to discuss this with other subscribers or get access to bonus episodes, visit gardenbasics.substack.com/subscribe
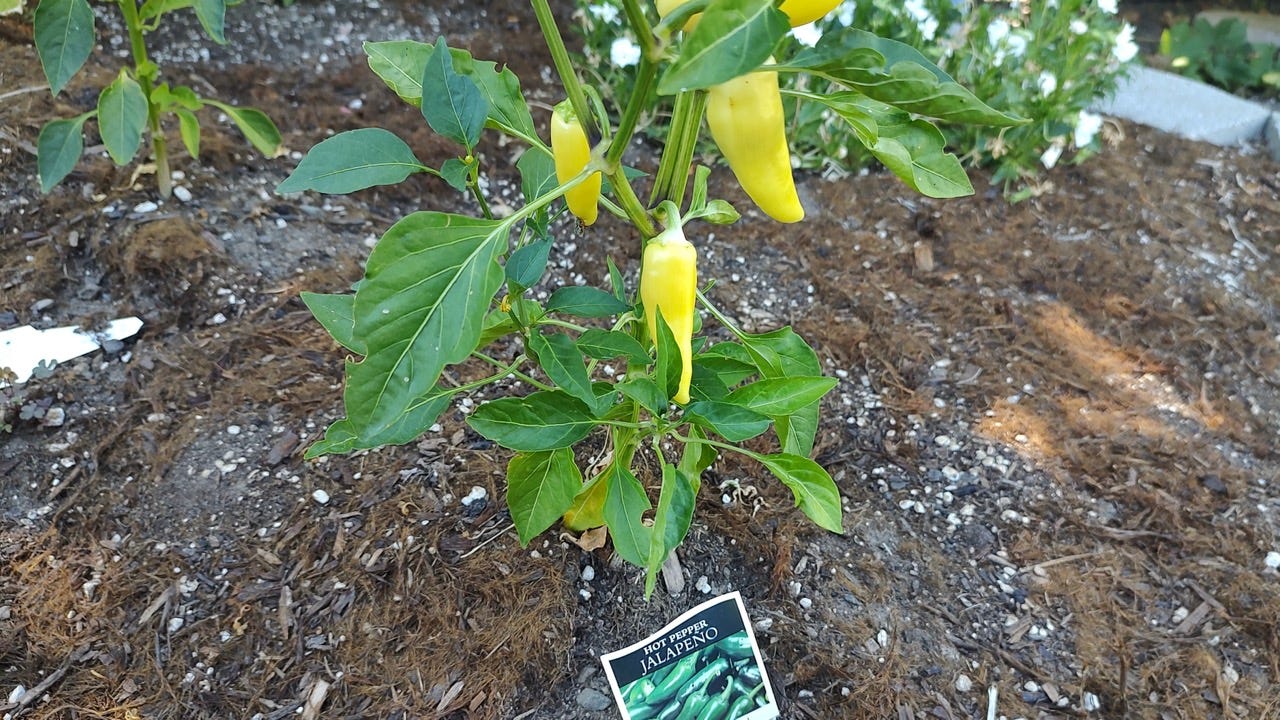
Jul 21, 2023
Drooping Leaves vs Heatwaves
Record-breaking heat waves have pummeled the world, especially during the last two years. What’s a gardener to do? In today’s newsletter podcast (above), Master Gardener Quentyn Young walks us through the fruit tree orchard at the Fair Oaks Horticulture Center, discussing how a record heat wave adversely effected the trees and the fruit. Plus, he has tips for dealing with extended heat waves in the home orchard. Heatwaves vs. Drooping Leaves Here we go again. Another multi-day bout of triple digit temperatures hit us last weekend and beyond. I’m just guessing that SOMEWHERE in the northern hemisphere of planet Earth, this will be the case for the balance of the summer, possibly into early Fall. What should a gardener do if the plants in your outdoor vegetable and flower gardens start showing droopy leaves when the temperature tops 100 degrees? Or, as the National Weather Service warned , 110 degrees? There are two schools of thought about what you should do. One school says plants naturally conserve moisture on a hot afternoon by allowing their leaves to sag; wait until the morning before determining if the plant needs water. According to the University of Maryland : “Sometimes a plant wilts on a hot day because moisture is evaporating from the leaves faster than the roots can take it up. If there is ample soil moisture, the plant will absorb water in the evening to restore turgor to the stems and leaves.” They also point out that hot, drying winds can also cause temporary wilting even when soil moisture is adequate. The other school says : Don't believe that first school. "Large, thin leaves, common in many ornamental, annual and vegetable species, do not conserve water," writes Washington State University Horticulture Professor Linda Chalker-Scott. "Tomatoes, zucchini and black-eyed Susans...are not water conservers. Chronic wilting of these and others can eventually cause leaf tip and margin necrosis (or tissue death). It also reduces growth, so that your yield of tomatoes, zucchini and black-eyed Susan flowers will be decreased." She advises applying a layer of mulch around those plants to help conserve water. However, be forewarned: drooping leaves can also indicate a lack of oxygen in the soil due to too much standing water. Using a moisture meter, plunge it into the soil to a depth of eight to 12 inches. That can help determine whether the suffering plant might benefit from a drink of water or that there is too much water present in the soil. Check the moisture in the root zone before your usual watering, as well. Improper watering is the number one cause of plant failure. The U.C. Master Gardeners of Marin County offer some tips to relieve heat stress on plants during extreme weather events: • Water thoroughly in the morning on days when high temperatures are expected, to help plants cope with excess heat. If discovered in time during a heat wave, a drooping, wilted plant can often be revived with additional water. • Watch for radiant heat - Pay special attention to plants next to walkways, patios, and other structures that radiate heat. They may be the first to show signs of heat stress and the need for extra water. • Add mulch - Apply two to four inches of organic mulch over the root areas around garden plants, trees, and shrubs. This will lower soil temperature and diminish moisture loss. • Provide shade - Use shade cloth to provide direct sun protection and reduce the air temperature around sun and heat-exposed plants. • Avoid applying fertilizers during extreme heat as they stimulate growth and add to plant stress. Fertilizers also absorb moisture from the root zone. • Harvest ripening fruit to give plants a break during hot spells. Fruiting plants will drop flowers during periods of extreme heat to conserve energy. And a few more pieces of advice from the University of Maryland : • Severe heat and water stress when a plant is in bloom may cause scorching or browning of flower buds and blossoms. • Locate garden close to a water source. Be prepared to water all vegetable plants deeply at least once each week during hot, dry weather. • Conversely, vegetable plant roots growing in poorly drained soils can quickly become deprived of needed oxygen leading to wilting and yellowing and browning of leaves and stems. This will be most noticeable on tight, clayey soils during prolonged rainy periods and can lead to severe disease problems. Avoid poorly drained soils. Plant in raised beds if necessary. “It’s the Best Garden Event in Northern California!” (I said that) Harvest Day at the Fair Oaks Horticulture Center Saturday, August 5, 8am-2pm. Free! Debbie Flower and I will be talking about “Garden Tips to Save Time, Money and Water” at Harvest Day at 830 am. The Fair Oaks Horticulture Center is located at 11549 Fair Oaks Blvd, in Fair Oaks Park, Sacramento County, California. Hope to see you there! More details here. Presented by the U.C. Master Gardeners of Sacramento County. Thank you for also listening to the Garden Basics with Farmer Fred podcast! It’s available wherever you get your podcasts. Please share it with your garden friends. Fred Hoffman is also a University of California Cooperative Extension Master Gardener in Sacramento County. And he likes to ride his bike. This is a public episode. If you'd like to discuss this with other subscribers or get access to bonus episodes, visit gardenbasics.substack.com/subscribe
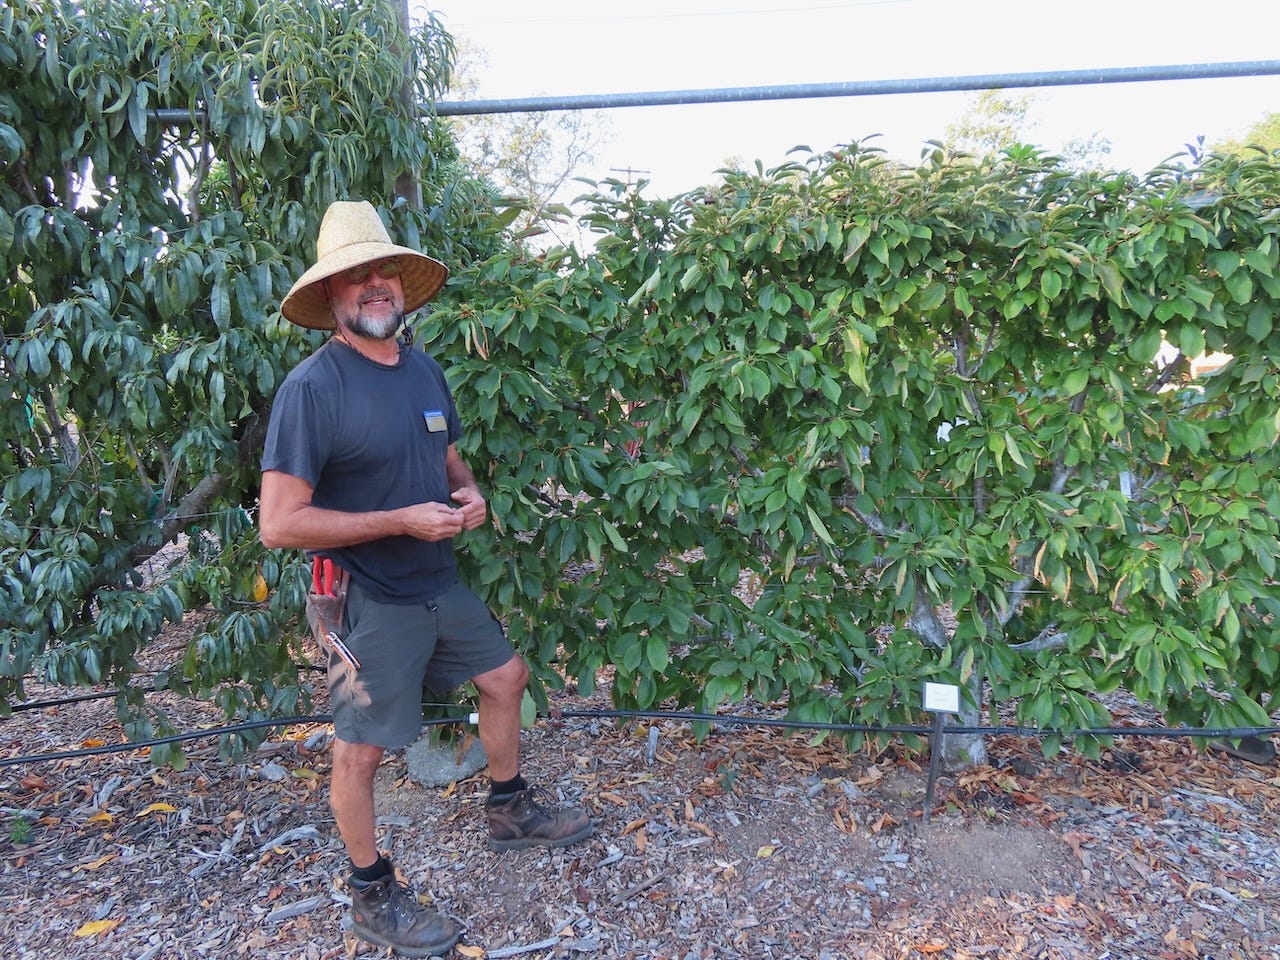
Jul 14, 2023
Is Your Fertilizer Radioactive?
Phosphorus, in the world of plant fertilizers, is considered a macronutrient, an important element used by plants. Phosphorus is used to promote root and tuber growth, as well as the production of flowers and seeds. But, do you really need to add it every time you fertilize? And why have 13 states - as well as several municipalities - placed restrictions on the use of phosphorus? Phosphorus is the “P” in “N-P-K”, the percentage of macronutrients found listed on the front of a container of fertilizer. But how much phosphorus do your plants need for sufficient growth? Apparently, not as much as Calcium or Magnesium, according to this chart presented as evidence by the University of Wisconsin . Should phosphorus be getting as much credit as Nitrogen or Potassium, every time you look at a bag of fertilizer? Garden author Robert Kourik (“ Sustainable Food Gardens ”) points out that not only is Phosphorus over applied by gardeners, it may not be organic, and it is certainly detrimental to the health of aquatic life when it is allowed to runoff into local streams. And speaking of detrimental, in today’s newsletter podcast (above), Kourik talks about the time he took a bag of phosphorus fertilizer to the local radiation analyst. Things started clicking! He has video, too: According to the Chicago Botanic Garden , when too much phosphorus is applied or is applied at the wrong time—such as right before it rains—most of it is washed away and ends up in the local waterways. This type of pollution is called nonpoint source pollution. It causes eutrophication (a reduction of dissolved oxygen in water bodies caused by an increase of minerals and organic nutrients) of rivers and lakes. This reduced level of oxygen in water ends up suffocating fish. Several municipalities have banned the use of phosphorus-containing fertilizers for turf or lawn areas. These laws are designed to protect local water quality in lakes, streams, and ponds. According to several experts, in most cases, phosphorus is not needed to maintain a healthy lawn. Retailers near towns that have enacted a ban are required to alert customers about the prohibition of phosphorus in fertilizers for lawn and turf by posting a sign where fertilizers are sold. At least 11 states ban phosphorus fertilizer use or sale: Illinois, Maine, Maryland, Michigan, Minnesota, New Jersey, New York, Vermont, Virginia, Washington, and Wisconsin. More are joining that group, including Pennsylvania and Florida, as well as several cities and counties, especially those that border large bodies of water. But it isn’t just lawns. Phosphorus, as well as nitrogen, are facing restrictions in all fertilizers offered for sale there. Consider these controversial restrictions that are in Brevard County Florida: “Spring is a popular time to fertilize the lawn, but did you know there are wrong ways to fertilize plants? Are you aware that a fertilizer ban goes into effect on June 1? Follow these fertilizer ordinances throughout Brevard County which state: * No nitrogen or phosphorus can be applied to any plants between June 1 and Sept. 30. * When applying a fertilizer with nitrogen, it must contain a minimum of 50% slow-release nitrogen and must be applied at a maximum rate of 1 pound of nitrogen per 1,000 square feet per application. * Phosphorus can only be applied if a soil test indicates it is needed. * When applying phosphorus, a maximum of .25 pounds per 1,000 square feet can be applied at one time, with a maximum of .5 pounds per 1,000 square feet applied yearly. * Do not fertilize if heavy rain is forecast. * A 10-foot fertilizer-free zone next to water bodies must be maintained in Cape Canaveral, Cocoa, Indian Harbor Beach, Malabar, Palm Bay and Satellite Beach. Residents living in unincorporated Brevard County, Melbourne, and Melbourne Beach must maintain a 15-foot fertilizer-free zone along water bodies. The City of Rockledge has a fertilizer-free zone east of Rockledge Drive. All other municipalities not mentioned have a 25-foot fertilizer-free zone along the IRL, Banana River and any other water body. * Keep fertilizer and grass clippings on the lawn and off sidewalks, driveways, roads and out of storm drains and water bodies.” Is Phosphorus Radioactive? According to the EPA, The United States mines and consumes about 23 million tons of phosphate rock per year, most of it (95%) for wet-process phosphoric acid or super phosphoric acid intended for fertilizers, with the balance used to produce phosphorus compounds for industrial applications, primarily glyphosate herbicide. The most important use of phosphate rock is in the production of phosphate fertilizers. Due to its chemical properties, phosphate rock may contain significant quantities of naturally occurring radioactive materials (NORM): * Uranium * Thorium * Radium * Their decay products Uranium concentrations in phosphate ores found in the U.S. range from 20 - 300 parts per million (ppm). Thorium occurs at essentially background levels, between 1 - 5 ppm. Before phosphate ore is turned into fertilizer or other products, it is transformed into either phosphoric acid (through a wet process), or elemental phosphorus (through a thermal process). This processing concentrates NORM in the waste products, transforming them into Technologically Enhanced Naturally Occurring Radioactive Materials (TENORM) . Bottom Line: Get a Soil Test Done Before Applying Any Fertilizers Why waste your money and possibly degrade the environment if you don’t need certain soil nutrients? Home test kits are available widely for testing N-P-K content of soils. For a more complete soil test, check with your local county Ag agency or Cooperative Extension Office and see if they offer testing at a reasonable price. At least three Universities do offer soil testing services for home gardeners, including: University of Massachusetts/Amherst , Texas A&M , and Colorado State . Kourik also recommends Harmony Farm Supply in Sonoma County, CA for soil testing services. All of Robert Kourik’s garden-related publications can be found at his website, RobertKourik.com “It’s the Best Garden Event in Northern California!” (I said that) Harvest Day at the Fair Oaks Horticulture Center Saturday, August 5, 8am-2pm. Free! Debbie Flower and I will be talking about “Garden Tips to Save Time, Money and Water” at Harvest Day at 830 am. The Fair Oaks Horticulture Center is located at 11549 Fair Oaks Blvd, in Fair Oaks Park, Sacramento County, California. Hope to see you there! More details here. Presented by the U.C. Master Gardeners of Sacramento County. Thank you for also listening to the Garden Basics with Farmer Fred podcast! It’s available wherever you get your podcasts. Please share it with your garden friends. Fred Hoffman is also a University of California Cooperative Extension Master Gardener in Sacramento County. And he likes to ride his bike. This is a public episode. If you'd like to discuss this with other subscribers or get access to bonus episodes, visit gardenbasics.substack.com/subscribe
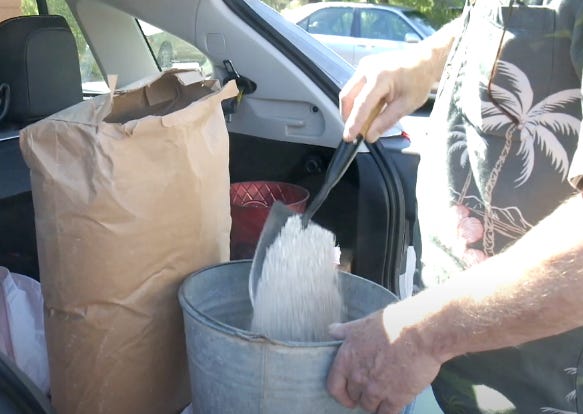
Jul 10, 2023
Six Common Tomato Problems
For those of you who did not receive last Friday’s Beyond the Garden Basics newsletter, here it is. My apologies. I will send the gremlins to bed without dinner. In today’s newsletter podcast (above), we chat with Don Shor of Redwood Barn Nursery in Davis, CA. Don is a big fan of growing tomatoes, and it helps that his nursery is located in a county that just so happens to be one of the top tomato producing regions in the entire world. In this conversation about tomato troubles (originally aired in June of 2020 on the Garden Basics with Farmer Fred podcast ), Don talks about many of the tomato travails we discuss in today’s newsletter, along with a few more. Alas, we did not get into many tomato issues (especially diseases) that might be daily occurrences in more humid climates, nor did we discuss everybody’s summertime garden pal, the tomato hornworm . We’re saving that for a future newsletter. The tomato, according to the National Gardening Association, is America’s favorite backyard vegetable. 86% of American gardens contain at least one tomato plant. Nothing beats the flavor and aroma of a homegrown tomato in the summer. However, with that pleasure, comes a bit of pain. Now is the time when several tomato problems can crop up, leaving gardeners fretting about the future of their plants. “Why are the tomato blossoms falling off?” Tomato growers’ primary concern during the plant’s young growing stage is centered around, “Why are the tomato blossoms falling off?” According to the tomato experts at UC Davis, blossom drop is usually weather related. Nighttime temperatures below 55 or daytime temperatures above 90 degrees can cause premature blossom failure on tomato plants. Planting tomatoes too early in the spring is stressful for the plants. Late April through early June is good for planting most tomato varieties here. Other causes of tomato blossom failure and fruit drop include planting tomatoes where there is too much shade or using too much nitrogen fertilizer. Be sure to read and follow all label directions on a fertilizer intended for tomatoes and vegetables. Thinking of using a tomato hormone spray to help the plant maintain its blossoms? The tomato experts at UC Davis say that won’t work when temperatures are forecast to be in the 90’s or above. Abiotic Disorders of Tomato Plants According to the University of California Statewide Master Gardener Program, five of the most common tomato maladies are abiotic disorders. “Abiotic” does not refer to pests or diseases, but to environmental issues, such as unfavorable soil conditions, temperature extremes, physical or chemical injuries, and watering issues – either too much or too little, and, of course, “operator error.” The abiotic problems of tomatoes include: • Sunburn Sunburn or sun scald is recognizable by a light brown or leathery-looking area on the sides of tomatoes that are getting hit by direct sun. Too much sunlight on tomatoes can be controlled by not pruning away leaf cover; maintaining plant vigor to produce adequate leaf cover; or, providing partial shade with a light-colored shade cloth or row cover during the hours of most intense sunlight. • Blossom End Rot This looks like sunburn, except it's the bottom of the tomato that becomes brown. Generally, it is a calcium deficiency brought on by fluctuating soil moisture or soils with too much salt. Maintain even soil moisture; amend the planting area with compost to improve water retention; avoid heavy applications of high-nitrogen fertilizer; and, if a soil test determines the area is lacking calcium, adding gypsum to the soil at the end of the season. • Fruit Cracks (Catfacing) Cat Facing refers to the circular concentric cracks around the stem end. Cracks that radiate outward from the stem, or malformation and cracking at the blossom end is also called fruit cracking. This happens when blossoming and fruit formation begins during hot weather as well as high soil moisture levels. Most gardeners just live with these conditions, knowing they can just cut away the damaged looking area and still have a tasty tomato. To help limit future outbreaks, keep the soil evenly moist; maintain leaf cover; give the plants some partial shade during hours of most intense sunlight; and add mulch, about three to seven inches high, around the plant, to maintain soil moisture and moderate temperature swings. • Solar Yellowing and Green Shoulders Noticeable by a yellow or yellow-orange color. Also, the upper portions of the tomato remain green even though the lower portion looks red and ripe. Caused by high temperatures and high light intensity, the solution - once again – is to maintain adequate plant vigor to encourage more leaf cover, avoid over-pruning, and provide partial shade during the hours of the most intense sunlight. • Leaf Roll The older tomato leaves may roll upward and inward suddenly and become stiff to the touch, brittle and leathery. Caused by high light intensity and high soil moisture, particularly when the tomato plants are staked and heavily pruned. Some tomato varieties are just more naturally susceptible to this problem. Maintaining even soil moisture and providing shade during hours of intense sunlight can help limit leaf roll. However, there are other, more sinister causes of tomato leaf roll, including herbicide drift damage, mites, viruses, and compost tainted with herbicides. For more about that, read the Texas A&M Agrilife report, “Why are my tomato leaves curling ?” “It’s the Best Garden Event in Northern California!” (I said that) Harvest Day at the Fair Oaks Horticulture Center Saturday, August 5, 8am-2pm. Free! Debbie Flower and I will be talking about “Garden Tips to Save Time, Money and Water” at Harvest Day at 830 am. The Fair Oaks Horticulture Center is located at 11549 Fair Oaks Blvd, in Fair Oaks Park, Sacramento County, California. Hope to see you there! More details here. Presented by the U.C. Master Gardeners of Sacramento County. Thank you for also listening to the Garden Basics with Farmer Fred podcast! It’s available wherever you get your podcasts. Please share it with your garden friends. Fred Hoffman is also a University of California Cooperative Extension Master Gardener in Sacramento County. And he likes to ride his bike. This is a public episode. If you'd like to discuss this with other subscribers or get access to bonus episodes, visit gardenbasics.substack.com/subscribe
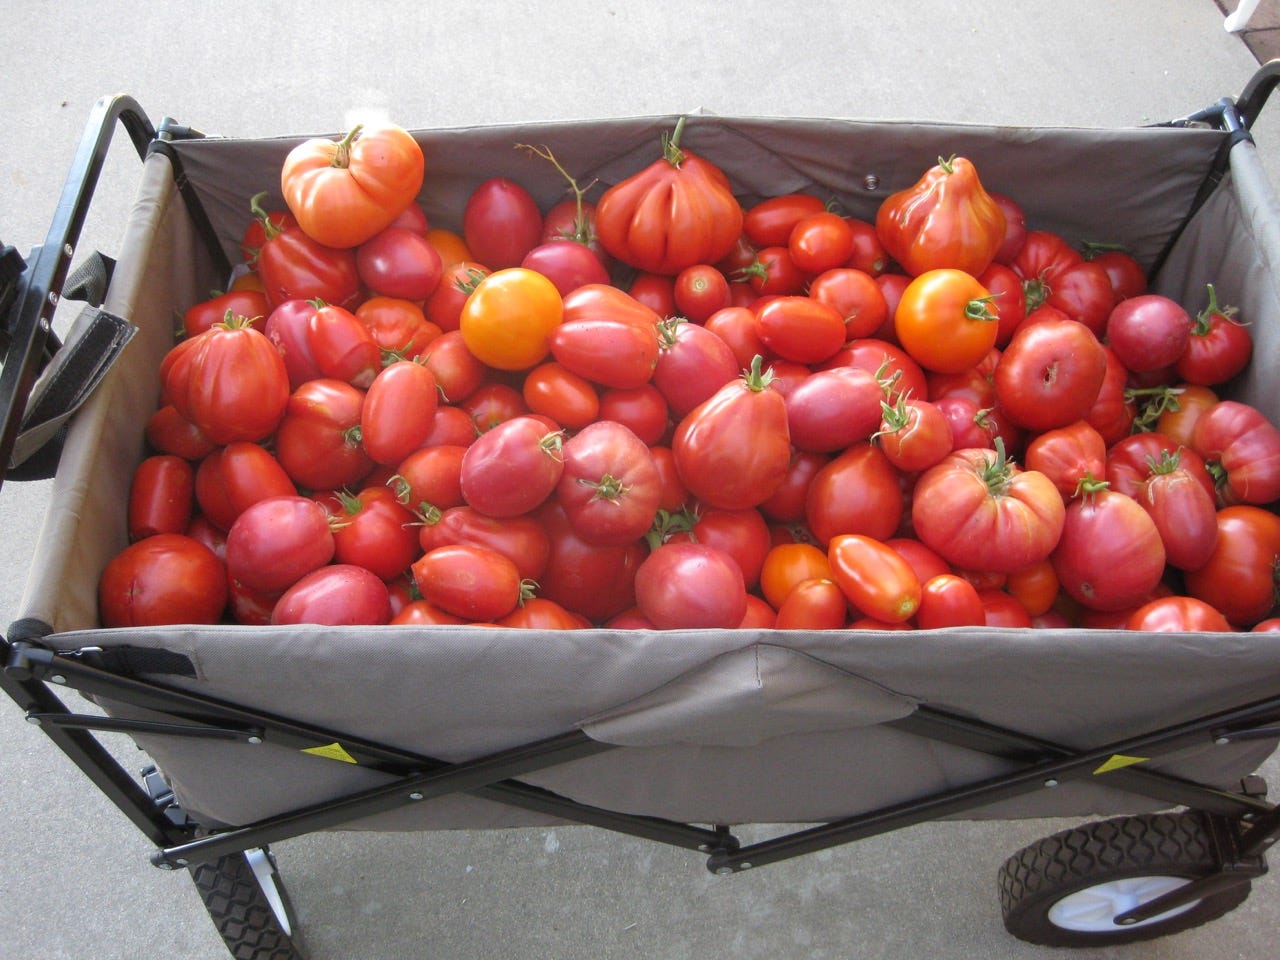
Jun 30, 2023
Selecting and Caring For Garden Hand Tools
Trying to decipher the basics on how to sharp garden hand tools can be a bit daunting to understand in an audio format. Here’s Sacramento County Master Gardener Bill Black, with his YouTube video about garden tool sharpening. Every picture tells a story, don’t it? How to Care and Store Your Garden Hand Tools As the weather heats up, don’t ignore your garden tools after a hard day in the yard. A good habit to get into is to clean and store your garden tools correctly before you go indoors for the afternoon. We know that cleaning the mud and dirt off shovels, trowels and other digging tools can help prevent rust. Did you know that how you store your garden tools might also lead to rust? On the Garden Basics podcast ( Episode 165, “Garden Tool Care ”), retired college horticulture professor Debbie Flower explained how that could happen. “On a garage surface, for example, moisture can move up through a concrete floor, if it's just a pad on the ground,” Flower said. “And that can cause the tips of a shovel to rust.” The cure for that? Hang the tools or store them upside down, she says. “Use wall hooks to hang the tools,” says Flower. “Or you can make tool storage dividers in which the tool sits on the ground, but it's the handle that touches the ground, not the metal blade.” And the wise gardener can help ensure that their garden tools can last a lifetime by first purchasing well-made tools. San Joaquin County Master Gardeners Lee Miller and Victor Rosasco advise you: instead of purchasing several inexpensive tools, pick the one tool that you will use the most, and then buy the highest quality one you can find. In a previous edition of the San Joaquin County Master Gardener’s newsletter, “Garden Notes ,” the pair write that good tools can last a lifetime and you get what you pay for. An example would be a spading fork with heavy forged tines, such as one from English toolmaker Clarington Forge. It might cost about three times more than a cheaper spading fork. They point out that the cheaper spading fork might have inexpensive tines that will bend after a few plunges into heavy clay soil. Whenever possible, purchase tools that are forged from one piece of metal. They are stronger and less likely to be compromised. A spading fork usually has four flat, wide tines that make it much easier than a shovel for penetrating tough soil, turning raw compost, transplanting, or weeding. The duo also points out that shovel heads made of sheet metal, wrapped around the handle, are less expensive…but not as strong and durable as ones forged with a socket for the shovel handle. “When you step into the soil on a shovel and the blade feels like it is moving sideways, you know you have a cheap shovel,” they advise. “Good shovels also have blunt tops or pads so when you step on the shovel, it is more comfortable.” The Master Gardeners point out that tool sharpening is a required skill to keep shovels and pruners in good working order, so you don’t have to work as hard. Miller and Rosasco say that surprisingly, many cutting and digging tools are not sharp upon initial purchase: “Right off, it is important to sharpen them. After this initial sharpening, tool edges can be maintained with a sharpening stone or a mill file. Files sharpen only on the forward stroke. So, it is ‘stroke, lift, return, and stroke again’. For pruners, loppers, or any fine cutting tool, never use a grinder. If the edge is nicked, as sometimes happens when we accidentally cut wire or another hard surface, a file is best for removing the nicks. If it’s just dull, a small sharpening stone, file or diamond sharpener can be used.” The pair agree that maintenance is key for protecting your investment in quality garden tools. Store your tools indoors. Moreover, don’t forget to give them a bit of care: “Keep tools, especially shovels, clean and shiny,” they say. “Dirt left on the tool creates a rusty surface to which more dirt will stick. Use a wire brush or whatever is at hand to remove dirt after using. Spraying with a vegetable oil or a commercial penetrating oil and water-displacing spray (such as WD-40) will help keep rust away while stored.” In an earlier edition of this newsletter, we asked the experts about the pros and cons of choosing bypass vs. anvil pruners. You can check out that edition from February 2022 here . “It’s the Best Garden Event in Northern California!” (I said that) Harvest Day at the Fair Oaks Horticulture Center Saturday, August 5, 8am-2pm. Free! Debbie Flower and I will be talking about “Garden Tips to Save Time, Money and Water” at Harvest Day at 830 am. The Fair Oaks Horticulture Center is located at 11549 Fair Oaks Blvd, in Fair Oaks Park, Sacramento County, California. Hope to see you there! More details here. Presented by the U.C. Master Gardeners of Sacramento County. Thank you for also listening to the Garden Basics with Farmer Fred podcast! It’s available wherever you get your podcasts. Please share it with your garden friends. Fred Hoffman is also a University of California Cooperative Extension Master Gardener in Sacramento County. And he likes to ride his bike. This is a public episode. If you'd like to discuss this with other subscribers or get access to bonus episodes, visit gardenbasics.substack.com/subscribe

Jun 23, 2023
Summer Cucumber Issues
Today’s newsletter podcast (above) features Master Gardener/Vegetable Expert Gail Pothour, discussing her favorite cucumber varieties, as well as tips and tricks for their success. Originally featured in Episode 263 of the Garden Basics with Farmer Fred podcast, in which we talked about the Top 5 favorite homegrown vegetables, according to the National Gardening Association. According to the NGA, cucumbers are the second most popular crop for home gardeners. Number One? Tomatoes, of course. A transcript of our conversation with Gail about cucumbers can be found towards the bottom of this newsletter. Meanwhile… Tackling Summer Cucumber Issues Last week we tackled the topic of poor pollination of summer squash plants. The lack of late spring zucchini fruit production is usually due to uncooperative weather, a lack of bee activity, or erratic coordination of the development of the male and female flowers of those vines. This week, we turn our attention to a close relative of summer squash, cucumbers. Cucumbers are the second most popular homegrown vegetable (after tomatoes), according to the National Gardening Association . And sure enough, many gardeners are fretting now about these summertime princes of the pickling world. We asked our favorite retired college horticulture professor, Sacramento-based Debbie Flower, about the primary needs for growing cucumbers successfully. She says freshness, warmth and water are at the top of the list. “The soil needs to be moist, not wet, but moist, all the time,” explains Flower. “Cucumbers are a warm season plant, a warm season annual. They need soil temperatures to be quite warm when you seed them. And you typically want to direct seed them, not start them from transplants ahead of time. They get root bound while in a container, it dwarfs them. They will never grow very big. If you do that once in your gardening life, you’ll remember it. It's such a disappointment. “I just tried my second time planting my cucumber seeds. I had planted some old seeds a few weeks ago and that might have been my problem. In general, you don't want to keep cucumber seeds more than two years. And these were two-year-old seeds. Even though I stored them correctly, in the refrigerator over those two years, they just didn't germinate. So yesterday I planted fresh seed. I would advise starting with fresh seed, plant them directly into the garden when your night temperatures have settled at 50 to 55 degrees Fahrenheit or greater. They need six to eight hours of sun, that's considered full sun. They need well drained, fertile soil and regular moisture.” Cucumbers are natural climbers and are less prone to rot issues and diseases when grown vertically. Training them up one or two heavy-duty, 6-gauge metal livestock panels to support the cucumbers eases harvesting chores. Cucumbers can also be grown in large containers, 18-24” deep. According to the Santa Clara County Master Gardeners : 18" to 24" deep containers (such as half-barrels or livestock watering troughs) can be used for deep-rooted vegetables such as tomatoes, potatoes, zucchini, winter squashes, beans, corn, cucumbers. Solving Cucumber Bitterness A very bitter gardener wrote to us recently: “I have never managed to grow vigorous cucumber vines, and the cucumbers themselves are often bitter. I've heard many explanations for this, including lack of water, weather that is too hot and weather that is too cold. What is the truth?” We solicited the advice of three University of California cucumber experts about controlling bitterness. All had similar answers. • Select the newer hybrid varieties, which have been bred to reduce the cause of the bitterness. That’s according to Dennis Pettinger, longtime UC Cooperative Extension Environmental Horticulturist. He adds, “If the cucumbers express bitterness, it can usually be eliminated by peeling away the skin and outer flesh and removing the stem end.” • According to the Contra Costa County Master Gardeners, the newer cucumber varieties that have been bred to be less bitter include Diva, Sweet Success, Cool Breeze, Summer Dance, Improved Long Green, Eversweet, Ashley, Sunnybrook, Saticoy Hybrid, and Lemon. • Plant cucumbers in full sun and adjust your watering with the weather to reduce plant stress. El Dorado County Master Gardener Kathy Ruiz writes, “Cool temperatures and shady sites seem to trigger bitterness in cucumbers. Research notes that temperature variations of more than 20 degrees, moisture stress and storage on the vine too long or near other ripening vegetables also can cause bitterness.” • Again, moisture consistency is key. UC Master Gardener Chantal Guillemin of Contra Costa County writes: “Since cucumbers require ample and regular irrigation during their growing period, add mulches, composted green waste or manure to the soil to increase the soil’s water-holding capacity and supply nutrients to the plants.” Compost or well-aged manures should be mixed into the soil well before planting. Then, top the area with several inches of coarse mulch after planting. Chipped or shredded tree limbs are ideal for mulch. PODCAST TRANSCRIPT: Growing Cucumbers, with Gail Pothour - Master Gardener Farmer Fred: So let's move on, on our 10 most popular homegrown garden vegetables. Number two, and I will tell you right off, I don't eat it so I don't grow it. I hope you have, and you can tell us all about cucumbers. Gail Pothour: Well, my husband won't eat them. So I grow them rarely at home, I am actually going to grow two of my favorites this year. One is called “Green Fingers” and the other is “Silver Slicer”. And “Silver Slicer” is a white, kind of off white cucumber that is very crisp and juicy. It's great. Green Fingers is a hybrid variety. It's small, like baby cucumbers. So you pick them when they're little. And they are never bitter. So it's really good. And then, if I'm going to make pickles, I like to grow “Alibi”. That's a hybrid pickling cucumber. For planting cucumbers, we won’t plant them in our area, probably for several more weeks, they like to have really warm soil, you know, probably in about, you know, a couple three weeks, we should hit 70 degrees. 65 or 70 degrees. for the soil. And that's when we'll plant. Farmer Fred: Remember, we're talking soil temperature here. And right now, even here in sunny California, we had one of the coldest wettest winters ever. Our soil temperatures are just starting to get into the upper 50s to low 60s. And it'll be a while before it gets into the 70s, which is prime growing conditions for those roots to really shift into high gear and start production. It could easily be June. Gail Pothour: Yeah, and cucumbers are something that you can plant all through the summer here. They grow fairly quickly, they produce quickly. So you don't have to start early in April or in early May, late April or early May. Wait until the soil temperature has warmed up and the nighttime temperatures are not so cold. You can start them in May, June, July and still get a good crop. You can either direct sow cucumbers or you could do transplants. But remember, they don't like to have their roots disturbed. So what I do, because I do transplants primarily because I have critters around my yard that like to eat the seedlings when they come up, I will start them about three weeks before I want to transplant them out. They grow quickly. I do seeds in a four inch pot and transplant them directly from that pot. Make sure they're not root bound. So if you buy a transplant at the nursery or garden center, be sure it's not root bound. Farmer Fred: And the easiest way to do that is to flip the pot over. If you see roots coming out the drain holes on that little container, put it back and go look for another one. Gail Pothour: Yep. And cucumbers can be trained up a trellis so you don't need to use up a lot of real estate in your garden. Grow them up a trellis and it makes for straighter fruits and you get better air circulation that way as well. Farmer Fred: According to the Vegetable Research Information Center at UC Davis, some of the varieties they recommend for containers (which would indicate they have a smaller growth habit): Pickle Bush, Bush Champion, Parks Bush Whopper, Salad Bush, and Spacemaster. All are rated as suitable for containers. But you're right. Most cucumbers need some training if you're going to be planting them. Gail Pothour: And they say, by trellising, you can plant more in a smaller space because they're not sprawling all over the ground. They still need to be spaced well enough so that you can get good air circulation. A lot of the crops in that cucurbit family can get powdery mildew, so you want to have good air circulation. Farmer Fred: Alright, if you like cucumbers, you can plant them, they're easy to grow. And then the good news, like you mentioned, is they grow easily from seed directly sown in the garden. How far apart would you space the seeds? Gail Pothour: Well, if I was going to train them up a trellis, I would probably grow them a couple feet apart. If you're not going to do them in a trellis, people typically do them in a hill, I have not grown them in hills, but you would plant several in the hill and then thin them to 2 plants. I would probably do them three or four feet apart, I want to get plenty of air circulation, if they're sprawling if they're not grown up. Farmer Fred: Probably one of the biggest complaints you might hear about cucumbers is bitterness. And they can experience bitterness, especially those that they've grown for fresh use or for pickling. And that's due to the formation of some compounds that impart a bitter flavor to seedlings, roots, stems, leaves and fruit. And one of the easiest ways, according to the University of California Davis, the easiest way to control the bitterness is basically to cut off the end and the skin on that end. And that can help control the bitterness. Gail Pothour: Yeah, and those compounds you're talking about, and I've been wanting to say this all day, is cucurbitacins. And that's the compound that does make the fruit bitter. It's also the compound that attracts cucumber beetles. So I know that they're trying to breed cucumbers that don't have those compounds in them, so the cucumber beetles won't be attracted to them. But there are some varieties you can grow that are reliably not bitter. So an Armenian cucumber is one (which by the way, is actually a melon), lemon cucumbers and any of them that are Persian. Those tend to not be bitter. Farmer Fred: Also avoid growing cucumbers in cool or shaded locations. They need regular moisture, too, as well as regular fertilization. And usually if you choose the new hybrid varieties, bitterness is much less of a problem. And again, if you do taste a bitter cucumber, try peeling away the skin and the outer flesh and removing the stem end. Gail Pothour: Yeah, because I think that's where the bitterness tends to accumulate or at least start, is at that stem end. But since I don't grow cucumbers all that often, I haven't experienced bitter cucumbers. Farmer Fred: Some of the varieties that are also recommended for burpless cucumbers if there is such a thing. “Sweet Slice” is recommended by UC Davis for being burpless Gail Pothour: My husband would appreciate that. That's why he doesn't eat them. Farmer Fred: Interesting that they note that burpless cucumbers tend to be long and slender with a tender skin and the bitterness associated with the burp has been removed. Other causes of bitterness in cucumbers include temperature variation of more than 20 degrees, moisture stress, and storage of cucumbers near other ripening vegetables. So it sounds like ethylene gas is an issue. Gail Pothour: It certainly does. Thank you for also listening to the Garden Basics with Farmer Fred podcast! It’s available wherever you get your podcasts. Please share it with your garden friends. Fred Hoffman is also a University of California Cooperative Extension Master Gardener in Sacramento County. And he likes to ride his bike. This is a public episode. If you'd like to discuss this with other subscribers or get access to bonus episodes, visit gardenbasics.substack.com/subscribe

Jun 16, 2023
Where's the Zucchini?
Where is the zucchini? That question is a popular one in the garden e-mail bag lately. Gardeners are fretting over a total lack of summer squash flowers. Other problems include zucchini flowers that drop off, or young fruit that dies back. A lot of it has to do with timing. Many gardeners tend to plant zucchini seeds at the same time as tomato and pepper plants, usually in April. That’s a bit too early. The heat-loving summer squash varieties get off to a better start when planted in May or June. However, there are more variables. Squash needs daytime temperatures in the 80’s and 90’s for best results. Usually, it’s too much heat - temperatures at or above 100 degrees – that slow zucchini production here. Lately, daytime highs have been in the 70’s, a bit below what those squash plants require for quicker results. In addition, if that yellow squash is an older, heirloom variety, it may not grow as vigorously as a newer hybrid variety. Another limiting factor can be too much shade. Make sure all squash plants receive as much sun as possible. Zucchini and other members of the summer squash family typically have a hard time producing fruit in late spring and early summer, due to incomplete pollination. This problem should straighten itself out if bees are in the area and the weather cooperates. Most years, these issues sort themselves out by July. And before you know it, you’ve got more zucchini than you need or desire. However, you can help that struggling squash plant, according to Hunter Johnson, Jr., a retired University of California Cooperative Extension Vegetable Specialist. According to Johnson , gardeners often become concerned when many squash flowers appear early, but fruits fail to set. The reason for this: all the early flowers produced are males, in heirloom squash varieties. Female flowers develop somewhat later. In newer, hybrid varieties of summer squash, the first flowers to appear are usually females, and these will fail to develop unless there are male squash flowers, and bees, in the nearby area. Squash and other members of the cucurbit family have this flowering habit, which is unique among vegetable crops. They bear two kinds of flowers, male and female, both on the same plant. For fruit set to occur, pollen from the male flower must be transferred to the female flower. The pollen is sticky; so, wind-blown pollination does not occur. Honeybees are the principal means by which pollen is transferred from the male to the female flower. When bees are absent, fruit set on garden plants in the cucurbit family is very poor and often non-existent. If only a few bees are present in the area, partial pollination may occur, resulting in misshapen fruit as well as low yield. When no bees are present in the garden or the bee population is too low, the dedicated gardener can stand in for the bee by pollinating by hand. Hand pollination is a tedious chore, but it is the only means of obtaining fruit set in the absence of bees. The pollen is yellow in color and produced on the structure in the center of the male flower. You can use a small artist's paint brush to transfer pollen, or you can break off a male flower, remove its petals to expose the pollen-bearing structure, and roll the pollen onto the stigma in the center of the female flower. When hand pollinating, it is important to use only freshly opened flowers, early in the day. Flowers open in the morning and are receptive for only one day. The female flower in cucurbits can be recognized easily by the presence of a miniature fruit (ovary) at the base of the flower. The female squash flower is borne on a very short stem, with that bulge at the base. The male squash flower can be identified by its long, slender stem. As far as all that extra zucchini you’ll get later in the summer? Consider donating it to a food bank, food pantry, or food closet in your area. Find the one nearest to you at ampleharvest.org . Thank you for also listening to the Garden Basics with Farmer Fred podcast! It’s available wherever you get your podcasts. Please share it with your garden friends. Fred Hoffman is also a University of California Cooperative Extension Master Gardener in Sacramento County. And he likes to ride his bike. This is a public episode. If you'd like to discuss this with other subscribers or get access to bonus episodes, visit gardenbasics.substack.com/subscribe
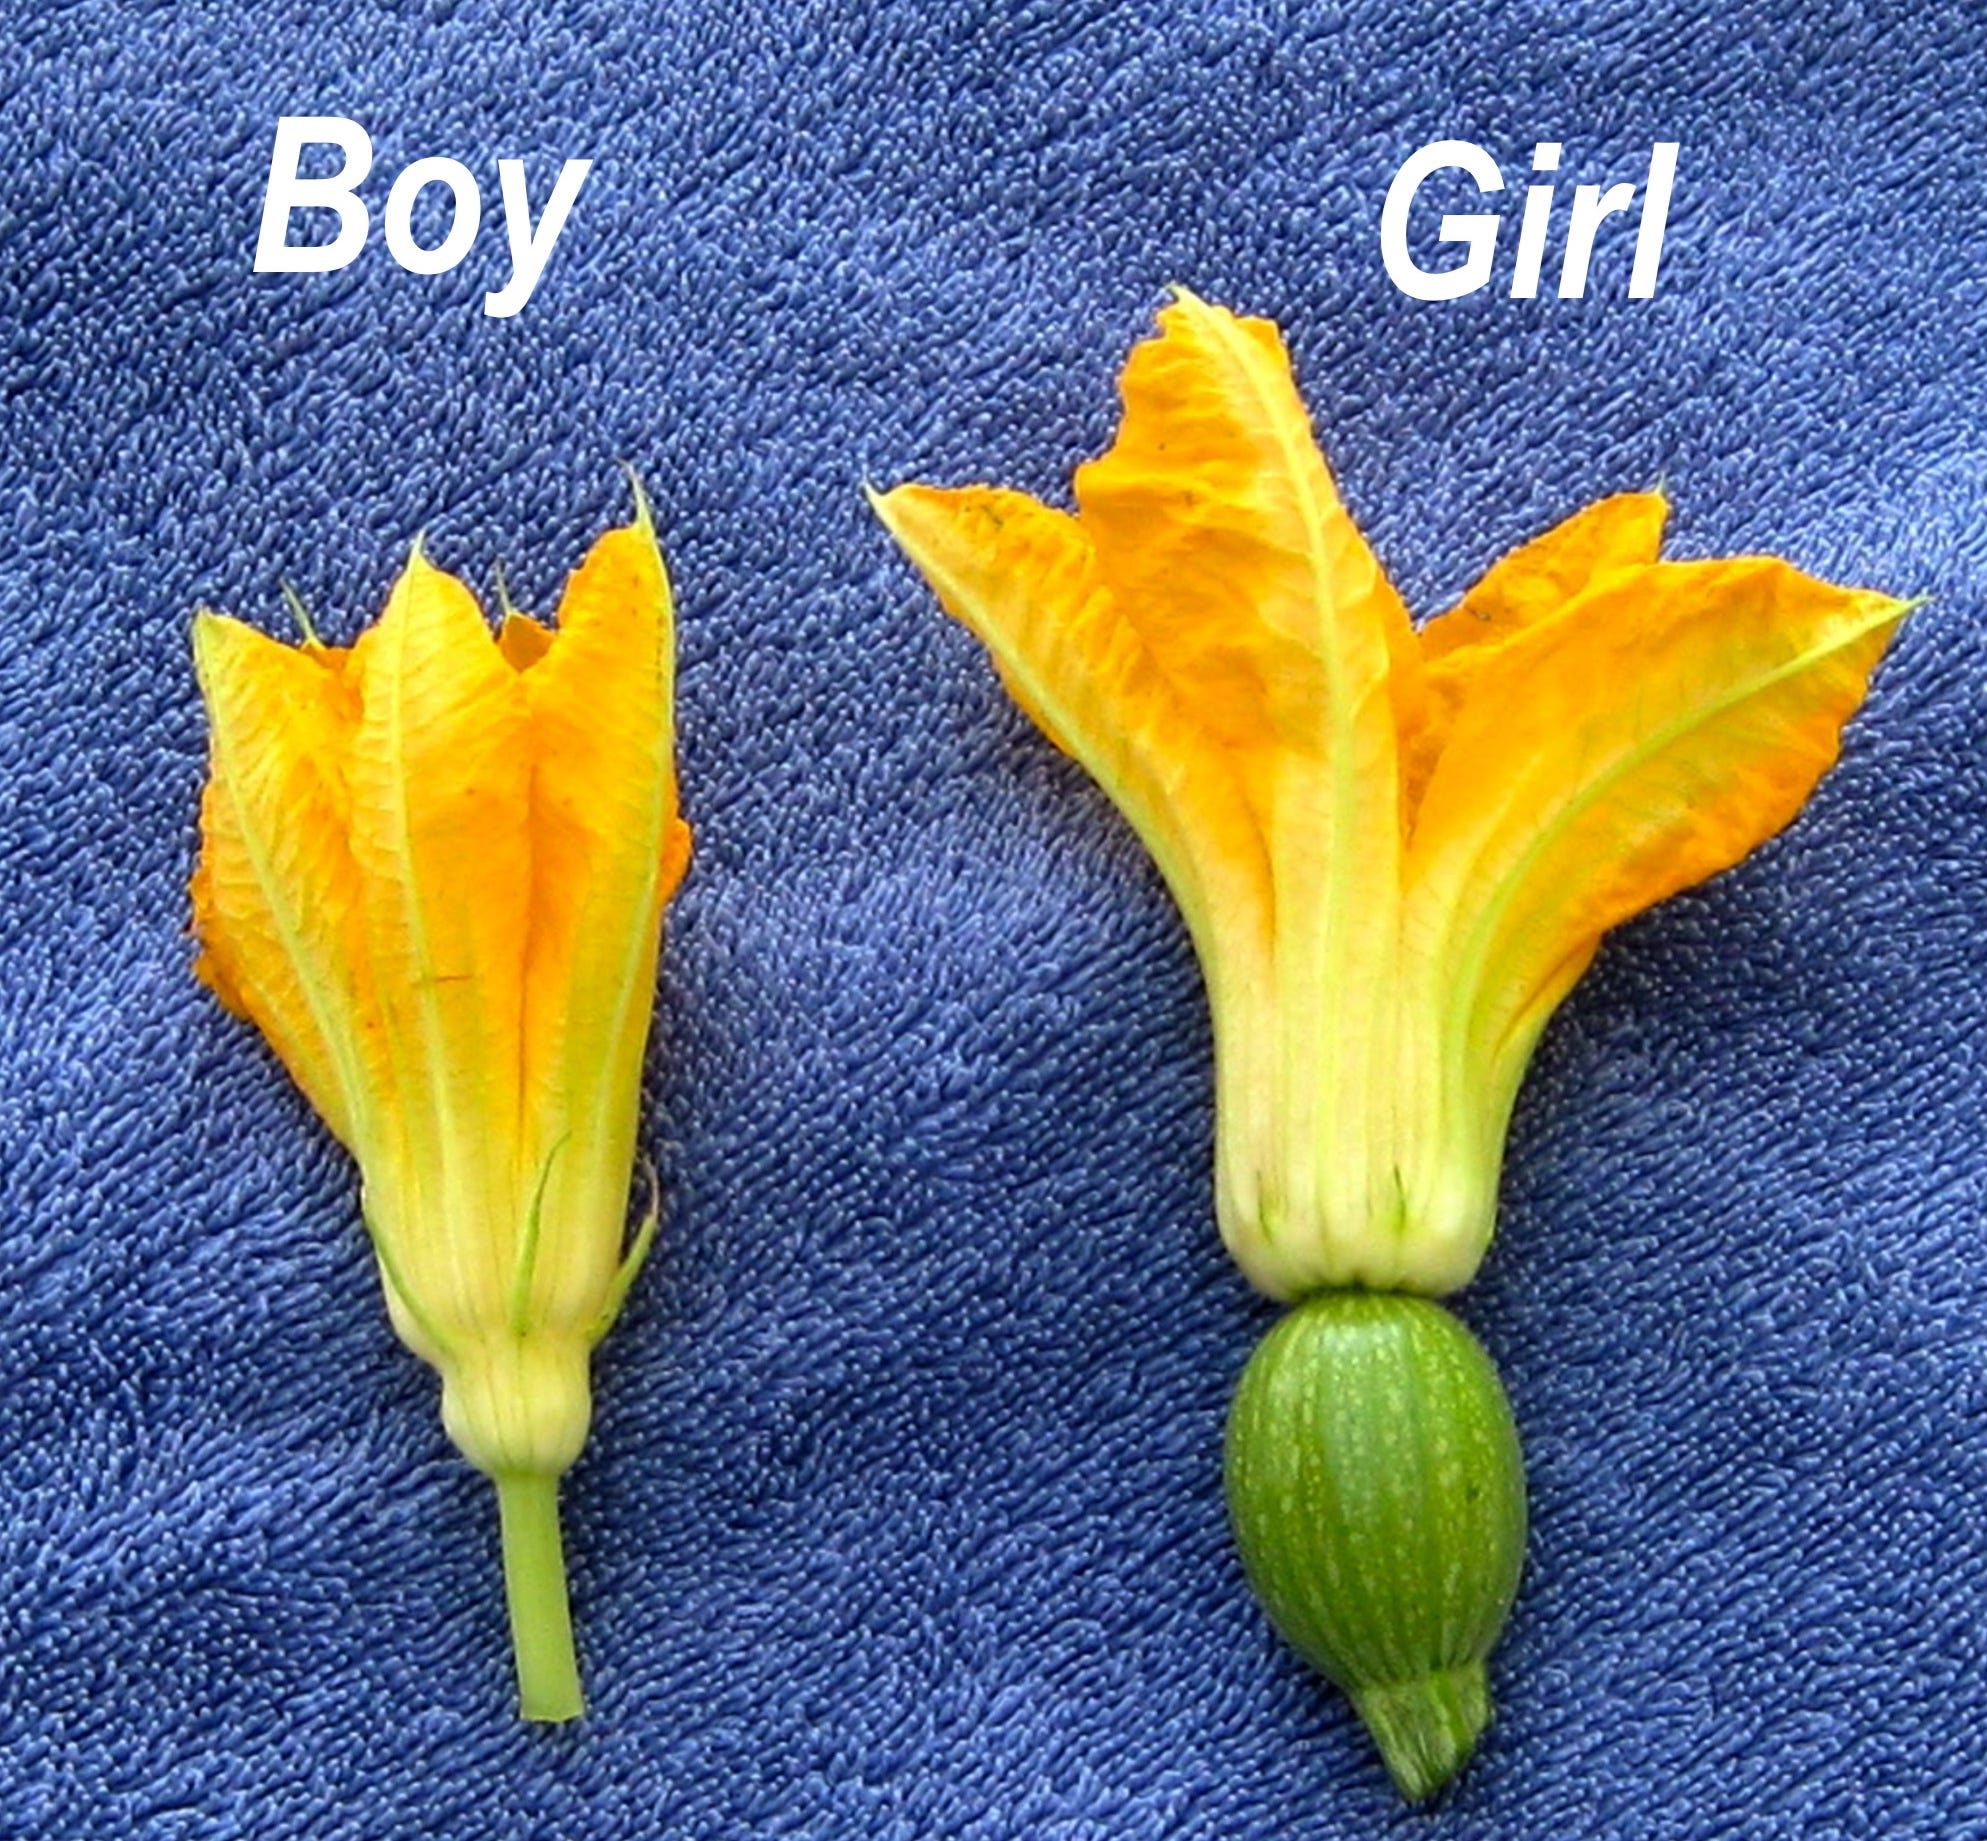
Jun 9, 2023
Growing Healthy Greens Year Round
If you listened to this week’s Garden Basics with Farmer Fred podcast (Ep. 269: “Growing Your Brain Food Garden”), you heard Dr. Laura Varich of FreshPhysician.com tout the cholesterol-fighting qualities of many home grown vegetables. Lowering cholesterol levels is widely known as a key factor in reducing heart disease. According to Varich, you’re not only doing your heart a favor, but also your brain. High cholesterol levels can also lead to blockages in the brain which can lead to a stroke. And recent evidence has shown that the same narrowing of those brain vessels is also associated with Alzheimer's disease. It seems that plaques and tangles that develop in Alzheimer's disease are likely not to cause the disease, but are instead the brain's response to the damage to that poor blood flow. Examination of the brains of Alzheimer's patients have found significant blockages in the arteries that bring blood to the critical memory centers of the brain. In other words, it's very similar to heart disease and stroke. High blood cholesterol is a major risk factor for the development of Alzheimer's disease. Among the garden crops that are some of the best for reversing high cholesterol levels (in conjunction with a reduction in consumption of ultra processed food and getting regular exercise) are greens, whole grains and cruciferous vegetables such as broccoli, cauliflower, kale and cabbage. She is especially fond of growing microgreens. Here’s Dr. Varich’s list of the nine best food groups for brain health: If you live in a hot summer climate, however, growing many of the greens and cruciferous vegetables is seemingly near impossible before they bolt and turn bitter. Those crops definitely prefer a cool climate (where summer temperatures seldom get into the upper 90’s), or the mid-to-late fall, winter, and early spring climate of USDA Zones 9 and 10. So can a hot climate gardener, who wants to eat healthier homegrown vegetables year-round, thwart this summertime stop sign? Yes. In today’s Beyond the Garden Basics newsletter podcast (above) we present three ways to eat healthy, homegrown greens year round: * Growing Microgreens with Master Gardener Gail Pothour (at 00:00 of the newsletter podcast) * How to Grow Cilantro in a Hot Summer Climate with Renee Shepherd of Renee’s Garden seed catalog (22:37) * Growing the Cheapskate Salad Bowl, with Brad Gates of Wild Boar Farms (25:24) Lettuce Varieties to Grow in Hot Summer Climates An especially vexing garden issue for greens lovers in USDA Zones 8, 9 and 10: How do you grow lettuce in the summertime? We discussed this in Episode 264 of the Garden Basics podcast with vegetable expert and Master Gardener Gail Pothour. A transcript of that conversation follows: Farmer Fred: All right, now we come to number nine on the list of the 10 most popular garden vegetables and it's a cool season crop in California. If you live in a very mild climate, or the Bay area of California, you can certainly grow all the lettuce varieties you want. And I can I can see why people grow lettuce and I hope that you try something different than Iceberg. Iceberg, to me, is the least nutritious, colorless, tasteless, lettuce that has fallen into mass marketing. There's a lot of leaf lettuce varieties that are so much tastier and also can withstand heat better than Iceberg. Gail Pothour: Yeah, I was gonna say Iceberg doesn't do that well in the Sacramento area. We're too hot. And so we generally recommend gardeners to try looseleaf or romaine or one of the butterhead types. But if you need to have an Iceberg, pick that up at the store, don't try growing it. It won't do that well here. Farmer Fred: Yeah, it's a waste of space. As a matter of fact, I have been on a lifelong garden search for a lettuce variety, a loose leaf lettuce variety, that can take the heat. Some are better than others as far as getting through July, perhaps. But it seems like when July turns into August, they all start bolting. Gail Pothour: Right. And actually, several years ago, we did an experiment two years in a row at the Fair Oaks Horticulture Center. Because we get this question a lot, “Why can't I grow lettuce in the summer?”. So we thought okay, let's find some varieties, and grow them through the heat of summer and see how they do. First off, you need to start with some varieties that are heat resistant, like Jericho that was bred in Israel, so it's a little more heat resistant. And we tried half dozen or so different varieties we monitored when we planted them, how many weeks it was before they started bolting. Some did better than others. Some did pretty well. But what we found is you need to mulch heavily to keep the moisture in, to keep them well watered, provide shade during their entire lifespan in the summer, and then be prepared as soon as one starts to bolt, take it out and then replant with another transplant. So kind of a succession planting. It is possible but it's a lot of work. It takes a lot of water and shading and monitoring. Not sure if it's worth it or not. Grow it in the shade if you have a shady location but often it's not just the sunlight, it is the heat and that’s true even in the shade in Sacramento. We can be fairly warm in the summertime. So it's a tough thing to do. Farmer Fred: The closest green I found that can be grown year round and especially if you do it in the shade it does okay here, and that’s swiss chard. Gail Pothour: Right yeah, that can be grown year round. I have done it in an area of my yard where it got some afternoon shade in the summertime. And it was able to survive over summer. But yeah, any of the other leafy greens are going to be a little tough. One of my favorites or absolute favorite lettuce is called Pomegranate Crunch . It's a red romaine. And it is very good. I get it as pelleted seeds, which makes it a little bit easier to germinate. Lettuce can have a difficult time germinating. Lettuce does need light in order to germinate. So don't plant the seed too deeply. Pelleted seeds don't have that problem. But I think sometimes if people have difficulty getting lettuce to germinate, it’s because maybe they buried it too deep. It needs light. It's one of the few vegetables that needs to light to germinate. Farmer Fred: And I believe it's one of those seeds that will not germinate in heat. Gail Pothour: Right, right. If you tried sowing lettuce seed in the summer, maybe for a fall crop, it is difficult. If your soil temperatures are too warm, the lettuce seed can go dormant. So if you're also starting it indoors, whereas I use a heating mat to get a lot of my seeds to germinate, you don't use a heating mat for lettuce because the soil will be too warm and lettuce seed will go dormant in heat. Farmer Fred: Some of the varieties that have been recommended as heat tolerant lettuces that I've grown over the years, and they're barely heat tolerant, are Black Seeded Simpson and Amish Deer tongue. They're pretty good. But like I said, they do eventually bolt. But I think one good rule to remember is if you want lettuce to last in the yard as long as possible, grow loose leaf varieties, not head lettuce. Gail Pothour: Right. And of the ones that we did in our heat tolerant trial, yhe ones that did well besides Jericho was Year Round Bronze. It's an oak leaf variety, and it was late to bolt in the summer so it actually did very well. Red Cross is a red butterhead, Merlot is a dark red leaf lettuce, and “Paradai”, a red oak leaf. That's one of my favorites, but I can no longer find seeds for it. And then Nevada. It's a green loose leaf, kind of a semi heading type. So all those did well as well as completely expected in our summer heat. So they did better than a lot of other varieties. Farmer Fred: I'm glad you mentioned Nevada because I have grown that one before and it it was pretty good. But I think if you want a dependable green, do the Swiss chard. Gail Pothour: Right, I agree. Brad Gates’ of Wild Boar Farms and his “Cheapskate Salad Bowl” Thank you for also listening to the Garden Basics with Farmer Fred podcast! It’s available wherever you get your podcasts. Please share it with your garden friends. Fred Hoffman is also a University of California Cooperative Extension Master Gardener in Sacramento County. And he likes to ride his bike. This is a public episode. If you'd like to discuss this with other subscribers or get access to bonus episodes, visit gardenbasics.substack.com/subscribe
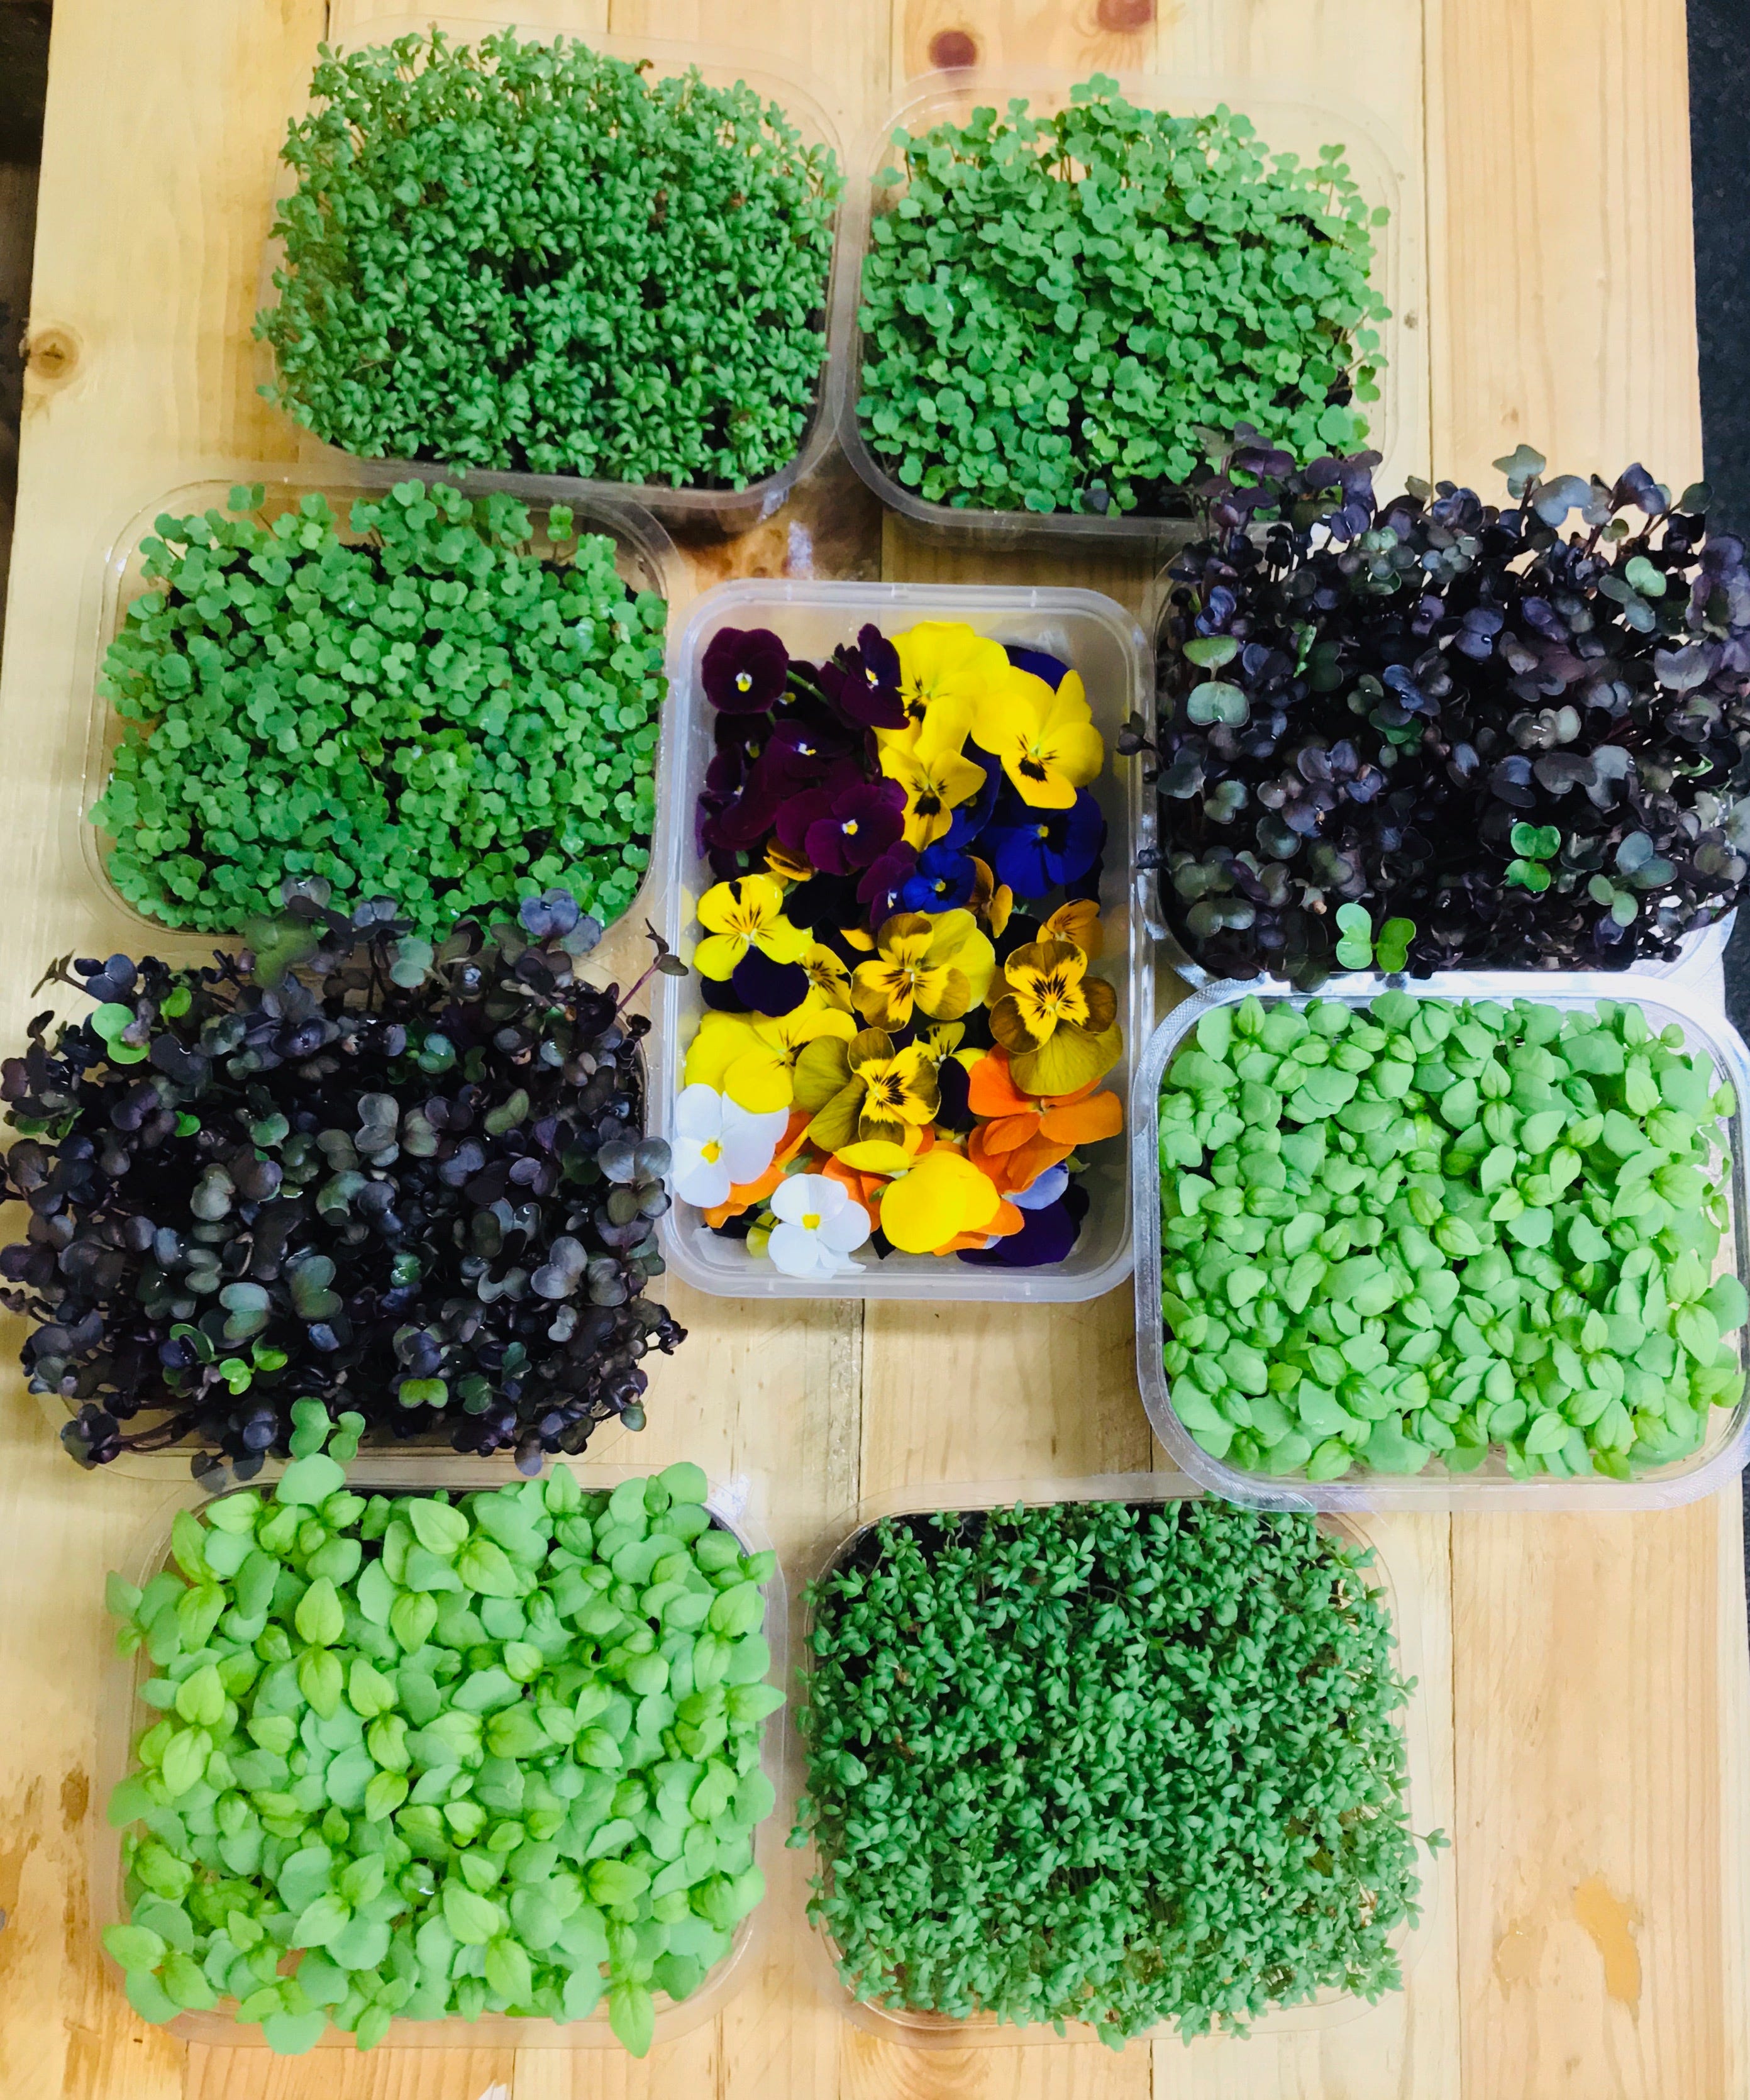
Jun 2, 2023
11 Garden Tips for Success
Recorded last week in front of a live audience at a meeting of the Sun City/Lincoln Hills (CA) garden club. Included a Power Point presentation, which I mistakenly referred to as “slides”. And yes, I still have a slide projector in a closet somewhere, along with a box of slides of my cross-country bicycle trip in 1988. It’s probably next to the Betamax VCR and the Sony 630-D reel-to-reel stereo recorder (sweet!). But, at least I know what a “podcast” is! 1. ALL GARDENING IS LOCAL. In your own yard, there are microclimates where certain plants will have a better chance for success. For example, monitor the morning low temperatures in various areas of your yard to find the warmest home for citrus trees. Just moved to a new home and wondering what grows well there? Take a walk through your neighborhood. Mimic the garden successes that you see. 2. KNOW YOUR SOIL . A complete soil test will let you know what nutritional elements your soil is missing, including nitrogen, phosphorus and potassium; and, micronutrients such as calcium, magnesium, boron, iron zinc, sulfur and others. University of Massachusetts/Amherst, Colorado State University, and Texas A&M offer a complete soil test at very reasonable rates. For the do-it-yourselfer, there are variety of test kits available for testing pH (Rapitest), and LaMotte kits for pH as well as Nitrogen, Phosphorus and Potassium. All plants are adapted to a certain pH range of soil acidity or alkalinity. Monitor your soil moisture with a soil probe, moisture meter, trowel or screwdriver. 3. RIGHT PLANT, RIGHT PLACE . In our area , roses won’t bloom in full shade and many tomato varieties won’t produce fruit. On the other hand, winter daphne, impatiens and hydrangeas will croak in full sun. Know the sunlight requirements for your plants in your location . The Sunset Western Garden book is a good source for finding out how much sun or shade your plants need where you live. 4. MULCH, MULCH, MULCH. Benefits of mulch: Retains moisture. Keeps soil temperature constant, reducing plant stress. Suppresses weeds. Gradually increases soil organic matter, feeding the soil. Attracts beneficial organisms that improve soil fertility and porosity. Mulch encourages healthier plants, reducing the needs for pesticides and fertilizers. Protects roots and plants from mechanical injury. On hillsides and around rural homes, it suppresses the spread of brush fires. 5. MOTHER NATURE BATS LAST. When you apply broad-spectrum synthetic insecticides, the bad bugs will eventually find a way to overcome that issue, usually developing a resistance to that chemical. The same is true of weeds, treated repeatedly with herbicides. To battle the bad bugs, lend Mother Nature a helping hand. Limit the use of insecticides and provide the right plants for food and shelter for beneficial insects. Build it and they will come. 6. WHAT’S OLD IS NEW AGAIN . Growing heirloom fruit and vegetables is not a passing fad. A University of Texas study showed that older varieties of vegetables are more nutritious than their newer, hybrid counterparts. Beneficials are attracted to the fragrance of older flower varieties. In the Sierra Foothills, the Felix Gillet Institute is rescuing Gold Rush-era fruit and nut trees. These abandoned specimens, uncared for since the 1800’s but still thriving, may hold the key for future drought tolerant plants as well as a gene pool for adding pest and disease resistance to new varieties. 7. EVERYTHING YOU KNOW IS WRONG. In the 1940’s & 50’s, DDT was available to home gardeners as a pesticide. Turns out, it caused cancer and killed birds. In the 1960’s-70’s, the Modesto Ash was considered the “perfect shade tree” for the Central Valley of California. Turns out, it is susceptible to anthracnose, mistletoe and is no longer recommended. In the first decade of the 21st century, the pesticides Diazinon and Dursban were taken off store shelves for health reasons. Proven ineffective, despite claims to the contrary: Vitamin B-1 for transplant shock, store-bought ladybugs, and tomato calcium spray to cure blossom end rot. 8. IF IT WORKS FOR YOU, FINE; BUT KEEP AN OPEN MIND . If you're using safe gardening techniques that others frown upon - and those techniques are working…well, who are we to tell you to stop? Still, new research, techniques or equipment may make your chores a heck of a lot easier and satisfying. Today’s solution could become tomorrow’s problem. Be open to change. 9. READ AND FOLLOW ALL LABEL DIRECTIONS . The instruction label on all pesticides is the law. Don’t assume that an insecticide or herbicide will kill a bad bug or weed if it is not listed on the label. Follow the instructions for when and how to apply the product. 10. LIFE IS TOO SHORT TO PUT UP WITH A PROBLEM PLANT . Become familiar with the euphemism, “Shovel-Prune.” 11. BERMUDA GRASS IS FOREVER . Runners on top of the soil, rhizomes beneath the soil, prolific seed heads, roots that can live for decades, just waiting for a bit of light. Instead of thinking "eradication" of Bermuda grass, think "control.” Bermuda grass is married to your yard. Just as in any marriage, you have to pick your battles. Call this one a draw. Thank you for also listening to the Garden Basics with Farmer Fred podcast! It’s available wherever you get your podcasts. Please share it with your garden friends. Fred Hoffman is also a University of California Cooperative Extension Master Gardener in Sacramento County. And he likes to ride his bike. This is a public episode. If you'd like to discuss this with other subscribers or get access to bonus episodes, visit gardenbasics.substack.com/subscribe
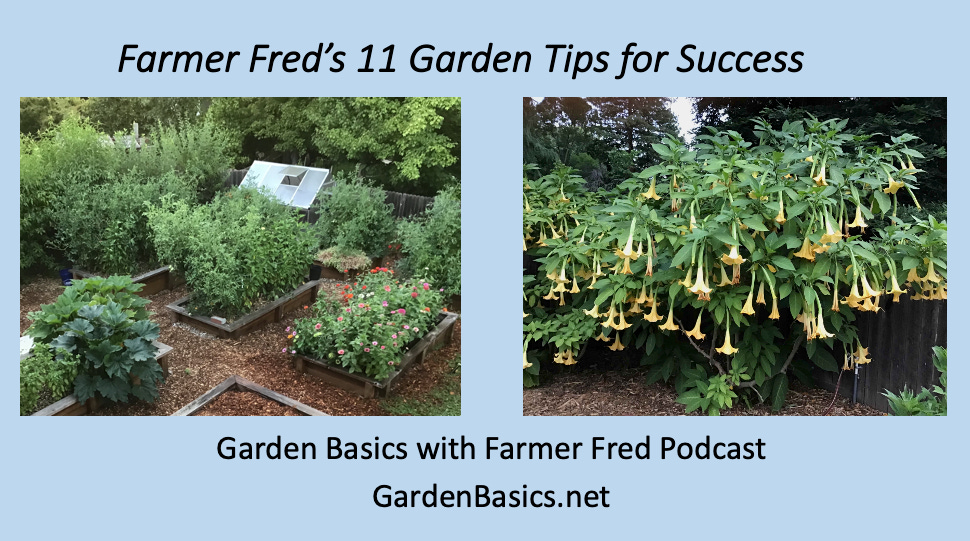
May 26, 2023
Thin Your Fruits and Vegs, Now!
Thinning Crowded Fruit on Fruit Trees, Shrubs and Vines A prolifically producing peach tree next to an often-used walkway in our narrow side yard serves as a not so-subtle reminder this time of year: thin the fruit before trouble begins. And if a glance up into the canopy of your peach, pear, nectarine, apple, kiwifruit, persimmon, apricot, or other deciduous fruit trees and vines (including table grapes) shows crowded young fruit, take action. Rubbing or tightly packed little fruit in a tree now can lead to big problems in the summer, such as undersized fruit, injured or diseased fruit, excessive fruit drop, and broken fruit tree branches. Some tips: • Remove some of the fruit. Space fruit evenly along each branch, with perhaps five inches between each piece of fruit. More importantly, be sure to leave the largest sized fruits on the tree or vine. • For table grapes, remove grape bunches so that there is at least six inches of space between each remaining bunch of table grapes. Cut off the "tails" from the remaining bunches at that same time. This is the lower one-quarter to one third of the bunch, where it begins to taper down in size. This will send more energy to the remaining grapes on the bunch. • Because of their small size, cherries are not usually thinned from backyard trees. In addition, nut crops, such as almonds and walnuts, are not thinned. • For shrub-like fruit bushes, such as blueberries, pruning may not be necessary on older shrubs with thicker branches that can support the weight of the fruit. Younger plants may need thinning if you see the branches bending precariously. And, as you may have noticed, the local bird population may be helping you thin the blueberries. That’s a definite sign that those blueberries are close to being ripe. If the robin population seems to be spending most of their time around your berries, cover the plants with bird netting The UCANR informational sheet, “ Fruit Trees: Thinning Young Fruit” has more deciduous spring fruit thinning advice. • Citrus trees tend to thin themselves, a phenomenon called “June Drop.” However, citrus fruit thinning now can help that tree produce next fall and winter. Certain citrus types, such as Valencia oranges and some mandarins, produce heavily one year followed by a year with sparse production. This is called alternate bearing. You can reduce the potential of a tree to alternate bear by reducing the fruit load in a heavy fruit set year by thinning out some of the fruit. Also, fertilize less in light years and more in heavy fruit production years so that the trees needs are met according to the demands of the fruit load. Despite using these strategies, some varieties will just alternate bear. Do not allow the old citrus fruit to stay on the tree longer than necessary. This may contribute to a smaller crop and perhaps, more fruit drop, for next year’s crop. More Fruit Thinning Tips • Here’s a valuable tip from the experts at Louisiana State University: when thinning fruit, keep looking at the tree; don't look at the ground. Seeing all that fallen fruit may dissuade you from the primary task. Cut off the excess fruit. Pick it up when finished pruning. Don’t try to juggle the chores of pruning and catching the fruit in a bucket. You may need both hands free for gently moving one piece of fruit out of the way to prune out the unwanted fruit. • Snip off, don’t pull off, the fruit. Pulling can damage the branch, inhibiting future production. The best tool to use for thinning is a pair of needle-nose pruners. The long, thin blades can easily get into tight spaces to snip the fruit along its stem. VEGETABLE THINNING Planting easy-to-grow vegetables that can get out of hand quickly is a time-honored gardening tradition in the spring. Carrots, corn, cucumbers, eggplant, radishes, summer squash and winter squash all emerge with little effort, but can take over a garden by summer. The problem is: because the emerging plants are small, many gardeners don’t have the heart to thin them out to their proper spacing. The result is an undersized crop, greater incidence of pests and diseases, or, too much of a good thing. The popular summer squash, zucchini, is a perfect example of the latter. Here are the planting and thinning instructions for zucchini seeds from the Burpee Seeds website : “Sow one to two seeds about 36 inches apart. Cover with one inch of fine soil. Firm lightly and keep evenly moist. Zucchini seedlings emerge in 10-14 days. Thin to one plant when seedlings have two sets of leaves.” That seems reasonable. And thrifty. And certainly clearer than these instructions on the back of a packet of Ferry-Morse zucchini seeds: Not sure how you leave three seedlings on one 2’x2’ hill, and yet space the plants four feet apart. Because they have calloused hands but soft hearts, many backyard gardeners will ignore rational spacing instructions, let alone keeping only one plant. And what happens? Overwhelmed gardeners go on midnight runs in August, surreptitiously placing bags of oversized zucchini on neighbors’ front porches. The bottom line: read and follow all planting instructions. If you can. Thank you for also listening to the Garden Basics with Farmer Fred podcast! It’s available wherever you get your podcasts. Please share it with your garden friends. Fred Hoffman is also a University of California Cooperative Extension Master Gardener in Sacramento County. And he likes to ride his bike. This is a public episode. If you'd like to discuss this with other subscribers or get access to bonus episodes, visit gardenbasics.substack.com/subscribe

May 19, 2023
The Best Roses For Cut Flowers
(From a 2022 interview with Master Rosarian Debbie Arrington. Originally aired on May 20, 2022, Garden Basics podcast ) Farmer Fred What is America's favorite flower? Well, of course, it's the rose. Something like 85% of all Americans say their favorite flower is the rose. How do you grow them? Well, we've talked about that on this show. You can go back and look for various episodes of the Garden Basics podcast where we talked about planting roses and pruning roses. We've even talked about fragrant roses. However, our next guest we've had on several times talking about roses, including the most edible roses. It's Debbie Arrington, Master Rosarian, the typist behind the Sacramento Digs gardening blog, a daily effort that has all sorts of good gardening tips including tips on roses. And Debbie, I am so into cutting roses now for display indoors. Is this what happens when you get old? You just descend into a cut flower garden mode. And that seems to be what I'm doing. And all of a sudden, I love going out to the yard every day, and picking off some rose branches and bringing them inside for display. And from my perspective, what I'm looking for in a rose as a cut flower is something that maintains its beauty for several days, if not longer. Something that, when I'm picking it, chances are I won't get stuck by a prickle. I mean little prickles are okay, but I don't want anything too thorny if you will, please. Maybe something that doesn't shed a lot while it's on display. Things like that. Everybody has their own criteria, as you might discover. And I imagine, Debbie Arrington, in the world of Master Rosarians, this might be a topic of great discussion, shall we say? Debbie Arrington Yes, it is. Because there are literally tens of thousands of different rose varieties that you could choose from, and everybody has their own opinion of what is “the best”. But the qualities that you describe is a rose that has a long stem, a presence in the room and in the vase, has few prickles, so you aren't getting thorns in your finger every time you admire it. Those are all qualities that people that grow roses professionally want in a rose. And those are also good things to have in your own garden roses. So we have several favorites that we can share with you today. I should add that I'm President of the Sacramento Rose Society, and we just had our 74th annual show. And it was our first show in three years due to COVID regulations. So we had a lot of pent up energy. And our roses seem to, as well, because we had well over 1000 blooms in the room. Farmer Fred Wow. And who won? Debbie Arrington Oh, the the top prize went to Marilyn Monroe , not mine this time. But one that was grown by Charlotte Owendyk. Marilyn is an outstanding show rose. She's one of the best exhibition roses ever introduced. But I don't necessarily recommend Marilyn for everybody's garden because she has some of the most vicious thorns you will ever see on a rose plant. It's only because she is so beautiful she ever made it to the market. Farmer Fred Okay, I'll cross that off my list. Debbie Arrington The roses that were sitting next to her up on the top shelf are both really good garden roses, as well as exhibition roses that fit all the qualities that you want in a cut flower with a lot less pain. And those are Ring of Fire , which is a hybrid tea that is a dark orange bordering on red. And it just sort of flows. And it's a really large, but the buds measure about two and a half up to three inches long. Then when the flower opens fully, you know, it's about five, six inches across is a big rose the color. It has a sort of inner burning orangey color beneath the red. So it just sort of glows in the vase, so very eye catching rows and excellent dark green foliage. So it just really sets it off nice. And it puts out very long stems easily 24-30 inches, this great big rose on the top. So they're very handsome. And the other one that was the Princess of our show was was the aptly named Hot Princess . And Hot Princess is a wonderful rose, both in the garden and in the vase, because it has beautiful form to it, a beautiful point that slowly opens, it has that sort of rolling pedals. That's a dark dark pink, and another one that has this almost fluorescent color to it. And so both of those make them very eye catching. And when you're competing against 1000 other roses, you have to have something that is going to draw the eye to it other than than the other flowers next to it, and it does it in the garden and also does it in the vase, both those roses. One of the reasons they're so outstanding for exhibition is because they put out good long stems. The key to growing long stems is when you cut a rose, is to cut a lot of stem with it. And that includes deadheading to the plant. Right now people have a lot of roses, they've gone through their first flush of bloom. And there's a lot of dead roses on the plant that have spent flowers. Most people will just snip them off with maybe one or two inches of stem underneath it. So they're leaving a lot of stem on the plant and just taking off a little bit of stem with the rows. Well, roses tend to grow to a certain height and a certain stem length. So if you had a long stem, you'll get a long stem on the next replacement rose coming off that cane. But if you cut a short stem, just like you're dead heading the top of the rose, then the rose thinks I don't need to put out any stem, I've got plenty of stem there. And we'll just put a little little rose on a little you know, side stem on top of that, that other stem. So instead of having a nice, long straight stem, you have this kind of funky, crooked, growth up at the top. And in the garden that looks fine. But if you're growing for a cut flower, cut long stems every time you cut the bush. Farmer Fred Where do you make that cut? I have heard it often said that the place to make a cut when taking a stem for a rose is to make that cut just above a bud that is putting out a five leaflet leaf as opposed to a three leaflet leaf. Debbie Arrington Yes, you always go down to five leaflet because the leaflet right there at the base of that leaflet, where it attaches to the stem, is the node. And that node is what is going to generate the next step. You want that down farther in the plant. And you also want it to be pointing outwards, away from the inside of the bush so that when that new growth comes, it will be growing out, and not in. That improves air circulation inside the bush. It also makes for straighter stems because it doesn't have to compete with other stems inside the bush. Farmer Fred One of my criteria also for going out to the yard and picking roses as a cut flower is I really like it when there's a bunch of roses all in one spot. I'm thinking of the Sally Holmes , there seems to be a gaggle of roses that are attached to what would be a long single stem and it fills out a vase very nicely. Debbie Arrington Yes it does. That's what's called a spray. That's a multiple buds on one stem. All roses will produce a spray, some more than others. Some roses are bred specifically to produce large flower heads like that, also called large spreads. And Sally Holmes is one of those. Sally Holmes is a white climber. The flowers are single and they look like apple blossoms. And actually roses are a distant cousin of apples. So Sally Holmes, you can really see the relationship between the two. And Sally Holmes is one of those roses that will literally cover a fence or a house if you let it. It grows very vigorously, very fast. But it does put out one stem for a full bouquet, with easily eight to 12 flowerheads on that one stem. Other roses that are bred that way are the floribundas. And floribundas are a class of roses that were introduced about 100 years ago from breeding and what their name literally means is abundant flowers. And they are roses that instead of just putting out one terminal bud on the end of a stem and that's the scientific approach to what you're describing: one bud, one stem. That's a terminal bud on that stem. Instead On a floribunda, and Sally Holmes, they put out a spray. And those are several buds that are collected at the end of that stem.. Farmer Fred What is the difference between a floribunda and a polyanthus? Debbie Arrington They're very different. Polyanthus tend to be little, itty bitty tiny roses, but lots of them. Polly means, "lots of" anthus. They put out on one stem, Oh easily, tend to 20 blooms, but they're tiny. They they look like little Tom Thumb roses, which is a variety, or Thumbelina , or something, something that is like a little fairy rose. In fact, a whole range of them are named after different storybook characters. There's a whole series of Snow White dwarfs polyanthus, that are named for each of the dwarfs. I've got Grumpy growing in my yard. And, Grumpy is hot pink, by the way, but the flowers are less than an inch across. And they had many little petals too. They're they're just dainty, and adorable. But they they're really nice in how they fill out, okay, because the key to making a good bouquet is not all the flowers are the same size. Now, if you're doing a formal bouquet, like an exhibition, they want all 12 roses to be exactly the same. But if you're making a bouquet for your table, or, inside or as a gift, it's really nice to have a variety of size flowers in there when you put together an arrangement. The basic formula is thrill, fill and the spill. And the thrill is your focal points. And those are usually, if you're talking roses, you're talking big roses. The fill is things to go between those big flowers and polyanthus make an excellent filler flower and they're these little tiny flowers that echo the big rows, but they're small, and they are usually lighter colors there. There's some dark pink ones, and there's a few reds too. Wingding is an excellent red polyantha and it's fire engine red, but a lot of them are like baby pink or white. And so it's like a nice, soft frame for the other flowers. And then your spill is your foliage, and other things that framed your bouquet and spill over the edges of the vase to soften the edge of the vase. So ivy is a good fill, it could spill. Ferns, any sort of your curved foliage that would complement the roses. I have a lot of sword ferns. And so I usually use those to fill out my rose bouquets. But I also have some different ivies which look really nice. And Nandina, the heavenly bamboo, and that's good for fill as well as spill. Because they have the little white flowers on the Nandina right now. And those look almost like baby's breath in the vase and a lot easier to grow. But other foliage that is just pretty foliage, this green foliage that frames the flowers nicely. You're softening the hard edge of the vase and framing your flowers when you add your foliage quite often, florists will add a sprig of citrus leaf, orange or lemon, because that adds an extra scent to the bouquet and a popular trick to add more rows sent to a bouquet of roses is a stem of rose geranium. Because the Rose Geranium actually has a stronger scent than most roses. Farmer Fred Do you want that? Debbie Arrington Sometimes, yes. For roses don't have that much scent. Might have a lot of look but not in a lot of scent. Farmer Fred Well, I distracted you from talking about floribundas. Debbie Arrington Oh, there's a lot, and floribundas they're a class of roses that are almost full size, hybrid tea roses. Most floribundas are three to four inches across when fully opened. But they have this blooming habit where they will bloom in a spray instead of single roses. And they can put out single roses too, but they tend to put out these big flower heads. And my favorite and the favorite of most people here in Sacramento is Julia Child . It is a wonderful butter yellow floribunda and Julia herself picked out this rose to honor her and it is a color of freshly churned butter to a lovely yellow and it grows in these big soft romantic curvy heads. They're very rounded, they're very soft and very full. So it has this sort of Old English look to it. The most of the sprays oh they've usually got five or six on it, but it has very good foliage, a very clean foliage so it's a nice kind of like a dark apple green and the scent on it is a really interesting licorice scent. It's not what you would typically say as a rose scent, but it's a beautiful yellow rose. It's really nice in the landscape because it stays in bloom, all through our heat without losing that yellow color. And that's one thing that's really tough in Sacramento, is that a lot of roses get bleached out in summer, because it's just too hot and you really get better bloom if you have an East facing garden instead of it being south facing or in full blasting sun. That way your your color will last longer. Other floribundas I wanted to mention that just put out pectacular bouquets include Betty Boop . Betty Boop is just a fantastic rose. But it can take all sorts of different growing conditions. And my Betty Boop right now, oh, it probably has 300 roses on it. It's tall. People tend to think floribundas are small, because they're marketed that way. You can prune a floribunda harder than a hybrid tea and keep it smaller. So you can keep the bush in a smaller space like three to four feet, instead of, you know, four to five. My Betty is about six foot tall and six foot wide and just covered with blooms. Betty Boop. Looks like each of the blooms are kissed, with bright red lipstick. Oh, they call it semi double. It's about eight to 10 petals. So the petals are very open and look almost single with real pronounced statements in the middle. And it's cream colored, but with this bright red edge to it. So it's like somebody painted lipstick right on the edge of each bloom. It's a lovely rose. So you can just imagine these big heads of those flowers in a spray with you know, 10 or 12 of them clustered together. They're just lovely. And bees love that rose because it has such pronounced stamens and very open blooms. So it always has a lot of bee activity. And it's just a beautiful rose in the garden. And another one of my floribunda favorites, it doesn't so much put out the big spray as it puts out a lot of singles, but it is just an absolutely gorgeous rose. It's called Daybreaker . And Daybreaker is a kind of an apricot blush color with a gold center and has a little bit of striping in it. And so every bloom looks like a slice of the dawn. And every one is different, just like dawn's art. No two are exactly the same. And it has beautiful dark green foliage that is totally disease proof. It never has any rust or powdery mildew or Blackspot or anything on it. It is just bulletproof as far as as any diseases, and I have a no-spray garden, so if somebody is prone to something, I know it right away. It puts out really nice long stems that look fantastic in a vase. It easily has about, I'd say, 60 blooms on that bush right now. And each of them has a two foot stem and that again is Daybreaker. Daybreaker. Yeah, it's a beautiful, beautiful floribunda. THE BEST ROSES FOR CUT FLOWERS, Part 2 Farmer Fred You used a couple of terms that probably need a bit of definition for people who don't know. You talked about roses that are singles and roses that are doubles, what is the difference? Debbie Arrington A single rose has fewer than eight petals. And quite often a single rose will have five or six petals. And it looks very open like an apple blossom with real pronounced stamens in the middle. And stamens are those little yellow gold things in the middle of the flower. It has a very open look to it like sort of like a daisy or something. You know, it doesn't even look like a rose a lot of times, which is one of the reasons they're very eye catching is because you have to think twice about what it is there. Betty Boop has a few more petals than eight. You know she has some roses on her that are probably about six to eight, but quite often has eight to 10. So that makes it called a semi double, which is up to 16. But other than that, roses are full roses, it just depends on how full. And so a full rose is anything above that. Most hybrid teas are in the 30 to 40 range, but your Austin roses, which are your big English red roses, that are supposed to be like giant cabbage roses, they can be 80 to 100 petals and that's why they get so full looking. They have so many so many petals. But that also makes them extremely fragile. And they quite often will burst and literally throw petals all over the room. It's pretty wild. Farmer Fred Yeah, I think that's another important criteria, is you don't want a plant on your dining room table that's going to make a mess. Debbie Arrington One that explodes. Yeah, so you know I have just a few Austin's because they get pretty big. And both of the ones that I have are in the ground, at least are ones that have smaller habits, which means that they stay under four to five feet. Because the thing about the Austin roses that they discovered these were shrub roses that were originally bred in England, where it tends to be colder than here in Sacramento. They stay smaller, you know, in like four or five foot range. But when they come to Sacramento, they love the warmth. They think it is just fantastic here and they will get to be you know, six to eight feet real quick and just as wide. And they're very handsome if you have the room, but they take up a lot of room. So the two that I have, one that they released a long time ago named Tamora which is kind of apricot color. And the other one is this new one that was released a few years ago named Olivia . And yes, they do name most of the roses after people are for women's names. Olivia is an outstanding rose if you're going to get an Austin rose. Olivia would be the one to get because she has all the good qualities and none of the bad for an Austin rose. She's a light baby pink, and with very full cabbage style flowers and incredible scent. Just a wonderful scent. And she puts out big sprays where one stem is a whole bouquet. She also can grow in semi shade because I've got her in a spot where she gets quite a bit of shade during the summer. And she keeps blooming and she has very few thorns. The big difference between her and Tamora is that Tamora is covered with prickles. Just terrible, terrible thing. But Olivia is just the best of the Austins for cut flowers. Farmer Fred Well, since you brought it up, will either of those explode on the dining room table? Debbie Arrington Oh Tamora does. Tamora will do it in a day. Tamora does not last well off the bush at all. But Olivia, when she goes, she will explode all over the table. Yes. Because she has just so many petals. And they have to go somewhere. Farmer Fred But do you recommend them as a cut flower? Debbie Arrington Yeah, because the scent is so strong. Okay. Farmer Fred All right. And, of course, most people are familiar with hybrid tea roses, in my experience with hybrid teas is they don't really have a long stem. They don't look great, that great in a tall vase. Or am I just being lazy on this? Debbie Arrington It depends on how you were cutting those stems, and how you were training that plant to grow. Because most hybrid teas are bred to put out nice long stems. That's one of the things that they look for in that rose. And there are a lot that will put out very good stems, especially for your first flush of flowers, those ones that you get in April in May. Farmer Fred All right. Now I know we've mentioned a couple of hybrid teas already, Ring of Fire and Hot Princess, what are some other good hybrid tea roses for cutting? Debbie Arrington Well, I'll start with the reds, because that's what people usually associate with cut roses is red roses. And that seems to always be the request that people have is what are some good red roses that I can grow and cut and bring inside? And everybody's favorite in that category is Mr. Lincoln . That's an old oldie, but still a goodie. And one of the reasons it's so beloved, is that it has a wonderful deep red rose scent, it's a very heavy scented rose, and that you bring one of those stems inside and it will fill a room with scent. So it's much sought after for that. It's a very dark red rose. And it's one of those roses that if it's planted in full sun, it can get kind of toasted. But it's a nice rose, you know, and it has wonderful long stems, and very consistent. Another good red is Olympiad , and Olympiad was introduced in 1984. For the LA Olympics. It's a classic red rose with a wonderful, high pointed center. It looks like a florist rose, has very few prickles on it. And a nice long straight stems. It has a beautiful red color that does not fade. So a very consistent rose in the garden. And a red rose that was introduced recently that is a outstanding red rose that looks just like a florist rose, is called Veteran's Honor . And it is a dark red with a high point and it lasts a long, long time in the vase, it will last easily a week, and it will still be continuing to open during that time, instead of opening really quickly. That's the one thing about Mr. Lincoln, is that once it's off the plant and in a vase it will tend to open fairly quickly. While Olympiad and Veteran's Honor will stay in their bud form much longer. Farmer Fred Is that a good thing? That's another thing I've been wondering about as I'm pursuing this new hobby of cutting roses for displaying indoors, is I see some of these with full open flowers. And yet there were buds that haven't opened right next to it. And I'm wondering, well, maybe I better not cut it because those buds will never open, Debbie Arrington The buds will eventually open. In most cases, the key is to keep getting water up the stem. And so when you bring that flower into the house, really cut the stem underwater, because it will remove any air bubbles. And it will get better flow of water up the stem. And recut the stems every couple of days. Also underwater again, to keep that flow of moisture coming up the stem. Because as long as there's there's water coming up the stem, those buds should continue to develop and open. Farmer Fred Now explain to me exactly how to do that. Do you keep a bucket in the kitchen and then take the rose out of the vase, put it in the bucket, make the cut and then quickly transfer it back to the vase? Debbie Arrington Yeah, but I don't even take a bucket. It's just like a cup of water or something. It's just just long enough for me to get a pair of scissors in there to snip the end of the rose because it doesn't need much, just about an inch from the bottom of the stem. Farmer Fred Okay, that's a good tip for cutting roses: trim them every couple of days and do it underwater and then plunge them back into, I imagine, into fresh water in the vase. Debbie Arrington And you can use some sort of flower food. That will help keep the water cleaner. What it does is add some sugar to the water and that is some nutrients. It's like giving your plant fertilizer and help the plant continue to be robust off the plant. Farmer Fred Will ginger ale accomplish the same thing? Debbie Arrington Yeah, So does sevenup or sprite. As long as you don't use diet versions. Farmer Fred Okay, well good. Now I know what to use that unopened bottle of ginger ale for. Debbie Arrington it will work. It's like ginger ale does have have some ginger in it. So It will color the water, but sprite and seven up, you know, they don't have any coloring in it so it doesn't come into the water as long as you don't use diet. Another tip while we're talking about it, is make sure to remove all the foliage that's going to be below the waterline, because the foliage will decay when it's underwater. And that will ruin the water. It makes it all funky. Farmer Fred 30:24 So do you use tap water to put your flowers in? Or are you somehow maybe using a filter? Debbie Arrington I just use tap water, that's fine. Our water's fine here. I mean, there's a problem over in the Davis area because of the boron in the water. But most people have that filtered off their tap, anyway. Farmer Fred What about soft water systems? Debbie Arrington Oh, geez, it should be fine. Okay, Farmer Fred I guess the other option is to use like a Brita filter like you'd use for drinking water and use that. Debbie Arrington Yeah. Farmer Fred Let's go back to hybrid tea roses and add some color to our to our red selection of Mr. Lincoln, Olympiad and Veterans Honor. What are some other colorful hybrid tea varieties for cut roses? Debbie Arrington Well, a lot of people love pinks and there are a lot of great pinks. One right now that a lot of people have and it's a very popular rose for several reasons is Pink Promise . And Pink Promise was distributed a few years ago as the breast cancer rose. A portion of sales went to a Breast Cancer Research Fund. And it is a lovely, classic shaped, really light pink rose. Very much like a baby pink, with just a little bit of a darker edge around the petals. And what's outstanding about this rose though, it puts out really long stems, beautiful, two to three foot long stems with these huge roses that are easily three inches long. So they're beautiful, but the one thing it does tend to fade out in heat and so it gets a little toasty around the edges, but it's a very pretty rose and very nice long stems and not many thorns on it either. So it's very good that way. A traditional pink, there's two that have a very kind of a fluffy look to them, but are really nice pink and one of them is Queen Elizabeth . Queen Elizabeth is the original grandiflora rose. Grandiflora is a cross between a hybrid tea and a floribunda. So it has that habit of putting out big sprays on one stem but they're full size roses and very showy and very big. And Queen Elizabeth was introduced the year that Queen Elizabeth the second took the throne, back in the early 50s. And it is an outstanding medium pink rose that just blooms and blooms and blooms. And she looks fantastic in the in the landscape and she's fantastic in the vase. They tend to open up quickly as a lot of grandifloras do tend to open up quicker than hybrid teas. A stem is a bouquet so it's a really, really nice rose. Another good pink that looks similar to Queen Elizabeth but is a hybrid tea is named Friendship . And that's a lovely rose. And those roses, they'll last a week off the bush easily. And another pink, this rose is wild, it is Gentle Giant . Gentle Giant is hot pink with a little bit of yellow in the throat and those blooms are easily eight to 10 inches across. When fully open, wow they they are immense. They're really impressive. And very very pretty. it's a lovely color in the blend. And one that has a wonderful scent and that lots of people love is Double Delight . Double Delight doesn't have that long of stems. it tends to stay a shorter plant but the flowers are just beautiful. And they have this wonderful kind of apple scent to them. They're cream colored with red coloring on the edges of the petals and the more heat and sun it gets the redder the bloom when early in the season. It will look very cream colored with just a little bit of blush on it. But by the middle of summer, it will look like it's a red rose with a little bit of white in the throat but it has a wonderful scent and it's another one that can really fill a room up with perfume and it looks good in the garden and good on the table. Ones that are yellow. Yellow is another popular color. And there are some excellent yellows that have come out recently. One of them is called About Face . About Face is a grandflora and it's really tall. it's definitely one that you want to put at the back of the bed because it goes six feet and up and it can throw up canes that are 10 foot tall. They're just amazing, which means it always has great long stems if you're looking for long stem, and the roses are easily six inches across when fully open, and they're bi-color on the inside of the petals. It's a light gold, but on the outside of the petals, It's a copper color. It's a real dark copper. And so it looks like two different roses on the same plant as they open up. It's a really interesting rose, and very pretty. One that's more traditional gold is called Strike it Rich . It's a grandiflora., And another one is Gold Medal . It's also a Grandiflora and one of the things about the grandifloras is a lot of them have fewer prickles, which makes them a lot smoother stemmed. And so they're easier to work with. And they're definitely easier for a bouquet. Farmer Fred And that last one, of course, was Gold Medal. Please continue. Debbie Arrington Yes. And Gold Medal is one that is a beautiful exhibition rose as well as in the garden and in the vase. It's a gorgeous, perfect yellow form. And it keeps it's dark yellow, which is really nice. While Stike it Rich is more of a soft gold as you would think, because it has, you know, they're both golden in their names. Love and Peace is a combination of red and yellow, which is really striking in the vase. It was a hybrid created between the Peace rose, which is a beautiful light yellow pink combo, and a rose named Love, which is a beautiful red rose. And in one of those weird happenstances it actually worked where they got what they were aiming for. It looks like a Peace rose with a dark red blush. And it's a very striking rose in the garden and in the vase. Perfect Moment is another one that's a red and yellow blend that's very striking as a cut flower. It has very nice long stems, and very consistent. My bush puts out 36 stems at once. With these big, big buds on them. It's a very, very good looking plant. Sunset Celebration is a wonderful orange. It's kind of a medium orange, somewhere past peach. It's a really nice orange color that holds this color instead of fading into something that's attractive. And it opens very slowly and has long, nice straight stems. It's a very good looking rose, and I have one left, that's a purple rose, because purples are good. Silver Star is kind of a lavender-mauve color. And it tends to put out a lot of sprays. So it's another one that has this bud habit of a bouquet on the stem, and it will bloom in summer shade. I've gotten in a spot where it's getting less than five hours of sun a day, and it blooms beautifully. Farmer Fred I will repeat that for those of you who like me may be blessed with more shade than you'd like, the name is Silver Star. Now let's talk a little bit about some, shall we say, rose confusion that exists out there because if somebody goes shopping for roses based on what we're chattering about here, and let's say they see Love and Peace. Well, they may see the hybrid tea like we've been talking about, but they may also see a miniature Love and Peace and a lot of these roses come in more than one form, don't they? Debbie Arrington Well, it depends. There's only a few of them really, where they doubled up on the name, because the registry tries to stop that confusion. But there are many forms of roses and miniatures are our one class of roses and miniatures are not referring to the size of the plant, they are referring to the size of the bloom. And miniature rose blooms tend to be under two and a half inches. There's smaller blooms. And the plants also tend to be smaller, generally will stay under three feet tall. And there's some that only grow to about ankle height. And in a container they'll stay quite small and compact. The roses can look like hybrid teas they can look like floribundas with big sprays, but they always are smaller. And so that that's why they're called a miniature. Farmer Fred Well, I have plenty of small vases. So I bet there's some good miniatures that make for good cut flowers. Debbie Arrington Yeah and closely related to miniatures are a class they created a few years ago called minifloras, and minifloras are that gap between miniature and floribunda. So it gets even more confusing. But yes, there are many miniatures that look really nice in a vase. Everybody's favorite in Sacramento is this one called Joy . and Joy is a classic, old creamy white rose, but has this purple peak edge, a picotee edge on the blooms. And they look like little hybrid tea roses. They they have that perfect form of a hybrid tea with a pointed center. But it has this edge that's this purple pink. That's very pretty. And it puts out lovely sprays. It's a really nice looking rose on the plant and also in the vase. It's just gorgeous. It almost always wins when when somebody brings in a good Joy. Farmer Fred Yeah, that is the rose that got me interested in doing roses as cut flowers, because the Joy in my yard last year just performed outstanding. It was in a very warm area too. And yet it bloomed and bloomed and got like four feet tall. Debbie Arrington Yeah, it's a very vigorous plant. It's really lovely. There's another that it's been an instant hit. And its name is You’re the One . And it is pink and yellow blend. And it's a very vigorous plant. And it's just covered with flowers right now, mine is at least, and they look like like full size hybrid teas, only they're tiny, maybe about two inches across. But very pretty. Kind of hot pink with it with a yellow blend at the throat. And my favorite miniature, at least in my own yard, is one that's called Rainbow Sunblaze . And it is a red yellow blend, it has more of a ball shape in the middle instead of a pointy center. But it just blooms and blooms and blooms. And so it's one of those I can always make a bouquet off the bush, you know, and it stays fairly compact. It's about two and a half feet tall. But easily that wide also, and just covered with buds. So it looks spectacular in the garden. And it also allows me to make lots of bouquets after that. Farmer Fred So I'm going to make an assumption here. I hope it's true. There is in the world of roses, a lot of single blooming roses where you get one major flush per year. And I think all the roses we're talking about today are repeat bloomers. Debbie Arrington Yes, it is. And there's a lot of older roses that only bloom in spring that are just single bloom roses. And a lot of your species roses and old garden roses will only bloom in spring, they bloom just once a year. But everything we've been talking about today, blooms multiple times a year, and very reliably. The thing about roses is that they react very predictably, when you cut off a stem, they will try to grow a new stem with a new flower on it. And that will take about six to eight weeks, depending on weather conditions until it blooms again. So if you have a major event coming up and you have a lot of flowers in your garden, you want to have a lot of roses for people to see. Like you know you're having a party or a wedding, backyard wedding or something like that. Count back eight weeks from the event and prune your rose bushes. Because the roses will put out new blooms that will bloom in six, eight weeks. And so it will have a very predictable flower show when the time comes. So you can use that. It also works if you're planning to have a rose show. Farmer Fred Or a wedding. Wedding events. Yeah. So people who plan weddings well in advance. You want to, if you're going to have a summertime, especially a late summer wedding in your backyard, then six to eight weeks beforehand, prune the roses. Do you have any more tips for growing roses or caring for roses as cut flowers? How often do you fertilize them, for example? Debbie Arrington Right now about once a month. Well, because I started my pruning schedule in anticipation of having an April rose show. I had a big bloom in late April. And so now my plants are cycling back. It's at that time of year where they're warming up again. So I've been doing a lot of deadheading. And so now that they're deadheaded they need some food. So I tend to fertilize after I've done a lot that. Farmer Fred Any of the roses we've mentioned, will most of these roses work well across the portions of the country that grow roses, I guess would basically be USDA zone six through nine. Debbie Arrington Oh, yes, definitely. Roses, you know, admittedly they grow better in Sacramento probably than just about anywhere because we have just about the perfect growing conditions for them. Farmer Fred We have low humidity, there's no summer rain and there's no Japanese beetles. Debbie Arrington Yeah. So we have good soil, we have everything they need. And roses actually are very drought tolerant. You know, that's one thing to remember. You know with them is, is they can get by with less water if you need to. The one thing is when you do cut back on your water cut back on your fertilizer. You can burn your plants. Farmer Fred And I imagine mulching would play a big role in making them more drought tolerant, too. Debbie Arrington They appreciate mulch. Farmer Fred Alright, did we leave anything out? Debbie Arrington To prompt more bloom, you need to cut your roses regularly. You need to cut out the spent blooms and encourage that plant to bloom more. Some people, though wonder why the roses aren't blooming, and then they realized they never took off the old roses. And if you don't take those off, that rose will think that it is done for the season and it should just let that turn to fruit. Farmer Fred Which is higher in vitamin C than most foods. Debbie Arrington Yes, rose hips are very high in vitamin C. That's for a podcast for the fall. Farmer Fred There you go. Cutting roses. Add them to your garden. A good pair of snippers to helps as well. Debbie Arrington, thanks so much for all your help, growing some good roses today. Debbie Arrington Thank you very much. It's my pleasure. (Here’s an update from Debbie, with the 2023 Sacramento Rose Show results:) “Yes, we did hold our 75th Sacramento Rose Show on April 29 at Shepard Garden and Arts Center. Two weeks before the show, we were worried if we were going to have any entries. It had been so cold and wet, nobody seemed to have any blooms. (Baldo Villegas had only one or two open buds at that time -- out of 3,000+ bushes.) But then it turned 90 degrees and bam! Roses everywhere. It just shows roses like heat and sun. And when they get it, they grow and bloom rapidly. Our top roses were all oldies. I'm inclined to think that these all came from well established older bushes that really benefited from the rain. (I know it's true in my case.) Winner of the 75th Sacramento Rose Show Queen of Show was ' Mikado ,' a 1987 red-gold blend hybrid tea. It's similar to Perfect Moment but bigger and redder. The inner petals just glow. Beautiful straight stems. Classic form with a lot of petals (35). And it was my rose. It's only the second time I've won Queen HT (Hybrid Tea) at Sacramento. (I've won Queens of minis and minifloras.) The other time I won was with 'Marilyn Monroe' in 2017 (maybe 2018). Marilyn wins a lot. That rose was introduced in 2001. Mikado is now out of patent, so it may become more widely available as a non-patent rose. It was an AARS winner. King of Show was 'Veterans' Honor," a beautiful red HT, probably the best red long-stem rose available. Introduced 1999. Princess of Show went to a real oldie, ' Paradise ," a 1979 AARS winner. (I had one of these at the Long Beach house.) It's mauve with outer petals of red-purple, and has a great scent. It is available as a non-patent rose. Linda Larsen, an up-and-comer in our club, exhibited both the King and Princess. Another of my HT roses made the Court of Honor: California Dreamin '. It's a 2009 introduction and just delightful -- big, creamy white blooms edged in purple pink. The hotter it gets, the more pink on the petals. For really long stems and some unusual roses, I recommend ' About Face .' It's a 2003 AARS-winning grandiflora. It puts out 8-foot stems all the time -- crazy long stems. (They're not canes because they're not sprouting from the graft.) The cuplike flowers are copper on the outside of the petals and golden apricot on the inside. Very impressive, but it needs room.” Thank you for also listening to the Garden Basics with Farmer Fred podcast! It’s available wherever you get your podcasts. Please share it with your garden friends. Fred Hoffman is also a University of California Cooperative Extension Master Gardener in Sacramento County. And he likes to ride his bike. This is a public episode. If you'd like to discuss this with other subscribers or get access to bonus episodes, visit gardenbasics.substack.com/subscribe

May 12, 2023
Flea and Tick Control Tips
As the weather warms, so do outbreaks of fleas and ticks. Today’s newsletter podcast features an interview with retired veterinarian and Master Gardener Heidi Napier, who talks about these pests, along with a scenic bypass about controlling slugs and snails using less toxic products that won’t harm your kids or dogs. Flea Control Tips This pest can live indoors and out, as well as on your pets. However, a combination of remedies can reduce a flea population. The trick, though, is to attack the problem simultaneously on three fronts: indoors, outdoors and on your pets. Here are a few flea control suggestions from the UC Integrated Pest Management Program. Inside the Home: • Wash throw rugs and the pet’s bedding in hot, soapy water once a week. • Vacuum daily or every other day to remove flea eggs, larvae, and adults. Include upholstered furniture, cushions as well as in cracks and crevices of furniture. • Vacuum carpets, especially beneath furniture and in areas frequented by pets. Recent studies suggest that destroying the vacuum bags isn’t necessary. • Use a hand sprayer to treat all carpets with an insecticide that contains an insect growth regulator. The most effective spray products contain the Insect Growth Regulator methoprene or pyriproxyfen. Aerosol foggers don’t provide the coverage and long-term effectiveness of direct sprays. • Hand spray pet sleeping areas, areas beneath furniture, baseboards, and windowsills. On the Pet: • If you administer oral or topical products early in the year before flea populations begin to build, the products can prevent fleas from establishing themselves in your home. Contact your veterinarian for advice in selecting the best flea-control product for your situation. • Use a spot-on or oral treatment, which can be purchased in pet stores or from vets, or a systemic oral treatment, which is available from vets only. Active ingredients suggested by UC that are available over the counter include Fipronil and Imidacloprid. Prescription products include those with the active ingredients Dinotefuran, Lufenuron, Nitenpyram, Pyriprole, Selamectin and Spinosad. • University of California research has shown that neither Vitamin B1 supplements nor brewer's yeast prevents fleas from feeding. In addition, herbal collars and ultrasonic devices are not effective flea repellents. • In our home, we spend quality time with our cat and dogs when we bring out the flea comb. This fine-toothed comb manages to pick off at least a couple of fleas from the cat each week, as well as letting us know when there is a major flea outbreak. Outside the Home: • If you treat your pets with spot-on or oral treatments, you’ll rarely need to spray outdoors. • Sprays are only necessary outdoors if you detect lots of fleas, usually in shady areas or places where pets rest. To locate heavy infestations, walk around pet resting areas wearing knee-high white socks. If fleas are present, they will jump onto the socks and be readily visible. Tick control tips from UCANR : * Ticks can spread several diseases to humans and pets, but Lyme disease is the most common. In California, Lyme disease is carried by the western blacklegged tick which occurs throughout the state. * Lyme disease has been reported in most California counties, but some areas pose higher risks than others. * You can protect yourself from ticks and the diseases they transmit by wearing long pants and long-sleeved shirts outdoors, using an EPA registered repellent with 20-30% DEET, or applying permethrin to clothing. * Check yourself often after being outside in areas that are prone to ticks (forests, woodlands, and grasslands). * Shower within 2 hours of exposure to ticks and place clothing in a hot dryer for an hour to kill any ticks that may be on them. * Safely remove ticks with tweezers by grabbing the tick as close to the skin as possible and slowly pulling it out. * The California Department of Public Health (CDPH) says to control ticks around your home , remove leaf and grass litter from your yard and create a 3-foot barrier of mulch or gravel between your lawn and unmanaged or forested areas. From the University of Massachusetts/Amherst Hort Notes, May 2023 : Q. I have been receiving offers and seeing advertisements for services to spray for ticks and mosquitoes. Is this something to consider and is it safe? A. Perimeter yard sprays are recommended as part of a three phase plan: Protect Yourself, Protect Your Pet and Protect Your Yard . I tell people not to depend on a yard spray as their only effort. Wearing permethrin treated clothing/footwear should be a front-burner tactic; a yard spray is a way to further reduce exposure risk. As far as yard spraying, this is something you can easily do yourself with a hose-end sprayer available at any garden center. Check out our video on yard spraying, as well as other resources about ticks, at capecod.gov/ticks(link is external) . When contracting a service, there are key questions to ask about what, where and when to spray. * What? The products should contain the active ingredients bifenthrin or permethrin. These have very low mammalian toxicity and, once they contact leaf litter or soil, they are immobilized, so there is no potential to leach and they are degraded by soil microbes. All Natural products that contain botanical oils like rosemary or cedar are NOT recommended. Research has demonstrated them to be completely ineffective. * Where? Only the perimeter of the yard where there is shade and leaf litter under shrubs and trees. If a service offers to treat the entire yard, they really do not understand ticks. * When? Mid to late May and mid to late June covers the window when nymph stage deer ticks are out. I also recommend a third spray around mid-October when the next generation of adult stage ticks emerge. A major study is underway to determine how effective perimeter yard sprays are by The New England Center of Excellence in Vector-Borne Diseases. If you are interested in participating, please visit https://www.newvec.org/itch(link is external) to complete their survey. Larry Dapsis, Deer Tick Project Coordinator – Entomologist, Cape Cod Cooperative Extension Thank you for also listening to the Garden Basics with Farmer Fred podcast! It’s available wherever you get your podcasts. Please share it with your garden friends. Fred Hoffman is also a University of California Cooperative Extension Master Gardener in Sacramento County. And he likes to ride his bike. This is a public episode. If you'd like to discuss this with other subscribers or get access to bonus episodes, visit gardenbasics.substack.com/subscribe
May 5, 2023
Can Human Food Also Be Plant Food?
Interview with Robert Pavlis of GardenMyths.com : Can Human Food also be Plant Food? (It depends how you apply it.) (originally aired in Episode 126 of the Garden Basics Podcast) Farmer Fred: What do you give plants to drink besides water and plant food? This question actually has been asked on many social media outlets, and in many gardening groups. And you might be surprised at the number of household kitchen products that are given to plants. Are they worth it? There is one gentleman who actually tackles a lot of garden myths. He's even written a book on the subject. It's Robert Pavlis. He's a well known speaker-educator, with over 40 years of gardening experience. He's the author of several books including "Building Natural Ponds", "Soil Science for Gardeners", and "Garden Myths". And he publishes the popular gardening blog, gardenmyths.com as well as garden fundamentals.com . He gardens in Ontario, Canada, and Robert Pavlis, it's a pleasure to have you on the program. Tell us, for those of us who aren't familiar with gardening conditions in Ontario, Canada, exactly what your seasons are. Robert Pavlis: Well, we have a USDA Zone five garden, so we have a fairly long winter. Around here we don't get great snow cover but we do have snow and then we have hail and sleet and everything in between. And then it gets warm and then it gets cold. So even though our winters aren't that cold, the problem here is that we have this freeze-thaw problem. Then spring comes, the summers are quite humid, quite hot. So today is 29 degrees centigrade (84 F). And fall comes pretty quick. And you know, by middle September, while things are finished in the garden by October, we could have frost. Farmer Fred: So if you're going to grow a summer vegetable garden there, you start around Mother's Day and wrap it up by, I guess, the end of September. Robert Pavlis: Yeah, well, our traditional last frost date is May 24. That's moved back now to around May 10. So a lot of gardeners up here will try to extend that season. So we use things like rowcovers, or we gamble, what I call gambling in the garden. And I plant things two or three weeks early and hope it doesn't freeze. But that doesn't always work. And we try various other ways to keep things a little warmer. But yeah, early May. Tomatoes and warm season crops, they probably won't go out until late, middle-late May, depending on the year. Farmer Fred: All right. So a bit shorter than here in California, to say the least. Robert Pavlis: Just a little bit. Right. Farmer Fred: All right. Well, I love your GardenMyths.com column that you post, and people can subscribe to it. It's free, and you get email notifications when they are released. And awhile back, you had one on feeding plants from the kitchen, discussing which products actually work. And for those of you who are short of time, the quick answer is, "not many". But I am amazed, though, at what food scraps people are feeding to plants that they think will work. I guess we should start off with discussing exactly how plants absorb nutrients. Robert Pavlis: Plant roots only absorb certain things. And they have to be what I call small molecules. So nitrogen, potassium, phosphate, these are all small molecules. But what you have in most plants is large molecules, proteins, carbohydrates, and so on. And you can put all that you want on a plant, it can't use it until it decomposes. That's why that composting process is so important. We're taking large molecules, converting them to these small little nutrients that plants can use. And until that happens, plants get no benefit. And they need a certain amount of those, they need a fair amount of nitrogen. They use a fair amount of potassium and phosphate, and then they use about a half a dozen other minor nutrients like calcium, magnesium, manganese, and sulfur. And they need all of those. So one of the things I look at when we're talking about the stuff we're putting on our plants, the first question you really need to ask is, what nutrients are in there? And by the way, the one nutrient that most soil is missing is nitrogen. And I won't get into why, just accept the fact that most of the other nutrients are probably there in the soil. But nitrogen can go away very quickly. It doesn't stick to soil, it runs away. So in most cases, growth is controlled by the amount of nitrogen you give your plants. Now, if you are deficient in one of those other things, you also need to add that one, but nitrogen is a key one. So the key question is how much nitrogen is in what I called food scraps, adding to my plants, and if it's very minor, then it's really not going to do much for your plants. Farmer Fred: And besides, it has to be converted by the soil biology into a form that the plant can use. Robert Pavlis: That's right, and nitrogen is used mostly as nitrates and some as urea. But plants pretty much use nitrates. So if I take a big protein molecule, which has lots of nitrogen in it, and I give it to my plant, it's absolutely useless, the plant can't use it. Now, the bacteria in soil may come along and degrade that protein and eventually release the nitrogen. But until the nitrogen is converted into nitrate, plants can't use it. Farmer Fred: Well, speaking of high protein foods that people like to put on plants for one reason or another, is milk. And this is something that people have been trying for years. Does milk do any good on a plant? Robert Pavlis: Well, I guess it depends on how you ask the question, right? So milk is mostly water, the second biggest ingredient in clean whole milk is fats. So now there's a tiny, tiny little bit of other stuff there. And some of that is protein, and protein does contain nitrogen. So milk does have a very low level of nitrogen in it. It also has things like calcium and magnesium and some of the other nutrients. So yes, adding milk to plants will provide nutrients to that plant. The question you really need to ask: is that enough nitrogen to actually make my plant grow? Well, and quite honestly, if you have spent milk, you know, you can't drink it. Okay, put it in your garden, put it on some plants, and it will do some good. But milk is an extremely expensive way to get nitrogen. So if you're using good milk that you could drink, I would never put that on the soil. That's just a waste of money. Farmer Fred: Exactly. It's a very expensive source of nutrients, if you dare. All right. Now, people also want to think that they can get their plants to grow faster if they give them some coffee. And I don't think plants absorb caffeine. Robert Pavlis: Yeah, this is something that people like to do. So they've finished drinking their coffee, there's a bit left on, it's got to be good for them, let's put it in the plants. So what I did in that blog post is I took a slightly different approach, because so many people are against chemicals, and pro organic. And this concept never makes any sense to me. I'm a chemist, so I understand what's going on here. And coffee is full of all kinds of carcinogens, and I listed them in the blog. And, I said, would you give that to your plants? I mean, would you even drink it yourself? All right. Well, that's the key here. And the thing that people just don't understand is that there's lots of chemicals out there that are toxic, and most of those, in fact, come from plants. Remember, coffee is a plant extract, it is coming from plants. Every plant we eat is full of toxins. The key question is how much of that toxin is in the plant? And what does it do to our bodies, and in most cases, these levels are very low. You don't have to be concerned about them. The chemical names just sound really nasty. They are carcinogens without question, but their levels are low. And the other thing is our bodies have been doing this for millions of years and we're very adapted to eating these toxins as long as they stay in low levels. So coffee doesn't hurt us, and coffee will probably not hurt most plants. However, there's a caveat here. Coffee does have caffeine in it; and, coffee grounds, which are also very popular in the garden. They also have caffeine, and both of them can harm seedlings. So small plants can be given too much caffeine from the coffee grounds if they're used as a mulch. And I guess if you pour too much coffee on you'll get the same effect. So caffeine can kill small plants and it can stunt larger plants, so you have to be careful how much caffeine you put on your plants. Farmer Fred: That takes us down another scenic bypass. All the people that are going to Starbucks and picking up that five gallon bucket of coffee grounds and taking it back home and putting it around their acid loving plants thinking it will acidify the soil. My concern is they apply those coffee grounds too thickly and it becomes an anaerobic environment. Robert Pavlis: Yeah. Well, there's a couple myths in this little story. The first thing is coffee grounds are not acidic. So I don't know where that came from. They can be slightly acidic, or they can actually be alkaline. But they're certainly not heavily acidic, they're not going to acidify the soil around your plants. And it's now been shown that a little bit as a mulch is probably okay in your ornamental beds. I would not use it in a vegetable garden where you're planting seeds. Just keep coffee grounds out of there completely. And quite honestly, the best thing you can do with them is compost them first. That will reduce the amount of caffeine and then they'll be fine in the garden. Farmer Fred: I feel sorry for house plants, especially in offices, especially around party time, just because people tend to dump everything into the house plants on their way out, including things like beer or Gatorade. Robert Pavlis: Yeah, yeah. By the way, this list came from an actual discussion on Facebook and these are all things that people suggest that I didn't really make out the list. I just went down and recorded it. And yeah, people are pouring good beer on the plants. I don't get that. Again, there's some very minor value there, because again, it has some protein in there. But basically, it's not doing any good for your plants. Gatorade, the reason people use that is because it replaces electrolytes. I mean, Gatorade is good for us, right? It's gotta be good for plants. And that's the logic that people use to get to this point. Well, it doesn't take a lot of effort to Google Gatorade and see what's in it. And the electrolytes is mostly sodium, and potassium. Now plants use potassium. And so that might be helpful. But sodium is toxic to plants. Now, we got to be clear, plants do need a very, very small amount of sodium in their diet. But higher levels are very toxic. Now you're from California, you wouldn't know this. But when it snows everywhere, we tend to put salt on the roads to keep them from freezing up. And so along the road edge, a lot of people have trouble growing plants because all that sodium comes on to those plants. Canadians know that you don't put sodium on plants. But a lot of people think Gatorade is electrolytes. So that's that's got to be good stuff. But it's not. One of those electrolytes is toxic to plants. So don't put Gatorade around your plants. Farmer Fred: Another ingredient of Gatorade that is also of dubious value when it comes to putting in the garden, although I know nurseries who sell it, is sugar. And, especially in the last drought here in California, there were nurseries selling a product that was mostly sugar, claiming it could mollify the effects of a drought by preserving soil moisture on your lawn. Robert Pavlis: Yeah, yeah, I've seen those products advertised and I haven't yet done a review on them. But sugar on its own, may help soil a little bit. So plants won't absorb this sugar, it doesn't really do anything for them. Now that may come as a surprise because some people know that plants are “green”. And they photosynthesize. They take sunlight and convert it to sugars. And plants need lots of sugars. That's what makes them grow. But plants don't absorb sugar through their roots. So they want to make the sugar themselves, they don't want to absorb it. So what happens with most of the sugar we put on our soil is that it makes microbes grow. And for microbes, sugars, like candy, they just love it. And they go nuts and they grow like crazy, you get this big explosion of microbes. And that sounds like a great thing. And it may be, but once the sugar runs out, there's a big crash in populations, they all die off. They are all decomposing and indirectly that decomposition of all those microbes will provide some nutrients to the plant. So other things, the potassium and phosphate and magnesium from these dead microbes, are now feeding plants. So indirectly sugar does help plants. But again, it's not the best source. You're better off getting some manure or compost that works just as well and probably works much better because it also includes other things than just sugar. Yeah, sugar is a high carbon material that has no nitrogen in it. And for microbes to decompose high carbon they have to get nitrogen from somewhere and they steal it from the soil, steal it away from plants, to digest that sugar. And so in the short term, it may actually reduce the amount of nitrogen that the plants are getting. Farmer Fred: In your post at gardenmyths.com on feeding plants from the kitchen: a lot of the substances you mentioned are water-based. There's banana water, there is coffee, of course, fish tank water, pasta water for plants, rice water, even soda pop. And again, probably water is okay, but it's that other stuff that it is probably not going to do much good. Robert Pavlis: Yeah, I think some of the reason people use this is because they don't want to waste it. Water is now recognized as a precious resource. And so you've got this water in a pot and well, what do I do? I don't want to put it down the drain and waste it, so I'll give it to my plants. And that's probably a valid way to use the water. It's certainly won't hurt the plants. So all those things you mentioned are not going to do a tremendous amount of damage, particularly in a garden where you've got lots of soil and a very small pot of water. If you're doing house plants, see, you might want to give them some variation once in a while. You don't give them all pasta water all the time, but it probably won't harm your plants. The biggest value though, is the water. it's not the other ingredients, the other ingredients are really not doing very much. So the key is you still have to fertilize those plants. Okay? And that's the danger. I think for most beginning gardeners, they say, well, geez, I put some pasta water on there. So I fed my plants. But that doesn't have the nutrients that the plants need. Okay, think of pasta water, and all these other things you mentioned as water, and you still need to put some fertilizer in there. Farmer Fred: One word of warning. If you do use pasta water on your plants, let it cool off first. Don't put boiling hot water on your plants. Thank you very much. Robert Pavlis: Yeah, that's a good idea. You'll only do that once though. Farmer Fred: Yeah, exactly, the results will be quick to see. All right, anything else in this you want to cover? Robert Pavlis: I think the the overall message I tried to get to gardeners is that except for potted plants, most things in the garden really don't need to be fertilized a lot. I grow about 3000 different varieties and species of plants, everything from trees down to little rock garden plants. And I've been doing this for 15 years in this garden. I have never fertilized anything. I don't fertilize when I plant and I don't fertilize 15 years later, and guess what, stuff grows. Okay. Now if you have a known deficiency, you do have to do something about that. But that applies to a very small percentage of our gardeners, particularly if you're putting on compost and manure and mulching and so on, you're not going to have that deficiency. So you don't have to feed those plants. Now container plants is a different situation. There, we're adding lots of water. We're watering regularly, water pours out the bottom, particularly if they're outside containers. And so we're washing those nutrients out of the soil all the time. And most of time that's not even soil, right? Some soilless stuff that has no nutrients in it, or very few nutrients. So containers, you have to fertilize. Everything else, ignore. Let it grow. Farmer Fred: Like we say on this program when it comes to fertilizing container plants, fertilize weekly, weakly. In other words, a regular fertilization, but cut the dosage in half every time you fertilize. Robert Pavlis: Good advice. Farmer Fred: Robert Pavlis is the author of the gardenmyths.com blog, plus the author of several books, including his best selling "garden myths", book one and Book Two. If you want more information about all his writings, including the books, you can visit his website, gardenmyths.com. Anything else you want me to mention? Robert Pavlis: I even have a YouTube now. So I'm a YouTuber. So we have a channel called Garden Fundamentals. And there's regular YouTubes on there all about gardening. Farmer Fred: Robert Pavlis. We've learned a lot this morning. I appreciate your time. Robert Pavlis: Well, thanks very much. It was fun being here. Thank you for also listening to the Garden Basics with Farmer Fred podcast! It’s available wherever you get your podcasts. Please share it with your garden friends. Fred Hoffman is also a University of California Cooperative Extension Master Gardener in Sacramento County. And he likes to ride his bike. This is a public episode. If you'd like to discuss this with other subscribers or get access to bonus episodes, visit gardenbasics.substack.com/subscribe
Apr 28, 2023
Happy Tomato Planting Day! But Which Varieties?
For years (decades, really), I’ve been promoting April 28 as Official Tomato Planting Day* for our area here in Northern California (Southern Sacramento and Northern San Joaquin Valleys, low foothills, and East Bay). And this time around in 2023, the weather has been very cooperative to make this year’s April 28th celebration an excellent time to start planting tomatoes. Wherever you are in the country, you have your own Official Tomato Planting Day. And it may change from year to year. The factors you are looking for include that the warmth of spring has settled in. Daytime highs will be in the 80’s (and above) for the foreseeable future. Early morning low air temperatures are steadily above 50 degrees. Soil temperatures are near 60 degrees. With those conditions, newly planted tomatoes will get off to a quick start. Just add water and fertilizer. Now, the question is…which tomato varieties to plant? We’ve talked in the past about the tried-and-true performers for our area, tomato varieties that will be in stock at area nurseries and garden centers now. If you are new to tomato gardening, start with three winners: The Sungold cherry tomato, the Early Girl tomato as your main season crop, and Big Beef for a large, slicing tomato. Other sure bets include Whopper, Champion, Ace, and Sweet 100. All the ones mentioned so far are hybrid tomatoes. Hybrid varieties are bred for desirable traits such as early productivity, adaptability to the local climate, vigor, and disease resistance, helping to guarantee success for the new tomato gardener. According to the UC Davis Vegetable Research and Information Center, Fusarium and Verticillium wilt are common diseases that can destroy a whole tomato crop. Many hybrid tomato varieties are resistant to these two diseases. Look for the letters, “VF”, after the cultivar name, indicating resistance to the wilts. “VFN” means the plants are resistant to verticillium, fusarium, and nematodes; “VFNT” adds tobacco mosaic virus to the resistance list. However, perhaps you want to stretch your tomato growing horizons this year by planting heirloom tomato varieties, which are noted for their flavor, aroma, and beauty. The downside to heirloom tomatoes? Production variability and a lack of disease resistance. Sacramento County Master Gardener Cathy Coulter explains the traits of an heirloom tomato. “An heirloom tomato is an open-pollinated variety that has been passed down at least 50 years through several generations in a family, ethnic, religious, or tribal group, or was commercially introduced before 1940,” says Coulter. “Some tomatoes now marketed as ‘heirloom’ are actually a cross between two different heirlooms (crossed on purpose or by nature) or are a cross between an heirloom and a hybrid tomato. The cross is then stabilized over several generations, so they become open-pollinated.” In other words, there is no agreed-upon standard for what makes a tomato variety an “heirloom.” One Northern California tomato plant breeder, Brad Gates of Wild Boar Farms, specializes in developing those modern heirlooms. “The most common definition of an heirloom tomato that I can come up with is that it's 50 years or older,” says Gates. “That seems to be the loose definition of an heirloom, because the definition of a heirloom is something that's been passed down from generation to generation. So somewhere along the line, somebody threw out the 50-year mark, and it seems to be the most popular. So some of my varieties are maybe working on 20 years old now. So they'll just have a little bit of a wait. But I think when most people think they want an heirloom, they want a tomato that's something other than round, red and tasteless.” Listen to the podcast (above) to find out more about Brad Gates’ tips and techniques for starting tomatoes from seed, as well as what it takes to breed a “modern heirloom” tomato. Originally aired in Episode 75 of the Garden Basics podcast. Sacramento County Master Gardener Gail Pothour is a fan of Wild Boar Farms’ “Brad’s Atomic Grape” tomato, a variety that is definitely neither red, round nor tasteless. “It is a kind of a grape tomato, which is the size of a cherry tomato, but it's elongated, kind of egg shaped,” says Pothour. “It's multicolored, with shades of purples and greens and red stripes and streaks all through it. And it's very tasty. It's got a good hang time, too. You don't have to pick it right now. It'll hang on the plant. I've been growing ‘Brad’s Atomic Grape’ for several years and it's become one of my favorites.” Davis, CA-based nursery owner Don Shor has his favorite heirloom tomatoes that he grows repeatedly for their beauty, productivity, and their flavor. “Most years, ‘Mortgage Lifter’ does reasonably well for me,” says Shor. “Another one that has done extremely well is ‘Cherokee Purple’. It was my top producer in 2021 of all my tomatoes. It's a good one for the valley and good one for hot climates.” In our garden, the heirloom tomato varieties that I tend to plant regularly include the prolific grape-sized heirloom, “Gardener’s Delight”, which will produce all the way through Thanksgiving, if the weather cooperates. Larger heirloom tomatoes that are consistently productive, tasty, and beautiful include Lemon Boy (there’s also a newer, hybrid variety of this), Dr. Wyche’s Yellow, and Orange Oxheart. * Plus, April 28th is a good date to mention my birthday. After planting tomatoes today, I’ll be out bicycling my age. I’ll be gone awhile. Thank you for also listening to the Garden Basics with Farmer Fred podcast! It’s available wherever you get your podcasts. Please share it with your garden friends. Fred Hoffman is also a University of California Cooperative Extension Master Gardener in Sacramento County. And he likes to ride his bike. This is a public episode. If you'd like to discuss this with other subscribers or get access to bonus episodes, visit gardenbasics.substack.com/subscribe

Apr 21, 2023
You Grew It. Now Eat It!
The healthiest food you can eat is the food you grow yourself. It doesn’t get any fresher than that. In today’s newsletter podcast, we talk with two Master Gardener/chefs: Kathy Morrison of the daily “ Sacramento Digs Gardening ” newsletter, and Master Gardener and Chef/instructor Andi MacDonald . Kathy has several recipes using ingredients that just might be maturing in your garden right now. And that’s the thrust of what is published in each Sunday’s edition of the Sacramento Digs Gardening Newsletter: If it’s ripening in your yard, she has a recipe for it. We have many of the recipes she mentioned in our chat here; for more, check out her Sunday posts, or the springtime recipes that Kathy and Co-content producer Debbie Arrington have compiled in their first recipe e-book, which is available for free at SacramentoDigsGardening.com . And their newsletter is free, as well, with little or no advertising (they will be going to heaven, I am sure). Even though their newsletter has a definite Sacramento slant about gardening activities here in Northern California, there’s a lot of good information provided in their daily posts that inspire gardeners everywhere. Go ahead. Subscribe . Here’s the recipe for the Strawberry Salad with Violets (courtesy of Sacramento Digs Gardening): Spring strawberry salad with fresh violets Makes 2 to 4 servings Ingredients: 4 to 6 strawberries, hulled and sliced crosswise2 radishes, sliced1 scallion, chopped2 tablespoons slivered almonds2 cups lettuce, roughly cut or torn into pieces1 cup baby spinach leaves, roughly cut or torn into pieces Dressing:3 tablespoons extra virgin olive oil1 tablespoon red wine vinegar1 teaspoon Dijon mustard½ teaspoon sugar¼ teaspoon seasoning salt Garnish: 2 to 3 tablespoons fresh violets or violas (optional) Instructions: In a large bowl, put sliced strawberries, radishes, scallions, lettuce and spinach. Toss lightly. In a jar, combine olive oil, vinegar, Dijon mustard, sugar and seasoning salt. Cover jar and shake to combine. Pour dressing over salad and toss lightly again. Divide salad onto plates. Garnish with violets or violas. Serve immediately. Another recipe from the Sac Digs Gardening e-cookbook that Kathy raved about in today’s newsletter podcast: Baked Asparagus ala Sacramento: Baked asparagus a la Sacramento Adapted from Sunset magazineServes 4 Ingredients: 1 pound fresh asparagus, washed3 hard-boiled eggs1 tablespoon butter1 tablespoon flour1 cup milk1 cup soft bread crumbsSalt and pepper to taste½ cup dried buttered crumbs¼ cup grated Parmesan cheese Instructions: Preheat oven to 375 degrees F. Break or cut the asparagus into 1-inch pieces. Steam until tender. Cook, cool and shell the eggs. Slice. Make a cream sauce with the butter, flour and milk. (Melt the butter in a saucepan, stir in flour until bubbly, then gradually add milk. Cook until sauce starts to thicken.) Add the soft bread crumbs and seasoning. In a buttered casserole dish, spread a thin layer of sauce on the bottom, then a layer of the cooked asparagus, then a layer of the sliced hard-cooked eggs. Repeat until the dish is filled. Sprinkle the top with the dried buttered crumbs and the grated cheese. Cover and bake in a moderate oven (375 degrees) for 30 minutes, removing the lid the last 10 minutes to allow the top to brown lightly. Serve warm. And, I would be remiss if I didn’t include Kathy’s recipe for Cherry Salsa! Cherry salsa Makes 2 cups Ingredients:2 cups fresh sweet cherries, any variety or a mix, de-stemmed and pitted Zest and juice of 1 lime 1/4 cup chopped red onion 1/2 cup chopped fresh cilantro 1 jalapeño pepper, seeds removed (keep them if you like more kick in your salsa), minced 1 fresh garlic clove, minced Salt and freshly ground pepper Instructions :Halve the pitted cherries and then chop them. Place in a bowl, then stir in the lime zest and lime juice. Add the red onion, cilantro, minced jalapeño and garlic clove. Add salt and pepper to taste. Cover the bowl and let the salsa chill in the refrigerator 45 minutes for the flavors to meld. When ready to serve, taste and adjust seasonings. Serve over grilled chicken breasts or grilled pork tenderloin, or with tortilla chips. Variations : This salsa also is delicious with any of these mix-ins: 1 chopped ripe but firm avocado; 1 chopped white nectarine; 1 chopped ripe mango. And, I did come across one recipe at the Sacramento Digs Gardening Spring e-cookbook that piqued my interest, just because I have beets ripening, as well as blood oranges: Roasted Beets and Citrus Salad . Check it out! Master Gardener/Chef Instructor Andi MacDonald is the “camp cook” for all the Master Gardeners who volunteer their services on Open Garden Days at the Fair Oaks Horticulture Center. Each month, the aroma wafting from the gazebo is so enticing, Master Gardeners keep checking their watch, asking: “Is it Lunchtime yet?” This month’s treat: Moroccan Lentil Soup Andi writes: “Lentil soup makes a simple, hearty, and inexpensive meal. This one is low in fat and high in flavor, with bittersweet cardamom, warm tones of cinnamon, earthy turmeric and cumin, aromatic saffron, and musky hints of rose water. The soup itself is easy to throw together but the Moroccan spices might prove more of a challenge. All are available at a well-stocked grocery, a Middle Eastern store, or online. Serve it with flat bread or a crusty loaf. This makes for a satisfying lunch or light dinner.” Moroccan Lentil Soup (serves 6-8) Ingredients: 1 cup red lentils 1 cup diced onions 2-4 large garlic cloves, minced 1 cup canned, crushed tomatoes 2 bay leaves 1 teaspoon turmeric 1 teaspoon ground cumin 3/4 of a teaspoon ground cinnamon 1/2 teaspoon freshly ground black pepper 1/4 teaspoon ground cardamom 1/4 teaspoon saffron threads 6 cups vegetable stock 1 cup coconut milk (or other non-dairy milk) 1 tablespoon pomegranate molasses (or Balsamic Vinegar) 2 teaspoons rose water Salt to taste Place all ingredients except coconut milk, rose water, and salt into a large heavy-bottomed saucepan. Bring to a boil, lower the heat, and simmer for 1.5 to 2 hours, until the lentils are very soft. An alternate method is an instant pot. Pressure cook for 35 minutes, and let steam release on its own. Remove and discard the bay leaves. Add the coconut milk and rose water, and stir well. Taste, and add salt as needed. Can be made several days ahead and refrigerated. Reheat before serving. Thank you for also listening to the Garden Basics with Farmer Fred podcast! It’s available wherever you get your podcasts. Please share it with your garden friends. Fred Hoffman is also a University of California Cooperative Extension Master Gardener in Sacramento County. And he likes to ride his bike. This is a public episode. If you'd like to discuss this with other subscribers or get access to bonus episodes, visit gardenbasics.substack.com/subscribe

Apr 14, 2023
Tomato Growing Tips For 2023
For the best tomato growing season ever, we have tips. Just a few tips. Today’s newsletter podcast features excerpts from two episodes of the Garden Basics podcast, Episode 93 with America’s Favorite Retired College Horticulture Professor, Debbie Flower, and Episode 259 with Don Shor, proprietor of Redwood Barn Nursery in Davis, CA. two tomato chats with these scenic bypasses for tomato success. As the sign posted at Don Shor’s Redwood Barn Nursery proclaims: IT’S TOO EARLY. Wherever you live, wait until nighttime temperatures are steadily above 50 degrees and the soil temperature where you’ll be planting is approaching 60 degrees. Less stress on the tomato plant means earlier, better growth. Note to tomato growers in the desert southwest: how were the tomatoes this past winter? If you have never “moved up” your young tomato plants into larger pots, start that habit about a month or three weeks before you put them in the ground. Those tomato plants in their original three or four inch nursery containers (or HEAVEN FORBID! in a six-pack) may already be root bound. By the way, why would you want to plant six Early Girl or Better Boy or Sungold tomatoes, all of which would ripen at the same time? As Don Shor is fond of saying about your tomato garden: “Diversify your portfolio!” Another tomato choosing task: if those tomato plants have been sitting in the nursery for more than a few weeks, or look like there about to tumble off the shelf, always turn over a tomato plant container at the nursery and make sure the roots aren’t coming out the bottom. Ditto for those tomato plants on your back patio, waiting to be planted. Watch for protruding roots! Root stress can set a tomato plant back. Sure, it will recover after it’s finally been planted in the ground, but it will take awhile. Meanwhile, tomatoes that have been repotted into larger pots can stretch their legs for a few weeks, putting on height and vigor to give you a “ready-to-grow” tomato plant once it is in the ground. Athletes warm up before an event. So should your tomato plants. Even though the calendar says “April”, your soil is just beginning to wake up from winter. Early April is a great time to go shopping for tomato plants. Late April, and continuing through June, is the time to plant tomatoes into the garden. By the end of this month, the weather will be more conducive to rapid tomato plant growth because of more sun, warmer nights (steadily above 50 degrees) and warmer soil (60 degrees and above). But be prepared for sticker shock when shopping. Checking out the garden center shelves of tomato plants recently at a big box store, tiny tomato plants in four-inch pots were selling for nearly six dollars; six-packs of tomato plants, which were even smaller, were approaching seven dollars. “Yes, the prices have definitely gone up,” explains Don Shor, owner of Redwood Barn Nursery in Davis. “And there are a couple of reasons for that, besides the increasing cost of labor. One is the cost of heating greenhouses. You don't get tomato seedlings available in March and early April if you don't have a heated greenhouse. If you do it at home, you've got to start them indoors, move the young seedlings outdoors during the day, and then move them back in during the evening. They're not doing that in big commercial wholesale nurseries. They're using propane or natural gas to heat those greenhouses. Plus, greenhouses aren’t very effective when it's cloudy. And we've had a lot of cloudy days.” Shor emphasizes a few rules for beginning tomato gardeners: don’t buy too many tomato plants, and “diversify your portfolio”. For the first time gardener, start with perhaps one plant per family member, maybe a total of five tomato plants. And those tomato varieties should be easy to grow hybrids (not necessarily heirlooms) of varying sizes, including a cherry tomato, a paste tomato, an early ripening full size tomato, a reliable main season tomato, and a variety that strikes your fancy, which could be an alluring heirloom variety. “There's a whole group of red tomatoes that are classic and reliable,” says Shor. “Better Boy, Champion, Red Delicious, and Whopper. Those are four that I find very similar in their performance. The most consistent, year to year, has been Champion, which has an easy to remember name. But all those are good. Better Boy has been very consistent over the years.” The key is: plant several different sized tomatoes that vary in ripening times as insurance in case of wild weather swings. Gardeners may remember last September, when the first nine days of the month sizzled with temperatures above 100, including three days above 110, with high temperature records falling by the wayside. For many tomato growers, including myself, most of the medium to large tomatoes shut down production for the year after that September heatwave. That was highly unusual for our area, where serving homegrown tomatoes on Thanksgiving is not uncommon. The ones that made it through that heat? The smaller, cherry-sized and slightly larger paste tomatoes. “Diversify your portfolio,” says Shor. “Get some interesting sauce tomatoes, because in my experience, a lot of those are just very consistent. One of the best-known ones is Roma, which will produce almost no matter what you do. You can't go wrong with cherry tomatoes such as Sungold. Juliet is a variety that is a bit bigger than cherry sized, but firm and incredibly popular. But try to mix in different kinds and a couple of early ripening, mid-size varieties, such as Early Girl and New Girl.” In our garden, consistent performers over the years have included the Sweet Million and Sungold cherry tomatoes, the slightly larger Gardener’s Delight, mid-season favorites Early Girl, New Girl, and Valley Girl, and a larger, long-season slicing tomato variety, such as Big Beef or Orange Oxheart. One tip that many tomato growers are familiar with: plant your tomatoes horizontally, in a trench. Why? I will let Dr. Rick Sommer, PhD in Mathematics from University of California, Berkeley, and over 30 years experience teaching mathematics and logic at Stanford ( and apparent tomato-head , as well) explain: Trench planting is a special technique for the advanced tomato grower. It involves planting in the ground horizontly, and bending the stems so only the top portion is above the surface. Roots will develop along the length of the stem, forming a more massive root system, capable of supporting a larger plant. Also, more of the root mass will be near the surface, which means the roots will be warmer (this induces plant growth). Of course, having a substantial root system that reaches several feet below the surface is important for healthy plants, and trench planting is meant to contribute to that. A large healthy plant above the surface requires a correspondingly substantial root system below the surface. I recommend that you bury the horizontal stem at least three inches below the surface. It is extremely important not to ever walk on the soil above the horizontal portion of the stem. Generally, walking too near your tomato plants will damage your root systems. It's good to have well defined walkways sufficiently close to the plants for tending and harvesting, but no closer than necessary. Establishing a walkway with stepping stones is one recommended way to help insure that no one will step too close to the plants. Pictured here are the roots of one of my plants (Sun Gold) from last year; on this one about 14 inches of stem was buried horizontally. When it was full grown, the length of the stem on this plant (above the surface) was over 13 feet. It grew to the top of my 8 foot stakes, and then along horizontal bamboo polls on my overhead trellis. They tell me that growing tomatoes is an addictive hobby. Nah… A Garden Tip Every Day on Substack Notes Thank you for also listening to the Garden Basics with Farmer Fred podcast! It’s available wherever you get your podcasts. Please share it with your garden friends. Fred Hoffman is also a University of California Cooperative Extension Master Gardener in Sacramento County. And he likes to ride his bike. This is a public episode. If you'd like to discuss this with other subscribers or get access to bonus episodes, visit gardenbasics.substack.com/subscribe
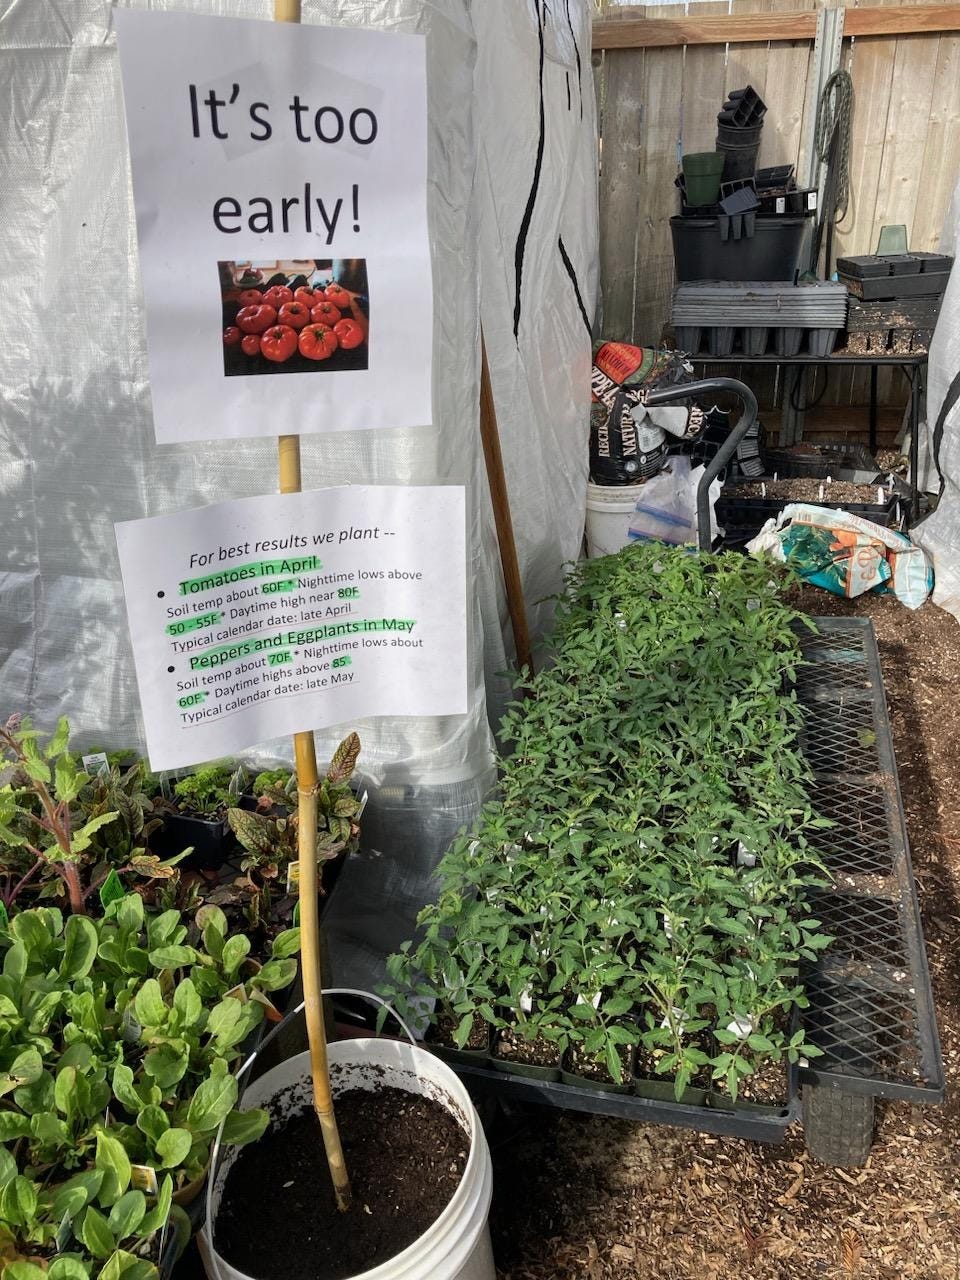
Apr 7, 2023
Backyard Beekeeping Advice
If the idea of raising backyard chickens appeals to you, you just might be mulling over the thought, “Well, why not raise backyard bees, too?” You may have listened to Episode 260 of the Garden Basics with Farmer Fred podcast , featuring urban chicken consultant Cherie Sintes-Glover discuss beginning a backyard chicken raising hobby. Cherie, besides being an urban chicken consultant, is also an apprentice Master Beekeeper. In today’s Beyond the Garden Basics newsletter podcast (above), she talks about how to get started raising bees. Her suggestions include: • Although bees are available now (April-May), they are best ordered in the winter months, due to demand. • Strive for ordering bees from local sources. Bees that are adapted to your climate have the highest success rate. • Take local beekeeping classes in the winter, before you get bees. Learn about the equipment you will need, as well as learning about bee temperament. Check with your local bee supply company for class information in your area. Cherie, a resident of San Joaquin County in Central California, is part of the Big Valley Beekeepers Guild, which is online at bigvalleybeekeepersguild.org. They also maintain an active page on Facebook . There, you can get a feeling for what’s involved with your new hobby! Bees are one of the best pollinators to have flying around your food and flower gardens. It’s been said that bees are responsible for one out of every three bites of food you eat. Today, we take attracting bees to your garden one step further: how about raising your own hive of honeybees? Besides a honeybee conversation with Cherie Sintes-Glover, we talk on today’s newsletter podcast with one of the world’s foremost bee authorities, Dr. Norman Gary, on how you can become a successful honeybee hobbyist. That just so happens to also be the title of his book, “ The Honeybee Hobbyist ”. The book contains: * Detailed, practical instructions for hobby beekeeping * Bee anatomy, behavior, and reproduction * How to safely open a hive and use a bee smoker * How to monitor hive conditions, prevent swarming, and deal with bee diseases * Sting prevention and effective strategies for safe handling * Fun uses for your beekeeping hobby, including entertainment and education * Urban beekeeping, with updated information on beekeeping on rooftops and in city environments. According to the University of California Agriculture and Natural Resources on-line publication, Bug Squad : Gary, known internationally as "The Bee Man," holds a doctorate in entomology (apiculture) from Cornell University and served on the UC Davis entomology faculty from 1962 to 1994. A beekeeper for seven decades and the author of Honey Bee Hobbyist: The Care and Keeping of Bees, he has written more than 100 publications, including scientific papers, book chapters and popular articles in beekeeping trade journals. He drew widespread acclaim for wearing a head-to-toe suit of clustered bees while "Buzzin' with His Bee-Flat Clarinet." (As a professional musician, he performs in area bands, but sans the bees.) "The Bee Man" holds the Guinness World record for keeping 109 bees inside his closed mouth for 10 seconds. You may have seen him and/or the bees he trained in action scenes in movies, television shows and commercials. His credits over the last 35 years include 18 films, including Fried Green Tomatoes ; more than 70 television shows, including the Johnny Carson and Jay Leno shows; six commercials; and hundreds of live Thriller Bee Shows in the Western states. Your Harvest to Better Health Begins at Dave Wilson Nursery ! Thank you for also listening to the Garden Basics with Farmer Fred podcast! It’s available wherever you get your podcasts. Please share it with your garden friends. Fred Hoffman is also a University of California Cooperative Extension Master Gardener in Sacramento County. And he likes to ride his bike. This is a public episode. If you'd like to discuss this with other subscribers or get access to bonus episodes, visit gardenbasics.substack.com/subscribe
Mar 31, 2023
Jumping Worms: An Update, Again
Jumping worms, and the publicity about them , are spreading. Debbie Flower (America’s Favorite Retired College Horticulture Professor) and I talked about this in August of 2021 in Episode 126 of the Garden Basics with Farmer Fred podcast. We provided an update on Episode 217 in August of 2022 (listen to that chat in today’s newsletter podcast). Jumping worms have been in the United States for more than a half century. And they’re moving around the country, with our unknowing help. As Debbie pointed out in the podcast (above), one of the biggest threats is their poop. Because they tend to reside near the surface and move horizontally through the mulch layer, their poop is more highly mineralized and not incorporated deeper into the soil. Plus, that poop tends to be hydrophobic: it repels water. As a result, the soil fungi and bacteria that would be incorporating typical castings into forms of nutrients for plant availability isn’t happening. The biggest threat is to emerging native plants that would use the nutrients and moisture normally in the soil to germinate, either as understory plants in the forest, or freestanding wildflowers in pastures or prairies. Verified, effective controls at this point, are still being studied. From Cornell University , come this: “Research is currently being conducted on invasive worms at the University of Wisconsin and several practices do show some promise of control. Abrasive materials such as biochar (ground up charcoal) and diatomaceous earth (fossilized diatoms) may show some promise in killing adult jumping worms. Incorporate one of these products into the infested soil to a depth where the worms are located; worms that come in contact with the materials will be adversely affected.” Again, that is ongoing research. Debbie and I, in the newsletter podcast, suggest other possible control measures, including using mustard to bring them to the surface, identify them as jumping worms, and discard them (the recipe is in the podcast). Oh, you don’t want to listen? OK, here’s the transcript, which can also be found in Episode 217 of the Garden Basics podcast : Sarah in Sacramento Hi, Fred and Debbie. This is Sarah from Sacramento. My question is about jumping worms. I've heard they're very destructive. And unfortunately, I recently found three in my yard. So I'd like to know a little more about them. My question has three parts. First, how much of a concern are these worms for the home gardener? And second, is there anything I could or should be doing about the jumping worms? Should I kill the worms when I find them, or just leave them be? And third, I keep reading that their castings deplete the soil? I'm wondering if that's actually true. And if so, why are these worms so different from other types of worms which are generally good for the soil? I have heard the jumping worms eat organic matter really quickly. So could I offset this by simply adding a lot more mulch? Any other advice for me? Thank you so much. Farmer Fred Jumping worms. Yes, indeed. We've tackled this topic before here on the garden basics podcast, but the jumping worms are jumping all over the place. Debbie Flower is here, America's favorite retired college horticultural professor, and golly now we have them in our own backyard, Debbie. Debbie Flower Yeah, that's unfortunate. Right. Farmer Fred And one of the primary ways they spread is through fishing bait. If you go to a bait shop, you may see see worms intended for fishing, and they go by a variety of names, like jumping worm or Asian jumping worm or crazy worms or Alabama jumpers, or snake worms. Don't buy them. And if you do buy them and you have bait left over at the end of your little trip, get rid of them, put them in the trash. Yes, jumping worms, as the caller said, they kind of destroy organic matter because they have a rather big mouthpiece. Debbie Flower And super, super, super fast. And that's the problem. Regular earthworms that we're used to and maybe keep in our house to consume our kitchen waste also consume organic matter, but they do it much more slowly. And when the jumping worms consume all the organic matter on the surface of the soil, especially in forests or places around lakes or natural areas, then the there is no organic matter on the surface of the soil that allows other plants, typically their native plants, in those situations, to establish and grow. And so it's causing fast destruction of the mulch layer and is causing destruction of the native plants. Farmer Fred And they live very shallowly. Unlike earthworms that tend to go vertically, the jumping worms tend to live horizontally. Debbie Flower yes, just below the mulch layer and on top of the soil, that's one way to identify them. If you find a worm there, along with their, their poop, their feces, their black and crumbled, it looks like coffee almost, then that's probably a jumping worm. They're also recognizable because they do jump. And they have a white collar that goes all the way around one end, close to one end of the worm itself, much like a Nightcrawler, which is also used as bait. It has a collar. But in the Nightcrawler, it's kind of a pinkish color. And in the jumping worm, it's a white color, and it is smooth, it doesn't have any ridges in it. Farmer Fred It's interesting how it's spread rather quickly, it was first reported back in around 1950, 1960, in the United States, it started off in the east, jumped over to the central states. And that's where it has changed the soil composition there in areas where it is living, its soil composition changes so that the soil is more water resistant, actually, Debbie Flower Yeah, the soil becomes more mineral, because they're not bringing the organic matter into the soil like an earthworm would do. They leave it on the surface. And they've already broken it all the way down, the mineral component of soil becomes greater, but an ideal soil will have 45% mineral and then about 5% organic. That 5% doesn't sound like much, but it makes a huge difference in the quality of the soil. Farmer Fred The soil gets so crumbly, that it does improve water percolation, but way too much. Debbie Flower Yeah, that's the problem there. Farmer Fred And it's basically not helping your plants out, because it's destroying that matter before the microbes in the soil have a chance to work it. Debbie Flower Right, it's not bringing it down into the soil. The healthy soil has a poop loop. And the bigger things that we can see, like worms, first eat the organic matter, they get what they can from it, they poop out there. And then the next level of organisms eats their poop and does the same thing. They do their pooping and the next level of smaller organisms eats their poop, et cetera, et cetera, et cetera. And each one releases something different into the soil that is beneficial for the plants. And we don't get that poop loop with when we have the jumping worms. Farmer Fred Oregon State University has a lot of good information online on the jumping worms. I'll have a link to that in today's show notes. And they advise that the jumping worms and their cocoons can be transported via soil, compost or other organic materials. So you want to check all that stuff when you're transporting material from one property to another, or bringing home a new purchase. And check all soil and organic material, especially if you're buying it from a sand and gravel yard, to make sure that it doesn't have any in there. Debbie Flower right. And if you're getting soil from a community garden, or organic mulching going on where you live. And let's say you're using your blower or rake to collect your leaves and you put them at the curb or you put them in your Greenwaste can. However you do that, because you can collect the egg cases with it. And then it goes to the organic waste station or maybe it gets used as mulch somewhere else. And so it can be transported that way. So knowing what it looks like, and that it's very close to the surface, is good when you bring home a potted plant. You can do the mustard check. Farmer Fred The mustard check. Do I need to break out the French’s on this one? Debbie Flower Yes, you do. Farmer Fred Yeah, it's interesting about the fact that maybe your nursery is selling plants with those critters in them. Hopefully not. But check them before you leave, that's for sure. Oregon State advises to buy bare root stock when possible. Good luck on that. As more and more plants now are potted up before they even leave the wholesale nursery to make it easier for the retailers. If you do have the jumping worms in your yard and you know it, never share the compost, the mulch, the soil, or plants with a known infestation. Debbie Flower Here’s the mustard check. It takes mustard and water, and you pour it on the soil. The mustard irritates the jumping worms and they come up. It irritates all the insects and they will come to the surface. Farmer Fred So that’s why I don't like mustard. Debbie Flower It's great for leg cramps. The proportions were written here somewhere. Farmer Fred How do you use mustard for leg cramps? Debbie Flower Just eat it. Farmer Fred Oh, okay. I thought maybe spread it on your legs. Debbie Flower Oh, that'd be lovely. Farmer Fred One other way to control jumping worms is to heat the soil. Jumping worms and their cocoons are unable to survive temperatures above 104 degrees Fahrenheit . Increasing soil temperatures above that threshold is one way to manage jumping worm populations. You can tarp sections of soil or compost that received direct sunlight or temporarily place soil in plastic bins and place that in direct sunlight. Oregon State also says to control jumping worms, you could perform a controlled burn. Don't do that. Debbie Flower No, no, especially not in the West. But the mustard solution is this: you mix a gallon of water with 1/3 cup of ground yellow mustard seed and pour this slowly into the soil. It won't hurt the plants. But worms, even good worms, will come to the surface and you can check for the bad guys. Farmer Fred How long does it take for the worms to come up? Debbie Flower It's going to be pretty quick. If I had known this when I was a kid, I would have done it with my grandfather's compost pile because he liked to collect worms for fishing. That just irritates them. You know, the mustard? Farmer Fred What's in it that does that? The mustard? Debbie Flower I don't know, specifically. Farmer Fred So again, that's 1/3 a cup of ground mustard seed to a gallon of water. Dump that on your garden soil. Debbie Flower One way of bringing them in is having them come in, in a container plant. So if somebody was using compost as the mix, some grower was using compost as the mix, or they set the containers on the ground, which is a no no, there should be gravel, etc. under the pots. And the worms crawled in the drain holes, let's say, and you want to just be sure that you're not bringing them into your pristine garden. Farmer Fred That's the other reason to check all containers. When you buy them at the nursery. Look at the bottom of the container for slugs. Debbie Flower Right. It's a common place for slugs to hide, right, say, brush it off. If you hire equipment, somebody to rototill ,don't do that very often. Maybe you're starting a garden or somebody is going to aerate your soil. Or if you're in the business and you're bringing in even bigger equipment that has tracks etc, or big tires, there should be language in the contract you want it to come in clean ,soil free, and leave clean. That way. Ii’s not bringing the worms to you, or weed seeds for that matter. And it's not taking whatever's in your yard to the next person. Farmer Fred And what also goes, if you have jumping worms, check your shoes. Because you don't want to be moving them around the yard. Debbie Flower yes. So there's no particular control right now. There's no chemical, there's no one size fits all. So we have to be aware of them. We have to look for them. We have to do what we can to prevent spreading them Farmer Fred The handout from Oregon State University is called, “Jumping Worms - a guide to identifying a new invasive species.” We'll have a link to that in the show notes and it has pictures of the worms. We will also have links to videos of the jumping worms where you can watch them jump, so you have a good idea of what you're dealing with. And yes, indeed they do jump. Jumping worms: they're jumping into a garden near you. So be on the lookout. Debbie Flower Unfortunately, yeah. Farmer Fred Debbie Flower. Thank you. Debbie Flower You're welcome, Fred. So, what’s a gardener to do? Don’t discard unused fishing bait worms into the soil; there’s a good chance they are jumping worms, which have proven to be, because of their thrashing about, excellent bait. Check any new soil in containers or bulk purchases carefully for jumping worms. But basically, just keep gardening, keep incorporating compost into the garden! We have written about jumping worms in this newsletter before: From Beyond the Garden Basics Newsletter, Sept. 2021 : The damage that jumping worms (aka Asian Jumping Worms, Crazy Worms, Alabama Jumpers, or Snake Worms) can do to your garden soil. (video originally produced by the Wisconsin Department of Natural Resources ) More on how jumping worms damage your soil structure, from Oregon State University : Because they have very large mouths akin to mechanical excavators, jumping worms are able to grasp and consume large amounts. With their voracious appetite, they outcompete the native microbial organisms and invertebrates that other organisms feed on. Their propensity to eat all the litter creates bare soil where invasive plants and animals move in, altering native ecosystems. They also remove the mulch that helps cool the soil and conserve moisture, Further, the castings – or fecal material – of most worms contain extremely important microbes that help fight soil-borne plant diseases and repel insects. Worm castings also improve soil structure by diversifying the size of soil particles, which enhances moisture penetration and increases water retention. With jumping worms, the outcome is the opposite. Since their gut biome is slightly different, there aren’t the same beneficial results. “What they are casting out doesn’t absorb moisture well so you end up losing porosity, which affects the overall structure of the soil,” said Sam Chan, Oregon State University Sea Grant Extension watershed health and aquatic invasive species specialist. “Initially wet and gummy, the castings quickly dry into hard granules that are difficult to rewet, not the best medium for growing plants.” The changes to soil structure and composition caused by the worm castings can attract certain unwanted microbes, which creates an increased susceptibility to disease and can cause girdled roots. Plant stems and roots at the surface of the soil may become exposed to more environmental extremes from the loss of litter and decomposed organic matter and changes to soil structure. Jumping worms have been outlawed in many states, but not all, and can still be found online for fishing. Chan advises to be careful not to purchase jumping worms, also known as crazy worm, Asian jumping worm and snake worm, and to spread the word about their danger. Many people – even those who sell them – aren’t aware of their invasiveness. To help decrease the spread of jumping worms, shake off the roots of plants when sharing or buying at a private plant sale. Buy bareroot plants when possible. Never share compost, mulch, soil or plants that contain a known infestation. Nurseries are being careful, but it’s still a good practice to inspect the soil for cocoons when you transplant. If you find jumping worms in your garden, they will probably be in pockets rather than the whole garden. Brush off your shoes and equipment when you move from place to place in an effort to keep them from spreading. If they are in contained spaces, you can spread plastic to heat the soil. Once it reaches 104 degrees F, the cocoons die. Thank you for also listening to the Garden Basics with Farmer Fred podcast! It’s available wherever you get your podcasts. Please share it with your garden friends. Fred Hoffman is also a University of California Cooperative Extension Master Gardener in Sacramento County. And he likes to ride his bike. This is a public episode. If you'd like to discuss this with other subscribers or get access to bonus episodes, visit gardenbasics.substack.com/subscribe
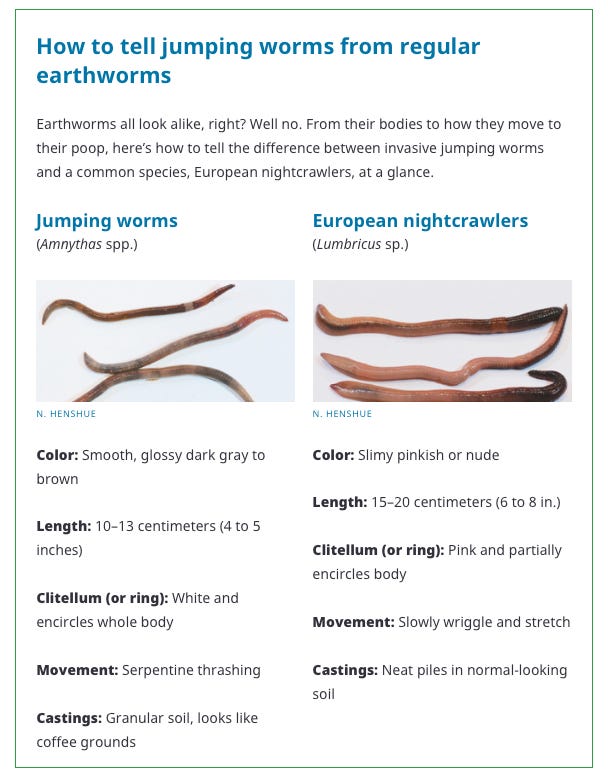
Mar 24, 2023
If You Can’t Dig Down, Grow Up! Raised Bed & Container Planting Tips
In today’s “Beyond the Garden Basics” newsletter/podcast, we revisit a chat we had three years ago with Linda Chalker-Scott , Washington State University Horticulture Professor, author of several outstanding garden books , and one of the forces behind the Facebook group page, “ The Garden Professors ”. Here, Linda discusses why loading up the bottom of planting containers with pot shards, gravel, styrofoam or other soil displacing items is not a good idea. It’s not even a bad idea. It’s a terrible idea! She explains why. Meanwhile, looking out the window…. Tired of the rain yet, California? At our place, the monthly rainfall has exceeded the normal amount for the first three months of 2023, and March isn’t even over yet! Your garden soil may also be struggling trying to absorb all that rain, resulting in perennially muddy locations. Most plants don’t like wet feet. For your garden areas, especially those yards with heavy clay soil, there are a couple of options. When we get two dry days in a row, take a walk through the garden on Day Number Three (before it starts raining again). If the ground is still wet or feels squishy, mark that area with a post or grape stake. That way, you’ll remember when we finally get to the return of dry weather exactly where the ground is probably saturated, unsuitable for most in-ground plants to develop healthy roots. The permanent answer for dealing with too-wet clay soil is to install an in-ground drainage system, provided you can locate the end drain in an area that won’t impact your neighbors’ yard and garden. If it will impact them, consult with a landscape irrigation or drainage specialist who may be able to advise you on how you could place the end of the drain in a sump (a hole in the ground on your property) and then pump the water out to a gutter, if local codes allow that. Can’t Dig Down? Build Up. The other solution? If you can’t dig down, build up. Construct raised beds or use large containers filled with an easy-draining, commercial potting mix. A word of caution if building a raised bed on an existing lawn area: remove the turf below the raised bed area first. Dig out a few inches of the turf area, down to at least the turf root zone. If you leave the grass in place, that layer of turf could impede the drainage of water from the raised bed. The same is true if using weed cloth beneath a raised bed or a layer of gravel or small rock in a large container. That could also slow the rate of water movement, leading to ongoing soggy soil in the raised bed or containers. If building raised beds, first loosen the existing soil in the area with a spading fork after removing the turf. Then, mix in an inch or two of the soil mix for your raised bed with the existing soil in that area to improve drainage. If gophers are a problem in your area, putting down sheets of quarter-inch mesh hardware cloth below and partially up the inside walls of the raised bed can help protect future plants. A persistent garden myth is that using a coarse material, especially rocks or gravel in the bottom of a container or raised bed, will improve drainage. Linda Chalker-Scott, Horticulture professor at Washington State University, writes about the topic in her excellent books, “The Informed Gardener” and “The Informed Gardener Blooms Again”. “This is just one of those myths that refuses to die, regardless of solid scientific evidence to the contrary,” explains Chalker-Scott. “Nearly every book or web site on container gardening recommends placing coarse material at the bottom of containers for drainage. The materials most often recommended for this misguided practice are sand, gravel, pebbles, and pot shards. Nearly 100 years ago, soil scientists demonstrated that water does not move easily from layers of finer textured materials to layers of more coarse texture. Since then, similar studies have produced the same results. Gravitational water will not move from a finely soil texture into a coarser material until the finer soil is saturated. Since the stated goal for using coarse material in the bottoms of containers is to ‘keep soil from getting water-logged,’ it is ironic that adding this material will induce the very state it is intended to prevent. Alleged ‘drainage material’ added to containers will only hinder water movement.” For a container planting, all you need are drain holes and a good quality potting mix. Thank you for also listening to the Garden Basics with Farmer Fred podcast! It’s available wherever you get your podcasts. Please share it with your garden friends. Fred Hoffman is also a University of California Cooperative Extension Master Gardener in Sacramento County. And he likes to ride his bike. This is a public episode. If you'd like to discuss this with other subscribers or get access to bonus episodes, visit gardenbasics.substack.com/subscribe

Mar 17, 2023
How Honeybees Say, "Come and Get It!"
One in every three bites of food you take comes courtesy of a bee. Without their pollination efforts, our diet and our gardens would be, to say the least, boring. In today’s “Beyond the Garden Basics” newsletter/podcast, we talk with Dr. James Nieh, of the School of Biological Sciences at UC San Diego. He and his team have been studying how honeybees communicate with each other, and how their elaborate dance moves are interpreted by the other honeybees in the hive. Basically, if you know where all the good pollen is, shake your booty, and do the Waggle Dance ! Dr. Nieh’s original study can be found in the March 2023 issue of the Journal of Science . A more gardener-friendly version can be read at ModernFarmer.com . Or, listen to the podcast (above) or read the transcript! TRANSCRIPT - How Honeybees Say, “Come and Get It!” Farmer Fred 0:00 Have you heard about the Waggle Dance? No, it's not an obscure Chubby Checker record from the 1960s. Nor is it the follow up to the Soupy Sales song, “Do the Mouse” . The Waggle Dance is something bees do. And it's how they communicate to their hive mates, the other bees, telling them where the good stuff is, where the pollen is, and how to get there. iI’s a very elaborate dance. If you're like me, if you're a gardener, and you spend a lot of time in the garden, sometimes you'll just sit down and watch the bees, and wonder: “How the heck did they find these plants?” What is going on in their communication? We're talking to a gentleman who has studied this for a living. He and fellow scientists have an article published in the Journal of Science, and it's all about the Waggle Dance and how they discovered it. We're talking with Dr. James Nieh. He's the Associate Dean School of Biological Sciences at the University of California, San Diego. He's a professor in the Department of Ecology, Behavior, and Evolution. And I always like talking to university bee specialists, because they seem to have a fun job. And it sounds like you have a very interesting job. I don't know how you get the bees to slow down long enough to study their dance. Dr. James Nieh 1:14 Thank you, Fred. It's a pleasure to talk to you. We actually don't have them stand still. We watch them as they're in motion. But you're right, it sometimes can be a challenge to move with the bees, as they're dancing. Farmer Fred So let's talk about the whole thrust of your paper. And if people want to read more about it, there's a very good explanation that you wrote for the March 2023 edition of Modern Farmer magazine and website. It’s called “Unlocking Secrets of the Honeybee Dance Language.” What was your impetus for studying this? Dr. James Nieh 1:45 One of the things we wanted to learn is, why is it that some animals, like human beings, songbirds, and naked mole-rats , why do they have to learn language? We know that other animals, many of them are actually born with the ability to have a perfect animal communication system or animal language without the need for learning. That is what actually motivated us to look at honey bees, because honey bees have a very sophisticated animal language. And we suspect because it is so complicated, that learning might be involved. Farmer Fred 2:18 And we have known for a few decades that bees do communicate by movement, haven't we? Dr. James Nieh 2:24 Yes, that's right. In fact, it was something that Aristotle even suspected thousands of years ago. Although if you look at the translation, there's a little bit of uncertainty if he knew about the Waggle Dance. But some historians of science say that he did. And it really is a Waggle Dance, it is a shake your booty. But what is amazing is the amount of information that is communicated via a bee to the fellow bees about where the pollen is, and how to get there. It's truly remarkable. And it's the most complex example of animal language that communicates something like location that we know of. Farmer Fred 3:01 And also according to your paper, the movement also reveals the quality of a pollen resource. Dr. James Nieh 3:06 That's right. When bees are repeating this figure-eight motion multiple times, the more times they repeat it, the higher the quality of the resource. And there are two motions, there's the waggle phase, if you imagine the bee as a little arrow, she's running forward with her head pointed forward, and her abdomen is waggling. So that's called the waggle run because she's running while waggling. And then there's something called the return phase where she's returning back in a semicircle. And that creates one half of the figure eight. And that return phase is faster, the more excited she is about the food. So it's almost as if she's more eager to come back and do more Waggles. Farmer Fred 3:45 And is this just happening at the hive? Anybody who's sat for a while and watched bees at work, they'll sometimes think, “oh my goodness, I'm going to be stung. Look at that bee as it's going after that pollen. It’s shaking its behind at me, like it's getting its sting, getting ready to come at me.” But they're just communicating. Dr. James Nieh 4:07 They would normally do this only at the nest. And it's true that they can sometimes do it, especially when the nest is crowded, on the outside of the nest. So if you have a standard wood box, kind of on the board standing in front. But typically they're going to be doing it inside the nest, you can see a bee flying around and moving at food sources. But that's not the Waggle Dance. That's something very different. Farmer Fred 4:28 Oh, maybe the are gonna sting me after all. By the way, let's figure out the sex of bees here that do go out foraging. Are they females or males? Dr. James Nieh 4:38 All the bees that are foraging or doing any work at all are females. The males only have one job, and when that job is done, they die. Farmer Fred 4:45 Oh, okay. Sad life but no. The Waggle Dance and the intricacy of their instructions are dependent upon not only being born with some of that knowledge, but also learning tips from others. Dr. James Nieh 4:49 That's right, the honeybees in a colony we discovered are actually learning how to dance from older and more experienced honey bees. Farmer Fred 5:10 That's great. As long as, I guess, there are older bees around. You've done experiments where you have isolated the bees from the older generation. Dr. James Nieh 5:18 That's right. And it's very interesting. Honeybees have a division of labor, meaning that they do different jobs depending on how old they are. When honeybees first emerged as adults, they start off as nurse bees, you're taking care of the larvae, and also the queen. Then, as they get older into their teenage days, you might say, because they don't live for years, they live for about 35-45 days, they start taking out the trash and building the comb, doing chores around the house. And then finally, when they get older, they start to work as a guard bee. And as a forager. And of course as a forager, then they start to Waggle Dance. So the key is, if you start out with a colony that's created only with day-old bees, they are all the same age, and then they're going to march through this progression of jobs with each other. So they really have no opportunity to observe Waggle dancers because no one in the colony is of Waggle dancing age. Farmer Fred So I would imagine that group wasn't very successful. Dr. James Nieh They actually were able to produce Waggle dances that we could definitely recognize. But in comparison to control colonies that had the same number of bees, but they had bees of all ages, and therefore they could observe and did observe other bees before they first danced. The experimental colonies were the ones that only had young bees, they could never watch older bees dance. And they had three problems in the way they danced. The first is they didn't communicate the direction very well. The second is they over-communicated the distance, meaning that they overshot where they were telling other bees to go. And thirdly, they had dances that didn't have the correctly formed figure eight pattern, those bees that had those difficulties. Farmer Fred 7:05 Did you reintroduce them to an older generation of bees? And did their dance evolve because of that exposure to the older bees? Dr. James Nieh 7:14 Great questions. So we came back 20 days later, when they were full adults, they had now achieved 95% of their full life expectancy. In the case of bees, they don't actually perform poor dances at this age, they're basically at their peak. And what we found is that the bees that weren't dancing very well, they were able to improve how they communicated direction and making properly formed figure eight dances. In those two aspects, they got better. But the thing about overshooting the distance, communicating distances that were too far away, that was something that they never recovered. We also did a preliminary experiment that we didn't report about in this paper. But we actually introduced another group of young bees, and had them be taught, in essence, by these older bees that were raised in the experimental colony. What we found is that these bees that were taught had normal direction and communication, they also did the normal figure eight pattern, but they learned, strangely enough, the incorrect distance encoding. So it seems that communication of distance, and the way it was disrupted, could be passed on from one generation to the next. Farmer Fred 8:30 A very good argument for keeping the old people around awhile. Dr. James Nieh 8:33 Exactly. They do need to learn and teach the young ones. Farmer Fred 8:37 Yes. How do they point out the direction? Does it have to do something with the sun, I would imagine? Dr. James Nieh 8:42 Yes, I think the the easiest way to think about it is what the dance probably was before it evolved to it's more complicated state. All honeybee species can produce the Waggle Dance. And all of them can do it on a horizontal surface, literally pointing at the direction of the resource. So I think that's the easiest way to think about it. Imagine that the honey bee, she's a little mapmaker. And what she's doing with her body is she's pointing forward with her head like an arrow. And she is pointing in the direction of the food source. So literally, if the food source is north, she's pointed north, if it's east, she's pointed east. Now, in that Waggle run, she's pointing in the direction, but also the farther away the food sources, the longer the waggle. So for example, if the food source is a mile away, she might be waggling about one second. But if it's two miles away, she might be waggling for about two seconds. So she's kind of showing in this little arrow that she's drawing, the direction and how far away it is. It's amazing. But you had brought up gravity, which is a really interesting point. So what if you can no longer dance, pointing directly at the food source? Honeycombs are vertically oriented? And in this case, they do a transposition and that's kind of a fancy word. But basically, if they're dancing on a vertical surface, and this is normally in the darkness of the nest, if they are dancing with their head, like an arrow pointed straight up, it means fly in the direction of the sun. Now, I don't mean fly into the sun, but I mean flight in the direction the sun, so imagine the sun on the horizon, and you're going to fly towards the sun on the horizon, and that will give you the right direction. Now, what about if the food source is opposite the direction of the sun, it's 180 degrees opposite the sun. Then the dancer will dance with her head, like an arrow pointing straight downwards. When she is inside the hive. Let's say the food source is 45 degrees to the left of the sun, then she dances 45 degrees to the left of the upright position. Farmer Fred 10:54 I would think that bees would start their day when a certain temperature is reached. Or do they start their workday when the sun is out? Dr. James Nieh 11:04 I think both factors are important. They need a certain minimum temperature in order to be able to fly. But typically they have a very strong circadian rhythm, meaning that like us, they're very influenced by the sun. And folks might appreciate now that we just sprung forward with our clocks, that for a little while, it's hard for us to wake up and get going at the right time. And the reason for that is that we have a certain biological rhythm that is responsive to the light. And the same is true of honeybees. Farmer Fred 11:32 I think bees are much like me on my bicycle. I don't like to ride when it's windy. And bees, I would think if it's a windy day, they too wouldn't be waggling very much. Dr. James Nieh 11:43 It's true that if they face some problems, I think they can still fly even with a somewhat significant wind. But if it's too windy, they probably wouldn't go out and forage. They just stay inside the nest. Farmer Fred 11:54 Indeed. And that's why it's harder for almond growers in California to have enough good days in a row to get their almond crop pollinated. Do native bees have the same sort of skills, or is this something just reserved for honeybees? Dr. James Nieh 12:08 So the only bees that can communicate the location of food sources are honeybees and stingless bees. Stingless bees are only found in the tropics, they are found in the New World tropics, like Brazil and Central America. And they are found in the Old World tropics and Africa, and Southeast Asia, but they're not found anywhere in the United States. So the only bees we have around here that can actually communicate food location are honeybees. Farmer Fred 12:35 So the purpose of native bees, I guess, is… I don't know. What is the purpose of native bees? Dr. James Nieh 12:41 So native bees are really important because they are here as part of our native ecosystem. And they've evolved along with many species of native plants, for example, if you've ever seen a barrel cactus, these are beautiful cacti that you find and they often have these beautiful yellow or other colored flowers. There is a cactus bee that specializes in, believe it or not, in pollinating barrel cacti. Honey bees will visit these flowers and can pollinate them. But when researchers have studied this, the native bee that's evolved or co-evolved with this cactus is actually a much better pollinator when she visits. Many more seeds come out of that one visit than on a single honeybee visit. And that story is recapitulated over and over again, with many different kinds of bees. We will have buffalo gourd and many other kinds of plants where although honeybees can do the job, that native species is actually better. So I'll give you an example. Most folks like avocados. And avocados are a big crop, especially in Southern California. The native pollinator of avocados is a stingless bee, because avocados evolved in areas where there were stingless bees. Honeybees nowadays, of course, are brought in to do the job. But they are actually less efficient at it than the native bee. But unfortunately, we don't have stingless bees in this range. So I think that illustrates some of the importance of native bees for native plants, but also for certain agricultural crops. And I'll just add one final thing: we think about apples, and apples are wonderful. It turns out that native bees are better at pollinating apples than honey bees. Farmer Fred 14:30 I did not know that apples required the attention of native bees. That's very interesting. Dr. James Nieh 14:36 So there is a blue orchard bee that is important for pollinating apples. I think I have that right. But I do know it is a native bee. And you're right. Apples were really not native to North America. They were brought over. You think about the story of Johnny Appleseed. But in fact, even though they are introduced, it's the native bee that turns out to be much better than honey bees. I think that illustrates the importance of these very diverse native bees. Farmer Fred 15:06 Going back to the avocado and the special bee it takes to pollinate the avocado. And maybe I should say not a special bee, but a bee that's better at pollinating. Because avocados have “A” flowers and “B” flowers, that open up at different times of the day, so basically, they're only available for certain hours of the day, I would think that the stingless bee would have to visit that tree twice in the same day to achieve successful pollination for that avocado tree. Dr. James Nieh 15:30 That's interesting. I actually haven't read the literature specifically on how it pollinates the avocado, but it's quite possible that it’s like a honeybee going after the nectar or the pollen. That forager will go back to that same tree or that same grove multiple times throughout a day. So even though the flowers are open at different times of day, the bee will be there and be able to collect that pollen and then subsequently pollinate the female flowers. Farmer Fred 16:00 One more thing about the Waggle Dance. And I love this part, too. You point out in Modern Farmer the fact that back at the hive, they have a dance floor. Dr. James Nieh 16:07 That's right, and the dance floor is very different for each colony. Now part of that difference is that parts of it are relatively empty, or may have honey or may have pollen or may have brood. But in a natural colony, the ones that are built in trees, these typically don't have the beautiful flat combs that they have in beehives that humans provide. Because our goal is for beekeepers to have something very uniform that's easy to remove, check and harvest honey from inside. A natural colony, these combs are built. And then they sort of merge together and grow. I think if you've looked around on the internet or actually seen a natural colony, you'll see that they make these beautiful, complicated shapes. And I think that's very interesting, because it means that those shapes might be hard for a bee to Waggle Dance on because they're not perfectly flat. And we suspect that one of the reasons why bees may need to learn to Waggle is that through practice, they can master the dance floor that is in their own colony. Farmer Fred 17:09 Without the benefit of a band, either. I would think your research isn't over. There's a lot more to learn about the relationship between younger bees and older bees, isn't there? Dr. James Nieh 17:18 That's right. We would really like to understand if this distance encoding is transmitted from one generation to the next. And moreover, if it is, as we suspect, is actually adaptive, so each colony lives in a certain habitat, local environment where food is available, and where bees have to go certain distances. We think that each colony might have a dialect that is subtly adapted to those local conditions. Because that would be another reason for bees to need to learn how to Waggle Dance so they could learn from the wisdom of their elders, the bees that have been out there and know where the food is, and know the best way to communicate where that food is. Farmer Fred 17:59 Just another example of the commandment, “Honor Thy Father and Thy Mother.” Dr. James Nieh 18:03 Exactly. Very important. Farmer Fred 18:06 You can read more about what Dr. James Nieh wrote about regarding the Waggle Dance, bees, and pollination by visiting modernfarmer.com and reading Dr. Nieh’s article that he wrote for “The Conversation”, that was reprinted by Modern Farmer. Or, you can go back to the source work that they published in the Journal of Science, the March 2023 edition, entitled, “Social Signal Learning of the Waggle Dance in Honeybees.” Why are we talking about this? Because one out of every three bites of food that you stick in your mouth comes to you, courtesy of a bee. Without bees, we wouldn't have much food. You want to disagree with that? Dr. James Nieh I totally agree that bees, honey bees, and native bees are very important. Farmer Fred Dr. James Nieh, with UC San Diego. He is the Associate Dean of the School of Biological Sciences. He is a professor of the Department of Ecology, Behavior and Evolution. And it's just a fascinating study about how bees communicate, by basically shaking their booty. It's the Waggle Dance. Doctor, I thank you so much for all this good information. Dr. James Nieh 19:17 Thank you. It's been a pleasure and thank you for being interested in the story. Thank you for also listening to the Garden Basics with Farmer Fred podcast! It’s available wherever you get your podcasts. Please share it with your garden friends. Fred Hoffman is also a University of California Cooperative Extension Master Gardener in Sacramento County. And he likes to ride his bike. Except when it’s windy…just like bees. This is a public episode. If you'd like to discuss this with other subscribers or get access to bonus episodes, visit gardenbasics.substack.com/subscribe
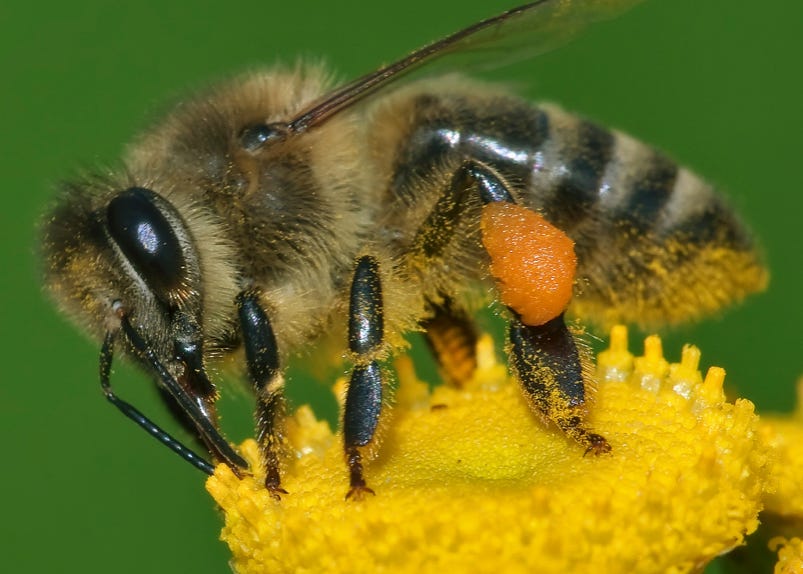
Mar 10, 2023
Pepper Seeds Slow to Germinate? Some Speedy Tips.
In today’s Newsletter podcast, we revisit some advice given to us by America’s Favorite Retired College Horticulture Professor, Debbie Flower, on how to get your pepper seeds to germinate more quickly, which can take up to three weeks before you see green leaves popping up above the soil surface. We were talking to the Elk Grove Garden Club last month, a wide-ranging conversation, which included how to tell if those old vegetable or flower seeds you have tucked away in a drawer will germinate or not. You can hear the entire chat in Episode 253 of the Garden Basics with Farmer Fred podcast. Home gardeners who grow their tomatoes from seed usually get fairly quick results after sowing the seeds indoors. Given the right germinating conditions - a soilless planting mix, good drainage, plenty of light, plenty of warmth - tomato seeds can pop up in 8-10 days. Pepper seeds are a different story. Why is it some peppers can take weeks to germinate? "The important thing in getting your (pepper) seeds to germinate is to keep them warm – the soil temperature should be in the 80's", says Renee Shepherd of Renee's Garden , a popular seed catalog based in Felton, California. "Germination is very much related to even moisture and warm temperatures. You should see germination within 2 to 3 weeks if it's warm enough. I strongly suggest using bottom heat to achieve the warmth the seeds need – most good nurseries carry good little electric seed starting mats which will keep your seeds at the right temperature to sprout. One online order source is Peaceful Valley Farm Supply ." For those who want to comparison shop, another source for heating mats for your pepper seeds: Amazon. Another trick that some gardeners employ is soaking the pepper seed for a few hours before sowing to soften the seed coat. The value of that is open to debate. "I have never heard of soaking pepper seed overnight and have never done it in 20 years of running a trial garden," says Shepherd. On the other hand, Professor Debbie Flower, formerly of the American River College Horticulture Department, sees the benefits of some "immersion therapy" for pepper seeds. "We soaked our pepper seeds in hydrogen peroxide for 10 minutes," explains Flower. "That's not enough time to scarify (soften or break the seed coat), or even get them soaked, but enough to kill exterior diseases." Many sweet pepper varieties will show their initial leaves about two weeks after planting the seeds. But some varieties of peppers take longer to pop up than others. "The hot pepper varieties take longer to germinate, some to three weeks," says Flower. But if you are experimenting with the really hot pepper varieties, such as the Bhut Jolokia (Ghost Pepper), it could take up to four months, says the Trade Winds Fruit website: "Chinense species (e.g. Habanero's) generally take longer to germinate than most common peppers. Keep soil warm to very warm (75-90F) for better germination. Do not use acidic soil. Some Chinense peppers, in particular Bhut Jolokia, Naga Morich and related peppers are very slow to germinate, averaging 1-4 months germination time." By the way, if you are growing the Bhut Jolokia...you're playing with fire. The Ghost Pepper is rated at 850,000 Scoville units of heat. For comparison, the habanero rates 200,000; the Jalapeno is 5,000; the Anaheim equals 1,000. And sweet bell peppers? 0. Another factor that can determine the rate of germination of pepper seeds: the pH of your seed starting mix. One of the most common ingredients in most seed starting mixes is peat moss, which is highly acidic, with a pH around 4.0. Pepper heads, including the Horticulture students at American River College, have found quicker germination when Coir (coconut fiber) is substituted for peat moss. Coir has a closer-to-neutral pH: around 6.5. The tests at American River College bear this out after trying Coir in their pepper seed soil mix. "We had the best germination of peppers ever!" says Flower. And don't be in a rush to set them out in their permanent garden home. "Pepper seedlings need to be grown out until they have at least several sets of true leaves, and it is at least 55° at night before you plant them out," explains Renee Shepherd. "And they will need a little time to get used to being outdoors, as well." In USDA Zone 9, that would be around mid-May. Be patient. After originally talking about this speedy pepper germination technique, other gardeners chimed in with their favorite tricks. One method that was seconded by many: germinate your pepper seeds in between two moist paper towels in a room that is between 70 and 80 degrees. For many, that room might be the kitchen or bathroom. When the "tails" appear after about 6 or 7 days (the tails, by the way, are the emerging roots), gently transplant them into a moist, seed starting mix, preferably one that uses the more neutral coir instead of the lower pH peat moss. Or, make your own. My preferred home mix consists of equal parts coir, perlite and fine compost. The improvements I would make to that germination suggestion? Use coffee filters instead of paper towels. That way, the emerging root doesn't get tangled, as happens when using fibrous paper towels. Pulling out germinated seeds from paper towels may be hazardous to their health. Also, to insure a warm environment, here's something you could do in just about any indoor room: place the moist coffee filters, containing the pepper seeds, inside a glass baking pan. Place that on top of a germination mat. Cover the baking pan with plastic wrap to keep it warmer. I tried this at home, pepper seeds germinated with six days. Thank you for also listening to the Garden Basics with Farmer Fred podcast! It’s available wherever you get your podcasts. Please share it with your garden friends. Fred Hoffman is also a University of California Cooperative Extension Master Gardener in Sacramento County. And he likes to ride his bike. This is a public episode. If you'd like to discuss this with other subscribers or get access to bonus episodes, visit gardenbasics.substack.com/subscribe

Mar 3, 2023
The Scoop on Worm Poop
In today’s newsletter podcast, we delve into the world of earthworms and red wrigglers with garden writer Amy Stewart, who authored the 2005 book, “ The Earth Moved: On the Remarkable Achievements of Earthworms ”. We recorded our chat back when the book was released, at her home (then) in Eureka, in northwest California. But we’re not here on the printed page to praise earthworms (although they are highly deserving of it), but to discuss their close relatives, the red wigglers, an excellent worm for composting. And now for something NOT completely different: From the Garden Basics e-mail bag , Don writes: “I discovered your podcast last week. Very interesting and cool stuff! I just retired at the end of last year and one of the items on my list of four, ‘To-Do’ items in retirement, is to create and maintain a backyard wildlife refuge with a focus on pollinators. On another note, my wife and I love sweet tea. We brew at least one pot per day, maybe two in the summer. What can we do with all the used tea bags?” Don, as usual, I’ll get to the answer for your question in a roundabout way. To have a successful garden to attract pollinators, you need successful soil. One of the best soil amendments to add for happy plants are worm castings, also known as worm poop, or, more euphemistically, vermicompost. According to Alameda County (CA) Master Gardener Judy Matthew : “Worm castings add beneficial bacteria to the compost which when spread around the garden, stimulates plant growth and can help protect plants against some diseases. The worm castings also help the compost-amended soil retain water.” You want more science about worm castings? Here you go . However, better soil doesn’t come cheap when using bagged worm castings. The price of a one cubic foot bag of worm castings is approaching twenty dollars here in California. You may want to tack on a new “to-do” item for your pollinator garden, Don: vermicomposting. Raising worms, who feast on many kitchen scraps and paper goods will return the favor, giving you a soil amendment teeming with microbial activity, perfect for plant roots to enjoy. One of those kitchen scraps they enjoy just happens to be tea bags. And don’t worry about the worms if you go on a three-week vacation. Give them some extra food before you leave and re-dampen the bedding. They won’t complain. Worms do best at temperatures slightly less than room temperature. Putting them in a cool indoor room or basement is an excellent idea. Some enthusiasts keep a worm bin at work, near their desk or in the break room. If you maintain the right balance of food, the bins won’t smell, either. Here are tips from the Sacramento County (CA) Master Gardeners here and here on starting and maintaining a worm composting bin. Some of those tips include: • All you need to create worm castings is a worm box, bedding material, red wriggler worms (not earth worms) and food scraps. • Bins can be purchased or homemade. Use a solid color (not clear) plastic storage box or a sturdy wooden box with a tight-fitting lid to keep out pests and protect your worms. If making your own bin, be sure to drill ¼-inch holes in the bottom to allow for drainage. • Worms will not escape; they dislike light and will migrate toward the center of the box. • A commercial vermicomposting system that features stackable bins take up a house-friendly smaller footprint, perhaps 24 by 24 inches. • Moistened, shredded newspaper or corrugated cardboard, shredded leaves, purchased pine shavings, or coconut fiber (coir) bedding provides worms with a balanced diet as well as a damp, aerated place to live. • Always keep the bedding as moist as a wrung-out sponge. • Place the worm bin in the shade or indoors. The best temperature range for thriving worms is between 55° and 75°F. • Worms love most fruits and vegetables, used tea bags, used coffee grounds and filters. Do not feed them animal products, dairy, onions, or processed foods. Limit citrus peels to less than 20% of the food. You’ll soon figure out what they’ll eat and what they’ll ignore. • Chopping the food into small pieces, one inch or less in size, will speed up the composting process. • To avoid fruit flies and odors, cover the food with at least one inch of bedding. • Use red wigglers or red worms, NOT earthworms or certain “fishing worms” such as Alabama jumping worms. Red wigglers can be purchased at some better nurseries, worm farms, and fishing supply stores. • The castings are ready when they are dark and fine in texture. Separate the worms from the castings. Place the worm castings in your garden bed before planting. Work the castings lightly into the soil with a rake. Cover with mulch or compost. The Sacramento County Master Gardeners have a great vermicomposting display area at the Fair Oaks Horticulture Center , which is open one day per month to the public. The next Open Garden Day will be on Saturday, March 11, from 9 am to noon. Thank you for listening to the Garden Basics with Farmer Fred podcast! It’s available wherever you get your podcasts. Please share it with your garden friends. Fred Hoffman is also a University of California Cooperative Extension Master Gardener in Sacramento County. And he likes to ride his bike. This is a public episode. If you'd like to discuss this with other subscribers or get access to bonus episodes, visit gardenbasics.substack.com/subscribe

Feb 24, 2023
Vegan Split Pea Soup
Here is Andi MacDonald’s “More Than Basic Split Pea Soup” vegan recipe. It serves 6-8 people. She explains its origins: “My Aunt Carol lived on the Central Coast of California. When we visited, my father took us to Pea Soup Andersen’s restaurant in Buellton, where we dined on endless bowls of pea soup. Ten-year-old me thought that this was the height of culinary genius. I went back a few years ago and concluded that the soup was okay, bit it needed more oomph. That’s what this version is: basic comfort, but with a bit more to it. Directions are for an Instant Pot. To make this on the stovetop, follow the basic directions, but cook it for a couple of hours, stirring frequently to prevent scorching.” Ingredients: * 1 lb dried split peas * 1 Tbs olive oil * 1 medium onion, diced small * 2 medium carrots, diced small * 2 stalks of celery, diced small * 6 cloves of garlic, minced * 2 medium russet potatoes, peeled and diced small * 1 Tbs fresh thyme leaves (or 1 tsp dried) * 1 Tbs fresh oregano, (or 1 tsp dried) * 1-2 bay leaves * 1/2 tsp black pepper * 8 cups vegetable stock (low sodium preferred) * 1 Tbs soy sauce * 1 Tbs liquid smoke * Salt to taste Set the Instant Pot to sauté. Cook the onions, carrots, and celery in olive oil until the onions soften. Stir in the garlic and cook for about one minute. Add the thyme, oregano, bay leaves, and pepper. Add the vegetable stock, soy sauce, and liquid smoke. Add the potatoes and the split peas. Put the lid on the Instant Pot and seal. On manual mode, set the time for 20 minutes. When the timer goes off, let the pot release naturally for 30-40 minutes. Release the valve, and stir the soup vigorously for a minute or so to break down the split peas. Taste, and add salt if needed. This soup will thicken as it sits. If made ahead (and refrigerated), you will need to thin it with water or stock before reheating. For more cooking tips, check out Andy’s Magic Apron on Facebook . I have questions, I have thoughts: What is in Wright’s Liquid Smoke ? (Answer: not much) The Bay Laurel You can grow just about every ingredient in this split pea soup recipe in your home garden. However, one ingredient in the recipe caught my fancy, because it is one of my favorite plants to grow, the bay laurel, also known as Sweet Bay or Grecian Laurel ( Laurus nobilis ). If I may quote the American Horticultural Society book, “ The Encyclopedia of Garden Plants” : The Bay Laurel is “an evergreen, broadly conical tree, about 40 feet tall and 30 feet wide. For USDA Zones 8-10. Narrow oval, leathery, glossy, dark green leaves are very aromatic and used in cooking. Small, star-shaped, pale yellow flowers are borne in spring and are followed by globose to ovoid, green, then black fruits.” The bay tree is frost hardy, but foliage may be scorched by extremely cold weather or strong, cold winds. Needs a sheltered position in sun or semi-shade and fertile, well-drained soil. In tubs, may be grown well as standards, which should be trimmed during the summer. Propagate by semi-ripe cuttings in summer or by seed in autumn.” My thoughts on this plant: WINNER, WINNER, WINNER! In Northern California, it is easy to care for and not fussy about watering. Prune or don’t prune. It’s up to you. Bay laurel is a great, evergreen privacy screen that isn’t overly messy (because of the weight of the leaves, fallen ones tend to stay nearby the plant). We had a row of these at the old radio ranch in Herald, CA next to a swimming pool, and never had to skim out any bay laurel leaves. And, it was a great privacy screen located 15 feet away from the hot tub. p.s. The official Town Motto for Herald: “Where’s Herald?”. Because it is a broadleaf evergreen tree, the small birds - finches and wrens especially - love it for perching and nesting. The happy bird chatter from our row of bay laurels in the early evening was a delight. They were probably describing their day to others, hunting for garden pests. Did they pick off leaves of desirable garden plants? Yes. So, you plant enough for everyone to enjoy! Birds are always welcome in my garden. If you listened to Episode 254 of the Garden Basics podcast (the Feb. 24, 2023 edition), you heard aromatherapist Amy Anthony rave about the bay laurel, as well. The scent, she says, can help you build courage. Sounds like a plant every cold-call salesperson should own. The bay laurel is slow to grow, especially from cuttings. But once it takes off, it shoots up to 20 feet or more in less than ten years. (“Ten years?!? I don’t want to wait no ten years!”). Trust me, it’s worth the wait. Thank you for listening to the Garden Basics with Farmer Fred podcast! It’s available wherever you get your podcasts. Please share it with your garden friends. As an Amazon Associate, I earn from qualifying purchases from some of the underlined links in the newsletter. This is how I am trying to keep this a free newsletter. And as long as you buy whatever you want from Amazon using any of those links to get into the Amazon site , I get a few pennies. Thank you. Thanks for Subscribing and Spreading the Word About the Beyond the Basics: The Garden Basics with Farmer Fred newsletter, I appreciate your support. Fred Hoffman is also a University of California Cooperative Extension Master Gardener in Sacramento County. This is a public episode. If you'd like to discuss this with other subscribers or get access to bonus episodes, visit gardenbasics.substack.com/subscribe

Feb 17, 2023
Freeze Damaged Plants? Embrace the Ugly.
Newsletter podcast excerpted from Episode 253 of the Garden Basics with Farmer Fred podcast. Recorded live, at the Elk Grove, CA Garden Club. Please note that the words below originated as a recent garden column in the Lodi (CA) News-Sentinel. Those of you in Michigan, Minnesota, Maine and other states where there are hardware stores that stock snowblowers year round can quit snickering at our plant panic when temperatures dip into the 20’s. Still, the advice holds true for wherever you live: give freeze-damaged plants a chance to recover. Our area has had quite the one-two punch of weather events so far in 2023. In January, it was record rains, near hurricane force winds, a tornado, flooding, and falling trees. Then, at the end of January, a hard freeze descended on many areas around us, where temperatures fell to the mid-twenties on January 31. That was followed by two consecutive February mornings with temperatures at or below 32 degrees. It was a triple punch that many of our more tender plants couldn’t take. How’s your garden looking these days, after all that weather? Your results may vary because all gardening is local. Many plants that we thought could shrug off the cold mornings are not looking good right now. Here, the salvias are dying back. Dependable, late winter blooming nasturtiums look like mush. That popular summer blooming low growing shrub, the lantana, has lost all its leaves. As gardeners, we like to put in plants that strike our fancy but are better suited to areas of California that get fewer frosts and freezes. We got away with very mild winters for a long stretch here in the Central Valley, encouraging our semi-tropical plant growing fantasies. And that’s especially true for those who planted tender perennials and shrubs. That list includes avocados and citrus trees. Wise gardeners here may have planted them in areas where they may be getting protection from wind as well as reflected heat from south-facing walls and patios in the early morning hours. And because cold air tends to flow downwards, planting semi-tropical plants in the higher sections of your property may give them a few degrees of protection from a freeze. Chuck Had a Tough Time Recently I feel bad for our ten-foot tall brugmansia shrub, also known as Angel’s Trumpet. Brugmansias, especially the variety ‘Charles Grimaldi’, are prized for their large, yellow or pink, aromatic, bell-shaped flowers, spring through fall. And, if the weather cooperates, it will flower through much of the winter, as well. Chuck – as I affectionately refer to Mr. Grimaldi - had thrived here for the last seven years, even blooming in the winter, in the lowest part of the yard (oops). Until now. So, what should a shivering gardener do, weeks after a hard freeze, when temperatures were at or below freezing for several consecutive hours? Number one: don’t prune away the dead portions now. If plants in your garden look blackened and wilted now, new growth may emanate from the base of the plant when the weather warms over the next couple of months. Pruning away the dead portions now would expose buds that may still be alive; another frosty morning could wipe out those survivors. Keep the shears in the garage and let the dead portions of the plants protect the understory. It may take until mid-Spring before you see new growth. Patience is key before you pick up the pruners. In the meantime, tolerate the ugly, and look for new growth, especially near the base of the plant. Water Can Help Your Plants Get Through a Freeze. But Not Succulents Number two: If it doesn’t rain, keep your tender plants well-watered, especially container plants. Make sure your garden and potted plants remain moist. Water gives off heat at night, and damp soil can protect plants from freezing, especially avocados and borderline citrus trees, such as lemons and limes. Moist soil retains heat better than dry soil, protecting roots and warming the air surrounding the soil. Too much water in the soil, however, can suffocate the roots of plants. Succulents, such as cactus, are the exception, however. According to the Arizona-based Desert Botanical Garden, most succulents survive freezing temperatures best if the soil around them is dry. Oh, and keep your frost protection gear handy...just in case we get another late winter surprise. Don’t let the latest string of sunny February days fool you. Historically, we can get freezing mornings through early spring. P.S. Chuck is already showing green growth near the base. Thank you for listening to the Garden Basics with Farmer Fred podcast! It’s available wherever you get your podcasts. Please share it with your garden friends. As an Amazon Associate, I earn from qualifying purchases from some of the underlined links in the newsletter. This is how I am trying to keep this a free newsletter. And as long as you buy whatever you want from Amazon using any of those links to get into the Amazon site , I get a few pennies. Thank you. Thanks for Subscribing and Spreading the Word About the Beyond the Basics: The Garden Basics with Farmer Fred newsletter, I appreciate your support. Fred Hoffman is also a University of California Cooperative Extension Master Gardener in Sacramento County. This is a public episode. If you'd like to discuss this with other subscribers or get access to bonus episodes, visit gardenbasics.substack.com/subscribe

Feb 3, 2023
Winter is Rose Pruning Time
Rose Pruning Time is Here Mid to late winter is rose pruning time, wherever you can grow roses. Here in California and in other USDA Zone 9 areas, mid-December through Super Bowl Sunday (usually the second week in February) is ideal. For colder rose-growing climates, late February through the early rounds of the NCAA Basketball Tournament (mid to late March) is pruning time. Former sportswriter and current Master Rosarian Debbie Arrington supplied those dates. Listen to the above podcast for what she has to say about choosing the right equipment, especially clothing, when pruning roses. Here then, are some "California (and USDA Zone 9) Rules" for pruning hybrid tea, floribundas, grandifloras and miniature roses this winter. Instructions on how to prune climbing roses would exceed my word limit here, But Debbie Arrington has tips for climbers in the podcast, and here’s a link for more info on pruning climbing roses.By the way, ask 100 rosarians how to prune roses, and you may get many varied answers. Hell, rosarians don't agree on much when it comes to roses. Which goes to show you: ROSES ARE THE MOST FORGIVING PLANT IN NATURE . Give them the basics (sun, water, decent soil), and they can pretty much take whatever you throw at them, and come back blooming. Roses, especially the repeat bloomers, would appreciate a monthly fertilization during the growing season...if you remember. Rose Pruning Tools: • A pair of hand bypass pruners (I prefer the Felco #2 or Felco #7).• Long Handled loppers (My Corona loppers have lasted for years).• One or two pruning saws (a small hand-held and/or a larger bow-style pruning saw). • For a large rose garden, a rechargeable, battery operated hand-held chain saw is the choice of many rosarians, especially when getting a rose ready for “shovel-pruning”.• Thorn resistant, long sleeved rose pruning gloves. Pruning Roses for USDA Zone 9 : • Prune out all dead, aged and weak growth. • Gnarly stems and gnarly thorns indicate "aged". • Remove any borer-infested branches, as well. A hollow or blackened center of a stem may indicate the presence of borers. Keep cutting until you see a solid, creamy colored interior. That is the sign of a healthy branch.• Make no cuts on hybrid tea rose bushes or grandifloras below your knee, unless you're removing the cane completely. • Leave as many primary canes as the plant can handle. Many cold climate rosarians might advise you to leave only three canes per hybrid tea rose bush. Here in USDA Zone 9, a vigorously growing hybrid tea or grandiflora rose might have as many as nine healthy canes. Keep most, if not all of those canes, for even more roses during spring through fall.• Try to make all cuts without extreme angles. Nothing exceeding 45 degree cuts; 90 degree cuts (or as close to that as possible) is fine. This is especially true of thick canes. The low part of a 45 degree cut on these would extend past, ultimately damaging, weakening or killing the eye (new bud) you are trying to cut above. • All cuts should be made one-quarter inch above a dormant eye or intersection of two branches.• Do not use glue, tree seal or paint on pruning cuts. A clean cut will heal much more quickly when left alone.• When you are finished, strip all remaining leaves from your roses, then blow or rake all the leaves out of the beds and send them to the dump, not the compost pile. Since all the fungus spores and insect eggs are there from the last growing season, removing these from your yard now reduces next year's problems. Thank you for listening to the Garden Basics with Farmer Fred podcast! It’s available wherever you get your podcasts. Please share it with your garden friends. As an Amazon Associate, I earn from qualifying purchases from some of the underlined links in the newsletter. This is how I am trying to keep this a free newsletter. And as long as you buy whatever you want from Amazon using any of those links to get into the Amazon site , I get a few pennies. Thank you. Thanks for Subscribing and Spreading the Word About the Beyond the Basics: The Garden Basics with Farmer Fred newsletter, I appreciate your support. Fred Hoffman is also a University of California Cooperative Extension Master Gardener in Sacramento County. This is a public episode. If you'd like to discuss this with other subscribers or get access to bonus episodes, visit gardenbasics.substack.com/subscribe
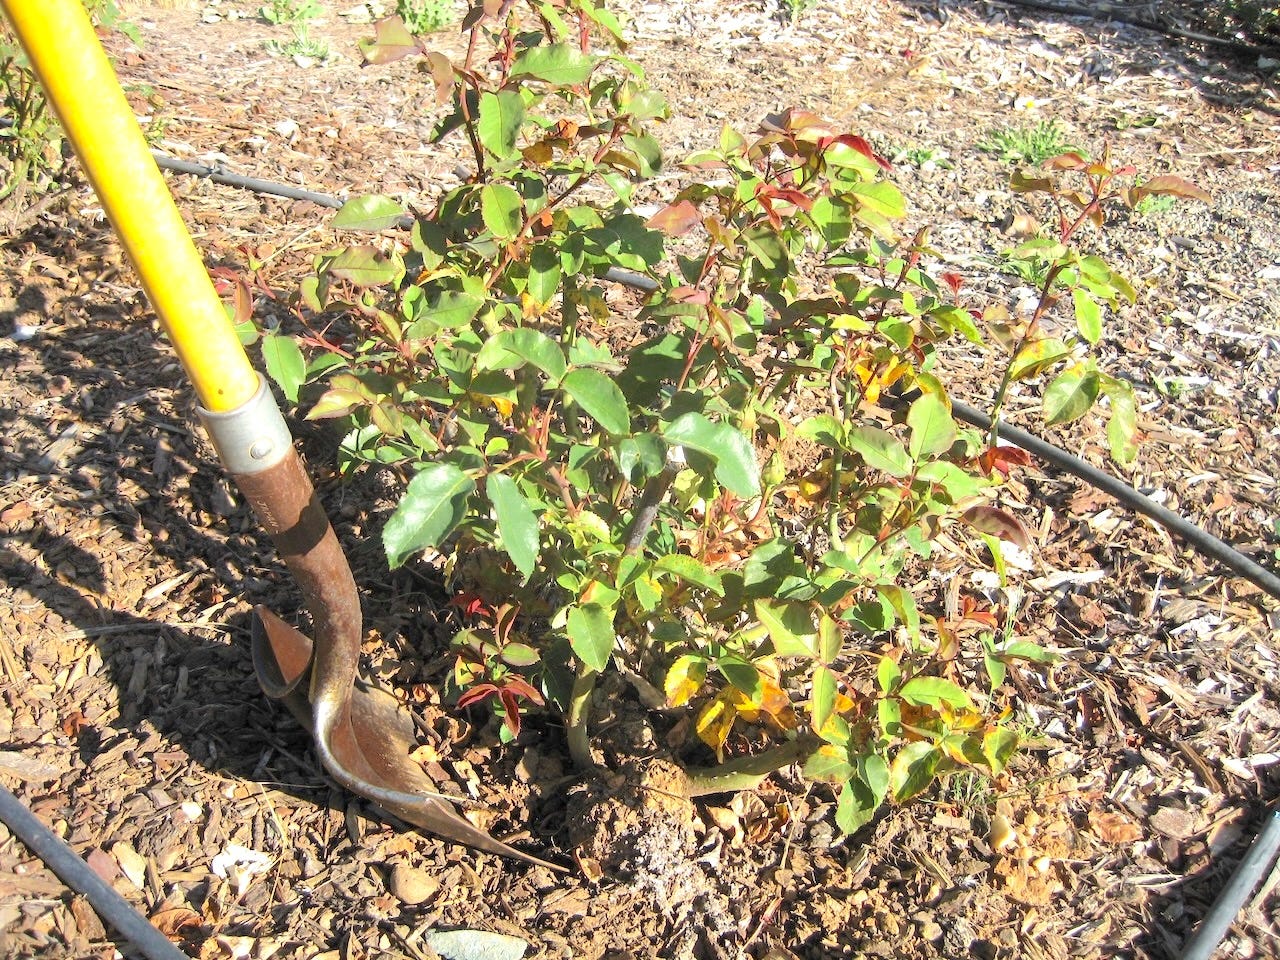
Jan 20, 2023
Drain That Rain!
“Where does the water go?” That’s a question I frequently ask myself while bicycling throughout the region, staring at rain-soaked suburban yards. This is also a question homeowners should ask themselves before, during, and after the rainy season. One of the best pieces of advice I can offer any new homeowner: before you spend any time and money on landscaping projects or a garden, live with the existing property for a year. This allows you to take monthly pictures of the area where you want a future garden, perennials, shrubs and trees. When we moved to our new home seven years ago, that’s what we did before we embarked on a totally redesigned landscape. Taking a series of pictures on a regular basis on sunny days, especially at different times of the day (9am, 1pm, 5pm), will remind you how much shade your future plants will be dealing with, and you can plant accordingly. A plant labeled for “full sun” will need at least six hours (preferably eight hours) of direct sun a day. “Part Sun/Part Shade” plants, 4-6 hours of sun per day. “Shade” should be reserved for those plants that get little direct sun (less than four hours) and preferably dappled sun, such as protection from an overhanging deciduous tree. However, the more important reason to live with that new yard for a year before embarking on outdoor landscaping projects: figure out where water goes, both after regular irrigation and after rainstorms. In our case, we discovered that few of the yard sprinklers worked fully or accurately, and that a heavy downpour of rain ends up in the garage. And the basement would flood. As a result, the price of our landscape rehab zoomed upward, to include a complete drip irrigation system for both the front yard and backyard, as well as an underground hard pipe drain system to move roof gutter water away from the house and garage to another part of the yard. You can hear more about how to do that in the podcast above, with landscape designer Michael Glassman. Home and Garden Pests That Sing in the Rain The other problem with wet weather: some home and garden pests love it when it’s wet; and others will seek refuge in drier quarters, such as in your home. The authors of the University of California Ag and Natural Resources publication, “Pests in the Urban Landscape,” offer some “Wet Weather Do’s and Don’ts” to ward off problems: • Check for snails and slugs. They like it moist and will sing in the rain. Unfortunately, their singing sounds a lot like, “chomp, chomp, chomp.” These garden leaf and flower munchers don’t like it too wet. They may be easily found headed for dry land – sidewalks and driveways – during a deluge. Find them under loose boards, as well. That’s the time for hand-picking or stomping them. Chemical controls for these mollusk family members are ineffective in the rain. • Remove weeds and unwanted plants. When the ground is wet, pulling them out goes much more quickly. Among the winter weeds spreading here right now are oxalis, nutsedge and groundsel. You may have other cool season weedy invaders in your yard. • Dump standing water. This wet winter is already favoring a big mosquito season ahead. Deprive breeding mosquitoes of water-nesting sites such as flowerpot saucers, wheelbarrows, buckets, clogged storm drains, and roof gutters. • Check for ants, cockroaches, and earwigs. These pests may invite themselves into your home when flooding or heavy rains make the outdoors unappealing to them. Seal any cracks or openings in your home. Outdoors, check the perimeter of your home as well as around doors and windows for insect entryways. Weather stripping, door sweeps, and traps placed beneath eave-protected walkways can help keep them outside. Indoors, keep food tightly sealed and the counters clean, especially near electrical outlets that might provide an entryway. • Remove yard mushrooms. Mild temperatures and wet soil are a combination that mushrooms and other fruiting bodies of fungi love. The good news is they are not harmful to your lawn and garden. The bad news? They can be poisonous to children and pets, when consumed. Rake them up. • Don’t apply outdoor fertilizer or pesticides now. Both are easily susceptible to being washed off the soil or plants and into our waterways. Wait for several days of dry weather before applying any sprays, dusts, liquids, or granules. • Avoid pruning plants unless it is to remove broken or damaged branches. Rainfall and open wounds in the winter on plants is a recipe for spreading diseases. Apricots, cherries, and olives should never be pruned during cool, wet, conditions, advises UCANR. • A common site on sidewalks after a rainstorm are worms, struggling to get out of the wet soil and onto dry land. If you have easy draining soil, you may see their mounds in lawns and gardens as they come up temporarily for air. Those mounds are a great fertilizer: worm castings. Just knock them down with your foot or a rake to feed the soil. • Tread lightly through the garden during or just after a rainstorm. Avoid walking, driving, or moving heavy equipment across wet soil. This compacts the soil, removing necessary air pockets, which are vital for healthy trees, shrubs, and other plants. • One other tip: if you have slow draining areas of your yard after a deluge, mark them. Stick a small stake or object on top of those areas to let you know that the area needs drainage help after the rainy season. Avoid planting in consistently wet areas. Consider putting in a drain system to move that water to another part of the yard to make it more habitable for plant life. Or, consider placing a large container or raised bed in that area for a successful garden. Thank you for listening to the Garden Basics with Farmer Fred podcast! It’s available wherever you get your podcasts. Please share it with your garden friends. As an Amazon Associate, I earn from qualifying purchases from some of the underlined links in the newsletter. This is how I am trying to keep this a free newsletter. And as long as you buy whatever you want from Amazon using any of those links to get into the Amazon site , I get a few pennies. Thank you. Thanks for Subscribing and Spreading the Word About the Beyond the Basics: The Garden Basics with Farmer Fred newsletter, I appreciate your support. Fred Hoffman is also a University of California Cooperative Extension Master Gardener in Sacramento County. This is a public episode. If you'd like to discuss this with other subscribers or get access to bonus episodes, visit gardenbasics.substack.com/subscribe
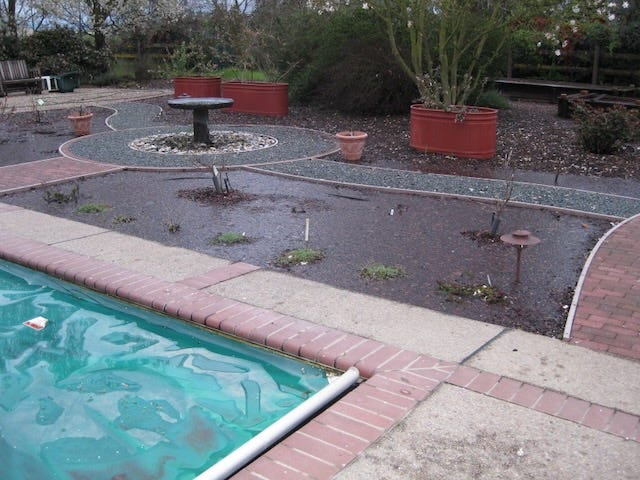
Jan 6, 2023
Bypass or Anvil Pruners? We Ask the Experts.
In today’s newsletter podcast (above): America’s Favorite Retired College Horticulture Professor, Debbie Flower, discusses the pros and cons of bypass and anvil pruners; and the best tool for sharpening pruners. This time of year, stroll down the tool aisle of any garden center and you'll find a vast array of cutting instruments, all designed with the backyard gardener in mind. Blade heads of short-handled pruners and long-handled loppers usually come in two different styles: bypass and anvil. Bypass loppers or pruners have a stainless steel curved blade that uses a scissors action to pass next to, not on top of, the lower surface, sometimes called the hook, designed to catch and hold the branch while the cutting blade comes down. Bypass pruners offer a cleaner cut, as the blade slices all the way through the stem. The cutting blade of anvil-style pruners comes down onto the center of a soft metal or hard plastic lower surface, called the anvil or table. Anvil pruners tend to crush the soft tissue of the stem, stopping the flow of nutrients, prolonging the healing time for the cut surface. Despite the bypass pruner's benefits, garden centers still offer a nearly equal number of anvil-style pruners and loppers, a never-ending source of confusion for the gardener hunting for cutting tools. We asked local garden experts their pruning preference: bypass or anvil? The late Sacramento County Farm Advisor, Chuck Ingels, preferred bypass pruners. "I never use anvil pruners because you often can't cut close enough to the branch collar without leaving somewhat of a stub," said Ingels. "When they begin to wear, they often don't cut all the way through. Also, they crush the bark, which bypass pruners can do also, but you can turn the shears so the blade is closer to the collar and make a clean cut." "I don't use and usually do not recommend anvil pruners," says Luanne Leineke, formerly the Community Shade Coordinator for the Sacramento Tree Foundation . "I tend to see too many wounded branches, particularly when the bark is soft. I suggest using bypass pruners for up to three quarters of an inch-thick branches, loppers for up to one inch thickness and a hand saw for anything larger." Pete Strasser is a former plant pathologist with a former Sacramento nursery, Capital Nursery. Pete has only one use for anvil pruners. "Anvils are for deadheading annuals, and that's about it." Loren Oki, Landscape Horticulture Specialist with UC Cooperative Extension in Davis , also has limited use for anvils: "I was taught that bypass pruners were used on live material, whereas the anvil types were better for dead wood. The bypass type cuts cleaner through the softer material without causing much damage." Steve Zien, owner of the Citrus Heights-based organic landscape consulting business, Living Resources , leaves no doubt to his preference: "I would never use anvil pruners! Never ever, unless something needed to be pruned right then and there, and it was the only tool I had beside my teeth." Bottom line: Bypass pruners are much more versatile than anvil pruners. Every gardener should own a pair of bypass pruners. But a word of warning: don't force cut a branch with bypass pruners that were not meant to cut a larger branch. Using too much force to work the blade through the wood could damage the entire unit. If those bypass pruners are advertised as cutting through one-inch branches, don't exceed that limit. Move up to a larger cutting tool for those bigger branches, such as bypass loppers, a small branch saw (my favorite), a bow saw, or when you finally realize that "Life is too short to put up with a problem plant", a good quality chain saw.Perhaps have a pair of small bypass snippers for the cut flower garden. And larger anvil ratchet loppers for removing dead wood. Finally, whatever you purchase, buy quality. Look for pruning tools that have replaceable parts (blades, springs,etc) that can easily be disassembled for cleaning, sharpening, oiling, and maintenance. The 3-Cut Pruning Method for Large Branches Illustration provided by Texas A&M Forest Service Thank you for listening to the Garden Basics with Farmer Fred podcast! It’s available wherever you get your podcasts. Please share it with your garden friends. As an Amazon Associate, I earn from qualifying purchases from some of the underlined links in the newsletter. This is how I am trying to keep this a free newsletter. And as long as you buy whatever you want from Amazon using any of those links to get into the Amazon site , I get a few pennies. Thank you. Fred Hoffman is also a University of California Cooperative Extension Master Gardener in Sacramento County. This is a public episode. If you'd like to discuss this with other subscribers or get access to bonus episodes, visit gardenbasics.substack.com/subscribe
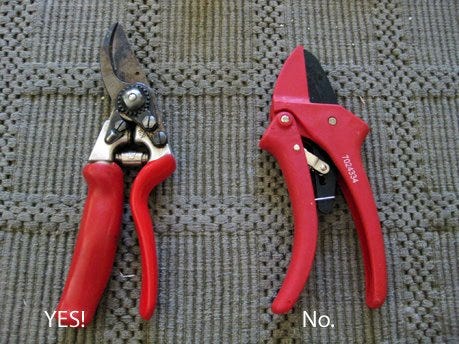
Dec 30, 2022
Ant Control
The recent bout of colder, wetter weather means ants have begun their march towards the warmth and comfort of your house, greenhouse or outbuildings. In today’s newsletter podcast, America’s Favorite Retired College Horticulture Professor, Debbie Flower, lists many ways to control ant populations, both indoors and outdoors, including her home recipe for lethal outdoor ant bait: 1 part boric acid (1 teaspoon, e.g.) - available at most garden centers 9 or 10 parts sugar (9 or 10 teaspoons sugar) Add enough water to make a slurry. Put slurry in a small container, tuna can size. Add 2 or 3 cotton balls and rotate them until they are completely covered in the slurry. Put a lid on the container. Lid must have holes big enough for ants to crawl through (about 1/8”). Bury in soil so lid is at soil level. Leave it alone. You won't see dead ants. They visit, take the bait back to the colony, and kill the entire colony. Commercial boric-acid ant baits are available, as well, for placing near outdoor plants where you see ants climbing up and down, herding aphids or gathering nectar. A word of praise for ants. Ants are a beneficial part of any successful garden. According to “ Ants Are Ecologically Beneficial ”, a publication of Iowa State University: “It is hard to imagine any other insect or animal that has a more important and positive impact on the terrestrial environment that sustains us. Ants are among the leading predators of other insects, helping to keep pest populations low. Ants move approximately the same amount of soil as earthworms, loosening the soil in the process and increasing air and water movement into the ground. They keep the ecosystem clean of dead insect carcasses and aid in the destruction and decomposition of plant and animal matter. By carrying bits of plants and animal remains into their nests, the soil is fertilized, and nutrients recycled through the world’s ecosystems. They carry seeds and help plants disperse into new areas.” However, as any gardener will swear, there are a couple of double-edged swords in that statement. Ant tunnels beneath the surface of a garden bed could move water too quickly to lower levels, making it unavailable to plant roots, especially in sandier soils. The solution for that: mix in compost on a regular basis. And those plant seeds that ants can disperse into new areas? There might be weed seeds in that mix. Yet another reason to own a long-handled hoe. It’s when ants start invading your house that homeowners need to act. Homeowners might reach for the spray can to douse those little scavengers. Many of those spray pesticides are only effective with direct contact on the ants. In addition, the stronger sprays, with residual action to thwart the next wave of ants, are potentially harmful to you, your children, and your pets. Here are some more modern, family-friendly indoor ant control methods from the University of California Ag and Natural Resources’ “Home, Garden, Turf, and Landscape Pests” publication, “Ants” : • Find where the ants are entering the house, then caulk any cracks and crevices both indoors and out. • Wipe up ant trails with soapy water when you see them. • Store food that is attractive to ants in closed containers. • Ant-proof kitchen garbage pails with sticky barriers like petroleum jelly. • Clean up grease and spills, pet food, and other possible food sources for ants. • Place pet food dishes in a moat of water with a drop of dishwashing liquid. The soap will keep the ants from floating. • If you decide to use a pesticide, choose prepackaged or refillable bait stations instead of sprays. Place them near ant trails and nest openings. Ant bait stations take time to work. It can take five to 10 days before you start seeing fewer ants. In the meantime, keep washing away the ant trails. In my experience, weak liquid boric acid combined with water in specially designed, refillable ant bait stations have proven effective, if given time. Boric acid powders and outdoor refillable ant bait stations are also available for outdoor ant control, especially if they have taken up residence in a long-neglected mulch pile of chipped/shredded tree parts. You’ll discover them in your first shovel full when you finally get around to using that mulch. Put down the shovel and pick up the powdered boric acid. Sprinkle it on the mulch pile and turn it into the middle of the pile. The ants will find it. But give them a couple of weeks before you return to that mulching task. Around the outer foundation of the house, the UC Integrated Pest Management team reports that several refillable bait stations are recommended, including the Ant Café, Antopia, Ant-No-More, and KM AntPro. A slow, but effective way to control Argentine ant populations is with a diluted, liquid boric acid product in a reusable ant bait station. Place the station outdoors near foundations where you see ants on the march. Thank you, also, for listening to the Garden Basics with Farmer Fred podcast! It’s available wherever you get your podcasts. Please share it with your garden friends. As an Amazon Associate, I earn from qualifying purchases from some of the underlined links in the newsletter. This is how I am trying to keep this a free newsletter. And as long as you buy whatever you want from Amazon using any of those links to get into the Amazon site , I get a few pennies. Thank you. Fred Hoffman is also a University of California Cooperative Extension Master Gardener in Sacramento County. This is a public episode. If you'd like to discuss this with other subscribers or get access to bonus episodes, visit gardenbasics.substack.com/subscribe
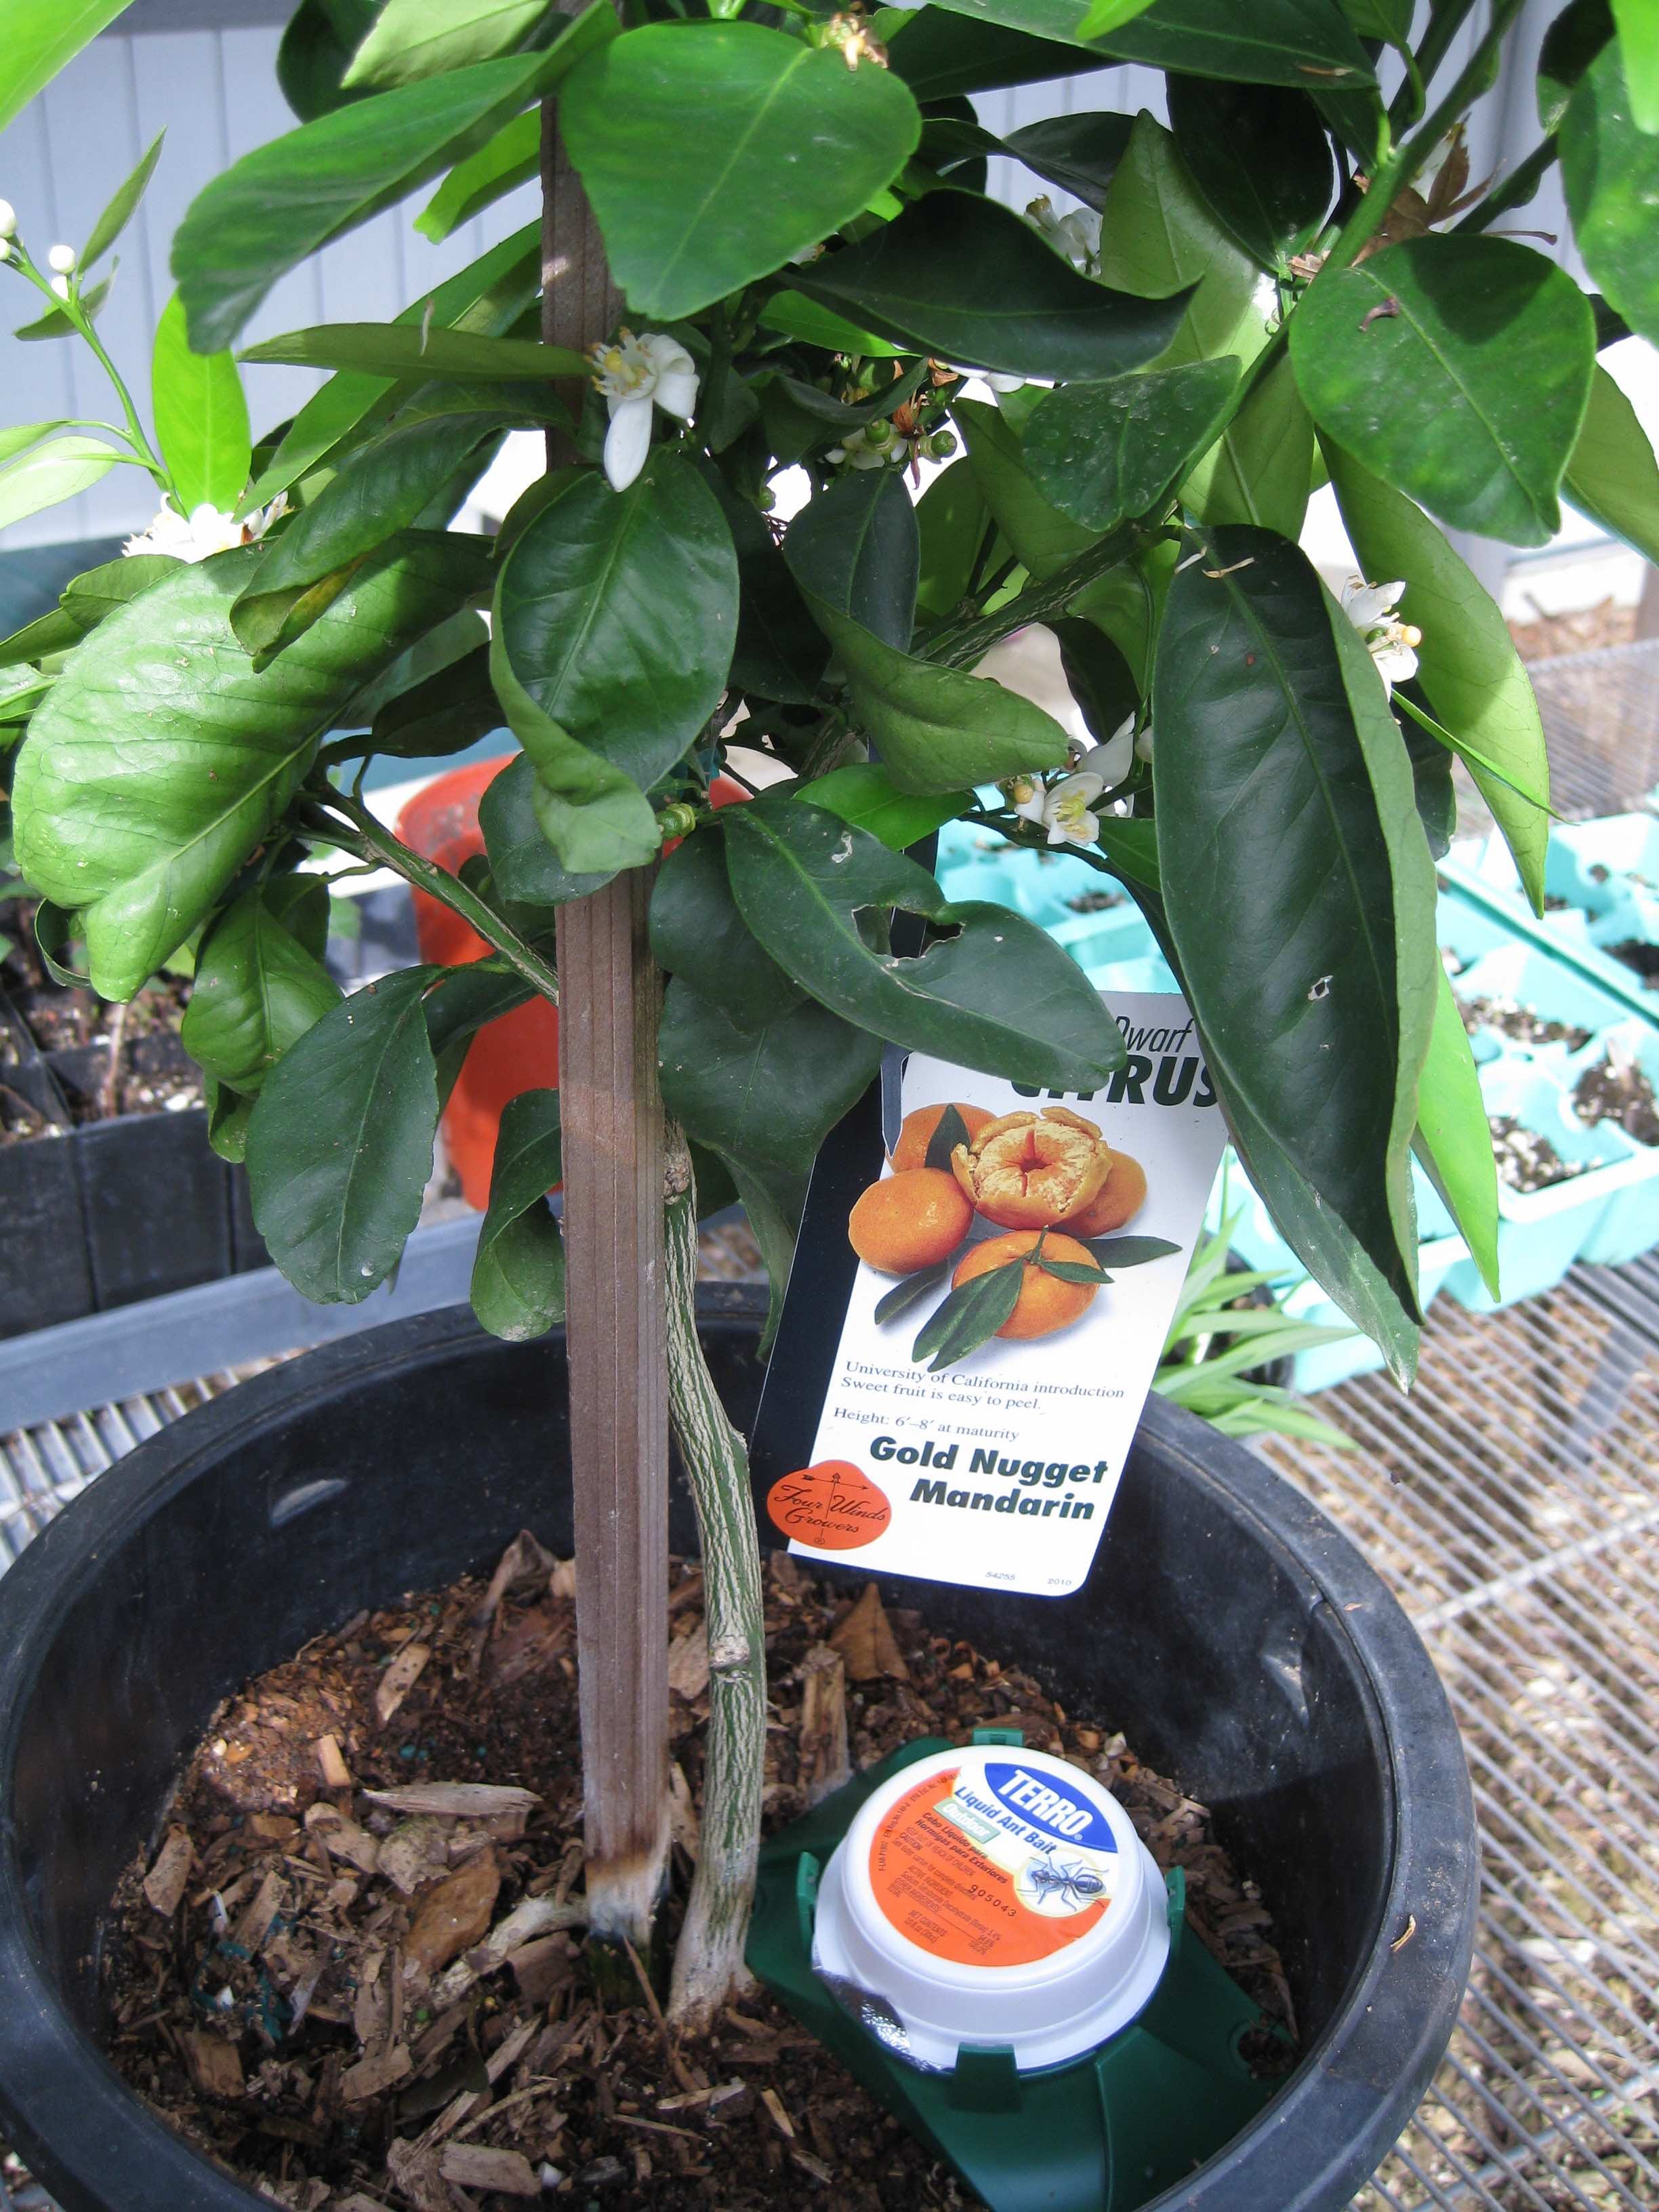
Dec 23, 2022
Poinsettia Pointers
In today’s newsletter podcast: Back in November of 2020, we chatted about poinsettia plant basics, with Bill Eisley, a wholesale grower of poinsettia plants in Auburn, CA. Searching for that last minute Christmas gift? Many stores, including supermarkets, are now offering red and ivory-colored poinsettias, tropical plants native to Mexico, that are showstoppers this time of year for any dining room table. Even more colorful varieties are available at area nurseries and garden centers. Don’t grab and run with the first poinsettia plant you see. Take a few minutes to closely examine the plant. • Avoid buying poinsettias from exterior store displays. Poinsettias (Euphorbia pulcherrima) are tropical plants. They will be stressed in temperatures below 60 degrees. Choose a poinsettia from a well-lit indoor display. • The eye-catching red color (or white, cream, salmon or pink) on the poinsettia plants is not the flower; those are the modified leaves, known as bracts. The true flowers of a poinsettia are the small yellow berries, the cyathia, in the center of the bracts. Choose poinsettias that have tightly budded cyathias, not ones that are fully open. • Make sure that the smaller bracts surrounding the cyathia are fully colored. If these secondary bracts are not fully colored, the plants will quickly fade and lose color. • Examine the plant's soil before purchasing. It is best to avoid waterlogged soil, particularly if the plant appears wilted. Such a condition could signify irreversible root rot. Here are a few ideas to keep poinsettia plants looking good for another couple of months indoors: • Place your plant in indirect sunlight for at least six hours per day. If direct sun can't be avoided, diffuse the light with a shade or sheer curtain. • Provide room temperature between 68 - 70 F. If you are comfortable, so is your poinsettia. • Do not place plants near cold drafts or sources of heat. Avoid placing plants near appliances, wood stoves or ventilating ducts. • Water your plant when the soil feels dry to the touch. Avoid overwatering your plant. Don’t let it sit in standing water. • Always remove decorative foil from the outside of a container before watering. Allow the water to drain completely. Afterwards, return the decorative foil to the container, if desired. • It is not necessary to fertilize your plant when it is in bloom. If you want to try to get that poinsettia to rebloom for Christmas 2023 – and you have a lot of patience and perseverance – try these tactics: • In late March or early April, cut back the plant so that two buds remain, about six inches from the base. The plant may still look elegant before you start this radical surgery, but the pruning is necessary to help it look great for next December. • In April, place the plant - pot and all- outside in a mostly sunny, warm area; against a south wall beneath the overhang of your house or apartment would be ideal. Keep the poinsettia watered, pruning back the branches by a couple of inches in June and August to keep the plant from getting leggy. When the red color begins to show, start feeding the plant with a fertilizer that has a bit more nitrogen in it than phosphorus and potassium. Follow label directions. • In late October, before the first frost, bring the plant back into the house and keep it in a dark closet or room for at least fourteen hours a day. The plant will bloom only when it has had these long "nights." By next Christmas, you'll again be able to enjoy the striking beauty of that same poinsettia plant. If all this sounds like a lot of work, it is. Moreover, the result may not be as spectacular as the original plant's bloom. The good news: there will always be more colorful poinsettias for sale next holiday season. So, when you’re done enjoying that poinsettia plant this winter, you can always add it to your compost bin. More tips on poinsettia care from the National Garden Bureau . Thank you for listening to the Garden Basics with Farmer Fred podcast! It’s available wherever you get your podcasts. Please share it with your garden friends. As an Amazon Associate, I earn from qualifying purchases from some of the underlined links in the newsletter. This is how I am trying to keep this a free newsletter. And as long as you buy whatever you want from Amazon using any of those links to get into the Amazon site , I get a few pennies. Thank you. Thanks for Subscribing and Spreading the Word About the Beyond the Basics: The Garden Basics with Farmer Fred newsletter, I appreciate your support. Fred Hoffman is also a University of California Cooperative Extension Master Gardener in Sacramento County. This is a public episode. If you'd like to discuss this with other subscribers or get access to bonus episodes, visit gardenbasics.substack.com/subscribe

Dec 16, 2022
All About Fruit Tree Chill Hours, and More
What are Fruit Tree Chill Hours? Do They Matter? In today’s newsletter podcast (Above. Originally aired in Episode 105 of Garden Basics ), Tom Spellman of Dave Wilson Nursery explains the term “chill hours” and how cold winter temperatures helps production on many deciduous fruit trees, especially apples. Chill hours refer primarily to low temperatures (usually between 32 and 45 degrees Fahrenheit) during a fruit tree’s dormant months in the winter. But Tom Spellman is throwing a monkey wrench into the hard rules about growing fruit trees that require lots of winter chilling hours (more than 800 hours) in areas of the country that don’t get that cold in the winter. And he is having a lot of success in his test orchard in Southern California, where accumulated winter chill hours seldom top 100, but still has nighttime cooling in the 40’s and 50’s. Tom explains his “high chill trees in a low chill test area” in today’s newsletter podcast (above). The key, Tom points out, is “All Gardening is Local” (hmm… that sounds familiar !). Most chill hour requirements listed for deciduous fruit trees were originally established where the tree has been growing - and producing - for decades. The only way to see if a particular fruit tree that supposedly requires winter chill can succeed in your area, is to try to grow it in your locale. And as Tom points out in an article he wrote for the Dave Wilson website , “ Fruit varieties can be productive where chill hours are less than recommended if there is sufficient cool weather (45-55°F) during the dormant period.” 1. In fall, deciduous fruit trees lose their leaves and enter a dormant state in order to survive winter. To end dormancy, bloom and set fruit they require a certain amount of winter cold (their “chilling requirement”) followed by a certain amount of heat. Chilling requirements vary widely among varieties. 2. Fruit varieties with chilling requirements much lower than received at the planting location may end dormancy and bloom too early, subjecting tree, bloom and fruit to freeze damage. Conversely, varieties with chilling requirements much higher than received will suffer delayed, weak leafing and blooming and will not fruit satisfactorily. 3. To quantify fruit tree chilling Dave Wilson Nursery uses the most widely used method, the Hours Below 45°F model. One hour below 45°F during the dormant period (autumn leaf fall to spring bud break) equals one hour of chilling or one “chill hour”. 4. Research indicates fruit tree chilling also occurs above 45°F (to about 55°F), is most effective at about 35-50°F, and does not occur below about 30°F. Chilling temperatures are most effective in early dormancy and during that time accumulated chilling can be negated by temperatures above 60°F. Such findings help explain the response of specific varieties to different climates, i.e. to different patterns of cold and warm temperatures. 5. Generally, fruit growers have most success with varieties that have stated chilling requirements similar to the chilling typically received at the planting location: “high chill” varieties (800-1,000+ hours) for cold winter climates, “low chill” varieties (500 hours and less) for warm winter climates. 6. Published chilling requirements for a fruit variety can be the minimum chilling required to produce a satisfactory home garden crop up to a higher requirement for the consistent, maximum crop sought by commercial growers. Note that many apple varieties can set fruit with far less chilling than recommended, color and quality depending on climate. 7. Fruit varieties can be productive where chill hours are less than recommended if there is sufficient cool weather (45-55°F) during the dormant period. 8. Some cold hardy fruit varieties are widely adapted because they have a low or moderate chilling requirement as well as a cold hardiness deriving from a high heat requirement for ending dormancy. 9. Much of California has an ideal, virtually frost-free fruit growing climate where almost any kind of deciduous fruit can be grown, including varieties with chilling requirements anywhere from 100 to 800 or more hours. 10. A variety is proven for a climate or region only by growing it there. When choosing fruit varieties always refer to area retail nurseries, agricultural universities, county extension offices and master gardeners for local fruit growing information and ideas. CAN YOU GROW AN APPLE TREE FROM SEED? Callers to the Garden Basics podcast or questions to the Farmer Fred e-mail bag also contain the attempts of many home garden scientists, trying to expand their horticultural horizons. Someone is always trying to grow something that is not intended (supposedly) for the local area. Roberta of Carmichael (Sacramento County, CA) is trying to emulate Johnny Appleseed: "I have two Maiden Blush apple trees in my yard. They ripen in August (which isn't very good). Is there anything I can do to make them ripen later in the year? I grew these trees from seeds from apples off a tree that was on my family's homestead in Nebraska. They are about 15 years old. This year, they seem to have gotten worm holes and not matured as well. Are they prone to any pests or diseases? What about watering? They seemed to have done OK so far, but i want to keep them healthy and alive!" Depending on your location, the Maiden Blush apple can ripen as early as mid-August or as late as mid-September. The Maiden Blush was introduced into commerce in New Jersey, in the early 1800's. It's a popular dessert apple in the Appalachian mountain regions. According to Tomorrow’s Harvest representative Ed Laivo , that tree may be producing fruit early because it is stressed due to our summer weather: hot and dry, which is quite different from the tree's original production grounds in New Jersey (humid and rainy in the summer, with a pronounced winter chill). And a stressed tree is an invitation to pests and diseases. Sort of like the slowest antelope in a pack, being chased by a lion. Or an aging catcher trying to steal second base; or, even more entertaining: 42 year-old New York Mets pitcher Bartolo Colon hitting a home run. The bigger, unasked question: How successful are apple trees grown from seed? According to the Horticulture and Home Pest News of Iowa State University , do you feel lucky? “It is possible to grow an apple tree from an apple seed,” says the authors of this newsletter. “However, in most cases, apple trees don't come true from seeds. For example, a seed taken from a Red Delicious apple will not produce a Red Delicious apple tree. Seedling apple trees are genetically different and usually inferior to the parent tree. Most apple trees are propagated by grafting. Grafting allows growers to produce trees that are identical (genetically) to one another. “While a tree grown from an apple seed is likely to be disappointing, it's not difficult to germinate apple seeds. Apple seeds need to be exposed to cool, moist conditions before they will germinate. The cool, moist requirement can be accomplished by planting apple seeds outdoors in fall. Plant the seeds 1/2 inch deep. The cool, moist requirement can also be attained indoors. Place a layer of moist sand in the bottom of a small container, such as a plastic margarine tub, place the apple seeds on the moist sand, and then cover the seeds with additional moist sand. Punch 1 or 2 small holes in the plastic lid and then place it on the container. Place the container in the refrigerator for 90 to 120 days. (The temperature in the refrigerator should be 37 to 41 degrees Fahrenheit.) Afterwards, remove the seeds from the refrigerator and plant indoors. Plant the seeds 1/2 deep in a commercial potting mix. Keep the potting mix moist until the seeds germinate.” The right plant in the right place Sacramento County may not be the right place for that Maiden Blush apple tree: 100 degree days, 15% humidity, and winter chill hours that are far below what is required for many eastern apple varieties. Winter chill hours are the total number of hours at 45 degrees or less between November and February. The Central Valley of California normally gets between 800 and 1200 chilling hours per year. Coastal California gets far less, ranging from near 0 (41 at La Jolla last winter) to about 400. There are plenty of apples that do well here in California’s hot Central Valley: Fuji, Granny Smith, Spitzenburg, Pink Lady, Gala, Ashmead's Kernel and many more. Their common trait: a winter chill requirement of 800 hours or less. Of those listed, several are taste test winners with winter chill needs that are far less than 800: Pink Lady (300-400 hours), Gala (400-500) and our personal favorite, Granny Smith (400 hours).This is usually a line of questions I get from Bay Area or Southern California transplants to the Sacramento area or the Northern California foothills. They wonder why their bougainvillea dies in the winter here or why they can't get their Hass avocado tree to produce in the valley. All gardening is local, especially in California, which according to the Sunset Western Garden Book , has 24 gardening climates. Having said that, let me repeat: All Gardening is Local. Actually, All Gardening is Really Local: you just might have the right microclimate in your backyard to grow plants that other gardeners struggle with in your neighborhood: Bananas in Lodi. Jacaranda trees in east Sacramento. And yes, bougainvillea that live year round...if you have the right conditions, and a lot of luck. A good reference book with lots of tips and tricks for growing plants in the Golden State: California Home Landscaping , by Lance Walheim. Thank you for listening to the Garden Basics with Farmer Fred podcast! It’s available wherever you get your podcasts. Please share it with your garden friends. As an Amazon Associate, I earn from qualifying purchases from some of the underlined links in the newsletter. This is how I am trying to keep this a free newsletter. And as long as you buy whatever you want from Amazon using any of those links to get into the Amazon site , I get a few pennies. Thank you. Thanks for Subscribing and Spreading the Word About the Beyond the Basics: The Garden Basics with Farmer Fred newsletter, I appreciate your support. Fred Hoffman is also a University of California Cooperative Extension Master Gardener in Sacramento County. This is a public episode. If you'd like to discuss this with other subscribers or get access to bonus episodes, visit gardenbasics.substack.com/subscribe
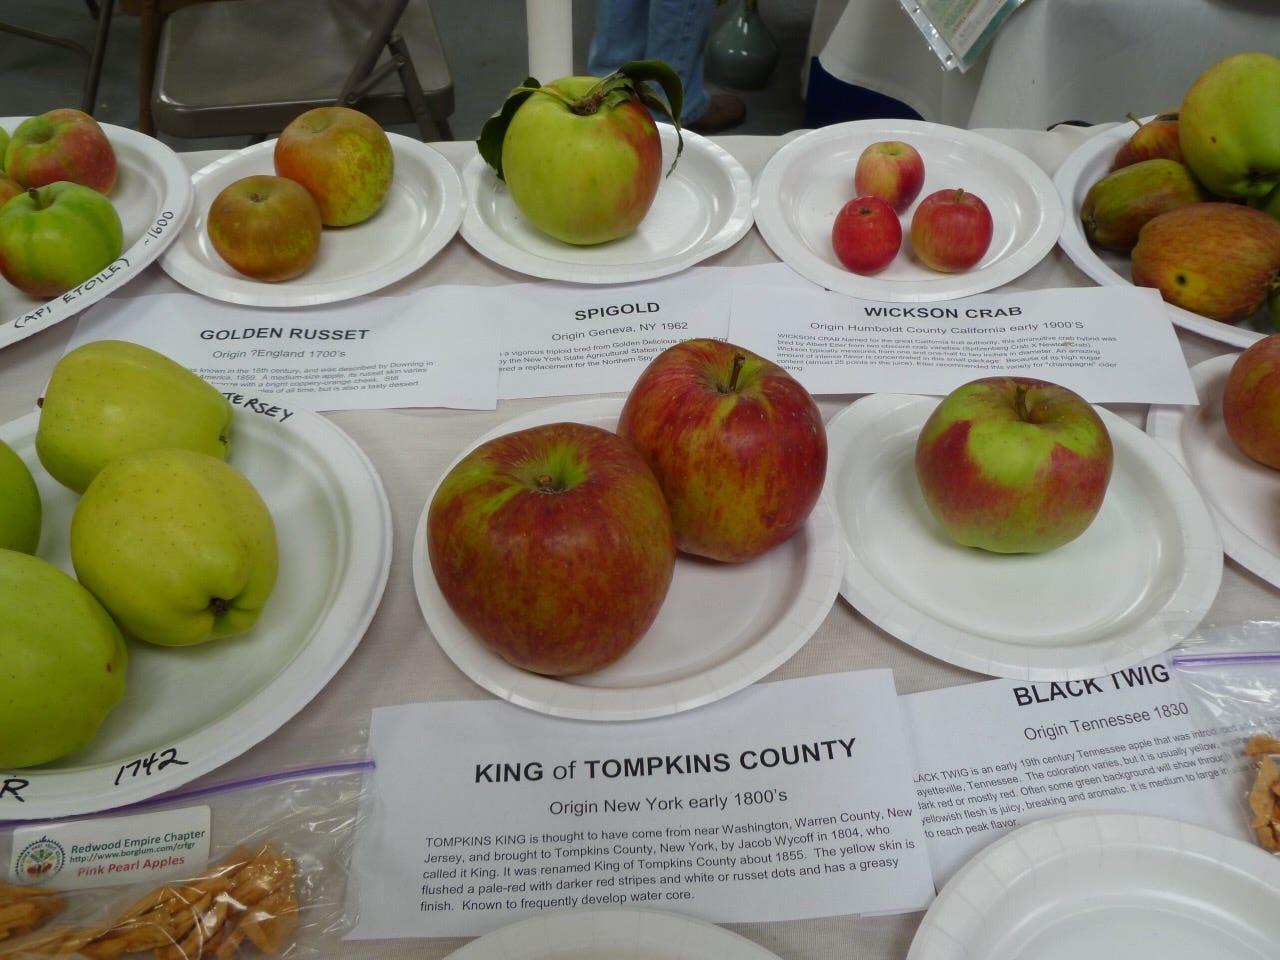
Dec 9, 2022
2023 All-America Plant Selections Winners
In today’s newsletter podcast: Diane Blazek , Executive Director of All-America Selections (AAS) and the National Garden Bureau, explains how a plant is selected to become an All-America Selection winning plant. In Episode 243 of the Garden Basics with Farmer Fred Podcast , Diane goes into the details of each of the winning plants in the 2023 AAS plant competition. Give it a listen while looking at the pictures and comments. More info, plus 90 years worth of previous winners, at the AAS website . Coleus Premium Sun Coral Candy Foliage Color: Multi Plant Habit: Mounded Plant Height: 10-16 inches Does well indoors, in a window with good natural lighting. JUDGE'S OBSERVATIONS * “Leaves are vibrant on a very tight, densely leaved plant” * “Each plant is very uniform, with only minor fading when in full sun” * “Very nice habit, excellent color, very full, robust, and rounded” * “This is excellent for container plantings” * “Phenomenal compact growth habit with appealing foliage color” ===================== Colocasia ROYAL HAWAIIAN® Waikiki Foliage Color: Deep-green glossy foliage with white markings and vivid pink veins Plant Habit: Clump forming Plant Height: 36 inches Also known as Taro or Elephant’s Ear JUDGE'S OBSERVATIONS * “Great foliage color on a compact plant” * “Color holds up well even in full sun and after a frost” * “Lush, large full leaves with great color” * “Tricolor foliage is stunning, red petioles stand out” * “A fantastic elephant ear that will add drama to the garden” ========================== Echinacea Artisan™ Yellow Ombre F1 Plant Habit: Bushy Plant Height: 24-34 inches Bloom Time: Summer to frost Bloom Color: Yellow Bloom Size: 3-4 inches Also known as coneflower. The designation, “F1” or “F1 Hybrid” after a plant name is - according to my Master Gardener friends - “ the first generation hybrid seed or plant that occurs following the successful cross-pollination of one genetically uniform plant variety with another specific genetically uniform variety .” If you can’t remember that, just tell anybody who asks about F1, “they found it in the back of the very first Ford pickup truck.” JUDGE'S OBSERVATIONS * “A more saturated bright yellow flower color” * “A very nice yellow Echinacea. Consistently better than comparisons” * “Due to the saturated color of the entry, it deserves an award.” * “Flower color lasted all season” * “The foliage was cleaner and slightly larger” ==================== ======================== Pepper cayenne Wildcat F1 Plant Height: 36-42 inches Fruit Color (Harvest): Green or Red Fruit Shape: Long, curled Fruit Size: 8-12 inches Fruit Flavor Description: Mild pungency 500-1500 Scoville units Number Of Fruits Per Plant: 20-25 Can be grown in an 8 or 15-gallon container. JUDGE'S OBSERVATIONS * “The entry fruits were large, about 8″ long, and mostly straight” * “Lots of fruit production” * “Entry did have HUGE fruits compared to the comparisons, which made harvest easier (easy to see a 6″ bright red pepper!)” * “Good flavor and a moderate heat level make this a multi-purpose pepper for your garden” * “The sheer size of these peppers is astonishing. They are literally almost 100% larger than the others, volumetrically speaking. Insanity” ===================== Pepper jalapeno San Joaquin F1 Plant Height: 30 inches Fruit Color (Harvest): Green-red Fruit Size: 4 inches Fruit Flavor Description: A hint of heat at 2500-6000 Scoville units Number Of Fruits Per Plant: 50 That “hint of heat” may be more than you might desire. Pro tip: to soothe a burning mouth, drink whole milk or eat ice cream. Water, beer, and non-fat milk won’t help. JUDGE'S OBSERVATIONS * “Produced almost twice the peppers as the comparisons” * “Large, thick-walled fruits, well shaded by leaf canopy reducing fruit deformities” * “Nice compact plant with heavy yields. Large fruit would make excellent stuffers” * “Loved this variety’s mild heat and large fruits that did not crack” * “Excellent size, yield, and uniform upright growth. Very good taste” ========================= Leucanthemum Carpet Angel® Plant Habit: Spreading Plant Height: 4-6 inches Bloom Time: All growing season Bloom Color: White Bloom Size: 3 inches Leucanthemum is a new name for former members of the Chrysanthemum genus. Leucanthemums include the Shasta Daisy and the common daisy. Botanical name changes occur just to tick us off. JUDGE'S OBSERVATIONS * “Flowers were unique shape and color” * “Plants were a nice dwarf size” * “Very good winter hardiness” * “The performance is exceptional, surviving many challenges that proved too much for the comparison” * “The habit and bloom time on this trial is much better than the comparison” =============== ======================== Salvia “Blue by You” Plant Habit: Mounded Plant Height: 20-22 inches Bloom Time: Late spring – Late summer Bloom Color: Blue Bloom Size: 10-12″ inches A low-water use plant. Dead-head for more blooms. The bees will thank you. JUDGE'S OBSERVATIONS * “Intensely beautiful flower color: dark purple with dark burgundy calyces” * “Individual flower size is larger than the comparison” * “Overall, a nice plant with good performance” * “Very nice salvia for the home garden” * “Flowering is consistent and superior to the comparison” ================ Snapdragon DoubleShot™ Orange Bicolor F1 Plant Height: 18-20 inches Bloom Time: Spring to light frost Bloom Color: Orange-white Bloom Size: 1-2 inches Considered a cool season annual in USDA Zone 9, snapdragons don’t hit their blooming stride until mid-spring, on exactly the weekend when you want that space for all the enticing summer annuals that are available. JUDGE'S OBSERVATIONS * Double flowers are really nice and attractive. * Strong stems didn’t break, even in hurricane winds. * Loved the warm color and beautiful double blooms. * Blooms all summer long, even through high temperatures. * Truly stunning color, I just can’t stop admiring the subtle gradient throughout. Soft, dusky, romantic, yum! ===================== Squash kabocha Sweet Jade F1 Plant Habit: Vining Plant Height: 24 inches Fruit Color (Harvest): Jade green Fruit Shape: Flat-round Fruit Size: 4-5 inches Fruit Weight: 1-2 pounds The secret to a successful pumpkin soup recipe? Use plenty of kabocha squash . JUDGE'S OBSERVATIONS * “Nice fruit size, good yields, and nice internal color” * “Nice single-serving fruits, high yields per plant” * “Incredible taste! Doesn’t even need butter, salt, etc.” * “Entry has strong yields, attractive shape and color, and good flesh quality and volume per fruit” * “This squash was outstanding in taste, texture, and durability” ==================== Tomato Zenzei F1 Plant Habit: indeterminate Plant Height: 72 inches Fruit Color (Harvest): Red Fruit Shape: Oblong Fruit Size: 4-5 inches Fruit Weight: 3-8 ounces Number Of Fruits Per Plant: 30-50 If this Roma variety can stave off blossom end rot, it’s got my vote! JUDGE'S OBSERVATIONS * “Very early and high-yielding, great color” * “Very meaty and flavorful fruit” * “Nice yields, great shape, and color Overall healthy and vigorous plant with large Roma tomatoes” * “Compact and tidy plant does not impact yield negatively” * “Great plant for smaller gardens” ========================= Watermelon Rubyfirm F1 Plant Habit: Climbing/vining Fruit Color (Harvest): Jubilee stripe red with red flesh Fruit Shape: Round Fruit Size: 6 inches Fruit Weight: 3.3-5.5 pounds Fruit Flavor Description: Very sweet and firm flesh Number Of Fruits Per Plant: 2-3 Put on a juggling clinic at your summer family reunion picnic. JUDGE'S OBSERVATIONS * “Loved the taste and the texture” * “The test variety had good disease resistance and held up through the middle up September against downy and powdery mildew” * “The flavor is quite good” * “Rind pattern is unique, attractive flesh color with good texture” * “Certainly had much less seed than comparisons.” Thank you for listening to the Garden Basics with Farmer Fred podcast! It’s available wherever you get your podcasts. Please share it with your garden friends. Fred Hoffman is also a University of California Cooperative Extension Master Gardener in Sacramento County. This is a public episode. If you'd like to discuss this with other subscribers or get access to bonus episodes, visit gardenbasics.substack.com/subscribe

Dec 2, 2022
A Persimmon Primer.
TODAY’S NEWSLETTER PODCAST: UC Davis Arboretum Superintendent Warren Roberts talks about persimmon trees, both American and Japanese persimmons. California's Central Valley was ablaze in October and early November with the other “orange” fruit tree: the brightly colored persimmon. And it's not just the fruit. Persimmon tree leaves can turn a brilliant hue of red before the first big wind and rain storm of late November washes them off their branches. What's left behind is the unpicked fruit, dangling like holiday ornaments during December. That's a feast for our eyes...as well as a banquet for hungry birds and squirrels. Persimmons have adapted well to our California climate: warm, dry summers and mild winters. At least 500 different Japanese persimmon (Diospyros kaki) varieties were brought to California during a major planting spree from 1870 to 1920. In 1877 alone, more than 5,000 plants in 19 varieties were imported from Japan. As a result, 99% of the U.S. commercial persimmon crop is grown here in California.Persimmons are quite nutritious, as well, loaded with Vitamin A, Vitamin C, Fiber, and antioxidants such as Beta-Carotene and Lycopene. If you live in the Central Valley, Southern California, Bay Area or low foothills as well as throughout USDA Zones 8 and 9 ... you can grow that! Bare root Japanese persimmon trees will be available at local nurseries during late December, January and February. Give them full sun and regular irrigation in the dry months for best production. Persimmon trees can tolerate partial shade.As Warren explained in the newsletter podcast, persimmons are usually classified as either astringent or non-astringent. For fresh eating straight from the tree, choose a non-astringent, self-pollinating variety such as Fuyu, Giant Fuyu, Yemon or Izu. Astrigent varieties, which need to soften thoroughly before they sweeten, include Hachiya, Chocolate or Tamopan. Those varieties are self-fruitful, as well. Persimmon growing advice from the California Rare Fruit Growers (CRFG): Location: Full sun with some air movement is recommended for persimmon trees in inland areas, although they will tolerate some partial shade. Persimmons grown in cooler areas should have full sun with protection from cooling breezes. As an attractive ornamental the tree fits well in the landscape. It does not compete well with eucalyptus. Soil: Persimmons can withstand a wide rage of conditions as long as the soil is not overly salty, but does best in deep, well drained loam. A pH range of 6.5 to 7.5 is preferred. The tree has a strong tap root which may mean digging a deeper hole than usual when planting (when on D. kaki stock). Irrigation: Persimmon trees will withstand short periods of drought, but the fruit will be larger and of higher quality with regular watering. Extreme drought will cause the leaves and fruit to drop prematurely. Any fruit left on the tree will probably sunburn. Some 36 to 48 inches of water are needed annually, applied gradually in spring and tapering off in the fall. Hot inland areas may require 2 or 3 applications weekly, while coastal areas may need watering only once every 6 weeks, depending on the soil. If a drip system is is used, the emitters should be moved away from the trunk as the tree matures. Fertilization: Most trees do well with a minimum of fertilizing. Excess nitrogen can cause fruit drop. If mature leaves are not deep green and shoot growth is less than a foot per year, apply a balanced fertilizer such as a 10-10-10 at a rate of 1 pound per inch of trunk diameter at ground level. Spread the fertilizer evenly under the canopy in late winter or early spring. Pruning: Prune persimmon trees to develop a strong framework of main branches while the tree is young. Otherwise the fruit, which is borne at the tips of the branches, may be too heavy and cause breakage. A regular program of removal of some new growth and heading others each year will improve structure and reduce alternate bearing. An open vase system is probably best. Even though the trees grow well on their own, persimmons can be pruned heavily as a hedge, as a screen, or to control size. They even make a nice espalier. Cut young trees back to 1/2 high (or about 3 feet) at the time of planting. Pests and Diseases: Persimmons are relatively problem-free, although mealybug and scale in association with ants can sometimes cause problems. Ant control will usually take care of these pests. Other occasional pests include white flies, thrips which can cause skin blemishes and a mite that is blamed for the "brown lace collar" near the calyx. Waterlogging can also cause root rot. Vertebrate pests such as squirrels, deer, coyotes, rats, opossums and birds are fond of the fruit and gophers will attack the roots. Other problems include blossom and young fruit shedding, especially on young trees. This is not usually a serious problem, but if the drop is excessive, it may be useful to try girdling a few branches. Over watering or over fertilization may also be responsible. Large quantities of small fruit on an otherwise healthy tree can be remedied by removing all but one or two fruit per twig in May or June. Harvest: Harvest astringent varieties when they are hard but fully colored. They will soften on the tree and improve in quality, but you will probably lose many fruit to the birds. Astringent persimmons will ripen off the tree if stored at room temperature. Nonastringent persimmons are ready to harvest when they are fully colored, but for best flavor, allow them to soften slightly after harvest. Both kinds of persimmons should be cut from the tree with hand-held pruning shears, leaving the calyx intact Unless the fruit is to be used for drying whole, the stems should be cut as close to the fruit as possible. Even though the fruit is relatively hard when harvested, it will bruise easily, so handle with care. Storage: Mature, hard astringent persimmons can be stored in the refrigerator for at least a month. They can also be frozen for 6 to 8 months. Nonastringent persimmons can be stored for a short period at room temperature. They will soften if kept with other fruit in the refrigerator. Persimmons also make an excellent dried fruit. They can either be peeled and dried whole or cut into slices (peeled or unpeeled) and dried that way. When firm astringent persimmons are peeled and dried whole they lose all their astringency and develop a sweet, datelike consistency. And we are in total agreement with the CRFG: persimmons make an excellent dried fruit, a great sweet snack or for use in cookies or breads, or as a homemade holiday gift.According to our favorite book on dehydration techniques, "How to Dry Foods" by Deanna DeLong: • Wash and remove the stem cap. Cut fruit in half and then into 3/8-1/2" slices.• Place on a dehydrator sheet in single layers.• Dry at 140 degrees for 1-2 hours, then reduce heat to 135 degrees for an additional 7 hours (approximate).• When done, they should be tender and pliable, but not sticky.At that point, you can either vacuum seal them in plastic bags for long term preservation, or store the dried persimmons in a canning jar for quick use.Backyard gardeners who do a lot of drying are passionate about their choice of dehydrators. Some prefer the rectangular Excalibur dehydrator or other rectangular models. Others (including our household) enjoy the circular Nesco American Harvest or Garden Harvest Dehydrator . Our largest complaint about the Excalibur: the fan blows from the back to the front, which can rearrange any lightweight herb leaves that you might be trying to dry. The Nesco dehydrator's fan moves warm air from the bottom up, offering less disturbance to the drying crops. Still, the Excalibur is a good choice for most fruit and vegetable drying. Thank you for listening to the Garden Basics with Farmer Fred podcast! It’s available wherever you get your podcasts. Please share it with your garden friends. As an Amazon Associate, I earn from qualifying purchases from some of the underlined links in the newsletter. This is how I am trying to keep this a free newsletter. And as long as you buy whatever you want from Amazon using any of those links to get into the Amazon site , I get a few pennies. Thank you. Fred Hoffman is also a University of California Cooperative Extension Master Gardener in Sacramento County. This is a public episode. If you'd like to discuss this with other subscribers or get access to bonus episodes, visit gardenbasics.substack.com/subscribe

Nov 25, 2022
Garlic Growing Tips
Want to grow garlic? In milder climates (where the ground doesn’t freeze), now is the time to visit your favorite nursery, garden center or garden catalog company to choose the garlic varieties you want. Note I said, “varieties.” Grocery store garlic is primarily one or two varieties. Around here, it is usually California Early or California Late. And these two softneck, Artichoke varieties of garlic do grow well in USDA Zone 9. They take our late spring heat, are very productive, and can be stored (in a cool, dark room, in netted bags) for up to ten months. However, if you want a variety that has a deeper, full-bodied flavor, choose a hardneck variety, such as one of the Rocambole varieties, many of which do well in colder climates, where garlic is best planted two to four weeks before the ground freezes. In the past, I have had good luck with Killarney Red and German Red. Purple Stripe varieties are also quite flavorful, especially when used in baked dishes. Chesnok Red and FerganskiJ are two Purple Stripes that have done well here. Storage life for these varieties is much shorter, usually four to six months. The longest storing varieties – up to a year – are the Silverskins and Creoles, which include two of my favorites: Nootka Rose and Burgundy. Increasing in popularity because of their large size and tangy flavors are the Porcelain garlics, especially “Music”, with cloves as large as a Brazil nut. A well-stocked garden center or independent nursery may have a better supply right now than many garlic catalogs, which sell out of their stock quickly. For more information about garlic – including longer definitions than what is supplied here – check out online garlic company Filaree Farm in Washington State ( filareefarm.com ). Their site can answer many of your garlic questions. A very good book on the subject is “ Growing Great Garlic ” by Ron Engeland. A harder to find, out-of-print book, “ The Complete Book of Garlic ” by Ted Jordan, is a prized reference for garlic aficionados. University of California Cooperative Extension Master Gardener Advisor Emeritus Michelle Le Strange offers these garlic growing tips : • The first time you plant garlic you should buy planting cloves from your local nursery or garden center. Their heads (bulbs) are typically larger than those in the grocery store and more reliable to grow. • The best garlic grows in loose, reasonably fertile, well-drained soil. • Planting a single clove will yield a whole bulb. Break the bulbs apart and remove the very smallest cloves and any that are discolored, moldy, or missing their protective papery jackets. • Push the cloves, pointed end up, into the soil about two inches deep. Space the cloves about six inches apart, in rows eight to twelve inches apart. • Let the plants grow all winter, spring and into summer. Some attention to weeding, irrigation, and an occasional fertilizer feeding (in late winter/early spring) is all that is required. • A clump of shoots will grow about a foot tall. Irrigate until tops begin to brown, and then withhold water to let the plant dry naturally. • One indication to start harvesting is when the leaves fall over and about half of the lower leaves turn brown. You can also just dig up a few bulbs and cut them in half; if the cloves fill the skins, then the bulbs are ready to harvest. • Use a garden fork to lift the plants out of the ground with shoots and bulbs attached. Knock off clumps of dirt and then let the plants air dry for a few weeks. The cloves should be firm to the touch. After curing, the shoots can be cut a little above the bulb and the roots can be trimmed close to the bulb base. Filaree Farm recommends topping your garlic planting bed with a few inches of mulch, perhaps leaves or chopped up straw. Not only does the mulch feed the soil and suppress weeds, that mulch might dissuade four footed diggers. One home remedy I use to deter the neighborhood cats is six inch mesh concrete reinforcement wire, suspended about an inch above the surface. Cats dislike this prowling obstacle on raised garden beds. Filaree Farm also recommends not storing your garlic bulbs in the refrigerator. The air is too humid, and the garlic will begin to sprout. Ideal storage conditions for garlic are 55-65 degrees and 45%-60% humidity. Looking for an easy recipe that contains lots of garlic? This low-salt, slow cooker recipe contains 2/3 of a cup of garlic, and is perfect for serving at casual get-togethers or as a main dish on a cold winter night. To make it vegetarian, just leave out the chicken! Super Bowl of Chicken Salsa Chili 14 oz. boneless, skinless, chicken: diced into 1" cubes 5 oz. diced onions 5 oz. diced red/green peppers 2/3 Cup finely chopped garlic or elephant garlic 10 oz diced tomatoes 15 oz can of low salt garbanzo beans 15 oz can of low salt black beans 15 oz can of no salt added kidney beans 16 oz cherry tomatoes 28 oz. tomato puree 1 cup unsalted chicken or vegetable broth 2 TBS fresh cilantro 1 TBS chili powder 1 tsp cayenne pepper 1 TBS Mrs. Dash garlic & herb seasoning fresh lime juice to taste Combine all ingredients in a slow cooker. Cook on low, 6-8 hours Makes 8 servings Nutrition for 1 serving of Super Bowl of Chicken Salsa Chili: Thank you for listening to the Garden Basics with Farmer Fred podcast! It’s available wherever you get your podcasts. Please share it with your garden friends. As an Amazon Associate, I earn from qualifying purchases from some of the underlined links in the newsletter. This is how I am trying to keep this a free newsletter. And as long as you buy whatever you want from Amazon using any of those links to get into the Amazon site , I get a few pennies. Thank you. Fred Hoffman is also a University of California Cooperative Extension Master Gardener in Sacramento County. This is a public episode. If you'd like to discuss this with other subscribers or get access to bonus episodes, visit gardenbasics.substack.com/subscribe
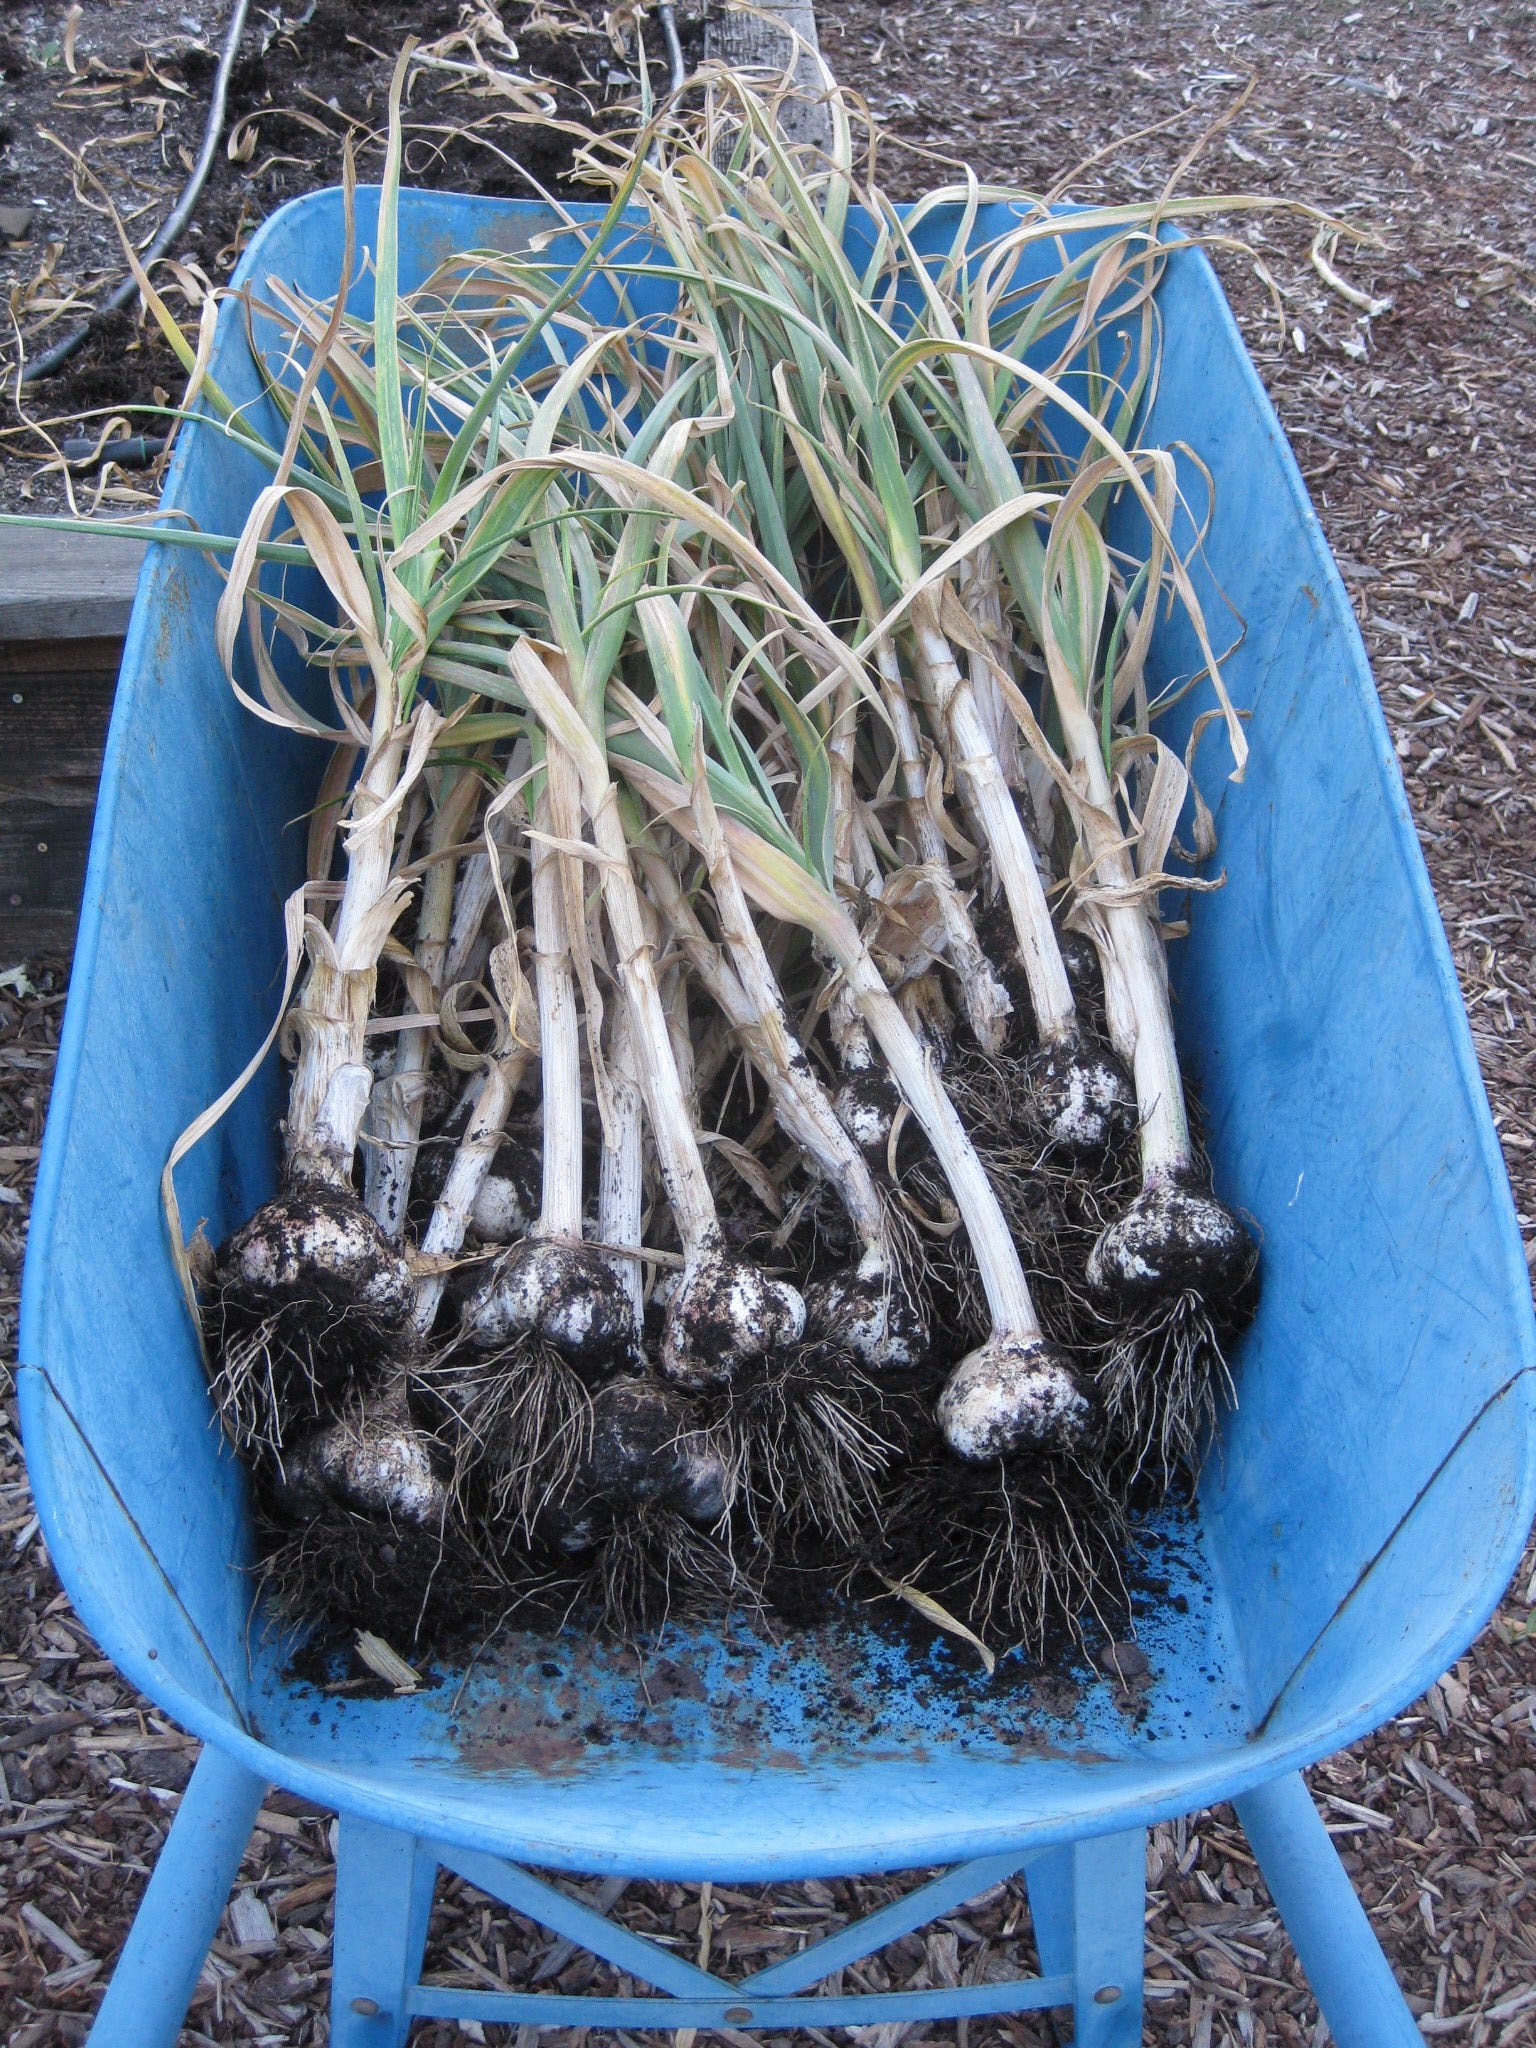
Nov 18, 2022
Roasted Tomatoes
Even though it is mid-November, many gardeners in milder areas of the country may still be harvesting tomatoes. What to do with those remaining, healthy tomatoes? Can or freeze them! Roasted tomatoes add so much more tomato flavor to any recipe you prepare that calls for tomatoes (such as pasta sauce, whole tomatoes or diced tomatoes). And it's an easy way to preserve the harvest for use throughout the year, either canned or frozen. To preserve the most flavor, roast them at a low temperature for a long period of time. Convection ovens, which distribute the heat more equally, are great for this. If you don't have a convection oven, be sure to turn the tomatoes once at the midpoint of the roasting process. Our recipe: • Cut fresh tomatoes into equally thick slices, about a quarter-inch to a half-inch thick (no peeling necessary!). Cherry tomatoes can be cut in half.• Place cut tomatoes in a single layer on a cookie sheet lined with parchment paper. • Drizzle with olive oil.• Bake for 90 minutes to two hours at 300 degrees (250 if your convection oven goes that low). If roasting on two trays simultaneously on upper and lower racks, switch them half way through. Check for doneness at 90 minutes; go longer if necessary.• The tomatoes will shrink, but should still look somewhat meaty.• Freeze in small batches or can them (hot water processing) in pint or quart jars. *There are naturally occurring sugars in tomatoes. In this recipe, there are no added sugars. Thank you for listening to the Garden Basics with Farmer Fred podcast! It’s available wherever you get your podcasts. Please share it with your garden friends. As an Amazon Associate, I earn from qualifying purchases from some of the underlined links in the newsletter. This is how I am trying to keep this a free newsletter. And as long as you buy whatever you want from Amazon using any of those links to get into the Amazon site , I get a few pennies. Thank you. Thanks for Subscribing and Spreading the Word About the Beyond the Basics: The Garden Basics with Farmer Fred newsletter, I appreciate your support. Fred Hoffman is also a University of California Cooperative Extension Master Gardener in Sacramento County. Thanks for reading Beyond Basics: The Garden Basics with Farmer Fred Newsletter! Subscribe for free to receive new posts and support my work. This is a public episode. If you'd like to discuss this with other subscribers or get access to bonus episodes, visit gardenbasics.substack.com/subscribe

Nov 11, 2022
Trees vs Storms
Today’s Podcast: Consulting Arborist Michael Santos tells us about online resources for homeowners to get more information about the trees in their yard. How to (Possibly) Thwart Tree Damage Before a Storm During or after a particularly violent fall or winter wind/rain/snow storm, TV news crews rush to the most photogenic damage during these rare occasions: downed trees, usually leaning against a house or crushing a car. Without the correct care of the trees on your property, winter storms and trees will not get along. Most susceptible are the trees that keep their leaves year round, such as eucalyptus and camphor, along with the conifer family: pines, firs, redwoods and cedars. All that mass of greenery acts as a sail in a heavy wind, bending trees at ridiculous angles. Another cause of winter tree failure is crown rot , which despite its name, refers to the deterioration of the root system near the base of the tree. Combine that with a couple of inches of rain onto already saturated soils, and you have tree roots heaving towards the surface, leading to these pictures popping up on the TV news: If this is the view from your window, the day after a major rain and wind storm is not necessarily the best day for the gardener to tackle the hazardous task of cleaning up the remnants of trees, shrubs and other plants that took a beating. If wind and rain is still in the forecast, the prevalence of slippery conditions and the chance of more falling debris should limit your cleaning chores to dragging broken branches away from the scene of the crime. It is not a good day to be climbing ladders or scrambling into trees while balancing a chain saw. Leave that to the professionals. Signs of Potential Tree Failure Arborists offer this good piece of advice for those surveying the fallen aftermath of a major storm: Limb failure is largely a product of poor tree maintenance over time. Take care of your trees, or they may take care of themselves in ways you won't appreciate. According to the University of California publication, "Inspect Your Landscape Trees for Hazards" , a nice day in autumn (or winter, spring or summer, for that matter) is the time to take an inventory of any possible future tree damage before you, your house or your car becomes the next victim of a falling tree or branch. Leaning Trees: Are your trees not as upright as the result of recent heavy winds? Can you see newly upheaved roots or soil around those trees? Then, immediate action is required: call in a professional, certified, bonded and insured arborist to do an onsite inspection and offer a solution (find one near you at treesaregood.org ). Newly leaning trees are an imminent hazard. If you have a tree that has leaned for a number of years, that tree can still be a hazard during wet, windy weather. Taking periodic photographs can help you determine if a greater lean is developing. Multiple Trunked Trees: This co-dominant condition can result in breakage of major tree parts during storms. Usually, these trunks are weakly attached. Inspect the point where the two trunks meet; if you see splitting beginning, call in an arborist. Weakly Attached Branches: Trees with many branches arising from the same point on the trunk are prone to breaking during wind storms. Prune out any split branches. Thin out multiple branches. Hanging or Broken Branches: If you see storm damaged branches hanging from the tree, remove them as soon as possible. This includes removing any completely broken branches that may be resting elsewhere in the tree's canopy. Cracks in Trunks and Branches: Measure the depth of any cracks with a ruler. If those cracks are more than three inches deep, call in an arborist to determine the best course of action. Dead Branches/Trees: Branches or entire trees that have completely died are very likely to come tumbling down in a storm. Dead branches are most noticeable in the summer when the tree is in full leaf. Cavities and Decay: Large, open pockets where branches meet the trunk, or at the base of the trunk, can mean big trouble. The presence of mushrooms on the bark or on exposed roots may indicate wood decay. Call in an arborist. The Arbor Day Foundation website has this guide to proper pruning techniques. Also: Tips for Hiring an Arborist . Choose the right pruning equipment for shrubs and trees: Hand Shears for branches less than the thickness of your little finger. Loppers for branches less than the thickness of your thumb. Pruning saws for branches greater than the thickness of your thumb. Want to avoid damaging your trees while pruning? Here’s an illustrated guide for pruning large branches (which are branches that are greater than the thickness of your thumb): The three-cut method When pruning larger branches, use the three-cut method to prevent the falling branch from stripping the bark, below the cut. CUT ONE: Make a cut halfway through the underside of the branch to be removed. Position the cut about one foot out from the branch collar. That’s where the branch attaches to the trunk. CUT TWO: saw through the top of the branch, about two inches further out from cut one. The branch should give way about halfway through this cut, with the undercut portion preventing any stripping damage to the tree along the stem. CUT THREE: This is the cleanup cut. Saw through the remaining branch, being sure to leave the branch collar. The branch collar usually extends out less than an inch from the trunk. Thank you for listening to the Garden Basics with Farmer Fred podcast! It’s available wherever you get your podcasts. Please share it with your garden friends. As an Amazon Associate, I earn from qualifying purchases from some of the underlined links in the newsletter. This is how I am trying to keep this a free newsletter. And as long as you buy whatever you want from Amazon using any of those links to get into the Amazon site , I get a few pennies. Thank you. Thanks for Subscribing and Spreading the Word About the Beyond the Basics: The Garden Basics with Farmer Fred newsletter. I appreciate your support. Fred Hoffman is also a University of California Cooperative Extension Master Gardener in Sacramento County. This is a public episode. If you'd like to discuss this with other subscribers or get access to bonus episodes, visit gardenbasics.substack.com/subscribe

Nov 4, 2022
Can You Foliar Feed a Plant?
Does Foliar Feeding Plants Really Work? Are there benefits to spraying a water soluble fertilizer to the leaves of plants? Can leaves absorb nutrients? If a gardener were to believe what they read on Wikipedia , the answer would be yes. However, one only need to read the warnings associated with that article, which state repeatedly, “Citation Needed” and “This section needs additional citations for verification ”. The study touting the use of foliar feeding that is cited in that Wikipedia post goes to a broken link. Not a good sign. The University of Missouri offers these warnings about foliar feeding: The mode-of-entry of essential elements into the leaves when applied as a foliar fertilizer still is under debate. Conventional theory is that foliar feeding is effective because plants can take in essential minerals in liquid form through pores in their leaf cuticle called stomata. The latter serve as points-of-entry for air laden with carbon dioxide used by the plant during photosynthesis. Research has revealed, however, nutrients are more likely to be taken in through the leaf cuticle. The latter contains a pathway of extremely minute pores ( Conversely, negatively charged essential elements in ionic form such as phosphorous (HPO4-2), sulfur (SO4-2) and nitrate-form nitrogen (NO3-1) find leaf entry through the cuticle more challenging. Whereas opposite charges attract, like charges repel one another. As alluded to above, another consideration when foliar feeding is the fate of the nutrients after they enter the leaf. Smaller molecules or those with a lesser positive charge are more readily transported in the vascular system where they are translocated to other parts of the plant. Examples of the latter include ammonium (NH+), potassium (K+) and urea (NH2CONH2). On the other hand, larger molecules and ions with greater positive charges tend to stay fairly close to their point-of-entry as they adhere to the negatively-charged cell walls. Examples of fairly tightly held (immobile) nutrients include calcium (Ca++), iron (Fe++), manganese (Mn++), zinc (Zn++), and copper (Cu++). Therefore, when applied as foliar fertilizers, elements with strong positive charges such as calcium do not move much upon entering the leaf. Accordingly, elements such as phosphorous which are negatively charged are slow to enter the leaf. Both are relatively immobile after gaining entry. Kinda blows a hole into that long-held habit of spraying calcium on the leaves of a tomato plant to cure blossom end rot. And there’s plenty more holes in that habit, as well . However - and Debbie Flower points this out in the podcast - foliar feeding may work to solve a very particular cosmetic issue if there is a certain micronutrient deficiency. For example, a shortage of iron availability, causing a yellowing pattern in citrus leaves. And then, as Debbie says, foliar feeding of iron only works on that particular leaf; it doesn’t solve the problem for the entire plant. To cure a plant of a nutrient shortage, FEED THE SOIL. Thank you for listening to the Garden Basics with Farmer Fred podcast! It’s available wherever you get your podcasts. Please share it with your garden friends. As an Amazon Associate, I earn from qualifying purchases from some of the underlined links in the newsletter. This is how I am trying to keep this a free newsletter. And as long as you buy whatever you want from Amazon using any of those links to get into the Amazon site , I get a few pennies. Thank you. Thanks for Subscribing and Spreading the Word About the Beyond the Basics: The Garden Basics with Farmer Fred newsletter, I appreciate your support. Fred Hoffman is also a University of California Cooperative Extension Master Gardener in Sacramento County. This is a public episode. If you'd like to discuss this with other subscribers or get access to bonus episodes, visit gardenbasics.substack.com/subscribe
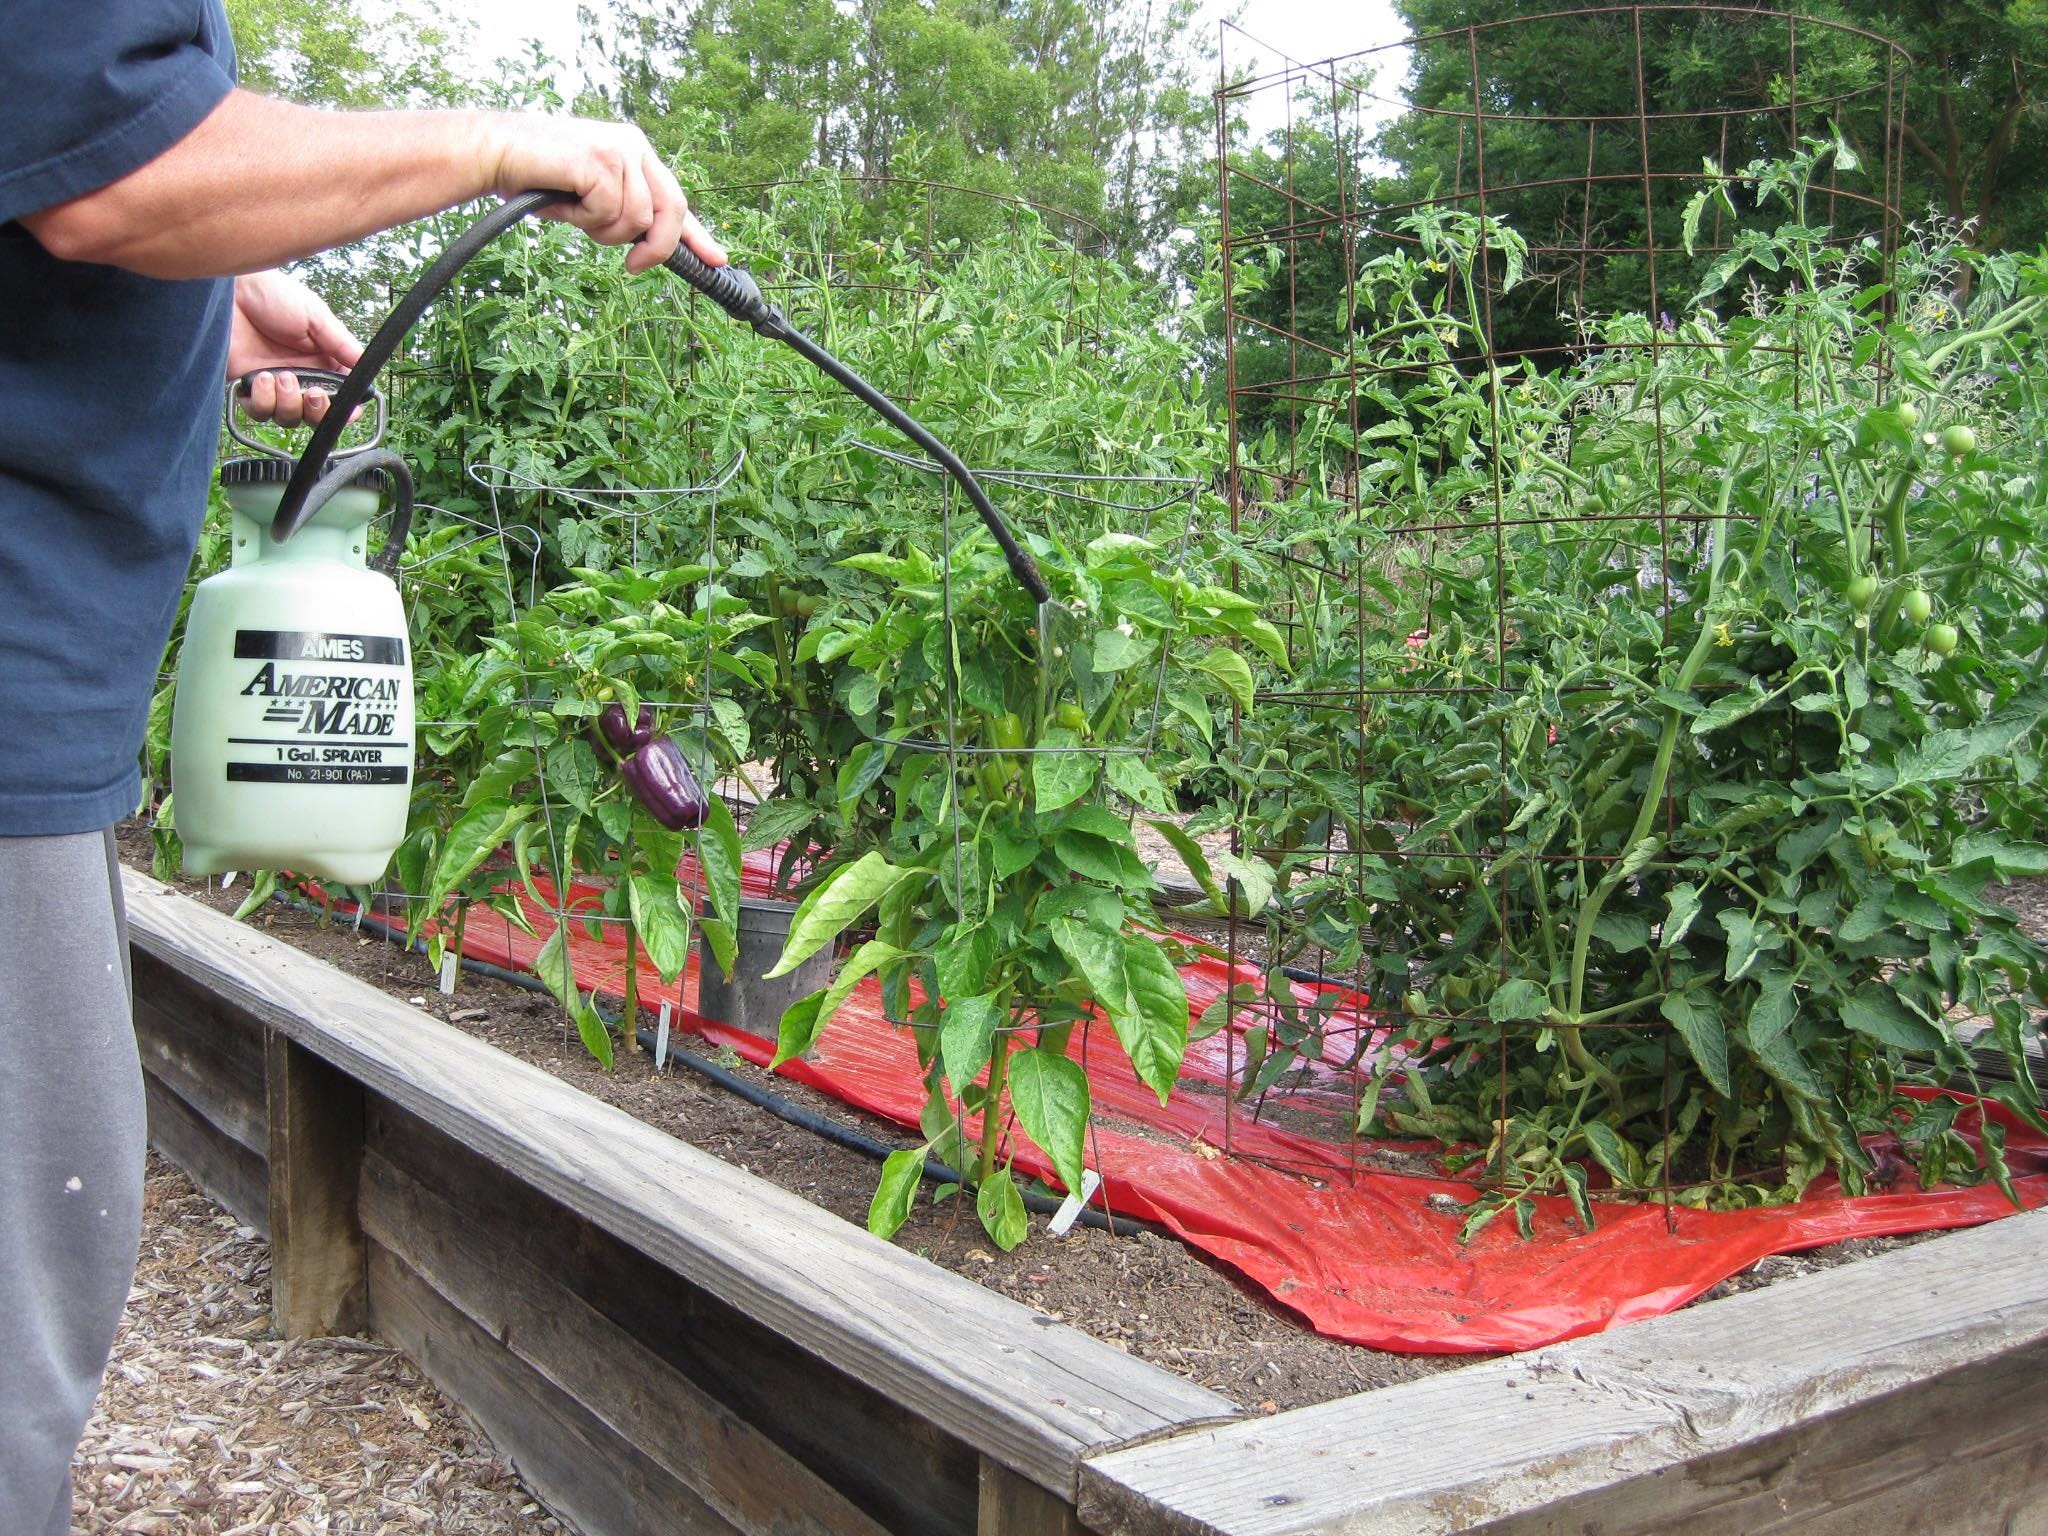
Oct 28, 2022
Curried Pumpkin Soup Recipe
CURRIED PUMPKIN SOUP (serves 6-8) by Andi Macdonald , Chef and Sacramento County Master Gardener INGREDIENTS * 2 tablespoons olive oil * 1 cup diced onions * 1/2 cup diced carrots * 1/2 cup diced celery * 1 tsp minced garlic * 1/2 cup dry white wine (optional) * 6 cups vegetable stock * Salt to taste * 1/2 tsp freshly ground black pepper * 1/4 cup curry paste* (or more, to taste) * 4 cups pumpkin puree** * 1 can coconut milk (12-13 ounces) * Chopped parsley for garnish * Toasted pumpkin seeds for garnish. INSTRUCTIONS * Heat the olive oil in a soup pot. Saute onion, carrots, and celery until soft. Add garlic and sauce one minute more. Add wine (optional). Boil down until almost evaporated. Be careful not to scorch the vegetables. * Add stock, pepper, curry paste, and pumpkin. Stir thoroughly to combine. Bring to a boil, immediately reduce heat to low, and simmer for 30 minutes. Add more liquid (stock or water) if soup seems to thick. * Puree the soup in small batches using a food processor or blender. You can either do this hot, being careful with hot liquid in a blender, or if time allows, let cool and then blend. Depending on how velvety you want the texture, you can pour the soup through a sieve after blending. * Return to pan and stir in coconut milk. Optional: add salt to suit your taste. Bring the soup to the brink of a boil. Reduce heat to low, and simmer for another 30 minutes. Taste again and adjust for salt and pepper. Pour into soup bowls and garnish with fresh parsley and pumpkin seeds. * Curry paste is available in many grocery stores in the specialty Asian sections. It can also be ordered online. Heat (spiciness) can vary, so take a taste before adding to the soup. You can always add more. Curry powder can be used instead of the paste. Start with a smaller amount and add more to taste. ** Pumpkin puree can be canned or scraped from a roasted pumpkin (no seeds!). If you make your own, the flavor is better if a variety of winter squashes are used. For this recipe, I combine roasted butternut, kabocha, and pie pumpkins. I have found that the pumpkins sold as pie pumpkins aren’t as flavorful as a combination of squashes. They also tend to be more watery than other winter squashes. A note - if you make your own pumpkin pies, try a combination of winter squashes, as well. The best pumpkins for soup? Andi stresses that to make pumpkin soup as appealing as possible, use several different winter squashes in the puree. Her recipe uses a pumpkin, Butternut Squash and Kabocha squash. Johnny’s Selected Seed website mentions many more tasty winter squashes worth trying, including Delicata, Acorn, Hubbard, and Buttercup. In the podcast, for her pumpkin, Andi mentions purchasing a 7 or 8-inch pumpkin from the grocery store, with the word “Sweet” in its name. This website lists their favorite pumpkins for puree. One of them: Early Sweet Sugar Pie, an heirloom variety carried by Burpee Seeds. Their description: “The fine orange flesh of this favorite is the best for rich pumpkin pies. Easy to handle, at only 6-7 lb. each.” Seed company Botanical Interests says this about another with a similar name (perhaps it’s the same?), Sugar Pie, an heirloom: “Since the 1800s, 'Sugar Pie' has been the standard for making terrific pies, soups, muffins, and casseroles. Small, 6"-7" fruits are also good for carving decor-size jack o'lanterns. Stores for months. Also called 'New England' pumpkin.” Johnny’s Selected Seeds has an excellent page on choosing, growing, harvesting and storing the best winter squash varieties for eating. They offer these tips on harvesting and storing: * Wait 50–55 days after pollination or fruit set to harvest. * When fruits are ready for harvest, clip them from the vines and handle carefully. * Cure the fruits by exposing them to sun in the field for 5–7 days; or, if there is a threat of hard frost, cure the fruits inside for 5–7 days at 80–85°F/27–29°C with good air ventilation. The curing process will improve storage potential by toughening the skin, and it can speed up the necessary post-harvest storage interval needed by some types for optimal quality. * After curing, store fruits at 50–60°F/10–15°C, with 50–70% relative humidity and good ventilation. Repeated exposure to temperatures below 50°F/10°C may cause chilling damage. * Sort fruits on a regular basis to remove any rotten fruits. Thank you for listening to the Garden Basics with Farmer Fred podcast! It’s available wherever you get your podcasts. Please share it with your garden friends. As an Amazon Associate, I earn from qualifying purchases from some of the underlined links in the newsletter. This is how I am trying to keep this a free newsletter. And as long as you buy whatever you want from Amazon using any of those links to get into the Amazon site , I get a few pennies. Thank you. Thanks for Subscribing and Spreading the Word About the Beyond the Basics: The Garden Basics with Farmer Fred newsletter, I appreciate your support. Fred Hoffman is also a University of California Cooperative Extension Master Gardener in Sacramento County. This is a public episode. If you'd like to discuss this with other subscribers or get access to bonus episodes, visit gardenbasics.substack.com/subscribe

Oct 21, 2022
Too Many Peppers? Try This Sweet Pepper Relish
Here in Northern California, sweet peppers continue to ripen on the plants in October, turning rich shades of red, purple, and yellow. The result? Peppers that are sweeter. And probably more peppers than you know what to do with. We spend this time of year making several batches of sweet red pepper relish, using a recipe we found in an old copy of Sunset's Home Canning book. It's delicious on many dishes, including as a topping for hot dogs and hamburgers...or just dolloped onto a cracker. It's the one homemade holiday gift that we distribute each December that our friends and family actually request! Sweet Red Pepper Relish Recipe: 6 pounds of sweet red peppers, seeded and cut into one-inch squares (we throw in a few Anaheim peppers for a touch of heat). Use your favorite blend of sweet and hot peppers! 3 pounds onions, cut into one-inch chunks 4 cups distilled white vinegar 3 cups sugar 2 Tbs canning salt or noniodized table salt 1 Tbs mustard seeds Chop the peppers and onions, then put in a food processor or food chopper with a medium blade. Pour chopped peppers and onions into a heavy-bottomed, 8-10 quart stainless steel or unchipped enamel pan. Mix in the vinegar, sugar, salt and mustard seed. Bring to a boil over medium-high heat, stirring occasionally. Reduce heat to medium-low and let it boil gently, uncovered. Stir often to prevent sticking. Cook about 50 minutes, until relish is thickened but still juicy. Makes about 7 pints. A quarter-cup serving has 81 calories, 1 g protein, 16 g carbohydrates, 2 g total fat, 0 mg cholesterol, 43 g sugar, 3 mg sodium Storage: Unprocessed: Ladle into pint jars or refrigerator containers, leaving a half-inch head space. Apply lids, let cool, then refrigerate. Refrigerator life: 1 month. or Processed: Ladle hot relish into clean, hot pint jars, leaving a half-inch headspace. Run a narrow nonmetallic spatula between relish and jar sides to release air bubbles. Wipe rims and threads clean. Top with hot lids, then firmly screw on bands. Process in boiling water canner for 15 minutes. Shelf life: up to 1 year. Your Harvest to Better Health Begins at Dave Wilson Nursery! SOME OF OUR FAVORITE SWEET PEPPERS Flamingo Flamingo, from Harris Seed Company , is truely unique with fruit that mature from a light yellow to pinkish-orange, then to red. This sweet bell pepper has concentrated fruit set and can produce high yields. Similar to Gypsy, Flamingo performs well in most pepper growing areas and its earliness makes it a stand-out in the northern U.S. and Canada. Wonderful color change through the growing season. OK taste. Good grilled. Nu Mex Joe E. Parker 6 to 7-inch thick-fleshed peppers turn from green to red and are relatively mild to medium in flavor. Ripens earlier than most other peppers of its type. 65 days." The overall winner of the Farmer Fred Pepper Party Taste Tests. Great in chili!. We grow this every year, great in salsas and for homemade nachos. Giant Marconi 72 days. Large, tapered, elongated fruits grow 8" by 3", with a sweet, smoky flavor that's equally delectable when fruits are eaten green or red, fresh or grilled. Widely adaptable, it produces larger than normal crops just about anywhere. “Withstands severe weather with excellent disease resistance." This 2001 AAS Award Winner has (in my opinion) more flavor than the Giant Aconcagua. Tequila Peppers begin as lavender and stay that color for a long time before fading to a lovely orange, then finally red. Strong plants are tobacco mosaic virus resistant and tolerant to blossom end rot. 72 days. The Farmer Fred Absolute Favorite Sweet Pepper! Anaheim 70 days. “Also know as the 'New Mexican Chile', this moderately pungent fruit is deep green, but turns red at full maturity. Excellent for canning, freezing or drying. 75 days." A good choice for nachos for the weak of heart...and stomach. Jimmy Nardello These bright green and red sweet peppers fry beautifully. Originally from the Basilicata region of south Italy. The plants are 24" tall, and festooned with 10-12" peppers. One of my favorites for grilling. Corno di Toro Yellow Italian 'bull's horn' colorful sweet peppers are 8 to 10 inches long and curved like a bull's horn. Ripen to deep red or bright yellow and are delicious fresh in salads, but more often are sauted or grilled. Prolific tall plants. 68 days. Gorgeous on the grill, and in salads, too. Thank you for listening to the Garden Basics with Farmer Fred podcast! It’s available wherever you get your podcasts. Please share it with your garden friends. As an Amazon Associate, I earn from qualifying purchases from some of the underlined links in the newsletter. This is how I am trying to keep this a free newsletter. And as long as you buy whatever you want from Amazon using any of those links to get into the Amazon site , I get a few pennies. Thank you. Thanks for Subscribing and Spreading the Word About the Beyond the Basics: The Garden Basics with Farmer Fred newsletter, I appreciate your support. Fred Hoffman is also a University of California Cooperative Extension Master Gardener in Sacramento County. This is a public episode. If you'd like to discuss this with other subscribers or get access to bonus episodes, visit gardenbasics.substack.com/subscribe

Oct 14, 2022
Reducing the Wildfire Threat to Your Home & Yard
In today’s “Beyond the Garden Basics” podcast, we talk with Douglas Kent , author of “ Firescaping: Protecting Your Home with A Fire-Resistant Landscape ”. He has a slightly different view of thwarting home and yard damage for residents of the urban-wildland interface, who are increasingly keeping a wary eye - and nose - in the air for smoke. And as we pointed out in the Garden Basics with Farmer Fred podcast this week (Ep. 235), in our chat with University of California Fire Advisor Luca Carmignani, it is the threat not so much from flames creeping onto your property as it is blowing, burning embers hurtling towards your house from a wind-driven wildfire. Those embers (or “firebrands”) can travel a half mile or more from the actual fire itself, whose ferocity is supercharged by winds that can reach 60 miles per hour or more. And it’s not just California. States throughout the West, Northwest, Southwest, intermountain west, and the South have been hit by massive wildfires, that the Washington Post estimates that 16% of all Americans - on 80 million properties - face the threat of wildfire. Wildfires remain a danger across California and much of the unusually dry Western United States, as there’s still plenty of time this fall for grass, woody debris, and other flammable materials to become dry and ignite, threatening homes adjacent to wildfire-prone areas with flying, embers. We are all hopeful that we will have a wet or snowy winter sooner, rather than later. In the meantime, the University of California has advice on prepping your home and landscape to slow the destruction in case of a wind-blown wildfire. "The smaller the fuels – pine needles, grass, and small twigs – the faster they can dry out, meaning they will be ready to burn again a few days or weeks after a large rainstorm," said Susie Kocher, a UC Cooperative Extension forestry and natural resources advisor for the Central Sierra. When it comes to essential wildfire preparations in this age of drought, not every project requires a bank-breaking budget and an army of contractors. There are small – but significant – home and landscaping improvements that most people can complete by themselves during a weekend or two, with a quick run to the hardware store and some basic planning and safety precautions. "There are a lot of factors that play into your home’s vulnerability to ignition; small changes and upgrades can help reduce some of that risk for people living in high wildfire risk areas," Kocher explained. "The bigger projects like replacing windows and roofs are very important, but there are definitely smaller projects that people can tackle right away at lower cost that also reduce risk. The main goal of these actions is to reduce the risk that wildfire embers can ignite your home." Kocher recommends these measures as simple but crucial ways to bolster your home’s wildfire resiliency. • Let’s start with what may be the most difficult task to accomplish. Not because it is dangerous, but because of reluctance: taking out all vegetation and wood chip mulch within five feet of your home. Creating defensible space immediately next to your home is a top priority, so be sure there’s nothing combustible within this primary zone. Plants, mulch, woodpiles, wicker furniture or anything that can catch fire should be removed. • And now for the more precarious task: removing debris from your roof. Because of its expansive surface, the roof is the most susceptible area of your house to embers. Removing accumulated leaves and needles is especially important if you have a complex roofline with dormers or other elements – that’s where embers gather, too, and could ignite flammable siding. And while you’re up there, give those gutters a good cleaning. Or, if you and the outdoor ladder are not on friendly terms anymore, hire a gutter cleaning service who can also blow debris off the roof. • Install metal flashing in vulnerable spots. Replacing all your siding with noncombustible material can be pricey, but a more manageable task would be adding corrosion-resistant metal flashing to select areas: roof-to-wall intersections, the place where the chimney comes out of the roof, and the edge where the deck meets the house. • Remove debris from between the boards of your deck and fence as well as below your porch. Embers can ignite leaves and needles stuck between the boards, so be sure to keep those gaps clean and clear. • Inspect vents and upgrade to finer mesh screens. Install or swap in noncombustible, corrosion-resistant metal mesh screening that is at least 1/8" mesh. 1/16" would be even better. However, that requires more frequent maintenance. These screens help prevent embers from entering your attic and crawl space. In addition, put together some vent covers that can be deployed if you have time before a wildfire arrives. More information and more fire-related links are available at the University of California Ag and Natural Resources webpage, “Wildfire Preparedness in the Home Landscape ”. Fred Hoffman is also a University of California Cooperative Extension Master Gardener in Sacramento County. This is a public episode. If you'd like to discuss this with other subscribers or get access to bonus episodes, visit gardenbasics.substack.com/subscribe

Oct 7, 2022
How Safe are Organic Garden Chemicals?
America’s Favorite Retired College Horticulture Professor, Debbie Flower , discusses garden chemical safety, including: when organic controls can be hazardous; the dangers of homemade pesticides; how to check for organic ingredients in a pesticide product; and, ways to determine if your organic garden “inputs” (water, mulches, manures) are safe to use. Despite your best organic efforts, this CDC study says there’s a high chance that glyphosate is probably in your urine: Here’s the background on one statement in that podcast: that there might be glyphosate in your urine: “…more than 80 percent of urine samples drawn from children and adults participating in a US health study contained a weedkilling chemical linked to cancer and other health problems. The June 30 report by a unit of the Centers for Disease Control and Prevention (CDC) found that out of 2,310 urine samples collected, 1,885 were laced with detectable traces of glyphosate, the active ingredient in herbicides sold around the world, including the widely used Roundup brand.” Sources For Water Testing: National Testing Laboratories : https://watercheck.com Water Testing Accredited Laboratories in California : https://www.calwater.com/waterquality/water-quality-testing-labs/ Source for Organic rice straw: Brokenbox Ranch, Williams, CA From Clemson University: “ Less Toxic Insecticides ”: Factsheet | HGIC 2770 | Updated: Aug 27, 2021 | While a good pest management plan will start with preventative, cultural, and other non-chemical methods, these are sometimes not completely effective on their own. In this case, a pesticide may be considered. If pesticide use is deemed necessary for control of the pest problem, it is good practice to use the least toxic pesticide that will do the job effectively. Although all pesticides are by their nature toxic in some way to some organisms, there are now a number of “less toxic” pesticide options. Insecticides may be considered less toxic for several reasons. Generally, they should pose less risk to human and environmental health than conventional insecticides. Many break down rapidly and do not accumulate in the body or environment. Some are very pest specific and do little or no damage to other organisms. Still, others, such as bait stations, minimize human exposure to the pesticide. While “organic” insecticides are often less damaging to the environment than conventional insecticides, they are still pesticides. All pesticides should be evaluated before selection for level of toxicity, effectiveness, environmental impacts, and costs. Some “organic” or natural pesticides are as toxic, or even more toxic, than some synthetic pesticides. All pesticide products have a toxicity signal word on the label, which will be “caution”, “warning”, or “danger”. Choose the products with “caution” on the label, as they are least apt to harm the user and the environment. Soaps & Oils Insecticidal soaps and oils have a number of advantages for controlling insects. They are virtually non-toxic to humans and other mammals and are relatively safe to beneficial insects in the landscape. They control a wide range of common soft-bodied pests, including aphids, mealybugs, thrips, whiteflies, mites, and scales. It is difficult for pests to develop resistance to oils and soaps. Soaps and oils are now readily available and relatively inexpensive. Both soaps and oils can cause damage to plants if applied when plants are water-stressed, temperatures are above 90 °F, sprayed in direct sunlight, or when high humidity prevents rapid drying. Some plants are sensitive to oil or insecticidal soap sprays. See sensitive plant lists in HGIC 2771, Insecticidal Soaps for Garden Pest Control . Read and follow the label. Since soaps and oils work on contact, an effective application must coat both the upper and lower leaf surfaces as well as stems for best results. Repeated applications may be necessary. Apply soap or oil sprays in the early morning or late evening to reduce drying times for more effective insect pest control. Insecticidal Soaps: Insecticidal soaps kill by suffocation; additionally, they damage the protective coat of soft-bodied insects, causing them to dehydrate. Homemade soap recipes are not recommended because they may be more likely to cause foliage burn. Commercial insecticidal soaps are tested on plants and are less likely to cause damage. Some are available as concentrates to dilute before spraying, and some are available as pre-mixed Ready to Use (RTU) bottles. Examples of insecticidal soap products are: * Bonide Insecticidal Soap RTU * Espoma Organic Insect Soap RTU * Garden Safe Insecticidal Soap Insect Killer RTU * Miracle-Gro Natures’s Care Insecticidal Soap RTU * Natria Insecticidal Soap RTU * Natural Guard Insecticidal Soap Concentrate * Safer Brand Insect Killing Soap Concentrate * Whitney Farms Insecticidal Soap RTU Horticultural Oils: Oil products smother soft-bodied insects on contact. Oils are formulated as either horticultural or dormant oils. Dormant oils are heavier, less refined oils used on dormant, leafless plants to control overwintering insects (e.g., aphids, spider mites, and scales). Dormant oils will damage plant foliage if used during the growing season. Horticultural oils are also called summer or superior oils, and these are lighter and more refined. They can be applied to both actively growing plants as well as dormant plants for insect pest control. Do not apply horticultural oil sprays when the temperature is above 90 °F, below 45 °F, or if rain is in the forecast within 24 hours. Most horticultural oils are applied at a 1 to 2% mix with water to spray actively growing plants (this would be 2½ to 5 tablespoons of oil with a gallon of water). To use horticultural oil as a “dormant oil” spray to control pests on woody plant bark, they are mixed at 4% with water (this would be 10 tablespoons of oil per gallon of water). Always spray very late in the day to slow drying time and to get better insect control. Most are available as concentrates made to dilute with water in a sprayer, although some are available as either a Ready to Spray (RTS), which is a bottle to attach to a garden hose for spraying, or as a Ready to Use (RTU), which is a pre-mixed spray bottle. Examples of horticultural oils are: * Bonide All Seasons Spray Oil Concentrate; & RTS; & RTU * Ferti-lome Horticultural Oil Spray Concentrate; & RTS * Monterey Horticultural Oil Concentrate; & RTS; & RTU * Safer Brand Horticultural & Dormant Spray Oil Concentrate * Southern Ag Parafine Horticultural Oil (concentrate) * Summit Year Round Spray Oil Concentrate Sesame Oil: Sesame oil sprays work in the same manner as horticultural oils. Follow label directions for mixing and use. * Organocide Bee Safe 3-in-1 Garden Spray Concentrate; RTS; & RTU Botanical Insecticides Botanical insecticides are naturally occurring toxins extracted from plants. There are several advantages to using botanical rather than synthetic insecticides. Plant derived insecticides break down quickly in the environment, resulting in little risk of residues on food crops and less risk to beneficial insects. Some materials can be used shortly before harvest. Most botanicals are rapid acting, and most, but not all botanicals are of low to moderate toxicity to mammals. Most botanical insecticides must be eaten by the insect pest. Therefore, they are primarily harmful to these pests and do little harm to beneficial insects. There can also be disadvantages to using these products. Rapid breakdown, while less risky to health and environment, often creates a need for precise timing or more frequent applications. Several botanical insecticides are quite toxic and should be handled accordingly. Some botanical insecticides can be difficult to find in local stores. Neem products: Neem oil is a botanical insecticide made from extracts of Neem tree seeds. The active ingredient is listed on product labels as clarified, hydrophobic extracts of neem oil. It is used to control a wide variety of insects, including leafminers, whiteflies, thrips, caterpillars, aphids, mealybugs, spider mites, scale crawlers, and beetles. Neem oil is most effective against actively growing immature insects. Neem oil sprays kill small insect pests and mites by suffocation, as do horticultural oil sprays, but also have some insecticidal properties. Neem oil sprays have some fungicidal activity, but it is typically limited to powdery mildew control. This control is primarily because it is an oil. However, a horticultural oil spray generally works better for powdery mildew control. Azadirachtin, the active ingredient in neem extracts, has a very low mammalian toxicity. It has been separated from the neem oil. It is a somewhat effective insect feeding deterrent and growth regulator. Azadiractin does not produce a quick knockdown and kill but stops insect feeding. The treated insect usually cannot molt into its next life stage and dies without reproducing. It also is an egg-laying deterrent. Many commercial neem products exist, and these products are labeled for use on ornamentals, foliage plants, trees, shrubs, and food crops. Most neem oil products are available as concentrates made to dilute with water in a sprayer, but some are available as either Ready to Spray (RTS), which is a bottle to attach to a garden hose for spraying, or as Ready to Use (RTU), which is a pre-mixed spray bottle. Examples of neem products for landscape and garden use include: Neem Oil: * Bonide Rose Rx 3-in-1 Concentrate; & RTU * Bonide Neem Oil Concentrate; & RTU * Concern Garden Defense Multi-Purpose Spray Concentrate * Espoma Organic Neem Oil 3-in-1 RTU * Ferti-lome Rose, Flower & Vegetable Spray Concentrate * Garden Safe Fungicide 3 Concentrate; & RTU; & RTS * Garden Safe Neem Oil Extract Concentrate * Monterey 70% Neem Oil Fungicide/Insecticide/Miticide Concentrate; & RTS * Natria Neem Oil Concentrate; & RTU * Natural Guard Neem Concentrate * Safer Brand Neem Oil Concentrate; & RTU * Southern Ag Triple Action Neem Oil Concentrate Some neem oil products also contain the botanical insecticide pyrethrin. Examples are: * Bonide Bon-Neem II Concentrate * Ferti-lome Triple Action Plus II with Neem Oil * Ferti-lome Fruit Tree Spray Concentrate * Monterey Fruit Tree Spray Plus RTS * Monterey Rose & Flower Spray Plus RTS * Ortho Tree & Shrub Fruit Tree Spray Concentrate Azadiractin: * Amazin 1.2% Plus * Aza-Direct Botanical Insecticide * AzaGuard Botanical Based Insecticide/Nematicide * AzaMax Botanical Insecticide * AzaPro * AzaSol Non-oil Based, Water Soluble Powder * Azatin O Biological Insecticide * Azera Gardening (with Pyrethrins) * Biosafe Insect Control Limonene (also known as d-Limonene) is produced from citrus oils extracted from oranges and other citrus fruit peels. It is used as a contact insecticide against ants, roaches, palmetto bugs, fleas, silverfish, and many other insects. Limonene has low oral and dermal toxicity to mammals, birds, and fish, although it can cause skin irritation or sensitization in some people. Limonene is not used for insect pest control on plants, as this active ingredient may cause significant plant injury. Several natural herbicide products contain d-limonone for weed control. Pesticide products containing d-limonene are available for indoor insect control, such as in Orange Guard Home Pest Control Insect Killer Concentrate & RTU. Capsaicin is the material that makes chili peppers hot. It can be used on ornamentals outdoors and indoors for control of aphids, spider mites, thrips, whitefly, lace bugs, leafhoppers, and other pests. It is important to note that capsaicin-containing products are primarily used to repel insects rather than to kill existing infestations, and they also appear to be effective at repelling certain animal pests, such as rabbits, deer, and squirrels. Homemade hot pepper sprays can be made for insect pest control on plants. Products containing capsaicin as an animal repellent include: * Bonide Hot Pepper Wax Animal Repellent RTU, Pyrethrin: Pyrethrum is made from the finely powdered flowers of a species of daisy. The word pyrethrum is the name for the crude flower dust itself, and the term pyrethrin refers to the insecticidal compounds that are extracted from pyrethrum. Pyrethroids are not botanical insecticides but synthetically produced pesticides that are very similar in structure to pyrethrins. They are stronger and last longer on plants for pest control. Pyrethrin is a contact insecticide and must be applied directly to the insect to be effective. Pyrethrin rapidly paralyzes pests but may not kill them. However, pyrethrins are often formulated with another insecticide to ensure that paralyzed insects do not recover and once again become pests. Because the pyrethrin mammalian toxicity is very low, it can be applied to food crops close to harvest. Pyrethrin has high contact toxicity for common beneficial insects., but its insecticidal activity only lasts a few hours. There are many products with pyrethrin available; some products contain pyrethrin alone, and other products are combined with another insecticide, such as in the lists below. Pyrethrins: * PyGanic Crop Protection EC 1.4 (1.4% a.i.) OMRI, * PyGanic Crop Protection EC 5.0 (5.9% a.i.) OMRI. * Monterey Bug Buster – O (1.4% a.i.) OMRI Pyrethrins & Neem Oil: * Ferti-lome Triple Action Plus II with Neem Oil Conc.; & RTU * Ferti-lome Fruit Tree Spray Concentrate (with pipernyl butoxide), * Bonide Bon-Neem II Concentrate (with pipernyl butoxide), * Ortho Tree & Shrub Fruit Tree Spray Concentrate. Pyrethrins & Pipernyl Butoxide: * Southern Ag Natural Pyrethrin Concentrate, * Garden Safe Rose & Flower Insect Killer RTU, * Garden Safe Multi-purpose Garden Insect Killer RTU Pyrethrins & Sulfur: * Bonide Captain Jack’s Orchard Spray Concentrate; & RTS, * Bonide Tomato & Vegetable 3 in 1 & RTU * Ortho Insect, Mite & Disease 3-in-1 RTU * Natria Rose & Flower Insect, Disease & Mite Control RTU * Natria Insect, Disease & Mite Control RTS; & RTU Pyrethrins & Canola Oil: * Monterey Take Down Garden Spray Concentrate; & RTU * Whitney Farms Outdoor Insect Killer RTU, * Espoma Organic Insect Control RTU Garlic is marketed in several products intended to repel insects, much as capsaicin does. Products are labeled to repel a wide variety of pests on ornamental plants, but garlic may also repel nuisance animals. To date, there is limited research showing the effectiveness of garlic insecticides. Products containing garlic or garlic oil include: * Havahart Critter Ridder Deer, Rabbit & Squirrel Repellent Concentrate (with putrescent egg solids & capsaicin) * Captiva Insect Repellent/ Insecticide (with capsicum & soybean oil) Rotenone, Sabadilla, Ryania, and Nicotine are older botanical insecticides that are no longer available due to toxicity to people and/or the environment. Although these insecticides were naturally derived, they are more toxic or harmful than many commercially produced insecticides. Essential Oils A variety of pesticides based on essential oils or components of essential oils have come on the market in the last few years. Essential oils are volatile, highly concentrated substances extracted from plant parts. In 1996 the EPA established that certain ingredients that pose minimum risk to users no longer require EPA approval to be marketed as insecticides. A number of these ingredients are essential oils, including the oils of geranium, cedar, cinnamon, citronella, citrus, clove, eugenol (a component of clove oil), garlic, mints, rosemary, thyme, and several others. As insecticides, these work most commonly as contact-killing agents only, so re-treatment may be needed. Most essential oils used as pesticides work by disrupting an insect neurotransmitter that is not present in people, pets, or other vertebrates. Examples of brands that make essential oil insecticides for insect pest control within homes are included below, but check the label for ingredients first. * Wondercide * Dr. Earth * Cedarcide * Essentia * Maggie’s Farm * Aunt Fannie’s * Monterey * Some Ortho Home Defense products Microbial Insecticides Microbial insecticides contain microorganisms (viruses, bacteria, fungi, protozoa, or nematodes) or their by-products. Microbial insecticides are especially valuable because their toxicity to animals and humans is extremely low. Insecticidal products comprised of a single species of microorganism may be active against a wide variety of insects or group of related insects (such as caterpillars), or they may be effective against only one or a few species. Most are very specific. Since there is such a narrow range of insects killed, they spare the beneficial insects almost entirely. Bacillus thuringiensis products are the most widely used microbial insecticides in the United States. They are commonly known as Bt. Different subspecies of Bt are effective against different groups of insects or their larvae. The best results will be achieved using Bt products by following a few guidelines. * Make sure the Bt product you have chosen lists the specific insect you want to control. * Make sure the insect is at a stage where it is susceptible to control by Bt. In general, Bt products are effective against young larval stages but will not kill adults. * Spray the parts of the plant on which insects are feeding thoroughly, including the underside of leaves. Bt products must be eaten in order to be effective. Liquid formulations are more effective and stay on plants better than dust formulations. * Treat with Bt in the late afternoon or evening or on a cloudy day as Bt breaks down in sunlight. * Be aware that Bt does not kill immediately, but the poisoned insects will stop feeding almost immediately. Bacillus thuringiensis var. kurstaki (Btk) products are toxic only to larvae of butterflies and moths. They are used to safely control many common leaf-feeding caterpillars, including caterpillar pests on vegetables, bagworms and tent caterpillars on trees and shrubs, and European corn borer larvae. Some caterpillars are not effectively controlled by Bt, especially those that live in the soil or bore into plant tissues without consuming a significant amount of the Bt applied to plant surfaces. Liquid Bt products are frequently referred to as Thuricide, and Bt dust products are often referred to as Dipel. Bacillus thuringiensis var. kurstaki products include: * Bonide Thuricide Bt Concentrate * Garden Safe Bt Worm & Caterpillar Killer Concentrate * Monterey Bt Concentrate; & RTU * Natural Guard Caterpillar Killer Spray with Bt Concentrate; & RTU) * Safer Brand Caterpillar Killer Concentrate * Southern Ag Thuricide Bt Caterpillar Control Concentrate * Tiger Brand Worm Killer Concentrate * Ferti-lome Dipel Biological Insecticide Dust * Safer Brand Garden Dust with Bt * Southern Ag Dipel Dust Bacillus thuringiensis var. israelensis (Bti) formulations kill mosquito, black fly, and fungus gnat larvae. Bti is most effective for mosquito or black fly control when it is used on a community-wide basis. For most homeowners, eliminating standing water sources is more effective than applying Bti or other insecticides. Floating products sold as dunks or pellets can eliminate mosquito larvae in ornamental ponds and other areas that cannot be drained. Bti products that are available commercially include: * Summit Mosquito Dunks, * Summit Mosquito Bits, * Microbe-Lift Biological Mosquito Control (granules & liquid) Milky Spore products contain the naturally occurring bacterium Paenibacillus popillae. These products are applied to turf and watered into the soil below to control the larval (grub) stage of the Japanese beetle, and less effectively, some other beetle grubs. If a substantial grub population is present at the time of application, milky spore can survive beneath undisturbed sod for a period of 15 to 20 years. Consequently, lawn applications of milky spore bacteria might not have to be repeated each year. Examples of products are: * St Gabriel Organics Milky Spore Powder Japanese Beetle Control * St Gabriel Organics Milky Spore Granular Grub Control Spinosad is an insect toxin derived from a soil-dwelling bacterium. It kills primarily by ingestion and is used against fire ants, caterpillars, thrips, leaf miners, and some beetles. It is also used against caterpillar borers of fruit trees. When applied at recommended rates, this product poses less risk than most insecticides to mammals, birds, fish, and beneficial insects. It is, however, toxic to bees and should not be applied to plants in flower. Affected pests stop feeding within minutes but may remain on the plant for up to two days. Always spray plants late in the day to reduce any harmful effects on pollinating insects. Products containing spinosad are sold as concentrates to spray or as fire ant baits in granular form. The sprays are labeled for use on ornamentals, lawns, and vegetables; the baits can be used in landscapes and within vegetable gardens. Examples of concentrates and baits are: Spinosad Concentrates: * Bonide Colorado Potato Beetle Beater Concentrate, * Bonide Captain Jack’s Deadbug Brew Concentrate; & RTU, * Ferti-lome Borer, Bagworm & Leafminer Spray Concentrate, * Monterey Garden Insect Spray Concentrate, * Natural Guard Spinosad Landscape & Garden Insecticide RTS, * Southern Ag Conserve Naturalyte Insect Control Concentrate. Spinosad Fire Ant Baits: * Conserve Fire Ant Bait, * Ferti-lome Come and Get It! Fire Ant Bait, * Southern Ag Payback Fire Ant Bait, * Terro Fire Ant Bait Mound or Broadcast Treatment. Beauveria bassiana is a naturally occurring fungus that attacks and kills a variety of immature and adult insects. Insects effected by various formulations include whiteflies, aphids, mites, caterpillars, leaf hoppers, grasshoppers, Colorado potato beetles, Mexican bean beetles, Japanese beetles, boll weevils, cutworms, sod webworms, bark beetles, chinch bugs, fire ants, European corn borers, and codling moths. Beneficial insects, such as lady beetles, are also susceptible. Products containing Beauveria work best when applied at the onset of an infestation. Thorough spray coverage is essential because fungal spores must contact the insect for infection to occur. Then it typically takes three to seven days after application for the spores to germinate, penetrate, and grow throughout the insect, thus killing them. Examples of Commercial products containing Beauvaria include: * Naturalis L (liquid) * BioWorks Botanigard 22WP (wettable powder) * BioWorks Botanigard ES (liquid) * BioWorks Botanigard Maxx (with pyrethrins; liquid) * Mycotrol WPO (wettable powder) * Mycotrol ESO (liquid) * BioSolutions BB Fix (wettable powder) Beneficial Nematodes Nematodes are microscopic, worm-like parasites. While some species of nematodes are pests of turfgrass and other plants, others are beneficial, being parasites of harmful insects. Since beneficial nematodes cannot develop in vertebrate animals, they are very safe for use in pest control. Beneficial nematodes can be used to control a variety of plant pests, including larvae of black vine weevil, clearwing borers, cutworms, sod webworms, mole crickets, and white grubs. It is important to select the proper nematode species when trying to control a particular pest. Nematodes can be difficult to use for most home gardeners. They must be shipped, stored, and used under specific temperature and moisture conditions and generally must be used very soon after shipping. For this reason, they are best ordered from suppliers immediately after a pest problem is observed. A number of nematode products are available by mail order. Be sure the product you are ordering is specified for the pest you have and that you are able to provide proper environmental conditions for the nematodes. In general, nematodes require moist conditions, high humidity, and temperatures between 55 and 90 °F with little direct sunlight. Minerals Diatomaceous Earth is a non-toxic powder composed of fossilized, one-celled organisms called diatoms. It is used to control slugs, millipedes, sowbugs, cockroaches, ants, and soft-bodied insects like aphids. It has low mammalian toxicity. Use the “natural grade,” not the type used as a filtering agent in swimming pools. Prolonged exposure to diatomaceous earth will irritate the lungs and other tissues of people or pets. Because it also kills honeybees, avoid applying the product to crops in flower. Diatomaceous earth products include: * Bonide Diatomaceous Earth Crawling Insect Killer, * Garden Safe Crawling Insect Killer Diatomaceous Earth, * Harris Diatomaceous Earth Crawling Insect Killer, * Natural Guard Crawling Insect Control Containing Diatomaceous Earth, * Safer Brand Ant & Crawling Insect Killer, * St Gabriel Organics Insect Dust Diatomaceous Earth. Kaolin Clay products act as a barrier that irritates insects and disguises the host plant by coating it with a ghostly white film. Insects are apparently unable to recognize plants treated with kaolin. It is most commonly used against a wide variety of pests on apple and pear trees. In addition, kaolin can be used to control Japanese beetles, tarnished plant bugs, thrips, leafhoppers, cucumber beetles, and Colorado potato beetles on vegetable crops. Kaolin must be applied as a preventative to be effective and cannot control a pest that is already established. Kaolin clay can be applied up to the day of harvest and is non-toxic. Kaolin is sold as Surround. Examples of products are: * Gardens Alive Surround Broad Spectrum Sun & Insect Crop Protectant * Nova Source Surround WP Boric Acid is derived from boron, a naturally occurring mineral. It acts as a stomach poison and causes insects to die from starvation. Boric acid is available in powder, paste, aerosol, tablet, and liquid forms for use against cockroaches, ants, and other insects. It should not be applied around plants in the landscape because, although boron is a necessary plant micro-nutrient, larger than trace amounts are toxic to plants. Most boric acid products are available as ready-to-use products. Boric acid (labels may list this as orthoboric acid or sodium tetraborate) is sold under a number of brand names, and product examples include : * Avenger Boric Acid Roach Killer II (powder) * Bonide Boric Acid Roach Killer (powder) * Hot Shot Maxattrax Roach Killing Powder with Boric Acid * Terro Multi-Purpose Insect Bait * Zap-A-Roach – Roach & Ant Killing Powder * Zone Defense Kills Roaches with Boric Acid (powder) Silica Gel is an inert, nonabrasive material that is very effective in absorbing moisture. It absorbs the waxy coating on the insect’s body and causes death by dehydration. Silica gel products are often used by professional pest control operators to control cockroaches, silverfish, and other pests. Examples are: * PT Tri-Die Aerosol, * CimeXa Insecticidal Dust, and * Bayer Drione Insecticide (dust). These contain amorphous silica gel. Sulfur is probably the oldest known pesticide in current use. It can be used as a dust, wettable powder, or liquid and is primarily for disease control. However, mites, psyllids, and thrips are also controlled by sulfur. Sulfur is non-toxic to mammals but may irritate skin or especially the eyes. Sulfur is also used as a fungicide to control powdery mildew, rusts, brown rot, and leaf spots on fruits, vegetables, and ornamentals. Sulfur has the potential to damage plants in hot, dry weather. It is also incompatible with other pesticides. Do not use sulfur within 20 to 30 days of applying spray oils to plants as it reacts with the oils and is more likely to cause damage to foliage. Do not apply sulfur when temperatures are above 80 °F. Examples of products containing sulfur are: Sulfur: * Hi-Yield Wettable Dusting Sulfur, * Safer Brand Garden Fungicide Concentrate; & RTU OMRI, * Southern Ag Wettable or Dusting Sulfur, * Bonide Sulfur Plant Fungicide (dust or spray), Sulfur & Pyrethrins: * Bonide Captain Jack’s Orchard Spray Concentrate; & RTS, * Bonide Tomato & Vegetable 3 in 1 & RTU * Natria Rose & Flower Insect, Disease & Mite Control RTU * Natria Insect, Disease & Mite Control RTS; & RTU * Ortho Insect, Mite & Disease 3-in-1 RTU Sulfur with Insecticidal Soap: * Safer Brand 3-in-1 Garden Spray Concentrate OMRI. * Safer Brand Rose & Flower 3-in-1 Garden Spray RTU OMRI * Safer Brand Tomato & Vegetable 3-in-1 Garden Spray RTU OMRI Insect Growth Regulators Insect growth regulators (IGRs) are juvenile insect hormone analogs. They interfere with egg development and molting of various insect life stages. Because of their mode of action, they are very safe for vertebrate animals. IGRs are among the safest pesticides for application in homes. They are primarily used in homes for flea control. More information is available in HGIC 2423, Flea Control . Two commonly available IGRs are methoprene (Precor) and pyriproxyfen (Nylar). The latter is photostable, and therefore can also be used outdoors. Nylar is sold as Martin’s IG Regulator. Safer Formulations Bait Stations deliver an insecticide through a sealed plastic or metal chamber that insects enter. This gives bait stations the advantage of decreasing both the amount of insecticide used and the likelihood of exposure to it. Bait stations are particularly suitable for use in situations where the safety of children and pets is a concern or in areas where food is prepared or stored. Numerous brands of bait stations are commonly available to control cockroaches and ants. Some of the more effective bait stations have fipronil as the active ingredient, but those with boric acid (it may list this as orthoboric acid or sodium tetraborate) or hydramethylnon are also available. Each company below has a variety of baits stations and gels. Examples of products are: * Terro Liquid Ant Bait, * Combat Source Kill Max Ant Bait, * Bayer Maxforce FC Ant Bait Stations, * Combat Roach Killing Bait, * Bayer Maxforce FC Magnum Roach Killer Bait Gel. Pesticide Safety Always read the pesticide label and follow its directions exactly. You may only use the pesticide on sites or crops listed on the label. Be sure to observe all special precautions that are listed on the label. Wear protective clothing or equipment as listed on the label when mixing or applying pesticides. Mix pesticides at the rate recommended for the target site as listed on the label. Never use more than the label says. Follow all label directions for safe pesticide storage and disposal. Always remember to read and heed the six most important words on the label: “KEEP OUT OF REACH OF CHILDREN.” Caution: Pollinating insects, such as honey bees and bumblebees, can be adversely affected by the use of pesticides. Avoid the use of spray pesticides (both insecticides and fungicides), as well as soil-applied, systemic insecticides unless absolutely necessary. If spraying is required, always spray late in the evening to reduce the direct impact on pollinating insects. Always try less toxic alternative sprays first for the control of insect pests and diseases. For example, sprays with insecticidal soap, horticultural oil, neem oil extract, spinosad, Bacillus thuringiensis (B.t.), or botanical oils can help control many small insect pests and mites that affect garden and landscape plants. Neem oil extract or botanical oil sprays may also reduce plant damage by repelling many insect pests. Practice cultural techniques to prevent or reduce the incidence of plant diseases, including pre-plant soil improvement, proper plant spacing, crop rotation, applying mulch, applying lime and fertilizer based on soil test results, and avoiding overhead irrigation and frequent watering of established plants. Additionally, there are less toxic spray fungicides that contain sulfur or copper soap and biological control sprays for plant diseases that contain Bacillus subtilis. However, it is very important to always read and follow the label directions on each product. For more information, contact the Clemson Extension Home & Garden Information Center. Thank you for listening to the Garden Basics with Farmer Fred podcast! It’s available wherever you get your podcasts. Please share it with your garden friends. As an Amazon Associate, I earn from qualifying purchases from some of the underlined links in the newsletter. This is how I am trying to keep this a free newsletter. And as long as you buy whatever you want from Amazon using any of those links to get into the Amazon site , I get a few pennies. Thank you. Thanks for Subscribing and Spreading the Word About the Beyond the Basics: The Garden Basics with Farmer Fred newsletter, I appreciate your support. Fred Hoffman is also a University of California Cooperative Extension Master Gardener in Sacramento County. This is a public episode. If you'd like to discuss this with other subscribers or get access to bonus episodes, visit gardenbasics.substack.com/subscribe
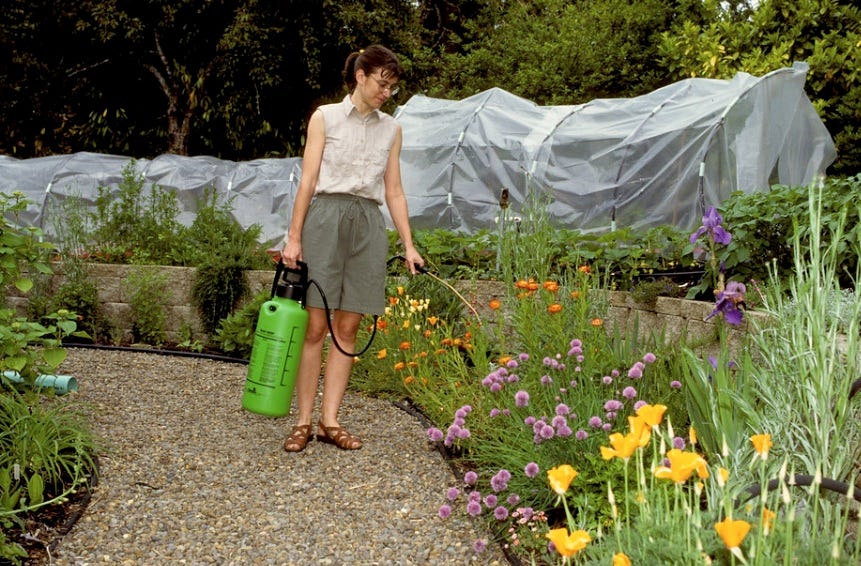
Sep 30, 2022
How to Grow Citrus Indoors
Growing Citrus Trees Indoors Here in California, or if you live in Arizona or Texas or Florida, you get to grow citrus in your backyard, year round. For most of the rest of the nation, though, that would be a challenge. A challenge to the point where maybe you have to bring it indoors for the winter. That could even be true here in California if you’re growing a citrus variety, such as lime trees, that can lose their fruit when the thermometer drops to 32 degrees, which happens here in the Central Valley on a regular basis. Maybe you have a really nice greenhouse to grow citrus. Combined with a heater to keep temperatures above 40, that would be ideal. When it comes to tips for growing citrus, we turn to Lance Walheim, who has written several books about citrus. His titles include, “Citrus The Complete Guide to Selecting and Growing More Than 100 Varieties," and “All About Citrus and Other Subtropical Fruits.” He also was one of the contributing editors to the Sunset Western garden book that has a very good citrus section. Walheim says indoor citrus growers need to choose the right varieties to be successful. “I have met many people who have been growing Meyer lemons and kumquats back East in very cold climates for 30-40 years, so people can be successful about it,” says Walheim. “But make sure you choose the right variety. I think you need to try growing citrus that is highly acidic. One of the best ones is the Meyer lemon tree . It's a very precocious tree that loves to bloom, and doesn't need a lot of heat to ripen. And it's a small tree so it can grows perfectly well in a container. All the kumquat hybrids, including Calamondins, are perfect for indoors. Also, they have smaller fruit that ripens quicker. And again, they have a propensity to rebloom often.” And despite the reputation of lime trees being very cold sensitive, Walheim says one lime variety, in particular, makes for a good household specimen. “ Bearss lime is a good variety to try indoors,” says Walheim. And what about the option of letting your citrus trees enjoy the warmer months outdoors and bringing them indoors for the winter? Is that viable? “It certainly is,” exclaims Walheim. “The key thing is to provide a transition zone, if moving it back and forth. When you're moving a citrus tree from indoors to outside in the late winter or early spring, or from the outside to the indoor conditions in November or December in the Central Valley (or earlier in colder climates), you're really changing things for that tree. The humidity levels outside could be over 50-60%. You take it inside where the house is heated, you're dropping down to 10% humidity. So those are dramatic changes, and they're going to affect the tree as will the changing light conditions. So what I really recommend, whether you're going inside or outside as you provide a transition period, is to do it gradually.” The process involves moving that tree every day for awhile, so make sure the plant is in a container that isn’t too big for you to move, perhaps 15 to 20 inches across at the top. Better yet, mount the container on a heavy duty small furniture dolly to roll the plant inside and out. “If you're taking the tree outside, make sure it is in a shady spot during this transition period, it may take several weeks,” says Walheim. Give them a shady condition several hours a day, and then move them back inside for the night. Move them to more outside light gradually.” Walheim says the more critical transition is moving a containerized citrus tree to the indoors for the winter in colder climates. “You certainly don't want them next to a heater vent, you want to do whatever you can to increase the humidity, which means they can be placed on a tray with some rocks over it where you can add water to the base and increase humidity around the tree,” says Walheim. “Give them as much light as you possibly can. But what's going to happen, especially with a Meyer lemon, you're going to bring them indoors, and they're going to drop their leaves because of the lower humidity levels as less intense light. After that, the next thing that might happen is that they're going to bloom. The stress of all that it's going to make them bloom, so you're going to get some flowers, they probably won't set fruit indoors, but you will start getting some new growth. Make sure that you are doing a good job to maintain the water in the pot. Don’t overwater or underwater. And then they'll start to grow again.” Other Tips from Walheim regarding growing indoor citrus: • “They are widely adapted to soil types, so I think that most potting soils, the quality potting soils, are probably going to be okay. It's more important that we make sure we get those fertilizer nutrients into the soil.” • “I would make sure I used a good citrus fruit food or another fertilizer that had the micronutrients in it of zinc, iron and manganese. But you are hoping that that tree is going to grow when it's inside unless you're totally shutting it down in a cold greenhouse. But I would fertilize lightly.” • “You want to want to make sure that you water thoroughly, so the whole root ball gets wet. But you don't want that water sitting around in the basin. So whatever you can do to drain it out or put something in there to keep the soil out of the water constantly. The quickest way to kill a citrus tree is to have the bottom of that container continuously soaking wet. You're just not going to get the drainage, they need air for the roots.” • “I know a lot of people that use supplemental lighting and get very good results. check around for the type of lights that you can get. Use lights especially if you're going to be growing your citrus trees in an area of the house where you're not getting enough light and they're a little out of the way.” • “Leaf burn can be an issue, especially if you go into a dramatically drier area. And if you are not, if you've allowed salts to build up in the soil ball of the tree, and then you bring it inside, the lack of humidity is going to cause leaf burn and eventually leaf drop. I recommend before you bring the trees inside, do a preventative insect control spray of some kind, whether it's insecticidal soap or neem oil, whatever you're going to do, but also make sure you water the tree really well before you bring it inside. Let it sit out there and drain for a couple days and leach any salts that are in the soil out. That's a good practice with any house plant that you bring outside and then eventually bring indoors and watch the weather. Don't get caught with your tree outside before it gets too cold or if a late spring frost hits. Watch out for that. Get them inside if you have to.” The University of Minnesota has more Indoor Citrus Growing Advice: Growing and caring for your citrus plants Growing citrus plants is not difficult if you can meet these requirements. * Citrus plants grow best indoors with 65° days, dropping five to ten degrees at night. * They need some direct sun for at least part of the day. * During the summer, put citrus plants outside to take advantage of better growing conditions and extra light. * Let the plants acclimate to sunny conditions by putting them in the shade of a tree or the north side of the house for the first several days. * Make sure they have plenty of direct light once they're used to being outside. * Get them used to lower light at the end of the summer by keeping them in a shady place for a week or so before bringing them back indoors. Use the right potting mix and fertilizer * Since citrus plants prefer acid conditions, use peat in the potting mix to help keep the pH down. * Use about one-third sterile potting soil, one-third perlite or vermiculite, and one-third peat or other organic matter in the potting mix. * Use a fertilizer made specially for acid-loving plants. Mix at half the recommended strength. * Fertilize the plant only when it is actively growing, usually April through August or September. Watch for pests * Scale , whitefly and spider mites are some of the more common pests of citrus. * Make sure the leaves are kept clean by periodically washing them, especially before you bring the tree inside for the winter. * Pay special attention to the undersides as well as the tops of leaves. * To treat insects, check garden centers for products currently approved for use on houseplants. Pollinate for fruit You may have flowers, but still have difficulty getting fruit to form on your citrus plant. This may be due to lack of pollination. Insects pollinate citrus outside. Since these are not usually present in the home, shake the flowers gently or flick them with your fingers to spread pollen from flower to flower. Thank you for listening to the Garden Basics with Farmer Fred podcast! It’s available wherever you get your podcasts. Please share it with your garden friends. As an Amazon Associate, I earn from qualifying purchases from some of the underlined links in the newsletter. This is how I am trying to keep this a free newsletter. And as long as you buy whatever you want from Amazon using any of those links to get into the Amazon site , I get a few pennies. Thank you. Thanks for Subscribing and Spreading the Word About the Beyond the Basics: The Garden Basics with Farmer Fred newsletter, I appreciate your support. Fred Hoffman is also a University of California Cooperative Extension Master Gardener in Sacramento County. This is a public episode. If you'd like to discuss this with other subscribers or get access to bonus episodes, visit gardenbasics.substack.com/subscribe
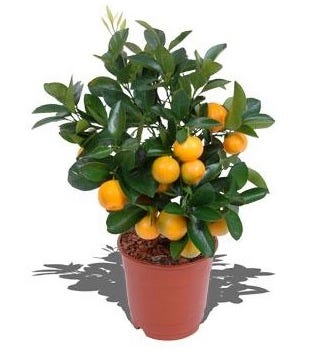
Sep 23, 2022
Fresh Corn Soup Recipe
Fresh Corn Soup (plus the cob) Recipe by Andi MacDonald, Sacramento Co. Master Gardener and Professional Chef Serves 4 During the dog days of summer, this soup is so refreshing served chilled. The secret ingredient is the corn stock, made from the corn cobs that generally get tossed. If corn is out of season, frozen can substitute and vegetable stock can be used instead of the corn stock. Perhaps not as good , but still pretty good! 2 tablespoons olive oil 4 ears of fresh corn, 2 cups altogether 1 cup onion, medium dice ½ cup carrots, medium dice ½ cup celery, medium dice 1 clove of garlic, minced 1 tablespoon fresh thyme, or 1 teaspoon dried 6 cups corn stock (or vegetable stock, unsalted if possible) 1 teaspoon salt, or to taste ½ teaspoon black pepper, or to taste Basil Oil for garnish (optional) Shuck the corn and shave the kernels from the cob. Set the corn kernels aside for later. Snap the cobs in half and place them in a stock pot. Add 12 cups of water. Bring to a vigorous boil, turn down to a low boil, and reduce to 6 cups, about 1 hour. Let cool, discard the cobs, and save the corn stock for the soup. In a soup pot, warm the olive oil over low heat. Add onions, carrots, and celery and cook on a low heat until vegetables are soft (this is called sweating ). Stir frequently and do not let the vegetables brown. (To aid the sweating, cover the pan with a lid.) This will take about 30 minutes, and maybe longer. Add the corn, garlic, and thyme and cook for 20 minutes, stirring frequently to keep the vegetables from sticking. Keep the heat low and do not allow to brown. Add corn stock and bring to a simmer/very low boil. Cook for 30 minutes. The vegetables need to be quite soft. Remove from heat and allow to cool to room temperature. Add the soup to a blender and puree. Depending on the blender, you might need to do this in batches. Strain through a fine sieve, discarding the solids. The soup is best if velvety-smooth. Serve hot or chilled, garnished with a drizzle of basil oil. To serve hot, return to the soup pot and heat to a near boil. To serve chilled, refrigerate for at least 4 hours. Can be made several days ahead and refrigerated. The soup will thicken as it sits. If it’s too thick, thin with corn or vegetable stock, and adjust the salt to taste. Basil Oil: Put 2 tablespoons of minced basil and ½ cup of olive oil into a small blender cup. Blitz until the basil is incorporated. Let sit for one hour and then strain through a small sieve. Thank you for listening to the Garden Basics with Farmer Fred podcast! It’s available wherever you get your podcasts. Please share it with your garden friends. As an Amazon Associate, I earn from qualifying purchases from some of the underlined links in the newsletter. This is how I am trying to keep this a free newsletter. And as long as you buy whatever you want from Amazon using any of those links to get into the Amazon site , I get a few pennies. Thank you. Thanks for Subscribing and Spreading the Word About the Beyond the Basics: The Garden Basics with Farmer Fred newsletter, I appreciate your support. Fred Hoffman is also a University of California Cooperative Extension Master Gardener in Sacramento County. This is a public episode. If you'd like to discuss this with other subscribers or get access to bonus episodes, visit gardenbasics.substack.com/subscribe

Sep 16, 2022
Grow A Yardful of Phytonutrients
In today’s newsletter podcast, we continue our chat with Dr. Laura Varich , from FreshPhysician.com , a conversation that we began on Episode 228 of the Garden Basics with Farmer Fred podcast . Dr. Varich is a former pediatric radiologist who is now focused on what’s really the cause of so many of the diseases in our society: poor eating habits. Specifically, we are missing a critical element in our diet: phytonutrients. We’re eating too much of colorfully-packaged, highly-processed factory food and not enough fresh from-the-garden (or farmer’s market) colorful food. The result: rampant increases, across all ages, of heart disease, diabetes, high blood pressure, cancer, and other ailments. In both podcasts, she encourages getting out into the yard and growing fresh fruits and vegetables, which is also great exercise. The healthiest food you can eat is the food you grow yourself…and then consume it, fresh. Or, at least, make regular runs to the farmer’s market in your area. What are phytonutrients? Dr. Varich explains that in the podcasts. And, here’s the word from Harvard University : Phytonutrients: Paint your plate with the colors of the rainbow Did you know that adding color to your meals will help you live a longer, healthier life? Colorful fruits and vegetables can paint a beautiful picture of health because they contain phytonutrients, compounds that give plants their rich colors as well as their distinctive tastes and aromas. Phytonutrients also strengthen a plant’s immune system. They protect the plant from threats in their natural environment such as disease and excessive sun. When humans eat plant foods , phytonutrients protect us from chronic diseases. Phytonutrients have potent anti-cancer and anti-heart disease effects. And epidemiological research suggests that food patterns that include fruits and vegetables are associated with a reduced risk of many chronic diseases, including cardiovascular disease, and may be protective against certain types of cancers. The American Cancer Society recommends 2 1/2 cups per day of fruits and vegetables. The most recent US Dietary Guidelines recommend consuming even more: 2 1/2 cups of vegetables and 2 cups of fruit, based on a 2,000-calorie diet. To get started, try to include as many plant-based colors in your meals and snacks as possible. Each color provides various health benefits and no one color is superior to another, which is why a balance of all colors is most important. Getting the most phytonutrients also means eating the colorful skins, the richest sources of the phytonutrients, along with the paler flesh. Try to avoid peeling foods like apples, peaches and eggplant, lest you lose their most concentrated source of beneficial chemicals. Following is a rundown of fruits and vegetables sorted by color, along with the phytonutrients they contain, and which foods you’ll find them in. Red: Rich in the carotenoid lycopene, a potent scavenger of gene-damaging free radicals that seems to protect against prostate cancer as well as heart and lung disease.Found in: strawberries, cranberries, raspberries, tomatoes, cherries, apples, beets, watermelon, red grapes, red peppers, red onions. Orange and yellow : Provide beta cryptothanxin, which supports intracellular communication and may help prevent heart disease.Found in: carrots, sweet potatoes, yellow peppers, oranges, bananas, pineapple, tangerines, mango, pumpkin, apricots, winter squash (butternut, acorn), peaches, cantaloupe, corn Green: These foods are rich in cancer-blocking chemicals like sulforaphane, isocyanate, and indoles, which inhibit the action of carcinogens (cancer-causing compounds).Found in: spinach, avocados, asparagus, artichokes, broccoli, alfalfa sprouts, kale, cabbage, Brussels sprouts, kiwi fruit, collard greens, green tea, green herbs (mint, rosemary, sage, thyme, and basil) Blue and purple: Have powerful antioxidants called anthocyanins believed to delay cellular aging and help the heart by blocking the formation of blood clots.Found in: blueberries, blackberries, elderberries, Concord grapes, raisins, eggplant, plums, figs, prunes, lavender, purple cabbage White and brown: The onion family contains allicin, which has anti-tumor properties. Other foods in this group contain antioxidant flavonoids like quercetin and kaempferol.Found in: onions, cauliflower, garlic, leeks, parsnips, daikon radish, mushrooms Reach for the rainbow Reaching a total of 4 1/2 cups of colorful fruits and vegetable a day is the goal for a powerful plate. Here are some ways to make it happen: * Servings are not that big. 1/2 cup of chopped raw vegetables or fruit makes one serving. Leafy greens take up more space, so 1 cup chopped counts as a serving. 1/2 cup of dried fruit equals one serving. * Think in twos. Try to eat two servings in the morning, two in the afternoon, and two at night. * Snacks count, too. Feeling hungry between meals? Munch on a piece of fruit or grab some sliced raw vegetables to go. * When shopping, look at your cart. If you find most of your choices are the same one or two colors, swap out a few to increase the colors — and phytonutrients — in your cart. * Dine out colorfully. Start out with a cup of vegetable soup. Choose an arugula or spinach salad and see if they can add extra vegetables. Top off your meal with fresh fruit for dessert and a soothing cup of green tea. * Look local. Farmers markets, co-ops, buying clubs, and community supported farms are usually great sources of fresh produce. Ask a farmer for fresh ideas on how to prepare fruits and vegetables that are new to you. * Frozen produce is okay too! It is best to eat in season, but since seasonal produce may be limited, frozen fruits and vegetables count and are just as nutritious as fresh. In the newsletter podcast, Dr. Varich made an interesting comment, one I had never heard before: in a study published in the British Medical Journal , patients who consumed mainly plants and fish had a 73% chance of not coming down with moderate to severe cases of COVID. Here’s a brief summary of that 2021 study, conducted by John Hopkins University and other institutions: Plant-based diets, pescatarian diets and COVID-19 severity: a population-based case–control study in six countries Abstract Background: Several studies have hypothesised that dietary habits may play an important role in COVID-19 infection, severity of symptoms, and duration of illness. However, no previous studies have investigated the association between dietary patterns and COVID-19. Methods : Healthcare workers (HCWs) from six countries (France, Germany, Italy, Spain, UK, USA) with substantial exposure to COVID-19 patients completed a web-based survey from 17 July to 25 September 2020. Participants provided information on demographic characteristics, dietary information, and COVID-19 outcomes. We used multivariable logistic regression models to evaluate the association between self-reported diets and COVID-19 infection, severity, and duration. Results: There were 568 COVID-19 cases and 2316 controls. Among the 568 cases, 138 individuals had moderate-to-severe COVID-19 severity whereas 430 individuals had very mild to mild COVID-19 severity. After adjusting for important confounders, participants who reported following ‘plant-based diets’ and ‘plant-based diets or pescatarian diets’ had 73% (OR 0.27, 95% CI 0.10 to 0.81) and 59% (OR 0.41, 95% CI 0.17 to 0.99) lower odds of moderate-to-severe COVID-19 severity, respectively, compared with participants who did not follow these diets. Compared with participants who reported following ‘plant-based diets’, those who reported following ‘low carbohydrate, high protein diets’ had greater odds of moderate-to-severe COVID-19 (OR 3.86, 95% CI 1.13 to 13.24). No association was observed between self-reported diets and COVID-19 infection or duration. Conclusion In six countries, plant-based diets or pescatarian diets were associated with lower odds of moderate-to-severe COVID-19. These dietary patterns may be considered for protection against severe COVID-19. After the harvest, where do you keep your crops to help preserve their nutrients? Available for free online, from the UC Davis Postharvest Technology department, their “ Storing Fresh Fruits and Vegetables for Better Taste ” chart. Thank you for listening to the Garden Basics with Farmer Fred podcast! It’s available wherever you get your podcasts. Please share it with your garden friends. As an Amazon Associate, I earn from qualifying purchases from some of the underlined links in the newsletter. This is how I am trying to keep this a free newsletter. And as long as you buy whatever you want from Amazon using any of those links to get into the Amazon site , I get a few pennies. Thank you. Fred Hoffman is also a University of California Cooperative Extension Master Gardener in Sacramento County. This is a public episode. If you'd like to discuss this with other subscribers or get access to bonus episodes, visit gardenbasics.substack.com/subscribe
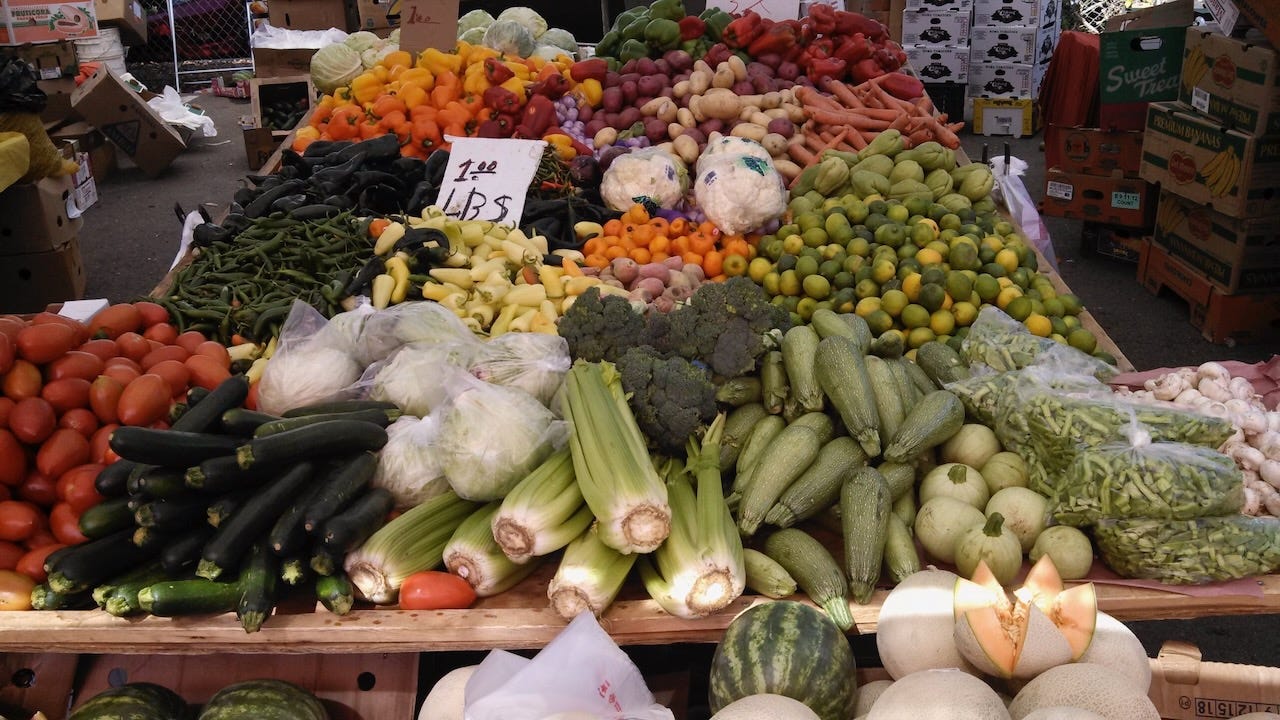
Sep 9, 2022
Cation Exchange Capacity for Gardeners
Debbie Flower, America’s Favorite Retired College Horticulture Professor, brought up the subject of “Cation Exchange Capacity” back in Episode 193 of the Garden Basics with Farmer Fred podcast, while discussing the limited lifespan of bagged worm castings. That alone should pique your interest. Go ahead and listen to that segment or read the transcript. I’ll wait. In the podcast in this newsletter, Debbie goes into depth about cation exchange capacity. If you were a high school chemistry class wizard, you’re excited to learn how the electronic charges in the soil aid and abet the feeding of plants. The rest of us need a bit more help (I took high school chemistry a couple of times. I still don’t get it.). Here’s an almost easy to understand explanation of the chemistry going on beneath our feet. From Australia’s Katharine Brown (The University of Western Australia) and Jeremy Lemon (Department of Agriculture and Food, Western Australia), entitled, “ Cations and Cation Exchange Capacity” . At the very least, you’ll learn about “meq”. Again, this is why this newsletter is entitled the way it is. Cations and Cation Exchange Capacity Key Points * Cation exchange capacity (CEC) is the total capacity of a soil to hold exchangeable cations. * CEC is an inherent soil characteristic and is difficult to alter significantly. * It influences the soil’s ability to hold onto essential nutrients and provides a buffer against soil acidification. * Soils with a higher clay fraction tend to have a higher CEC. * Organic matter has a very high CEC. * Sandy soils rely heavily on the high CEC of organic matter for the retention of nutrients in the topsoil. * Background Cation exchange capacity (CEC) is a measure of the soil’s ability to hold positively charged ions. It is a very important soil property influencing soil structure stability, nutrient availability, soil pH and the soil’s reaction to fertilisers and other ameliorants (Hazleton and Murphy 2007). What are exchangeable cations? The clay mineral and organic matter components of soil have negatively charged sites on their surfaces which adsorb and hold positively charged ions (cations) by electrostatic force. This electrical charge is critical to the supply of nutrients to plants because many nutrients exist as cations (e.g. magnesium, potassium and calcium). In general terms, soils with large quantities of negative charge are more fertile because they retain more cations (McKenzie et al. 2004) however, productive crops and pastures can be grown on low CEC soils.The main ions associated with CEC in soils are the exchangeable cations calcium (Ca2+), magnesium (Mg2+), sodium (Na+) and potassium (K+) (Rayment and Higginson 1992), and are generally referred to as the base cations. In most cases, summing the analysed base cations gives an adequate measure of CEC (‘CEC by bases’). However, as soils become more acidic these cations are replaced by H+, Al3+ and Mn2+, and common methods will produce CEC values much higher than what occurs in the field (McKenzie et al. 2004). This ‘exchange acidity’ needs to be included when summing the base cations and this measurement is referred to as effective CEC (ECEC). Measuring CEC Different laboratories use various methods to measure CEC, and can return contrasting results depending on the fraction of the soil measured. In Australia, some laboratories measure CEC directly and others calculate it as CEC by bases. Cation exchange capacity is commonly measured on the fine earth fraction (soil particles less than 2 mm in size). In gravelly soils the effective CEC of the soil as a whole is diluted, and if only the fine (clay) fraction is analysed, reported CEC values will be higher than actual field values.Measuring CEC involves washing the soil to remove excess salts and using an ‘index ion’ to determine the total positive charge in relation to original soil mass. This involves bringing the soil to a predetermined pH before analysis. Methods, including pre-treatment, for measuring CEC and exchangeable cations are presented by Rengasamy and Churchman (1999) and described in detail by Rayment and Higginson (1992). Units CEC is conventionally expressed in meq/100 g (Rengasamy and Churchman 1999) which is numerically equal to centimoles of charge per kilogram of exchanger (cmol(+)/kg). Management Implications Soil type and CEC The CEC of soils varies according the clay %, the type of clay, soil pH and amount of organic matter. Pure sand has a very low CEC, less than 2 meq/100 g, and the CEC of the sand and silt size fractions (2 µ m/2 mm) of most soils is negligible. Claying sandy soils for managing water repellence increases the CEC of the surface layers by a small amount depending on type and amount of clay added. Typically CEC is increased by less than 1 meq/100 g.The most commonly occurring clay in Western Australian soils, kaolinite, has a CEC of about 10 meq/100 g. Other clays such as illite and smectite have CECs ranging from 25 to 100 meq/100 g. Organic matter has a very high CEC ranging from 250 to 400 meq/100 g (Moore 1998). Because a higher CEC usually indicates more clay and organic matter is present in the soil, high CEC soils generally have greater water holding capacity than low CEC soils. Soil pH and CEC Soils dominated by clays with variable surface charge are typically strongly weathered. The fertility of these soils decreases with decreasing pH which can be induced by acidifying nitrogen fertiliser, nitrate leaching and by clearing and agricultural practices (McKenzie et al. 2004). Soil pH change can also be caused by natural processes such as decomposition of organic matter and leaching of cations. The lower the CEC of a soil, the faster the soil pH will decrease with time. Liming soils (see Soil Acidity fact sheet .) to higher than pH 5 (CaCl2) will maintain exchangeable plant nutrient cations. Nutrient availability and CEC Soils with a low CEC are more likely to develop deficiencies in potassium (K+), magnesium (Mg2+) and other cations while high CEC soils are less susceptible to leaching of these cations (CUCE 2007). Several factors may restrict the release of nutrients to plants. Some groups promote the controversial idea of managing cation ratios, claiming ideal ratios for Ca:Mg or Ca:K. For plant nutrition, a more critical factor is whether the net amount of Ca or K in the soil is adequate for plant growth. The addition of organic matter will increase the CEC of a soil but requires many years to take effect.Figure 1 illustrates how CEC can change with depth. The sum of the base cations provides an estimate of the CEC of each soil layer. The surface 10 cm has a CEC of 4.6 meq/100 g because of a high organic content. At 10 – 30 cm depth, the organic content of the sand is very low, hence the low CEC. The CEC of the subsoil layers are governed by clay content, 61 %, 51 % and 34 % respectively. The dominant clay in this soil is kaolinite so CEC values remain low. Figure 1: Sandy duplex soil, with clay at 40 cm. Note the high CEC of the clay below 40 cm, and the impact of organic matter on the sand’s CEC. Further reading and references Cornell University Cooperative Extension (CUCE) (2007) Cation Exchange Capacity (CEC). Agronomy Fact Sheet Series # 22 . Department of Crop and Soil Sciences, College of Agriculture and Life Sciences, Cornell University. Hazelton PA, Murphy BW (2007) Interpreting Soil Test Results: What Do All The Numbers Mean? . CSIRO Publishing: Melbourne. McKenzie NJ, Jacquier DJ, Isbell RF, Brown KL (2004) Australian Soils and Landscapes: An Illustrated Compendium . CSIRO Publishing: Collingwood, Victoria. Moore G, Dolling P, Porter B and Leonard L (1998) Soil Acidity. In Soilguide. A handbook for understanding and managing agricultural soils . (Ed. G Moore) Agriculture Western Australia Bulletin No. 4343. Rayment GE, Higginson FR (1992) Electrical Conductivity. In ‘Australian Laboratory Handbook of Soil and Water ChemicalMethods’ Inkata Press: Melbourne. Rengasamy P, Churchman GJ (1999) Cation Exchange Capacity, Exchangeable Cations and Sodicity. In Soil Analysis an Interpretation Manual . (Eds KI Peverill, LA Sparrow and DJ Reuter). CSIRO: Melbourne. Author: Katharine Brown (The University of Western Australia) and Jeremy Lemon (Department of Agriculture and Food, Western Australia). This soilquality.org.au fact-sheet has been funded by the Healthy Soils for Sustainable Farms programme, an initiative of the Australian Government’s Natural Heritage Trust in partnership with the GRDC, and the WA NRM regions of Avon Catchment Council and South Coast NRM , through National Action Plan for Salinity and Water Quality and National Landcare Programme investments of the WA and Australian Governments.The Chief Executive Officer of the Department of Agriculture and Food , The State of Western Australia and The University of Western Australia accept no liability whatsoever by reason of negligence or otherwise arising from the use or release of this information or any part of it. Thank you for listening to the Garden Basics with Farmer Fred podcast! It’s available wherever you get your podcasts. Please share it with your garden friends. As an Amazon Associate, I earn from qualifying purchases from some of the underlined links in the newsletter. This is how I am trying to keep this a free newsletter. And as long as you buy whatever you want from Amazon using any of those links to get into the Amazon site , I get a few pennies. Thank you. Thanks for Subscribing and Spreading the Word About the Beyond the Basics: The Garden Basics with Farmer Fred newsletter, I appreciate your support. Fred Hoffman is also a University of California Cooperative Extension Master Gardener in Sacramento County. This is a public episode. If you'd like to discuss this with other subscribers or get access to bonus episodes, visit gardenbasics.substack.com/subscribe

Sep 2, 2022
Plant Hormones
In today’s newsletter podcast, America’s Favorite Retired Horticultural Professor, Debbie Flower, explains plant hormones, and how they can help you become a better gardener. Want to propagate your own plants from cuttings? Depending on the plant, hormones can help. The book, “Propagating Plants” by Alan Toogood has more information. Online, the site “ Untamed Science” has an easy to understand page on how the five major plant hormones work . Want bigger table grapes? Hormones, such as Gibberellic acid can help. If you’re a commercial grower. According to the California Garden Web : “Growers use several methods to increase cluster and berry size: cluster and berry thinning; trunk girdling; and gibberellic acid sprays . Gibberellic acid is a synthetic plant growth regulator and is not available to home gardeners. Some increase in size can be achieved by cluster and berry thinning and trunk girdling.” How To Increase The Size Of Your Seedless Table Grapes Mid-Spring is the best time to thin out, trim and fertilize seedless table grapes. 1. Thin out the bunches so that there is at least six inches of space between each remaining bunch ot table grapes. Late April to mid May is best for this. 2. Cut off the "tails" from the remaining bunches at that same time. This is the lower one-quarter to one third of the bunch, where it begins to taper down in size. This will send more energy to the remaining grapes on the bunch. 3. Fertilize...or not. The book, " The California Master Gardener Handbook " advises that a half pound of ammonium sulfate can be applied for each vine at berry set (when the berries are about a quarter-inch big, usually in May). Remember, though, that too much nitrogen can result in an overabundance of vine growth and not enough grapes for eating. The late Chuck Ingels, Sacramento County farm advisor, said that very little nitrogen, if any, is needed. If you opt to use another commercial fertilizer, follow label directions. 4. Water. The same book advises gardeners to apply about 50 gallons of water per week per vine, during the hottest months (June through August) in the Central Valley of California. Apply less (about 35 gallons a week) during May and September. 5. Girdle the Stems in late May. According to Chuck Ingels, in the Sacramento County Cooperative Extension brochure, " Grapevines: Girdling and Cluster Thinning to Increase Berry Size" : Girdling removes the inner and outer bark from around the trunk. The inner bark, or phloem, is where carbohydrates produced by photosynthesizing leaves move to developing organs (including fruit and roots). Removal of a strip of bark prevents the translocation of carbohydrates to the root system thus making more available for fruit growth until the girdle heals in about four weeks. Girdling can make berries about 30% larger if done correctly. If is particularly effective on seedless varieties; no effect on seeded varieties.How to Girdle Vines: Remove a strip of bark, down to the wood, that is 1/8 to 1/4 inch wide. A double bladed girdling knife makes the job easier. It is essential that all the phloem tissue is removed, so press fairly hard. Check for completeness about 20 minutes afeter the girdle is made. A proper girdle will have the appearance of an all white, fibrous ring of wood (xylem). Remove any brown portions of the ring; if there is even an 1/8" of phloem tissue left, the girdle's benefits are lost. Be sure not to cut so deep as to damage the water conducting xylem and weaken the vine. With a proper cut, the ring should just pop out." For commercial growers: “Using Plant Growth Regulators to Increase the Size of Table Grape Berries” Thank you for listening to the Garden Basics with Farmer Fred podcast! It’s available wherever you get your podcasts. Please share it with your garden friends. As an Amazon Associate, I earn from qualifying purchases from some of the underlined links in the newsletter. This is how I am trying to keep this a free newsletter. And as long as you buy whatever you want from Amazon using any of those links to get into the Amazon site , I get a few pennies. Thank you. Thanks for Subscribing and Spreading the Word About the Beyond the Basics: The Garden Basics with Farmer Fred newsletter, I appreciate your support. Fred Hoffman is also a University of California Cooperative Extension Master Gardener in Sacramento County. This is a public episode. If you'd like to discuss this with other subscribers or get access to bonus episodes, visit gardenbasics.substack.com/subscribe
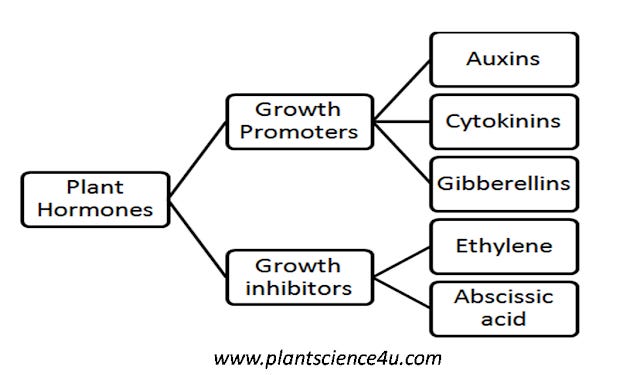
Aug 26, 2022
All About Imidacloprid
A question into the Garden Basics with Farmer Fred podcast raised more questions for myself and Debbie Flower, America’s Favorite Retired College Horticulture professor. First, the question: “Recently, a Pest Control Company came by to inject my birch trees (soil) with a chemical (Imidacloprid) that helps prevent sticky droppings from landing on my driveway, etc. This year they came by and also started inject all shrubs and also injected my plum tree and lime tree. I asked why and they said it was part of their new procedure. I am concerned that my limes and plums may not be safe to eat. Is this a worry? While I only make jam out of the plums, I do enjoy fresh lime juice. Thanks.” You’ll have to listen to the podcast (above) where we enumerate the many ramifications raised by this question, such as: What was the exact concentration of Imidacloprid used? Is the product registered for use on the crop of concern? Is the pest listed on the product label? All of this information could be found on the product label. Which is why we are fond of saying: read and follow all label directions. Imidacloprid is an active ingredient in many popular systemic insecticides. It’s also banned in some regions. Scientists have pointed out that the government (the EPA) needs to take a harder look at this insecticide due to its effect on pollinating insects, such as honeybees. From the October 31, 2021 International Journal of Molecular Sciences : “In conclusion, the lethal dose/concentration and molecular effects of sublethal dosages of imidacloprid on honey bees and other pollinator bees were integrated and reviewed. Molecular evidence suggests that the expression of the immune response, detoxification, oxidation-reduction, and other development-related genes was ubiquitously affected among different species of target bees. Transcriptomic approaches revealed that even very low dosages/concentrations of imidacloprid could cause global effects, even altering the developmental queue and inducing a precocious forager. Realistic field levels of imidacloprid severely impact the sustainable development and population dynamics of domesticated and wild pollinators. The application of imidacloprid and other neonicotinoid pesticides should be more carefully and rigorously evaluated.” What is Imidacloprid? From the National Pesticide Information Center at Oregon State University: What is imidacloprid? Imidacloprid is an insecticide that was made to mimic nicotine. Nicotine is naturally found in many plants, including tobacco, and is toxic to insects. Imidacloprid is used to control sucking insects, termites, some soil insects, and fleas on pets. It has been used in products sold in the United States since 1994. What are some products that contain imidacloprid? Products containing imidacloprid come in many forms, including liquids, granules, dusts, and packages that dissolve in water. Imidacloprid products may be used on crops, houses, or used in flea products for pets. There are over 400 products for sale in the United States that contain imidacloprid. Always follow label instructions and take steps to avoid exposure. If any exposures occur, be sure to follow the First Aid instructions on the product label carefully. For additional treatment advice, contact the Poison Control Center at 1-800-222-1222. If you wish to discuss a pesticide problem, please call 1-800-858-7378. How does imidacloprid work? Imidacloprid disrupts the nerve's ability to send a normal signal, and the nervous system stops working the way it should. Imidacloprid is much more toxic to insects and other invertebrates than it is to mammals and birds because it binds better to the receptors of insect nerve cells. Imidacloprid is a systemic insecticide, which means that plants take it up from the soil or through the leaves and it spreads throughout the plant's stems, leaves, fruit, and flowers. Insects that chew or suck on the treated plants end up eating the imidacloprid as well. Once the insects eat the imidacloprid, it damages their nervous system and they eventually die. How might I be exposed to imidacloprid? There are four ways that people can be exposed to chemicals. Chemicals may get on the skin, get into the eyes, be inhaled, or be eaten. This can happen if someone handles a pesticide or a pet recently treated with a product and does not wash their hands before eating. You could be exposed to imidacloprid if you are applying a product to your yard, on a pet, or in another location and get the product on your skin or breathe in spray mist. Because imidacloprid is a systemic insecticide, you could be exposed to imidacloprid if you ate the fruit, leaves, or roots of plants that were grown in soil treated with imidacloprid. From the submitted product label of a supplier of imidacloprid to the EPA, intended for use by homeowners, comes this series of warnings: The questioner in the podcast was wondering how safe is it to eat the fruit or drink the juice of a lime from his backyard tree. The answer, again: it depends. It depends on the concentration of the Imidacloprid in the product, as well as the harvest date, if any. From an Imidacloprid-containing product label aimed at the home market, here some information in that regard. Note that the label for citrus contains no “Do Not Harvest Fruit Until…” warning. The bottom line: for pest control, identify the pest. Start with the least toxic remedies. Pesticides should be the last resort, if necessary. When using pesticides, READ AND FOLLOW ALL LABEL DIRECTIONS. If employing a pest control company, ask to see the label of the product they are applying. Chances are, they are using a formulation that is more concentrated than what you would find at a garden center. Different concentrations may have different application regulations. This is a public episode. If you'd like to discuss this with other subscribers or get access to bonus episodes, visit gardenbasics.substack.com/subscribe

Aug 19, 2022
Kaboom! Sudden Tree Limb Failure
It happens without warning every summer. A tree branch from an oak, eucalyptus, elm, ash, or other large, old tree crashes to the ground on a warm, non-windy day. It’s a phenomenon referred to as sudden limb failure or summer branch drop. According to the Butte County (CA) Master Gardeners newsletter : “A break due to summer branch drop usually occurs three to twelve feet away from the trunk, along the length of the branch. The broken branches are usually long and horizontal, as opposed to upright, frequently extending to or beyond the average tree canopy. While some limbs that drop show evidence of wounds or decay, many of these failed limbs appear to be quite sound. Older, less vigorous trees seem to be more prone to this problem. Once a tree has lost a limb due to summer branch drop, it is more likely to lose another.” Why sudden limb failure happens is not very well understood. The Butte County Master Gardeners newsletter goes on to discuss the possibility of the combination of drought and ethylene gas, a hormone found in all plants, as being part of the problem: “Drought stress during a hot, calm afternoon reduces the flow of water in the branch, causing the branch temperature and the concentration of ethylene to increase. Ethylene is known to promote the process of cell aging. Elevated levels of ethylene may weaken the cell wall cementation, which when coupled with reduced transpiration and increased root pressure, increases internal sap pressure, moisture content of branches, and limb weight, resulting in branch failure. Old wounds and decay hidden inside a limb, possibly resulting from improper pruning, occasionally contribute to branch drop, but this does not account for the majority of summer branch drop failures. Pruning that encourages uneven growth at the end of a limb can put tremendous stress on the limb due to the added weight of the new growth. Although there is no guaranteed way to prevent summer branch drop, several things can be done to mitigate this hazard in oaks and other commonly affected tree species such as eucalyptus, elm, and ash. On mature trees, shorten and lighten long horizontal branches and open up the tree by thinning to healthy lateral branches to reduce branch weight. Inspect the tree for externally visible defects and prune out damaged or sickly low-vigor limbs that have decay or cavities. Although watering is required to keep most ornamental trees healthy in hot summer climates, don't forget that summer moisture can encourage oak root fungus and other oak pathogens that can kill oaks when the summer-watered area is within 10 feet of the trunk. Finally, do not park cars or place play structures, benches, or picnic tables beneath older, susceptible trees. Falling limbs can't harm people - or property - if they aren't under the tree.” If you own any large, old trees, it pays to hire an arborist to come out and examine your trees. Regular tree inspections every few years can spot trouble before it happens, especially weakly attached branches, injuries, or disease. Many times, though, homeowners choose an arborist without doing their due diligence. Make sure whomever you hire is licensed, bonded, and insured. Under some circumstances you might be held financially responsible if an uninsured worker is hurt on your property, or damage is done to a neighbor’s property. Have more than one arborist submit an estimate. Also, consider hiring a specialist, a consulting arborist. Their job is to tell you what’s wrong with your trees, in writing. “I think a consulting arborist can provide the best value actually, in many cases for a homeowner, when they actually call us before they need us,” Bay Area-based consulting arborist Michael Santos told us in today’s newsletter podcast. “They think their tree is fine. Or maybe they've just acquired the property and these trees are new to them, they have no history with them, and they want to know what they need to do. Oftentimes, a consulting arborist can provide the best value before something negatively has happened to the tree like a large limb failure, or a significant disease has started. Calling us sooner rather than later can really help the longevity and the outcome for their trees.” One professional organization that can help you find an arborist or consulting arborist is the International Society of Arboriculture (ISA), online at Treesaregood.org . At the ISA website, you may enter your zip code or city and obtain a list of certified arborists in your area. In the meantime, watch where you park your car in the summertime. Thank you for listening to the Garden Basics with Farmer Fred podcast! It’s available wherever you get your podcasts. Please share it with your garden friends. As an Amazon Associate, I earn from qualifying purchases from some of the underlined links in the newsletter. This is how I am trying to keep this a free newsletter. And as long as you buy whatever you want from Amazon using any of those links to get into the Amazon site , I get a few pennies. Thank you. Thanks for Subscribing and Spreading the Word About the Beyond the Basics: The Garden Basics with Farmer Fred newsletter, I appreciate your support. Fred Hoffman is also a University of California Cooperative Extension Master Gardener in Sacramento County. This is a public episode. If you'd like to discuss this with other subscribers or get access to bonus episodes, visit gardenbasics.substack.com/subscribe
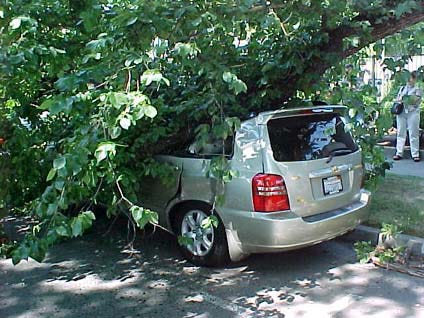
Aug 12, 2022
Roses That Can Take the Heat
“Of all flowers, methinks rose is best” . Shakespeare said that. He lived in Stratford-upon-Avon, about halfway between London and Birmingham, England. However, the roses he saw 600 years ago never endured 100 degree heat…until recently. Although roses were found originally in Central Asia, they spread quickly throughout the Northern Hemisphere between the 12th and 18th centuries. Those old roses wouldn’t stand a chance in the heatwaves of the 21st century, succumbing to scorched flowers, leaves, and buds…as well as dying off due to a lack of regular watering in drought-effected areas. Of course, hybridization of roses in the 19th, 20th and 21st centuries has created varieties that can withstand a number of modern ailments, including air pollution. So, what are the modern roses that can take the heat, when temperatures hit 100 degrees for several days in a row? What are the traits of a heat-tolerant rose? Master Rosarian Debbie Arrington of the Sacramento Rose Society (and the Sacramento Digs Gardening blog) enumerated several in the podcast at the top of this page. Sacramento ( City Motto: “At Least It’s a Dry Heat” ) is no stranger to prolonged, triple digit heat waves, which can occur anytime from May through September. So, the area is a good testing ground for roses that maintain their color, health and vigor throughout spring, summer - and sometimes fall - heatwaves. One trait many of these have in common: these rose bushes produce light-colored blooms of white, pink or yellow. Most red roses, Arrington explains, absorb more of the heat, and will be among the first to scorch. Sorry about that, Bobby Darin . Among the roses on Debbie Arrington’s list of heat-tolerant roses: Iceberg Iceberg is a floribunda rose, a class of roses characterized, according to the American Rose Society’s Handbook for Selecting Roses, by its “profuse ability to bear flowers in large clusters or trusses with more than one bloom in flower at any one time. This class is unrivaled for providing massive, colorful, long-lasting garden displays… Floribundas are hardier, easier to care for and more reliable in wet weather than their hybrid tea counterparts.” Iceberg was introduced in 1958. Julia Child Master Rosarian Charlotte Owendyk of the Sierra Foothills Rose Society loves Julia Child so much, it lines her walkway. A floribunda with medium yellow blooms, this 2005 introduction - one that is also on Debbie Arrington’s list of heat tolerant roses - is also an American Rose Society’s Members’ Choice winner and an All-America Rose Selections champion. Joy One of my favorite miniature roses that blooms it’s little head off, despite being grown in a container, sitting on reflective rocks, facing south, with the hottest side of the house right behind it. Debbie Arrington likes it, too. A pink blend, Joy was introduced in 2007. Joy was an American Rose Society Award of Excellence Winner, as well as an ARS Members’ Choice winner. Here are a few other roses that are heat-tolerant, according to Debbie Arrington. Listen to her descriptions of these roses in the podcast at the top of the page. Shockwave (Floribunda) Day Breaker (Floribunda) First Prize (Hybrid Tea) Baldo Villegas and his namesake rose (mini-floribunda) And, I’m out of room for more pictures. The rest of the heat tolerant roses that Debbie mentions in the podcast: Edisto (miniature) Whirlaway (mini-floribunda) Innocence (miniature) The Drift Series of low growing shrub roses The Knock Out collection of landscape roses, especially Home Run. Thank you for listening to the Garden Basics with Farmer Fred podcast! It’s available wherever you get your podcasts. Please share it with your garden friends. As an Amazon Associate, I earn from qualifying purchases from some of the underlined links in the newsletter. This is how I am trying to keep this a free newsletter. And as long as you buy whatever you want from Amazon using any of those links to get into the Amazon site , I get a few pennies. Thank you. Thanks for Subscribing and Spreading the Word About the Beyond the Basics: The Garden Basics with Farmer Fred newsletter, I appreciate your support. Fred Hoffman is also a University of California Cooperative Extension Master Gardener in Sacramento County. This is a public episode. If you'd like to discuss this with other subscribers or get access to bonus episodes, visit gardenbasics.substack.com/subscribe

Aug 5, 2022
Should Chicken Manure Fertilizer Be Considered "Organic"?
Today’s “Beyond the Garden Basics” podcast takes a closer look at a very popular organic fertilizer: chicken manure. As retired organic landscape consultant Steve Zien of Living Resources Company points out, manures are an excellent soil amendment, especially their contribution to the soil biology. In this day and age, however, should chicken manure still be considered organic? Up to 90% of the corn produced in America is from Genetically Engineered seed. A major part of a chicken’s diet is corn, along with soybeans, of which a substantial portion is also grown with GE seed. Can we trust that what comes out of the other end of those chickens is organic? It depends who you ask. One chicken manure fertilizer supplier, who specializes in organic fertilizers, danced around that topic…anonymously. “I occasionally get this same question from home gardeners. Usually the person asking prefers a more “purist” definition of organic so it’s unlikely that I am going to change their opinion. Dictionary.com : https://www.dictionary.com/browse/organic Organic is: * derived from a living organism * a substance, as a fertilizer or pesticide, of animal or vegetable origin. Chicken manure meets both of these definitions. In addition, the National Organic Program (NOP) is responsible for the regulatory program that is part of the USDA agricultural marketing services that determine crops that can receive the USDA Organic Seal. The NOP clearly indicates that animal manure is an approved input for organic crop production: https://www.ecfr.gov/current/title-7/subtitle-B/chapter-I/subchapter-M/part-205/subpart-C/section-205.203 Most likely the “purist” will not accept that the kale they purchased with the USDA Organic Seal grown with poultry manure is truly organic but that is what the USDA has decided. I usually like to ask; what then is your definition of an organic input? Feather meal, blood meal, meat & bone meal are common organic fertilizer products and are all produced and processed from conventionally raised poultry, swine, or bovine. If the position is that only an organically raised livestock manure can be considered “organic” then the consumer needs to recognize that the organic feed that those organically raised chickens are eating is likely grown with conventionally raised chicken manure or conventionally raised feather meal, etc… Often what I’ve found is the person questioning “is your chicken manure really organic” is more concerned about the about the use of steroids, hormones, and/or antibiotics fed to the conventionally raised livestock. Steroids & hormones are a complete myth with modern farming practices – they are banned by the USDA and not used: https://www.nationalchickencouncil.org/nationwide-survey-reveals-nearly-80-percent-americans-mistakenly-belive-chicken-contains-added-hormones-steroids/#:~:text=hormones%20or%20steroids.-,No%20chicken%20sold%20or%20raised%20in%20the%20U.S.%20is%20given,the%20healthier%20growth%20of%20birds . Antibiotics are occasionally used in broiler operations and rarely used in layer operations. Still, I would argue that even if antibiotics have been used, residual levels do not exist in the manure. The composting process exponentially grows beneficial bacteria and fungus to break down the organic matter in the manure. If antibiotics were present, how would the beneficial bacteria grow? I guess this doesn’t necessarily directly answer the corn GMO question but it’s in the same ballpark.” GMO vs GE If you listened to the podcast, you know we delved into the difference between GMO (Genetically Modified Organism) and GE (Genetically Engineered). University of Vermont Public Radio has an easy-to-understand, mud-filled primer on this topic. Basically, “GMO” has a very broad definition. It’s a plant breeding process that has been around since the dawn of agriculture: plant pollen, being transferred from one plant variety to another plant variety, usually creating a slightly different plant within the same species. Think about the pollen of sweet corn being wind blown (or insect carried) to an adjoining field where popcorn is planted. The result: kernels that won’t pop, they’ll just burn when heated. Every tomato or pepper variety in your garden may be an heirloom variety, but it, too, had a beginning, 50, 100, or hundreds of years ago, when the wind or a bee moved pollen between two different tomato varieties, creating a new variety: a Genetically Modified Organism. Genetic Engineered food, on the other hand, is considered by the FDA as introduced in the 1990’s. One of the first GE foods available to the public? The Flavr-Savr tomato , developed by several UC Davis professors at Calgene in 1994. The tomato was taken off the market in 1998 for a variety of reasons. Unfortunately, language is a virus. And the term, “GMO” is still used in some circles when “GE” is what they are really upset about. Will the “non-GMO” label you read on many food products ever be changed to the more accurate, “non-GE” label? There are no easy answers to the questions raised in this podcast. More research is necessary. And, more gardeners need to be asking the question: what’s really in this bag of fertilizer or soil amendments? Thank you for listening to the Garden Basics with Farmer Fred podcast! It’s available wherever you get your podcasts. Please share it with your garden friends. As an Amazon Associate, I earn from qualifying purchases from some of the underlined links in the newsletter. This is how I am trying to keep this a free newsletter. And as long as you buy whatever you want from Amazon using any of those links to get into the Amazon site , I get a few pennies. Thank you. Thanks for Subscribing and Spreading the Word About the Beyond the Basics: The Garden Basics with Farmer Fred newsletter, I appreciate your support. Fred Hoffman is also a University of California Cooperative Extension Master Gardener in Sacramento County. This is a public episode. If you'd like to discuss this with other subscribers or get access to bonus episodes, visit gardenbasics.substack.com/subscribe
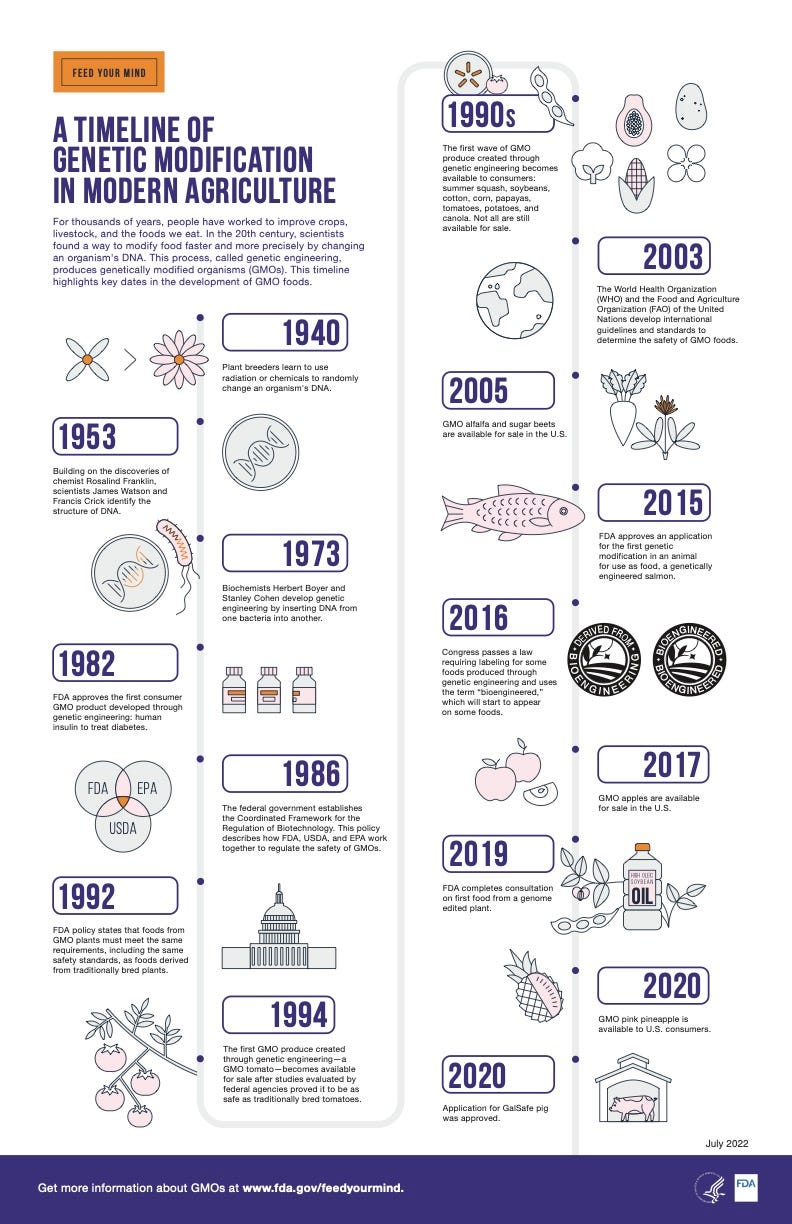
Jul 29, 2022
African Keyhole Gardens
The conversation started innocently enough. Penny Pawl, Napa County (CA) Master Gardener, was chatting with me about soldier flies: ominous-looking, wasp-like creatures who, along with their grubby larvae, might be populating your worm bin or composting bin. You can listen to what she had to say about that in Episode 214 of the Garden Basics with Farmer Fred podcast. Or, read a previous edition (July 1, 2022) of the “Beyond Garden Basics” newsletter where we talked in depth with Sacramento County Master Gardener Susan Muckey about her take on soldier flies. My chat with Pawl then veered into the worm bins that she uses on her property. The collection, she said, included four African Keyhole Gardens, with worm bins. What??? My ears perked up. And we were off to the races! Penny Pawl is certainly a very inquisitive gardener. When she heard about the African Keyhole gardening method, she had to try it for herself. And as you heard in today’s newsletter podcast, hers are a roaring success. So much so, she now teaches classes in African Keyhole Gardens in Napa County. So, what is the history of African Keyhole gardens? Pawl explained them in a column for the Napa County Master Gardeners, entitled “ African Keyhole Garden - Great Garden Idea .” “A so-called keyhole garden bed has a dead end opposite the opening. At the dead end is a compost bin. More than 20,000 of these have been built in Africa. The Texas Master Gardener Association has held a number of workshops to promote this type of garden. There are also standardized plans . Their version is a six-foot-wide garden bed with a twelve-inch-wide bin made of chicken wire in the middle. The gardener fills the bin with compostable material such as moistened newsprint, cardboard, dead plants, kitchen waste and red wiggler worms, the same components of a worm bed. The concept is that the worms will gradually decompose the material and their castings will nourish the soil and plants around the bin. For mine, I decided to use an old garbage can with holes drilled in it. The garbage-can lid keeps out pests and any creature looking for a warm nest. I created the planting bed with building blocks set three high and cemented in place. Alas, I had a big problem with gophers, and I needed to win that battle. So this fall, when it was time to rework the soil, I put a layer of hardware cloth on the bottom. The hardware cloth helps to keep the gophers out. It won't last forever, but it will foil the varmints for a few years. Then a mixture of clean cardboard and soil was placed over the hardware cloth. Since the bed was already in a square keyhole shape, I added the garbage can and put soil around it to hold it in place. I fill this garbage can with the same things I put in my worm compost beds, including red wiggler worms. I have been watering it and feeding it for a few weeks to try to get it working. Eventually, the liquid and castings from the worms and other insects will work its way into the new bed areas and fertilize the soil from below rather than from on top.” Hunt County (TX) Master Gardener John Sanger explained more about the nuts and bolts of building an African Keyhole Garden for gardeners in hot, dry climates in the Hunt County Master Gardener Newsletter, “ On the Grow ”: “The keyhole garden was developed in sub-Saharan Africa to help people grow food in hot, dry conditions – much like we have here in Texas during the Summer months. It is very efficient at holding moisture and retaining nutrients. The keyhole garden is essentially a round raised bed garden built on a compost pile with a central compost basket. The keyhole is a small aisle on one side of the circular garden that enables the gardener to reach the compost basket to add to it or turn it. It also brings the gardener closer to the center of the bed to reach plants more easily. Keyhole gardens get their name from the appearance of the garden as viewed from above. The keyhole garden can be made of anything that can contain the soil. The ideal size for maintaining moisture is about 6 feet in diameter. I like the garden walls to be about two feet tall, as I like to tend the garden from a standing position. People use wood beams, cinder blocks, stacked stones, fencing material, even wine bottles and concrete for their garden walls. To build the garden, lay out a 6-foot diameter circle on the ground. Keep in mind that if you plan to angle your materials inward for strength, you may want to start with a wider base to allow for that angle so that the top of your garden is about 6 feet across. The central compost basket can be a 1-foot diameter cylinder of hardware cloth that will extend about one foot above the final soil level. On my gardens, a 48” wide roll of hardware cloth was the perfect height. Secure the basket with wire and cover the exterior with weed block, burlap, or other permeable fabric. Lay out where you want your keyhole and move your garden wall materials to create an aisle that will allow you to stand near the center of the bed to reach the compost basket. The keyhole garden should be lined with wet cardboard, and then filled with alternating layers of brown and green compost. Browns include lots more cardboard and dry leaves, and greens can include green, leafy material or manure. Alternate layers until the bed is almost full, then top with a rich planting mix. Plant the bed densely so that the canopy of foliage will shade the soil and then add several inches of mulch around plantings. Put compostable materials into the compost basket regularly. When watering the plants, also water the compost basket so that the water will leach nutrients into the surrounding soil. During the hottest months, some gardeners build a frame so that shade cloth can be hung over the garden. If you want to maximize crop output in your vegetable garden even during the hottest and driest months, try a keyhole garden. It is a versatile and efficient design which is easy to maintain and can provide a family with a year-round abundance of vegetables.” As Pawl mentioned in today’s newsletter podcast, ready-to-use, African-style Keyhole Gardens are available from many retail sources, including Amazon . However, the whole original concept of the African Keyhole Garden was to implement a productive garden for those who couldn’t afford much and wanted to use easily obtainable materials. For more information about building one yourself, check out the “ Field Guide to How to Build a Keyhole Garden” with Dr. Debbie Tolman . Do an internet search for “African Keyhole Gardens” pictures. And you may find an image of one that appeals to your senses…and budget. Thank you for listening to the Garden Basics with Farmer Fred podcast! It’s available wherever you get your podcasts. Please share it with your garden friends. As an Amazon Associate, I earn from qualifying purchases from some of the underlined links in the newsletter. This is how I am trying to keep this a free newsletter. And as long as you buy whatever you want from Amazon using any of those links to get into the Amazon site , I get a few pennies. Thank you. Thanks for Subscribing and Spreading the Word About the Beyond the Basics: The Garden Basics with Farmer Fred newsletter, I appreciate your support. Fred Hoffman is also a University of California Cooperative Extension Master Gardener in Sacramento County. This is a public episode. If you'd like to discuss this with other subscribers or get access to bonus episodes, visit gardenbasics.substack.com/subscribe

Jul 22, 2022
What to Do With All Those Berries?
Back in Episode 212 of the Garden Basics with Farmer Fred podcast , we chatted with Sacramento County (CA) Master Gardener Pam Bone - an expert caneberry grower - about summertime problems with backyard blackberries, raspberries, boysenberries and other caneberries. The question arose: “So Pam, what do you do with all those berries?” She marched us into her kitchen to show us a freezer filled with jam, especially the jars and jars of her specialty, raspberry jam. She shared her favorite recipes and tips here, in the newsletter podcast. Below are the details of three of her favorite recipes using homegrown berries. Best of all, Pam says these are all easy to make. Pam is justifiably proud of the popularity of her raspberry freezer jam . “I’m known far and wide for my raspberry freezer jam,” she told us. “People are always begging for it.” The popularity could be due to its simplicity. She says: “It’s just fresh fruit and sugar.” And if you listened to the above podcast, she freely admits it’s a recipe straight from the box of Sure Jell: ====================================================== Pam also freezes raspberries whole, for two of her other favorite concoctions, one of which is a raspberry Jello recipe, named after a long time friend and day care provider, Alba: ==================================================== The final recipe Pam shares with us is one that can utilize all the berries in the garden, Berry Crisp. Thank you for listening to the Garden Basics with Farmer Fred podcast! It’s available wherever you get your podcasts. Please share it with your garden friends. As an Amazon Associate, I earn from qualifying purchases from some of the underlined links in the newsletter. This is how I am trying to keep this a free newsletter. And as long as you buy whatever you want from Amazon using any of those links to get into the Amazon site , I get a few pennies. Thank you. Thanks for Subscribing and Spreading the Word About the Beyond the Basics: The Garden Basics with Farmer Fred newsletter, I appreciate your support. Fred Hoffman is also a University of California Cooperative Extension Master Gardener in Sacramento County. This is a public episode. If you'd like to discuss this with other subscribers or get access to bonus episodes, visit gardenbasics.substack.com/subscribe

Jul 15, 2022
Garden Shows for the Nose
GARDEN SHOWS FOR THE NOSE Looking for a garden show for your nose? There are a wide variety of fragrant plants that do well in various USDA zones, providing olfactory pleasure at various times of the year. Besides such sensory stalwarts as gardenias and roses, there are many other aromatic perennials and shrubs that can add a welcome scent to your evening stroll through the yard. • Brugmansia versicolor ‘Charles Grimaldi’ (pictured above, USDA Zones 9, 10). Also known as “Angel’s Trumpet”, this is a fast-growing, flowering shrub that can get 10 feet tall in two or three years. The show-stopper part of this plant is the nearly non-stop bloom in mild areas. This Brugmansia features huge (over a foot long), yellow, trumpet-shaped flowers. An added bonus in late spring and early summer is the warm evening aroma of those blooms, when the air is still: a perfume-like scent that hits your nose as soon as you step into the yard. It does best with some afternoon shade and regular watering. A word of warning about this plant: all parts are considered poisonous, so it may not be right for the gardener living with indiscriminate munchers, either pets or children. However, there are plenty of other plants available that give off a warm-weather show for the nose in the evening: • Nocturnal daylilies (Hemerocallis) . Most USDA zones. Nocturnal daylily flowers open late in the afternoon and stay open throughout the evening until the morning. Many named hybrids are available, including the fragrant Arctic Ruffles, Nathan Carroll, Full Moon Rising and Winds of Tide. • Tuberose (Polianthes tuberosa). Most USDA Zones. The blooms of this perennial tuber, a native of Mexico, will fill your backyard with a heady scent during summer evenings. The grass-like leaves can get to three feet tall, with white, tubular flowers clustered at the top. A good choice for containers, the tuberose needs regular water to look its best. If your winter temperatures stay above 20 degrees, the rhizomes can stay in the ground all year. Otherwise, lift and store in a protected area. • Flowering Tobacco (Nicotiana sylvestris) . Most USDA zones. The fragrant, tubular flowers of this tender perennial (usually planted as an annual) are attractive to hummingbirds and butterflies. The plant itself gets about four to five feet tall and two feet wide. Another flowering tobacco variety with great nighttime aroma is the ‘Grandiflora’ (Nicotiana alata). • Four O' Clocks (Mirabilis jalapa ). (Most USDA zones; treat as an annual in colder regions.) This tuberous rooted perennial grows quickly to three feet high and wide, with trumpet-like flowers in white, red or yellow that open at about the time you get home from work. Although the top will die back from a freeze, it will usually sprout the following spring. • Star Jasmine (Trachelospermum jasminoides ). (USDA zones 7-10) A popular evergreen twining vine. It is most noted for the fragrance of its small, white flowers this time of year. Can be used against a trellis, or as a spreading ground cover. Does well with afternoon shade and regular water. • Moonflower (Ipomoea alba). (USDA zones 9-10, treat as a summer annual elsewhere). A relative of the morning glory, the moonflower is a perennial vine that shoots up 20 feet or more in one season, perfect for a fence or trellis. The six-inch white flowers are quite fragrant, and open in the evenings or cloudy days. • White Evening Primrose (Oenothera caespitosa) . (Most USDA zones). Grows about a foot tall and wide. This perennial has fragrant, three-inch white flowers that put on their profuse blooming show during summer evenings. Other fragrant shrubs for daytime aroma • Banana shrub (Magnolia figo, formerly Michelia figo ). (USDA Zones 8-10). This evergreen shrub has small, yet very fragrant pink/cream flowers during April and May. The late afternoon aroma may remind you of Juicy Fruit gum. Grows slowly to 8 feet. Prefers partial shade. • Sweet olive (Osmanthus fragrans ). (USDA zones 8-10). The scent of the flowers of this 10-foot tall evergreen shrub in spring and early summer will conjure up images of apricots. Heavy bloom in late spring through early summer, but will bloom sporadically throughout the year in mild winter areas. • Sweetbox (Sarcococca ruscifolia ). (USDA zones 8-10). An evergreen shrub for shady areas, sweetbox is at its most fragrant during late winter and early spring. • Winter Daphne (Daphne odora ). (USDA zones 8-10). This evergreen shrub solves two vexing garden problems: a plant that thrives in full shade (part shade in cooler areas); and, produces fragrant blooms in December and January. One of the best for New Year’s aroma, it can be a fussy plant, it needs good drainage, and it does better with less water during dry periods. Just give it enough to keep from wilting. And good luck. • Wintersweet (Chimonanthus praecox ). (USDA Zones 8-9) This rangy (10-15 feet high) shrub produces spice-like yellow flowers before it leafs out each winter. It prefers the colder areas in those zones. Put it in a protected area to avoid frost damage, ideally near a door or window. • Sages (Salvia) . (Zones vary by species. Salvia officinalis is one of the hardiest). The California Native Plant Society says the state’s many native sages are all fragrant, but Cleveland sage (Salvia clevelandii) is in a class by itself. Most sage varieties prefer full sun; natives such as the Cleveland sage can get by with little water. This evergreen small shrub has gray foliage is aromatic, and its lavender flower spikes are perfumed, attracting hummingbirds and bees, as well as your nose. • Gardenia. (USDA zones 8-10, hardy down to 20 degrees). Of the many gardenia varieties that do well, the “Mystery”, “Kleim’s Hardy”, “Summer Snow”, “Veitchii” and “White Gem” are noted for their fragrance. Wherever azaleas and rhododendrons thrive in your yard is where a gardenia would like to be: in part shade, acid soil, regular watering. Feed with an acid based fertilizer. • Pelargoniums. (USDA zones 8-10, grown as an annual elsewhere.) Commonly referred to as geraniums, they are not a true geranium. Many scented geraniums are available, noted for their aromatic foliage. According to the Sunset National Garden book, scented varieties usually have names that include the words, “apple” (Pelargonium odorartissimum), “lemon” (P. crispum), “lime” (P. nervosum), “peppermint” (P. tomentosum) or “rose” (P. capitatum or graveolens). Tolerant of heat and humidity. Why Do Certain Aromas Trigger Long-Ago Memories? From Discovery Magazine, Nov. 27, 2019 : Our nose can evoke powerful, vivid memories if it catches a familiar scent. The smell of pine needles may take you back to summer camp, a roasting turkey transports you decades in time to grandma’s house for the holidays. This powerful connection between scent and memory is sometimes called the Proust phenomenon , a nod to French author Marcel Proust, who eloquently described a potent memory of childhood evoked by the smell of a madeleine biscuit dipped in tea. But the link is more than literary. Smell is the only sense that doesn’t pass through the thalamus before reaching the forebrain. The thalamus functions as an operator switchboard of sorts, connecting sensory inputs from our eyes, ears, tongue and touch to the right parts of the brain so we can register and make sense of them. But scent bypasses this switchboard entirely, in favor of a direct line. What’s more, the bundle of nerves that detects scent molecules, the olfactory bulb, has a high density of connections near the amygdala and hippocampus, which are involved in emotional response and memory formation, respectively. That's why smells make our brains form strong, emotionally salient memories and at a subconscious level. And Finally, Repurposing Garden Tools Thank you for listening to the Garden Basics with Farmer Fred podcast! It’s available wherever you get your podcasts. Please share it with your garden friends. As an Amazon Associate, I earn from qualifying purchases from some of the underlined links in the newsletter. This is how I am trying to keep this a free newsletter. And as long as you buy whatever you want from Amazon using any of those links to get into the Amazon site , I get a few pennies. Thank you. Thanks for Subscribing and Spreading the Word About the Beyond the Basics: The Garden Basics with Farmer Fred newsletter, I appreciate your support. Fred Hoffman is also a University of California Cooperative Extension Master Gardener in Sacramento County. This is a public episode. If you'd like to discuss this with other subscribers or get access to bonus episodes, visit gardenbasics.substack.com/subscribe
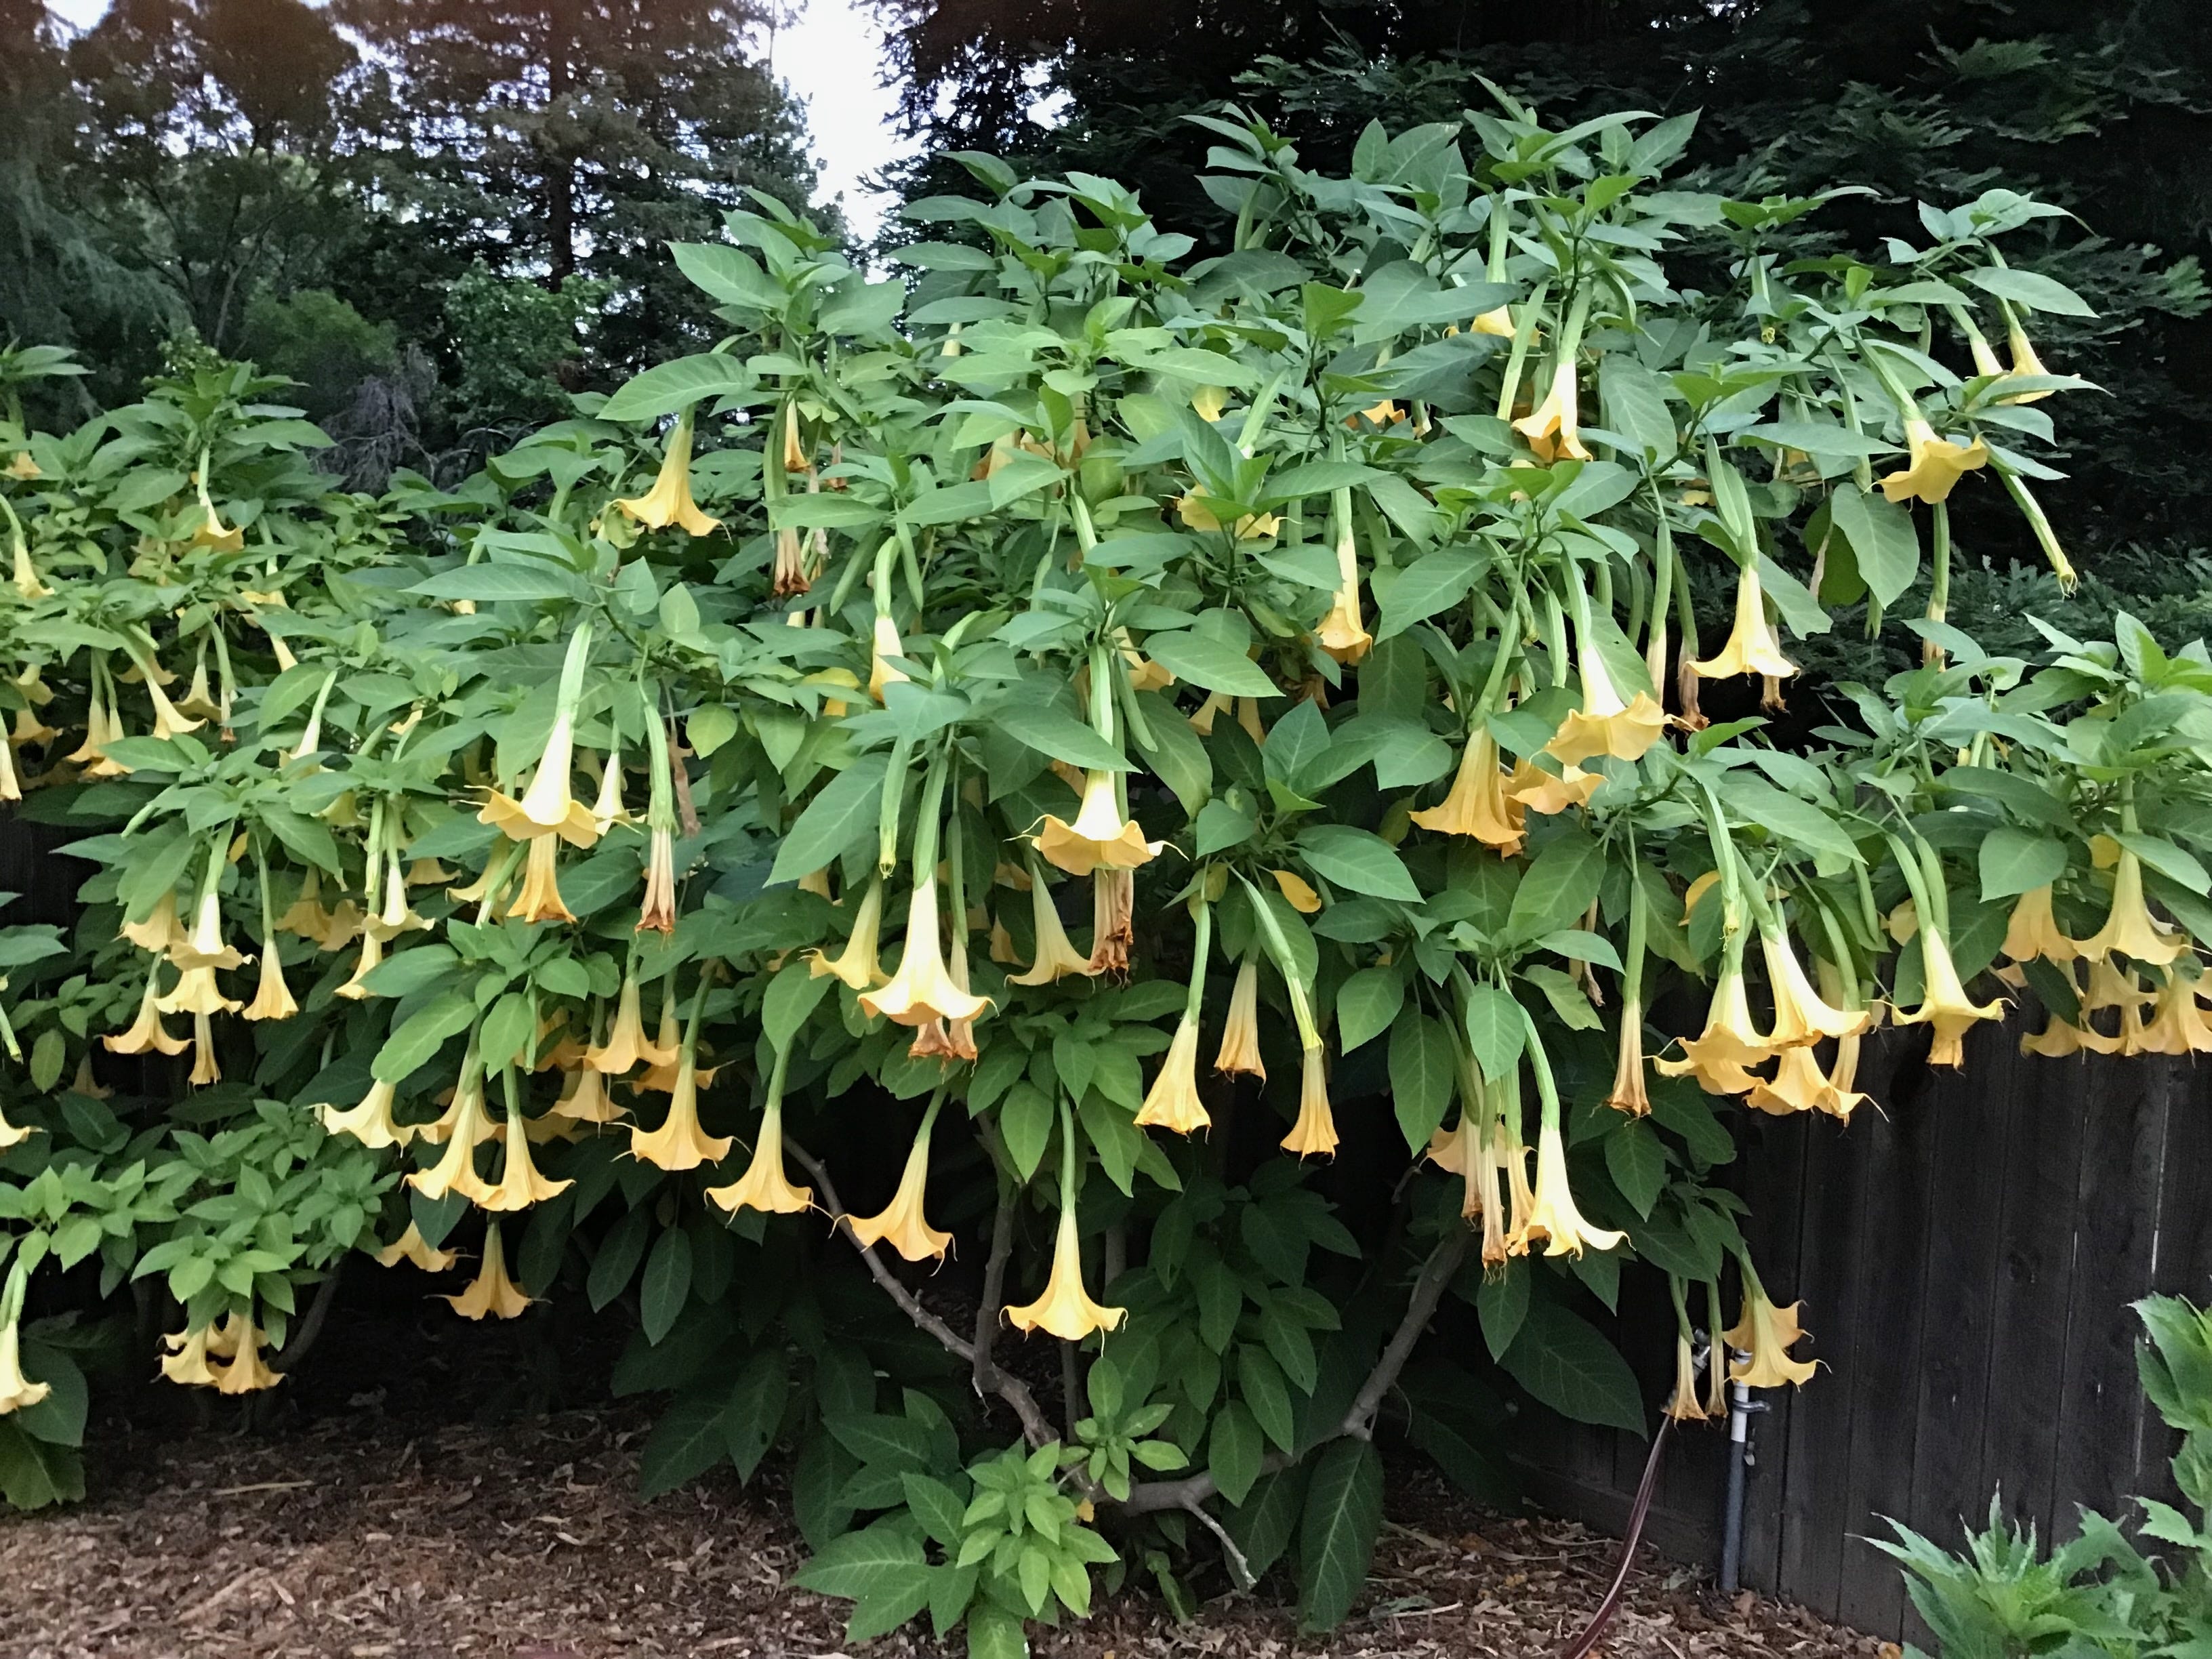
Jul 8, 2022
Why You Don't Want To Use Fertilizer or Rooting Hormones When Planting Trees and Shrubs
In this podcast, retired college horticulture professor Debbie Flower explains about the use of rooting hormones and fertilizers for newly-installed plants. You’ll find out: How rooting hormones work. How auxins (the rooting stimulant in root hormones) can either inhibit or promote growth. Why you don’t want to use rooting hormones on an established plant or transplant. Why you want to cut the roots of a tree or shrub before planting. Why you don’t want to add fertilizer at planting time. The benefits of “paper hats” on new plantings. And if you are using kelp or seaweed products as a root stimulator, you’d be better off spending your money on water and mulch. According to the Washington State University study, “The Efficacy and Environmental Consequences of Kelp-Based Garden Products” : “• There is no documented benefit to applying plant hormones to newly planted or established plants in gardens and landscapes. Hormones are produced naturally by the plant and transported to the tissues that require them. The two most important additions new transplants require are water and mulch. • Good quality research on kelp- containing biostimulants has been performed by several researchers in different climatic regions using different species of woody plants in natural settings. None of them reported success: • Roots of newly planted trees treated with biostimulants showed no improved growth compared to control trees. (Barnes and Percival 2006; Gilman 2004; Popenoe et al. 2017). • The best performing trees and shrubs were those that were irrigated frequently for 38 weeks post installation (Gilman 2004) or received a simple topdressing of pine bark mulch immediately after planting (Figure 3; Abbey and Rathier 2005). * Trees treated with biostimulants and assessed two years after planting were not significantly different than those receiving only water (Kelting et al. 1998). * No biostimulant was able to confer increased protection to shrubs and trees against drought or salt damage compared to plants treated with water (Banks and Percival 2014). * Researchers who tested biostimulants that were reported by local growers to be highly effective could find no evidence to support that belief (Popenoe et al. 2017). In fact, some of the products were worse than the controls. “ Click Here for the Farmer Fred Smart Pot Discount! Here’s a transcript of today’s newsletter podcast: Farmer Fred 0:00 Ray sent us an email, to Fred at farmerfred.com. He says, "I recently bought some fruit trees, and the label mentioned using a rooting stimulant for transplanting. In further research I found that certain root stimulants are illegal in California. Do you know why?" I bet it's because there's something else in that stimulant, Ray. The stimulants themselves may not be the problem. But with more information on that, we bring in America's favorite retired college horticultural Professor, Debbie Flower, who is probably going to snuff your dreams, right? Debbie Flower 0:35 Root stimulants typically contain, not all of them, but typically contain synthetic auxin. Auxin is a plant hormone, it's produced by the plants, produced in the buds, which is why you don't always want to remove the buds at the tip of the stem. It's produced in the buds and it controls the growth of the plant. At certain concentrations, synthetic hormones will prevent growth. At other concentrations, it will promote growth. When it's applied externally to roots, it has different and fewer effects on the plant. It's not stimulating root growth per se. It's actually subduing above ground growth in favor of the roots growing. Farmer Fred 1:15 Yeah, that sounds like the purpose of phosphorus. Debbie Flower 1:18 Well, no. The auxin stimulators, IBA and NAA, are two of the auxin stimulants. If you put it on a broken stem or root, and there will be broken roots on a transplant, then it can be absorbed into the vascular system and do its job at the right concentration, stimulating cell growth. And so there is some of that going on. And that's why they're used in cuttings. But when you're just buying an already rooted plant, a healthy plant, applying the stimulant to the roots doesn't directly cause them to grow better. So that's one thing. Another is that root stimulants often contain fertilizer. And the ones that I found that were illegal in California, they don't say illegal, they just say 'Not for use in California", or, "Not registered for use in California". They have fertilizer in them, nitrogen, phosphorus and potassium. And excess fertilizer is a pollutant. It's the reason we get overgrowth of algae in streams and rivers. That overgrowth kills the life, the animal life, fish, frogs, whatever, in the water body, and we upset the ecosystem. And so the stimulants in California that have the fertilizer in them are not labeled for use in California. Growth regulators, which root stimulants are, are lumped in with pesticides as far as licensing is concerned. So they have to first be licensed by the US Environmental Protection Agency. And then at least in California, and in other states. I know New York, Maryland, Virginia, for sure. I'm sure there are lots of other states that go through this process as well. In California, it is the California Department of Pesticide Regulation. They have to then look at the product again, and decide whether it will be legal in the state. So different growth regulators are available in different states because the states have decided to allow them to be or to not allow them to be part of the product. Farmer Fred 3:16 Ray mentioned one that has a lot of phosphorus in it. It was a 4-10-3, which means 4% nitrogen, 10% phosphate, 3% potash. Phosphate is not illegal in California yet. So I think the reason that it wasn't for use in California had to do with the instructions. And this goes back to what we always say, read and follow all label directions. This particular root stimulant said that you could not apply it on food crops. It was okay for ornamental plants, but not for food crops. Debbie Flower 3:31 I read some items that also discussed grain and grass production, because those are done in big fields. So I think it was prohibited there as well. Farmer Fred 4:00 Yeah, we're gonna see a lot less phosphorus on the shelves, I think. That big middle number is going to disappear, right? Debbie Flower 4:07 We seen it disappear in laundry detergents, because of its ability to cause pollution in runoff. It's been a while now, but there was a worldwide shortage of phosphorus for a while. And we in horticulture and agriculture, at least some of us figured out, we don't need near as much as we thought we did to produce the plants. It cost money to buy fertilizers, so there was some natural cutback there. But yes, we need to take care of our planet. And unfortunately, Americans believe if a little is good, a lot is better. And that ends up as runoff and pollution. Farmer Fred 4:49 So how can you naturally encourage roots to grow? Debbie Flower 4:52 Have the proper soil. So that means it has the ability to hold moisture and nutrients and it drains well. Then water it appropriately. And that's gonna vary on your soil, your location, your sun-shade location, whether you're on a slope or not, you don't want it to dry out so completely that the roots can't grow and they die; and you don't want it to absorb so much moisture that they drown. So having the right media for your situation, and using the correct cultural practices, Farmer Fred 5:22 We are fond of also saying on the show, "right plant in the right place" And we should point out, "right plant, right place, right time". You don't want to do any transplanting in the heat of the summer, or in very cold , wet wintry conditions. So consider that, too, to encourage roots to grow. Keep them relatively moist and let them get established. The other thing you've pointed out in past episodes, too, that bears repeating here is: when you are transplanting into the ground, discourage the use of fertilizer. Debbie Flower 5:53 Yes, because it can burn. Whenever you transplant from a container, or if you're buying a ball and burlap, or if you're buying a bare root. In all cases, the roots have been or will be damaged in the process of planting them. The roots are also probably damaged when the commercial growers are getting the transplants out of the growing field. And you can't avoid that. That's just part of the game. In fact, it's encouraged that you at least cut the roots so that you don't have any circling, girdling, roots over time. So you're doing damage, then you put the plant in the ground. Now you've got open wounds in the root system, which can be burned by fertilizers when they're in the form that can be absorbed by the plant or in the salt form. It's not exactly the same thing, but think about if you pour salt in an open wound on your body. Okay, you don't want to do that to your plant. The part of the root system that absorbs the water and nutrients is the root hairs. They are the most delicate parts of the root. They're typically at the ends of the root, or the root branches. And they're right there and they get harmed in this process. So the plant kind of can't do anything for a few days. It takes a few days for them to produce new root hairs. You don't want anything to impede that. You don't want to burn those broken root parts. So, plant the plant, water it well, and then walk away. Or if it's possible, shade the plant for a few days. I've been known to make little caps out of newspaper and lay them on the plant and then hold them down with something just a rock. Sure, they blow away. I just go collect them. But it's just about three to five days that you need to shade, give the plant a little more shade, so it can produce new root hairs and be able to absorb the water. Farmer Fred 7:41 When you were sick, as a youngster, I imagine that if you came home from school, and you didn't feel good, and you just sort of plopped down on the couch, mom or dad might throw a blanket over you. Not a bad idea after you've transplanted a plant, too, is maybe to add some mulch on top. Debbie Flower 7:56 Yes, mulching the soil is always a good thing. Make sure it doesn't touch the trunk or where the stems of the plant go into the ground, because you don't want to trap moisture there and cause other problems. But mulch controls moisture loss. It prevents compaction from water hitting the soil from above. Because water can actually cause soil compaction. It breaks down if it's organic mulch, it breaks down and makes nutrition that the plant can use at a quantity that the plant can use. It's a very desirable thing to have organic mulch over your root systems. Farmer Fred 8:31 And it helped keep weeds away, too. Debbie Flower 8:32 Yes, it does. Farmer Fred 8:34 All right. So there you go. Well, we hope that helps you as far as figuring out what you need to really get your plant off to a good start after you've transplanted that fruit tree into its new home. And you probably don't need to buy some sort of rooting hormone. So there you go. Debbie Flower, thanks so much for your help on this. You're welcome Fred. Thank you for listening to the Garden Basics with Farmer Fred podcast! It’s available wherever you get your podcasts. Please share it with your garden friends. As an Amazon Associate, I earn from qualifying purchases from some of the underlined links in the newsletter. This is how I am trying to keep this a free newsletter. And as long as you buy whatever you want from Amazon using any of those links to get into the Amazon site , I get a few pennies. Thank you. Thanks for Subscribing and Spreading the Word About the Beyond the Basics: The Garden Basics with Farmer Fred newsletter, I appreciate your support. Fred Hoffman is also a University of California Cooperative Extension Master Gardener in Sacramento County. This is a public episode. If you'd like to discuss this with other subscribers or get access to bonus episodes, visit gardenbasics.substack.com/subscribe

Jul 1, 2022
What's That Critter in My Compost & Worm Bins?
In Episode 206 of the Garden Basics with Farmer Fred podcast , we did a deep dive into worm bins (Oops. That sounds like a new, bad reality sports competition TV program). Sacramento County Master Gardener Susan Muckey told us everything we need to know to start vermicomposting, the end result being raising worms to create excellent quality compost for your garden. One thing she warned us about is mentioned in the short podcast segment, above. And it may be a critter that might have initially shocked you when you opened up your worm bin or turned your compost pile: the soldier fly. The adults look like inch-long black wasps and do a fair share of loud buzzing when disturbed. But the soldier fly is harmless...to you. They do not bite, they only live a couple of days, usually die soon after having sex and laying eggs on the tops of partially composted kitchen scraps. Some critters have a nice life. The soldier fly larvae - the maggots - are also about an inch long, gray-white, and segmented. When exposed to light, they will scurry deeper into the compost bin, where they are voracious feeders on decaying, nitrogen-rich foods. Those maggots are very good decomposers of organic material, helping along the process in your compost bin. According to Oregon State University , the soldier fly also inoculates the compost with beneficial bacteria from other sources. Because they are such efficient feeders of manures, their presence can limit the growth of nuisance fly species in that same manure pile. Soldier flies can be found throughout the U.S., wherever there is moist, rotting food. Depending on the composting system, soldier flies and their larvae may be either good guys... or a major detriment. In a regular composting bin, the soldier fly larvae are a welcome addition, speeding along the decomposition. Soldier flies do such a good job digesting your garbage, there are websites that will be glad to show you how to build a system to raise soldier flies. It is their appetite that is a double edged sword for home composters, especially vermicomposters. In a vermicomposting system - a worm bin such as the Can O' Worms - soldier fly larvae are competing with the worms for food. Plus, they consume so much material, they generate a lot of heat. And in the summer, that may be more heat than your composting worms would be willing to tolerate. Temperatures over 90 degrees will bring worm work to a near halt in a worm bin, or worse, unless you work to keep them cooler. For worm aficianados, several university studies offer these tips if you want to remove the soldier flies and their larvae from your vermicomposting system and attempt to keep them out: • Make sure you have enough leaves, dry grass, shredded paper and other organic "brown" material in the pile to cover the nitrogen food sources by at least two to four inches. • Be sure to bury food scraps deeply in the pile and cover them well. • Put window screen over any holes in the bin and glue it down with a waterproof caulking (like an exterior household caulk) on the inside of the bin to help exclude the flies in their egg laying stage. • Birds love soldier fly larvae so you can remove them and feed them to chickens. Or just toss them on the ground and other birds may find them. Or, remove the maggots and put them into another compost bin or pile. Of my composting systems, my favorite is the Tumbleweed, which produces usable compost quicker than the Can O' Worms ...but the Can O' Worms is more fun! Even with the maggots. If you can’t find the Tumbleweed, there are plenty of other tumbling compost bins. And if the Can O’ Worms is unavailable, there are lots of stacking worm tray vermicomposting systems , too. More information about small scale vermicomposting from the University of Hawaii . A good book about vermicomposting: " Worms Eat My Garbage " by Mary Appelhof. And if you want to get into the business of raising soldier flies to control manure piles in stalls, coops, barns and corrals, (or as chicken or tropical fish feed or exotic animal feed) you’ll need to feed the young maggots. And yes, someone (the University of Georgia) actually studied what’s the best food for soldier fly larvae. Here’s that study . One interesting factoid from that study: one of the food recipes used in their experiments was developed by Purina (insert your “Chow” joke here). More reading about Soldier Flies: Black Soldier Flies: Mostly Beneficial Black Soldier Fly Larvae in Worm Bins The Good Soldier Finally, don’t confuse the Soldier Fly with the Soldier Beetle. The soldier beetle is a garden good guy. The adult (pictured above) feeds mostly on nectar and pollen (hence, a pollinator), but some adult species also enjoy aphids and other plant sucking insects. But, its larvae (pictured below), which can spend three years in the soil or organic litter, feed on, according to North Carolina State University , “caterpillars and other hapless insects they encounter as they crawl about.” Thank you for listening to the Garden Basics with Farmer Fred podcast! It’s available wherever you get your podcasts. Please share it with your garden friends. As an Amazon Associate, I earn from qualifying purchases from some of the underlined links in the newsletter. This is how I am trying to keep this a free newsletter. And as long as you buy whatever you want from Amazon using any of those links to get into the Amazon site , I get a few pennies. Thank you. Thanks for Subscribing and Spreading the Word About the Beyond the Basics: The Garden Basics with Farmer Fred newsletter, I appreciate your support. Fred Hoffman is also a University of California Cooperative Extension Master Gardener in Sacramento County. Come visit the composting displays and worm bins on Harvest Day, Aug. 6, 2022 at the Fair Oaks Horticulture Center. This is a public episode. If you'd like to discuss this with other subscribers or get access to bonus episodes, visit gardenbasics.substack.com/subscribe
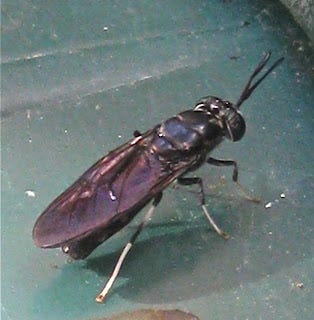
Jun 24, 2022
Backyard Chicken Egg Care Tips
On today’s newsletter podcast segment, Cherie Sintes-Glover, Urban Chicken Consultant and proprietor of the website ChickensForEggs.com , has egg care tips for backyard chicken flock hobbyists: should eggs be stored in the refrigerator or on the kitchen counter (it depends)? Should you wash the eggs, and what temperature should that water be? (It’s important!). Which eggs make the best hard boiled eggs? How can you determine if an egg is past its prime? How many eggs will a hen lay in its lifetime? How do you get your chickens to lay more eggs in the winter? And why you don’t want a heat lamp near your chickens. More chicken care tips, including how to take care of your backyard flock during a summer heatwave, on the Get Growing with Farmer Fred podcast, Episode 204 . Also on Episode 204 of the Garden Basics podcast : why you might want this chicken breed as part of your flock: For those who would rather read than listen, here is the transcript of the full conversation about backyard chicken care with Cherie Sintes-Glover on Episode 204 of the Garden Basics podcast. It includes information about thwarting avian flu, dietary supplements to use (and the ones to avoid) for your chickens in heat waves, and how chickens adjust their body temperature in the heat. You’ll still have to listen to the egg tips presented in the podcast at the top of the page. No transcript for that. From Episode 204 of the Garden Basics with Farmer Fred podcast: Farmer Fred If you've been in a supermarket lately, you may have seen the prices of eggs you may have seen the prices of chickens, maybe some of you are thinking maybe it's time we get ourselves a chicken and have our own eggs. Well before you do that you want to hear what my next guest has to say. Cherie Sintes-Glover is an urban chicken consultant. She is a certified poultry health inspector as well, and runs a wonderful website, chickensforeggs.com. Plus she does seminars as well Zoom classes. Cherie, the rising prices of eggs and chicken. This isn't because of the war in Ukraine? I think it's the avian flu, isn't it? Cherie Sintes-Glover That's a great question. I think it's a little bit of everything right? It's anytime there's an opportunity for prices to go up. They seem to be going up. But yeah, chicken, gosh, chicken eggs are going for? I think I've seen them as high as six or $7 a dozen in some stores. And it depends on which ones you get. If you get the quote unquote, “organic farm fresh raised eggs” versus the regular, just old-fashioned white ones from Costco. But yeah, the prices have just been skyrocketing. Farmer Fred I have not seen $2 a dozen eggs in quite a while now. Cherie Sintes-Glover No, no. And even the people on your average farm that are selling eggs at a roadside stand, they're raising their prices as well. I think it's because chicken feed costs have gone up a little bit. But anytime there's a rise, we have to kind of keep up with that. And right now, because of that, more people are actually thinking about raising their own chickens. And especially with the uncertainty for a long time, we weren't sure what would be available in the stores or what would be running low. There's still times when I go into Costco and there's no paper towels. So people are trying to think outside of the box or maybe in the box if they haven't already taken that dive into backyard chicken-keeping, like during COVID times. Now they're really considering it, because of the expense and the cost. They want a backup plan. Farmer Fred And one nice thing too, when you raise your own chickens, is the quality of the eggs. They're colorful, they have a nice, deep, rich yellow yolk, and they're much more tasty than what you're gonna find at a grocery store. Cherie Sintes-Glover They're very different. In fact, people are often just kind of shocked and surprised at how flavorful their eggs are. The ones that they have in their own backyard. Chickens that they've raised themselves compared to the ones that they can buy in the supermarket. And the reason for that is just really comes down to that chicken’s diet. So backyard chicken keepers, their flocks are typically searching around in the backyard for bugs and all those wonderful grass weed nuggets out there that they can grab. So because of that they're nutritionally increasing their diet with all of those great nutrients. And that's what makes that yolk just a bit more orange. But what's funny too, is that sometimes even the breeds will make a little bit of a difference. And there is for instance, in our laying flock that we have, I’ll crack open three or four different types of eggs and each of those yolks will be a different color. So it lets me know who's maybe foraging more than the others, perhaps. Farmer Fred Let's talk a little bit about avian flu. It is decimating flocks throughout the country. I know up in the northwest and back east, something like 35 million chickens have been culled, which, by the way is a euphemism, because of the avian flu. Cherie Sintes-Glover There are so many different types of avian flu, people typically don't realize that the one that's circulating right now is the highly pathogenic avian influenza, which is known as the HP A1. In this one, they actually feel it's the worst one since 2015. And back then, in 2015, they had about 50 million birds that were euthanized. So we're getting close to that number, but we're watching it closely because throughout the United States it is beginning to spread. It hasn't luckily, knock on wood, has not reached California. But it has gotten as close as Oregon and Washington. So we are keeping an eye on it. And people need to realize that this is mostly inhabiting wild fowl, and we're talking about wild birds such as ducks and geese that are migrating out there. Although there have been cases within backyard flocks there. They've been minimal, but they are asking people to take certain precautions, especially if they happen to live by large waterways. So waterways or it's funny, the USDA on their website, it talks about lagoons. Luckily, I don't think we have a lot of lagoons here in Northern California. But as we know, the way that the Pacific Flyway goes, all of those migrating ducks and geese are going to be flowing down through California to get to Mexico (this fall). And I think that's what they're trying to be preemptive with. And they want to make sure that people are not only educated but just informed about the flu, this avian flu, and what they can do to protect their own backyard flocks. Farmer Fred Well, give us some quick tips on protecting backyard flocks from avian flu. Cherie Sintes-Glover Oh, sure. So there's a couple of things that backyard chicken keepers can do. And one of them is just use really good biosecurity. And we've heard this before, right. It's things like limiting access to your property to where your chickens are, you want to make sure, too, that you don't have waterfowl, wild ducks and geese, that can actually get into where your coop is located. That's a big one. So having an enclosed coop is always a good thing. We had neighbors that had a duck flock out in their yard. And as it turned out, they have a little pond. Well guess what, one day they walked out and they actually had some wild ducks visit them. Something like that can be definitely a sensitive area and are in or risk for a lot of backyard chicken keepers as well. So doing things like keeping that biosecurity, maybe having a foot bath, limiting that access, those are going to be the key things that most will be able to do to keep their flock safe. Farmer Fred Right . You mentioned foot bath and during the last avian flu outbreak, I remember the emphasis that was placed upon basically wiping off your shoes, cleaning your car tires, and not tracking any of the detritus from an infected flock to someplace else. Cherie Sintes-Glover It's amazing how we as the human person, as the chicken keeper, can actually be the vector, which is basically the module of movement for viruses, we can track things into our own coop without even realizing it. So the easiest footbath to do is to get one of those basins from say, Home Depot, or one of those hardware stores. What you do is you take one of those rubber or plastic mats, you lay that on the bottom, and you basically do a bleach and water solution, it needs to just be super simple, it doesn't have to have a lot of bleach in it, I believe it's a tablespoon for every gallon. And then what you'll do is you can literally just put your shoes in, it doesn't even have to be that deep, you do a quick wipe of your shoes or your special chicken boots on that mat in the water. And that will do the trick. Another thing that's super easy is to basically have a chicken sprayer, or just a regular backyard garden sprayer, where you have the bleach solution. And you can use that sprayer to actually spray your shoes or your boots before you go in or out of your chicken area. And I would do the same thing with visitors. For instance, I had a delivery from our local feed store and that's what we did. I actually sprayed the delivery person's shoes and boots so that he could deliver the feed that we needed. Farmer Fred All right. So this is important if you're thinking of starting up a little backyard chicken operation of your own to get some eggs, for example. Practice biosecurity when there is an avian flu outbreak, and it does happen every few years or so. And so you may want to invest in rubber boots. Cherie Sintes-Glover Yes. Basic rubber boots for work or shoes that you can easily clean. You know, for us our regular tennis shoes are just a little tougher to clean. But something else that was interesting that I read was something we might not always think about: duck hunters, right? So duck season is coming up in the fall. And if you happen to have your own backyard flock and you go out on Saturday to go duck hunting, you're going to be in that environment with waterfowl. And the recommendation was actually to make sure that you don't walk with your hunting gear, your clothing, your boots that you were out in the duck fields and blind walking, don’t go into where your chicken coop is. And I wouldn't even have thought of that. Except that my son is a duck hunter. And so that means that if he happens to bring some ducks back home, I need to make sure he doesn't walk through our chicken coop area. Farmer Fred All right, well, that was a good scenic bypass. Now for those who are thinking of getting a backyard flock, how many chickens do they need? How big of a space do the chickens need? What are some of the basics when it comes to implementing a backyard chicken operation? Cherie Sintes-Glover So I'm so glad you asked this because this is one of the top questions I get when I teach the chicken classes. People want to know how many chickens do I need, what are the best breeds to have if I want to have fresh eggs every morning. So we're really fortunate that we have a lot to choose from when it comes to the breeds. And there are so many different hatcheries available. There's so many different breeds of chickens available. So first thing you have to really decide, though, is how many you need. And really that depends on how many eggs you eat per week. So your normal average chicken will lay about half a dozen eggs per week. So that's about six per week. So you figure if you eat a dozen eggs a week, which actually sounds like quite a few, that will factor into how many chickens you have. The other factor, especially if you live in an urban environment, happens to be: do you have neighbors? If you have neighbors, I would actually get another chicken just to supply your neighbor with some fresh eggs, too. And that just helps them buy into the idea that you might have some backyard hens for fresh eggs. Who's going to turn down fresh eggs? So plan on figuring out how many eggs you eat per week. How many do you want, and then figure one chicken for every half dozen? That's the easiest way to think about it. So as far as breeds go, the breed of the chicken. First thing is size. Luckily we have we have so many different ones to choose from. So we have both standard size chickens which are your typical chicken size, or you have Bantam. And Bantam refers to it's kind of like a miniature chicken, so they don't always have the same breeds or varieties between the bantams and the standard size. But that'll at least tell you what you have to choose from. Now bantams do lay a smaller egg and typically Bantam size birds will have usually one to two to three eggs equal one of the standards. So two or three Bantam eggs will equal one standard sized chicken egg, so just bear that in mind. But from the standard breeds versus the Bantam breeds, you can get everything from feather-footed which means they have feathers on their legs to all different colors and varieties. Some of the breeds are good dual breeds, which means that they not only lay great eggs, but you can also, if you're interested, harvest them for your freezer, for chicken dinner, you can do that. But you really have a variety to choose from, especially if you order from a hatchery, that's what's going to give you probably the best options. But you don't always have to raise chickens from the baby chicks stage. If you really don't want to raise baby chicks and be that Mama hen until they they get fully feathered, an option is to look at your local feed stores, maybe even look at local chicken breeders, and see if they have maybe young pullets that you can purchase where they're already past that stage where they need like warmth or a brooder. Farmer Fred I'm looking at an article on the website, Successful Farming , and actually the website is called agriculture.com. But they had an article about “10 Chicken Breeds for your Farm”. And I was just amazed at the descriptions about the personalities of these chickens. And that some sound like they're very aggressive, while others sound like they're they would be very good in cold climates. And others are very docile. Cherie Sintes-Glover See. that's what's interesting. You really can pick the kind of chicken that's going to suit your lifestyle, or maybe even where you live. Really, your chickens are always going to be able to survive the colder months especially if you live in areas like mine here in the San Joaquin valley where we really don't get much of a winter. We have pretty mild winters. The chickens are mostly going to be affected by actual heat, they are more likely to suffer heat stress. But when it comes to their personalities, and I'll actually say that even though they're a chicken, they will have personalities and different temperaments. One of the most popular chickens, at least chicken breeds, back in the day, used to be one called a Rhode Island Red, and everybody had Rhode Island Reds, that was just what you had, if you wanted eggs, they all look the same. They were kind of that brick red kind of color. They had like a lighter under color for their feathering. But they were kind of mean, right? They were the ones that would chase you even if they were hens and they were just more likely to just not be as friendly. And so what's kind of cool is that these days you can choose some of the breeds that are a little more colorful, that are a little more friendly as far as human interaction goes. So one of my all time favorites is actually called the Red Star. And it's a breed that one of the hatcheries produces and what's so awesome about the Red Stars is that they're actually a cross between the White Leghorn and the Rhode Island reds. And they are the most fabulous chicken for just hanging around with you in the yard. They're the one that when I've raised them in the past if I'm out in the yard working on something or working out in the garden, first thing I'm going to do is, I'm going to feel something watching me. And then I turn to look and it's always the Red Star. They just for whatever reason they are just a very friendly, personable, very relaxed, easygoing chickens. So if you're looking for eggs, they lay a nice bright orange, red kind of colored egg, nice and large. And if you have kids, they're a great chicken because they'll easily get used to being handled by children. So Red Stars always kind of my favorite. Another really great one is the Silver Lace Wyandotte, and then also the Buff Orpingtons. They tend to be the heavier breeds and they're just so much fun. I don't know if you remember the movie “Chicken Run” but those chickens are the ones that remind me of “chicken run”, it's just their way that their body is shaped and their plumage, but that's the cool thing about chickens: is that if you get a chance to visit a chicken show or you know poultry show, you’ll get to see all the different types of chickens that are female. Oh my gosh, all of them lay eggs. So have fun with it. Choose a chicken breed that you're interested in and that you'll enjoy. Farmer Fred What about roosters? Do you need roosters? Do you need a rooster in order to get eggs? Cherie Sintes-Glover No, you do not. It's funny how many people still think that you have to have a rooster in order to have good egg production. And the truth is you really don’t. Your female hens are going to lay eggs whether there's a rooster there or not. And they're going to lay them consistently. So no, there is no rooster needed. And what's kind of interesting is that a lot of the city ordinances for people that are in an urban environment, the city ordinances will typically outline that no roosters are allowed. So the good thing is that you can still have your chickens, your hens, without having to have a rooster. Farmer Fred You do a lot of classes, in person classes and consulting, of course, and Zoom classes on raising chickens. I know that where you are near Lodi, California, you've got some classes coming up in June and July. We'll have some links to that information at our website, gardenbasics.net , and on the show notes as well. You can find the info at chickensforeggs.com. And you do have some great information there on your homepage about keeping your chickens cool. And with summer on the way, those are some good points there to consider for those who currently have chickens. Cherie Sintes-Glover Oh my gosh, yes. And you know, it's funny because we tend to worry about our chickens in the winter, right? We think it's gonna be freezing, the poor chickens. But the truth is, chickens are like any any bird, right? You think of all the wild birds that are out in the trees and that are there, you know, surviving cold winter, they're doing just fine, your chickens will do just fine. And we always warn: do not use heat lamps, do not use heaters in your chicken coops in the winter. They truly do not need them. And they cause more fires and more damage than you can imagine. But when it comes to summer heat, that's what affects chickens more than anything. And that's because of a couple things. The first one is that chickens actually have a higher body temperature. So for them, when it gets to be in the 70s, that's probably the absolute perfect temperature range for them. That's when they're the happiest. The daylight hours are enough for them to generate those eggs, and they're doing great. But once that temperature begins to rise and increase, and especially here in the Central valley of California, we get temperatures over 100 to 110, sometimes even 115, if you're up near the Chico area. And that is brutal. That's when you're actually going to have a chicken death on your hands. So the best way to prevent heat stress in chickens is you can do a couple things. Number one is avoid feeding treats like chicken scratch, that means like corn, scratch, anything like that. And those carbohydrates are going to actually increase that chicken’s body temperature. So I have a strict rule in my backyard flock, which is no scratch, new corn scratch, during the summer months, when it's basically over 85 degrees. Then another thing you can do is have good airflow. You want there to be good ventilation. And chickens tend to reset their body temperature at night when the temperature is lower. So I actually have large box fans that are set up on a timer. And what that does is they switch on and off during the cooler hours of the early morning. And that allows that chicken to kind of reset and be able to handle it, especially if we go into day after day after day with those 100 degrees or more temperatures outside. You also want to make sure your chickens have good, fresh, cold water and use electrolytes. They actually have basically its powder Gatorade for your chickens, that are called poultry electrolytes. You can find them at any poultry store or even on Amazon, and pick those up. Add those to the water but don't wait until it's 100 degrees. What you're going to do is be able to add in a few days before. So watch your weather reports. When you know that a heatwave is coming, don't wait . Go ahead and start the birds on the electrolytes before that. You just add them to the water, which makes it super simple. And one last trick and actually I learned this from someone who used to show rabbits. What you do is you take a two liter bottle or any kind of plastic bottle. You fill it up with water and you freeze it. Then what you can do is place those frozen water bottles inside your chicken coop. What's cool about that: not only will it provide a little bit of coolness when it evaporates and starts to melt, but you'll find that your chickens will snuggle up next to that frozen two liter water bottle just to help them cool off during the hottest parts of the day. And what's super great is that it doesn't create a mess. A lot of people want to go with misters, but I find that those end up creating pools of water that really aren't healthy for the birds to drink out of and they tend to clog up right there more more work than they're worth so those will be my my biggest tips when it comes to eliminating or at least help preventing heat stress in your chicken. Farmer Fred Probably some shade too. Cherie Sintes-Glover Oh yes. I forgot about the shade. It's funny because to me I'm like shade is automatic and that's partly for me as the chicken keeper because I would not want to work with my chickens in the hot sun but oh my gosh yes make sure they have a good shaded area to go to. It still gets really hot, even in the shade but at least that will provide them some protection from the sun. So a nice tree, a shade cloth you can set that up, anything you can do to help those chickens, especially in the late afternoon sun. Links: ChickensforEggs.com 10 Chicken Breeds For Your Farm Chicken Eggshell Cleaning Brushes Electrolytes and Vitamin Supplements for Chickens As an Amazon Associate, I earn from qualifying purchases from some of the underlined links in the newsletter. This is how I am trying to keep this a free newsletter. And as long as you buy whatever you want from Amazon using any of those links to get into the Amazon site , I get a few pennies. Thank you. Fred Hoffman is also a University of California Cooperative Extension Master Gardener in Sacramento County. This is a public episode. If you'd like to discuss this with other subscribers or get access to bonus episodes, visit gardenbasics.substack.com/subscribe
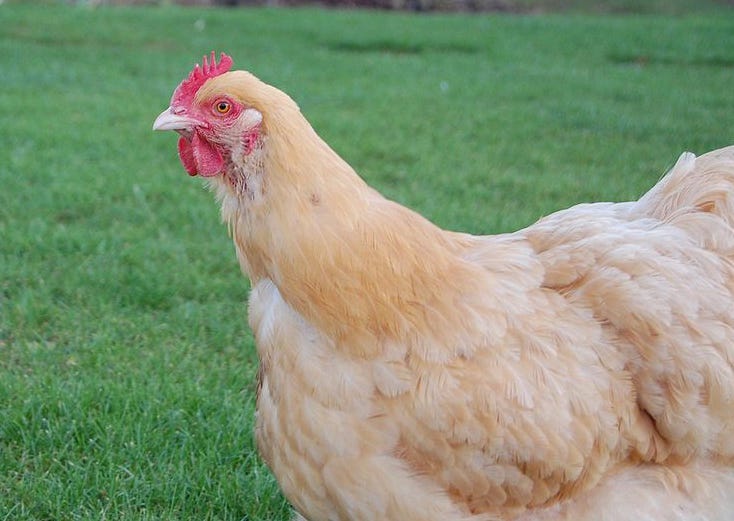
Jun 17, 2022
Don't Let Drip Irrigation Become "Drip Irritation"
In this Newsletter podcast, Drip Irrigation expert and garden book author Robert Kourik troubleshoots the most common drip irrigation issues for home gardeners. Drip Irrigation: How Long Do I Water? 90% of all plant problems are water related, either too much or too little. Compounding the problem: gardeners who are operating a drip irrigation system but using a sprinkler mentality. Talking to gardeners, after describing a plant problem, will be asked: "How are you watering that plant?" More often than not, if the answer is, "drip irrigation", they will follow that with, "And I run it for five minutes a day, everyday."And therein lies the problem. A drip irrigation system puts out water much slower than a sprinkler system, usually a gallon or two an hour versus a sprinkler system's output of a gallon or two A MINUTE. In five minutes, a 1 gallon per hour (gph) drip emitter will put out about 10 ounces of water...slightly more than a cupful. Not only will that pittance of water not saturate the width of the plant's root zone (which can extend beyond the canopy of the plant), it won't penetrate more than an inch or two. And then not stay there very long. What happens to a plant with a shallow watering program? The roots stay very near the surface, where they are more subject to drying out quickly. This boom and bust cycle stresses the plant, opening up the possibility of disease and insect invasions. With a drip irrigation system, don't think "minutes". Think: "hours". And water deeply, but infrequently (once or twice a week). However, that instruction can be and should be modified based on the type of soil you have. If you’re doing in-ground planting and have heavy clay soil, you may be able to get away with that formula. Irrigating a raised bed, where the imported soil amendments may be lighter and fluffier, with a greater sand content, more frequent irrigations with drip will be necessary. More horizontal tubing will be necessary as well, perhaps 8-10 inches separating the lines of half-inch tubing. In sandier soil, the water footprint is much more narrow than in clay soil. Listen to Robert Kourik , author of the book, Drip Irrigation for Every Landscape and All Climates . In the podcast at the top of this edition of the Beyond the Garden Basics newsletter, he talks about watering with a drip system, a little bit, every day. HOWEVER…he also mentions that his preseason watering regimen includes saturating the entire soil mass in his raised bed, and then only adding enough water each day to make up for any loss. You can try this at home, but…don’t try this at home unless you are dedicated to the craft of measuring your soil moisture in the root zone on a regular basis in your raised beds. Your goal is to apply enough water to penetrate the soil to a depth of at least 6 inches, preferably more. The day after you water, either dig down 8 inches by hand or with a soil sampling tube ; or, stick a moisture meter down to that depth to determine if the soil is moist (not dry, and not soggy). Battery-operated soil moisture meters tend to have a longer life. In our raised bed vegetable garden, the summer watering regimen is with an inline drip irrigation system (1 gph emitters along the line, with emitters spaced 12" apart) which is run twice a week, six hours at a time. Your weather, soil type, slope and crops may need a slightly different watering schedule. In our 4'x8' raised beds, five inline emitter lines run the length of each bed. The lines are spaced about 9" apart. The big reason why I can get away with a once or twice a week application of water via drip irrigation: the soil is amended each growing season, covered with a half inch of worm castings, a couple of inches of fine compost, and finally three to four inches of shredded oak leaves as the top mulch. No digging is necessary (digging and tilling destroys soil structure and the necessary air pockets). The end result of doing this after a few years: soil that retains moisture better, longer. And, more beneficial microbial activity, as well as more worms (worms are good). Consider using microsprinklers or sprayers to thoroughly wet the root area for trees and shrubs. These put out more water, usually between 8 and 20 gallons per hour. We have these on our shrubs and fruit trees, and during the summer will run them for about an hour, once or twice a week, depending on how hot it is. The other part of the drip irrigation equation that a lot of gardeners miss: not enough emitters for the plant. Placing one emitter next to a new tree or shrub is not enough. Remember, plant roots tend to grow out horizontally. Emitters should be spaced evenly around the tree or shrub, in a spiraled circle, halfway between the trunk and the outer canopy of the newly installed plant. The spacing between the emitters will depend on your soil type: for sandy soils, use a 12" spacing; for heavy clay, 18-24" spacing. Add emitters towards the outer canopy of the plant as the plant grows. • Soaker hoses need maintenance, too. Flush them monthly. The Dramm soaker hose , pictured here, is the most reliable, even-flowing soaker hose I have ever used. One of my favorite aisles at the big box stores is the drip irrigation aisle (also known as “Purgatory on Earth”). It’s almost like a church in that section of the store. People are silent, staring straight ahead at the morass of bins containing strange looking drip irrigation parts…and those people are more than likely praying for guidance that they can unravel the mysteries surrounding drip irrigation installation and repair. A great online tutorial about drip irrigation: the Dripworks website. This site has helpful tips and videos that can help beginner and pro alike solve their drip irrigation and yard watering woes. The Dripworks catalog is also great resource for anyone tackling the problems associated with drip irritation...uh, irrigation. Just thumbing through the catalog can give you several "Aha!" moments for improving your own yard watering procedures, especially if you are looking to replace your residential sprinkler systems with a drip irrigation system , which can work with your existing automatic sprinkler system control box. A final warning about drip irrigation systems: they will need maintenance. Lines can separate from their fittings . Emitters can clog. Micro-sprayers can jam. Shovels, trowels, weed whackers, spading forks, squirrels and rats can pierce a half-inch or quarter-inch drip feeder line. Turn the system on manually at least once a month and walk the circuit. Look for unusual wet spots, dry spots and geysers. Have the necessary repair parts handy. Know where the end caps are for each line. Remove those caps and flush the system for several minutes at the least at the beginning and end of each season, especially if you are on well water. And to answer your question: “Is it worth it?” Yes. Because of its pinpoint accuracy, drip systems use far less water than ordinary sprinklers, and that accuracy insures the roots of the plant will get the water they need. Plus, you’ll be spending more time in “church”. Thank you for listening to the Garden Basics with Farmer Fred podcast! It’s available wherever you get your podcasts. Please share it with your garden friends. As an Amazon Associate, I earn from qualifying purchases from some of the underlined links in the newsletter. This is how I am trying to keep this a free newsletter. And as long as you buy whatever you want from Amazon using any of those links to get into the Amazon site , I get a few pennies. Thank you. Thanks for Subscribing and Spreading the Word About the Beyond the Basics: The Garden Basics with Farmer Fred newsletter, I appreciate your support. Fred Hoffman is also a University of California Cooperative Extension Master Gardener in Sacramento County. This is a public episode. If you'd like to discuss this with other subscribers or get access to bonus episodes, visit gardenbasics.substack.com/subscribe

Jun 10, 2022
Weed Killers: Read The Fine Print
It's a common site this time of year: gardeners with sprayers in hand (or on their back), applying weedkiller to the unwanted greenery that has popped up around their desirable plants. Winter - USDA Zones 8 and 9 - would seem to be a better time to do this: cool-season weeds are easier to control when they are small and actively growing; around valuable deciduous plants, there is less danger of the spray accidentally hitting the leaves (there aren't any); and, those new, green weeds are like a flashing freeway sign in a drab, brown landscape, screaming "Nyah, Nyah, Nyah!", taunting us into action. Below are some tips you may not be aware of, when using the most popular post-emergent weed killer, Roundup, as well as it's generic counterparts that also use glyphosate as the active ingredient. (Hint: compare prices!) The purpose of this posting is not to rail about the dangers to the environment after using glyphosate. Check out the Wikipedia entry for a fairly balanced report on what the scientific community is studying and debating about glyphosate, including this tidbit: "An in vitro study indicates that glyphosate formulations could harm earthworms and beneficial insects. However, the reported effect of glyphosate on earthworms has been criticized. The results conflict with results from field studies where no effects were noted for the number of nematodes, mites, or springtails after treatment with Roundup at 2 kilograms active ingredient per hectare. Glyphosate can negatively affect nitrogen-fixing bacteria, and increase the susceptibility of plants to disease. A 2005 study concluded that certain amphibians may be at risk from glyphosate use." Sure, you've read the instructions on how to mix it and how much to apply. And you know not to spray it on desirable foliage. The point here is to make you aware of some of the instructions on the label that you may have overlooked. Much of this information is taken straight from the 10-page instruction book that comes with Roundup Pro. Of course, Rule Number One always has been, and always will be: READ AND FOLLOW ALL LABEL DIRECTIONS. I know, I know...you started reading the first sentence, and by the time you got to the fourth line, it was all, "blah, blah, blah". But note a couple of items in that paragraph. It doesn't specify to avoid spraying desirable leaves; it says to avoid "desirable vegetation". And sure enough, there are enough thin-skinned trees and shrubs out there through which that wandering mist can attach itself on a windy day. One of the most susceptible shrubs in the dormant season: your rose bushes. Sure, there are no leaves on them in winter (hopefully), but glyphosate can be absorbed through the thin bark of rose bush trunks, creating problems in the spring and summer for the new growth: This is what a rose looks like, months after the green stems were hit with errant glyphosate spray. At it isn't just a wintertime weed killer application that could hurt roses down the line. According to the UC Integrated Pest Management Program : "Glyphosate damage may appear at bud break the following spring after a summer or fall application that contacts leaves or stems; symptoms include a proliferation of small, whitish shoots and leaves." And how many times have you seen gardeners in a hurry, briskly walking down a row of plants, sprayer close to the ground, or spraying while driving their ATV, attempting to decimate a line of weeds at full speed? That increases the chance for spray drift. To it's credit, that product label repeats itself, in even clearer tones: Here's one that surprised me: How many times have you seen someone spraying weeds on a foggy or low overcast day? That's a temperature inversion! Don't spray on a foggy day, because, as the label says: "drift potential is high", due to the droplets remaining suspended in a concentrated cloud. Hmm, I guess you might be inhaling some of that on a foggy day...possibly? How about all those days when you see someone spraying a post-emergent weed killer on plants that are past their prime, already half-dead or totally dead? You're wasting your time and money, according to the label: Many gardeners know about using glyphosate as a stump killer of an unwanted woody tree or shrub. Make the cut, then immediately apply the glyphosate at a high rate of concentration. But wait a minute...what's going on underground? Possible intermingling of the roots of different plants. The good news here: plants of different genera (a eucalyptus and pistache, for example) tend not to graft their roots together. But if you are trying to get rid of one willow stump while saving another healthy, desirable willow nearby… well, you've been warned. The US Dept of Agriculture also offers advice on paying attention to other meteorological conditions when applying glyphosate: • Use when ambient air temperature is between 60 - 85 degrees F. (plants slow down their growth when it's too hot or too cold; glyphosate works best on actively growing plants). • Do not use if rain is expected, or if foliage is wet. • Do not water treated areas for at least 6 hours after treatment. • Allow seven days for the plant to die. In cool, dark or dry climates the effects of treatment may take longer than a week because plant growth rates are slowed and the chemical requires more time to act and the plant to die. • Do not use in windy conditions or on water. And, the USDA Forest Service suggests precautions when storing weed killers: “Minimum storage temperature refers to the temperature required to keep the pesticide in solution. Below that temperature, the pesticide will form crystals and freeze.” According to that publication , different weed killers have different minimum storage temperatures; glyphosate needs protection at temperatures less than 10 degrees fahrenheit.Again, your better chemical defense against weeds is to read and follow all label directions when applying any weed killer. Your best defense? A hoe, when you first spot a young weed. Or, for mature weeds…goats. Thank you for listening to the Garden Basics with Farmer Fred podcast! It’s available wherever you get your podcasts. Please share it with your garden friends. As an Amazon Associate, I earn from qualifying purchases from some of the underlined links in the newsletter. This is how I am trying to keep this a free newsletter. And as long as you buy whatever you want from Amazon using any of those links to get into the Amazon site , I get a few pennies. Thank you. Thanks for Subscribing and Spreading the Word About the “Beyond the Basics: The Garden Basics with Farmer Fred'“ newsletter, I appreciate your support. Fred Hoffman is also a University of California Cooperative Extension Master Gardener in Sacramento County. This is a public episode. If you'd like to discuss this with other subscribers or get access to bonus episodes, visit gardenbasics.substack.com/subscribe
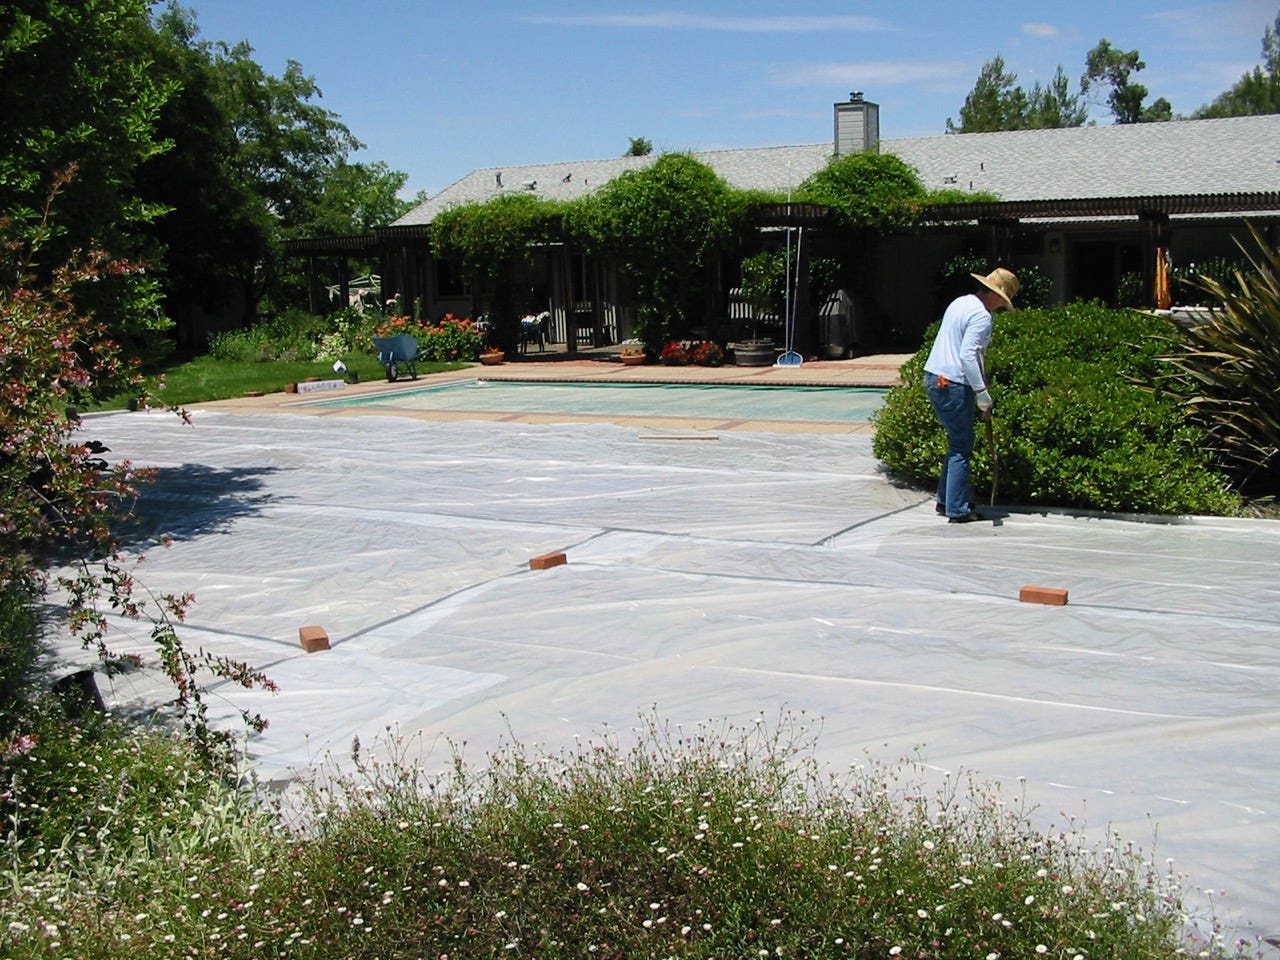
Jun 3, 2022
Crop Rotation and the Pizza Pie Garden
In this interview with America’s Favorite Retired College Horticulture Professor, Debbie Flower, we discuss how to stave off plant diseases and insect pests by rotating your crops. And heck, if you’re gonna rotate, it might as well resemble a wheel, right? This interview originally aired in Episode 114 of the Garden Basics with Farmer Fred podcast . I have little or no artistic sense whatsoever, especially in the garden. I tend to plant in rows, in rectangular raised beds, all designed for function, not form. With raised boxes, it's easier to rotate the vegetables each year. But only IF you can remember what was planted where, the year before. A circle garden, on the other hand, might be easier to rotate crops than a scattershot series of raised, rectangular beds. The benefits to crop rotatation? Many of the plants that are in the same "family group" have diseases in common. Many of these diseases are difficult, or impossible, to control using chemicals. For example, don't plant tomatoes in the spot where you had potatoes last year, and vice versa. That could spread late blight disease. The best solution for disease control is crop rotation. Of course, choosing resistant varieties of vegetables can help thwart diseases. For example, tomatoes with a "V" "F" and/or "N" after their names indicates resistance to verticillium wilt, fusarium wilt and nematodes. However, most heirloom varieties of vegetables offer little or no disease resistance...another good argument for crop rotation. For heirlooms, choose those varieties that are meant to grow in the area you live. And, it helps to spread an inch or two of compost over all your garden beds before you plant each year. Another advantage of having a series of garden beds in the same area: each crop can be irrigated according to its specific needs. For example, as onions and garlic mature in May, watering should be reduced. But that is also the time that summer crops such as tomato and pepper plants need regular watering. An automatic drip irrigation system, with individual lines for each bed, can customize the amount of water for each bed. In my dream circular garden, the valves can be centrally located in the “hub area” - Where all the beds come together -for ease of operation. Individual drip lines then would run to each bed, where on-off valves can be located for each bed. Another reason for crop rotation: to replenish nutrients to the soil. Many vegetables tend to be heavy nitrogen users. Giving your soil an "off-year" every few years by planting cover crops allows it a chance to reduce pest populations while building up valuable soil nutrients, as well as beneficial fungi and bacteria. Annual cover crops that do well in USDA Zone 9 for the warm weather seasons: buckwheat, cowpeas, soybeans and black eye peas. For the cool weather seasons in USDA Zone 9: bell or fava beans, winter peas, vetch, clover. All of these can add more nitrogen to the soil. An excellent online reference for cover crops: the Peaceful Valley Farm Supply Catalog. That publication also points out several other benefits to crop rotation:• Increases organic matter• Increases earthworms and beneficial microorganisms • Stabilizes soil to prevent erosion • Brings deep-rooted minerals to the surface• Provides habitat, nectar, and pollen for beneficial insects while choking out weeds• Improves water, root and air penetration of soil • Increases the soil’s moisture-holding capacity • Breaks up subsoil and plow-soles • Provides aesthetic value and color (artistic!) Which brings us back to my original quandary...how to remember exactly what was planted where, each year. Garden gnomes (cleverly disguised as possums) steal the signs; leaving crop remnants in each bed could add to pest and disease problems; writing down the location of crops each year would work...if you remember to go back in the house to check your garden notebook before starting the task of planting each year (ha!). One solution that may work is a circular garden, consisting of six raised beds formed to look like spokes emanating from a hub, like a bicycle wheel, for example. Perhaps a pizza garden would be a more appropriate name for this wheel of edibles. There are definite benefits to having a garden in the shape of a circle: a central water source in the middle of the circle, perhaps a small tool shed in that hub area, and compacted walkways three or four feet wide (big enough for a wheelbarrow) to avoid stepping on the garden soil or squeezing between the sides of the raised beds. Make those pathways wider if you want to drive a small tractor with a bucket up those pathways. And, you’ll need room in the middle to turn around or navigate your way out. So, that middle circle at the hub - which would hold water valves, a faucet, small tool shed, a recirculating bird bath (Hey! Let me dream, will you?), and room to navigate your little orange Kubota around - might need a diameter of 12-15 feet. The length of each slice of this pizza garden should be about 20 feet, with the outer edge of each piece being about four feet wide, to easily reach the middle of each slice to pull weeds, plant, and harvest. Please, any reader with graph paper or a landscape computer program: figure out the ultimate size of this six slice pizza garden for me. I’ll start looking on Zillow for acreage. Seems like a lot of work to just have an easier way to remember to rotate crops each season. But it would be really cool to look at from the roof of the house. Or a drone video. Here's the general idea for the Circular Crop Rotation Garden. The crops are arranged so that every three years, the soil gets a break: either nitrogen-fixing crops such as peas and beans are planted; or, a cover crop and compost are added to replenish the soil. Also, crops that tend not to be heavy nitrogen users are situated right before the "rest year". In this case, root crops and leafy crops precede beds that are in minimal use (cover crops or peas/beans). The heavy nitrogen-using beds are directly opposite each other: tomatoes, peppers, etc. are opposite the corn and cucurbits. More info at the Farmer Fred Rant Blog Page, “It’s Crop Rotation Time! Do You Have the Room?” Thank you for listening to the Garden Basics with Farmer Fred podcast! It’s available wherever you get your podcasts. Please share it with your garden friends. As an Amazon Associate, I earn from qualifying purchases from some of the underlined links in the newsletter. This is how I am trying to keep this a free newsletter. And as long as you buy whatever you want from Amazon using any of those links to get into the Amazon site , I get a few pennies. Thank you. Thanks for Subscribing and Spreading the Word About the Beyond the Basics: The Garden Basics with Farmer Fred newsletter, I appreciate your support. Fred Hoffman is also a University of California Cooperative Extension Master Gardener in Sacramento County. This is a public episode. If you'd like to discuss this with other subscribers or get access to bonus episodes, visit gardenbasics.substack.com/subscribe

May 20, 2022
Plants To Attract Beneficial Insects, Pt. 2
In today’s “Beyond Basics” podcast segment of the newsletter, “Sustainable Food Gardens” author Robert Kourik discusses tips for attracting beneficial insects to your yard. Hear the entire interview in Episode 191 of the Garden Basics with Farmer Fred podcast . In last week’s newsletter, we discussed three of the best beneficial insects to have in your garden: lacewings, ladybugs, and hoverflies. Today, we cover several more garden good guys worth putting to work in your yard to subdue the pests, and the “Welcome Mat” plants they need for extra food and shelter. Soldier Beetles (leather-winged beetles) Like many of the beneficials, it is the larval stage of soldier beetles that do most of the munching on the bad bugs. Whereas the adult soldier beetles feed mostly on the pollen and nectar of flowers - as well as the occasional aphid, insect eggs and larvae - young soldier beetles can be found under the bark of the plant or in soil or litter. There, they feed primarily on the eggs and larvae of beetles, butterflies, moths and other insects. Plants That Attract Soldier Beetles * Celosia Cockscomb * Coreopsis * Daucus carota Queen Anne’s Lace * Echinacea purpurea Purple Coneflower * Pycnanthemum Mountain Mint * Rosa Roses * Solidago Goldenrod PARASITIC MINI-WASPS Mini-wasps are parasites of a variety of insects. They do not sting! The stingers have been adapted to allow the females to lay their eggs in the bodies of insect pests. The eggs then hatch, and the young feed on the pests from the inside, killing them. After they have killed the pests, they leave hollow “mummies.” Braconid Wasps Braconid wasps feed on moth, beetle and fly larvae, moth eggs, various insect pupae and adults. If you see lots of white capsules on the backs of a caterpillar, these are the braconid cocoons. Leave the dying caterpillar alone! Ichneumonid wasps control moth, butterfly, beetle and fly larvae and pupae. Trichogramma wasps lay their own eggs in moth eggs (hungry caterpillars-to-be), killing them and turning them black. Plants that attract parasitic mini-wasps : • Achillea filipendulina Fern-leaf yarrow • Achillea millefolium Common yarrow • Allium tanguticum Lavender globe lily • Anethum graveolens Dill • Anthemis tinctoria Golden marguerite • Astrantia major Masterwort • Callirhoe involucrata Purple poppy mallow • Carum carvi Caraway • Coriandrum sativum Coriander • Cosmos bipinnatus Cosmos white sensation • Daucus carota Queen Anne’s lace • Foeniculum vulgare Fennel • Limonium latifolium Statice • Linaria vulgaris Butter and eggs • Lobelia erinus Edging lobelia • Lobularia maritima Sweet alyssum - white • Melissa officinalis Lemon balm • Mentha pulegium Pennyroyal • Petroselinum crispum Parsley • Potentilla recta ‘warrenii’ Sulfur cinquefoil • Potentilla villosa Alpine cinquefoil • Sedum kamtschaticum Orange stonecrop • Sweet alyssum - white• Tagetes tenuifolia Marigold ‘lemon gem’ • Tanacetum vulgare Tansy • Thymus serpylum coccineus Crimson thyme • Zinnia elegans Zinnia - 'liliput' TACHINID FLIES Parasites of caterpillars (corn earworm, imported cabbage worm, cabbage loopers, cutworms, armyworms), stink bugs, squash bug nymphs, beetle and fly larvae, some true bugs, and beetles. Adults are 1/3 to 1/2 inch long. White eggs are deposited on foliage or on the body of the host. Larvae are internal parasites, feeding within the body of the host, sucking its body fluids to the point that the pest dies. Plants that attract tachinid flies : • Anthemis tinctoria Golden marguerite • Eriogonum fasciculatum California Buckwheat • Melissa officinalis Lemon balm • Mentha pulegium Pennyroyal • Petroselinum crispum Parsley • Phacelia tanacetifolia Phacelia • Tanacetum vulgare Tansy • Thymus serpyllum coccineus Crimson thyme MINUTE PIRATE BUGS (Orius spp.) True to their name, minute pirate bugs are tiny (1/20 inch long) bugs that feed on almost any small insect or mite, including thrips, aphids, mites, scales, whiteflies and soft-bodied arthropods, but are particularly attracted to thrips in spring. DAMSEL BUGS (Nabis spp.) Damsel bugs feed on aphids, leafhoppers, plant bugs, and small caterpillars. They are usually dull brown and resemble other plant bugs that are pests. Their heads are usually longer and narrower then most plant feeding species (the better to eat with!). BIG EYED BUGS (Geocoris spp.) Big eyed bugs are small (1/4 inch long), grayish-beige, oval shaped) bugs with large eyes that feed on many small insects (e.g., leaf hoppers, spider mites), insect eggs, and mites, as both nymphs and adults. Eggs are football shaped, whitish-gray with red spots. Plants that attract minute pirate bugs, damsel bugs and big eyed bugs: •Carum carvi Caraway •Cosmos bipinnatus Cosmos “white sensation” •Foeniculum vulgare Fennel •Medicago sativa Alfalfa •Mentha spicata Spearmint •Solidago virgaurea Peter Pan goldenrod •Tagetes tenuifolia Marigold “lemon gem” Thank you also for listening to the Garden Basics with Farmer Fred podcast . It’s available wherever you get your podcasts. Please share it with your gardening friends. Fred Hoffman is also a University of California Cooperative Extension Master Gardener in Sacramento County, California. This is a public episode. If you'd like to discuss this with other subscribers or get access to bonus episodes, visit gardenbasics.substack.com/subscribe

May 6, 2022
The Truth About Compost Tea
In today’s Beyond the Basics podcast (above), we talk with Ralph Morini, Virginia Cooperative Extension Master Gardener and researcher about his compost tea article for the Piedmont Master Gardener’s newsletter, The Garden Shed . The March 2019 article is entitled, “The Truth About Compost Tea: Making It, Using It, and What To Expect From It ”. Read it for yourself for even more information about the Compost Tea-making process. In that article, Morini delved into the online compost tea rabbit hole, which is comprised of the deep warrens of compost tea opinion, experience, sales attempts, and a smattering of actual well-researched studies. As you can surmise from our conversation in today’s newsletter podcast, Morini came away from his deep dive with more questions than answers. Which harkens back to Farmer Fred Garden Rule #8 : “If It Works for You, Fine. But Keep an Open Mind.” Morini concludes his article with nine sources of reputable information, source material you may want to check out for yourself. The genesis for our thorough discussion regarding the “truth vs. myth” aspects of compost tea use sprung from a comment Steve Zien, an organic gardening professional, made about using compost tea back in Episode 188. He loves it. Especially using worm castings as the basis of your compost tea. I’ve know Steve for 40 years. I know that he is usually ahead of the curve when it comes to implementing his earth-friendly garden practices. I also know that the rest of us usually catch up with him and buy into his train of thought about a decade later. It turns out, he’s usually right. Here are the Cliff Notes version of our discussion with Ralph Morini. Points about compost tea that you should consider before you apply it around or on top of your plants: How the Compost Tea is Made Ralph Morini: “Compost tea is a solution made from compost and clean water* combined in a bucket or some sort of a container. We recommend that the solution be aerated. As Steve mentioned, the best way to do that is with an aquarium pump. Let it run for one to two days. The typical aquarium aeration system includes a pump that sits outside the aquarium and then basically a couple of diffusers, the air from the pump will go into an inlet on what's called a stone and it becomes diffused at the output side of the stone and blows bubbles into the water.” *Ah yes, the water quality. Garbage in, garbage out. That might have been the problem for some of the studies of compost tea. Your water may kill the beneficial bacteria and fungi that you are attempting to add to the soil. More on that below. What is the Active Ingredient in Compost Tea? Ralph Morini: “What it does is it allows the microbes in the compost to multiply many, many times over so that you have an extremely microbe rich solution, a solution that advocates claim can be used for anything from fertilization - which I'm not buying - to enriching the microbe content in the soil, which is what Steve referred to. And if you have enough organic matter in the soil to feed them, it can release a lot of the nutrients that matter is holding in the soil. Some people use it as a foliar spray, which, if you have the right type of microbes in the solution, can help to prevent disease by out competing; or, the good guys somehow overtake the bad guys and reduce disease damage on your plants. Or you can use it to stoke up your compost pile. If you want to get some more microbial activity going in your compost pile, for instance. It can be sprayed on the lawn or on the ground directly. My own view of it is that the amount of compost is typically about one or one and a half cups of compost per gallon of water. So I think people who claim a lot of nutrients in it are overstating the case. There can't be that much nutrients. On the other hand, microbial content is where it could conceivably have some benefit both on releasing nutrients and soil. If the soil has enough organic material for them to feast on for a while*, or potentially doesn't have the right microbes in it. It might help disease prevention on plants.” *Pouring compost tea on poor soil, bereft of microbial activity, may be a waste of compost tea. The soil needs to have certain healthy qualities to assimilate the addition of more microbes. It’s All About the Water Quality Ralph Morini: “You want to make sure your water is potable starting off. You can't have any chlorine or chloramine in it. The reason they're in the water supply is to kill bacteria, and fungi. If you put chlorinated water in your bucket before you put your compost in and you bubble it for a day or so, you get rid of the chlorine; it should be okay. Chloramine is longer lasting and you can't just get rid of it by aerating or boiling. You really have to extract that from the water by using a charcoal filter. There are some materials that are used in aquariums that will help you if you mix it with the water. It changes the chemical composition of chloramine and it will leave the water by aeration. You can get that at a pet supply store or online. So you need to find out if your water is treated, what it's treated with* and take appropriate measures to get that stuff out of the water.” *Good luck with that. You may want to spring for a water quality test from an independent source, ideally someone who isn’t also in the business of selling water treatment equipment. Use It Quickly! And, Make It Yourself. Ralph Morini: “It's recommended to be used within about four hours. You're generating all this microbial activity and they're really moving along. If you leave them in the bucket for too long, that large population of highly active microbes is going to consume the oxygen. They'll go anaerobic, and that destroys the point of your whole process. And, for that same reason, I'm very skeptical of store-bought compost teas. Some of them even claimed to be made of aerobically, but when they're sitting on the shelf for however long they're there, it's pretty hard to believe they remain that way.* I've tried to find some sort of research-based data about that and haven't been able to, but I wouldn't recommend them. I think if you want to do this, you're much better off making your tea yourself.” *I don’t know about you, but I often wonder about the health of the critters in bagged soils, soil amendments and fertilizers sitting on Garden Center asphalt, outdoors in the sun, that claim to have beneficial microbes (mycorrhizae) included. Compost Tea as a Foliar Spray? Farmer Fred: “There are advocates like Steve Zien who say it's a great foliar spray, reducing the chances of disease. Have you seen any research based on its effectiveness as a foliar spray?” Ralph Morini: “No research. Unfortunately, I've seen mostly organic gardeners and YouTube types talking that they've had success with it, but nothing at all from any of the extension services or research-based groups* that I trust.” *When doing Internet searches for garden answers, especially in regards to pest control, include the suffix “.edu” in your search terms. Or “.org”, if you’re feeling lucky. Quality Compost? What’s Quality Compost? Ralph Morini: “So how do you measure good quality compost? The main thing in my view is it needs to be hot compost, I suppose manure based compost products are likely to have a little bit of a higher nitrogen content, which is great for flowers and vegetables. Compost that's made from arborist waste and that kind of thing - leaves, yard waste - are likely to be higher fungal content, which are great for shrubs and trees. It's more typical of what you'd find in the forest. So that makes some sense to me. You know, unless you get an analysis of the compost that you buy, which isn't very common, I think focusing on hot compost and trying to understand what the main ingredients are is the best approach.” Tomatoes and Peppers Like Bacteria; Your Fruit Trees Like Fungi. Match Your Compost and Mulch Choices with the Needs of Your Particular Plants Farmer Fred: “Interesting, you brought up forest products. We're learning more and more about mulches and their use and the same is true with compost: the critters in the soil, all that microbial activity, really depend on what's in the soil already and the type of plants that are growing around there. And you have two types of mulch, compost, and compost tea: a fungally dominated tea (or mulch or compost) or a bacterially dominated tea (or mulch or compost). One is better for woody plants. One is better for your annual plants.” Ralph Morini: “Herbaceous plants tend to be high nitrogen consumers. We plant them, harvest them, replant them every year. They tend to be high nitrogen consumers. And so for that kind of a use, the higher nitrogen tea can be helpful. The problem with creating them is beyond the basic content of the compost. It’s that the additives that are typically recommended are sugar-based, like unsulfured molasses or something that the sugars tend to enable more reproduction on the part of the pathogenic microbes that we don't want in our tea. For instance, if that stuff is added to a compost tea, the National Organic Program requires the growers have the tea analyzed to make sure that there is no coliform or salmonella, before it's allowed to be used on their crops or soil or their plants. On the other hand, forests tend to be permanent perennials. The stuff on the forest floor is decomposed leaves and wood, basically, it's a much higher carbon content, it's harder to break down. The stuff is broken down by fungi, mainly. 90% of our plants are mycorrhizal fungi partners. And so for that reason, those kinds of teas, which tend to have the fungal content tend to be appropriate for woody plants.” Farmer Fred: “So, a bacterially-dominated product that you're making (from green waste products) would be perfect for your annual vegetables, for example. And the wood-dominated compost is better for the permanent crops like perennials (as well as shrubs and trees)*.” *Those kitchen scraps and outdoor flower and vegetable matter? Save that compost for your annual beds. The stuff that goes through your chipper-shredder, including tree limbs, is great for your woody plants as a top-dressing mulch. Farmer Fred Garden Rule #7: EVERYTHING YOU KNOW IS WRONG. In the 1940's & 50's, DDT was available to home gardeners as a pesticide. Turns out, it caused cancer and killed birds. In the 1960's-70's, the Modesto Ash was considered the "perfect shade tree" for the Central Valley of California. Turns out, it is susceptible to anthracnose, mistletoe and is no longer recommended. In the first decade of the 21st century, the pesticides Diazinon and Dursban were taken off store shelves. Also proven ineffective, despite beliefs and claims to the contrary: Vitamin B-1 for transplant shock, calcium sprays to stop blossom end rot on tomatoes, store-bought ladybugs (the majority of them fly home. sorry.). And, apologies to the Firesign Theater. As an Amazon Associate, I earn from qualifying purchases from some of the underlined links in the newsletter. This is how I am trying to keep this a free newsletter. And as long as you buy whatever you want from Amazon using any of those links to get into the Amazon site , I get a few pennies. Thank you. Thanks for Subscribing and Spreading the Word About the Garden Basics with Farmer Fred newsletter, I appreciate your support. And thank you for listening to the Garden Basics with Farmer Fred podcast ! It’s available wherever you get your podcasts. Please share it with your garden friends. Fred Hoffman is also a University of California Cooperative Extension Master Gardener in Sacramento County. This is a public episode. If you'd like to discuss this with other subscribers or get access to bonus episodes, visit gardenbasics.substack.com/subscribe

Apr 29, 2022
Why Do Pepper Flowers Fall Off?
In this past week’s two episodes of the “Garden Basics with Farmer Fred” podcast, we covered several timely topics in Episodes 188 and 189 including: Episode 188 : • Tips for Controlling Bermudagrass (Note: the word is “control”, not “eradicate”). Bermudagrass is forever. • How plants communicate to get nutrition and ward off pests. (Steve Zien of Living Resources Co. spends a lot of time with his ear to the ground. Maybe he’s fallen and can’t get back up? Anyway, he says plant roots sweat a lot.) • The (Alleged) Benefits of Compost Tea. Not that I doubt the enthusiasm of Steve Zien - also known as Sacramento’s Organic Advocate - for advocating the use of compost tea for improving soil biology, but next week in this space we will talk with a researcher from the University of Virginia Cooperative Extension who has studied the pros and cons of compost tea. It may come down to the quality of the water that you use to brew the compost tea. • Thin your vegetable seedlings! Thin your flower seedlings! THIN THE FRUIT ON YOUR DECIDUOUS FRUIT TREES! (lessons learned the hard way) Episode 189 : • Stop Tomato Blossom End Rot Before It Starts (Tips to reduce the incidence of this disorder in your tomato and pepper plants. Yes, peppers get blossom end rot, too.) • Grow Your Soil via the “Clip and Flip” and “Chop and Drop” mulching methods. The author of the book, Grow Your Soil , Diane Miessler, also refers in our chat to bermudagrass, calling it “the spawn of Satan”, so she’s OK in my book. So why, then, is the above podcast about pepper flowers? Because in many parts of the country this time of year, nurseries and garden centers have tomato and pepper plants, side by side. They wouldn’t be stocking peppers on their shelves unless it was the right time to plant them, right? right? Let’s put it this way: those pepper flowers are more susceptible to dropping off during typical late April-early May nighttime low temperatures. Don’t worry, you’ll get peppers. Eventually. We had to cut short last week’s display of Master Rosarian Charlotte Owendyk’s list of the Ten Most Fragrant Roses to grow (the Internet was running low on zeroes and ones). Here, then, is the balance of those shows for the nose, excerpted from the June 2021 Rose Reflections Newsletter of the Sacramento Rose Society and Sierra Foothills Rose Society. By the way, those two societies are having their spring rose show and sale, Saturday, April 30, 1-4:30 pm, at the Shepherd Garden and Art Center, 3330 McKinley Blvd. in Sacramento’s McKinley Park. Free admission, free parking. If you’re in the area, drop in and smell the roses. Sacramento Rose Society President Debbie Arrington wants to remind you, “after seeing the show, check out the McKinley Park Memorial Rose Garden, too.” DOUBLE DELIGHT & MR LINCOLN ARE FRAGRANCE WINNERS Two roses stand out as the most loved fragrant rose. Query rose growers and you will find Mister Lincoln and Double Delight mentioned most often. Also, these roses are frequent winners of the “most fragrant rose” award at rose shows. However, both roses are problematic in relation to disease resistance. Hybridized in 1965, Mister Lincoln, a dark red hybrid tea, has an old fashioned, damask scent. Mr. Lincoln's blossoms are held on stiff, upright stems and will turn bluish as they age. The bushes can be expected to grow 4-5 feet tall and about 2 feet across. The lower couple of feet of the canes are usually leafless. It is susceptible to blackspot. Double Delight, hybridized in 1977, has flowers that are a rich, creamy white to pale pink center with deep, ruby edging. They have a bushy habit, growing to about 4-5 feet with a 2-3 foot spread. It has a sweet, spicy scent. It is also susceptible to mildew. Beverly – Perfectly formed high centered blooms with an intense fruity fragrance that has notes of citrus, peach, pear, and plum that mingle with base notes of patchouli and fresh myrtle that makes want to keep you nose in those beautiful blooms. Foliage is dark green with excellent disease resistance. The blooms open flat. This rose was the winner of the “Best Hybrid Tea” and “Most Fragrant Rose” awards at the 2013 Biltmore International Rose Trials. Falling in Love – lovely warm pink with white accents and reverse exhibition blooms with strong rose and fruit fragrance. This rose is a good bloomer and fairly quick repeat. The rose produces big, beautiful and nicely fragrant blooms that are long lasting cut flowers. Falling in Love is upright, has big stiff canes and is fairly angular with great looking foliage. However, watch out for those thorns -- Falling in Love is one of the thorniest roses currently on the market. It's a beautiful rose and great looking bush with outstanding foliage. Golden Celebration One of the largest-flowered English Roses, bears rich yellow blooms in the form of giant cups. They have a strong Tea fragrance, developing wonderfully combined notes of Sauternes wine and strawberry. It forms a large rounded shrub, with ample foliage – the flowers held beautifully poised on long, arching branches. A few blooms will fill a room with fragrance. Very few thorns. One of my top favs. As an Amazon Associate, I earn from qualifying purchases from some of the underlined links in the newsletter. This is how I am trying to keep this a free newsletter. And as long as you buy whatever you want from Amazon using any of those links to get into the Amazon site , I get a few pennies. Thank you. Thanks for Subscribing and Spreading the Word About the Garden Basics with Farmer Fred newsletter, I appreciate your support. And thank you for listening to the Garden Basics with Farmer Fred podcast ! It’s available wherever you get your podcasts. Please share it with your garden friends. Fred Hoffman is also a University of California Cooperative Extension Master Gardener in Sacramento County. This is a public episode. If you'd like to discuss this with other subscribers or get access to bonus episodes, visit gardenbasics.substack.com/subscribe
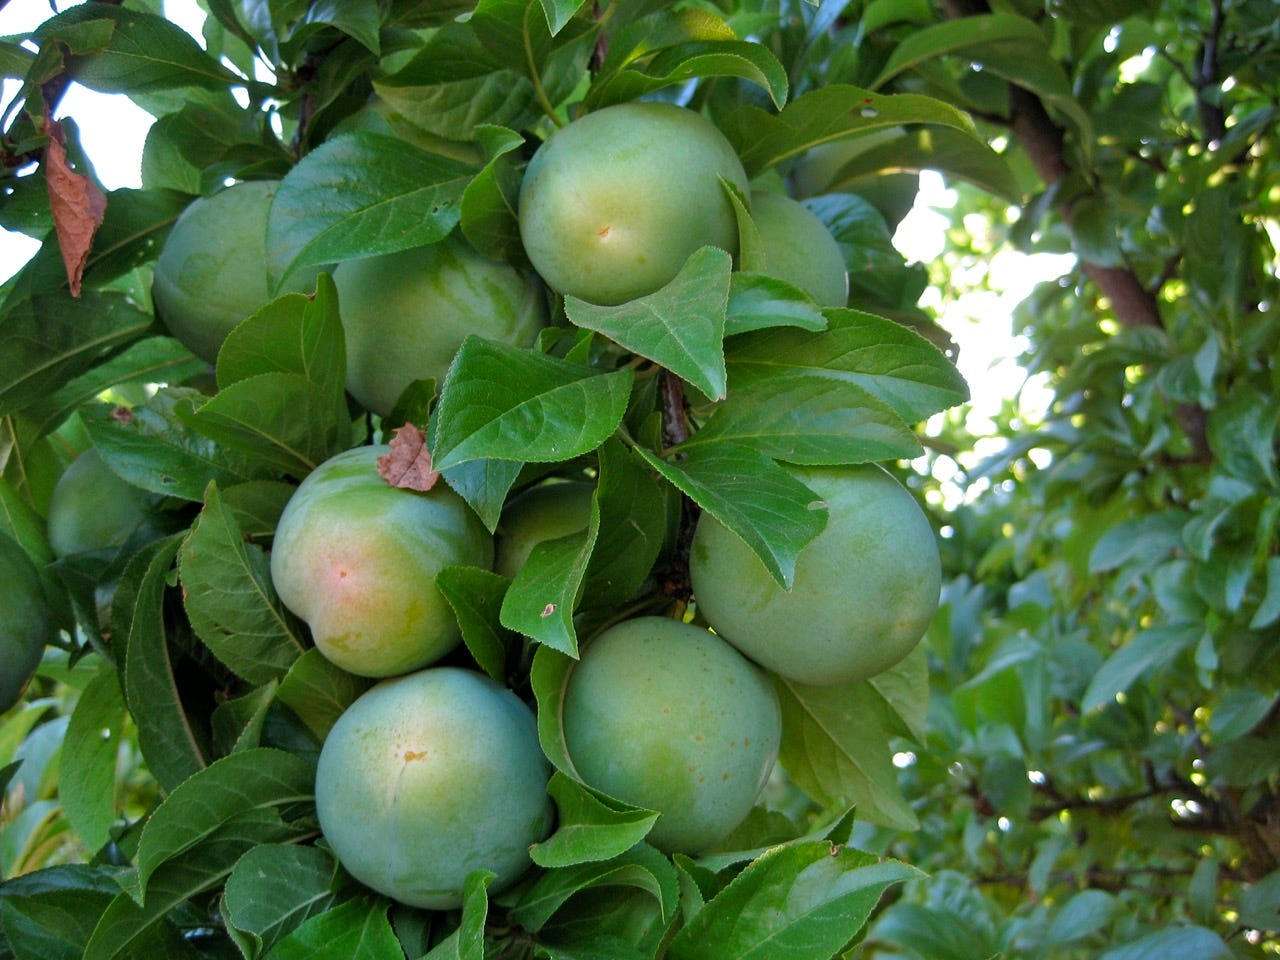
Apr 22, 2022
Top 10 Fragrant Roses (in the Podcast)
As we learned in Episode 186 in the Garden Basics with Farmer Fred podcast , the most fragrant roses make the best meal. Really. Well, maybe not a meal, more like an appetizer. Master Rosarian Debbie Arrington of the Sacramento Rose Society explained that rose petals are actually quite delicious, either served raw in a salad, used as a garnish, or steeped into a tea. Listen to her tips for choosing the right blooms for your rose tasting experience in Episode 186 of the Garden Basics podcast . One of her tips: fragrant roses tend to be the most tasty. Her most important tip: “Don’t eat rose flowers that have been sprayed with pesticides.” Listen to her suggestions for fast food floribundas in the current podcast (186). So, what are the most fragrant roses to choose for your dining experience? In this newsletter podcast, above, another Master Rosarian, Charlotte Owendyk of the Sierra Foothills Rose Society, offered her Top 10 roses that are a show for noses. And below, is part of Charlotte’s article for the Sacramento/Sierra Foothills Rose Society’s newsletter about fragrant roses. Clear your nose, let’s go! Fragrant Roses…A Few That I Grow by Charlotte Owendyk (excerpted from the June 2021 Rose Reflections Newsletter) Watch someone walk by roses displayed at a rose show. First, there'll be an exclamation over color or beauty, but, inevitably, the head will lean in towards the rose in order to sniff its scent and rise with either a smile or expression of disappointment. Yep, we all want fragrance in our roses. This usually is especially important if you only have space for a few roses in your garden. The aroma of roses is due to more than 300+ volatile chemical compounds. In addition, there are times when roses are more fragrant than other times. The best time to smell your roses is in the morning when the tem- perature is about 65 - 70 degrees (F). As the day gets warmer, the fragrance oils evaporate. Another factor in fragrance perception is the fact that no two noses are the same! When the hybrid tea rose became the rage earlier last century, breed- ers aimed for large, high-centered hybrid tea blooms as well as new and different colors. Cut-flower rose cultivars for florists were selected for long vase life,flower shape, and color. In both cases, fragrance was incidental. However, the old garden roses (OGRs) continued to sell because they were great garden plants and many of them have outstanding fragrance. In many cases, it was the fragrance that sold the rose. And many of these OGRs, unlike hybrid teas which bloom all season long, only bloom once a season. In 1985 a paradigm shift occurred; David Austin, a farmer in England, succeeded in breeding fragrant OGRs with repeat blooming roses to produce a whole new generation of fragrant repeat bloomers. Currently, David Austin Roses is a major hybridizer of repeat blooming roses that have fragrance and luscious bloom form. A typical example is Golden Celebration. Many members have a soft spot for these roses. Hybridizers in the last 10-20 years have been working to incorporate disease resistance into roses. (It takes a minimum of 10 years for a rose to come to market.) Many of recent roses introduced are disease resistant to most fungal diseases. Fragrance took a backseat to disease resistance. Now, breeders are more focused on including fragrance in roses. MORE RECENT FRAGRANT ROSES Firefighter – a dusky red velvet hybrid tea that is disease-resistant, with intense old rose fragrance. It is named in honor of the firefighters who lost their lives on 9/11/01. It is very productive, generating long straight stems which are almost thornless, and fragrant until it falls apart. Is an excellent cut flower. This rose grows tall. Francis Meilland This rose has amazing sweet strong fruit and citrus rose perfumed blooms on long stems. Also winner of many awards in America and internationally. It is also tested and proven highly resistant to blackspot in a variety of climates. The bush is covered with dark green glossy foliage. Francis Meilland stood out to me because it’s a heat lover, grows long cut-worthy stems, has massive blush to white blooms, some of the most fragrant blooms. Its form is actually more of an old fashioned type rose and not your average hybrid tea. Julia Child ‐ Just before our wonderful American icon left us, she selected this exceptional rose to bear her name. Julia loved the even butter gold color & the licorice candy fragrance. To top it off it has a perfectly rounded habit, super glossy leaves & great disease resistance. Consistent, hardy & floriferous in all climates. Very disease resistant. The blooms do fade a bit. Memorial Day Lovely orchid pink hybrid tea rose with enormous old-fashioned full 5-6" flowers (petals 50+) saturated with super-strong classic old rose fragrance. Long, almost thornless stems are lushly adorned with clean green leaves on a continual blooming plant. Just one flower perfumes an entire room. All-American Award winner. This is my #2 favorite rose. Pope John Paul II –Beautiful clear white blooms with approximately 45 petals de-light the nose with a strong citrus fragrance. Dark green glossy foliage is diseaseresistant. The bushy plants tops at 4 feet. DO NOT prune hard. Just de-twig and kind of shape the bush. Next season you will be surprised at the results. This is my #3 favorite rose. Secret – My favorite rose! Produces lots of lovely creamy blooms with pink on the edges of the blooms when the petals reflex shows a touch of gold which provide aglow to the fragrant strong spicy scented blooms. Secret repeats blooms quickly and has glossy bright green foliage that is very disease resistant. Great cut flower. Princess Alexandra of Kent - The unusually large, bright pink flowers are full-petaled and deeply cupped. In spite of their size, they are never clumsy, being held nicely poised on a well-rounded shrub. There is a strong and delicious fresh Tea fragrance, which changes to lemon, eventually taking on hints of blackcurrants. The blooms handle our heat well. We will highlight more of Charlotte’s favorite fragrant roses in next week’s newsletter. Thank you for listening to the Garden Basics with Farmer Fred podcast ! It’s available at gardenbasics.net or wherever you get your podcasts. Please share it with your garden friends. Fred Hoffman is also a University of California Cooperative Extension Master Gardener in Sacramento County. This is a public episode. If you'd like to discuss this with other subscribers or get access to bonus episodes, visit gardenbasics.substack.com/subscribe

Apr 15, 2022
Different Mulches for Different Plants. Fruit Trees vs. Lawns
Some of the highlights of this week’s two podcasts on Garden Basics with Farmer Fred, Episodes 184 and 185 , are featured in today’s “Beyond Basics” newsletter podcast. One of the highlights of Episode 184 was Raffaele DiLallo, author of “ Houseplant Warrior” , venturing into his other horticultural passion in his yard in Cleveland, Ohio: getting tropical plants to survive and thrive…outdoors…in an area of the country where snow blowers are more in demand than a chipper/shredder. From Episode 185, Emily Murphy, author of “Grow Now” , talks about how to customize your garden mulching to match the needs of your particular plants. And to give you a hint about the thrust of her book, she casually tossed out the German word, “ hegelkultur ” in our podcast conversation…which is a raised bed building technique long utilized by those who practice permaculture. Not that there’s anything wrong with that . And, Master Gardener Pam Bone gives us lots of good reasons to NOT plant a fruit tree in the middle of the lawn. But she offers some tips on the precautions to take to do it successfully. Finding accurate, reputable information (and that’s the key) online is difficult on how to grow trees, especially fruit trees, in a lawn situation. However, the University of Wisconsin-Madison offers tips for commercial orchardists in the Midwest on the benefits and drawbacks of growing grass in the vicinity of fruit trees, in their publication: “ Orchard-Floor Management For Fruit Trees ”: That publication is also bullish on establishing “grass alleys”: strips of turf, 5-6 feet wide, between the rows of trees, as long as the turf strips are set back about three feet from the trees: “The grass alley provides a solid place for equipment travel, helps prevent soil erosion, and helps increase water infiltration. Sod also helps to maintain soil structure. …weed invasion can be minimized and sod establishment can be fairly quick.” Happy 10th Anniversary to Me! (How Gardening Has Helped Keep Me Alive, Courtesy of The Heart-Healthy Garden The Heart Healthy Garden is a topic that is close to my heart, literally. After being diagnosed with four cholesterol-jammed heart arteries in March 2012, I underwent quadruple coronary artery bypass graft surgery on April 17, 2012. At the same time, I was told I had full-blown Type 2 Diabetes (A1C of 10.4). My general practitioner doctor (at the time) told me after the surgery, “You’re good for three to five years, tops.” I took that as a personal challenge.The surgery went well and the long road to healing from heart disease and diabetes began...including doctors' orders that a gardener does not want to hear: no lifting anything heavier than a gallon of milk for 3 months! Even more problematic for me: no bike riding for three months. After all, when surgeons slice open your sternum to work on your heart, it takes a long while for that bone to heal, despite being held together with wires.Thanks to regular exercise and a healthier diet, with a kickstart from low dosages of diabetes and heart medications, I lost over 60 pounds by February 2013, the replacement arteries (taken from the chest) that still service my heart were cholesterol-free, the blood sugar levels were back to near normal (A1C = 5.9), and I no longer needed to take any prescription medications for either of these ailments. With the doctors' blessings, of course. Today, I weigh the same as in 2013. And still ride my bike, over 100 miles a week. A big part of my success was due to the encouragement and diet tips I got from the nurses who ran the cardiac rehabilitation program at the hospital. They believed - as I did - that there was enough clinical evidence out there that eating right and regular exercise can reverse heart disease and diabetes. The “exercise” part of the recovery was not an issue. As an avid cyclist, I usually averaged 50 to 100 miles a week on the bike. Living at the time on 10 acres, I got a lot of weight-bearing exercise shoveling 10 cubic yard piles of mulch, and lugging it around in 8 cubic foot wheelbarrows throughout the property to keep my fruit and nut tree orchard fat and happy. The “Diet” part of the secret? Eat less sugar. Eat more fiber. That included growing, and eating, heart-healthy fruits and vegetables, loaded with fiber. Most people are familiar with fiber. Fiber is a component of all plant-based foods which cannot be absorbed or digested. It travels relatively intact through your body and out. This is the role of insoluble fiber, the roughage found in many fruits, vegetables and grains that passes through your digestive system and helps promote regularity. Fiber is also composed of soluble fiber, a type of fiber that dissolves in water to form a gel-like material. Studies at the Mayo Clinic and other institutions have shown that soluble fiber may help lower blood cholesterol levels by reducing low-density lipoprotein, or "bad," cholesterol levels. Soluble fiber may have other heart-health benefits, such as lowering blood pressure, blood glucose levels (important for Type 2 diabetes patients) and inflammation.Consuming foods rich in soluble fiber became one of my nutritional keystones for recovery. And it worked! If battling high cholesterol levels and diabetes are part of your life, ask your doctor if a high fiber diet (30 or more grams a day of fiber) is right for you. Better yet, ask a registered dietician. Doctors know pills. Dieticians know food. Which do you want to consume for the rest of your life?If you cast your vote for "food", you, as a gardener, may be wondering, “What are the top five fruits and vegetables with the most soluble fiber that should be part of a heart-healthy backyard garden?” Thanks for asking: Artichokes (3.2 grams soluble fiber per 100 grams). According to the UC Davis Vegetable Research and Information Center website, the globe artichoke is a perennial, cool-season vegetable that yields and produces best when grown near or along the California coast where cool to mild climates prevail. In milder areas of the East Coast, some success has been reported growing from seed varieties, or from transplants such as “Imperial Star”. A mature artichoke plant produces ten or more stems during a season; each stem can provide four to five buds.Unfortunately, perennial plantings of artichokes are not recommended in areas where warm to hot temperatures are common. However, it is possible to grow high-quality artichokes in inland valleys and low desert regions of southern California by handling the crop as a direct-seeded or transplanted annual crop. Until recently, it was believed that artichoke buds produced from seed-propagated plants were of inferior quality to those produced by vegetative propagation. Recent research at the University of California has shown that seed-initiated artichokes looked and tasted great. Moreover, annual cropping makes growing artichokes feasible in gardens with limited space because the crop does not require long-term space allocation. Quicker rotation with other vegetables is also possible.To grow artichokes in warm climates, plant seeds or transplants of 'Imperial Star’ in July for inland valley locations or in September for the low deserts. Blueberries (3.0 grams soluble fiber per 100 grams). Up until about 25 years ago, commercial highbush blueberry production was relegated to the cooler, more humid climates, especially in the northern tier of states. The development of southern highbush blueberry varieties meant we could start growing this tasty fruit here in USDA Zone 9 and other in warm climates. According to the UC Cooperative Extension, rabbiteye blueberries grow in the southeastern part of the country and thrive in hot, humid weather but are not cold hardy. Lowbush blueberries grow in the northeastern states and Canada. Northern highbush blueberries grow from Florida to Maine and the northern tier states and have a high chilling requirement that limits their adaptability. Southern highbush blueberry varieties have a low-chill requirement and are heat tolerant. Although they are self-pollinating, blueberry fruit set will increase and berries will be larger if two varieties are planted together. Most varieties grow 4 to 6 feet tall here. A few, such as Sunshine Blue (3'), are more compact. Shell Beans (1.6-2.2 grams soluble fiber per 100 grams). This easy-to-grow summertime garden staple should be included in every yard. The horticultural bean (shell bean), is widely grown in many parts of the country. The colorful pods and beans of the horticultural bean make it an attractive addition to the garden and kitchen. The seeds of pinto beans look similar to those of the horticultural beans, but are smaller. They are used widely as brown beans and as refried beans in Mexican dishes. Black beans or black turtle beans make an unusual, delicious black-colored soup. They are easy to grow if given plenty of air movement to prevent the disease problems to which they are susceptible. Kidney beans are the popular chili and baking bean, available in deep red or white types. Navy pea and Great Northern beans are used in soups and as baked beans. Plantings of beans should be made after danger of frost is past in the spring and soil is warmed, since seeds planted in cold soils germinate slowly and are susceptible to rotting. One old nurseryman offers this tip to avoid rotting bean seeds: water the day you plant the seeds; don't water the soil again until you see the bean emerge from the ground. Apricots (1.8 grams soluble fiber per 100 grams). Apricots - as well as other deciduous fruit and nut trees - are available inexpensively as bare root trees in late winter and early spring. According to the annual taste test surveys conducted by Dave Wilson Nursery , the top-rated apricot varieties include the Blenheim, Canadian White Blenheim, Tomcot, Early Autumn, Autumn Glow, and a couple of Apricot-Plum crosses: the Flavor Delight Aprium and the Cot-n-Candy Aprium. Green Peas (1.7 grams soluble fiber per 100 grams). According to the UC Davis Vegetable Research and Information Center website, peas do best when grown during cool weather; warm weather shortens the harvest season. In the Central Valley, low foothills and East Bay, plant peas from September through March. Peas can be grown throughout the country, timed with coolness and humidity.Bush types grow in most areas of California; vine types do best when planted along the coast. It is essential to provide support for the climbing vine types. Do not use overhead irrigation; it increases the incidence of mildew. Harvest peas when the seeds and pods are well-developed, but tender enough so they may be crushed between the fingers without separating into halves. Harvest edible pod types at the first sign of seed development. The sugar content of peas readily transfers into starch. Peas overmature quickly and starch conversion continues after picking. Therefore, cook or process (can or freeze) peas soon after shelling.Bush peas have a shorter, earlier production period than the pole types. However, the pole types require extra work, but yield more and produce for a longer time. Recommended varieties include: China, snow, or sugar Dwarf Grey; Sugar Mammoth; Melting Sugar; Cowpeas (Southern peas, blackeye peas); Snap (thick, edible pods); Sugar Ann (dwarf); Sweet Snap (semi-dwarf); Sugar Rae (dwarf); Sugar Daddy (stringless, dwarf); Sugar Snap. And finally, listed from greatest to least, the soluble fiber content (grams of soluble fiber per 100 grams of food) of the most commonly grown garden fruits and vegetables:(From: Handbook of Dietary Fiber by Sungsoo Cho & Mark L. Dreher) * artichokes 3.2 * blueberries 3.0 * pinto beans 2.2 * apricots 1.8 * green peas 1.7 * kidney beans/white beans 1.6 * raisins 1.3 * avocado 1.3 * carrots 1.3 * eggplant 1.3 * oranges 1.1 * pears 1.1 * peaches 0.9 * strawberries 0.9 * leeks 0.9 * green beans 0.7 * cabbage 0.7 * cauliflower 0.7 * peppers 0.7 * potatoes 0.6 * peanuts 0.5 * asparagus 0.5 * celery 0.5 * spinach 0.5 * sweet potatoes 0.5 * turnips 0.5 * tomatoes 0.4 * apple 0.3 * melons 0.3 * broccoli 0.3 * corn 0.2 * lettuce 0.2 * walnuts 0.1 * olives 0.1 * cucumbers 0.1 * onions 0.1 * radish 0.1 * zucchini 0.1 As an Amazon Associate, I earn from qualifying purchases from some of the underlined links in the newsletter. This is how I am trying to keep this a free newsletter. And as long as you buy whatever you want from Amazon using any of those links to get into the Amazon site , I get a few pennies. Thank you. Thanks for Subscribing and Spreading the Word About the Garden Basics with Farmer Fred newsletter, I appreciate your support. And thank you for listening to the Garden Basics with Farmer Fred podcast ! It’s available wherever you get your podcasts. Please share it with your garden friends. Fred Hoffman is also a University of California Cooperative Extension Master Gardener in Sacramento County. This is a public episode. If you'd like to discuss this with other subscribers or get access to bonus episodes, visit gardenbasics.substack.com/subscribe

Apr 1, 2022
A Visit to the Luther Burbank Gardens
Above is an interview about the Luther Burbank Home and Gardens in Santa Rosa, California. Luther Burbank, of course, is probably America’s most famous botanist, horticulturist and pioneer in agricultural science. He is responsible for the development of over 800 varieties of plants in his 55 year career of plant hybridization, his most famous, possibly is the Burbank Russet potato, which is still available in supermarkets and restaurants every day. His biggest flower achievement? Probably the Shasta daisy. And his fruit tree introductions included the July Elberta peach, the Santa Rosa plum, the plum-apricot cross, the plum-cot, and the freestone peach, many of which are still in commerce. One of his most lucrative developments that you will hear about in this interview is the spineless cactus, which is valuable as cattle feed in drought-stricken areas. Yes, you’re going to learn a lot about Luther Burbank here. But also, listen carefully to the docent describing all of this during our visit to the Luther Burbank Home and Garden: Jack Hadley. I conducted this interview years ago, back in 2006. My method of operation for conducting many of these “on the road” garden interviews is fairly haphazard: driving to a destination, I’ll see something interesting along the way. I’ll pull over, get out my microphone and recorder, and grab the first person who knows something about wherever I am - and is willing to talk - and I then turn on the recorder. It was just my good fortune to be talking to Jack Hadley that day in 2006. Jack passed away in 2013. Jack, although very informative, didn’t talk about himself in our conversation. I wish he had. It was only after reading his obituary that I came to the realization that here was a person I wish I had known better. If you are in the habit of reading obituaries, you may occasionally have the same reaction: “Wow, what an interesting person who lead a vibrant life. I wish I knew them.” Give a listen to the interview, and then read this edition of the Garden Basics newsletter, or do both at the same time. We will tell Jack’s story in the newsletter, along with his invention of an item that may be in your garage or garden shed right now: the hand-held, Whirlybird-style fertilizer and seed spreader, which he developed as an employee of Ortho, the long-time garden chemical division of the Chevron corporation. I have a feeling that Luther Burbank and Jack Hadley would have been good friends. Here are some of Jack Hadley’s life achievements, as written about in his obituary from Legacy.com, published in the January 8, 2014 Santa Rosa Press Democrat: “Jack Hadley, a longtime Santa Rosa resident, beloved husband, father, U.S. Navy veteran and inventor of the "Whirlybird" hand-held fertilizer-spreader, passed away on Dec. 29, 2013. He was 88. The oldest of four boys, Jack was born in Martinez, CA on Dec. 15, 1925. He attended Nichols Elementary school and Mt. Diablo High School in Concord, where he excelled in football. He graduated in June 1944 and was drafted into the U.S. Navy. He was assigned to the USS Colorado BB45 battleship in Leyte Gulf, Philippines and was anchored in Okinawa when the atomic bombs were dropped on the Japanese cities of Hiroshima and Nagasaki in August 1945. They were assembling to invade Japan when World War II ended. He was discharged in June 1946 and attended Marin Junior College where he excelled in football as a half back and fullback. His hopes were fulfilled when he received a full football scholarship to Oregon State College (now OSU) where he studied agriculture. He hoped to run a cattle ranch. After redshirting in 1947, Jack suffered a severe dislocation of his shoulder in 1948 while playing linebacker, an injury that ended his football career. But he didn't slow down, riding bareback in the College Rodeo and winning first place in 1949. After graduation, Jack joined Chevron Chemical in 1951 as a livestock specialist. In 1952 he met and fell in love with Aneta Nygren, and three months later they were married. They had their daughter, Shellie, in 1953. Later Jack was in product development working his way up to Western Regional Manager. He worked for 36 years for Chevron Ortho Division where he invented the "Whirlybird," a hand-held fertilizer spreader. More than 100 million Whirlybird spreaders have been sold to date. Jack was known for his enthusiasm, can-do attitude and his positive and sincere outlook on life. He loved people, and they flourished when around him. While working for Ortho, Jack designed and built five homes on weekends. He was a powerhouse of creativity and energy. Jack retired in December 1986. After years of living in San Rafael, he and Aneta moved to Santa Rosa in 1987. Jack designed and built a beautiful dream home for them overlooking Sonoma Valley. Jack volunteered with "Ideas to Market" an inventors group, and later was recognized by the city for his work at Luther Burbank Home and Garden.” Some of the comments left by Jack’s friends and family on that obituary page reinforce and expand on much of what you just read: “Jack was a kind and generous soul, always cheerful and always with a good idea. It was my pleasure to know and work with him as a fellow volunteer at Luther Burbank Home & Gardens.” “All who knew him loved him! Hope you are spreading your wonderful good cheer wherever you are now, Jack.” “He has a special place in our hearts, as he stood tall during the goood and not so good times.” “Jack was a beloved boss and mentor of ours when we worked for him at Ortho. What a wonderful man, this world won't be the same but heaven is rejoicing in his coming home!” “Always a kind word, how you doing, with a laugh. Happy memories . Laughing, smiling. Always so sweet.” “He will always be remembered as the spark plug that ignited Chevron and made it the envy of the industry. Jack was the best at everything..the best.” “Jack was an overwhelming personality who could not accept a "NO, Jack" on a regulatory or label issue. The Ortho family will miss him. He was a treasure.” “Never a happier man than Jack. I am a better person for having worked for and known Jack Hadley.” “I remember Jack when they were very involved and great volunteers at the Burbank Home & Gardens. He had such a positive and helpful attitude about everything.” “A great man and a great life. He left an indelible mark on so many. I was blessed to have the opportunity to witness his leadership skills for 10 years.” “Mr. Hadley was one of the best I've ever met. He was always so kind and had the nicest smile and could light up a room with those eyes. He will definitely be a shining star up above.” “Jack was a mentor for many of us. For me he was both a professional and personal friend who taught me much about work and life.” “Jack was a wonderful man one of the best I ever worked for. He was always in high gear and full of life. he will be missed!” “I loved working for Jack at Ortho. He was my hero and role model.” “Even in his 80s Uncle Jack was a delight and bubbling with life. His LOVE of family and the world around him was intoxicating...a "Hadley trait" I hope transcends generations to come. Love always Uncle Jack.” “Jack was a wonderful man and such a fine human being. Always positive and seeing the good in life, unfailingly kind and ever a gentleman. I always felt happy when I was around him, because he was so cheerful.” As I am compiling this, it’s getting a bit misty in here. I bet you wish you knew Jack Hadley better, too. My interaction with Jack was brief; but I’m glad to be able to share with you my few minutes chatting with him, all those years ago. You’ll never be able to think about your Whirlybird fertilizer spreader in the same way. As an Amazon Associate, I earn from qualifying purchases from some of the underlined links in the newsletter. This is how I am trying to keep this a free newsletter. And as long as you buy whatever you want from Amazon using any of those links to get into the Amazon site , I get a few pennies. Thank you. Thanks for Subscribing and Spreading the Word About the Garden Basics with Farmer Fred newsletter, I appreciate your support. And thank you for listening to the Garden Basics with Farmer Fred podcast ! It’s available wherever you get your podcasts. Please share it with your garden friends. Fred Hoffman is also a University of California Cooperative Extension Master Gardener in Sacramento County. This is a public episode. If you'd like to discuss this with other subscribers or get access to bonus episodes, visit gardenbasics.substack.com/subscribe
Mar 25, 2022
What's Your NQ*? (Nature Quotient)
That audio snippet (above) is from Episode 178 of the Garden Basics with Farmer Fred podcast, featuring author Emily Murphy, talking about her new book, “ Grow Now-How We Can Save Our Health, Communities, and Planet, One Garden at a Time ”. Go to Episode 178 to listen to the entire conversation. The audio sampler above touches on one section of her book, where she discusses the importance of knowing your “Nature Quotient.” As she puts it in her book: “Your nature quotient (NQ) is a measure of your understanding of the natural world, the dynamics at work within it, and your personal connectivity to nature. It involves skills such as observation, curiosity, mindfulness, and empathy and compassion.” But the podcast interview gave short attention to how to increase your NQ, in order to become a better gardener. Nor did it offer up the quiz that Emily presents in “Grow Now” on how to measure your NQ. Since the name of this digital typing allegedly contains the words, “Beyond Basics”, it seems appropriate that we present the quiz here, along with tips for increasing your NQ, which you can also find in the book, “ Grow Now” : Measure Your “NQ” (Nature Quotient) (In the book, you can circle all the answers that apply to you. If you try that here, you’ll have permanent black circles on your phone or tablet. Just get the book.) • How much time, on average, do you spend outside each week? Two or more hours; one hour; less than one hour. • What are your touchpoints with nature? Houseplants; nearby park or open space; plants and trees in your yard or garden. • Which of the following have you done recently? Take a nature walk; stop when you hear the sound of a bird; notice a change in wind direction; look to the sun to figure out the time of day; notice a shift in the seasons; pick up litter; photograph flowers and plants. • How often do you feel burnt out and exhausted? Often; sometimes; never. • How comfortable are you without wifi, or going without your phone for periods of time? Love it; hate it; it doesn’t matter; a mix of all three. • Can you determine when the moon is full? Yes; no. • What do you think of bugs? Fascinating; frightening. • What are your feelings on dirt? Love it; hate it; neutral; not sure. • What do you do when you find spiderwebs outside? Leave them where you find them; Swipe them away. • How do you see yourself? As someone who can grow anything with a little bit of effort; as someone who is challenged by gardening and everything you try to grow withers. Unfortunately, for those of us who are results-oriented, this is a quiz without a score. As frequent guest (and retired college horticulture professor) Debbie Flower likes to remind us, “This information will not be on the Final.” So, just be honest with yourself, and perhaps take up some of Emily’s suggestions in her book for 15 easy ways to increase your NQ, with my additional thoughts in italics : 15 Easy Ways to Increase Your NQ * Keep a Bird book and binoculars by the window. ( be sure to tell the neighbors you’re looking for birds, not hot tub parties ) * Grow three new herbs in your kitchen or on your patio ( gentle reminder: marijuana is not an herb. Besides, the teenagers next door have binoculars, too, and might covet your “herb garden” .) * Compost your kitchen scraps and yard waste. ( And start a worm compost bin. They’re quiet and undemanding. They’re happy with your leftover, chopped up vegetables .) * Try growing - from a cutting - a plant that you pass on walks in your neighborhood. ( Pro tip: for the sake of your health, ask before you snip. A good book on the topic is “Plant Propagation” by Alan Toogood ) * Try propagating a favorite houseplant. ( Again, the book “ Plant Propagation” is a handy reference ) * Try growing mushrooms in your cupboard or in a shady spot outside. ( for advice on which mushrooms you find outdoors that are safe to eat, consult someone with extensive mud stains on their shirt and pants. They are probably members of a local mycological society, who spend their weekends crawling through forests, looking for mushrooms. And let them taste it first. ) * Commit to using only organic fertilizers. ( Pro Tip #2: building a healthy soil with consistent practices of mulching, composting, no-till, and cover cropping may reduce your fertilizer needs to near zero, especially on permanent plantings .) * Follow the sun by creating outdoor spaces to be either sun or shade, depending on the season. ( Pro Tip #3: just moved to a new home? Plan before planting. And that could take a year. Track the moving shade in your yard with pictures for the first year in your new home. Once each month, on a sunny day, take a series of pictures at 9am, noon, 3pm and 6pm of the areas where you want to put a garden. Gauge from those pictures whether the area, on average, is full sun (6-8 hours or more per day), part sun (4-6 hours) or mostly shade (less than 4 hours). Plant accordingly. Fear not, you can still plant in year 1. Just use containers that you can move around easily to follow the sun .) * Add a new, pollinator-friendly planting bed to your existing garden. ( In USDA Zone 9, don’t forget to add winter-blooming shrubs that are attractive to bees and other beneficials, such as rosemary and euryops. ) * Begin a nature project. What can you make with leaves, driftwood, or other found items? ( I like to put fallen oak leaves in a metal trash can and whip them into small pieces with a string trimmer, and then top my raised beds with those shredded leaves. A mulching mower can accomplish that task, as well ) * Do a simple test of the soil near your home. ( Inexpensive pH and macronutrient test kits are widely available. A couple of universities also do inexpensive, but complete soil testing: University of Massachusetts/Amherst and Colorado State University .) * Plan a small cutting garden for homegrown bouquets. ( Zinnias are easy to grow and long lasting as cut flowers! ) * If there are trees in your yard or nearby landscape, create a comfortable spot to sit and enjoy them for some at-home forest bathing. ( A long time ago, an old edition of the Sunset Western Garden book offered instructions for creating a redwood haven. I did it, and the result was fabulous! Truly a “greenhouse” and a cool, contemplative area in the summer that attracted nesting owls. Pro tip #4: use tall, evergreen trees that are native to your area. And you’ll need a big yard to do this! Instructions at the end of this newsletter .) * Replace a section of your lawn with a riot of regionally appropriate plants and wildflowers. ( YES! ) * Fill window boxes and planters with flowers and leafy greens you’ve never planted before. ( “Bright Lights” Swiss Chard is a personal favorite for the eyes and mouth .) Pick up Emily Murphy’s book, “Grow Now”, wherever you pick up books. Lots of great advice and great pictures! ============================================================================ How to Make an Evergreen “Greenhouse”. These instructions from the 1988 edition of the Sunset Western Garden Book applied to coast redwood trees. Many different varieties of conifers could be used instead: pines, cedars, and firs, for example. Choose species that are native to your area for the best chance of longterm success. From the 1988 Sunset Western Garden book description of Sequoia sempervirens (coast redwood tree): “Plant several in a grove or in a 40-foot diameter circle. Inside it’s cool, fragrant, and a fine spot for fuchsias, begonias, and people on hot summer days. For grove or circle planting, space trees 7 feet apart. Trees can be planted 3-4 feet apart and topped at least once a year to make a beautiful hedge.” If you have the room, do the circle. The hedge is too much work and, in my opinion, destroys the majesty of the trees. As an Amazon Associate, I earn from qualifying purchases from some of the underlined links in the newsletter. This is how I am trying to keep this a free newsletter. And as long as you buy whatever you want from Amazon using any of those links to get into the Amazon site , I get a few pennies. Thank you. Thanks for Subscribing and Spreading the Word About the Garden Basics with Farmer Fred newsletter, I appreciate your support. And thank you for listening to the Garden Basics with Farmer Fred podcast ! It’s available wherever you get your podcasts. Please share it with your garden friends. Fred Hoffman is also a University of California Cooperative Extension Master Gardener in Sacramento County. This is a public episode. If you'd like to discuss this with other subscribers or get access to bonus episodes, visit gardenbasics.substack.com/subscribe

Mar 18, 2022
Growing the Gumbo Garden
Professional chef and Sacramento County Master Gardener Andi Macdonald shares her California-style gumbo recipe in the brief chat at the top of this edition of the Garden Basics’ “Beyond Basics” newsletter. Mardi Gras season is also gumbo season in Lousiana. And we know a good thing when we taste it. Gumbo dishes have spread, and can be found served on a regular basis everywhere, including the dining rooms of Congress. What makes Andi’s gumbo recipe unique: it’s vegan. “Sacrilegious!”, you say, about a dish that goes back hundreds of years in Louisiana, a staple of an early American diet that features meat as the main attraction. To quote Wikipedia: “Gumbo is a heavily seasoned stew that combines several varieties of meat or seafood with a sauce or gravy. Any combination of meat or seafood can be used. Meat-based gumbo may consist of chicken, duck, squirrel, or rabbit, with oysters occasionally added. Seafood-based gumbo generally has shrimp , crab meat , and sometimes oysters. Andouille sausage is often added to both meat and seafood gumbos to provide " piquancy , substance, and an additional layer of flavor" to the dish. The key is to use a tender andouille so it does not become too chewy. Most varieties of gumbo are seasoned with onions, parsley , bell pepper, and celery. Tomatoes are sometimes used in seafood gumbo, but traditionally few other vegetables are included.” “I have been a vegan for the past 2-1/2 years,” explains Macdonald, who trained at Michelin-starred restaurant Chez Panisse in Berkeley, CA, where founder Alice Waters developed the concept of California Cuisine and promoted the farm-to-table movement. Macdonald goes on to say: “I work at creating upscale vegan cuisine. I believe that all food should be wonderful, and there's no reason vegan cuisine can't meet a high bar. I also don't believe that following a vegan diet should be a political statement. Humans have evolved to like certain tastes and textures and that can be achieved in vegan cooking.” Here’s the recipe: Vegan Gumbo Yaya By Andi MacDonald, Sacramento County Master Gardener / Professional Chef Serves 8 What makes gumbo so special is the roux, a cooked mixture of flour and fat that both thickens and flavors the stew. Depending on what it will be used for, roux can be white, blond, brown, or black. For this gumbo, the aim is a very dark red-brown roux, which takes patience and a good eye. One way to tell that you’ve reached perfection is that the roux will smell like popcorn. You can buy Creole seasoning from just about any grocery store or make your own. Making your own is pretty cheap and not difficult. There’s a recipe for a spice mix following the gumbo recipe. Textured vegetable protein (tvp) is a gluten-free soy product available in many grocery stores. It can also be ordered online. ½ cup neutral oil, such as canola oil ½ cup AP flour 1 red bell pepper, diced 1 green bell pepper, diced 1 celery stalks, diced 1 yellow onion, diced ½ lb vegan Italian sausage, in ¼” slices 1 tablespoon Cajun/Creole seasoning (or to taste) 2 teaspoons Kosher salt (or to taste) ½ teaspoon black pepper (or to taste) 1 bay leaf 1 teaspoon chili powder ½ teaspoon dried oregano 2 teaspoons minced garlic 1 ½ cups textured vegetable protein, large chunks 7 cups vegetable stock 1 tablespoon filé powder mixed with water (optional, see comments in #7 below * Combine the peppers, celery, and onions into a bowl and set aside. * In a separate bowl combine textured vegetable protein with 1½ cups of warm water (or vegetable stock for more robust flavor). Cover and set aside. * Pay close attention – this next step is crucial! Heat the canola oil in a heavy saucepan. When it gets hot, add the flour gradually, while vigorously stirring with a wire whisk. Boil the mixture and whisk as it continues to boil. Keep stirring until the roux becomes a dark reddish brown color and smells like popcorn. Be careful not to splash yourself or touch the side of the pan with your arm. Be both attentive and brave – this procedure could take anywhere from 20 to 45 minutes. Do not ever, ever, ever walk off and leave it. * Pull the pan off the flame. Add half of the vegetable mixture, and with a long handled wooden spoon, stir for 1 minute. It will splatter and steam – so be careful! * Return to the flame. Add the remaining vegetable mixture and stir for an additional minute. * Gradually stir in the vegetable stock. Add the sausage, spices, herbs, garlic, and soaked textured vegetable protein. Bring to a boil, reduce heat, and simmer for 45 minutes, stirring occasionally. * Fifteen minutes before serving, check the gumbo. If it seems too thick, add more stock. If it seems thin, thicken with a filé slurry (filé powder mixed with enough water to form a pourable paste). Taste and add salt if desired. * Serve over rice and top with fried okra pieces. Some cooks add okra to the stew with the other vegetables. Personally, I find boiled okra too slimy. It’s best if it’s fried and sprinkled on top. Win-win for both camps! Creole Seasoning 2 tablespoons paprika 1 tablespoon smoked paprika 2 tablespoons garlic powder 1 tablespoon ground black pepper 1 teaspoons ground white pepper 1 tablespoon onion powder 1 teaspoon chipotle powder 1 teaspoon ground cumin 1 teaspoon ground coriander 1 teaspoon salt 1 teaspoon msg (optional) Combine ingredients in a small jar and stir or shake to blend. ===================================== Although I am very familiar with the smell of freshly-made, stovetop or air-popped popcorn (which, by the way, has a much more pleasant aroma than overly zapped, artificially flavored, microwave popcorn), I had questions about some of her ingredients: neutral oil? AP flour? Filé powder? “Neutral oil is an oil that doesn't have a strong flavor, such as canola, corn, grape seed, and mild olive oils,” explains Macdonald. “AP flour is white all-purpose flour, the kind used for just about everything. Filé powder, also called gumbo powder, is dried sassafras root. It is traditionally used to thicken gumbo. It's mixed with water to form a glutinous slurry (fancy chef talk for paste), which is then stirred into the gumbo, usually not long before serving. It's probably available at stores, but I order it from Amazon because I don't have the time nor inclination to drive all over the county trying to find it. In place of filé, a cornstarch slurry would work, as would potato flakes; neither exactly traditional, but it thickens the stew. Gumbo is served over rice.” And as you heard in our chat, “Yaya” is the Greek endearment for “grandma”. You’ve probably grown many of the ingredients of this gumbo recipe. But celery? Okra? And what about growing your own seasonings, including cumin, coriander, paprika, and chipotle? Celery As odd as it sounds, the primary commercial growing areas for celery in the United States are California and Michigan. Two very different climates. However, the majority of commercial farms in California growing celery are nestled in the fertile valleys near the Pacific Ocean , areas that seldom get above 90 degrees or below 40 degrees. Celery prefers climates without the extreme temperatures (which is Michigan in the summertime). In hot climates, success depends on your timing. Celery plantings in March and April or August through November in hot summer areas helps this sensitive crop dodge the heat in its developmental stages. For most of the country, March is the ideal month to start celery from seed, indoors. Set out transplants (which are much easier than from seed) in hot summer areas in March or April; in mild areas of the country set them out in late May or early June. Read more here from Johnny’s Selected Seeds about growing celery. Okra “Valued as a key ingredient in authentic Southern gumbo and other soups and stews, okra can also be roasted, pickled, dipped, or grilled. Despite being slow to evolve from seeding to fruiting, pods form repeatedly and quickly in late summer.” Here’s more from the Sonoma County (CA) Master Gardeners on how to grow okra. Chipotle Not the restaurant chain. It’s a dried, smoked jalapeño pepper. The website, chilipeppermadness.com says it takes 10 pounds of jalapeños to make one pound of chipotles. Here’s how to do it , from that same website. Cumin and Coriander: Two Different Plants The cumin plant: Cuminum cyminum. Here’s how to grow this herb and harvest its seeds, from West Coast Seeds . The Coriander plant, Coriandrum sativum. But you may know is by its other common name, cilantro. A cool season crop in hot areas; a summer crop in milder areas. However, if all you want are the cilantro leaves, hot climate gardeners can grow it as a micro green in a shady area. Fill a tray with a light, seed-starting soil, scatter the cilantro seeds throughout. When they get a few inches tall, give it a haircut of about an inch or so from the top, and harvest just the upper leaves. The book, The Sunset Western Garden Book of Edibles says this about harvesting the coriander seeds: “To collect seeds, pull up whole plants when fruits (which look like seeds) begin to turn gray-brown; then put the plants headfirst into bags and shake them; or, hang them over paper and let seeds drop.” Paprika Grow it like you would a pepper. Because, it’s a pepper! Renee Shepherd of Renee’s Garden seed company is fond of the “Hungarian Magyar” paprika pepper, and explains how to grow it here. As an Amazon Associate, I earn from qualifying purchases from some of the underlined links in the newsletter. This is how I am trying to keep this a free newsletter. And as long as you buy whatever you want from Amazon using any of those links to get into the Amazon site , I get a few pennies. Thank you. Thanks for Subscribing and Spreading the Word About the Garden Basics with Farmer Fred newsletter, I appreciate your support. And thank you for listening to the Garden Basics with Farmer Fred podcast ! It’s available wherever you get your podcasts. Please share it with your garden friends. Fred Hoffman is also a University of California Cooperative Extension Master Gardener in Sacramento County. This is a public episode. If you'd like to discuss this with other subscribers or get access to bonus episodes, visit gardenbasics.substack.com/subscribe

Feb 18, 2022
Peppers to Try in 2022
Looking for tried and true pepper varieties to grow this year? How about proven varieties of tomatoes, greens, squash, okra, melons, as well as pollinator-friendly flowering plants such as begonias and petunias? Give a listen to Episodes 168 and 169 of the Garden Basics with Farmer Fred podcast. In Episode 168 , we chatted with Sacramento County Master Gardener and vegetable expert Gail Pothour. She and the other Master Gardeners there have been growing an array of All-America Selections winners for several years at the Fair Oaks Horticulture Center ’s AAS Display Garden…along with some staff favorites. Not only are the vegetable varieties she mentions winners here in USDA Zone 9, but the majority of them are All-America Selections national winners, having proven their mettle in trial gardens from coast to coast. In Episode 169 , Diane Blazek, the Executive Director of the All-America Selections organization, lengthens this “you oughta grow this!” list considerably. In all, between the two episodes, we chatted about 45 different varieties of vegetables worth trying…and, my condolences to you if you were trying to jot them all down while driving. Here, then, are the pepper varieties we mentioned, along with the usual effusive catalog descriptions, as well as personal thoughts on those varieties we mentioned that were not AAS Winners. All of the AAS winners mentioned can be found at all-americaselections.org . Due to space limitations in this newsletter, we’ll list the tomato varieties in next Friday’s Garden Basics “Beyond the Basics” newsletter. The following Friday (March 4) we’ll have the varieties of chard, lettuce, squash, eggplant, okra, melons and flowering plants that we talked about in those two podcasts. You will also see the notation, “F1”, after many of these hybrid varieties. No, they are not part of the international Formula One auto racing circuit (although “Pepper Quickfire” would be a good name for an accident-prone driver). According to the smarty pants experts who occupy the F1 Wikipedia entry , “…the term F1 hybrid (also known as filial 1 hybrid ) is usually reserved for agricultural cultivars derived from two parent cultivars. These F1 hybrids are usually created by means of controlled pollination , sometimes by hand pollination .” PEPPERS TO TRY IN 2022 Pepper Carmen F1 2006 AAS Edible Vegetable Winner Carmen is an improved sweet pepper with an unusual shape. Most gardeners think of a bell shape when “sweet” peppers are mentioned. Not so anymore. Carmen is an Italian bull’s horn type which refers to its elongated shape, about 6 inches long. The medium thick flesh is the sweetest when it is ripe red, but Carmen peppers are sweet even when immature or green. One of the improved traits is the earliness to ripe red. Gardeners can look for red peppers about 75 days after transplanting into warm garden soil. The other improved traits are sweet flavor and high yield. Carmen proved to be widely adaptable, flowering and setting fruit over a wide temperature range. Like all peppers, Carmen will produce the highest number of peppers when grown in full sun and given proper nutrients and water. Carmen plants are productive with an upright, medium height of 28 to 30 inches. This plant size is perfectly adaptable to larger patio containers. https://all-americaselections.org/product/pepper-carmen/ Cornito Giallo F1 2016 AAS Edible – Vegetable Winner “DOUBLE YUM” was one judge’s response to the AAS Winner Cornito Giallo F1 pepper, “The flavor on this one is totally a winner!” Starting as small green fruits, this AAS Winner develops into bright yellow jewels with a delicious sweet and fruity flavor. The peppers themselves are plentiful and durable, yet easy to eat fresh. Being an early bloomer, you will be able to enjoy these peppers throughout the growing season and well into the fall. Plant Cornito Giallo F1 in your garden this year and you can join our judges in exclaiming “YUM!” https://all-americaselections.org/product/pepper-cornito-giallo/ Dragonfly F1 Sweet Pepper 2022 AAS Edible-Vegetable Winner Dragonfly pepper plants produce beautiful purple peppers that have thick, sweet walls, unlike the thin papery walls of other purples on the market. Similar to the beloved dragonfly that flits around your garden, this pepper transforms itself from a green pepper into a purple fruit that is as delicious at the green stage of maturity as it is when fully purple and mature. Overall, it’s a much better purple color than comparison varieties, with above average, robust pepper flavor. Fruits are held high on the plant, keeping them from the soil. The 4-lobed fruits do not fade, and if left on the vine, turn a beautiful, bright red color. https://all-americaselections.org/product/pepper-dragonfly/ Escamillo F1 Pepper 2016 AAS Edible – Vegetable Winner A wonderful sweet taste on a golden yellow pepper, the Escamillo F1 pepper is an early bearing pepper plant with a compact habit makes it an ideal choice for any home garden. Gardeners will be captivated with the high yield of peppers per plant and how the fruit itself is held off the ground for easy picking and less rotting. This plant is a winner with its all-around qualities of excellent taste either raw, cooked or fire roasted, compact size and high yield. https://all-americaselections.org/product/pepper-escamillo/ Gypsy hybrid Sweet Pepper 1981 AAS Edible – Vegetable Winner The early and heavy production of the yellow sweet pepper Gypsy provides color and flavor variety to your salads and dips. The 3-4 inch wedge-shaped fruits are very tender, crunchy and sweet. The plants average 18-20 inches in height with a 14-18 inch spread and are resistant to tobacco mosaic virus disease. (One of my personal favorites. Gypsy has been part of my pepper bed for over 30 years) https://all-americaselections.org/product/pepper-gypsy-hybrid/ Just Sweet F1 pepper 2019 AAS Edible – Vegetable Winner A unique snacking pepper with four lobes like a larger bell pepper, only smaller. Not only are the 3 inch fruits deliciously sweet with nice thick walls but the plants are vigorous growers (up to 36 inches tall and 15 inches wide) that don’t need to be staked because they’ve been bred to have a strong bushy habit. Many judges conduct consumer taste tests and reported back that this pepper won those tests, hands down. The Just Sweet peppers are exceptionally bright, shiny and a vivid yellow color with a flavor described as sweet with aromatic accents. Great lunchbox item for kids! https://all-americaselections.org/product/pepper-just-sweet/ Nadapeno pepper (from Baker Creek, Not an AAS Winner) Love the flavor and crunch of jalapeño, but can’t take the heat? This truly heatless jalapeño is perfect for those with sensitivity or aversion to the heat of traditional jalapeño peppers. Great for pickling, stuffing, poppers and salsa. This variety is very early and prolific! (Not only will it fool your heat-sensitive taste buds, it will also fool Mother Nature. Nadapeno produced sweet peppers for us through mid-December) https://www.rareseeds.com Orange Blaze F1 Sweet Pepper 2011 AAS Edible – Vegetable Winner Although colored peppers can be difficult to grow, this 2011 AAS Winner, Orange Blaze F1, solves that problem. This variety proved itself a winner in AAS Trialing Grounds across North America due to early maturity, sweet flavor, and disease resistance. It matured to a beautiful orange color earlier than the comparisons. Expect a very sweet flavor at full orange color about 65-70 days from transplant. Orange Blaze F1 produces 3 to 4-inch long fruits about 1 1/2 inches wide with 2-3 lobes. High resistance to diseases. https://all-americaselections.org/product/pepper-orange-blaze/ Pot-a-Peno Pepper F1 2021 AAS Edible – Vegetable Winner Pot-a-Peno is a fun new jalapeno pepper with a compact habit perfect for growing in containers and hanging baskets. Plentiful small, green jalapeño fruits have a traditional spicy zip that is great in any dish where you want a little punch of spice. Simply leave the fruit on the vine a few extra weeks and they will ripen to red for a sweet, spicy flavor. This variety is earlier to mature than other jalapenos giving you a head start on your garden’s harvest. A unique trait of Pot-a-Peno is how the fruit hangs down beneath the plant making it very easy to harvest without damaging the appearance or productivity of the plant. A dense foliage canopy makes for an attractive addition to your patio or balcony garden. Not a sweet pepper, but not too hot, either. In the podcast that starts off this newsletter, Diane Blazek, Executive Director of the All-America Selections organization, has a recipe for stuffed poppers using the Pot-A-Peno pepper, cream cheese and mild sausage. https://all-americaselections.org/product/pepper-pot-a-peno/ Pepper Quickfire F1 2022 AAS Edible – Vegetable Winner Mighty, strong, hot, and quick! What more might one want in a hot Thai-type pepper? Quickfire peppers produce plenty of hot delicious fruits on a compact, sturdy plant that is perfect for container gardening. No staking is required. This pepper has tremendous ornamental value but was bred for its taste and yield. Culinary gardeners will definitely want to give this gem a try in their Thai and other Southeast Asian dishes where a little heat and kick give the meal some quickfire! https://all-americaselections.org/product/pepper-quickfire/ Roulette F1 Habanero 2018 AAS Edible – Vegetable Winner Roulette F1 resembles a traditional habanero pepper in every way (fruit shape, size and color, and plant type) with one exception – No Heat! This AAS National Winner’s one-ounce fruits are red with thick walls when it matures and a nice citrusy (no heat) habanero flavor! Gardeners will be delighted with the earlier production of large, uniform fruit and a very high yield. One judge noted that each plant easily produces 10-11 fruits at one time and up to 100 per season so there are plenty to eat fresh, cook with, and enjoy! For an early fruit production of a habanero pepper that will charm even those that don’t like it hot, take your chances…Roulette is the perfect choice. https://all-americaselections.org/product/pepper-habanero-roulette/ Tequila sweet pepper (Fred’s choice) A true purple sweet bell pepper, deep in color with early maturity. Its 3 to 4-lobed fruits mature to a medium red. Matures in 75 days. Cut it open and savor the delightful aroma! Attractive fruits make excellent stuffed peppers and stir-fries. Resists Tobacco Mosaic Virus. https://www.totallytomato.com/product/T03229/66 Tricked You Hybrid Pepper (Gail’s Pick) This completely heat-free jalapeno is an improved version of the popular Fooled You Hybrid. Get jalapeno flavor without the heat or mix with hot jalapeno varieties to create the exact heat level you want in hot sauces and salsas. Improvements include disease resistance to Bacterial Spot, races 0-3, 7, and 8. Expect large harvests of these peppers that are 4½ inches long and 1½ inches wide. 90 days. https://tomatogrowers.com/products/tricked-you-hybrid As an Amazon Associate, I earn from qualifying purchases from some of the underlined links in the newsletter. This is how I am trying to keep this a free newsletter. And as long as you buy whatever you want from Amazon using any of those links to get into the Amazon site , I get a few pennies. Thank you. Thanks for Subscribing and Spreading the Word About the Garden Basics with Farmer Fred newsletter, I appreciate your support. And thank you for listening to the Garden Basics with Farmer Fred podcast ! It’s available wherever you get your podcasts. Please share it with your garden friends. Fred Hoffman is also a University of California Cooperative Extension Master Gardener in Sacramento County. This is a public episode. If you'd like to discuss this with other subscribers or get access to bonus episodes, visit gardenbasics.substack.com/subscribe
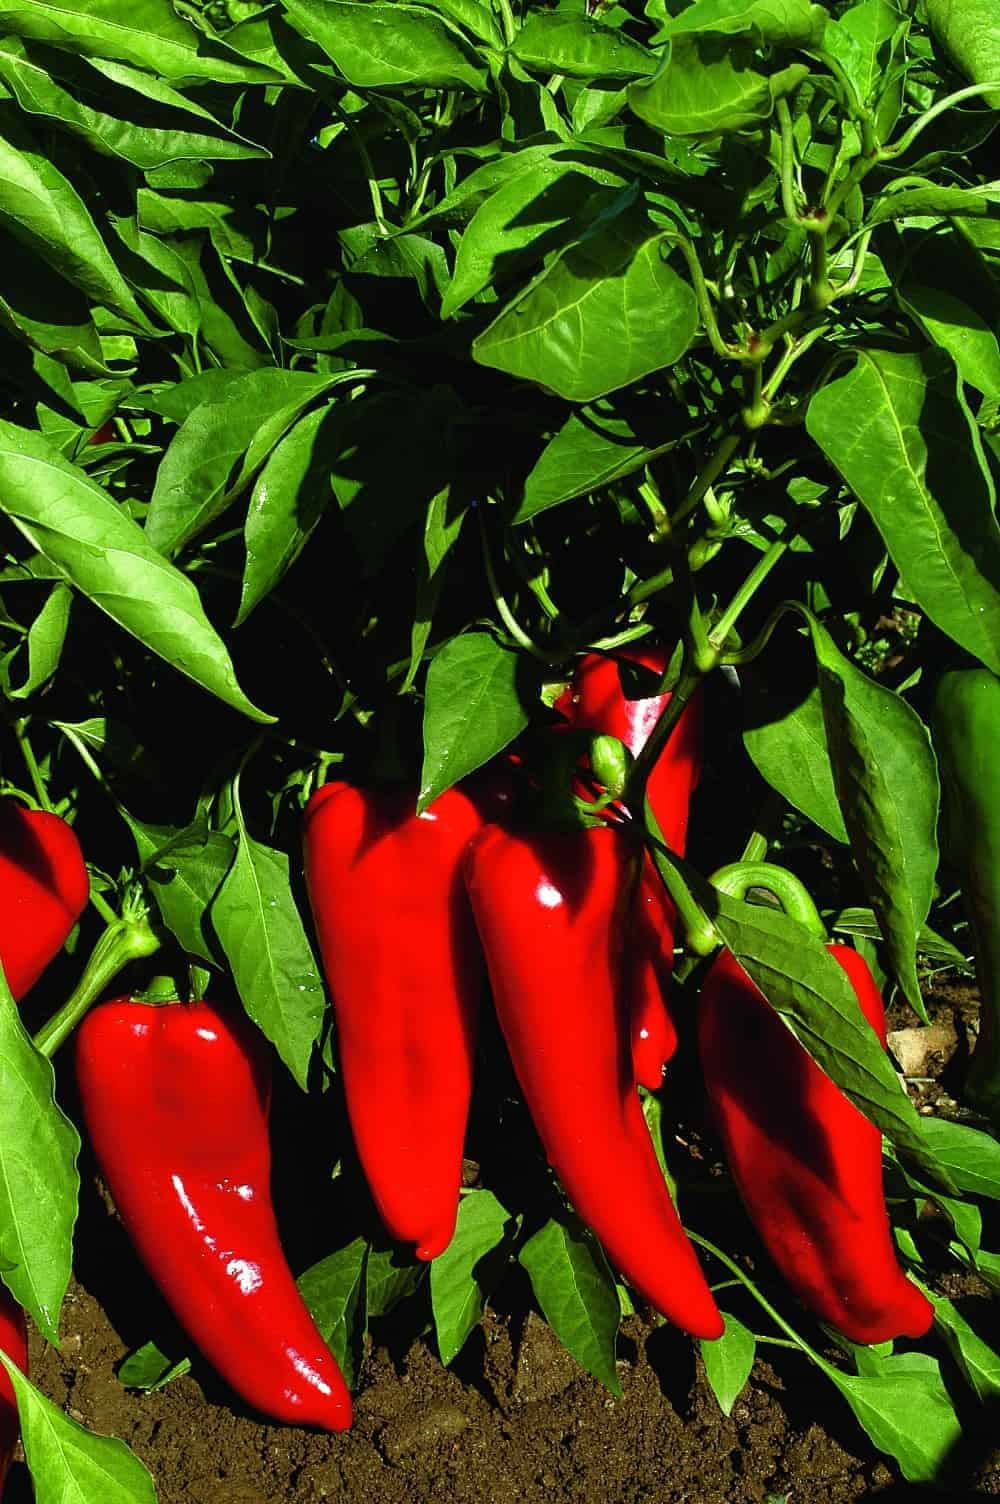
Feb 11, 2022
Should You Add Bagged Soil To Your Garden?
As you can hear in the podcast above, adding bagged soil products to your garden might cause problems with your plants, due to impeded water movement. What to do? Debbie Flower, our favorite retired college horticultural professor, says to stick to the native soil. But, she does offer tips on how you can use bagged soil in your garden. Give a listen. And if you want to hear the whole conversation, head to Episode 166 of the Garden Basics podcast, released Tuesday, February 8. Also in that episode: thwarting weeds around rosebushes, without resorting to chemical weed killers. But if you do choose to use them, how to do it safely. Also in this edition of the Garden Basics “Beyond Basics” Newsletter: • Do you need to fertilize cool season flowers and vegetables? • What Your Yellowing Citrus Leaves Are Trying to Tell You • When is a rock mulch on top of your soil most appropriate? • A Deep Dive into How Water Flows Through Soil • Soil Testing: Do It Yourself, or Send It Out Do You Need to Fertilize Your Cool Season Annual Vegetables and Flowers? Maybe. Maybe not. It depends. Listen to the entire conversation in Episode 167 of the Garden Basics with Farmer Fred podcast. Here’s a transcription of the salient points from the podcast to that question: Fred: Do you need to fertilize cool season annuals? Debbie: "Need" is a strong word. And it would apply to fertilizing anything, really. Plants make their own food and they use nutrients that they get through the environment and absorbed through their roots to make that food. The time to fertilize is when they show you that they don't have enough of those nutrients. And that is when they have very small new leaves and they're losing all of their older leaves down at the bottom or closer to the trunk or they're all turning yellow, that would be a nitrogen deficiency. Or when you're seeing different streaks of yellow, let's say, in the leaves. That could be a micronutrient deficiency, the plants should be flowering, producing flower buds and opening them and it's not or the plant should be producing fruit and the fruit should be expanding. And it's not. Those are deficiency symptoms. And that's when you apply nutrition, which is in the form of fertilizer in the cool season. All those processes are very slow in the plant. And if you have soil that has been mulched with organic matter for a long time, long enough that the organic matter has started to break down and release nutrients to the soil, you typically will not need to fertilize the winter annuals. Fred: That makes a lot of sense too. Because mulch is a slow release fertilizer as it breaks down. It's feeding the soil and if you've had that mulch for a long time, like you say, then your plants are slow. Slowly, slowly being fed. And I think we all prefer to be fed, slowly slowly. Debbie: It's painful to eat too much at one sitting. Yeah, exactly. And a plant can show that symptom as well. They can burn when you give them too much fertilizer. Yes, cool season annuals need nutrition, because they're alive and they're flowering or fruiting or whatever it is you you have them for, even just growing them for their showy green parts. But do we need to add fertilizer only if we see deficiency symptoms. Fred: And it can't hurt to do a soil test. Debbie: Absolutely. Find out exactly what it needs. Fred: And you can buy soil tests that do more than just measure pH, which the less expensive soil test kits do. A step up are the test kits that also measure nitrogen, phosphorus and potassium. But you can go beyond that and buy more expensive soil test kits to check for micronutrient deficiencies. More info about soil test kits included at the end of this newsletter. ============================= Online Soil Test Services If you don’t want to play kitchen counter chemist with the soil, you may be fortunate enough to live in an area where your county or state ag departments may help you out in that regard. Check with your local Cooperative Extension office to see if soil testing for homeowners is still part of their services. Unfortunately, in many states, including California, that service is no longer offered by Cooperative Extension. There are private companies that do offer soil testing, but they can be pricey and they may be more geared to agricultural soil testing. However, at least two universities do offer soil testing for home gardeners throughout the U.S. at reasonable prices: University of Massachusetts/Amherst Colorado State University Click on those links for more information. This soil test was conducted by UMass/Amherst. The test results also include in additional pages information about how to correct any soil abnormalities. What are Your Yellowing Citrus Leaves Trying to Tell You? Why do citrus tree leaves (the leaves of oranges, limes, lemons, mandarins, avocados, pummelos, grapefruit and others) turn yellow? There are many possible reasons, especially as winter transitions into spring. Generally speaking, each problem has some tell-tale differences in the yellow leaves to help you diagnose the cause. A few of the possible problems are illustrated below, from the UCANR citrus page, “ Diseases and Disorders of Leaves and Twigs ”, which has a more extensive list.( http://ipm.ucanr.edu/PMG/C107/m107bpleaftwigdis.html ) Iron Chlorosis Interveinal chlorosis from iron deficiency appears as yellowing between the small, darker green veins. This net-vein pattern occurs primarily in young leaves of the fall growth flush as soils cool, reducing root activity. ================================= Nitrogen Deficiency Foliage is pale overall when nitrogen is deficient. The causes include a true deficiency of nitrogen, adverse soil conditions (cold, wet soil) or unhealthy roots. ====================================== Magnesium Deficiency Leaves turn yellowish overall but larger veins remain slightly green where manganese is deficient. Zinc deficiency symptoms are somewhat similar to those of manganese deficiency. Both are more prevalent on young leaves of the fall growth flush as soils cool and root activity diminishes. ====================================== Boron Toxicity Leaf mottling or yellowing, spotting on the underside of leaves, and premature leaf drop can occur from excess boron; severe symptoms can include twig dieback. =================================== Citrus greening disease (Huanglongbing) Leaf mottling and yellowing that crosses leaf veins helps to distinguish citrusgreening; yellowing in just one section of a tree is characteristic of citrus greening. The cause is a bacterium spread by aphidlike psyllids (the Asian Citrus Psyllid, in particular, here in California). Symptoms include stunted trees, leaf and fruit drop, twig dieback, and fruit that are lopsided, small and bitter-tasting. When zinc deficiency is the cause discoloring occurs between distinctly greener veins. Report suspected citrus greening to agricultural officials if found in California. ======================================= Zinc Deficiency Extensive chlorosis develops between veins when zinc is severely deficient; leaves may be smaller in size on shoots that have shortened internodes. ======================================= Potassium Deficiency Yellowish leaves with edges bent downward, especially at tip are symptomatic of insufficient potassium. ===================================== When is a rock mulch appropriate? When it’s next to a house in a wildfire zone. Here’s a link with more tips on creating defensible space around your home from the Marin County (CA) Master Gardeners. As they point out, for the area that extends from 0 to 5 feet from any building’s foundation, use non-combustible mulches only (stone, rock, gravel, pavers, etc.). ==================================== Watching the River (not) Flow As you heard in the podcast at the top of this page, mixing different types of soil or bagged soil products into your native garden soil can slow the percolation of water, threatening those plants that are trying to survive in a root zone that may be saturated for too long with standing water. Here’s another deep dive into why that is, from UCANR’s Ventura County Cooperative Extension . For a more gardener-friendly explanation on this same topic, pursuing it from the angle of why you don’t want to put gravel in the bottom of your containerized plants, is the Garden Professor’s Linda-Chalker Scott. ================================== My Two Favorite Soil Test Kits (and one to get after winning the Lottery) Basic: (pH, Nitrogen, Phosphorus, Potassium) ============================== More Fun: (same as above, but with nine micronutrients added. Convenient.) ========================== Move aside, Mama, I’m taking over the entire kitchen counter! : ( The Lamotte Soil Test Kit/Professional ) $$$$ As an Amazon Associate, I earn from qualifying purchases from some of the underlined links in the newsletter. This is how I am trying to keep this a free newsletter. And as long as you buy whatever you want from Amazon using any of those links to get into the Amazon site , I get a few pennies. Thank you. Thanks for Subscribing and Spreading the Word About the Garden Basics with Farmer Fred newsletter, I appreciate your support. And thank you for listening to the Garden Basics with Farmer Fred podcast ! It’s available wherever you get your podcasts. Please share it with your garden friends. Fred Hoffman is also a University of California Cooperative Extension Master Gardener in Sacramento County. This is a public episode. If you'd like to discuss this with other subscribers or get access to bonus episodes, visit gardenbasics.substack.com/subscribe

Feb 4, 2022
Tips for Garden Tool Selection & Care
Above: In today’s Garden Basics “Beyond Basics” Newsletter podcast: Brad Gay of JB’s Power Equipment in Davis , CA explains what to look for when choosing garden pruners. And, Debbie Flower has a garden tool storage tip you may not be aware of: your garage floor could rust your shovels! Here’s a hint on what to do: We are back to two Garden Basics with Farmer Fred podcasts a week as we start Season 3 (plus Friday’s newsletter podcast). On Tuesday’s Episode 164, we talked with Matthew Ampersand of Find Out Farms and Community Fruit in Sacramento about the best tools to own to pick fruit. Debbie Flower and I chat about the importance of winter cleanup in your garden, to help stave off the pests this spring and summer. In Friday’s Episode 165 , Debbie and I do a deep dive into garden tool care and selection, including the must-have tools that should be part of every gardener’s arsenal of backyard fun. In Episode 164, Matthew Ampersand mentioned his favorite snips for removing citrus and apples from trees, while retaining a bit of the stem on the fruit (we talk about why that’s important). He said his go-to small pruners resemble dog toenail clippers. They fit easily into the front pocket of overalls, tend to stay sharp, and yes, professional orchardists and farm workers do use them. It’s Citrus Harvest Season in USDA Zone 9. But Who’s Going to Pick all That Fruit? Matthew also told us about his volunteer group, Community Fruit, that gathers unused backyard fruit around Sacramento and distributes the fruit to the needy. Considering that nearly one-third of all the food grown in the U.S. is never eaten, with most of it ending up in a landfill , this is a project that should be emulated throughout the United States. One way you can help reduce the amount of wasted food in this country is to store it properly when you bring it inside, so it lasts longer in your kitchen. The UC Davis Post Harvest Technology Department has produced a handy sheet for hanging on the inside of one of your kitchen cabinet doors: “Storing Fresh Fruits and Vegetables for Better Taste.” Also in Episode 164 , Debbie Flower told us about the importance of winter cleanup in the garden, how removing fallen fruit, leaves, branches and any fruit hanging dead in the trees could stave off many insects, diseases and weed seeds that could survive the winter in that debris, and spring to life…in spring. If you have backyard apple or pear trees, this is especially effective at controlling codling moth, and its wormy larvae that will be burrowing in and out of your apples and pears when the weather warms. So, if you have areas of your garden that look like this: Take action now before the codling moth comes out of hibernation in late winter and early spring. Anvil versus Bypass? It’s No Contest When Choosing Hand Pruners Episode 165, “Garden Tool Care and Selection” , presented a wide-ranging lesson from our favorite schoolmarm, Debbie Flower, on choosing the right tools and caring for them properly. We discussed the importance of caring for wooden handled tools, which involves sandpaper, boiled linseed oil and some old rags or towels. But we both drew a blank when talking about care tips for fiberglass handles on shovels and other large garden tools. One website did offer this, however: “Fortunately, fiberglass handles require very little in the way of maintenance. All you really need to do is give them a good wash down to remove any dirt or grime. However, now is a good time to give each handle a thorough examination. Fiberglass can be damaged by the sun and if you apply to much stress it will crack. Catching any signs of damage early can save someone from getting seriously hurt if a handle should happen to break under a load. Remember to store your tools with fiberglass handles out of the sun.” However, if you want the real lowdown on fiberglass handles, eavesdrop on some fire fighters. You might hear comments like this : “We have some very old fiberglass handles here, once or twice a year they get TLC in the form of a wipe down with fine grit sandpaper to remove those pesky little splinters, some steel wool on the heads, and a little Rustoleum paint, good as new! Newer stuff comes with a plastic overlay which protects both you and the fiberglass. And be sure to wear gloves, always always always, even when cleaning up. You think fiberglass splinters are a pain? While cleaning up after a fire I found out the hard way that window glass splinters are much worse.” And it’s kind of hard to be discussing garden tools without it devolving into the pros and cons of anvil versus bypass pruners. Basically, it’s this: If you listened to this newsletter’s podcast at the top of the page, you also got the opinion of Brad Gay of JB’s Power Equipment in Davis, CA . Just say Yes! to bypass pruners. Meanwhile, back at Episode 165 , I gave my secret for cleaning my shovels and cutting equipment of hard to remove mud: a barbecue grill brush, that lives in the garden tool shed. Besides the cleaning action of the bristles, that thin metal plate at the top of the brush head is great for getting into the rolled foot rest of the shovel to clean out the mud: Controlling rust on garden tools was also a hot topic of conversation in Episode 165 . Here’s more information on rust control from Home Depot . Debbie also mentioned, and I concurred, that one of our favorite utility garden tools is the Hori-Hori knife . It’s a trowel! It’s a root saw! It’s digs! It excavates weeds! And you’ll probably lose it, unless you paint the handle a bright yellow or wrap the handle with brightly colored electrical tape. We spent a good portion of our tool care chat talking about sharpening tools . Go back and listen to that. And then watch this video . Links to Products Talked About on the Podcasts: Felco Bypass Pruners Felco’s How To Clean and Sharpen Pruners Video Felco Sharpening Tool Hori-Hori Knife Fiberglass Handled Shovels 3-in-1 Oil Orchard fruit pruning shears/snips Orchard Ladders Harvest Bags As an Amazon Associate, I earn from qualifying purchases from some of the underlined links in the newsletter. This is how I am trying to keep this a free newsletter. And as long as you buy whatever you want from Amazon using any of those links to get into the Amazon site , I get a few pennies. Thank you. Thanks for Subscribing and Spreading the Word About the Garden Basics with Farmer Fred newsletter, I appreciate your support. And thank you for listening to the Garden Basics with Farmer Fred podcast ! It’s available wherever you get your podcasts. Please share it with your garden friends. Fred Hoffman is also a University of California Cooperative Extension Master Gardener in Sacramento County. This is a public episode. If you'd like to discuss this with other subscribers or get access to bonus episodes, visit gardenbasics.substack.com/subscribe
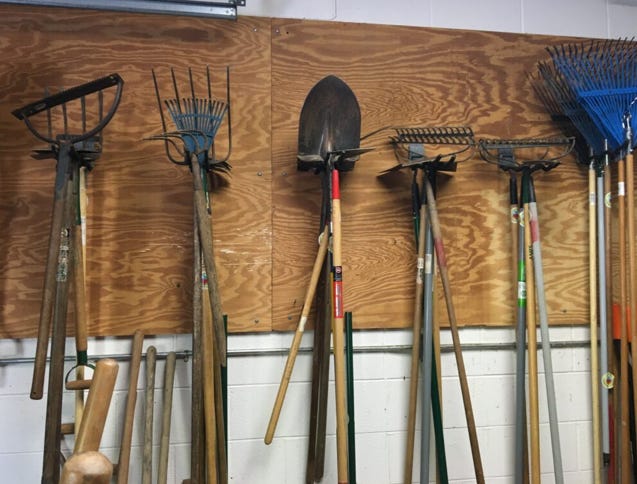
Jan 28, 2022
Seed Starting Tips
In this special podcast for the Garden Basics Newsletter, Beyond the Basics, I wanted to highlight five great garden hints offered by Debbie Flower from the original podcast, Episode 163 of the Garden Basics with Farmer Fred : • Soaking pepper seeds in hydrogen peroxide can speed up germination; and, how seeds germinate. • Why seeds don’t need fertilizer. • How to know when to transplant those seedlings into larger containers. • Why seedlings need a light period and a dark period each day. • The importance of air movement and the development of reaction wood for the young seedlings.* On Episode 163 of the Garden Basics with Farmer Fred podcast , we delved into seed starting tips, especially for those slow-to-germinate pepper seeds, which can take up to three weeks to show their first set of leaves. Our favorite retired college horticultural professor, Debbie Flower, offered several speedy seed germinating tips, which could be applied to just about any seed you’re trying to coax to life. What you’ll need for successful seed germination and growth, according to Debbie: • Small, clean seed trays or containers with drain holes . • A soilless seed starting mix . (We offer up several homemade recipes, too) • The benefit of soaking pepper seeds for a few minutes in hydrogen peroxide. • Bottom heat via a propagation mat . • Consistent moisture. • Lights, once the seedlings appear. • Air movement . • Transplanting those seedlings into bigger containers once roots pop out of the bottom. Listen to all of Episode 163 for more details about all those tips. Or read the transcript . Debbie Flower is a horticultural treasure. One listen to what she has to say isn’t enough. She is offering up so many great tips for gardeners in our “scenic bypasses”, that it really pays to either listen a couple of times or read the entire transcript. I am amazed at all I am learning from her; and, I’m listening to what she has to say at least four times (the original interview, two editing sessions, proofing the final) and polishing the transcript. And reading and editing that transcript, although last on the list, reveals more great gardening information that I had missed before. (A word of warning for future podcasters who will deal with transcripts: digital robots that provide the original transcript are notoriously inaccurate. Be prepared to spend at least an hour per 30 minutes of interviews to do the corrections. Translating from a transcription of the spoken word to a transcription intended for readers takes work. I am convinced that World War 3 could start due to someone reading a raw, robot-generated transcript; there’s that much misinformation included in the original file.) In Episode 163 , we also discussed the importance of gentle watering of seedling trays, so as not to dislodge the seeds. We have different ideas about the best sort of gentle watering equipment to use. A list and links of all the seed starting implements that we discussed, including watering equipment, is here: Grow lights Dramm Water Breaker nozzle Pump Pressure Water Sprayer Multi Head hose-end sprayer with Mist setting Seed Starting trays, kits Indoor Greenhouses Outdoor Greenhouses Seed Starting Mix * The phrase, “reaction wood”, awakens the thirteen year-old boy in me. I wonder how many giggling scientists it took to come up with the explanation of the importance of air movement in the development of reaction wood among young plants. According to this scholarly presentation, the answer would be: 10. As an Amazon Associate, I earn from qualifying purchases from some of the underlined links in the newsletter. This is how I am trying to keep this a free newsletter. And as long as you buy whatever you want from Amazon using any of those links to get into the Amazon site , I get a few pennies. Thank you. Thanks for Subscribing and Spreading the Word About the Garden Basics with Farmer Fred newsletter, I appreciate your support. And thank you for listening to the Garden Basics with Farmer Fred podcast ! It’s available wherever you get your podcasts. Please share it with your garden friends. Fred Hoffman is also a University of California Cooperative Extension Master Gardener in Sacramento County. This is a public episode. If you'd like to discuss this with other subscribers or get access to bonus episodes, visit gardenbasics.substack.com/subscribe
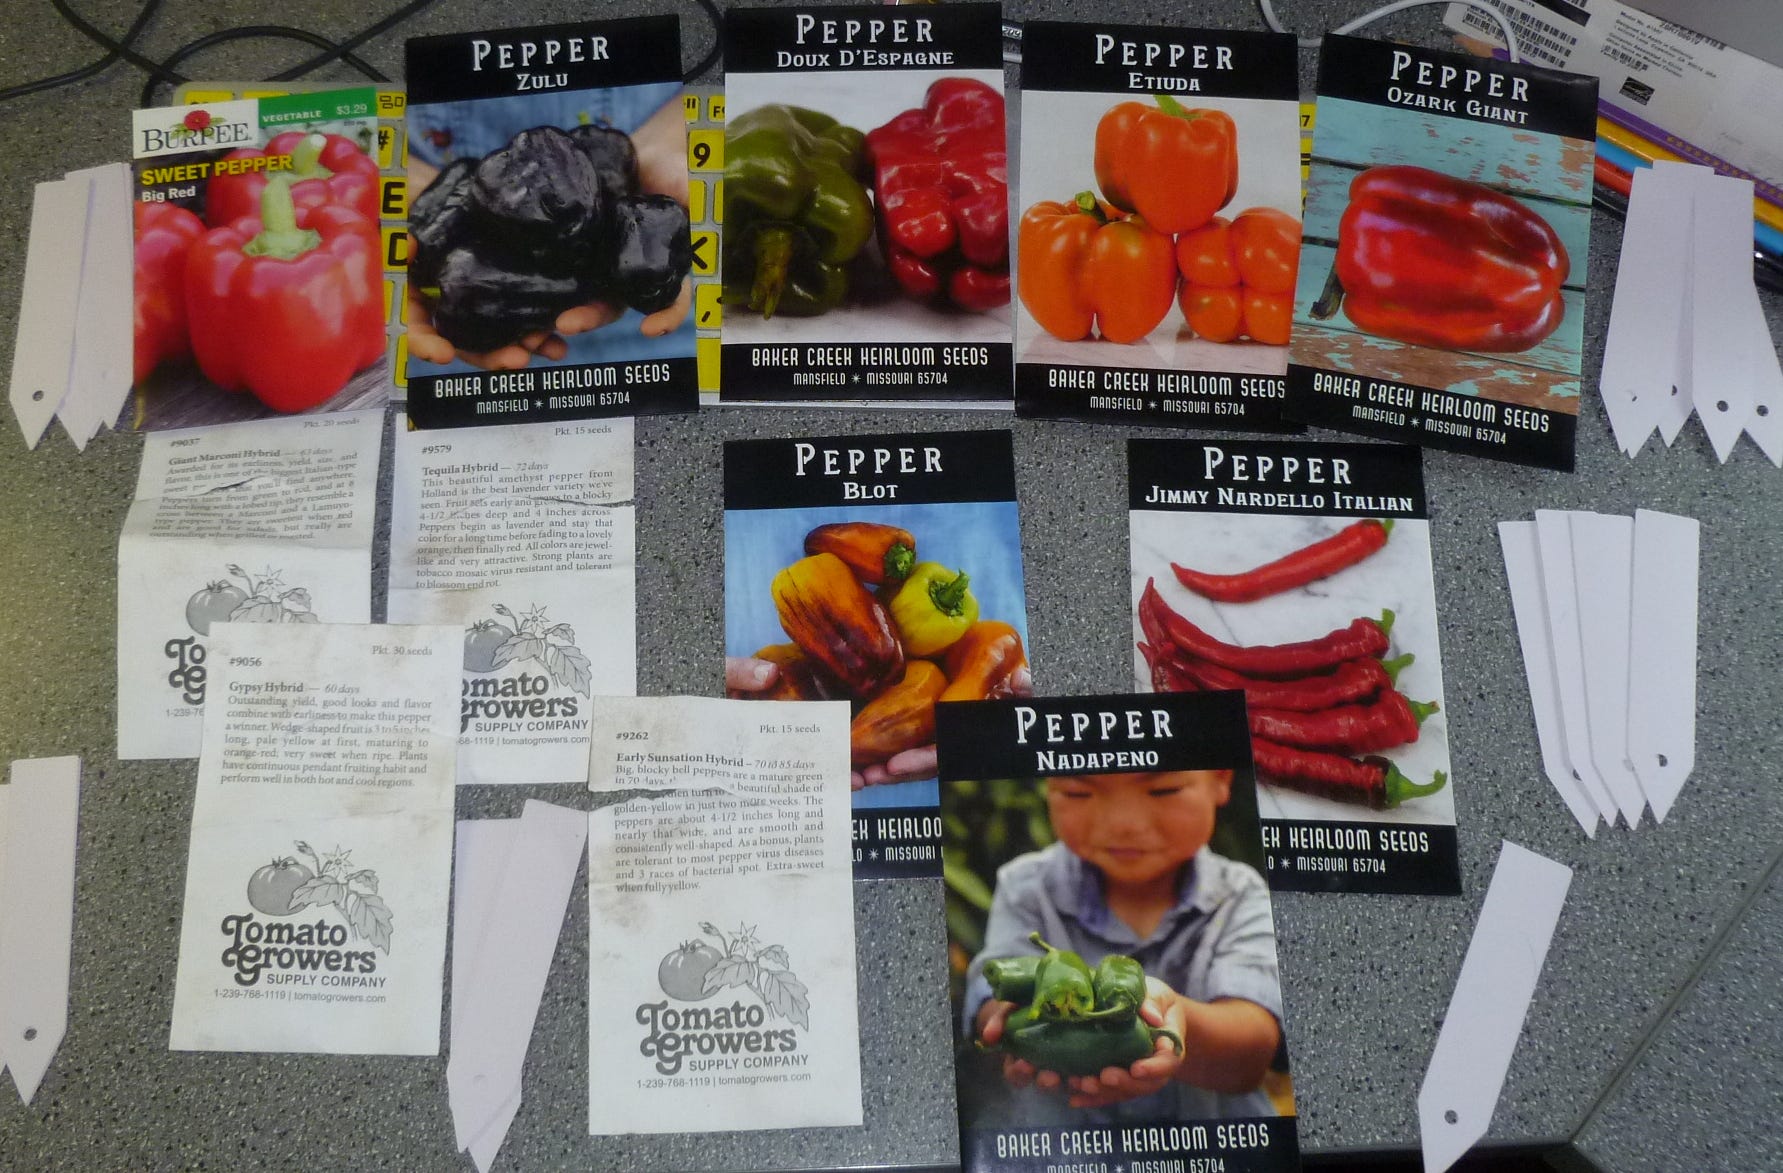
Jan 21, 2022
The Best Roses for America? One Master Rosarian's List.
Podcast Bonus: High Scoring Roses for Most of the United States We like to check in with Master Rosarian Charlotte Owendyk of the Sierra Foothills Rose Society, to find out which roses have captured her fancy in the last year or two. And beyond that, which roses she recommends because they can be easy to grow in a variety of climates. The Sierra Foothill Rose Society, after all, has California members from near sea level in Sacramento and Roseville all the way up to Lake Tahoe, more than a mile up in the Sierra Nevada mountains. Is there a rose that can be grown in such varied climates? Sure enough, Owendyk has a list that she likes to call, “Bulletproof Roses”. Owendyk didn’t hesitate to respond about her favorite, widely adaptable rose. “One rose that can really take the heat and the cold is ‘Distant Drums’, which has a very distinct coloration,” she says. “The petals are apricot-colored in the center, surrounded by lavender on the outer petals. It’s hardy down to USDA Zone 4, and has a wonderful strong scent with great disease resistance.” We here are considered to be in USDA Zone 9, where winter lows seldom drop below the upper 20’s. USDA Zone 4, on the other hand, has seen lows dip down to 31 below zero in the winter. Yet, ‘Distant Drums’ can do well for your aunt and uncle in North Dakota. Lake Tahoe (USDA Zone 6) is relatively balmy in comparison, where January overnight lows average about 26 degrees above zero. Another top performing rose for most of the United States, according to Owendyk is the floribunda rose, ‘Iceberg”, and its close relative ‘Burgundy Iceberg’. Floribunda roses are noted for their massive, long-lasting, colorful displays of large clusters of white flowers. However, when it comes to a quick turnaround for getting new blossoms, nothing beats “Secret”, says Owendyk. “Normally, hybrid tea roses take five or six weeks to rebloom after deadheading,” says Owendyk. “For ‘Secret’, it’s only four to five weeks. That’s why it’s one of my favorite roses. Plus, it’s very fragrant.” Other rose varieties that Owendyk is fond of in 2022, the ones she recommends for rose growers across the country, include: • “Belinda’s Dream”, a shrub rose (“A tough, soft pink rose, with great disease and heat resistance” says Owendyk.) • “Cinco De Mayo” (“Wonderful ruffled, smoky lavender flowers”). • “Lyda Rose” (“The flowers look like apple blossoms, absolutely stunning”). • ”Gemini” (“This All-America hybrid tea rose winner is very vigorous, with coral-and-cream colored petals”). • “Memorial Day” (“Extremely fragrant rose that blooms all summer, plus the canes don’t have many prickles or thorns”). • “Sally Holmes” (“A shrub rose that can get seven feet tall and is tolerant of some shade”). Other honorable mentions in Owendyk’s list of roses for everyone include “Betty Boop”, “Dick Clark”, Cherry Parfait“, “Julia Child”, “Marilyn Monroe”, “Playgirl”, “Rock N Roll”, and “Quietness”. “Floribunda? What’s That?” A Modern Rose Glossary Master Rosarian Charlotte Owendyk and I talked rose pruning in Episode 162 of the “Garden Basics with Farmer Fred” podcast. The episode may have had you wishing for The American Rose Society’s “Handbook for Selecting Roses” , a great, pocket-sized encyclopedia of roses, and rose information, perfect for anyone shopping for good rose varieties. Plus, it has a lot of handy definitions when trying to decipher head-scratching questions such as, “What’s the difference between a floribunda and a grandiflora rose?” Here then, is a brief glossary of rose varieties, courtesy of the ARS: GRANDIFLORA ROSE In 1954, the introduction of a rose crossing between the ‘Charlotte Armstrong’ (a hybrid tea rose) and the floribunda rose, ‘Floradora’, resulted in a flower with carmine rose and dawn pink coloration. The cross had the characteristics of a hybrid tea rose, but also the ability to bear clusters or trusses and grow to a commanding height of six to eight feet or more. Thus, the class of Grandiflora was born. The first Grandiflora was named “Queen Elizabeth” in honor of the (at the time) very young queen of England. FLORIBUNDA ROSE The floribunda class of roses is characterized by its profuse ability to bear flowers in large clusters or trusses with more than one bloom in flower at any one time. Floribundas provide massive, colorful, long-lasting garden displays. Floribundas have the edge on hybrid tea roses. Hybrid teas bloom in cycles every six or seven weeks. Floribundas, on the other hand, can bloom continuously. One standout floribunda, with an ARS rating of 8.6, is ‘Lavaglut’. HYBRID TEA ROSES Probably the most recognizable class of roses, due to the large, shapely blooms, with each flower containing 30 to 50 petals. Flowers are borne on long stems either singly or with several sidebuds. One highly rated hybrid tea rose that is widely available at nurseries is ‘Mr. Lincoln’. MINIATURE ROSES The height of the average miniature rose is about 15 to 30 inches, making them ideal for edging beds and containers. Miniatures have been developed from many hybrid tea and floribunda roses. My favorite? ‘Joy’. CLIMBING ROSES Their long, arching canes have the ability to climb up fences, over walls and through trellises, arbors and pergolas. They offer a wide range of flower forms, shapes and colors. Among the highly rated climbing roses: ‘Don Juan’. SHRUB ROSES If you’re looking for easy care roses, consider the shrub roses. They can grow five to fifteen feet in every direction, depending on the climate. Shrub roses are noted for their hardiness, vigor, and large quantities of clusters of flowers. The ‘Knock Out’ varieties of shrub roses are especially hardy and highly rated. And you have to be hardy to thrive next to the drive-thru lane at Jack in the Box. How to Prune a Climbing Rose If you listened to Episode 162 of the '“Garden Basics with Farmer Fred” podcast , “‘PRUNE’-ciples: Tips for Pruning Roses”, you know Charlotte and I came to a grinding halt when it came time to talk about pruning climbing roses. It’s not a subject that lends itself very well to an audio format. You need to see it in action to better understand the nuances of training climbers. We mutually decided on one very good Youtube video on pruning climbers you might want to watch. Enjoy . If you listened to the podcast episode , you know Charlotte and I did a deep dive into the proper tools and clothing required to take on the somewhat dangerous task of pruning roses. Here, then, is the part of the newsletter where I try to get you to buy something from Amazon, so I can earn enough funny money to keep my cat and dogs supplied in hard-to-find, canned varieties of pet food. Pruning gloves, arm protectors for working around roses Bypass-style Hand Pruners Bypass-Style Loppers Rechargeable Reciprocating Saw P.S. Those sharp things on rose canes? They’re not thorns. They’re prickles. Really. Debbie Flower, retired college horticulture professor, explains . As an Amazon Associate, I earn from qualifying purchases from some of the underlined links in the newsletter. This is how I am trying to keep this a free newsletter. And as long as you buy whatever you want from Amazon using any of those links to get into the Amazon site , I get a few pennies. Thank you. Thanks for Subscribing and Spreading the Word About the Garden Basics with Farmer Fred newsletter, I appreciate your support. And thank you for listening to the Garden Basics with Farmer Fred podcast ! It’s available wherever you get your podcasts. Please share it with your garden friends. Fred Hoffman is also a University of California Cooperative Extension Master Gardener in Sacramento County. This is a public episode. If you'd like to discuss this with other subscribers or get access to bonus episodes, visit gardenbasics.substack.com/subscribe

Jan 14, 2022
Cold Tolerant Succulents. Plants for a School Garden. Pepper Seed Germination Tips.
ABOVE: Tips for Germinating Pepper Seeds in Less Than Two or Three Weeks Episode 161 of the Garden Basics with Farmer Fred podcast delved into two popular issues: tips for choosing the easiest to grow succulents; and, the best plants and themes for a school/home school garden. In this newsletter, we expand on those two topics, plus a bonus podcast (above) with information on getting pepper seeds to germinate quicker. More tips are included at the bottom of this “Beyond the Garden Basics” newsletter. There’s no need to wait two or three weeks to see those pepper seeds begin to sprout! (Usually. Your results may vary. All gardening is local.) Succulents That Can Take a Bit More Cold Weather For gardeners just starting off their succulent garden, either indoors or outdoors, our interview with Robin Stockwell in Episode 161 has a lot of good advice on choosing and planting these unthirsty, beautiful blooming plants, which thrive in warmer climates. And what’s true for all plants is true for succulents: choose the right plant for the right place. The beauty of succulents: they do well, indoors, too. In the right sized pot, with the correct soil mix, of course. Robin gets into those details in Episode 161 . But what about for gardeners in colder climates? Are there any succulents that can take a freeze better than others? Robin Stockwell notes those in his beautiful, excellent book, “ Succulents: The Ultimate Guide to Choosing, Designing, and Growing 200 Easy-Care Plants ”. Unfortunately, it may be difficult finding this book, even though it is only five years old. Check with your favorite used book sources for a possible copy, or Amazon . Stockwell highlights those succulents that can tolerate outdoor temperatures at or below freezing: Delosperma (many). Hardy to 20 degrees. Sedum hispanicum . Hardy to 20 degrees. Sedum rupestre ‘Angelina’. Hardy to 20 degrees. Sedum rupestre ‘Blue Spruce’. Hardy to 20 degrees. Sempervivum (many) . Hardy to 25 degrees. Another strategy for growing tender succulents that may be a bit chilly in the outdoors in the winter where you live: grow them in pots , and move them to a warmer location (against a south or west facing wall, preferably with a cover) or…indoors. Starting a School Garden? Tips for the Home School garden, as well. In Episode 161 of Garden Basics , we tackled a question from a school superintendent who wants to start an elementary school garden. Our in-house school marm, Debbie Flower, has first hand experience with this, and offered up plenty of good tips, including making sure that the plant selections can overlap beyond botany lessons to other scientific endeavors in the classroom, such as choosing plants that attract beneficial insects and pollinators to control pests; and, choosing plants that may reflect on the Native-American culture of the area: which plants did the first residents consume and use? Homeschool instructors, as well, can pick up a lot of good tips for providing a well-rounded education, just by growing the right plants, especially native plants. Give it a listen . And if you are interested in attracting bees and other pollinators to your garden, here’s a list of plants that can provide year-round bee attraction in California’s interior. For all zones, check out these regional plant recommendations of the Xerces Society for attracting bees, butterflies, hummingbirds and other pollinators to your garden . More Tips for Germinating Pepper Seeds For many home vegetable gardeners, growing peppers from seed can be an excruciating experience. January is the time for many in USDA Zones 7, 8, and 9 to start those seeds. Colder climates can wait another month or so. Still, it can take 12 weeks or more from the time of planting a pepper seed to the point where it is vigorous enough to be taken outdoors. However, there are some tips for speeding up that process. Home gardeners who grow their tomatoes from seed usually get fairly quick results after sowing the seeds indoors. Given the right germinating conditions - a soilless planting mix, good drainage, plenty of light, plenty of warmth - tomato seeds can pop up in 8-10 days. Pepper seeds are a different story. Why is it some peppers can take weeks to germinate? "The important thing in getting your (pepper) seeds to germinate is to keep them warm – the soil temperature should be in the 80's", says Renee Shepherd of Renee's Garden , a popular seed catalog based in Felton, California. "Germination is very much related to even moisture and warm temperatures. You should see germination within 2 to 3 weeks if it's warm enough. I strongly suggest using bottom heat to achieve the warmth the seeds need – most good nurseries carry electric seed starting mats which will keep your seed soil at the right temperature in order for the pepper seeds to sprout. A local mail order source is Peaceful Valley Farm Supply ." For those who want to comparison shop, another source for heating mats for your pepper seeds: Amazon . Another trick that some gardeners employ is soaking the pepper seed for awhile - even overnight - before sowing, in order to soften the seed coat. The value of that is open to debate. "I have never heard of soaking pepper seeds overnight and have never done it in 20 years of running a trial garden," says Shepherd. On the other hand, Professor Debbie Flower, formerly of the American River College Horticulture Department, sees the benefits of some "immersion therapy" for pepper seeds. "We soaked our pepper seeds in hydrogen peroxide for 10 minutes," explains Flower. "That's not enough time to scarify (soften or break the seedcoat), or even get them soaked, but enough to kill exterior diseases." Many sweet pepper varieties will show their initial leaves about two weeks after planting the seeds. But some varieties of peppers take longer to pop up than others. "The hot pepper varieties take longer to germinate, some to three weeks," says Flower. But if you are experimenting with the really hot pepper varieties, such as the Bhut Jolokia (Ghost Pepper), it could take up to four months, says the Trade Winds Fruit website: "Chinense species (e.g. Habanero's) generally take longer to germinate than most common peppers. Keep soil warm to very warm (75-90F) for better germination. Do not use acidic soil. Some Chinense peppers, in particular Bhut Jolokia, Naga Morich and related peppers are very slow to germinate, averaging 1-4 months germination time." By the way, if you are growing the Bhut Jolokia...you're playing with fire. The Ghost Pepper is rated at 850,000 Scoville units of heat. For comparison, the habanero rates 200,000; the Jalapeno is 5,000; the Anaheim equals 1,000. And sweet bell peppers? 0. This is as hot as I can stand. The Inferno: 4,000 Scoville Heat Units Another factor that can determine the rate of germination of pepper seeds: the pH of your seed starting mix. One of the most common ingredients in most seed starting mixes is peat moss, which is highly acidic, with a pH around 4.0. Pepper heads, including the Horticulture students at American River College, have found quicker germination when Coir (coconut fiber) is substituted for peat moss. Coir has a closer-to-neutral pH: around 6.5. The tests at American River College bear this out after trying Coir in their pepper seed soil mix. "We've had the best germination of peppers ever!" says Flower. And don't be in a rush to set them out in their permanent garden home. "Pepper seedlings need to be grown out until they have at least several sets of true leaves, and it is at least 55° at night before you plant them out," explains Renee Shepherd. "And they will need a little time to get used to being outdoors, as well." Here in the Central Valley of California, that would be around mid-May. Be patient. Now, for the MORE tips portion: Since first posted years ago, this Farmer Fred Rant Blog page has received a lot of attention. The beauty of that...lots of pepper growers have chimed in about their preferred methods for growing peppers.One method that was seconded by many: germinate your pepper seeds in between two moist paper towels in a room that is between 70 and 80 degrees. For many, that room might be the kitchen or bathroom. When the "tails" appear after about 6 or 7 days (the tails, by the way, are the emerging roots), gently transplant them into a moist, seed starting mix, preferably one that uses the more neutral coir instead of the lower pH peat moss. Or, make your own. My preferred home mix consists of equal parts coir, perlite and fine compost. The improvements I would make to that germination suggestion? Use coffee filters instead of paper towels. That way, the emerging root doesn't get tangled, as happens when using fibrous paper towels. Pulling out germinated seeds from paper towels may be hazardous to their health.Also, to insure a warm environment, here's something you could do in just about any indoor room: place the moist coffee filters, containing the pepper seeds, inside a glass baking pan. Place that on top of a germination mat. Cover the baking pan with plastic wrap to keep it warmer. I tried this at home, and the pepper seeds germinated with six days. As an Amazon Associate, I earn from qualifying purchases from some of the underlined links in the newsletter. This is how I am trying to keep this a free newsletter. And as long as you buy whatever you want from Amazon using any of those links to get into the Amazon site , I get a few pennies. Thank you. Thanks for Subscribing and Spreading the Word About the Garden Basics with Farmer Fred newsletter, I appreciate your support. And thank you for listening to the Garden Basics with Farmer Fred podcast ! It’s available wherever you get your podcasts. Please share it with your garden friends. Fred Hoffman is also a University of California Cooperative Extension Master Gardener in Sacramento County. This is a public episode. If you'd like to discuss this with other subscribers or get access to bonus episodes, visit gardenbasics.substack.com/subscribe
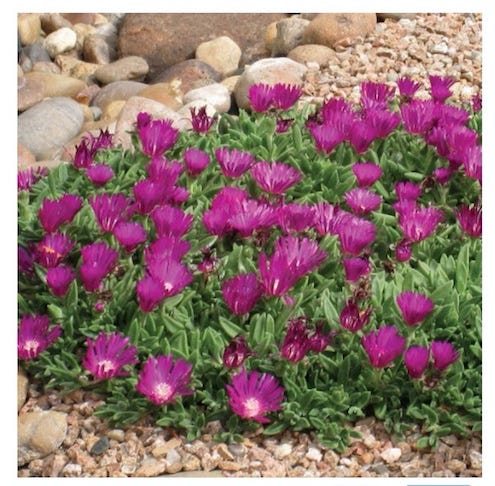
Jan 7, 2022
Tomato Varieties, Winners & Losers
All About Tomatoes! Gardeners LOVE growing tomatoes. So much so that the subject of tomatoes made the Top 5 audience favorite segments among all of the 2021 Garden Basics with Farmer Fred podcasts . The latest episode, #160, The Greatest Hits of 2021: All About Tomatoes , runs over an hour. And the top listened-to segments are directly or indirectly related to growing tomatoes: Starting Tomato Seeds ( episode 79 ), Reusing Potting Soil ( also Episode 79 ), Transplanting Tomatoes ( Episode 93 ), Tomatillo Pollination ( Episode 124 ), Tomato Pruning ( Episode 106) and Tomato Troubleshooting ( Episode 110 ). There is so much to talk about when it comes to growing tomatoes, that even an hour+ special podcast isn’t enough. So, for the Garden Basics Newsletter readers…enjoy the conversation posted at the beginning of this newsletter with Don Shor of Redwood Barn Nursery in Davis, CA. We talk about our tomato winners and losers of 2021 in our own yards; the best tomatoes to grow for the novice gardener (or any gardener who want a successful tomato-growing experience); and, our picks for our favorites to grow this year. By the way, if you know a gardener who is venturing into growing tomatoes for the first time or just wants more tomato information, please share this newsletter with them. Thank you! We spent a bit of this special newsletter podcast talking about the All-American Selections Winners , and how that can be a good barometer for choosing the tomato varieties that you might want to plant this spring and summer. The AAS has tomato trial gardens throughout the country; many of their choices are national winners. You can also drill down into the complete AAS Winners list to find the best performing vegetables and flowers for your region of the country. Growing Tomatoes in Containers This year’s Great Tomato Growing Experiment: is this small area (4’x16’), adjacent to a north-facing fence, truly the sunniest spot on the property? After monitoring my entire full sun-deprived Folsom yard for nearly three years, this one spot, near the garage, may be the one area that gets more than eight hours of direct sun a day, perfect for growing tomatoes.The dilemma (well, two dilemmas, actually): because it is a concrete surface, the tomatoes must be grown in containers; and, how do you avoid water stains on the concrete when the barrels drain?Solution: use a big container (in this case, half barrels with five 7/8” drain holes drilled through the bottom) and place that container on top of a catch basin with several 3/4” holes drilled on the side rim on the back side, allowing the water to drain from the catch basin to the 12” wide gravel area along the fence line. The prototype catch basin was at the suggestion of Master Gardener Lori Ann Asmus, owner of Emerald City Interior Landscape Services, who decorates Christmas trees professionally (you can see her work during the holiday season at various lobbies in public buildings, including the downtown Sacramento’s Citizen Hotel). The catch basins were, in reality, meant for placing beneath Christmas trees to catch any water overflowing the tree holders . They are available wherever fine Christmas tree accessories are sold. And Amazon, of course. The barrel/catch basin combo have shims under the front side, allowing a gentle slope towards the fence, coaxing the water to go out the back side of the holes in the catch basin and into the gravel. So far, so good.Regarding the container dilemma: when planting thirsty summer vegetables in full sun, try to use the largest containers, preferably made out of something that doesn’t allow heat build-up. Plastic pots are notorious for overheating the soil. It’s not unusual for the soil in an unprotected plastic pot in full sun to reach temperatures in excess of 140 degrees on a day in the upper 90’s. A wood barrel works perfect for that purpose. Plus, the greater volume of soil in a barrel (as opposed to a 15-gallon plastic pot) also helps the plant avoid stress from dried-out soil if you miss a watering during 90 and 100-degree days. And, more soil means more room for root development. And don’t forget Smart Pots, lightweight fabric containers that breathe, so they stay cooler and inhibit root girdling, as well.Because a container plant may need water every day in the summer, I’ve given these two tomato plants (a Champion full-size tomato and a very popular grape tomato, Juliet) their own watering system: a battery operated timer on a nearby faucet with a Y-adapter . Connected to the timer is a short, half-inch drip line run, going along the backside of the barrels. Connected to the half inch line: quarter inch tubing snaked through a small hole on the lower backside of the barrel, and topped off with an adjustable drip bubbler/sprinkler in the middle, which sends out 6 or 8 even streams of water in a circle. Unfamiliar with drip irrigation systems? Entire kits are available, such as this. Pro tip: run the quarter inch line in the barrel BEFORE filling it with a good quality potting soil . (By the way, “Pro Tip” = “lesson learned the hard way”). The tomato cages are made from 4’x5’ sheets of concrete reinforcement wire, 6” mesh (for easy reaching of the tomatoes). Bend the sheets in a circle and fasten with plastic zip ties. Or, use your barbed wire tool (What? Everyone doesn’t have a barbed wire tool? It’s also known as fencing pliers.) to cut off the vertical 12-gauge wire ends on one side, and then bend the free horizontal wires around the opposite side. Or, an even easier way to connect the opposite sides of the wire sheet: use sturdy zip ties. Watering containerized plants is tricky, and must be increased or decreased more frequently, depending on the weather. Having a nearby faucet/timer/drip system in place helps ease those adjustments. Fertilization can also be tricky. Because of the leaching nature and frequent watering that an easy-draining potting mix needs during the summer, fertilizers must be applied more frequently. Note that “frequently” does not mean “more fertilizer”. If, for example, the directions on your slow-release vegetable fertilizer package advises fertilizing with a certain dosage once a month, modify it to meet the needs of your container plant: cut the dosage in half, and apply every other week. Don’t forget that topping that containerized plant with a few inches of a bark mulch can help maintain soil moisture on a hot day and also keep the soil temperature moderate. Thanks for Subscribing and Spreading the Word About the Garden Basics with Farmer Fred newsletter and podcast , I appreciate your support. As an Amazon Associate, I earn from qualifying purchases from some of the underlined links in the newsletter. This is how I am trying to keep this a free newsletter. And as long as you buy whatever you want from Amazon using any of those links to get into the Amazon site , I get a few pennies. Thank you. And thank you for listening to the free, Garden Basics with Farmer Fred podcast . It’s available wherever you get your podcasts. Please share it with your garden friends. Fred Hoffman is also a University of California Cooperative Extension Master Gardener based in Sacramento County, California. This is a public episode. If you'd like to discuss this with other subscribers or get access to bonus episodes, visit gardenbasics.substack.com/subscribe

Dec 31, 2021
Is Gravel Gardening Right For You?
In episode 159 of the Garden Basics with Farmer Fred podcast , we discussed gardening trends of 2022 that might have appeal for you. We talked with Andrew Bunting of the Pennsylvania Horticultural Society, which released its list of garden trends worth pursuing in the coming year. Among the trends catching on in many parts of the country (some of which are fairly well established in other parts of the U.S.), are putting in pollinator-friendly plants, converting lawns into gardens, attending a plant swap, and more. Their complete list is at the bottom of this newsletter. One trend we discussed that you did not hear on the Garden Basics podcast : the increased interest in gravel gardening. Their are some rather profound differences between gravel gardening and maintaining a landscape topped with rocks, which has been popular in the southwest for more than a century. There are some rather beautiful examples of gravel gardens back East and in the midwest, as you will hear Bunting describe in this special podcast edition of the Garden Basics with Farmer Fred newsletter. One gravel garden that Bunting highlighted was the Olbrich Botanical Gardens in Wisconsin. You can see and listen to Jeff Epping of Olbrich describe the development and results of their gravel garden experiments here . In this newsletter podcast, Bunting describes the success of gravel gardens throughout the mid-Atlantic region. Following that, retired college horticulture professor Debbie Flower and myself will discuss whether this is appropriate for the hot climates of USDA Zone 9, and some of the possible drawbacks. Still, the results from back East are certainly eye-catching. But is it right for you, especially if you live in a hot summer/low rainfall climate? As we say in the podcast, go ahead and try, but do it on a small scale at first. The Pennsylvania Horticultural Society is also putting together the Philadelphia Flower Show, June 11-19, 2022. For more information about the Society, along with details about their 2022 Flower Show, click here . Here is their list of the 2022 Garden Trends: • Utilize Native and Pollinator-Friendly Plants. Coax bees and pollen-loving insects to your gardens. Native plants attract native pollinators. A good California source for the appropriate plants is the Calscape website, Calscape.org , for ideas for native plants suited to wherever you live in California. • Consider Turning Lawn Space into Garden Space . Removing a small piece of lawn and transforming it into garden space has the power to significantly lower fossil fuel emissions that would otherwise be applied to the lawn through regular trimming and maintenance. Your new garden space can also boost its positive environmental impact by being used as a pollinator garden, perennial garden, or even a vegetable patch. • Attend a Plant Swap and Make a New Friend. A great way to incorporate new plants in your garden and gain expertise as a beginning gardener is by attending a plant swap. At a plant swap, attendees can bring their small plants, cuttings, potting soil, pots, seeds or other gardening equipment and exchange them for something they don’t have. This is a simple way to diversify your garden, learn new horticultural skills, and connect with fellow gardeners. Many of these exchanges can be found online in local Facebook pages or the Next Door gardening groups. • Try Gravel Gardening. Saving water in the garden isn’t just a passing fad here in California; it’s the law. The Pennsylvania Horticulture Society has noted that more and more areas in the U.S. are experiencing inconsistent weather patterns and periods of drought. Planting gardens that require little watering or irrigation is growing in popularity. However, there is one trend back East that may sound intriguing to some California gardeners: gravel gardening, which offers a way to cut back on water and fertilizer use in your garden through eliminating the use of soil. Gravel gardens can incorporate a multitude of plants, including a wide array of succulents and ornamental grasses, as well as lavender, ceanothus and sage. A word of warning for California gardeners: if you excavate several inches of soil and fill it with gravel, make sure the soil below has good drainage. Also, when temperatures hit triple digits, a gravel garden may require regular irrigation. Starting a gravel garden in an area that gets afternoon shade may eliminate that need for more frequent watering. • Grow Your Own Fruit. Growing fruit is no longer reserved for those with large yards. Even just a few fruit trees can produce hundreds of pieces of fruit, perfect for jams, jellies, cookies, ice cream, or simply eating as-is. Dwarf fruit trees come in many varieties including figs, mulberries, apples, peaches and pears, and are ideal for growing in a limited, sunny space. • Cut Flowers Are Trending. Across the country, boutique flower businesses are incorporating more and more classic cut flowers like zinnia, dahlia, poppy, cosmos, and Shasta daisy. Cut flowers offer a rewarding means to experience the pride of growing your own flowers and sharing them with loved ones that will never go out of style. Thanks for Subscribing and Spreading the Word About the Garden Basics with Farmer Fred newsletter, I appreciate your support. And thank you for listening to the Garden Basics with Farmer Fred podcast ! It’s available wherever you get your podcasts. Please share it with your garden friends. Fred Hoffman is also a University of California Cooperative Extension Master Gardener in Sacramento County. This is a public episode. If you'd like to discuss this with other subscribers or get access to bonus episodes, visit gardenbasics.substack.com/subscribe
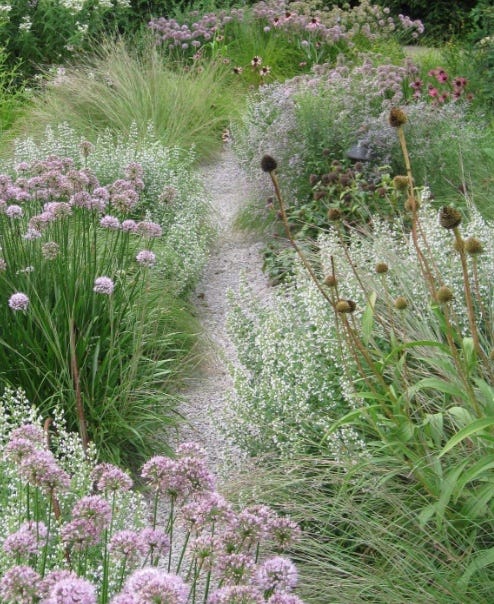
Sep 19, 2021
BEYOND BASICS: JUMPING WORMS
YOU DON'T WANT THESE WORMS IN YOUR GARDEN, COMPOST OR WORM BIN The damage that jumping worms (aka Asian Jumping Worms, Crazy Worms, Alabama Jumpers, or Snake Worms) can do to your garden soil. (video originally produced by the Wisconsin Department of Natural Resources ) More on how jumping worms damage your soil structure, from Oregon State University : Because they have very large mouths akin to mechanical excavators, jumping worms are able to grasp and consume large amounts. With their voracious appetite, they outcompete the native microbial organisms and invertebrates that other organisms feed on. Their propensity to eat all the litter creates bare soil where invasive plants and animals move in, altering native ecosystems. They also remove the mulch that helps cool the soil and conserve moisture, Further, the castings – or fecal material – of most worms contain extremely important microbes that help fight soil-borne plant diseases and repel insects. Worm castings also improve soil structure by diversifying the size of soil particles, which enhances moisture penetration and increases water retention. With jumping worms, the outcome is the opposite. Since their gut biome is slightly different, there aren’t the same beneficial results. “What they are casting out doesn’t absorb moisture well so you end up losing porosity, which affects the overall structure of the soil,” said Sam Chan, Oregon State University Sea Grant Extension watershed health and aquatic invasive species specialist. “Initially wet and gummy, the castings quickly dry into hard granules that are difficult to rewet, not the best medium for growing plants.” The changes to soil structure and composition caused by the worm castings can attract certain unwanted microbes, which creates an increased susceptibility to disease and can cause girdled roots. Plant stems and roots at the surface of the soil may become exposed to more environmental extremes from the loss of litter and decomposed organic matter and changes to soil structure. Jumping worms have been outlawed in many states, but not all, and can still be found online for fishing. Chan advises to be careful not to purchase jumping worms, also known as crazy worm, Asian jumping worm and snake worm, and to spread the word about their danger. Many people – even those who sell them – aren’t aware of their invasiveness. To help decrease the spread of jumping worms, shake off the roots of plants when sharing or buying at a private plant sale. Buy bareroot plants when possible. Never share compost, mulch, soil or plants that contain a known infestation. Nurseries are being careful, but it’s still a good practice to inspect the soil for cocoons when you transplant. If you find jumping worms in your garden, they will probably be in pockets rather than the whole garden. Brush off your shoes and equipment when you move from place to place in an effort to keep them from spreading. If they are in contained spaces, you can spread plastic to heat the soil. Once it reaches 104 degrees F, the cocoons die. Audio from Episode 126 of the Garden Basics with Farmer Fred Podcast This is a public episode. If you'd like to discuss this with other subscribers or get access to bonus episodes, visit gardenbasics.substack.com/subscribe